
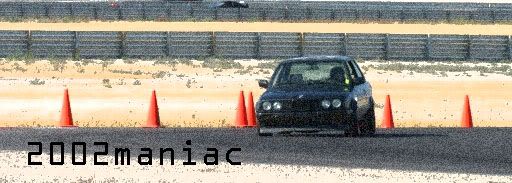
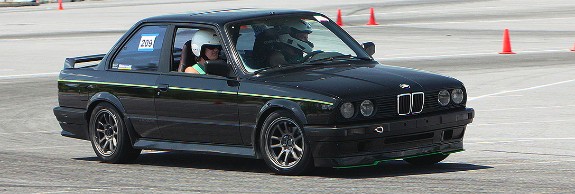
Well I like the look of our late model valances bu they seem too bland sometimes. I love the look of the 87' 325is air dam and I have been told it is not possible to fit it to a late model e30. Well thats just not true :D .
Materials:
2.Then you remove the lower part of the metal valance on your car. This needs to be done to give you room and you need to leave the top half so that you can still mount the plastic bumpers. To remove the bottom half, drill out the stamps that hold the two pieces together and the bottom half will fall off.
3.Now you need to mount the air dam to the plastic bumper. To do this lay the bumper down upsidedown and then set the air dam on top of it. Start w/ the two outermost points and work to the center.

4.Next you need to take off the air dam and cut off the sides. This is so that you can shorten them to not go into your wheel well. After you have cut the sides remount the air dam to the bumper and put it on the car.

5. Now take the piece you cut off and set it up to the air dam while its on the car and move it till it looks right. When you have the piece where you want it score the plastic w/ something sharp (or a pen) and cut them.

6.Now that its time to connect the pieces back together. You need to make a bracket that goes all the way down the piece.


7.You are now ready to put everything back on and bondo the crack from the two pieces being mated back together. First use the fiberglass repair bondo in the crack and then after you sand that down good use the ultimate to give a better smoothness to the bumper. Also this is the time to bondo and holes you have in your bumper from prev. mounting or anything.


8. Paint time (this is still primer white thought)


Materials:
- 87' 325is air dam
- Sand paper / paint stripper
- Drill
- Something to cut the air dam (cut off saw, etc.)
- Bondo (fiberglass repair and untimate)
- Mounting bolts
2.Then you remove the lower part of the metal valance on your car. This needs to be done to give you room and you need to leave the top half so that you can still mount the plastic bumpers. To remove the bottom half, drill out the stamps that hold the two pieces together and the bottom half will fall off.
3.Now you need to mount the air dam to the plastic bumper. To do this lay the bumper down upsidedown and then set the air dam on top of it. Start w/ the two outermost points and work to the center.
4.Next you need to take off the air dam and cut off the sides. This is so that you can shorten them to not go into your wheel well. After you have cut the sides remount the air dam to the bumper and put it on the car.
5. Now take the piece you cut off and set it up to the air dam while its on the car and move it till it looks right. When you have the piece where you want it score the plastic w/ something sharp (or a pen) and cut them.
6.Now that its time to connect the pieces back together. You need to make a bracket that goes all the way down the piece.
7.You are now ready to put everything back on and bondo the crack from the two pieces being mated back together. First use the fiberglass repair bondo in the crack and then after you sand that down good use the ultimate to give a better smoothness to the bumper. Also this is the time to bondo and holes you have in your bumper from prev. mounting or anything.
8. Paint time (this is still primer white thought)


Comment