
For ever, people have been trying to find an easy way to fit the plastic bumpers onto a metal bumpered car. There is no easy way to do it and when I started to do mine, I wanted it to be perfect (or close to it). I know that Jordan has a nice write up and I used that to help my idea along. So, after you make the nessasary notches in the bumper holes like so...
You can begin the fun stuff:-D
First step: You need to bolt up the bumper so that it is exactly how you want it to be on the car, you know, except it will be a little too long.

See, too long:tsk:
Second step: Now take the bumper off and cut off the front half of the bumper. I cut off about 3 inches before the side marker light. After both sides are cut (cut strait), bolt the bumper back up like you had it before.

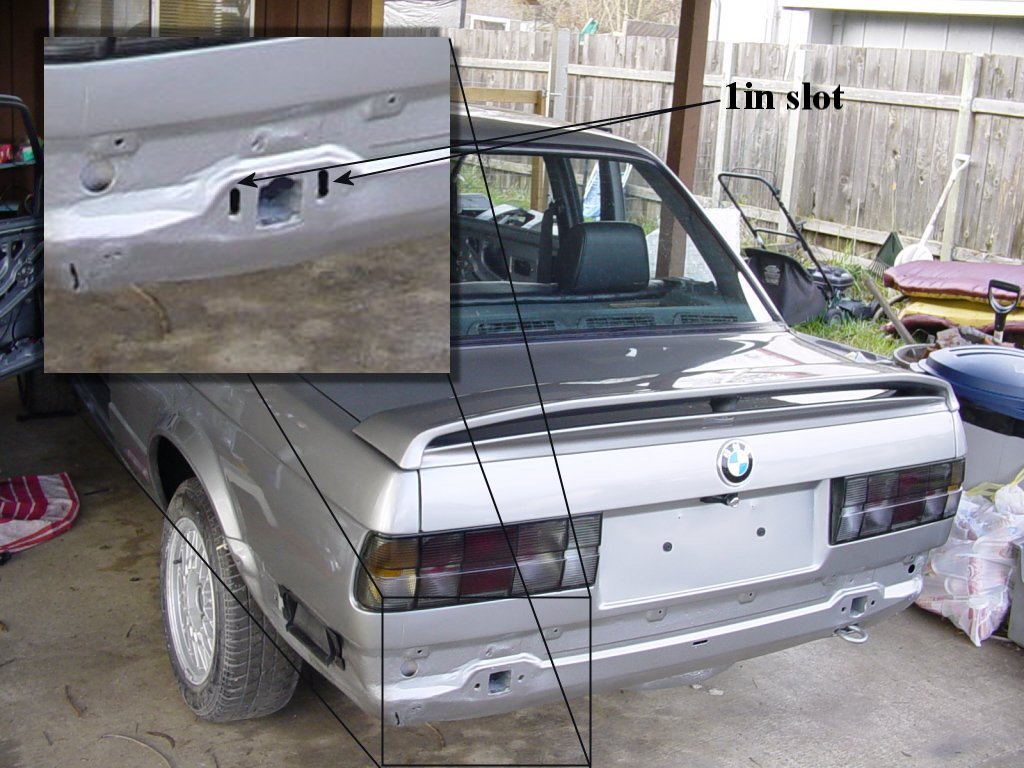
It should look like this. The plastic outer skin is held in by the black inner skin with tabs that can be a little hard to get off. A long flat head screwdriver works well for this.
Third step: Take the piece that you just took off and place it up to the bumper and overlap the pieces to see how much material you need to take off. Should be about an inch.

Fourth step: I used the blue masking tape for my cut line because it helps to keep the melting of the plastic to a minimum which is a good thing. I used a dremmel tool with a cut-off wheel for this job.

Blue cut off line.
Fifth step: Cut off material and see how it lines up. I had to do some minor trimming of the parts so it would fit tight, but it was not bad at all.

Freshly cut and taped on for now8-)
You can begin the fun stuff:-D
First step: You need to bolt up the bumper so that it is exactly how you want it to be on the car, you know, except it will be a little too long.
See, too long:tsk:
Second step: Now take the bumper off and cut off the front half of the bumper. I cut off about 3 inches before the side marker light. After both sides are cut (cut strait), bolt the bumper back up like you had it before.
It should look like this. The plastic outer skin is held in by the black inner skin with tabs that can be a little hard to get off. A long flat head screwdriver works well for this.
Third step: Take the piece that you just took off and place it up to the bumper and overlap the pieces to see how much material you need to take off. Should be about an inch.
Fourth step: I used the blue masking tape for my cut line because it helps to keep the melting of the plastic to a minimum which is a good thing. I used a dremmel tool with a cut-off wheel for this job.
Blue cut off line.
Fifth step: Cut off material and see how it lines up. I had to do some minor trimming of the parts so it would fit tight, but it was not bad at all.
Freshly cut and taped on for now8-)


Comment