
Alright, well I'm sure a lot of you already know the trick, but even if you do you either probably haven't done it, or just bought one that was already made for you.
If you don't know about this, here's a quick run down on how easy it is to make a pressure bleeder, and save some green over buying one.
I spent just a little over $20 on mine.
$10 - 1 gallon weed sprayer basically from Home Depot, but FWIW, a smaller branch "YardBirds Home Depot" for those of us that live around where I do. HD bought YB. Anyway whatever. This is probably one of the better ones that lend itself to turning it into anything pressurized.
$2.50 - 10' of clear 1/4" ID tubing
$3.50 - 1/4" hose repair kit (for compressor line pretty much). Comes with a double ended barb for 1/4" ID hose, a single ended barb with some threads, and three hose clamps. I didn't buy just the regular plumbing 1/4" barbs because first, theyre more expensive, and the hose fits tighter over the barbs meant for 1/4" ID compressor hose.
$7 - (ouch) Generic master cylinder cap from about any auto parts store out there. It's intended for GM's but is the right size. It says HELP! on the red carded backing, PN 42035. You'll have to fix something to make it work, but its no big deal.
Add a couple of bucks for a metal tire valve that screws together to test pressure with a tire gauge, or just actually buy a cheap gauge and stick it out the top of the tank to make sure you don't over pump it.
I didn't take any pictures before I was done with the basic project. I still am going to add a tire valve and/or a gauge to it, but that's self explanatory. The idea is to just show how easy it is to make one of these things for much less than you'll pay buying one.
Here's an over view of what the whole thing looks like together so far-
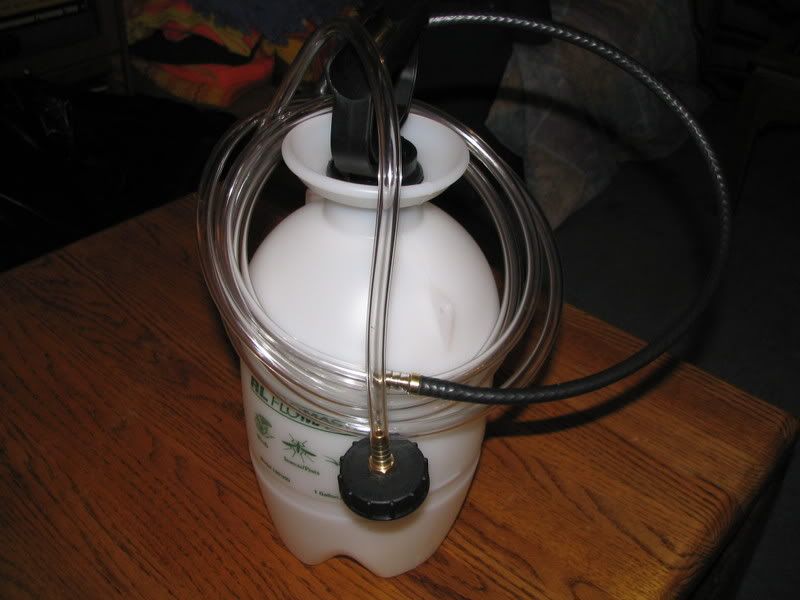
Like I said, I bought the cheapest 1 gallon sprayer available, it says RL FloMaster. The basic hook up for mine versus any other sprayer out there may be slightly different but I feel this is probably one of the better ones to start out with since it's so easy to adapt the hose without any modifications at all to the rest of the unit. The siphon tube is also really long that more than easily reaches the bottom of the tank. At another hardware store there were some that had a more complicated setup to attach the hose for the sprayer to the siphon hose, and I wasn't sure if the hose was separate from the gun in the box. The cheapest one there was 10 bucks for a half gallon too, and more for 1 gallon. I decided that they wouldn't hold enough air with a fair amount of fluid in them to keep the perssure up long enough to make it worth it. I'd suggest a one gallon sprayer.
This is how the sprayer hose connects to the rest of the body-
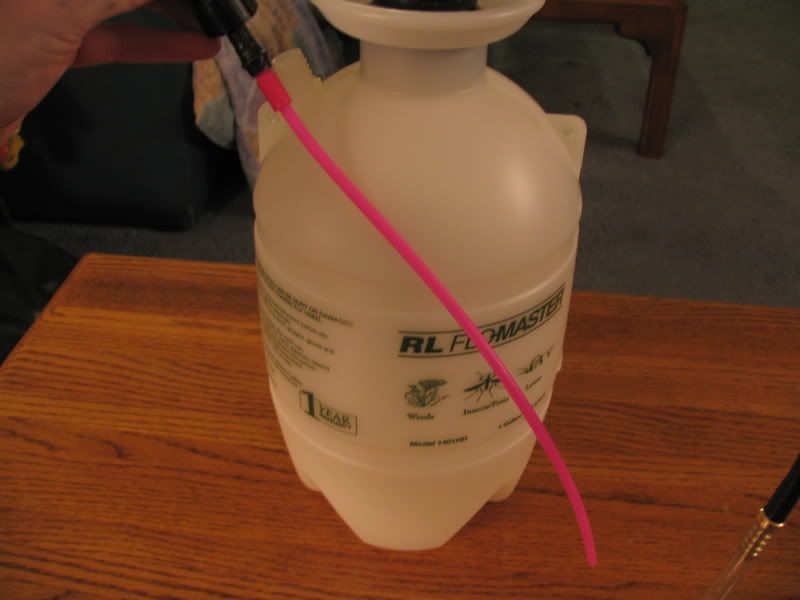
Can't get simpler than that.
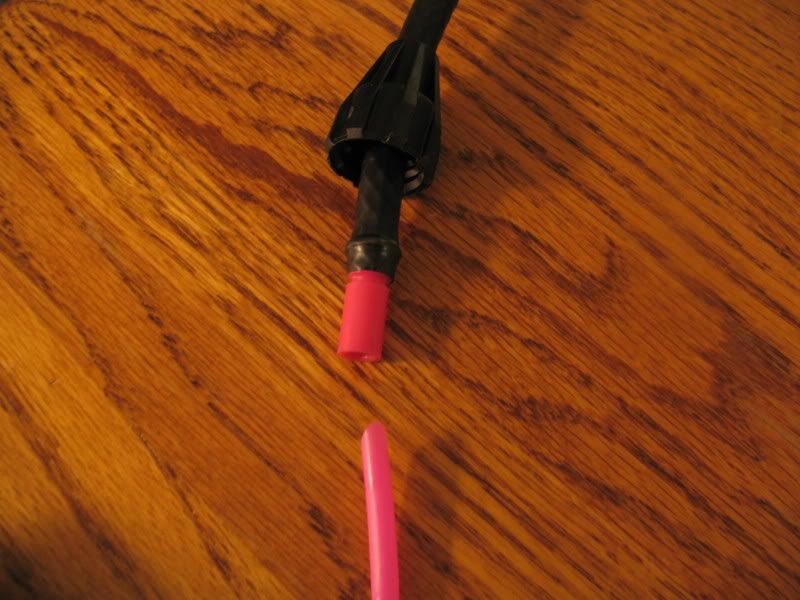
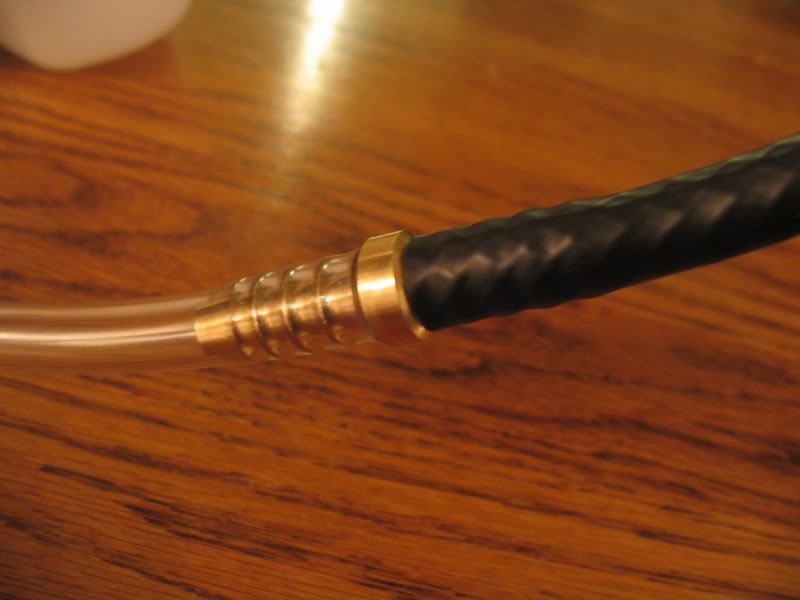
The instructions then say put together the gun on the end of the black hose, but instead I just put one end of the double ended barb on it, and attached the clear line to the other side-
Now, for the master cylinder cap. I worked myself up on drill bit size through the center of it until I could barely thread the one ended barb on. The bit size I stopped at was just shy of 1/2" which also probably would have worked, but my 31/64 bit yielded a REALLY nice tight fit. Before I screwed it on all the way, I had to fill in a groove that is molded into the bottom of the cap that seems to be designed to relieve pressure in the reservoir. We don't want that :) I could have used some silicone and smooth it out real nice and it would stay soft, but I used some 5 minute epoxy lightly applied and smoothed out with my finger and hoped for the best. It looks like it'll work just fine-
EDIT - Should use silicone sealant stuff. The epoxy was not quite air tight. Silicone adds sort of a cushion to deform and seal against if it's not 100% perfectly flat, which is the goal anyway but clearly hard to do. Also, when screwing the barb into the cap, add some epoxy on the threads to seal it up once it's all connected. I didn't and some brake fluid seeped under pressure. Doing so would have easily prevented that.
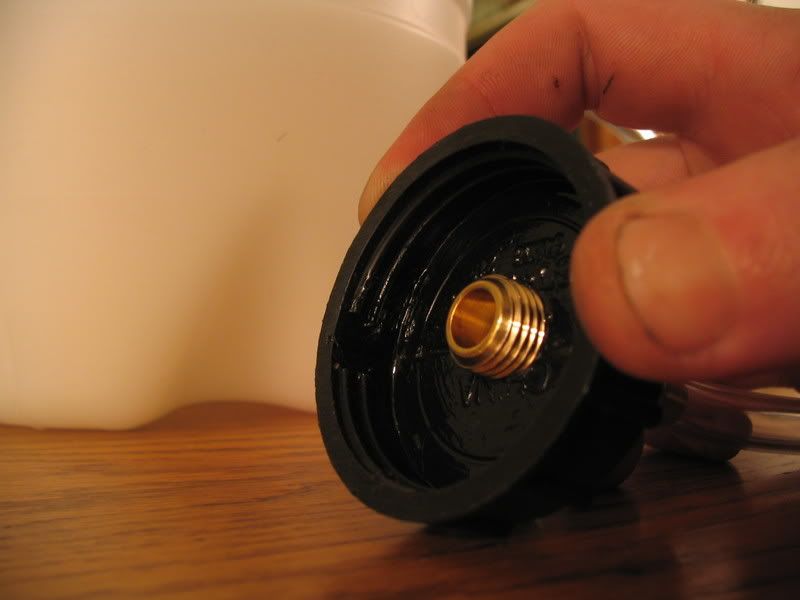
You can see the circular groove, but the one from the center all the way out and to the bottom of the threads is a little harder to see. That's what really needs to be filled in though, it runs directly to the left from the center in that picture.
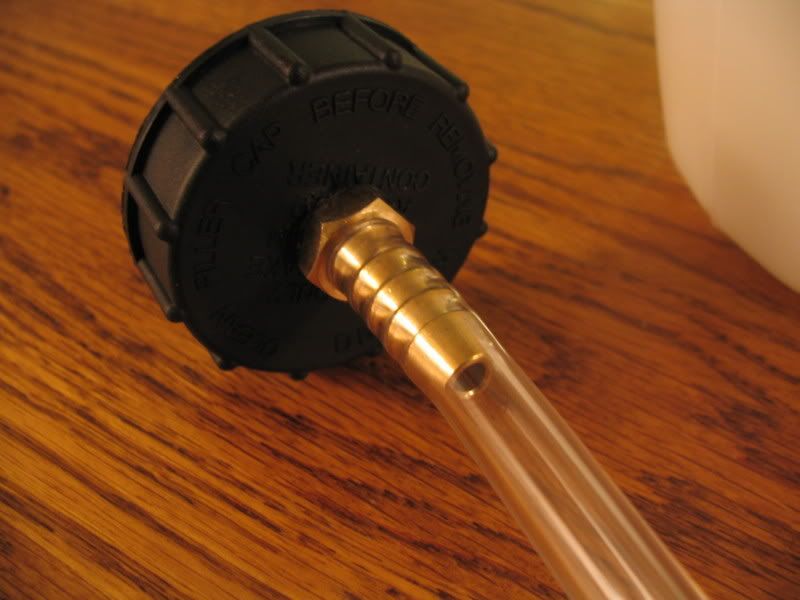
Screw the barb on, attach the line, and you're done with the basic bleeder-
Modifications, which I'll be doing but haven't done yet-
-Add a tire valve and/or gauge to monitor pressure (IMPORTANT, keep it at about ~20ish PSI or less, just enough to push the fluid through)
-Add a tube of some sort to the inside of the reservoir cap off the threads so that when the pressure is relieved in the tank, it will siphon the fluid out of the reservoir to the proper fill level rather than leaving it overflowing.
The only thing that I can see that might be a PITA, is that the cap is tightly attached to the hose, so it doesn't exactly rotate freely of it. I'd hope that the ones you pay for do spin freely, but this is cheap. I'm sure there's some way to modify it with some fittings to allow it to rotate, or just forget about it and don't worry about it coiling up the hose as you turn the cap on. That's not the point :)
If you don't know about this, here's a quick run down on how easy it is to make a pressure bleeder, and save some green over buying one.
I spent just a little over $20 on mine.
$10 - 1 gallon weed sprayer basically from Home Depot, but FWIW, a smaller branch "YardBirds Home Depot" for those of us that live around where I do. HD bought YB. Anyway whatever. This is probably one of the better ones that lend itself to turning it into anything pressurized.
$2.50 - 10' of clear 1/4" ID tubing
$3.50 - 1/4" hose repair kit (for compressor line pretty much). Comes with a double ended barb for 1/4" ID hose, a single ended barb with some threads, and three hose clamps. I didn't buy just the regular plumbing 1/4" barbs because first, theyre more expensive, and the hose fits tighter over the barbs meant for 1/4" ID compressor hose.
$7 - (ouch) Generic master cylinder cap from about any auto parts store out there. It's intended for GM's but is the right size. It says HELP! on the red carded backing, PN 42035. You'll have to fix something to make it work, but its no big deal.
Add a couple of bucks for a metal tire valve that screws together to test pressure with a tire gauge, or just actually buy a cheap gauge and stick it out the top of the tank to make sure you don't over pump it.
I didn't take any pictures before I was done with the basic project. I still am going to add a tire valve and/or a gauge to it, but that's self explanatory. The idea is to just show how easy it is to make one of these things for much less than you'll pay buying one.
Here's an over view of what the whole thing looks like together so far-
Like I said, I bought the cheapest 1 gallon sprayer available, it says RL FloMaster. The basic hook up for mine versus any other sprayer out there may be slightly different but I feel this is probably one of the better ones to start out with since it's so easy to adapt the hose without any modifications at all to the rest of the unit. The siphon tube is also really long that more than easily reaches the bottom of the tank. At another hardware store there were some that had a more complicated setup to attach the hose for the sprayer to the siphon hose, and I wasn't sure if the hose was separate from the gun in the box. The cheapest one there was 10 bucks for a half gallon too, and more for 1 gallon. I decided that they wouldn't hold enough air with a fair amount of fluid in them to keep the perssure up long enough to make it worth it. I'd suggest a one gallon sprayer.
This is how the sprayer hose connects to the rest of the body-
Can't get simpler than that.
The instructions then say put together the gun on the end of the black hose, but instead I just put one end of the double ended barb on it, and attached the clear line to the other side-
Now, for the master cylinder cap. I worked myself up on drill bit size through the center of it until I could barely thread the one ended barb on. The bit size I stopped at was just shy of 1/2" which also probably would have worked, but my 31/64 bit yielded a REALLY nice tight fit. Before I screwed it on all the way, I had to fill in a groove that is molded into the bottom of the cap that seems to be designed to relieve pressure in the reservoir. We don't want that :) I could have used some silicone and smooth it out real nice and it would stay soft, but I used some 5 minute epoxy lightly applied and smoothed out with my finger and hoped for the best. It looks like it'll work just fine-
EDIT - Should use silicone sealant stuff. The epoxy was not quite air tight. Silicone adds sort of a cushion to deform and seal against if it's not 100% perfectly flat, which is the goal anyway but clearly hard to do. Also, when screwing the barb into the cap, add some epoxy on the threads to seal it up once it's all connected. I didn't and some brake fluid seeped under pressure. Doing so would have easily prevented that.
You can see the circular groove, but the one from the center all the way out and to the bottom of the threads is a little harder to see. That's what really needs to be filled in though, it runs directly to the left from the center in that picture.
Screw the barb on, attach the line, and you're done with the basic bleeder-
Modifications, which I'll be doing but haven't done yet-
-Add a tire valve and/or gauge to monitor pressure (IMPORTANT, keep it at about ~20ish PSI or less, just enough to push the fluid through)
-Add a tube of some sort to the inside of the reservoir cap off the threads so that when the pressure is relieved in the tank, it will siphon the fluid out of the reservoir to the proper fill level rather than leaving it overflowing.
The only thing that I can see that might be a PITA, is that the cap is tightly attached to the hose, so it doesn't exactly rotate freely of it. I'd hope that the ones you pay for do spin freely, but this is cheap. I'm sure there's some way to modify it with some fittings to allow it to rotate, or just forget about it and don't worry about it coiling up the hose as you turn the cap on. That's not the point :)


Comment