Announcement

Collapse
No announcement yet.

M30 swap for my Olive Drab Vert!

Collapse
X
 
  • Filter
  • Time
  • Show
Clear All
new posts

    I have had a couple of opportunities over the last 2 weeks to get some work done.
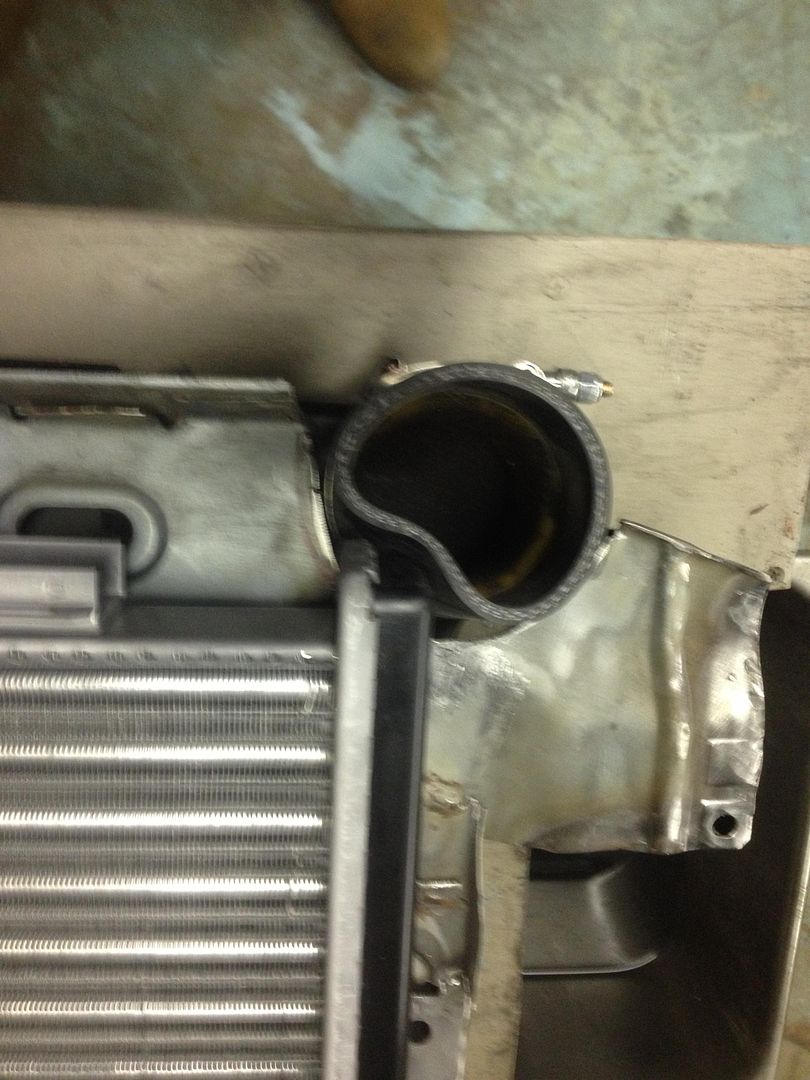
    I have a slight obstacle to overcome, the e28 radiator is about 1/2" longer than I expected. This extra length interferes with the drivers side intercooler inlet. So now I need to rework my intercooler mounts.
    But the work I got done was good. I got the e28 radiator lower brackets installed and looking factory. I found that e21 lower radiator mounts and rubber bushings are a perfect mate for the bottom of the 535i radiator. I cut them off the e21 and modified them to hold the radiator off of the support where I want it. A little trimming and bending and welding and then perfection. I then proceeded to work on boxing in the drivers side of the radiator support around the frame mount modification. Next time I will finish the passenger side and remount the intercooler and start fabbing up the shrouds that will direct the air through both the intercooler and radiator. OH and I have to get the 2 speed fan picked out and purchased and of course installed.

    PICTURE TIME!

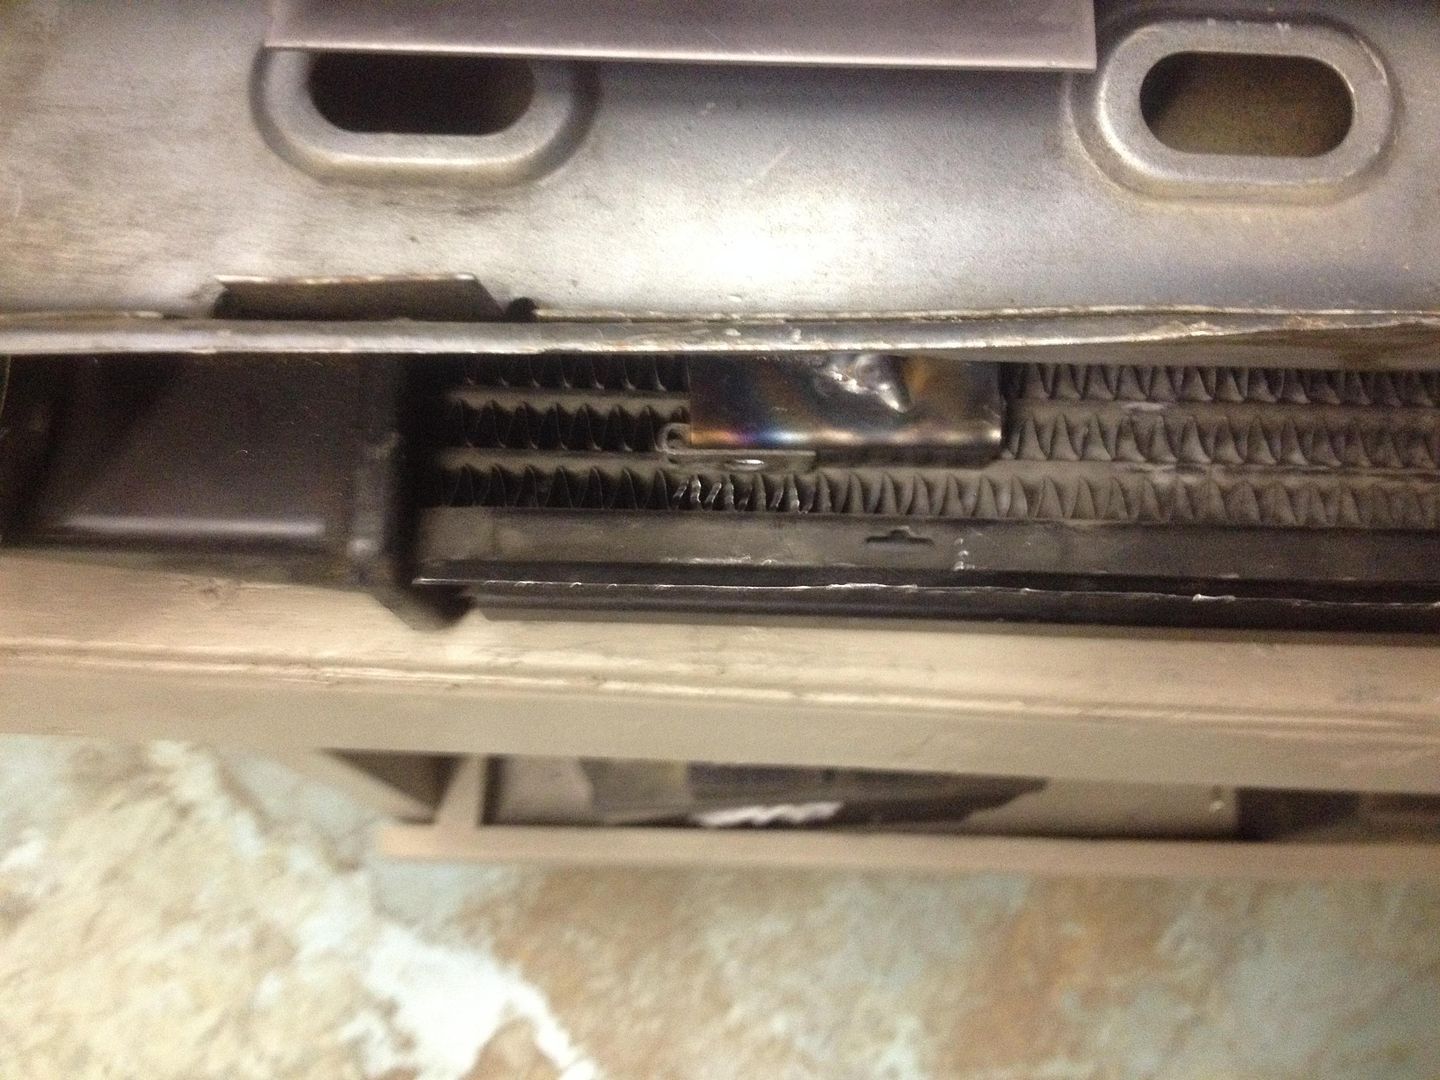
    It looks like this in the original intercooler mounting position.


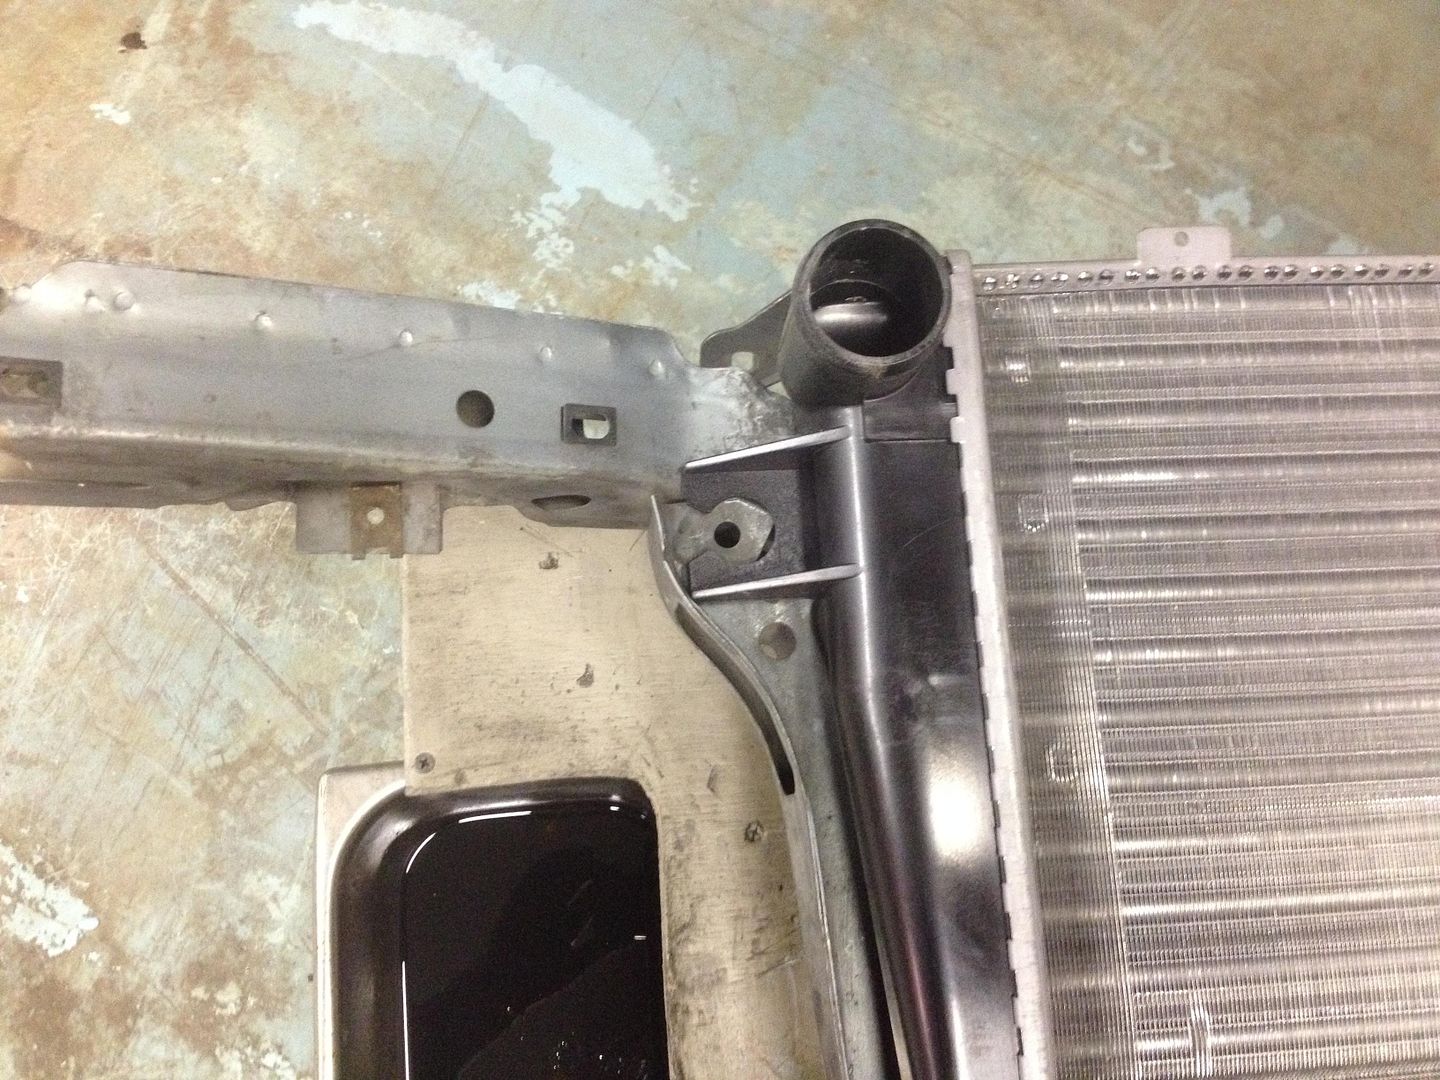
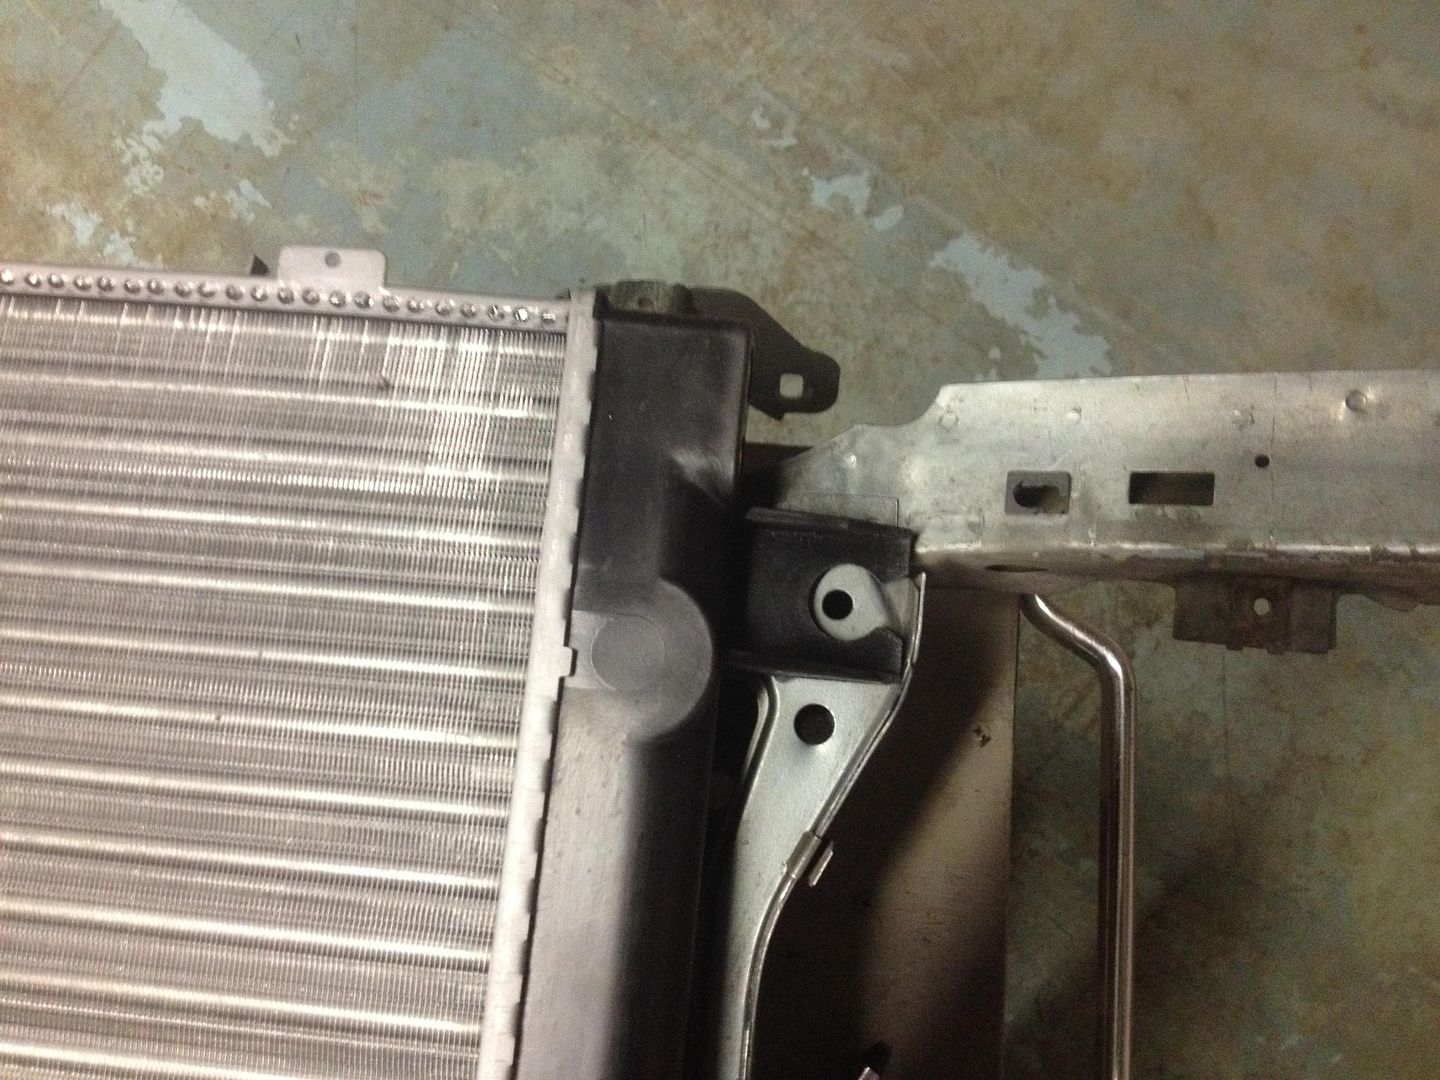
    With the radiator using the existing u-nut locations on the radiator support. And I am 99% sure it can not go any higher.


    And if I move the intercooler down the gap in the cutaway that I did previously looks like the fender gap in a stock 1985 318i. And it hangs about 3/4" below the radiator support which concerns me a little.


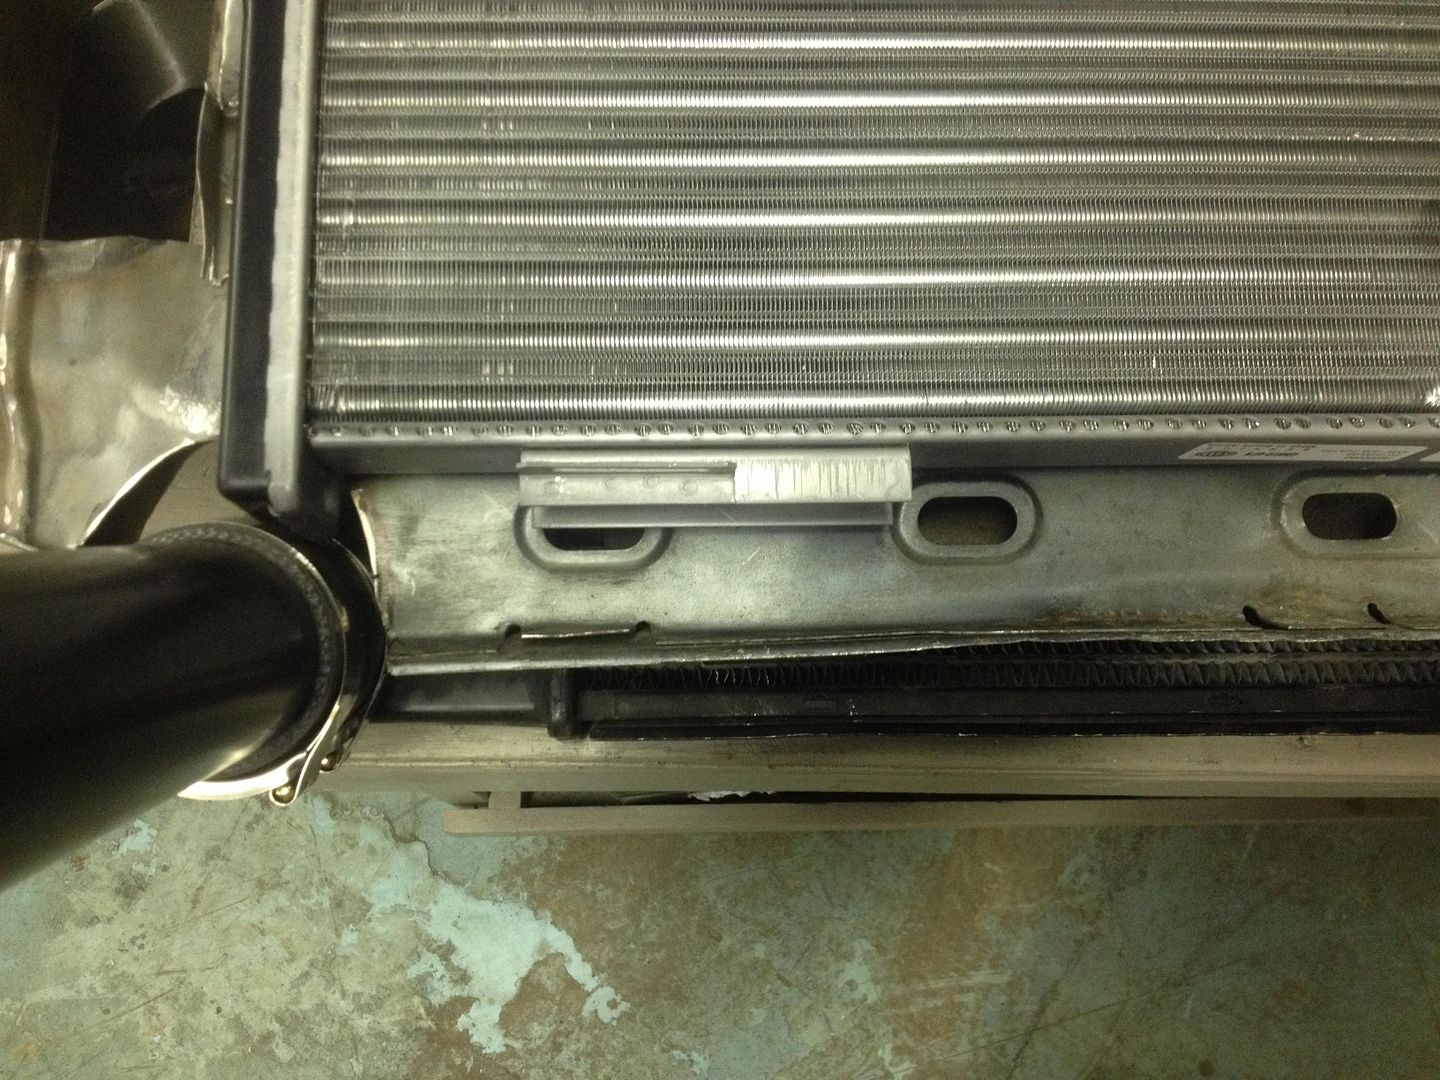
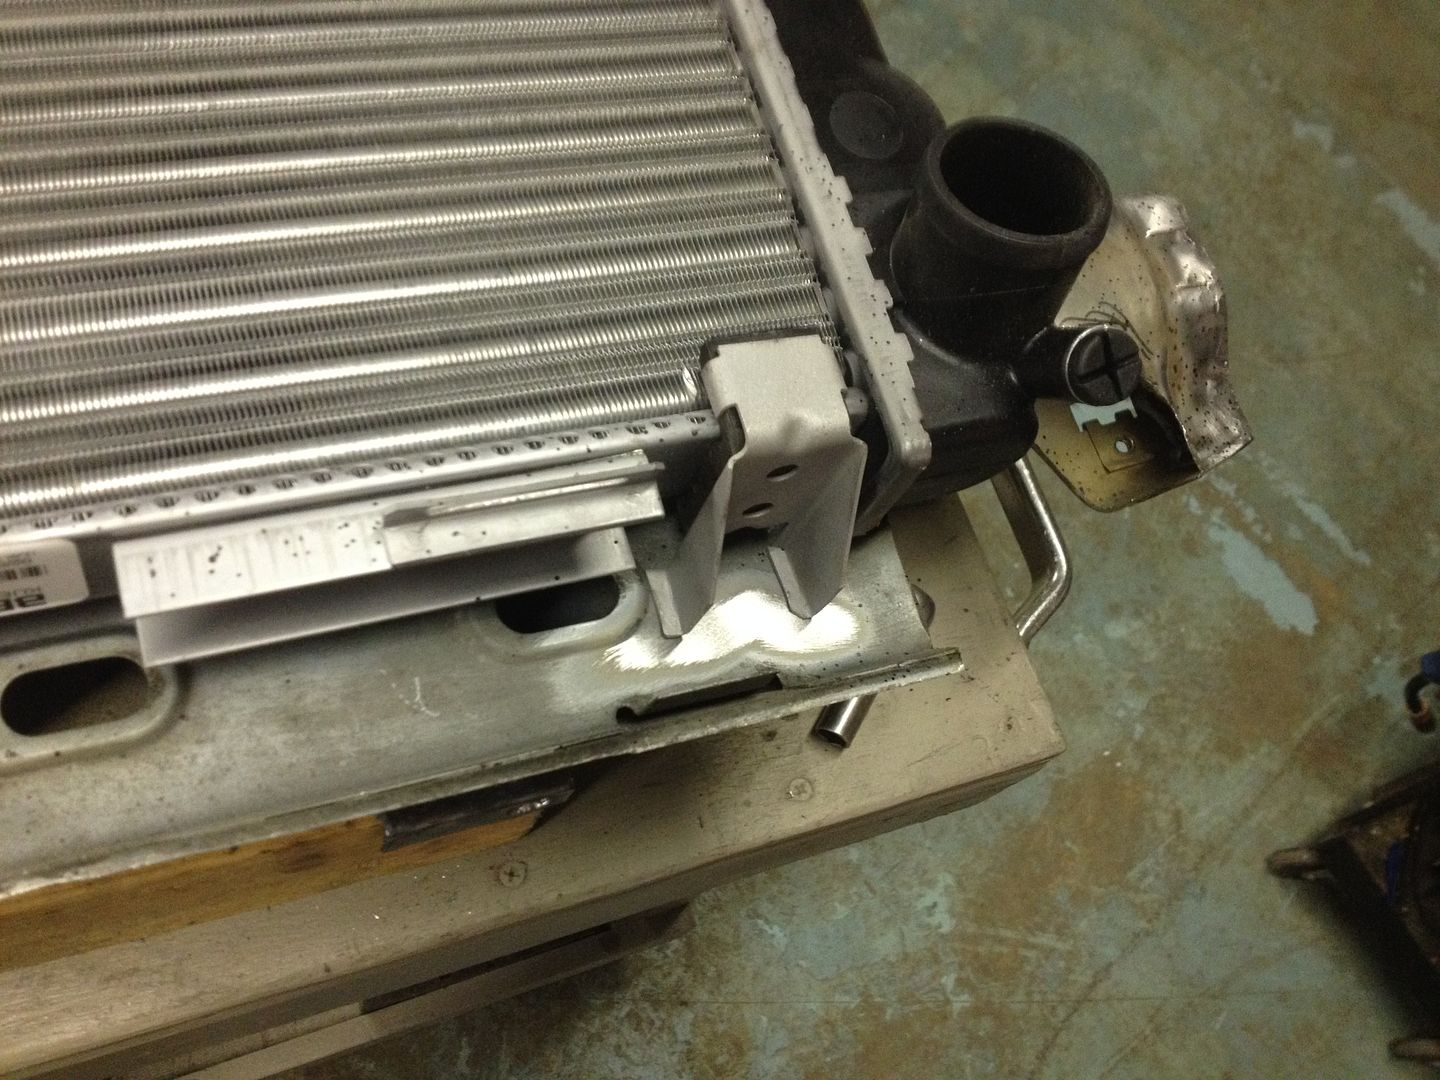
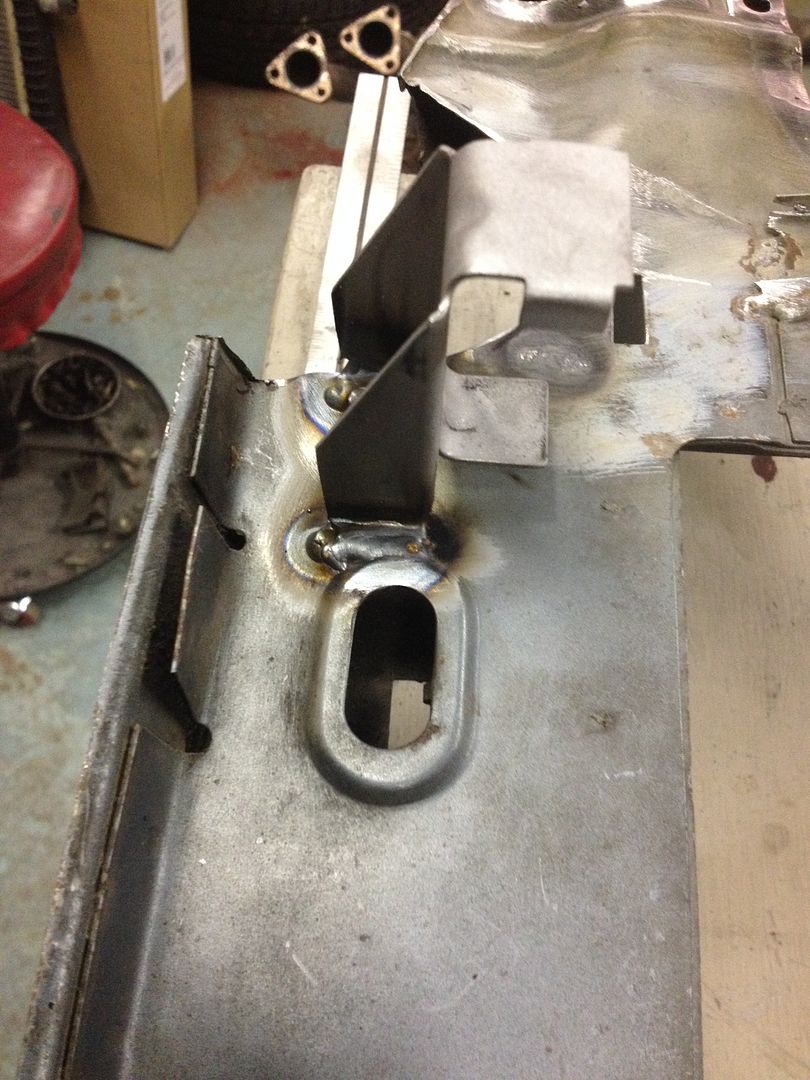
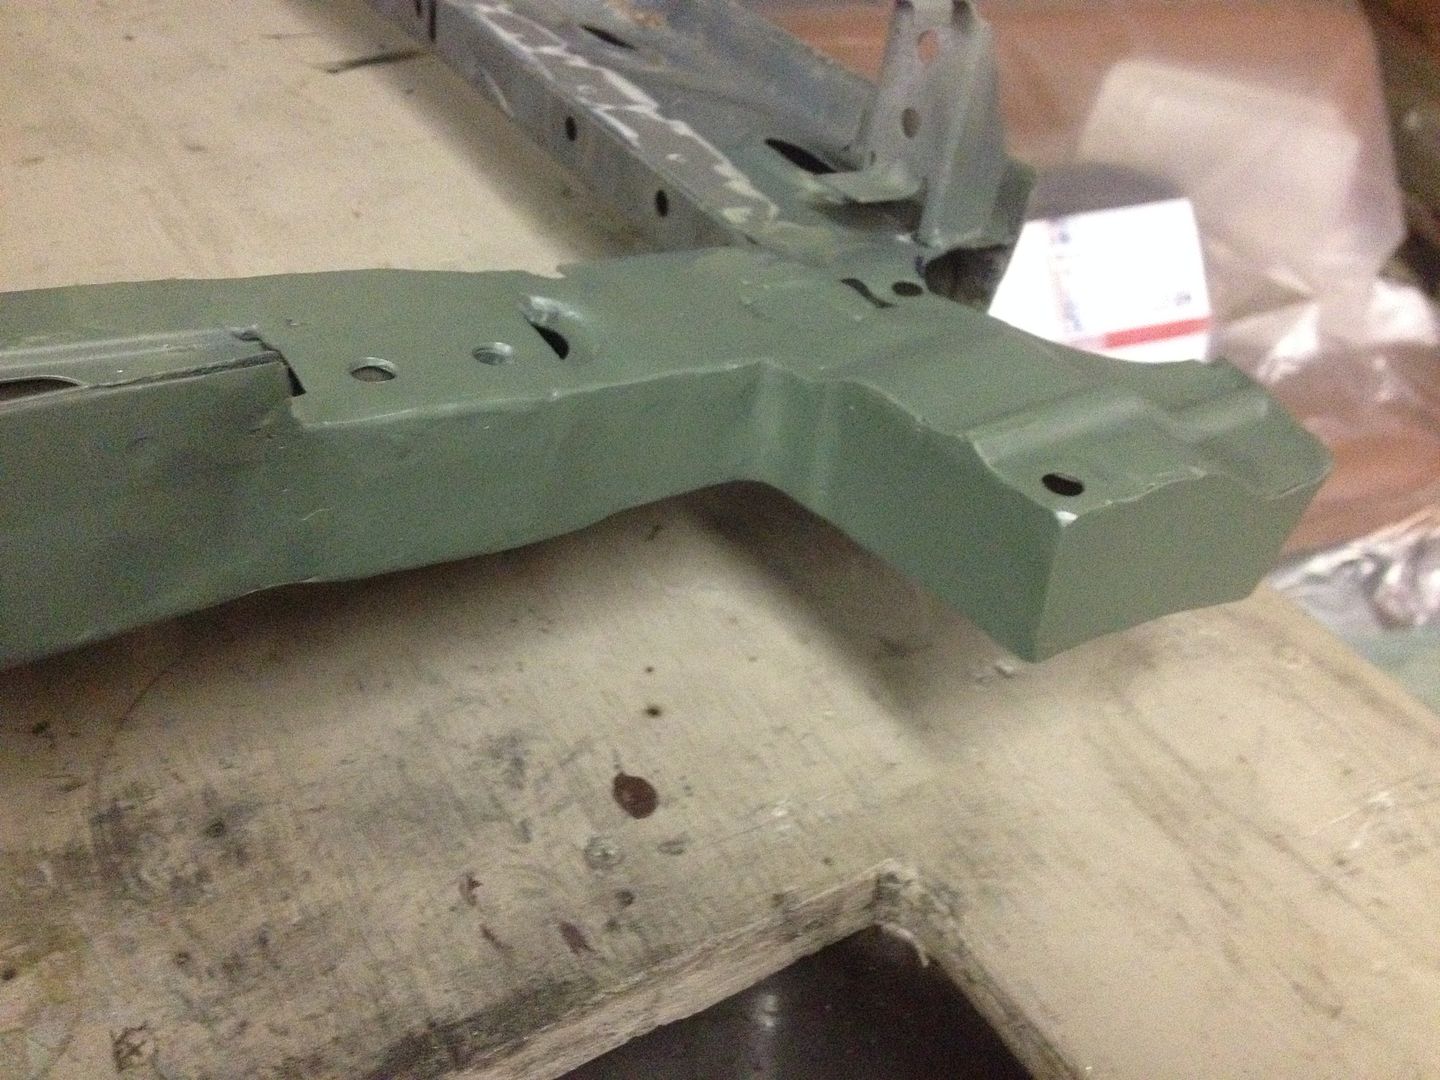
    And up next are pictures of the lower radiator mount brackets and the boxed in section. I know it isn't much but progress is progress.


    450whp 524 lb-ft 1988 336ic In progress

    http://www.r3vlimited.com/board/showthread.php?t=250709

    Comment


      More progress was made today. I finished boxing in the radiator support and remounted the intercooler. I had to start from scratch with the intercooler and I finally found a position that kept it as snug to the radiator as possible and a minimum amount of the intercooler hanging below the radiator support. The lowest point of the intercooler is still slightly higher than the oilpan so I figure I am good. The valance still fits in the original configuration without touching the intercooler even though It is super tight.

      iPotato pics


      Then I mounted the radiator support (Being super careful with the new paint) and I set the fenders and hood on the car just to see what the clearance of the radiator, dizzy, and turbo looked like. Good news, the radiator and distributor have plenty of room. Bad news, no matter how I clock the turbo it will not clear the hood. I need almost 3/4" in order for it to clear and still be functional. Next step will be to lower and twist the engine using custom solid aluminum engine mounts, which should be a nice little upgrade as well.


      450whp 524 lb-ft 1988 336ic In progress

      http://www.r3vlimited.com/board/showthread.php?t=250709

      Comment


        I will start off this weekend's update with some clearance pics. I am happy with it but by all means comments are welcomed. I still have not adjusted for the hood to turbo issues but the over all fitment is nice.


        I then set about bolting up the fenders and then took on my next big obstacle the upper intercooler mount.
        I made a cardboard template (which I feel is deceiving because it is so much easier to work with) that looks like a U-channel in which the top of the intercooler fits. I also was able to utilize two existing holes on the top of the radiator support to fasten my bracket.

        Once I transferred this supposedly simple design to my 16ga sheet metal I remembered that I don't have a sheet metal brake and I had to make two 90 degree bends that were 22" long!!! So after some not so fun efforts with c-clamps, a bench vice, some angle iron, and a 2x4 I was able to kinda sorta make a shitty sheet metal brake that almost worked. I finished the bends with a BFH and an anvil.

        I then trimmed off some extra metal to make it pretty. Then I drilled some holes and fitted some u-nuts to it and did a test install. Final assembly will include some rubber bushings around the top of the intercooler to prevent vibration and damage.


        I also media blasted the hinge assembly and all the little pieces and sprayed them with self etching primer. Now they are ready for final paint.

        I know that most people have become bored with this thread because it is not running yet and it has been 2.5 years in the making.... Oh well. This project has taken so many different turns and I have taken so many little detours along the way but in the end I don't want to be that guy who says, "Ah man I wish I had done that while I was doing the swap!"

        Next steps:
        1) strip the radiator support and prep for paint
        2) Install starter
        3) Install intake
        4) Install wiring harness
        5) build exhaust
        6) crank it up for test fire
        7) final assembly and break in (NA, boost after break in and MSII)
        450whp 524 lb-ft 1988 336ic In progress

        http://www.r3vlimited.com/board/showthread.php?t=250709

        Comment


          I'm really impressed with this and I like your attention to detail. It's pretty awesome how you make things fit as if they were supposed to be there. Keep up the good work, I can't wait to see the finished product.

          Sent from my SAMSUNG-SGH-I727 using Tapatalk

          Comment


            I'm serprized your turbo will not clear the hood. Are the steel motor mounts a little tall?

            The work on the project is looking good.
            Projects Hartge,Alpina & AC Schnitzer Builds.http://www.r3vlimited.com/board/showthread.php?t=280601
            http://www.r3vlimited.com/board/showthread.php?t=227993
            http://www.r3vlimited.com/board/showthread.php?t=289362

            DSC04926 by Raul Salinas, on FlickrDSC03413 by Raul Salinas, on Flickr

            Comment


              The mounts are from QBang so I assume they are the same as what he always produces. The turbo is pretty freakin big though. I have a couple of ideas on how to make it work so I have no plans at the moment to step down in the size of the turbo.
              450whp 524 lb-ft 1988 336ic In progress

              http://www.r3vlimited.com/board/showthread.php?t=250709

              Comment


                Have fun getting that intake manifold on :)

                Hood clearance is most likely the turbo. I had no problem fitting my turbo in there with qbang mounts. We shall see if my new turbo fits any better or worse with the e30.de mounts.

                Car is coming along great. Keep up the good work!
                89 325i: 86 535i motor+trans, JE forged pistons, MLS head gasket, ARP head studs, Comp turbo, GoodNTight b34 turbo manifold, e30.de motor mounts, AKG 75D engine/trans mounts, custom 3" exhaust, intercooler, MS2PNP, Megan Racing Coilovers.

                Comment


                  Jim, I thought you said you were going to take care of that for me
                  450whp 524 lb-ft 1988 336ic In progress

                  http://www.r3vlimited.com/board/showthread.php?t=250709

                  Comment


                    Sounds like you need a sweet hood blister over the turbo. Time to get out the sandbag and round mallet.

                    Lorin


                    Originally posted by slammin.e28
                    The M30 is God's engine.

                    Comment


                      The pan has 1" of clearance between the steering rack. That IMO is too much. I would suggest shortening the engine brackets.
                      Need a Turbo manifold? We have them in stock- Click here---> http://rapidspoolindustries.com/
                      ____________________________
                      E-mail Panayiotisx2@gmail.com
                      Dyno vid http://www.youtube.com/watch?v=C7aM7..._order&list=UL

                      Comment


                        Otis, I am having solid aluminum mounts made to replace the oem rubber mounts. I have to go this evening and remove the oem mounts and position the motor where I want it and take measurements. Hopefully by the beginning of next week I will have the custom mounts in place.
                        450whp 524 lb-ft 1988 336ic In progress

                        http://www.r3vlimited.com/board/showthread.php?t=250709

                        Comment


                          Originally posted by RagtopE30 View Post
                          Otis, I am having solid aluminum mounts made to replace the oem rubber mounts. I have to go this evening and remove the oem mounts and position the motor where I want it and take measurements. Hopefully by the beginning of next week I will have the custom mounts in place.
                          Solid mounts because race car..! Check your intake manifold clearance with the brake booster, it's a tight fit.
                          Need a Turbo manifold? We have them in stock- Click here---> http://rapidspoolindustries.com/
                          ____________________________
                          E-mail Panayiotisx2@gmail.com
                          Dyno vid http://www.youtube.com/watch?v=C7aM7..._order&list=UL

                          Comment


                            Good call
                            450whp 524 lb-ft 1988 336ic In progress

                            http://www.r3vlimited.com/board/showthread.php?t=250709

                            Comment


                              I dared Mother Nature and braved the almighty SNOPOCOLYPSE!!! Why did I do this you ask. Do I not care about my well being and the future of my young family? Have I lost my mind?


                              Probably

                              But actually I did it because I finally got my spray booth in a box and I just had to get it set up!


                              Ok ok it didn't come from the same box unless you consider the big box store a "box".
                              I have all the remaining parts for the engine bay prepped and primed and I want to get them sprayed but I have a few cars in the shop and a fresh from paint CJ-7 that I can not afford to get overspray on.


                              So I drew up a simple, low cost, and small but expandable spray booth and headed out to acquire the essentials.

                              I then followed my own directions very carefully, because I can be a dick to work for sometimes, and pieced together the frame. I didn't get to wrap it in the 4 mil plastic today or seal it or install the box fan with filters or the two fluorescent light fixtures but that is all going to happen if we survive SNOPOCOLYPSE 2014!!!


                              And pics of the horrific scene that unfolded before me on my way home from the shop! For those of you who are not familiar with North Carolina I live in the mountains so even though this really doesn't look bad the pucker factor is multiplied as you are going through a negative camber curve down hill on ice.


                              450whp 524 lb-ft 1988 336ic In progress

                              http://www.r3vlimited.com/board/showthread.php?t=250709

                              Comment


                                great thread. Im ditching my stroker motor plans and doing an N/A m30 swap. Very nice car keep up the good work!!
                                sigpicWhat is that?... a lufa?... Its a Quinoa!
                                1989 325i, 1970 Chevy El Camino

                                Comment

                                Working...
                                X