Announcement

Collapse
No announcement yet.

M30 swap for my Olive Drab Vert!

Collapse
X
 
  • Filter
  • Time
  • Show
Clear All
new posts

    Very little progress to report today. The weather is turning super cold and the snow was stacking up so I didn't stay at the shop for long.
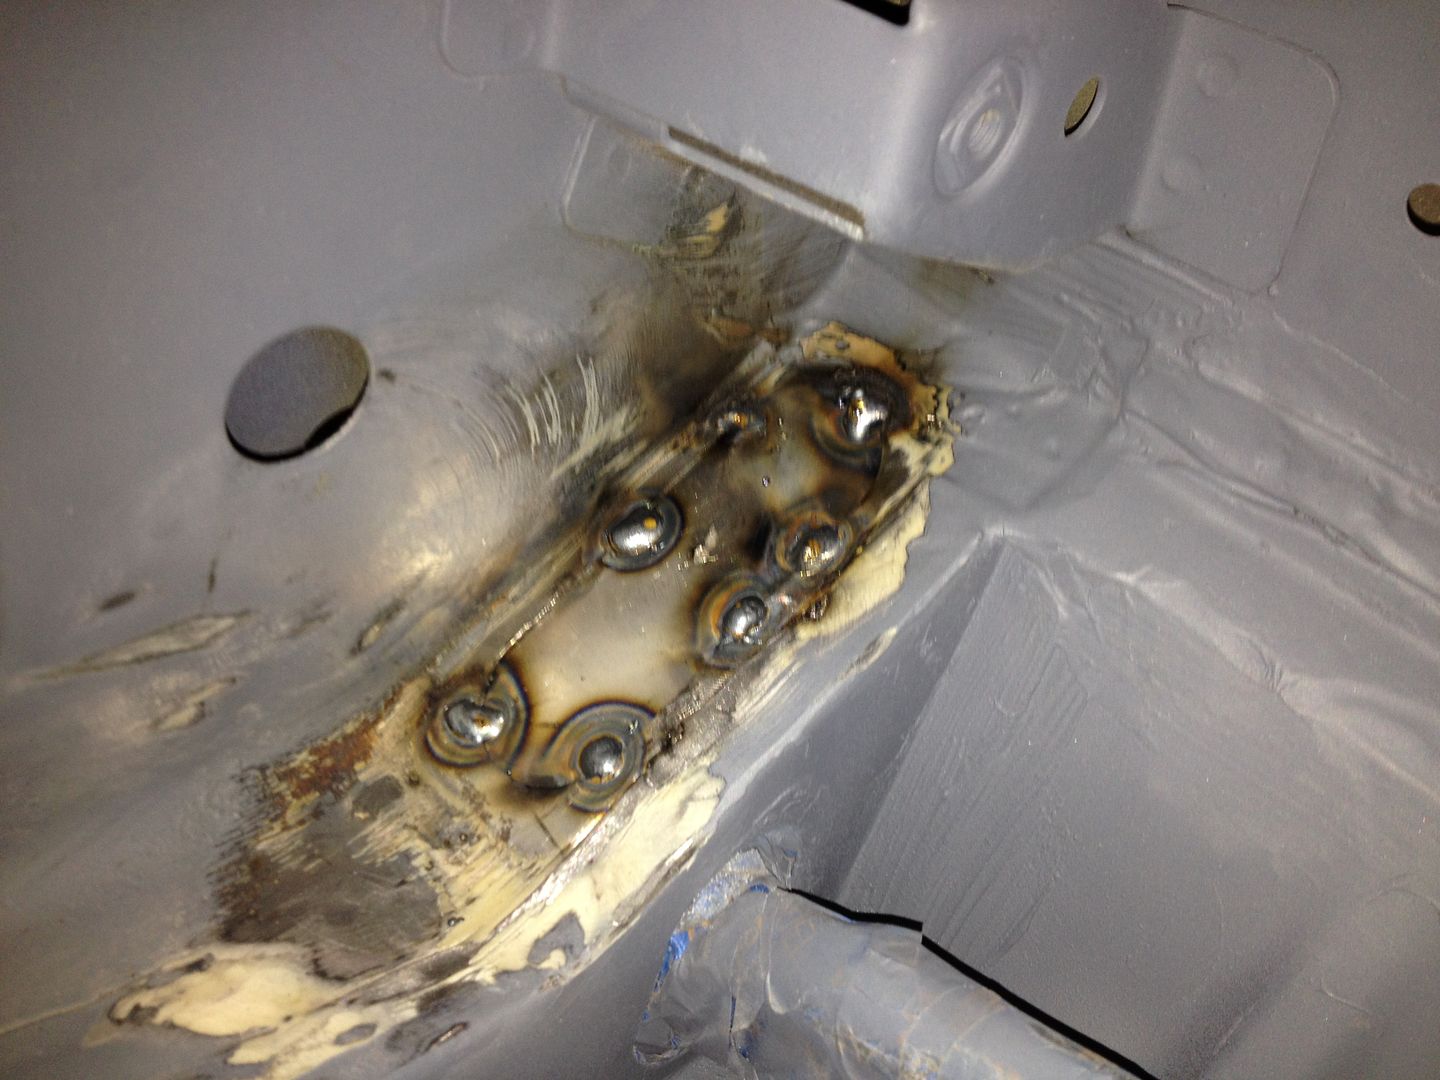
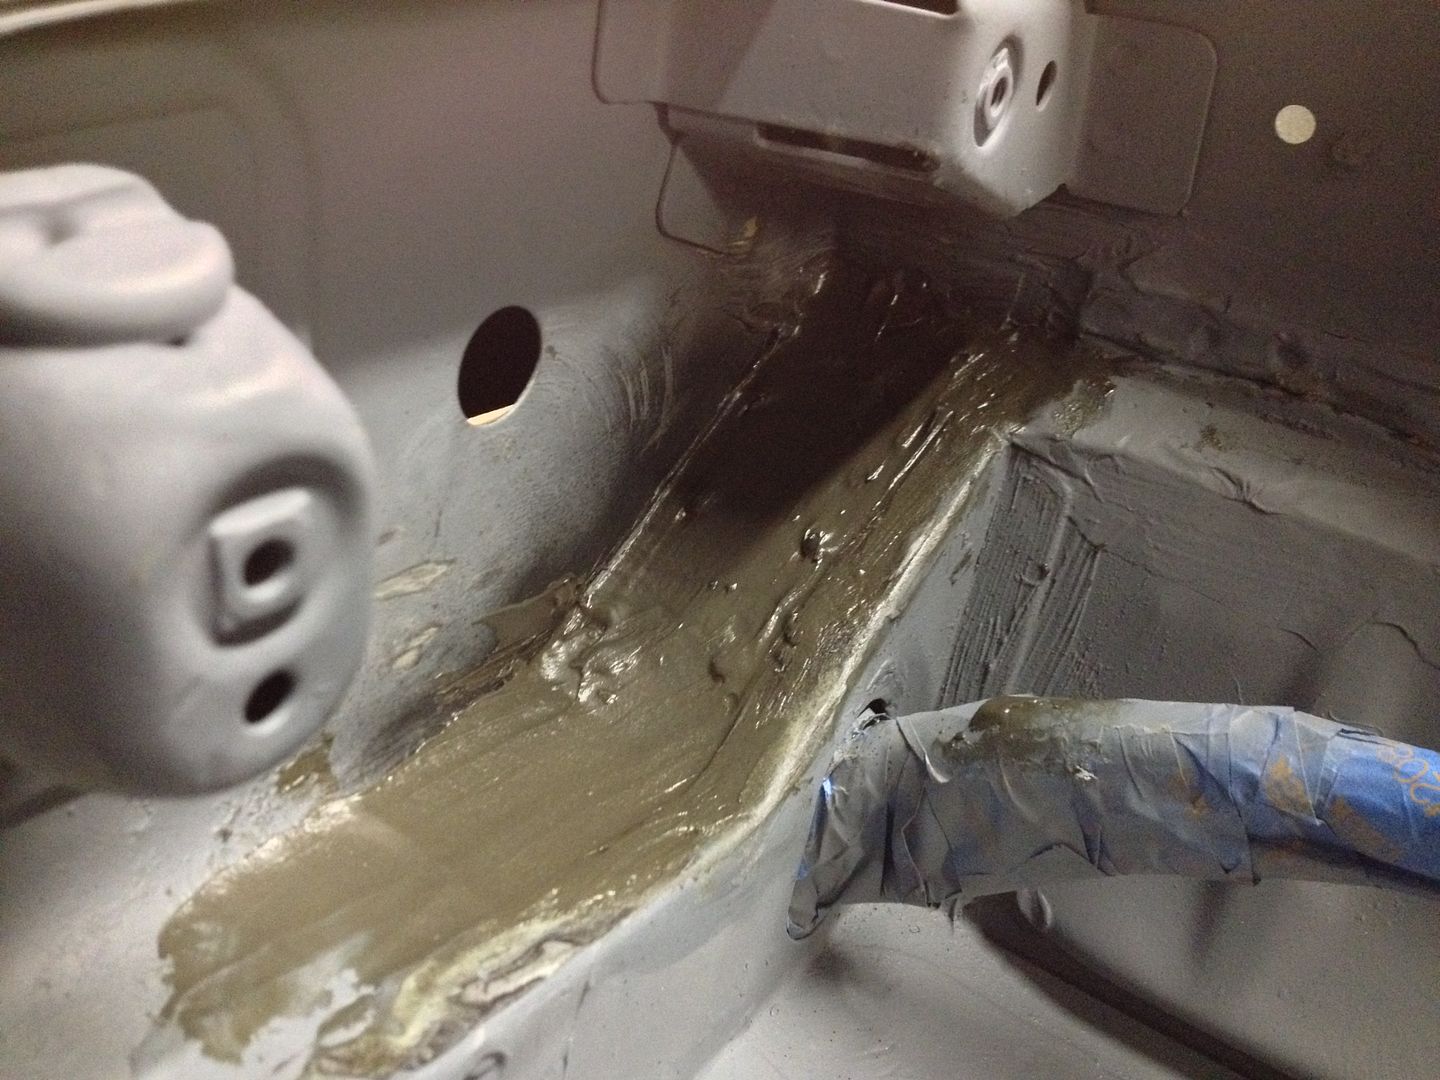
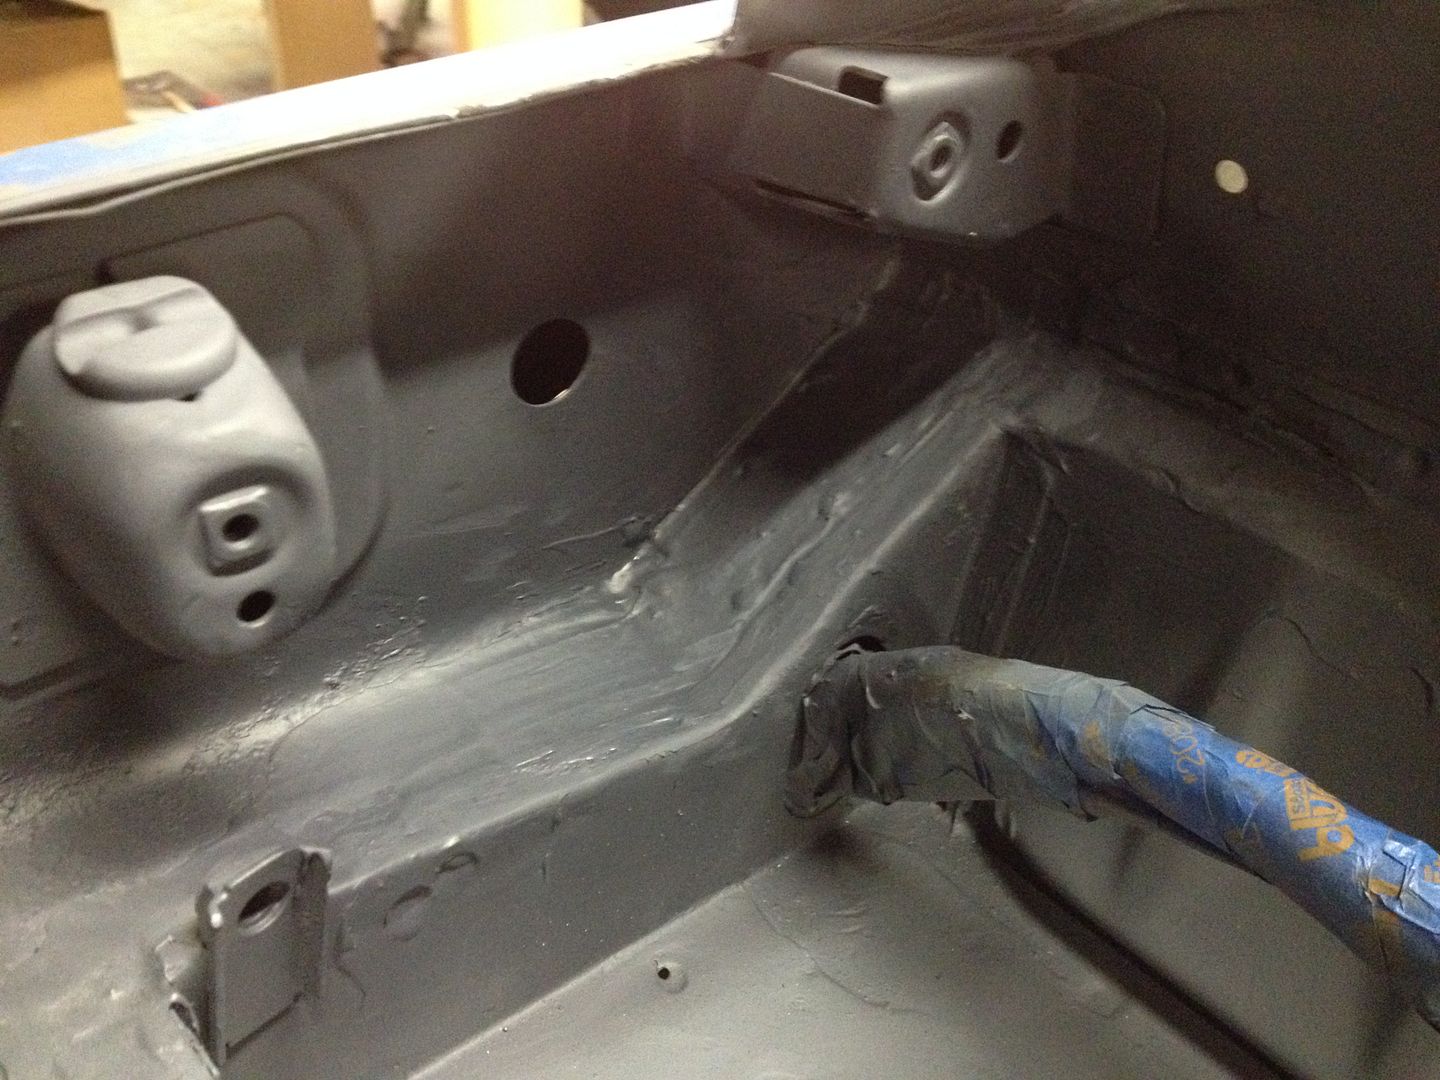
    I cut a patch panel for the AC hole and tacked it in. I then sealed it and primed it. But now the engine bay is ready for final paint. The mud work is not perfect and I mainly focused on the sheet metal on and forward of the strut towers. The battery tray and area around the fuse box will be mostly hidden so I didn't worry to much about perfection there. Plus the battery tray was replaced a couple of years ago so the seams are not perfect anyways.


    Last edited by RagtopE30; 01-06-2014, 06:52 PM.
    450whp 524 lb-ft 1988 336ic In progress

    http://www.r3vlimited.com/board/showthread.php?t=250709

    Comment


      What better way to spend the afternoon of the coldest day of the year but in an unheated shop painting a car with a HVLP gun for the first time ever! Yeah I figured the only way to do this was to stack the odds against myself as much as possible. In doing so I learned a few valuable lessons that I didn't see mentioned in any thread or how to video.

      1st - As your spray booth gets smaller in size the protective clothing needs to cover more and more. My "spray booth" was very small and when it was all said and done my hair and eye lashes were crunchy.

      2nd - DONT DO THIS ON THE COLDEST DAY OF THE YEAR IN AN UNHEATED SHOP!!

      So I made a small enclosure, which I will refer to as my "spray booth" from here on, out of large sheets of quasi clear plastic and packing tape. You cant see it in the pictures but the front of the spray booth has a door that I drop when I started spraying. I masked off every thing I thought was important.
      And I started my 75000 btu construction kerosene heater and warmed up the spray booth and sheet metal to around 100 degrees. It was like an oasis of awesome in the otherwise frigid shop.


      Earlier today I went to the local automotive paint supply store and picked up some Limco Acrylic enamel. The color I choose for the engine bay and eventually the exterior is from the 2011 Toyota FJ. It is the army green paint code 6V7. I also stopped by Home Depot on the way home and picked up a $49 HVLP spray gun. I got it all to my shop and proceeded to read the directions on both the paint and gun and went to town. Yes I did use a pressure regulator and kept the pressure between 25 and 30 psi.

      Keep in mind this is my first time painting with a HVLP gun and with enamel so be kind.
      This is a sneak peek after the first coat.


      I did a total of 3 coats. The second and third coats were pretty heavy and I went a little to heavy on the fender humps and strut towers on the last pass. I got a couple of runs but I will let it cure and cut/sand them down flush and spray another coat. I did get some trash in the paint but not as bad as I was expecting considering I had no filtration at all and I did very little to prevent dust from entering my specialized and extremely sophisticated spray booth.

      This is what I ended up with today. A couple of the pics are only to highlight the runs.


      I still need to go back in and shift the fuse box and paint where it was blocking. I will use that opportunity to fix the runs and then let it fully cure for a couple of days. Then everything goes back in. Followed by the final fab and paint of the radiator support once my radiator gets here.
      Last edited by RagtopE30; 01-07-2014, 06:12 PM.
      450whp 524 lb-ft 1988 336ic In progress

      http://www.r3vlimited.com/board/showthread.php?t=250709

      Comment


        More adventurous than I!
        Si vis pacem, para bellum.

        New Hawtness: 1995 540i/6 Claptrap
        Defunct too: Cirrusblau m30 Project
        Defunct (sold): Alta Vista

        79 Bronco SHTF Build

        Comment


          This... is insane and looks very nice. Keep up the good work, wish I had done a lot of this when I did my swap.

          Comment


            I went back today and finished up the paint behind the fuse box. There is a little more trash in the paint than I first thought but it really is not bad being my first dance and all.
            I looked into how I can fix the runs and all the options involve a great risk of screwing up the nice finish I achieved on the first attempt. Considering that the runs are exactly where I plan on placing the reflective heat protection for the turbo set up I will just knock down the worst of the run and then apply the heat protection. It will be like it never happened and will only leave one singular drip on the drivers side that is pretty hard to see unless I point it out. I am happy with this.
            So no updates for a few days while the paint cures. I plan on unwrapping the car and reinstalling the engine and trans on Sunday and then I will post some automotive porn.
            450whp 524 lb-ft 1988 336ic In progress

            http://www.r3vlimited.com/board/showthread.php?t=250709

            Comment


              Looks great...!!! Don't worry about the imperfections in the paint. Once the engine is in and few hundred miles driving you won't notice.
              Need a Turbo manifold? We have them in stock- Click here---> http://rapidspoolindustries.com/
              ____________________________
              E-mail Panayiotisx2@gmail.com
              Dyno vid http://www.youtube.com/watch?v=C7aM7..._order&list=UL

              Comment


                Lol yeah came to a similar conclusion. Worst case scenario the HX40 will hide all of it!
                450whp 524 lb-ft 1988 336ic In progress

                http://www.r3vlimited.com/board/showthread.php?t=250709

                Comment


                  Thanks Otis!!


                  450whp 524 lb-ft 1988 336ic In progress

                  http://www.r3vlimited.com/board/showthread.php?t=250709

                  Comment


                    Originally posted by RagtopE30 View Post
                    Because I want the reservoir to be the highest point in the cooling system and I already shaved the mounting brackets for the stock piece. I had planned on using the built in tank on the 318i radiator. But all said and done the firewall mounted reservoir will look fitting with the m30.

                    And thank you for the pictures. I will be using them as references as I get into final assembly.
                    I did a firewall mounted setup on my b34 swap. I think it looks pretty slick but you do give up some things like the ability to run a strut brace. At least I've never seen one that will clear. If you want to go that route I could post some pics of my setup but all said and done it works either way.
                    $500, Diamantschwarz, and a Dream

                    Comment


                      I have researched it as well and any pics you want to post would be appreciated. I am always open to new ideas.
                      I have access to a fab shop so I planned on having a custom strut brace made.
                      450whp 524 lb-ft 1988 336ic In progress

                      http://www.r3vlimited.com/board/showthread.php?t=250709

                      Comment


                        Goal Met!!!!

                        I have to change my engine mounts (not the arms just the rubber pieces) because there is about an inch of clearance between the oil pan and cross member. And currently the turbo is sitting almost an inch to high to clear the hood. So small adjustments aside the engine and trans are mounted in the painted engine bay. I plan on making an adapter to replace the turbo until I am ready for it so that I only have to do the exhaust once. I am have a surprise in store for the exhaust.


                        Last edited by RagtopE30; 01-12-2014, 05:47 PM.
                        450whp 524 lb-ft 1988 336ic In progress

                        http://www.r3vlimited.com/board/showthread.php?t=250709

                        Comment


                          That's one big mama turbo dude..!!! Look at all that room around it
                          Need a Turbo manifold? We have them in stock- Click here---> http://rapidspoolindustries.com/
                          ____________________________
                          E-mail Panayiotisx2@gmail.com
                          Dyno vid http://www.youtube.com/watch?v=C7aM7..._order&list=UL

                          Comment


                            I know I know! Hmmmm What to do with all that room..... Maybe down the road the turbo will grow into it, that is if I can get the current turbo to clear the hood!
                            450whp 524 lb-ft 1988 336ic In progress

                            http://www.r3vlimited.com/board/showthread.php?t=250709

                            Comment


                              Matt its a work of art. Don't get it dirty
                              Seat Shocks....I have passed the baton to John Christy from Ninestitch. Email John or Garrett at ninestitch1@gmail.com

                              https://www.r3vlimited.com/board/sho...86#post4944786
                              Alice the Time Capsule
                              http://www.r3vlimited.com/board/showthread.php?t=360504
                              87 Zinno Cabrio barn find 98k and still smells like a barn. Build thread http://www.r3vlimited.com/board/show...20#post3455220

                              Comment


                                ^ Thanks Jeff. I am excited to finally be able to open my hood at the Vintage!
                                450whp 524 lb-ft 1988 336ic In progress

                                http://www.r3vlimited.com/board/showthread.php?t=250709

                                Comment

                                Working...
                                X