
Maybe
Thanks!
No, first time
Go slow, research what others have done, think through details, take 10,000 pics, know my limits, ask for input, fix something if I break it (no big issues yet - worst thing was stripping a thread for the rear ABS and having to re-tap)
Thanks!
Seriously it’s a function of time, thought, and teamwork. The guys at Korman have been invaluable, as was my body shop, as was my interior guy, as has R3V/S14/RealOEM/FCP/Bentley/old factory manuals and on and on
-
You’re a mad man... I’m so impressed by everything in this thread.
Have you ever restored a vehicle before? How are you confident that you’re not missing a step or doing something incorrectly?
I love the work you’re doing!Leave a comment:
-
;D
I'm running full speed to finish her up. Been getting a lot of boxes lately. I spent my free time this weekend with degreaser and a pressure washer cleaning off the underside. Very dirty job, but i decided i couldnt leave the underside dirty when the rest of the car was so clean. I'm using an engine degreaser gel, and just got a short handle for my pressure washer. Thankfully temps this weekend will be warm so i can finish that part up and start the driveshaft/heat shielding work
Remaining to be installed- Headlights (have)
- Brakes (in mail this week)
- Gauge restoration (going to Bavrest right after the motor starts up - hopefully this weekend if the brakes come in)
- Drive shaft (have)
- Front/Rear Glass (have)
- Heat shielding/underbody trim (have)
- Rear bumper trim behind wheels (in paint)
- Midsection (in mail)
- Evo 3 muffler (in mail)
- AC system (last parts arriving today)
- Bumper (complete, just need to mount)
- Evo Bumper and Hood seals (have)
- A few remaining factory decals (have)
- Spare wheel/tire (need)
- Dash/wiring (have, testing electrics before installing)
- M3 door seals (still off because of electrical testing)
- Door film (in mail - off for electrical testing)
- New Switches (in mail)
- E36 hand brake cover (in mail)
- Steering fluid (trans fluid, diff fluid, coolant are in)
- Badges
- A few other things im sure I'm forgetting
Will post update soonLast edited by CurrusDei; 03-06-2019, 08:08 AM.Leave a comment:
-
Incredible work!
Just read through the whole thread.
Hope to see this beauty at The Vintage this year!Leave a comment:
-
Brief update, but more to come shortly. I'm going to finish this thing in short order. Motor start looks like this month, want it done by May beacuse 5 years is long enough
Headlights arrived. Very much worth the wait.
manual adjustment knob
wires are inbound. have to re-wire to eurospec.
New coolant cap
Final hose - power steering pump to rack. The new versions are slimmer than the old
Fitting shape is also different. I think this will still work, but we'll see
I connected it up first, then had to undo it to fit in the steering u-joint. so, do the u-joint first, then the final line
u-joint. top was easy to get on. the bottom wasnt. had to remove the bottom bolt (of course, wont go on with it on), line it up, and have my wife hammer on a bunch of socket extensions that were connected together and rested on the top of the lower section of the u-joint. it gradually went on, but was definitely a 2 man job to keep it aligned while hammering from the top.
Got the throttle cables on
Also, I had some degraded wiring connections. Found a good permanent fix...
Coolant level sensor: Original wires in my hand, BMW replacements hooked onto the sensor
Thermostat sensor connector: This one was a real beauty. Nice fix by the PO soldering rusted wires.
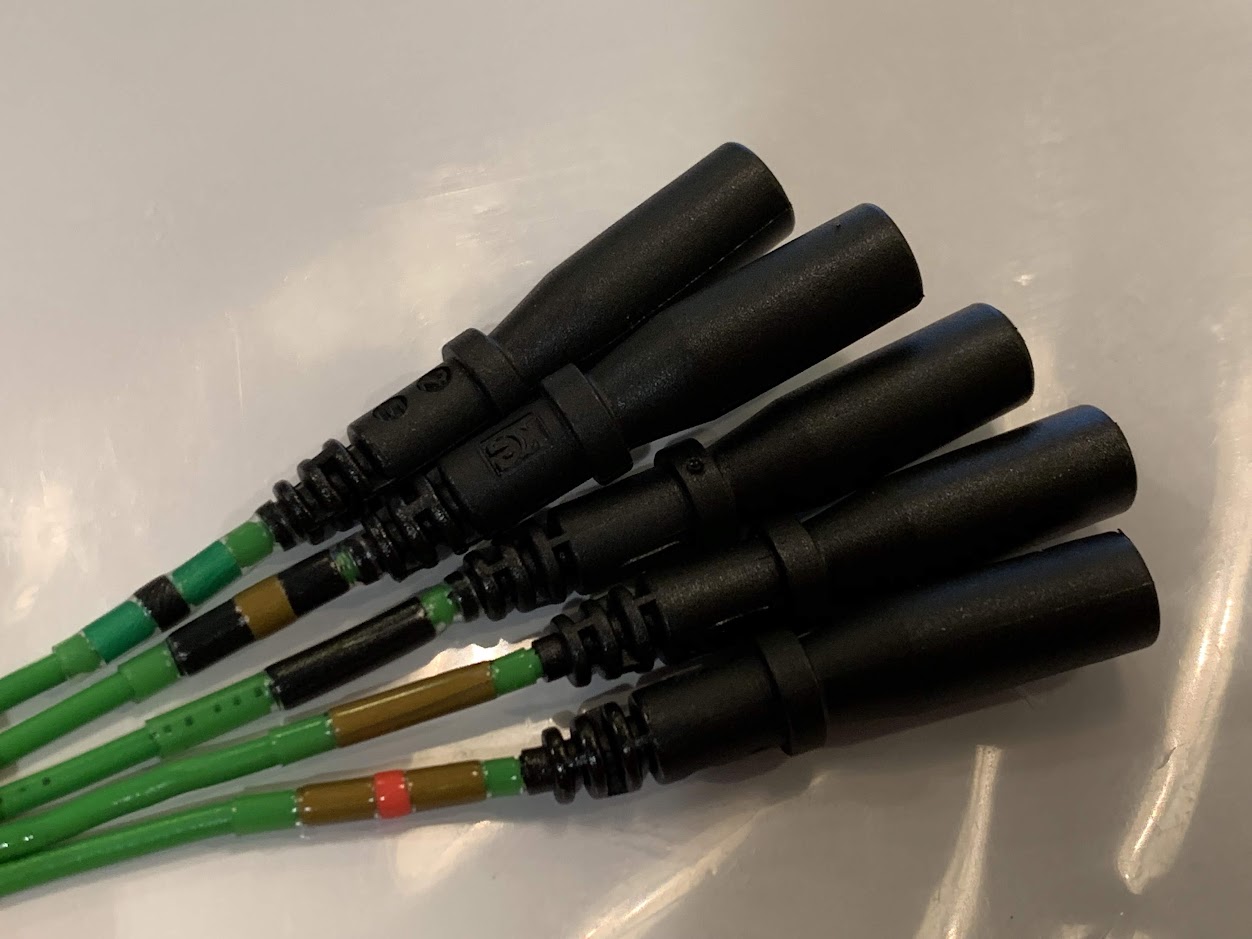
Here's my fix. Of course you can just connect up the BMW replacement wires, but then you're left with just green wires and no way to tell which is which. My solution was to order the colored tabs in the picture below, along with clear heat shrink wrap.
I cut sections of the color labels corresponding to the OEM wire color, wrapped them around the end of the wire, then used the clear heat shrink to encase it, so that whenever I need to know which wire is which, its right there
Also, I switched to these instead of soldering or using crimp connectors. These things are awesome.
Also, critically, Raychem DR-25 heat shrink wrapping is far and away the best I've found. It stays flexible after shrinking where many get stiff and brittle
Coolant level sensor repair:
Thermostat connector repair
Other sensor
T-stat in
Also, I decided against the DSSR. Went with the factory one.
First fitting had a lot of slack.
Used more to close the gap per recommendations from other owners
Brakes
Disassembled the calipers. Messy job. had to use a grease gun to push the old pistons out.
I tried cleaning them up a bit, but it wasnt happening. Sent them off to be zinc coated. I can not wait to get these back and on.
Leave a comment:
-
-
Its taking forever, but it'll be worth the wait. They just cleared customs in Miami.Leave a comment:
-
oh man. i think about that sometimes. It would be a real shot in the dark. I'd say on average 3 hours/wk (sometimes I'll work on it all weekend, sometimes it goes untouched for weeks).
Over nearly 5 years, so 3x52x5=780. Said another way, this would be almost half a year of straight, full time 9-5 work. This seems in the ballpark if i started over and condensed all the time i've spent. Of course, if i started over i could do it much, much quicker. Plus thats just my time, not counting the paint/body guys, engine guys, and upholstery guys.
I'll round it off at 1,000 hours so far of just me.Leave a comment:
-
Everything about this is superb. Can you share how many “man hours” you’ve estimated has gone into the build up to this point?
Sent from my iPhone using TapatalkLeave a comment:
-
ebay. the seller says he has two sets left. not cheap, but for this kind of Euro NOS what else are you gonna do?
https://www.ebay.com/itm/BMW-E30-M3-...tZH:rk:50:pf:0Leave a comment:
-
Please tell me where ever you ordered those lights from they have more! I’ve been looking for new euro lights!Leave a comment:


Leave a comment: