-
Current:
1989 325i
1988 M3
1987 325ic
Past:
2001 330ci
2001 M3 -
Alright, should be fixed now. Way more to come!Comment
-
I just read this entire thread and its pure win! I've recently been going back and forth on restoring my regular e30 (which I've already bought a crazy amount of parts for) or getting an m3. You thread give me so much inspiration to get an m but finding one like you did is proving difficult (at least for me) but never the less keep up the good work! I'm definitely in for more updates.Comment
-
Thanks! I saw a couple good ones on eBay go in the mid 20s. There was a also a slammed up, rusted shell (literally, no engine, no interior, no suspension or subframes) that went for $8k. Sadly I think the days of grabbing good ones in the teens are past us. But a good one snagged for in the 20s would be a great deal if it doesn't need a respray.
Merry Christmas everyone. The M3 did ok this year as well :)
Comment
-
Front Subframe
Now the last phase of transition from car - to shell. Front and rear subframes.
Detatching the steering linkage
The one dusty bolt facing down in the middle of the picture comes off
You can see how the bolt goes through the linkage to tighten the bracket down on the splines of the steering column.
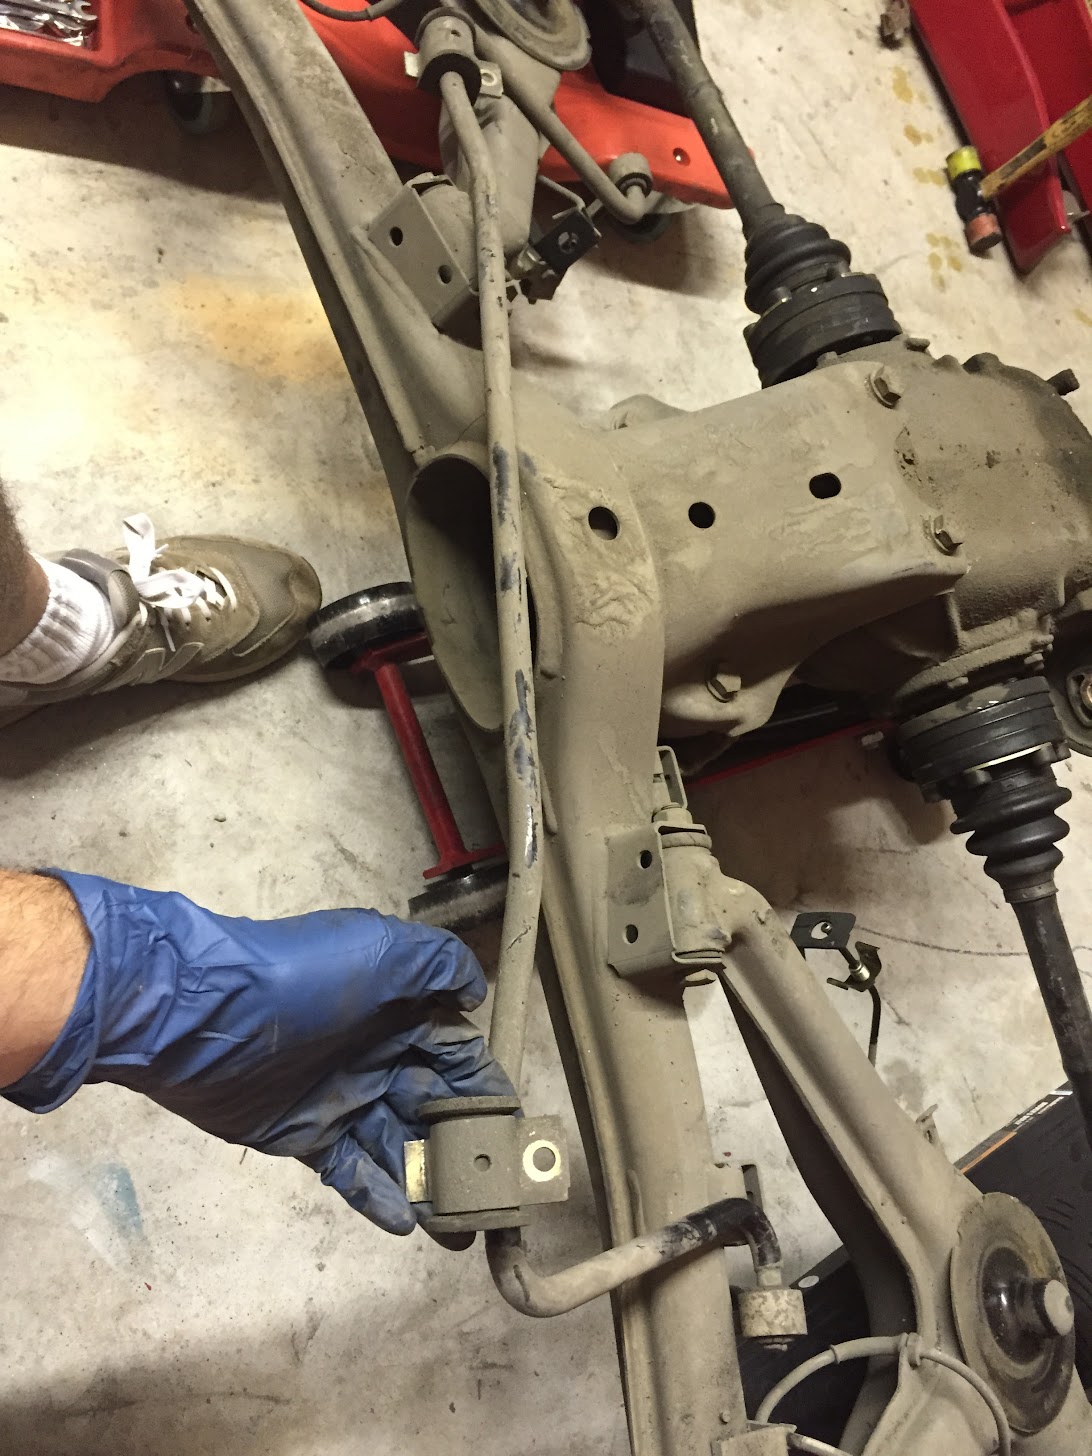
This picture shows where i detatched the front control arm "lollipops" in the bottom left. held on by two bolts
The four lollipop bolts, the steering column bolt, and the nuts holding on the front shock mount shown here. Shock mount bolts coming off
Driver side, courtesy of mr blurrycam
Balancing both front strut/hub/brake assemblies in preparation for removing the front subframe. I pulled this thing all out as a single unit - i would not recommend this approach as it is very heavy and likes to bend in different directions. Anyways, doing things the hard way, i pulled it out - almost dropped it on my toes. Thankfully i was wearing my open toed sandals - safety first.
Very very dirty.
Various pictures of teardown - separating the strut/spring/brake/hub assemblies from the control arms, steering rack, and then detaching the control arms and steering rack from the front subframe. This is real "hip bone connects to the leg bone" kind of stuff, so i wont walk through in too much detail as it has been covered elsewhere. Some pics though...
This is detaching the control arm from the subframe.
Here you can see the bolt where the hub housing/knuckle assembly connects to the control arm, and where the control arm connects to the subframe. Also the rubber brake line is front and center here. Weighing OEM vs SS lines for the reassembly.
ABS sensors - these are dirty but still working. Thinking about whether to replace - these fawkers are expensive ($80-120 each from what i've seen)
Unbolted the steering column from the subframe. There she is - my pressure washer trigger finger was getting itchy at this point.
Rest of it
Steering rack out
Strut/shock/brake/hub assemblies. Took the control arms off easily.
Rotors are worn to say the least
Thats it for the front!
Last edited by CurrusDei; 12-25-2015, 07:12 PM.Comment
-
Rear Subframe
Going a bit out of order here, but since i just posted the front subframe - here's the rear.
Drive shaft to rear diff
If i were doing this again i would remove the driveshaft before the engine/trans to keep the shaft from rotating while unbolting from the diff. As it happened here i used a strap wrench and elbow grease to keep it from moving while I worked at the bolts.
After burning many calories...
Center bearing unbolts easily
And out she comes
Detatched the metal brake line from the rubber brake line end section on both sides
Here's the T junction where the single brake line coming from the ABS unit splits into left and right sections. I fount it best to leave this to disconnect until after the diff was out.
Had to remove the parking brake lines as well. Think i covered this when i did my rear bearings, but its covered numerous places also.
Two little spring loaded inserts.
And unhook at least one of the two spring clips
Then the shoes and brake adjuster come out easily.
The little clip thing that activates the brake.
It comes off easily, the two pieces pivot around that little dowel.
Then the line pulls out the back.
Then they unclip to swing free of where they mount to the sway bar link mounting bracket
Speaking of rear sway bar links. The bushings on this guy were pretty shredded. I took the bar off separately from the rear subframe assembly.
Bolt off
Both sides - you can see the parking brake line holder here really well.
And main rear swaybar bracket mounts
This is where the balancing act began. I put furniture dollies under each brake rotor/shield to catch the assembly when i released the shock (and lowered it down gently using the floor jack.
Once each was down, i could easily remove the springs.
I supported the diff with my floor jack (the sides are still up in this pic, but you get the idea)
Removed the rear subframe bolts
And the bracket that goes between the subframe bushing houseing and the frame
Released the rear shock mounts (the shocks were already hanging, just wanted more room to maneuver)
Dropped the shocks
Double checked that everything was removed/supported, and then removed the differential mounting bolt
Be VERY careful if you do this, especially if by yourself. It was not as smooth a process as it looks here and this is a fair amount of weight to be moving around in an awkward position. Do this at your own risk
Lowered the floor jack, and out she came.
Shell status achieved (doors were empty here and trim off, will cover that next)
Comment
-
-
wowo, zino! The picture taking and sharing on here takes just as much time and effort as doing the work on the car. Seriously, a huge thank you.
I can't believe (but at the same time not that surprised) BMW didn't make a junction on the electrical harness between the engine compartment harness and main chassis harness. When I was peaking mine I was praying that there was one, but now I know. That sucks! After doing a similarly extensive rebuild on a S13 240sx recently, I was very grateful there was a "Super Mega Junction" (Nissan lingo) that allowed the harnesses to be separated. Damn Germans...Comment
-
The doors on the car actually required a fair amount of work to empty while cataloging everything, and not breaking anything.
First step was removing the rear glass. easy. two bolts in the b pillar, suction cups helped keep it from dropping
Next this clip had to come off, popped off easily with minimal force
This guy just pries off the back
These plastic pry tools are hugely helpful. I would never do this with a screwdriver - and they're less than $5 at Harbor Freight, so who cares if you break one - you arent scratching anything.
These are the clips on the lower window trim
Rubber was a bit tired. Going to be replaced
I was able to raise and lower the window manually fairly easily
The upper trim pries off with some moderate force in the front. Be careful and definitely use a plastic tool here. Be very gentle. I bent my passenger side trim a bit taking it off, but it should straighten easily with some careful re-installing. Driver's side came off perfectly - practice makes perfect.
This is the first clip
Clips all the way across the top
Little bend, should fix ok i think
The B Pillar trim comes off with some force pushing toward the front so it can clear the lip and clips.
So i tried to preserve the original moisture barrier when removing it... didnt go so well. The heat gun melted through it instead of loosening the adhesive. So I'll need new moisture barrier material - if anyone knows where i can find that...
These are the inserts the door tweeter speaker goes into. they just twist in
Window motor
The wire is zip tied up the front part of the door (from the factory). I cut the zip ties to free the cable. You can see both ends of the cable here as i have it disconnected from the window wiring harness.
Disconnected the motor from the gear mechanism. This lets the window move completely freely. One trick i used to keep it from falling was to put a strong suction cup on the outside of the window so that the cup would get stuck on the door sill, preventing the window from falling down.
Two bolts and the motor wiggles free
The casing shell comes off easily, but i stored the two together
Window down to remove weather stripping
Worked the weather stripping down from the top. There's a surprising amount of rubber down in the door itself.
Now the upper trim on the body of the car
Started prying here
First clip released. They are old and fairly small, so they'll probably break. Fortunately replacements are cheap and plentiful
Some of the clips came off with the trim, leaving scratches. Not a problem in this case with the respray.
Worked my way up. Remember what i said about it being ok to break the plastic tools...
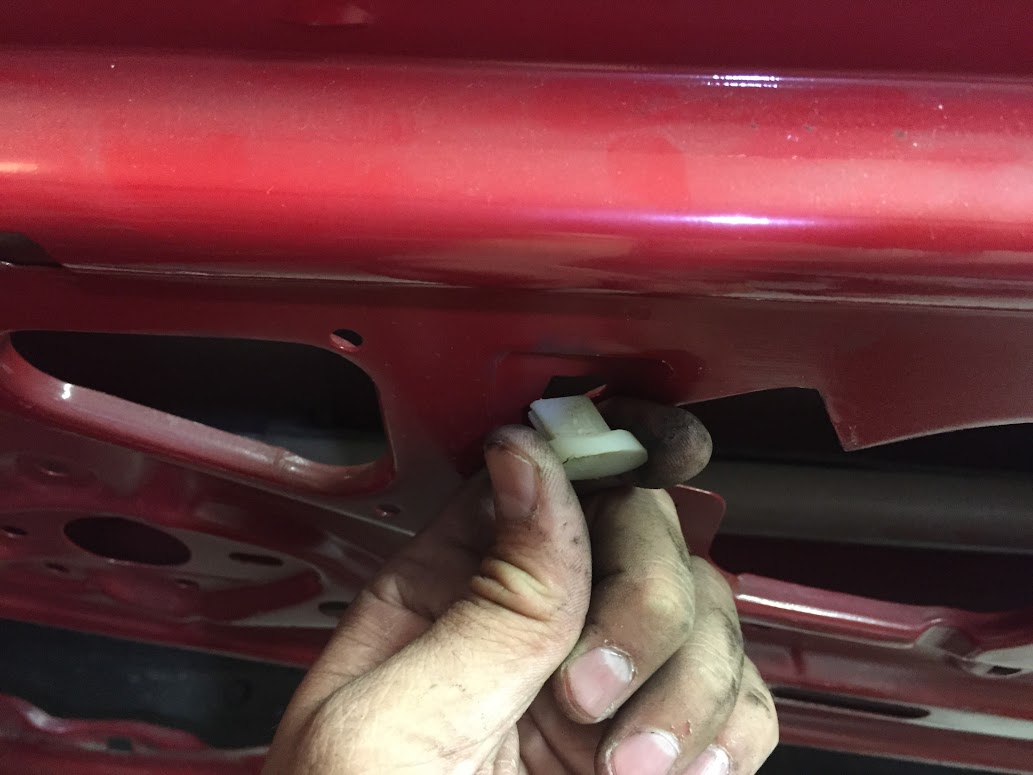
Now for this guy.
I just drilled out the center of the old retaining pins.
Then its just prying
And removing all the mounting clips and gaskets - not much hope of getting these off intact.
I removed the clips so the body shop has a clean surface to work with. Plastic pry tools again
And a gentle mallet tap sends the clip flying
And then on to the door mechanics. I removed the four bolts that hold on the window motor (three on the left, one in the bottom right corner of the door)
Here you see one of the two tracks on the bottom of the window glass. To the right is the insert on the window regulator arm that goes into the track. Its already out here obviously.
Once the runners are out of the tracks, the window just lifts out.
Glass out
Now to take out the regulator and arms. These two nuts hold it on.
Collapse it down into the right position and it lifts out easily.
Here its where those two nuts went
Now, this is a cool shot. Inside the door! The bolt at the bottom holds on the front track that the rubber window stripping fit into.
There is a little hook at the top that you have to watch out for, the track has to drop down before it will release. Dont force it and break this.
Now looking toward the back
The other track is held on by one of the four bolts that held in the window regulator
The little black plastic plastic clip just below center in this pic holds a clip that holds a connection on the window wiring harness.
These two bolts hold in the door lock actuator
Disconnect the hook at the top
Then disconnect the electrics
Getting emptier. Left the hook for the lock actuator hanging.
Door hardware coming off
BMW gave you a metal bracket with your metal bracket so you can bracket while you bracket.
Then there's this goo
Rear bracket
How it all goes back together
And black rubber goo coming out
Door handle
Another hook
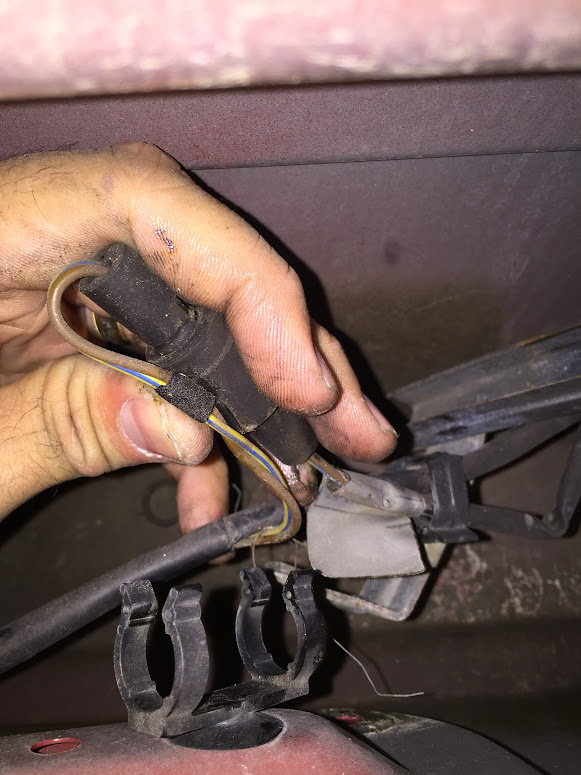
Wiring harness extraction
Tagging
Speaker wires
More mounting points for clips
Couple more zip ties
Powered mirror connection
The last wires are on the door latch box. This thing was not easy to get off. The bolts are torqued hugely tight and the screw metal isnt super hard. My advice, do what i did on the driver's side and use hand tools - a screwdriver bit paired to a long wratchet works very well. Power tools stripped the screws almost without fail. then you have to get mean and use dremmels, flat screw drivers, and force. Fortunately all came out nicely and new bolts will be used on install of course.
Door handles are easy
here's the back, inside the door
This little guy lives on the inside of the door and provides the bolt studs for the nuts to hold the door handle hinge.
Here's how it fits in
Unhooking more electrics. This looks like a sensor that sits on the door lock arm.
Here what it looks like after you remove the black box
One more bolt to release the high tech motion control mechanism... steel rods
How it sits in the car.
Misc door hardware
lock releases with this C clip
EMPTY DOOR!! Now, just do it all over again on the other side
And some organization afterward will help later
Remember what i said about door latch box hand tools? Proof from the driver's side...
And the driver's side lock didnt look so hot. Guessing this is related to the dent that is in the same location. Body shop is working that one out
Last edited by CurrusDei; 01-30-2016, 07:59 PM.Comment
-
Some misc pics of clips and retainers on the inside. gotta remember where these all go.
I think im pointing to where another clip goes...
Yeh, thats what it was
reading light mount
Holds the glove box, keeps it from going down too far
And in the engine bay
How the hardware goes back on
under the lip of the quarterpannel
Where the speed nuts go
Next up. Gas tank!Comment
-
Wowza. This will be a legit respray!Current:
1989 325i
1988 M3
1987 325ic
Past:
2001 330ci
2001 M3Comment
-
Man! I can wait for it to be sprayed and for you to start the reassemblyComment
-
Fuel Tank/Lines
Hey Guys,
It has been a while since my last update because we just moved to a new house. More on that later, but for now. Here's the fuel tank:
Started where most people interface with their car's fuel system. Took the cap off, then drained from the plug you see pictured here.
Its wet here because i had drained some out already.
This container was nearly perfect for the job. Still had a good amount of gas in there.
Next i removed the covers under the rear passenger seat
The electronic sensor has already been unplugged here, but the fuel lines are still attached. The thing being held down in the middle by four bolts is the fuel level sensor.
No need to take it out to remove the tank, but here it is
Hoses Removed. Based on looking at the hoses underneath the car, the one that is above and to the right (if you are facing the rear of the car, not in the pic below) of the fuel level sensor is the main fuel sender line. The other is the fuel return line.
There is also another line that is in front of the hoses above. This heads over to the expansion tank.
I found this diagram VERY helpful

With those off, there's some underbody shielding to remove
And the lower end of the fuel filler neck to disconnect.
Next i started to remove the four (i think its four, could be more - its been a while) bolts that hold up the tank. They're all fairly obvious. There are still some lines on the driver's side of the tank that need to be disconnected but i did that with the tank partially lowered - either way works but it was easier to reach with the tank down.
removed the fuel filter
The sender pump and pressure regulator are easy to remove after the filter is out of the way.
Tank is partly down
Other lines i mentioned. I disconnected one from the tank and one further down.
Tank down
Many shop towels later...
The underside had a gunky coating on it. I'll probably respray it with a protective coating, but this one was coming off.
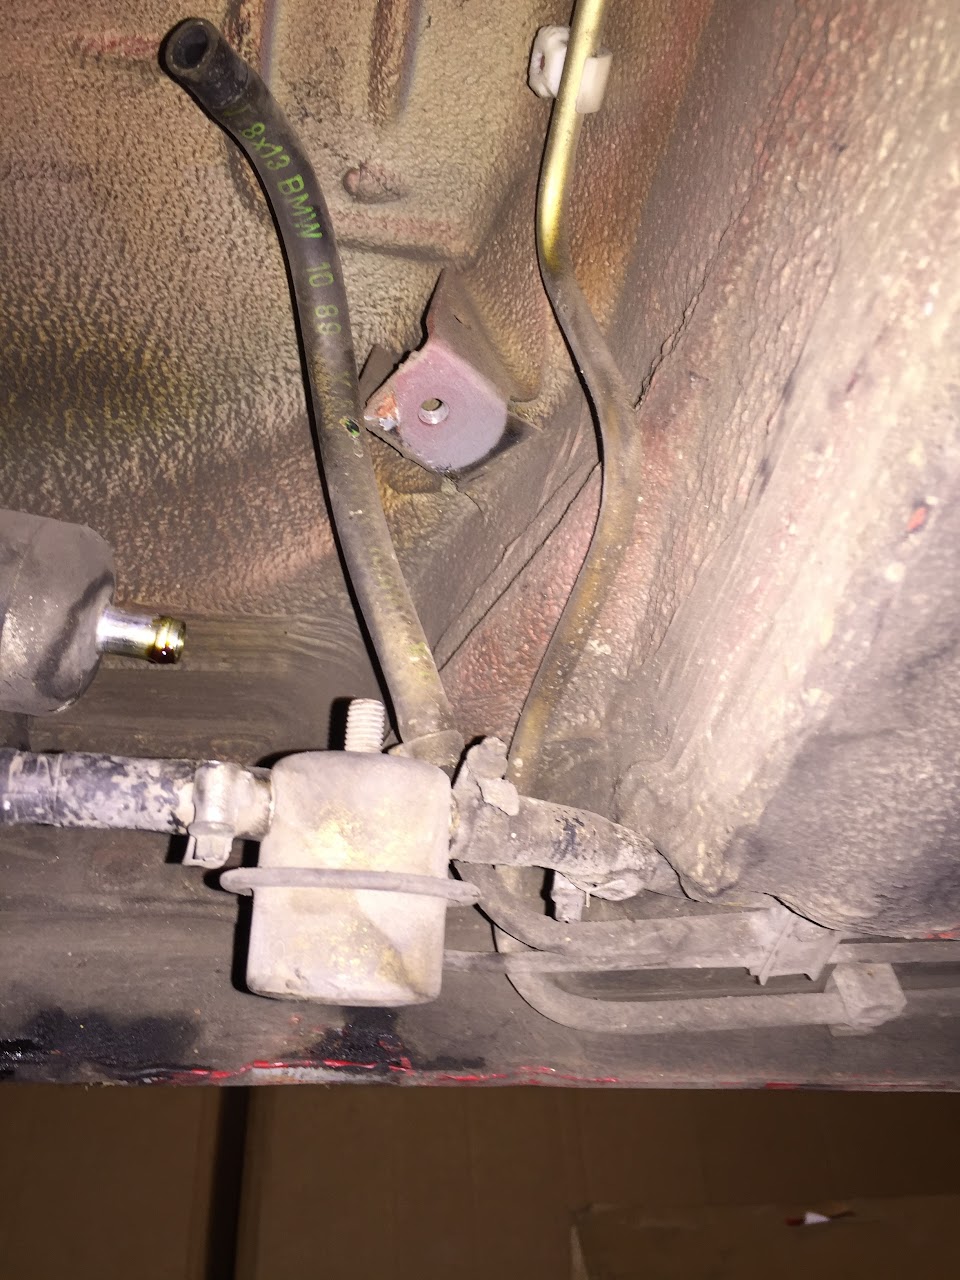
Now for those fuel lines (and a brake line)
These guys are LONG, and are held on by several clips along their journey from in front of the driver's feet to behind the rear axle.
Fuel lines terminate here. The line at the top connects to the return, and the other runs into the fuel absorber (which here has been detached from the sender pump).
the brake line continues on past the fuel pump assembly, then makes a 90 degree turn to run to a T joint in the middle of the car - where it splits into two lines to feed the driver and passenger side rear brakes. (dont know why the pic is all red... its not an instagram filter, just a taking pictures on your back under a car filter i guess...)
The T joint is right above where the diff used to be
I had to loosen the fuel sender pump assembly to get the rear brake line out, since i runs behind the bottom mount.
Once that's free, the rest of the mounts are just as easy. I've catalogued them all, but here's the end result. Lots of long lines to store.
Then there's the filler neck and tank mess. I believe i just pulled the filler neck out through the back of the rubber boot you see here (after loosening the bolt on the bracket that holds it to the body).
Neck comes off with a few bolts
Right above the fuel filler neck in the picture above you can see the lines running to the evap tank. These are normally covered by a shield which i have already removed here. Most were very easy to remove, but the one that runs to a metal condiuit that runs to the charcoal canister needed a bit more work.
Here's the charcoal canister line
A little more work and...
There's more detail, but thats the gist of it. At this point the car was pretty much a naked shell.Comment
-
nicely done. you can still get those oetiker clamps no problem. The lack of rust on the lines and brake line tee is very cool :-)
you'll be replacing all the hoses right?I BUY/SELL REFURBISHED CM5907s & CM5908s
HOWTOs:
DB vert plastic bumpers
OEM Keys
MTech1 docs
88 ix Lach/Card
91 ic Calypso 3.1
86 Cosmo 2.7
OEM+ or bust!

reelizmpro: I will always be an e30 guy.. I still do all of my own labor
TrentW: There's just something so right about a well-built M20 in an E30
e30m3s54turbo: I save my money for tuner parts.Comment


Comment