2nd e30, 87 Lachssilber Revival

Collapse
X
 
  • Time
  • Show
Clear All
new posts

  • Jb325is
    replied
    Nice!

    My recommendations:
    • Shape your clay flange with a mixing stick/tongue depressor to create a small "vertical" wall that's normal to the surface of your gas door. This should be deep enough to account for your laminate thickness and, as mentioned before, give you a more uniform end of part area
    • Hand-cut your surface ply to be a nice fit into your mold cavity. Then use carbon strips or "bootlace" all around the edge of the gas door to avoid bridging. These strips should be between your first and second plies.

    Leave a comment:


  • Reichart12
    replied
    Originally posted by 2mAn
    Do you think the garage temp is affecting things?
    Possibly, probably 10-15 degrees F below optimal temp. Hurrying some steps were probably more of an issue.

    Originally posted by Northern
    I need to catch up on the videos soon, I've been slacking.

    I have such a weird disjoint in knowledge for composites.
    On one hand I've done a ton of repair work from my old job, but on the other, I've basically never manufactured something and there is hilariously little in common between the two.

    For the clay issue, I think the edges just need to be very smooth and consistent. Then it should be much easier to clean up.
    I don't know what the consistency of that clay is, but you might be able to smooth it with a tongue depressor or squeegee.
    Maybe even using a finger in a latex glove with a drop of water or solvent depending on what seems to work with the clay.

    If you're not vacuum bagging the carbon layup, it's really going to want to bridge over the edges instead of conforming to the shape of the mould.
    The water on the clay is a good idea. I bought the high temp clay thinking I'd be doing this more in the summer so trying at ~50-60 made it hard to work with. I think the bits that really stuck behind were my little addon chunks and if I did it in larger more solid pieces, less should stick. I learned most of what I'm doing from other youtube videos mainly Street Bandito. It's been a fun process so far.

    Leave a comment:


  • Northern
    replied
    I need to catch up on the videos soon, I've been slacking.

    I have such a weird disjoint in knowledge for composites.
    On one hand I've done a ton of repair work from my old job, but on the other, I've basically never manufactured something and there is hilariously little in common between the two.

    For the clay issue, I think the edges just need to be very smooth and consistent. Then it should be much easier to clean up.
    I don't know what the consistency of that clay is, but you might be able to smooth it with a tongue depressor or squeegee.
    Maybe even using a finger in a latex glove with a drop of water or solvent depending on what seems to work with the clay.

    If you're not vacuum bagging the carbon layup, it's really going to want to bridge over the edges instead of conforming to the shape of the mould.

    Leave a comment:


  • 2mAn
    replied
    Do you think the garage temp is affecting things?

    Leave a comment:


  • Reichart12
    replied
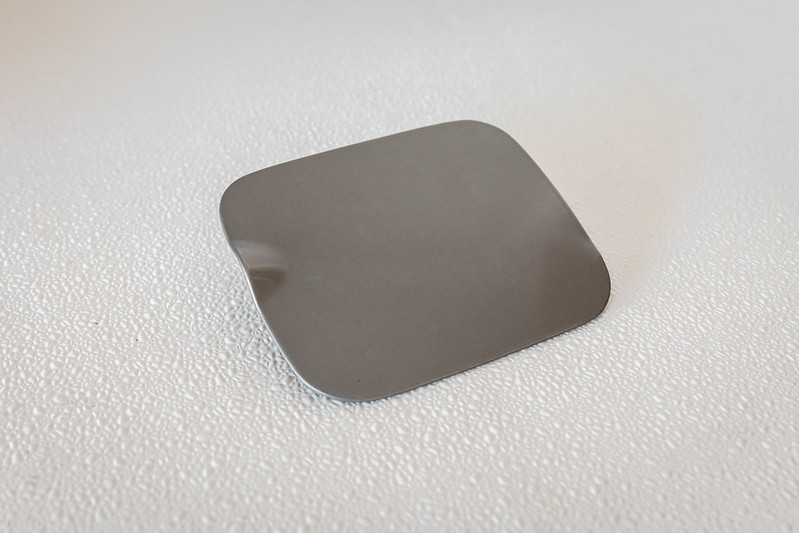
    Hey some r3v content... Attempted to make a carbon fiber gas door. You can see it here in both photo and video form.


    Dirty gas door to start but cleaned up nicely.


    Built a flange for it and did my first layers with Partall Paste and PVA to make an easy to release surface for the fiberglass mold.


    Layered on some gel coat to be the surface of the mold.


    Couple layers of chopped strand mat and a couple of continuous strand mat. The chopped is so much easier to work with but take more layers to build up to the thickness of the continuous strand.


    Good until this part and then I started to rush. Couldn't get the extra modeling clay off so I thought a little sanding would knock it loose. Then I started messing up the surface. So eventually I sanded that back smooth but the clay was still there. Wet the mold off to get any dust off and then added some PVA but didn't let it dry long enough before putting down the carbon fiber resin.


    Well the clay did eventually come off with the carbon fiber part. Need to figure out how to get more smooth resin. It was thicker on the back side which was the top side in the mold. Ready for attempt two.

    Leave a comment:


  • Reichart12
    replied
    Originally posted by Mike36
    Nice vid! Looking forward to the install. Also, where did you buy your roll of carbon fiber?
    Thanks! The carbon fiber, fiberglass, and epoxies are all from FiberGlast. They sponsor the guys at Industry Garage/Street Bandito and that's where I got the motivation for this so I'm going through that company. No clue if they're the cheapest or most expensive.

    Leave a comment:


  • Mike36
    replied
    Nice vid! Looking forward to the install. Also, where did you buy your roll of carbon fiber?

    Leave a comment:


  • 2mAn
    replied
    You have to beg and plead with everyone. Including your family... and then you will reach the 80+ subscribers I have.

    BTW I still havent sent out your mics lol... Maybe this week

    Leave a comment:


  • Reichart12
    replied
    Originally posted by Northern
    oooh I like this. Somehow missed the video but I'll look for it tonight.
    Should be a recurring video series over the winter.

    Originally posted by 2mAn

    SMASH THAT BELL ICON and you wont miss anything!
    I'm not a big YouTuber like you so I haven't been telling my viewers to subscribe yet.

    Leave a comment:


  • 2mAn
    replied
    Originally posted by Northern
    oooh I like this. Somehow missed the video but I'll look for it tonight.
    SMASH THAT BELL ICON and you wont miss anything!

    Leave a comment:


  • Northern
    replied
    oooh I like this. Somehow missed the video but I'll look for it tonight.

    Leave a comment:


  • Reichart12
    replied
    https://youtu.be/YIz1a0rYJTs

    Got some new goodies and made a video about it. Also here are some pictures to go along with it. Don't expect any progress for a little bit, I have all winter to do this.


    Leave a comment:


  • Reichart12
    replied
    Originally posted by 2mAn
    my comment on your video was about the lower dash trim. I just noticed one of them was missing. There are some 3D printed ones for sale on ebay that are quite nice
    Oh I do have that. Its on the shelf haha. When my friends put the stock engine in for me, they changed my wire job of putting the e-fan to the ac switch to a toggle switch mounted under the steering column. With the trim in place, it's sometimes difficult to turn on and off.

    Leave a comment:


  • 2mAn
    replied
    my comment on your video was about the lower dash trim. I just noticed one of them was missing. There are some 3D printed ones for sale on ebay that are quite nice

    Leave a comment:


  • Reichart12
    replied
    Originally posted by 2mAn
    Enjoyed watching your video, left a comment and a like... but man so many thoughts...

    I think you can get a generic brake line and I actually have a brake line bendy thing tool I can send ya to try out if you want to try out making a whole new line.

    FYI, of all my videos the DIY has by far the most clicks, so maybe a brake line DIY video could bring more views your way
    Pretty much what I ended up doing. Bought two sections of generic line and went from the abs unit down pass my last repair and connected there. I had it all as one video but split it in to two since I felt like it was too long.

    Some day I'll redo my redo but would want to refresh the entire system at that time.

    Leave a comment:

Working...