-
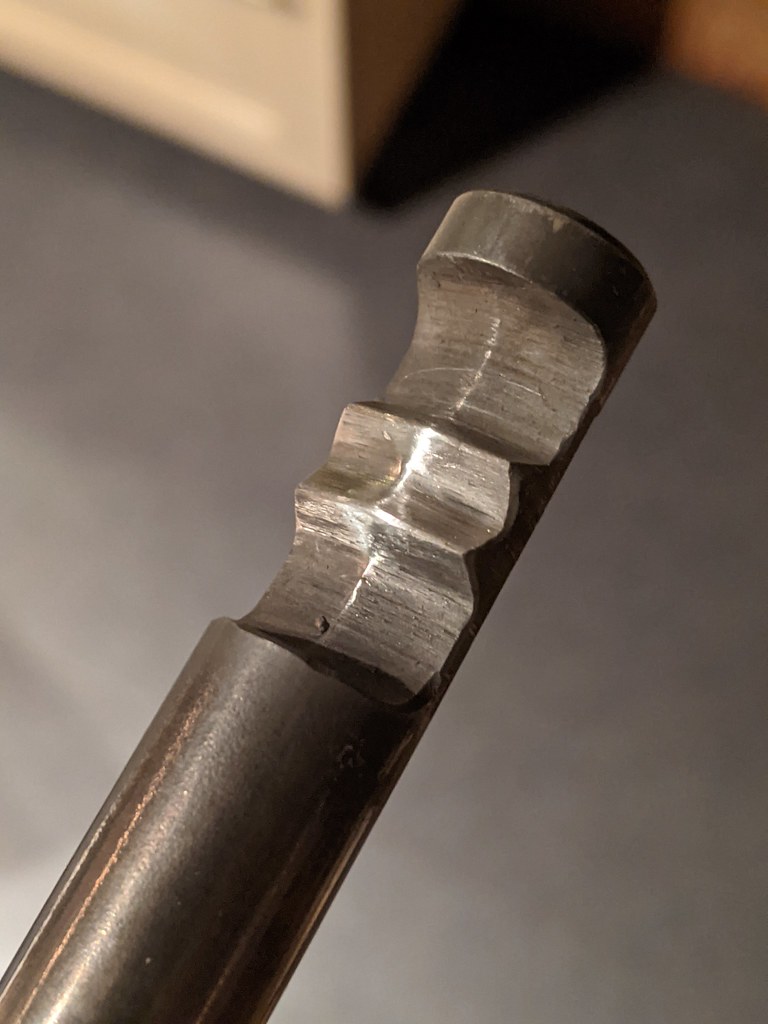
Before starting the rebuild of the transmission, I needed a new spare selector shaft. The original shaft from my gearbox got slightly bent when pulling the housings apart (because we forgot to put it in neutral..)
Luckily I do have a spare gearbox which I bought a while back. I had a go at splitting the transmission and pulling the shaft, this one will need to get laser welded as well.
I found a big plate, had to drill a couple of hole but managed to get the transmission apart. :)


And voila!


I also had a final go through on all of the bolts/part that need replating. I've get them delivered to the platers next Friday.
Meanwhile I need to figure out the hard hydraulic lines for the steering rack and glass bead blast the last couple of aluminium parts.Comment
-
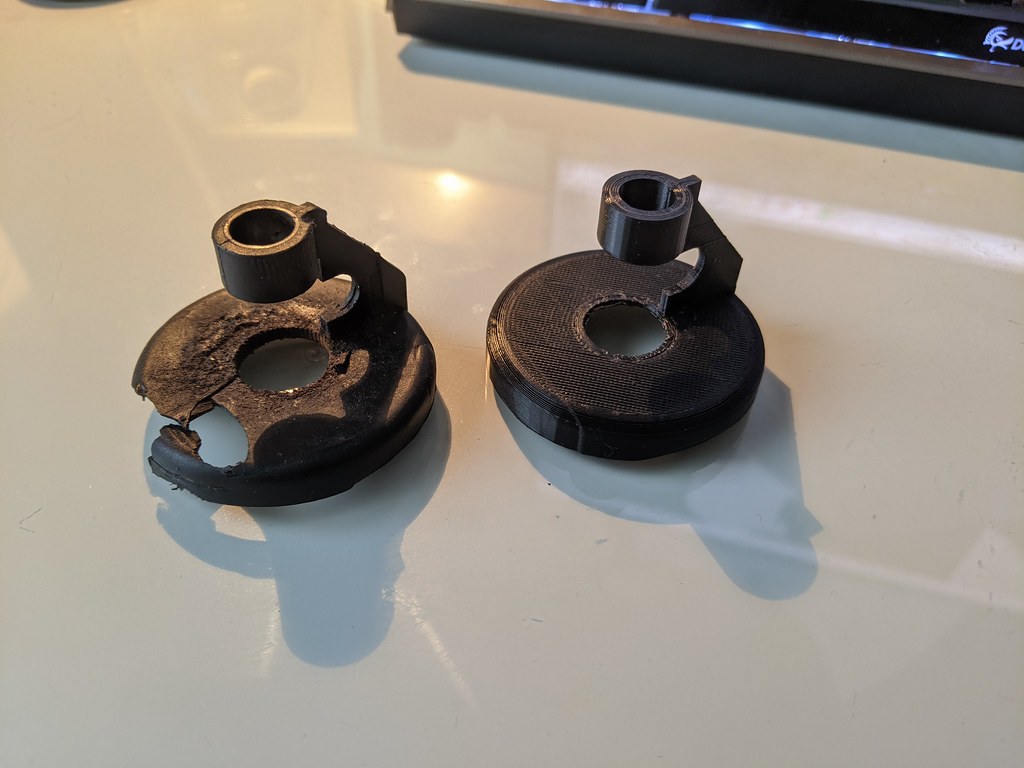
I've ordered a sealing kit for the X3 steering rack but I'm not sure if there'll be a new cover included in the kit.
The one I got with the rack it broken. Luckily I have a 3D printer ;)
old and new, it's not perfect. Might try and print a new one or maybe even change the design and remove the top section so it's just a cap. Make printing a new one even easier.
Today after work I stayed a bit longer and laser welded the selector shaft. After putting a file on the edge, it's pretty soft material, definitely not hardend.
So I used regular filler wire to weld the shaft.


After some filing with a couple small files.. done!
Comment
-
-
Comment
-
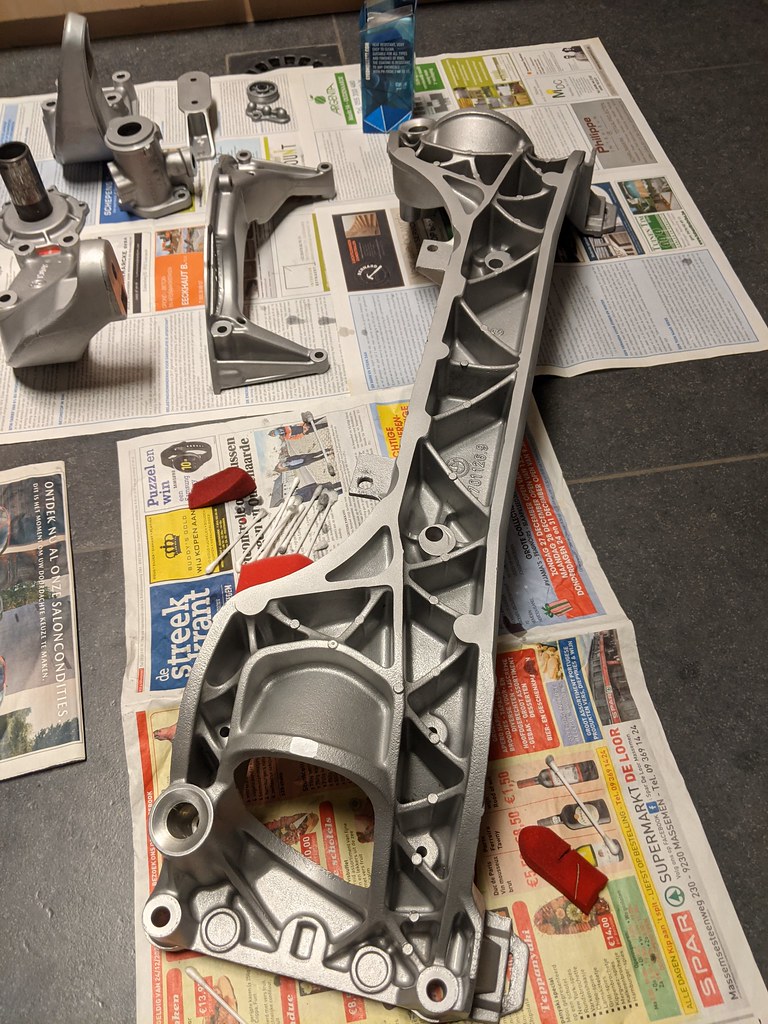
Today I glass bead blasted the last bits of aluminium. I'm thinking about just painting the steering rack housing as I don't want to risk getting bead stuck in some of the chambers/ports. and actually like the darker finish, gives it some contrast.


Engine mounts and some smaller stuff

While I was at work, I decided to also shorten the X3 steering shaft; I still need to add a counterbore and make the threads deeper for the tierods.

When home, I hosed the parts down with water, dried them and finally gave them a ceramic coating to protect them against oxidation.
Very happy with the results.
Comment
-
Couple small things got done over the several last days.
I painted the steering rack housing, I'd prefer to have a more mat finish but at least the color is pretty much spot on

I also re threaded the shortend steering shaft, added a counter bore as well to be able to fit the tie rod and chamfer on the outside.

I also got my hardware back from the plated, on the last minute I decided to also include the tools form the tool kit however they didn't turn out all that great.
Probably since they are casted? not sure.

And gold plated hardware. Somehow the cooling fan turned all white.. not sure if this is some kind of coating they used to protect the plastic or it just changed color from the process.
The plastic is still flexible like it was..

Very happy with the result of the bolts, they came out nice and shiny.

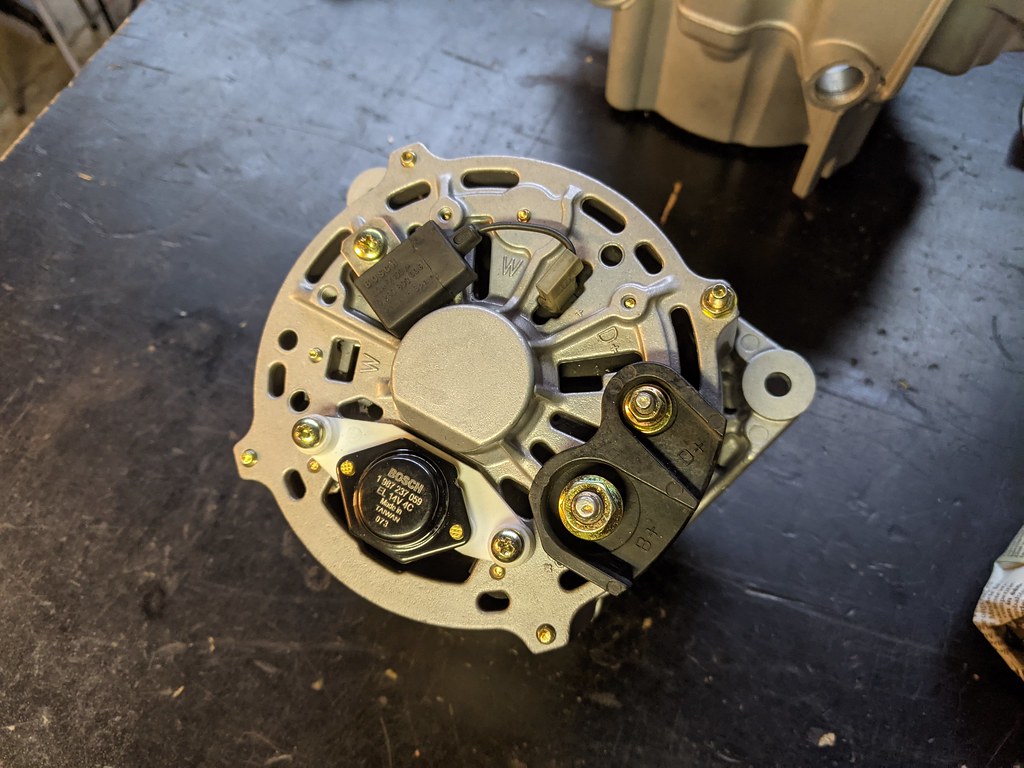
I also had the chance to rebuild the alternator, I got a new rotor (aftermarket brand) but had to modify the collar a little bit where the plate that hold the bearing into the housing sits on to.
Happy with the results.

New bearings, voltage reg., rotor, sandblasted stator + new red isolator varnish, replated hardware and glass bead blasted + ceramic coated housing.
Comment
-
Seriously awesome update! So much thought and effort goes into your work and it really shows.Comment
-
Comment
-
This weekend I got some more stuff done.
I brought my cleaned up transmission housing and bolts + new parts to the guy that will rebuild it all.
Unfortunately due to Covid, it's no longer possible be present when he rebuilds it at his work (in the weekend). He will now do it by himself after hours.
Meanwhile I also got the steering pump back together. Using the BMW Vickers rebuild kit.


I also receive the stickers In had custom made for the alternator, so this one is now fully refurbished :)

And the throttle body arms/hinges got also installed. Took some time to fiddle with the springs and getting the proper tension back into the mechanism.
But I'm pretty confident it's the same as before (as far as I can remember how much tension there was)

Comment
-
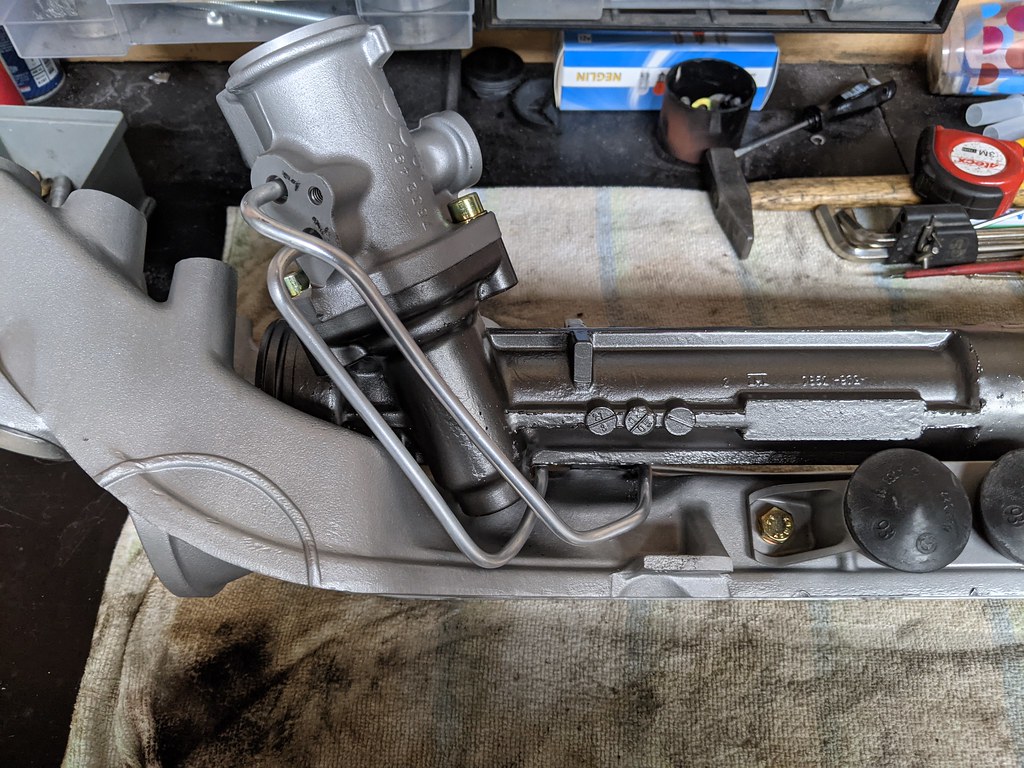
Next step of the X3 steering rack conversion is getting the steering rack hydraulic lines made.
I opted to get some made with the same connection as original (some kind of flare connection, where the two halves of the pipe are pushed towards each other, making a little flange where the o-ring sits against)
I found a company in the UK that sells reproduction lines for all sorts of cars, after going through his website, I noticed the pipes had the same connection - I aksed the hydraulic shop next to my work if they could make these but unfortunatly they can't, buying the specific dies is rather expensive as well.
After sending the company an email if they were willing to make my a couple of lines, they said yes. I just needed to make a template they could follow to make the lines the correct lenght.
first type of connection, located at the spindle of the rack, this side is held into place by a little plate

Other connection on the rack itself, a nut is used to secure the line into place

I got some 6mm aluminium pipe from the hardware store and had a go at bending the pipes in the correct shape, turned out pretty good
I also send them out to the company to remake them.

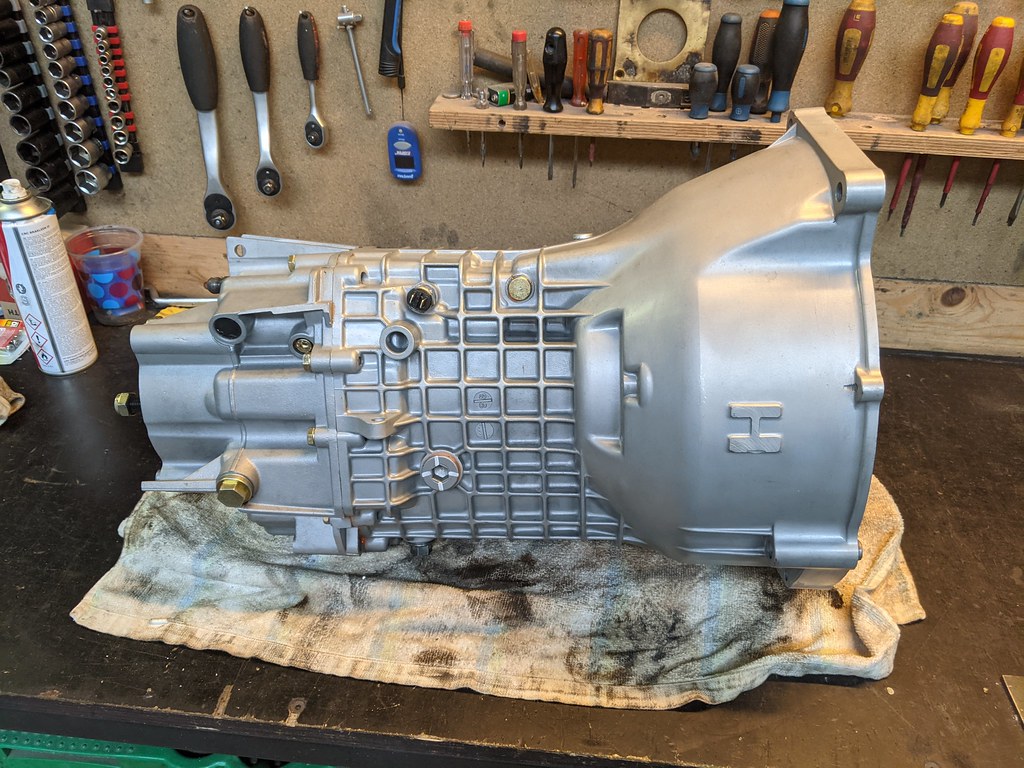
Next up, I got a text message from the guy that's rebuilding my transmission. Couple in between pictures. I already went got the transmission back as well, very happy with the result.
There is still some play on the input shaft but a lot less then before. I'm eager to fit it back into the car and see/heard the results.


I'll post some pictures of the finished transmission laterComment
-
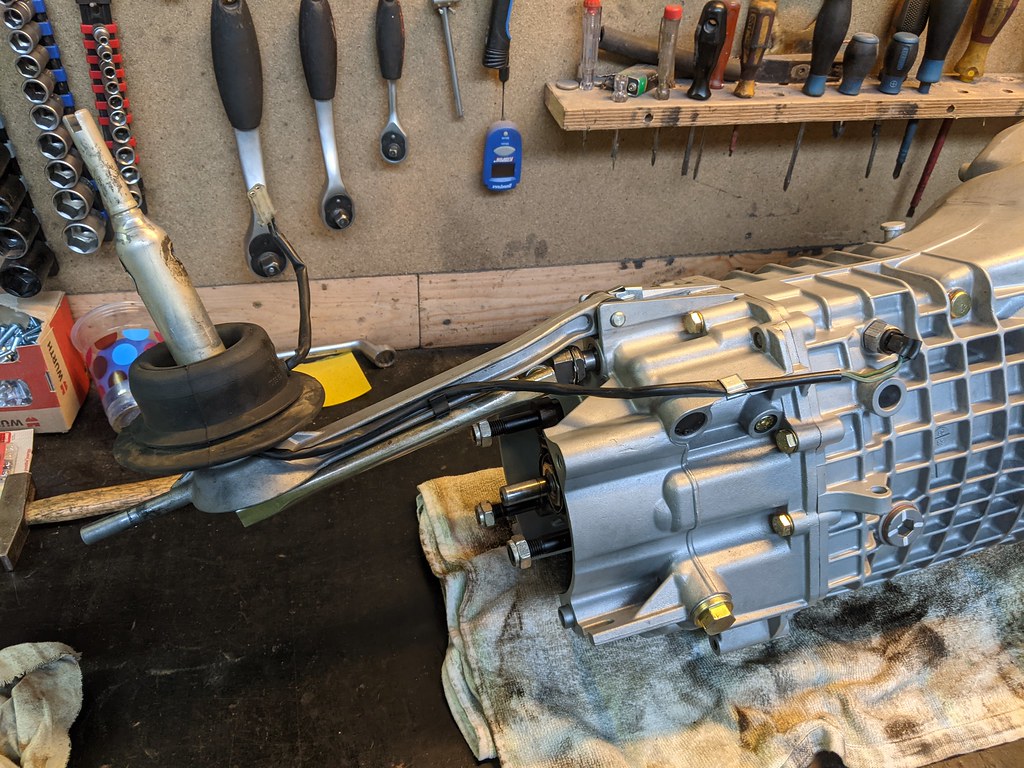
Couple of pictures of the transmission fully assembled:


I already mounted the pivot arm and throw out bearing + shifter
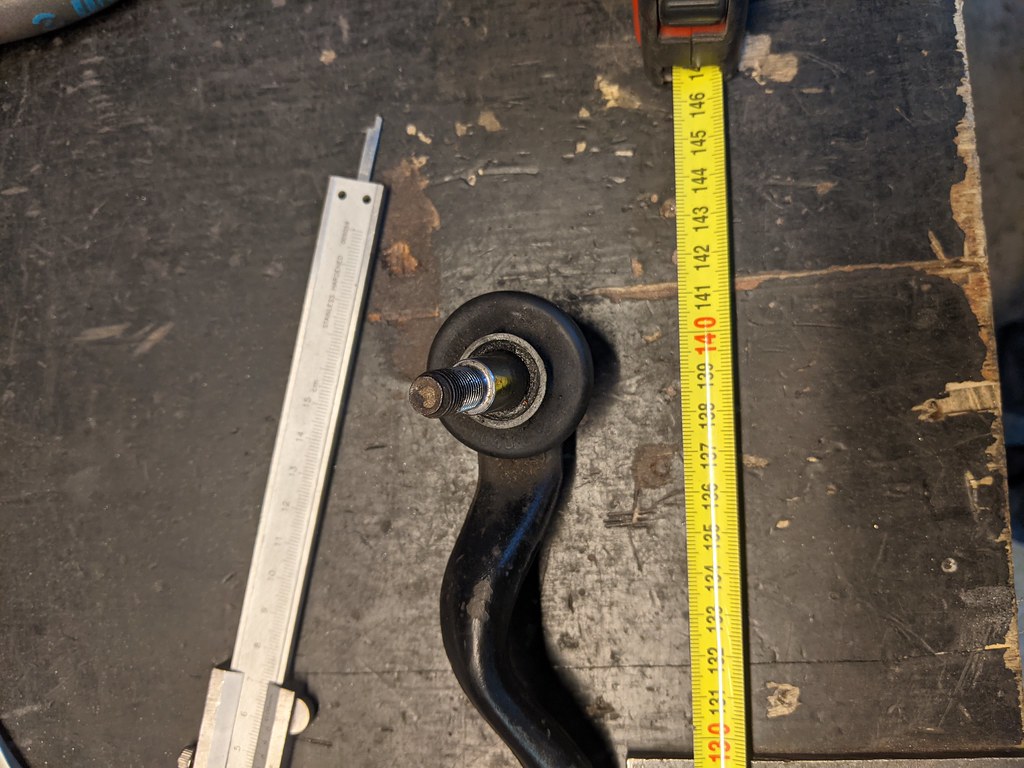
I was able to get some old E36 tie rods from a friend to test/modify them in order to get the same overall length from tie rod end to tie rod end. stock iX is +/- 1380m
E36 tie rod is already a bit shorter but in order to get to the stock overall length, I had to remove 20mm from the X3 inner tie rods. I might remove a little more as they are now fully bottomed out on the threads - so I have some more room to get the toe right.

Comment
-
So I finally received the receipt for the custom hydraulic lines. took 2 week for the seller to contact me, now I'll have to wait until they arrive...
Then it's time to test fit the rack, if everything checks out, I will reassemble the steering rack with the new seals I got.
I still need to shorten the new E36 outer tie rods I got as well, the ones pictured above were just to test and making sure.
A few weeks back friend contacted me and told me he had a 325iX Touring that he was going to part out, he asked if I was interested in a few bits.
Straightaway I noticed that iX had the SWRA headlights, I asked if he was willing to swap wiring looms and reservoirs. Since I'm using a regular E30 SWRA loom and the iX is different because of the location of the SWRA reservoirs.
Luckily he had no problem with this, I also bought a full retrofit for electric windows, middle console and front/rear doorcards included. so that's the next project for the iX :)
I already cleaned up the iX SWRA wiring loom with some new tape.

Comment
-
some serious update and refurbish here ! loving it , i think i like more e30 touring's than coupes haha. So bad there is none in my country :(Comment
-
Comment


Comment