-
I am in awe of your attention to detail and care for this project. I just read through all of this and your build thread on your last mtech2 in one sitting. I am incredibly impressed. -
-
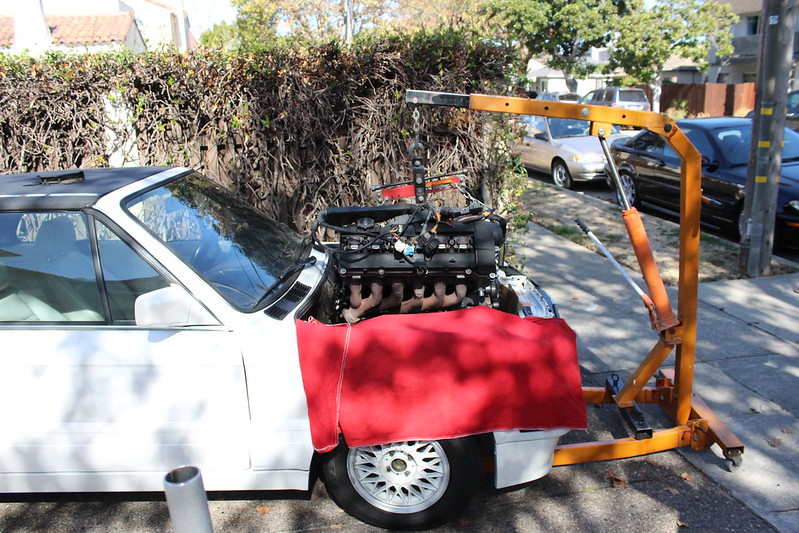
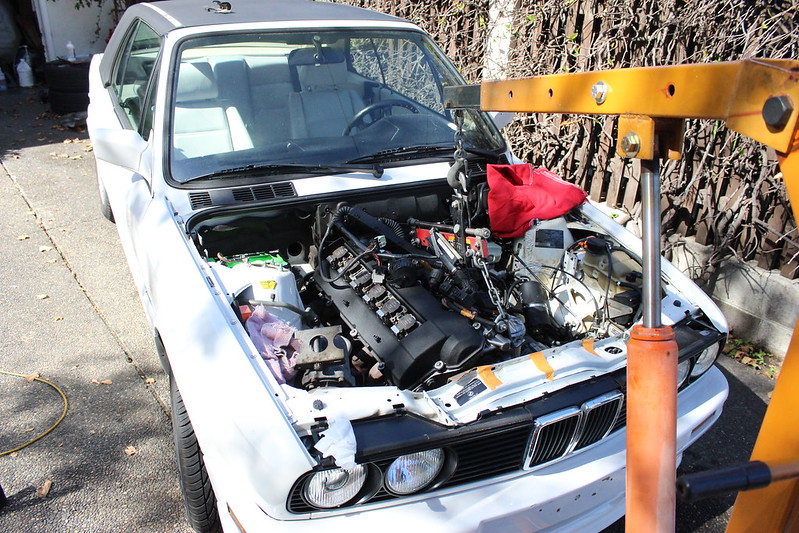
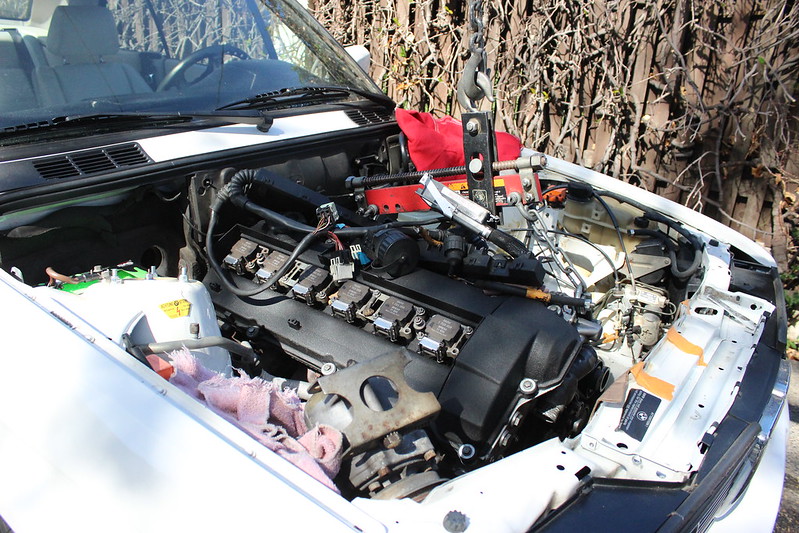
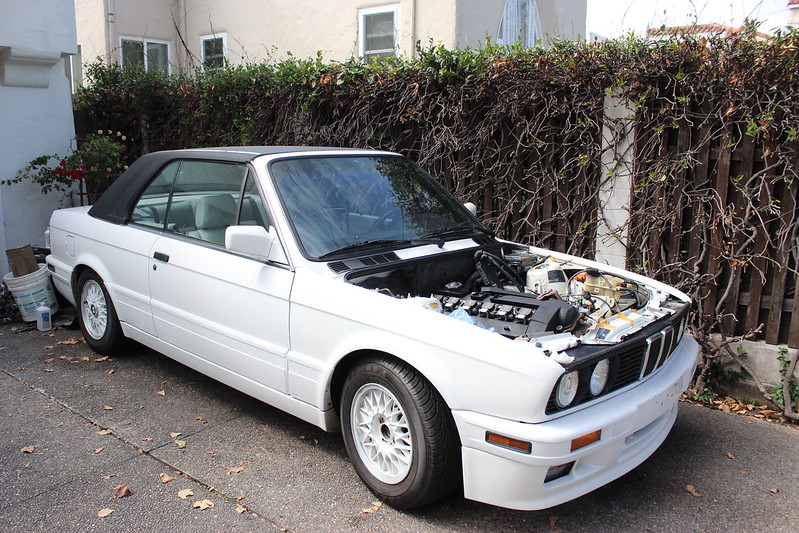
The update you guys maybe have been waiting for? At least it's the update I've been waiting for.. She's in! Fit like a glove, seriously though. If you didn't know any better you'd think e30's came with these stock, that's how well this S50 fit in place. I guess biting the bullet on those $200 AKG engine mounts (24v swap specific mounts for e30) looks to have been well worth it. Transmission goes in tomorrow. Hopefully the rest of the swap will continue to go this smoothly.. Intake manifold still needs to go on, dip stick, coolant hoses.. Some work needed still but this was a major step in the right direction :up:
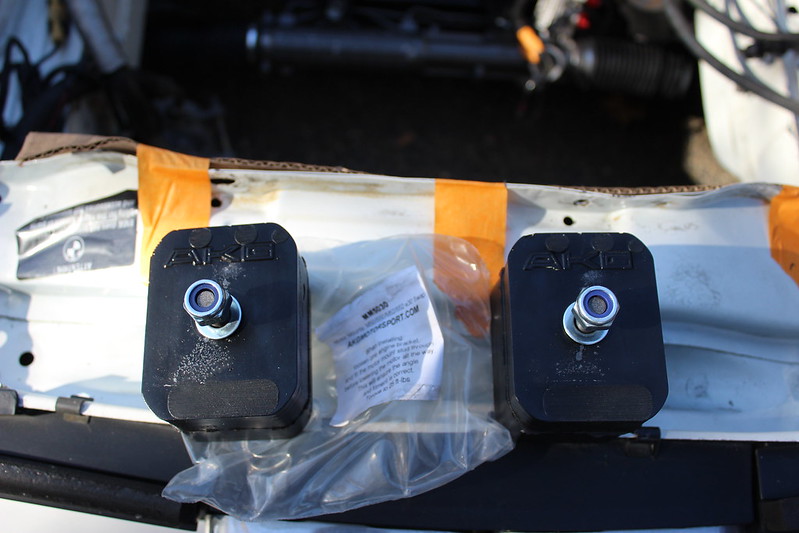
The factory e36 M3 engine mount heat shield fit perfectly, you can see it on the passenger side.

 Last edited by KIRIEIW; 09-30-2018, 04:45 PM.
Leave a comment:
-
-
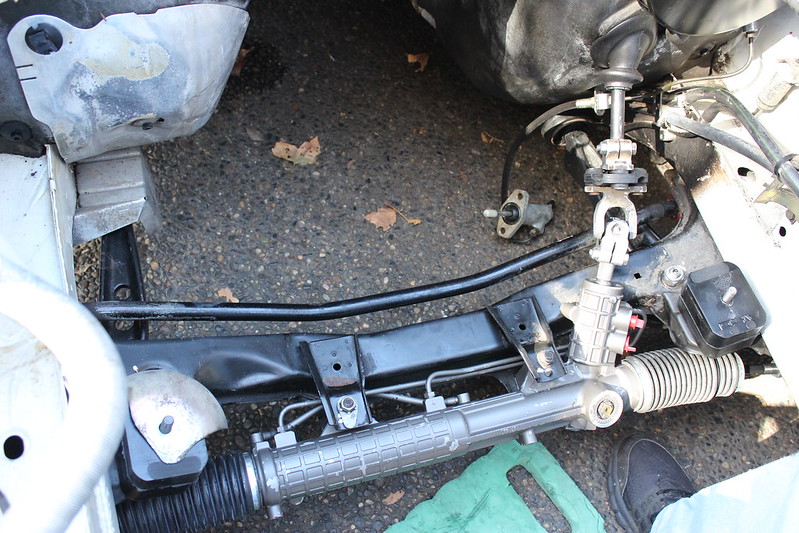
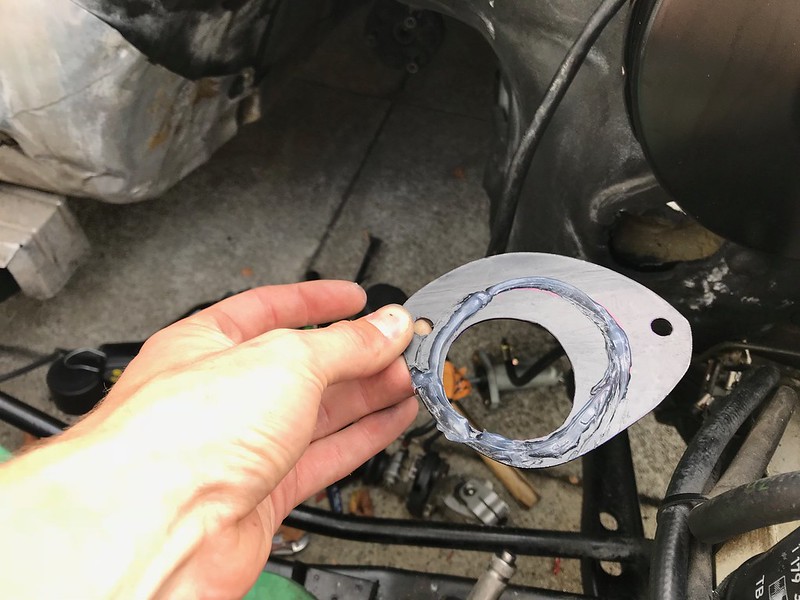
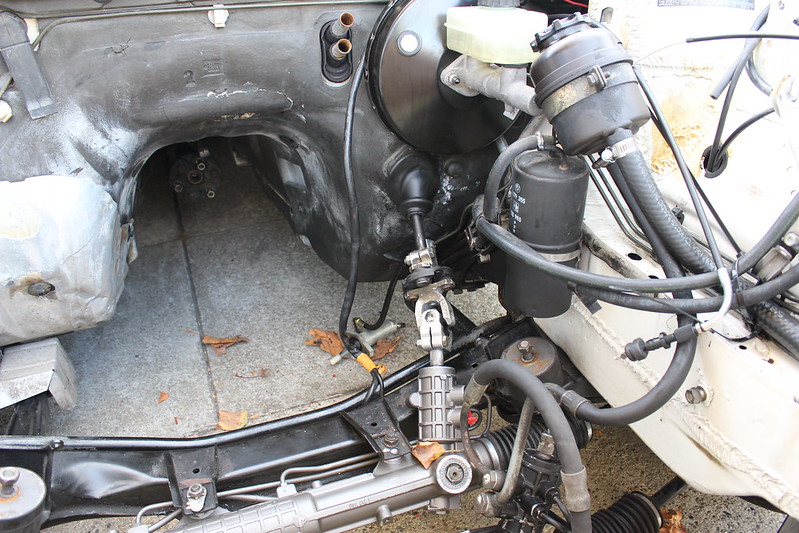
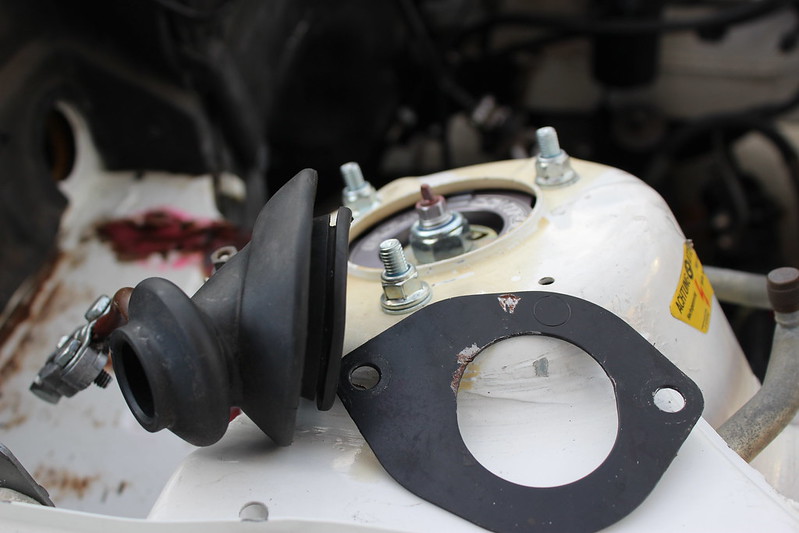
So today I had some fun.. e36 steering rack install. Wow was this one a challenge to get in. It looks like most the guys who do a rack swap either leave the steering column/ firewall boot completely off the car, or at very least not attach properly. Of course, no way in hell was I going to leave a boot off my car so I went ahead and fabricated a custom plate made from steel to hold the boot in place. You can see a pic of the stock plate bellow which I removed from the car (and installed my custom plate in it's place). They're damn near the same thing, but you need to make a custom plate since once you install a e36 steering rack it changes the angle ever so slightly that the column enters the rack. Tons of trial and error, a total of four plates were made.. changing the dimensions of each until finally I got the perfect one made. Couldn't be happier how clean the install came out in the end.
Test fitting one of the plates:
Applying some sealant to the new custom plate to insure it's water tight
Done.
And here's a picture of the factory plate and the original boot. I ended up buying a brand new boot from BMW just for the hell of it. New rubber is always nice.
 Last edited by KIRIEIW; 09-29-2018, 09:20 PM.
Leave a comment:
-
Haha, actually the funny part is I put on some oldies and went to town re pining the connector. Pretty relaxing :)
You know, I really went back and forth doing this swap on the car but I think when I'm done the swap will be a good clean job which shouldn't hurt the value. The goal at this point is to do the best job I possibly can, doing the least amount of modifications possible to get the engine and stuff installed. I guess I've just had too many M20 powered cars over the years and needed to try something new. :up:
Btw, I remember seeing your Mtech up for sale. Looked really clean!Leave a comment:
-
I hope you replaced those main cap bolts. They're TTY and cannot be reused.
Surprised to see you dropping in the 24v. I was torn on my mtech2 vert but opted to keep it stock. I figured it would be more valuable without any major modifications as I had never intended to keep the car forever.
Definitely going to be a hoot to drive!!Leave a comment:
-
Great work. Seems possibly theraputic.
Sent from my Pixel 2 using TapatalkLeave a comment:
-
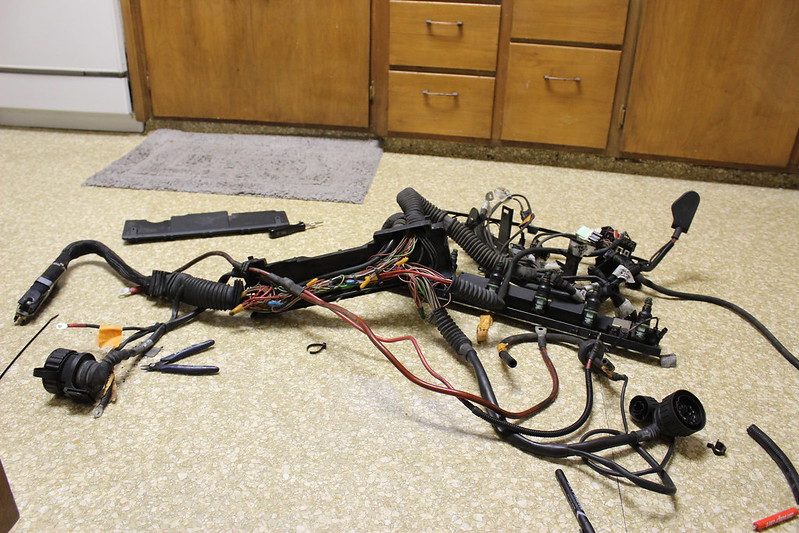
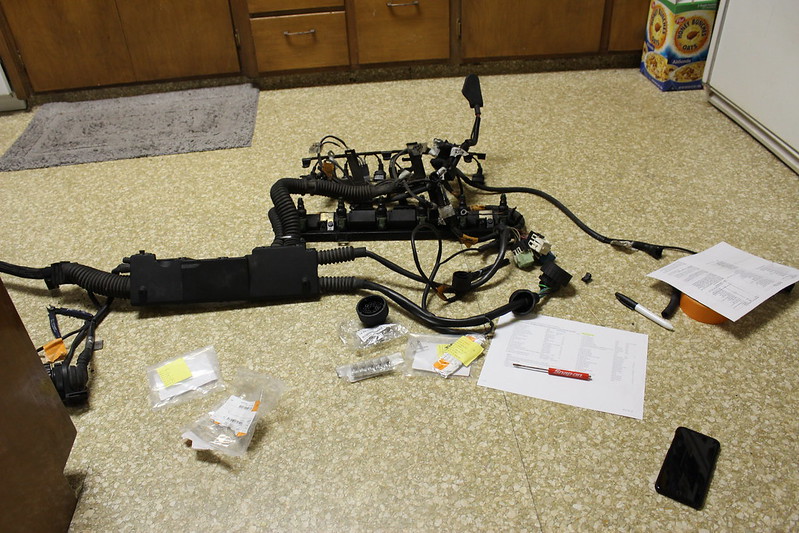
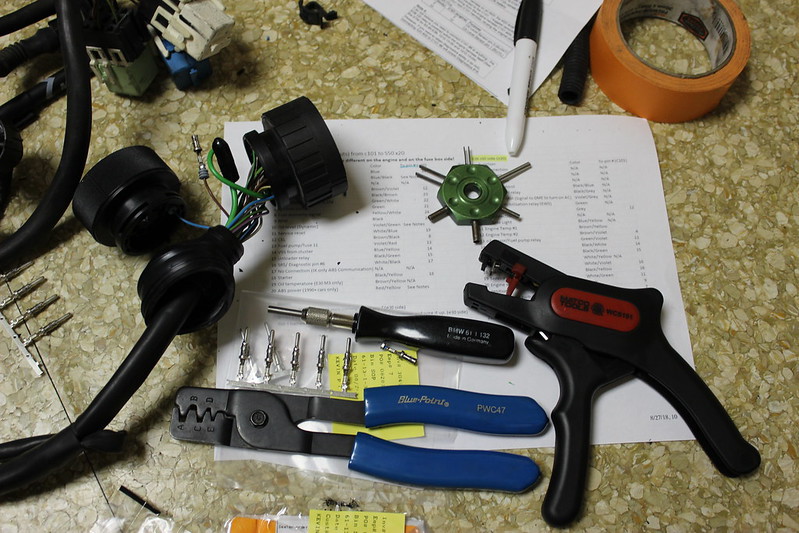
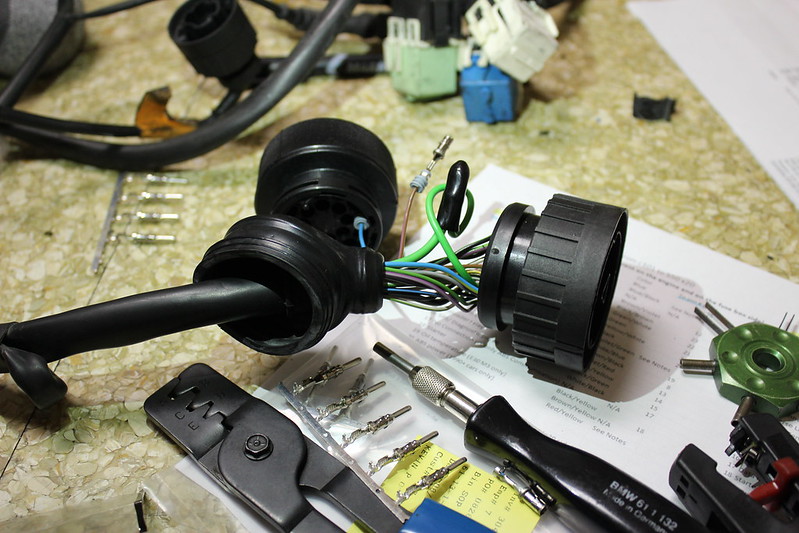
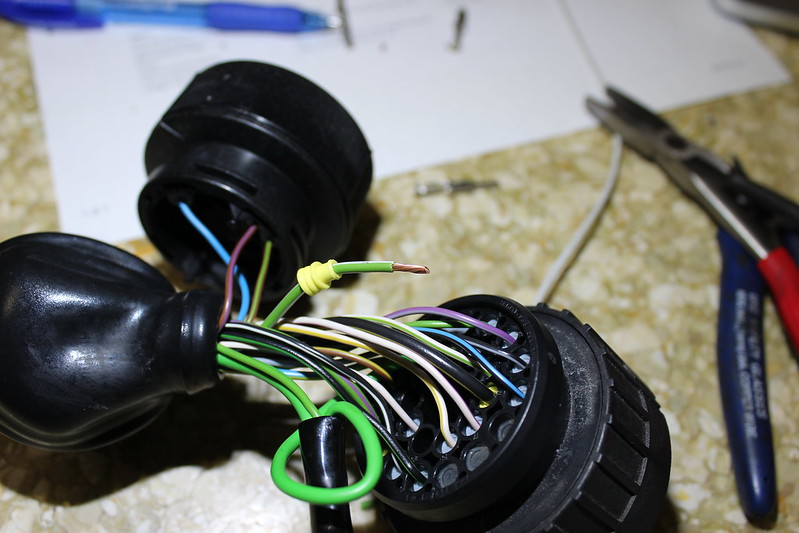
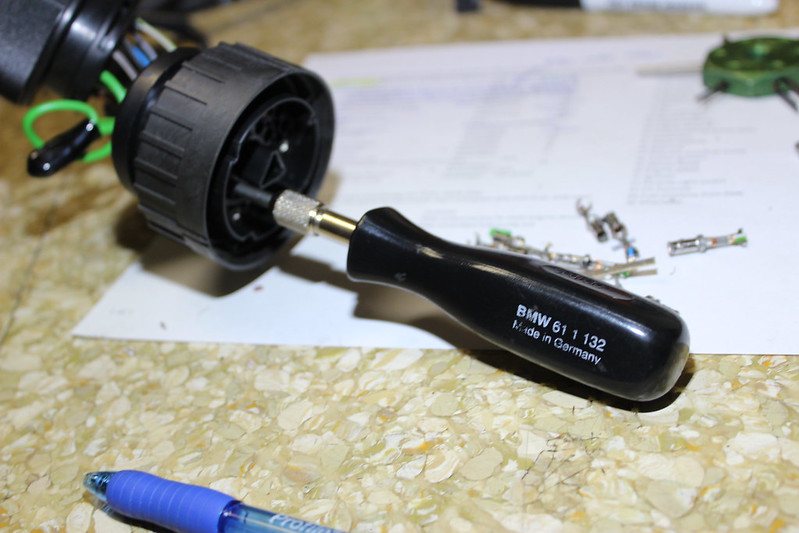
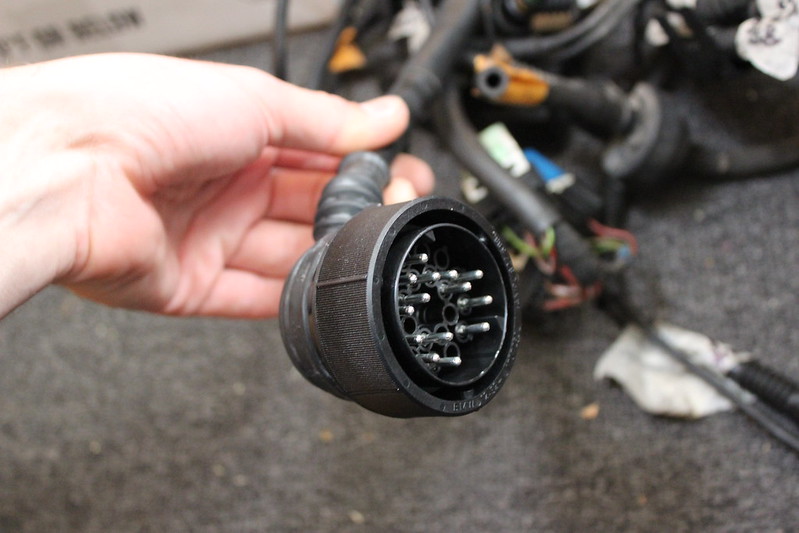
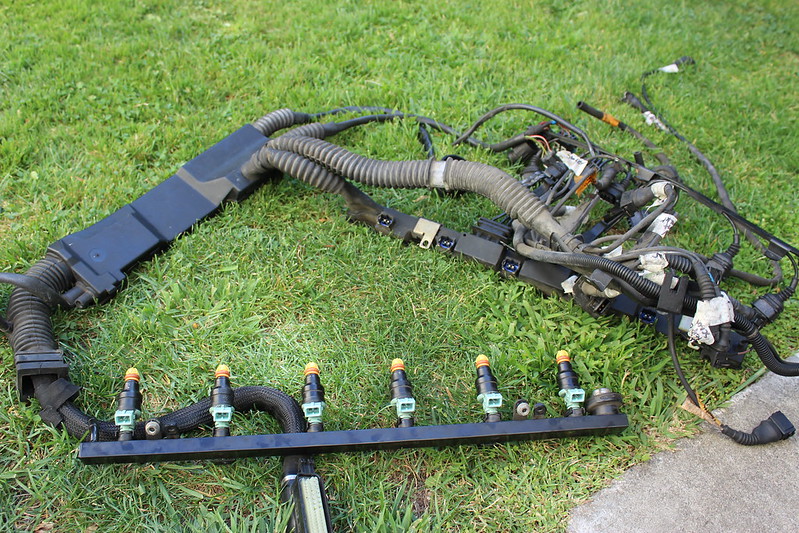
Got the wiring harness done! I had to borrow a special BMW tool from work to press the pins out of the X20 connector to get each wire needed out of the connector. Basically what your doing here is removing each individual wire from the X20 connector (e36 body harness plug/ connector), crimping on a new pin on each and every wire needed, because the pins on the e36 are different from e30, and putting the newly crimped wire into a new C101 connector (e30 body harness plug/ connector). It took a little while but it's done and most importantly done right. I bought all brand new factory pins at work and of course a new C101 connector.
You also need to open up the harness "cap" and remove two positive wires. They're the thick wires that run from the e36 "jump block" to the e36 fuse box in the engine bay. Basically our e30's have two positive wires coming out of the fuse box already so you don't need to run the two additional e36 wires to our fuse box. You can see them in the first pic before they were removed. Super simple because they're not crimped to any other wires in the harness so you literally just pull them out, no cutting needed.
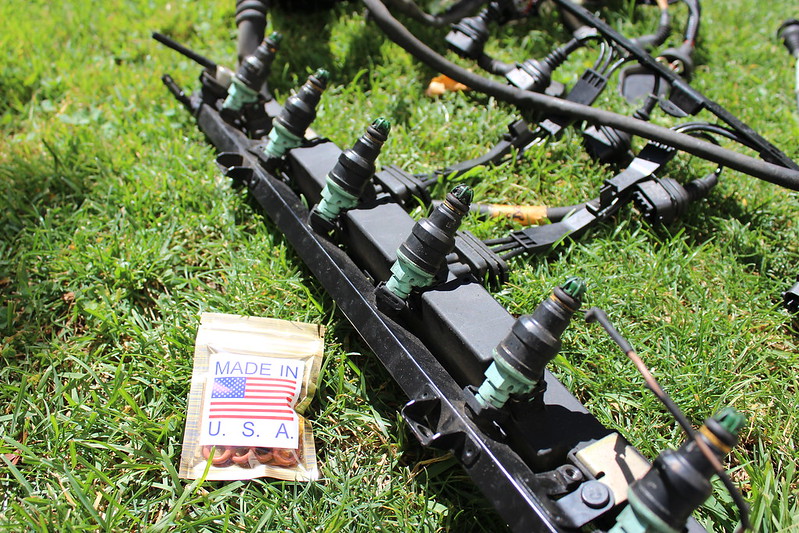
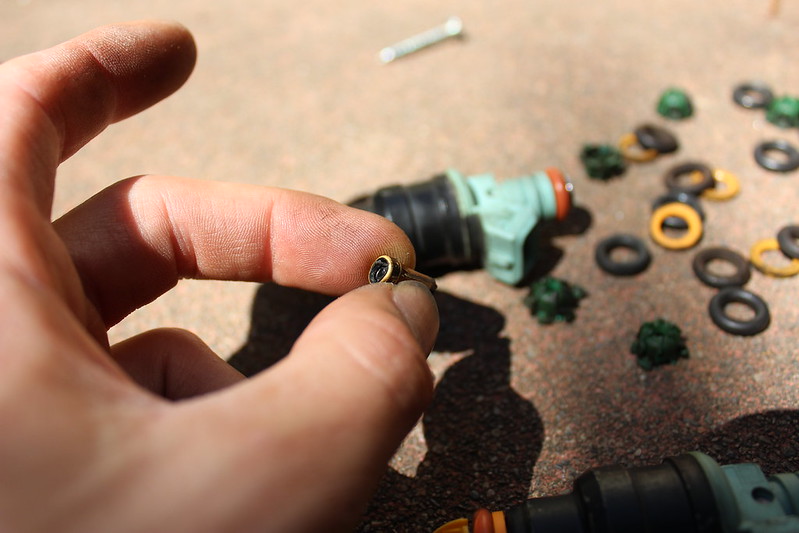
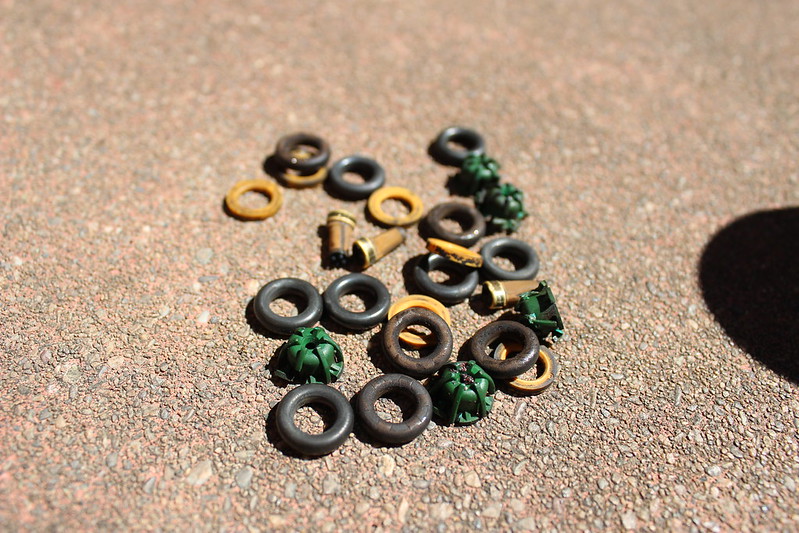
I also rebuilt the fuel injectors with a kit I bought online. Came with new pintle caps, o rings, and filters for each injector. Definitely worth it since the o rings looked original and had cracks starting from old age..
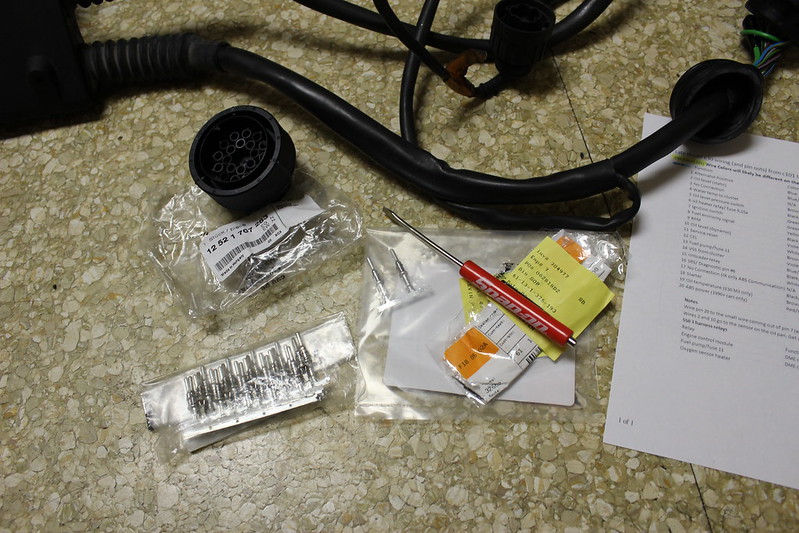
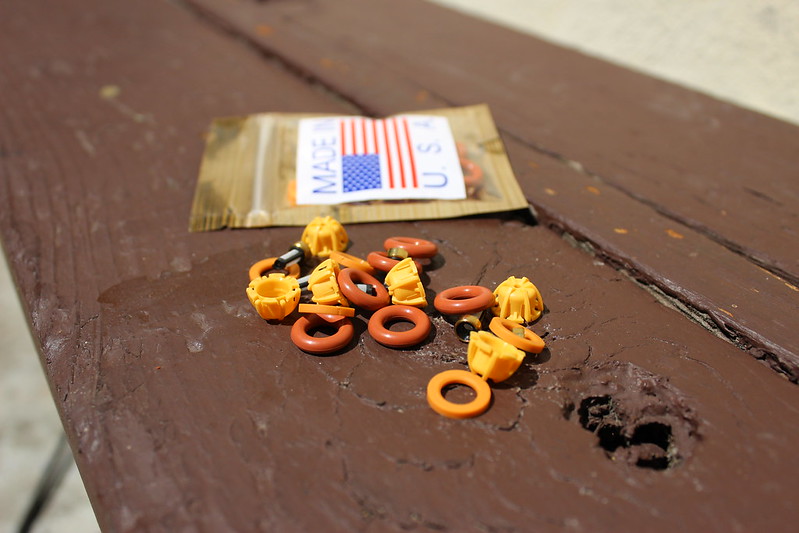
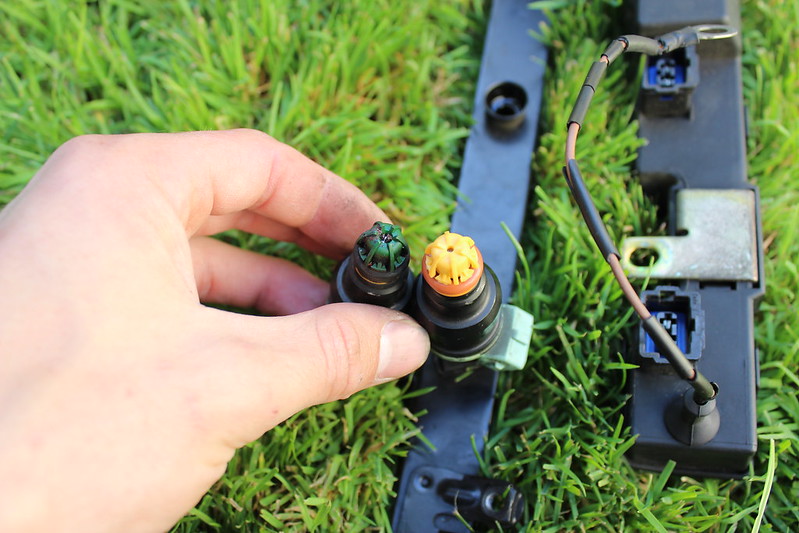
Here's what the original fuel injector filters looked like:
 Last edited by KIRIEIW; 09-08-2018, 03:11 PM.
Leave a comment:
-
Another for the Collection - Mtech 2 Vert S50!!
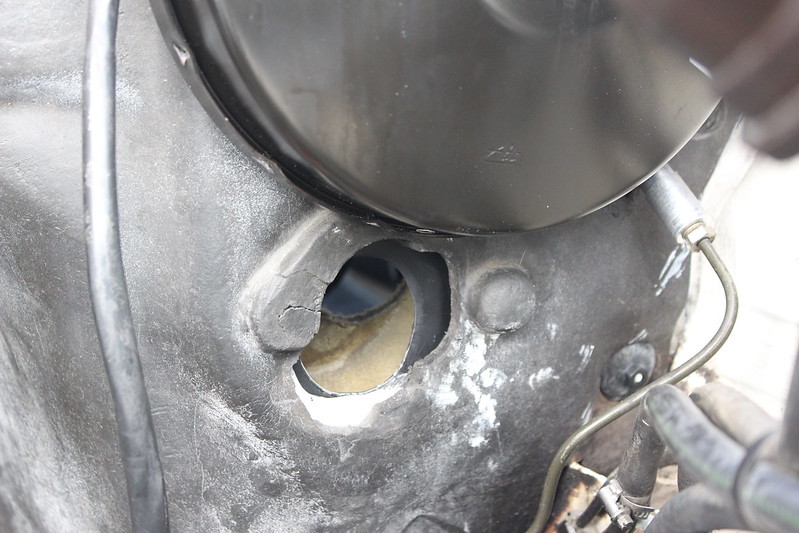
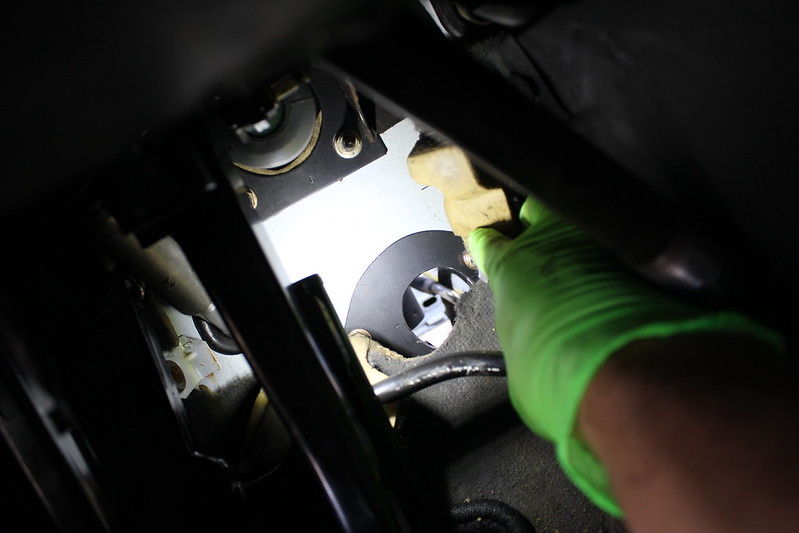
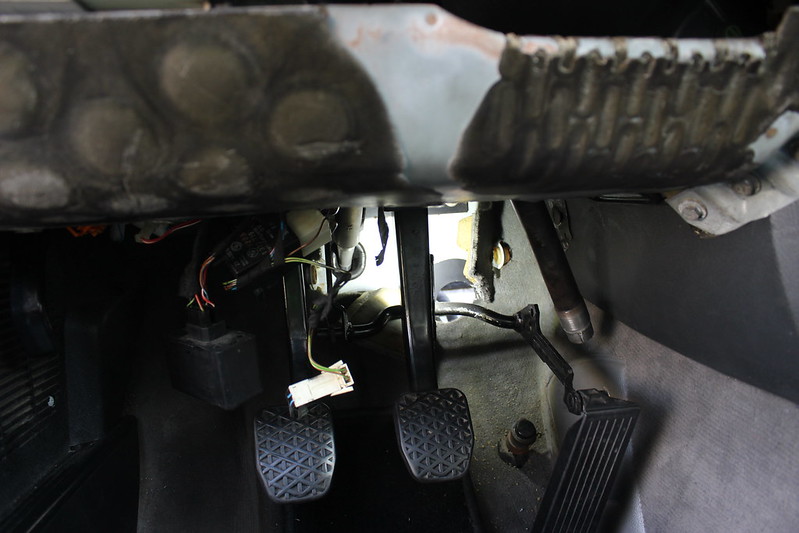
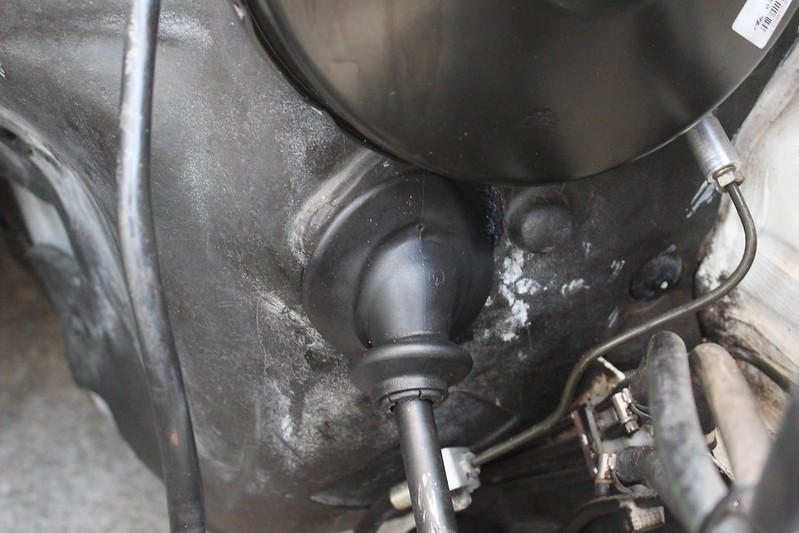
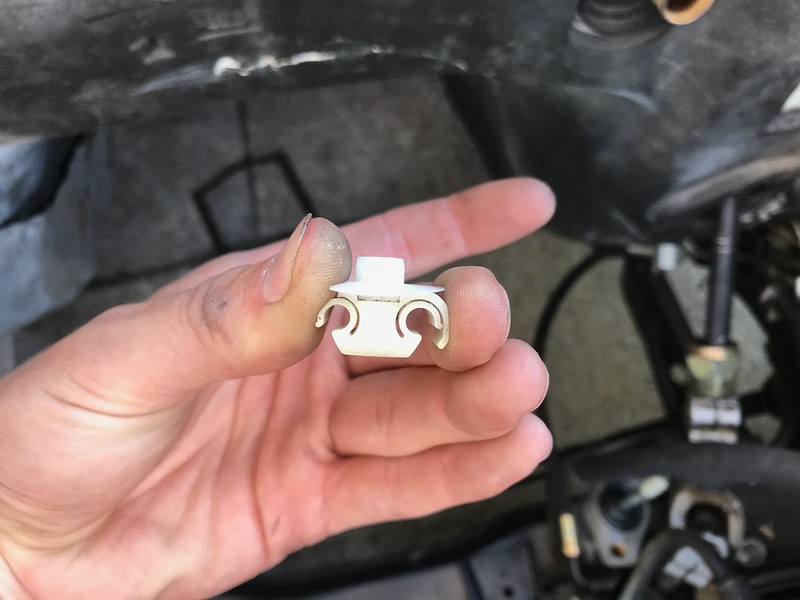
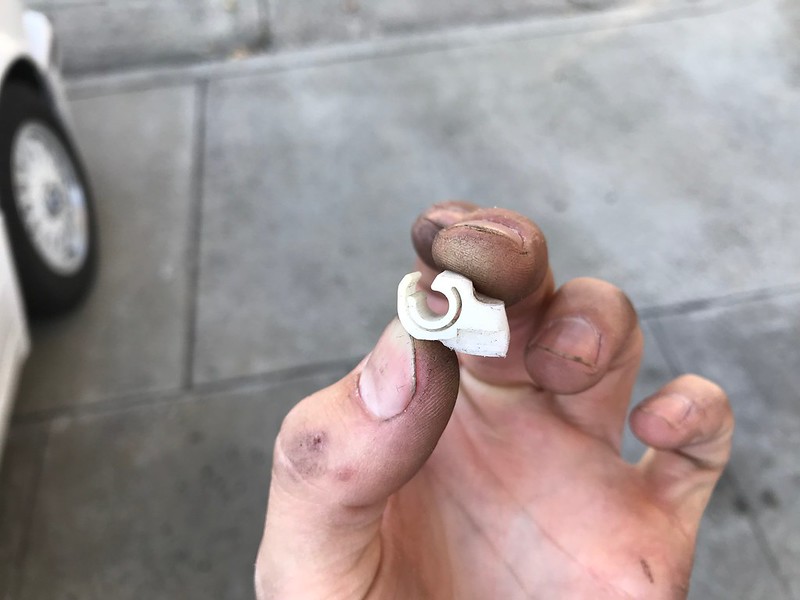
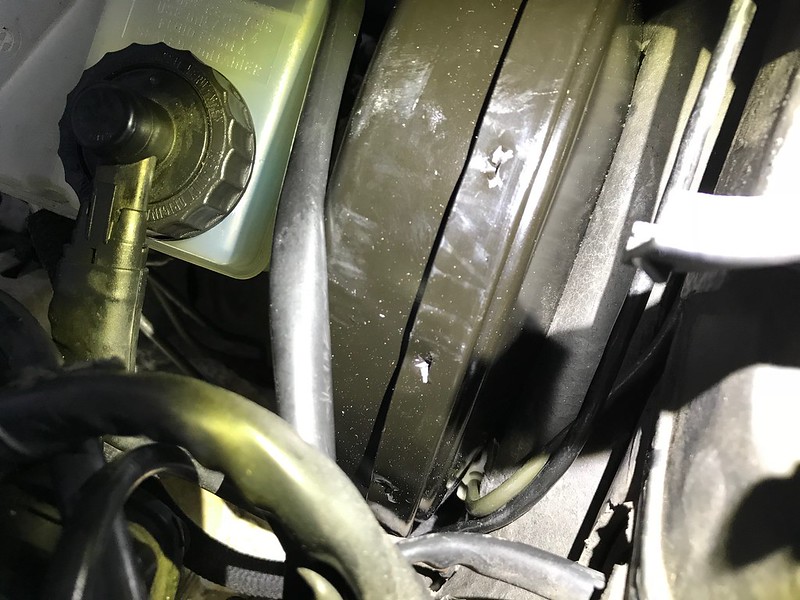
Booster is in! It's not a "direct bolt in" like people claim it is, but it's pretty close. For example, I had to modify a plastic clip which holds one of the hydraulic line's against the firewall otherwise the booster would make contact with it/ wont fit flush. Of course I could have just left the clip off but BMW put it there for a reason so I insisted on keeping it. All I did was trim the clip down a bit to sit more flush against the firewall and it fit perfectly. You can see where it fits onto, I'm pointing at it with some Knipex pliers bellow. You also need to trim the firewall insulation just slightly larger to compensate for a more flat booster. I drew a line with a ruler and cut it a quarter inch larger or so. The good news is nothing under the dashboard needs to be modified, its all a direct bolt in afterwords.
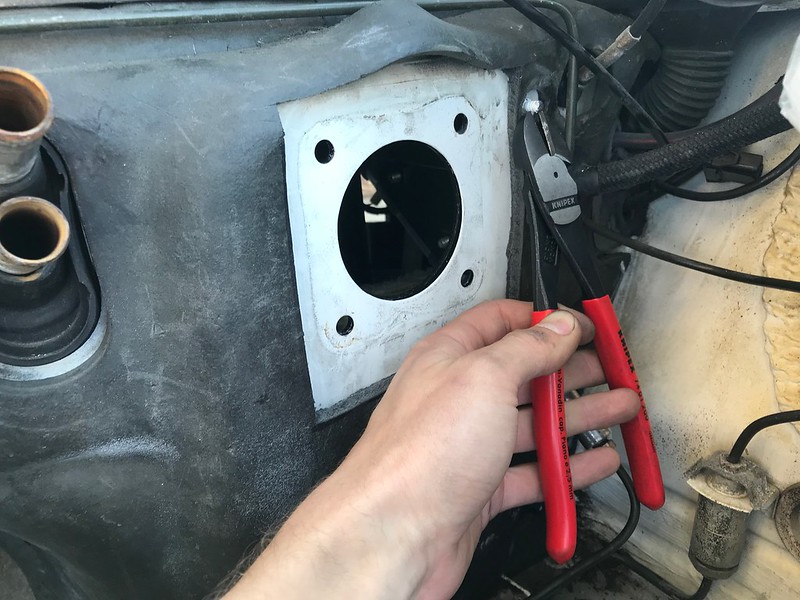
And then clip the line in..
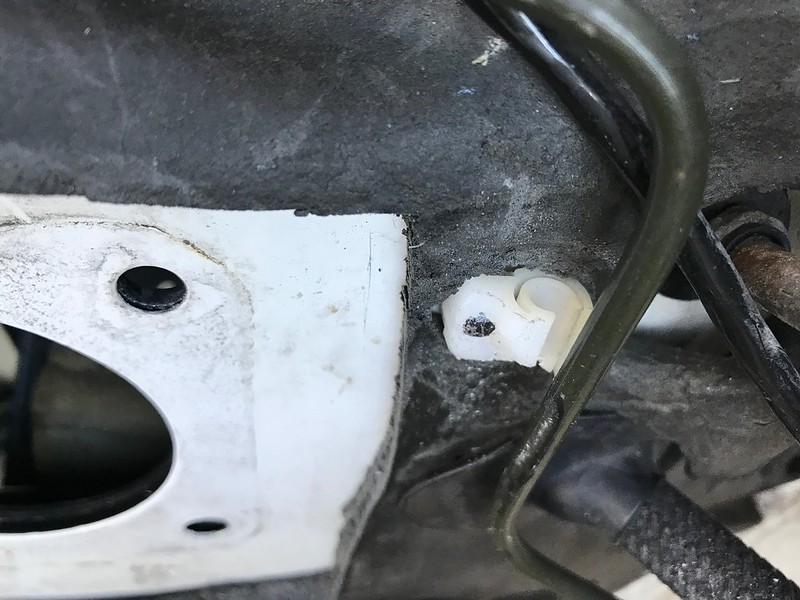
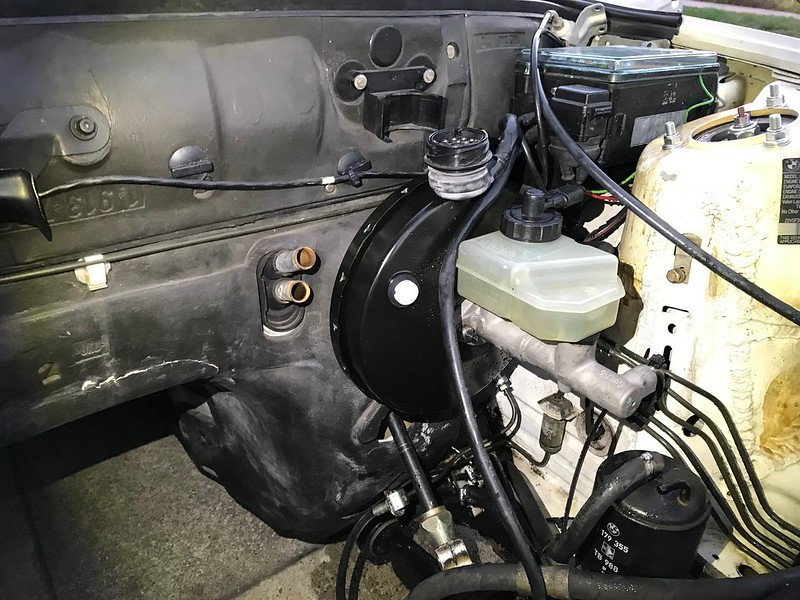
You can see the clip in the bottom right hand corner
 Last edited by KIRIEIW; 09-06-2018, 05:43 PM.
Leave a comment:
-
Another for the Collection - Mtech 2 Vert S50!!
I got it from FCPeuro new for like $200 bucks, I actually made a thread on it recently in the 24v swap section on R3v To clear up a little confusion, plus posted the part number the thread. Take a look whenever the time comes for a swap!
I also personally think it’s the best route since you can still use all four firewall mounting fasteners unlike other booster options. The less modification needed, the better in my book. I think eventually I’ll buy some willwoods for the car but one thing at a time.
Sent from my iPhone using TapatalkLeave a comment:
-
E90 booster works as well as the clio booster. E90 is for sale in the classifeds last time I looked.
Sent from my Pixel 2 using TapatalkLeave a comment:

Leave a comment: