-
Wow, thanks! Super helpful for me. You did a great job of documenting stuff, and I have a lot of reading to do over there. One of the items that I do not think has a part number is the little plastic spacer that goes on the top stud for the B-pillar exterior trim. When I removed them they broke, unfortunately. So I may be 3D printing some replacements from ASA since I got good measurements from the originals.
You took a good pic of one of them installed:

I checked through all of your paint-related posts...great work fixing up the rusty spots. I am crossing my fingers that the shop does not run in to any more when they sand everything down...I already had to spend some money on some replacement sheet metal for the rear battery tray area where the rust was actually starting to get serious. Unlike the roof, there is no question what needs to be done under the battery tray. It looks like the previous owner had some sort of repair done there at one point since I didn't slather the black sealer on...and I have owned this car since 2005 so I guess I really was not paying enough attention here. I guess it is good that we have been in a major drought here for most of the last decade!
Anyway, the piper must be paid, and this little repair is adding a not-insignificant additional cost to the project.
Since the car is now properly disassembled, I started in on cleaning up the parts that I plan to reuse, which I am not sending to the body shop for paint. First up were the inner door window guides. They are in great shape overall, and just needed a little TLC in the areas where they slide onto the door's integrated channels. I have all sorts of automotive grade stuff left over from building the harness for my aftermarket ECU, so I put some adhesive lined ATUM shrink tubing in a few places, as well as some of the TESA 51036 tape (engine-bay rated!).
The tape: https://www.tesa.com/en-us/industry/...e-a-51036.html
(I recommend buying it from a reputable source...eBay is full of fake Tesa tapes)
For motorsport quality harnessing supplies, such as heat shrink tubing, one of my go-to's is here: https://www.prowireusa.com/
The little arms for the sunroof headliner have some rubber overmolded onto the metal. It was starting to wear off here and there, so I remedied this with more ATUM. You can still buy the arms, but I am entering cost-control mode and this is not a showroom car. I will probably sand down the exposed metal parts and hit them with some satin SEM trim black.
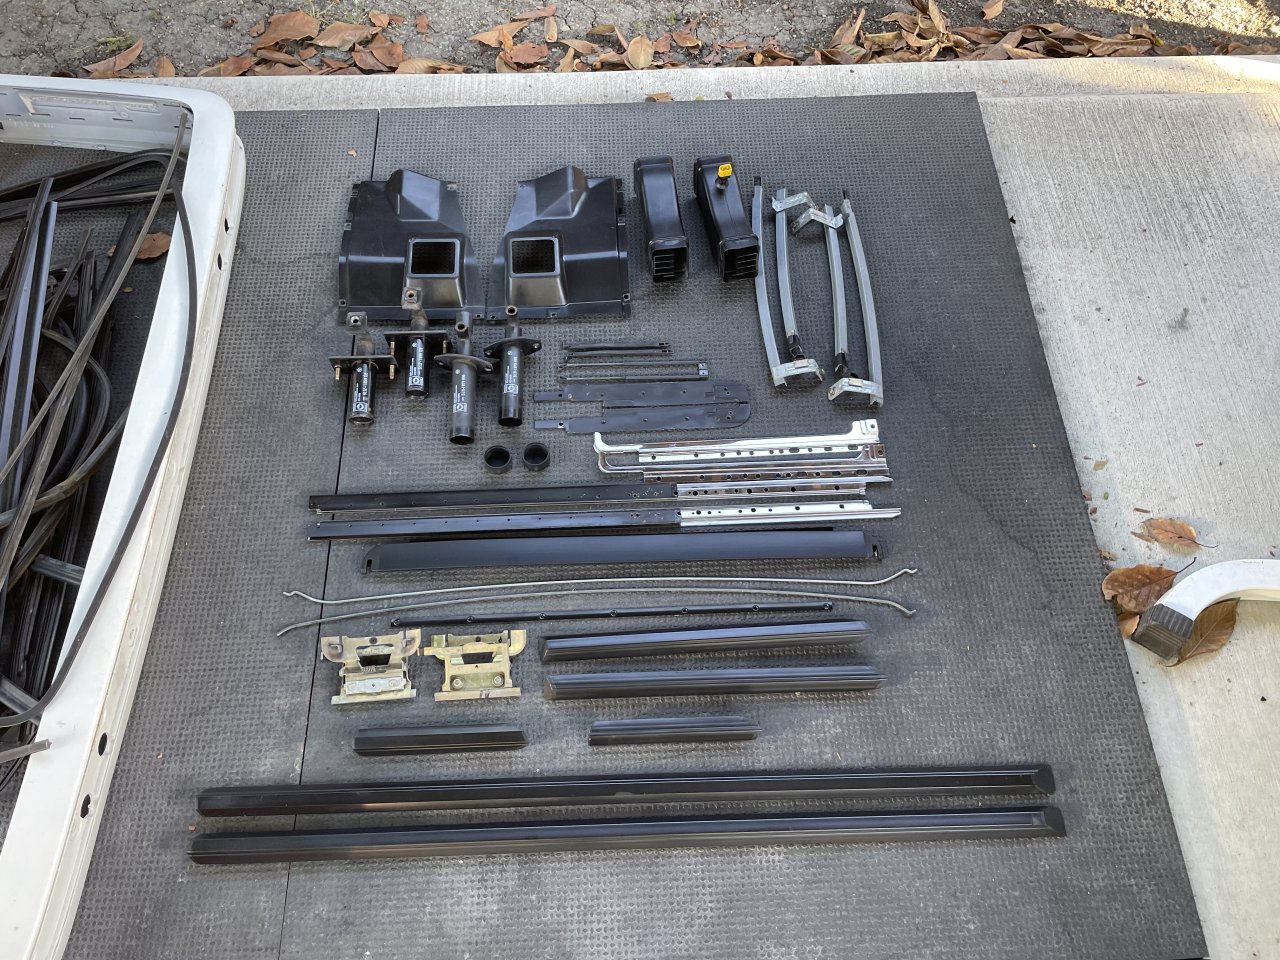
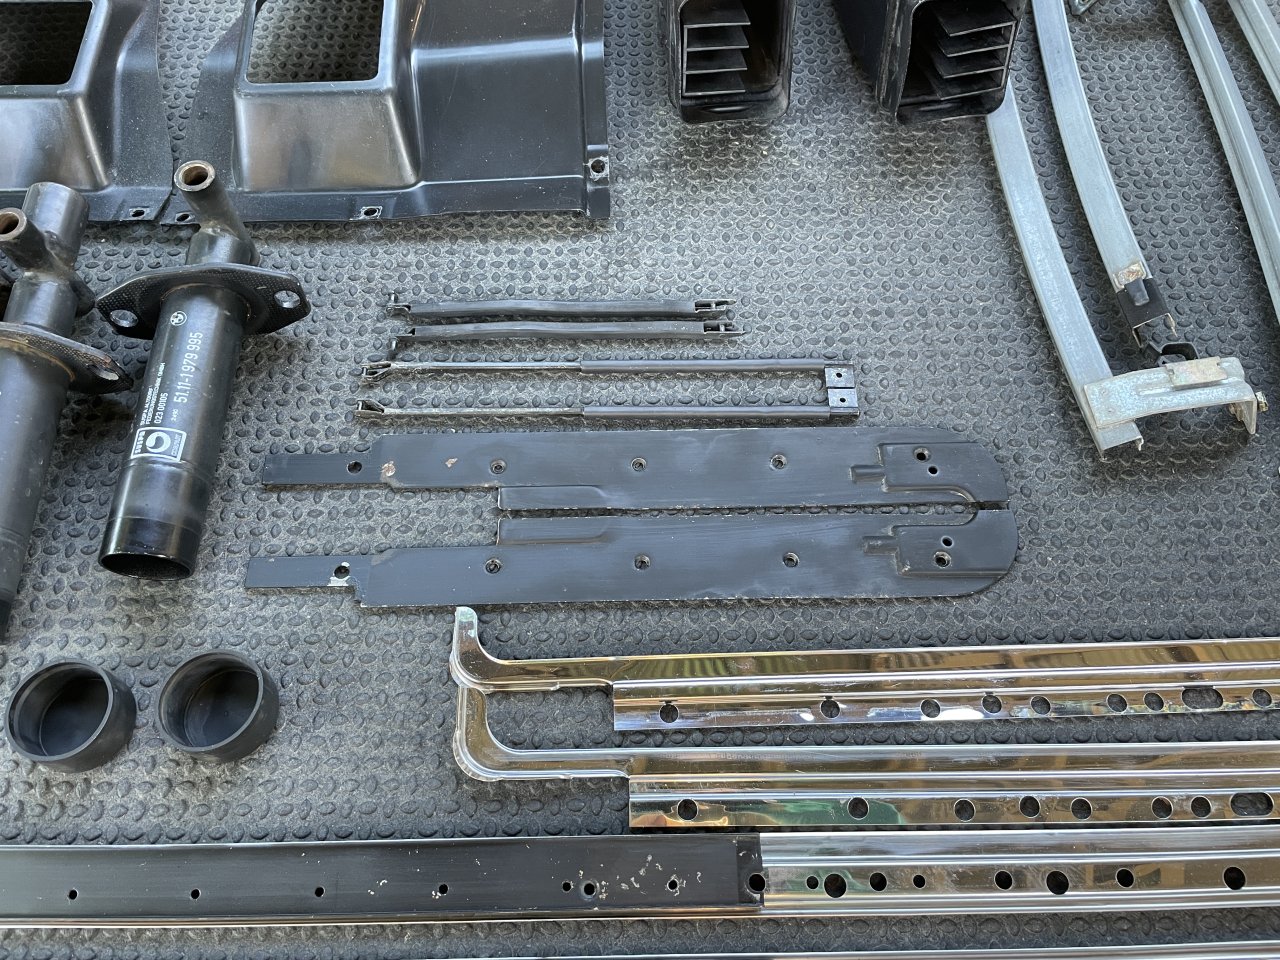
Here is the rest of the exterior / sunroof stuff that I am not replacing. It all needed some good scrubbing, and the channels in the long guides were a hassle to degrease. My thumbs have some nice cuts in them from the chrome metal covers and the inner metal strips in the side moldings. The moldings are unfortunately NLA, and even if they weren't they seem to be stupid expensive. I forget when I last replaced them, probably some time in the last 5-7 years, so they are still in pretty good shape overall. The driver's door molding has a bit of a groove worn into it from the fender from over-opening the door. There was a bit of a dent in the passenger side door molding from someone whacking it in a parking lot too. The dent was not really visible at all from the outside, but the metal carrier had visible distortion inside. I remedied this very carefully with a hammer and some punches to straighten out the metal, and now it looks perfect!
There are several other parts that I need to sand and paint black with the SEM paint as well. I have a couple of cans of the black, but I need to order the accompanying primer and clear coat.
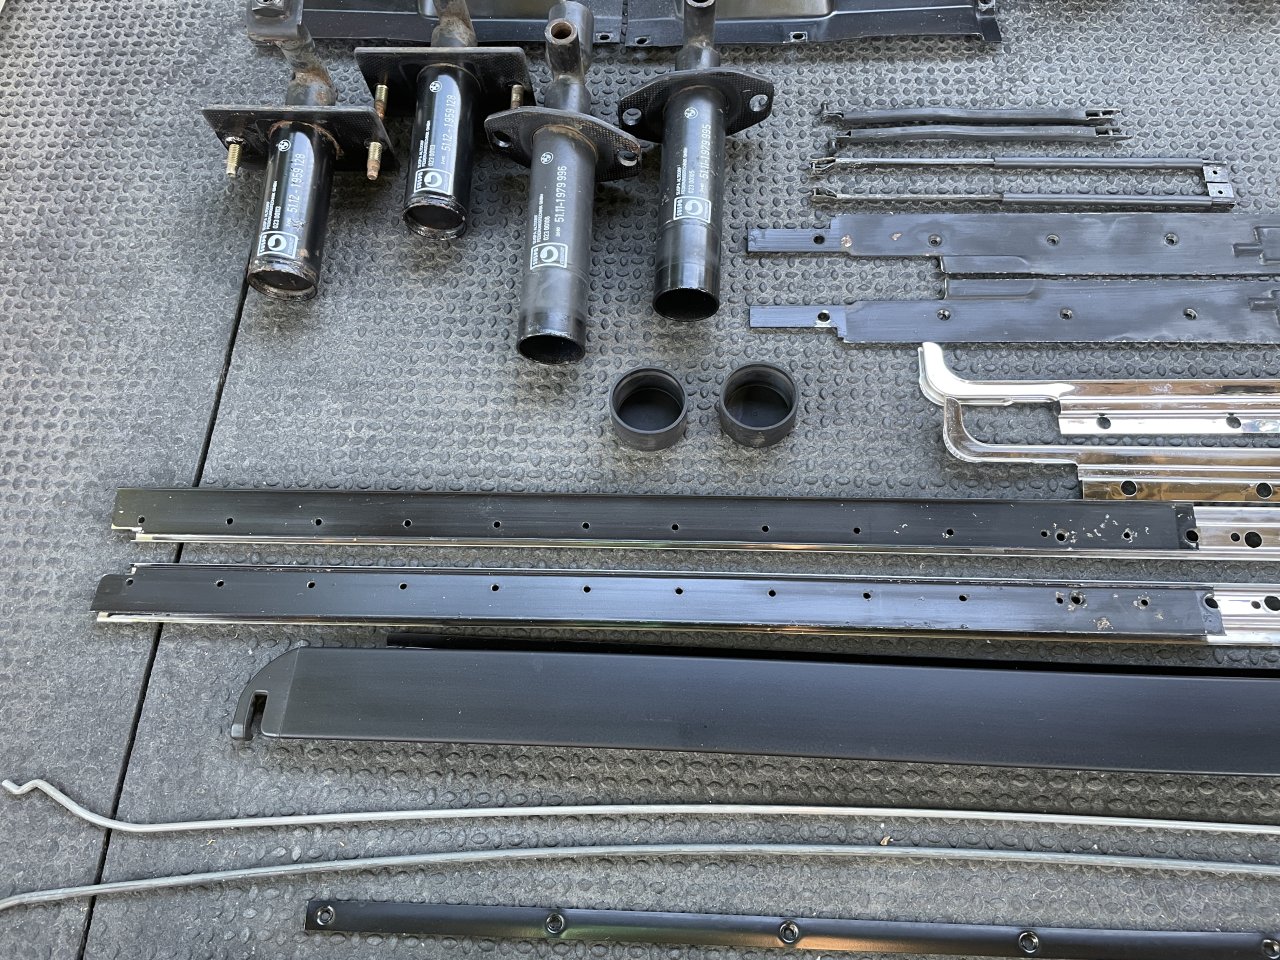
I was able to refresh the brake duct tubes and lower front fender liners. There were no cracks or chips in them, so some washing with Simple Green and wiping with acetone (it takes the nasty old cosmoline right off!) had them looking great. The big upper liners are cracked and broken, so those are being replaced with new OEM ones.
I still need to give the plastic underbody cover for the engine area some TLC, and the window regulators will be receiving a thorough cleaning and lubrication later this week.
That's all for now!Leave a comment:
-
You are making really good progress and I am enjoying following your thread.
See post number 139 in the thread below for the info on the small round rubber bits that fit on the lower part of the C-pillar trim.

The sticky gray material under the sunroof slides is just a butyl rope material, you can get a roll of it at most decent hardware or big box stores. I used this but there are many different versions:
Leave a comment:
-
I spent a few hours today pulling the car apart further. Upon discovering that CATuned makes a headliner kit (which still requires a LOT of careful work to properly install...I may have an upholstery shop near my house do it), I decided that it was time to do the headliner since much of the prep for doing that is already done (glass removal).
The sunroof mechanism and headliner are things that I have never before taken apart, so it was a little slow going as I did it. I have a ton of pics from the day which show all sorts of details for the sunroof assembly and headliner, and maybe at some point I will dump them all into a public Dropbox folder or something.
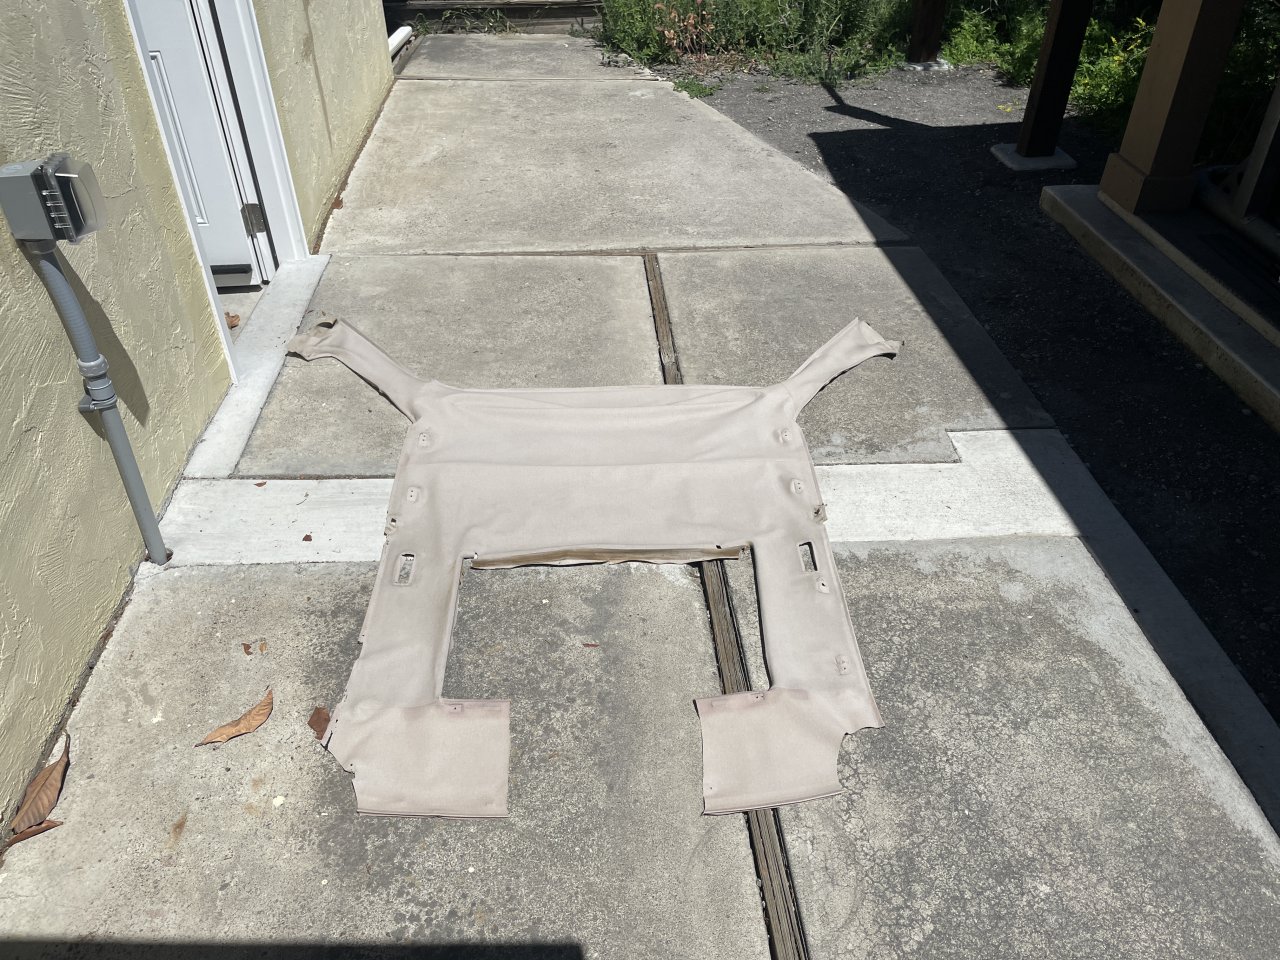
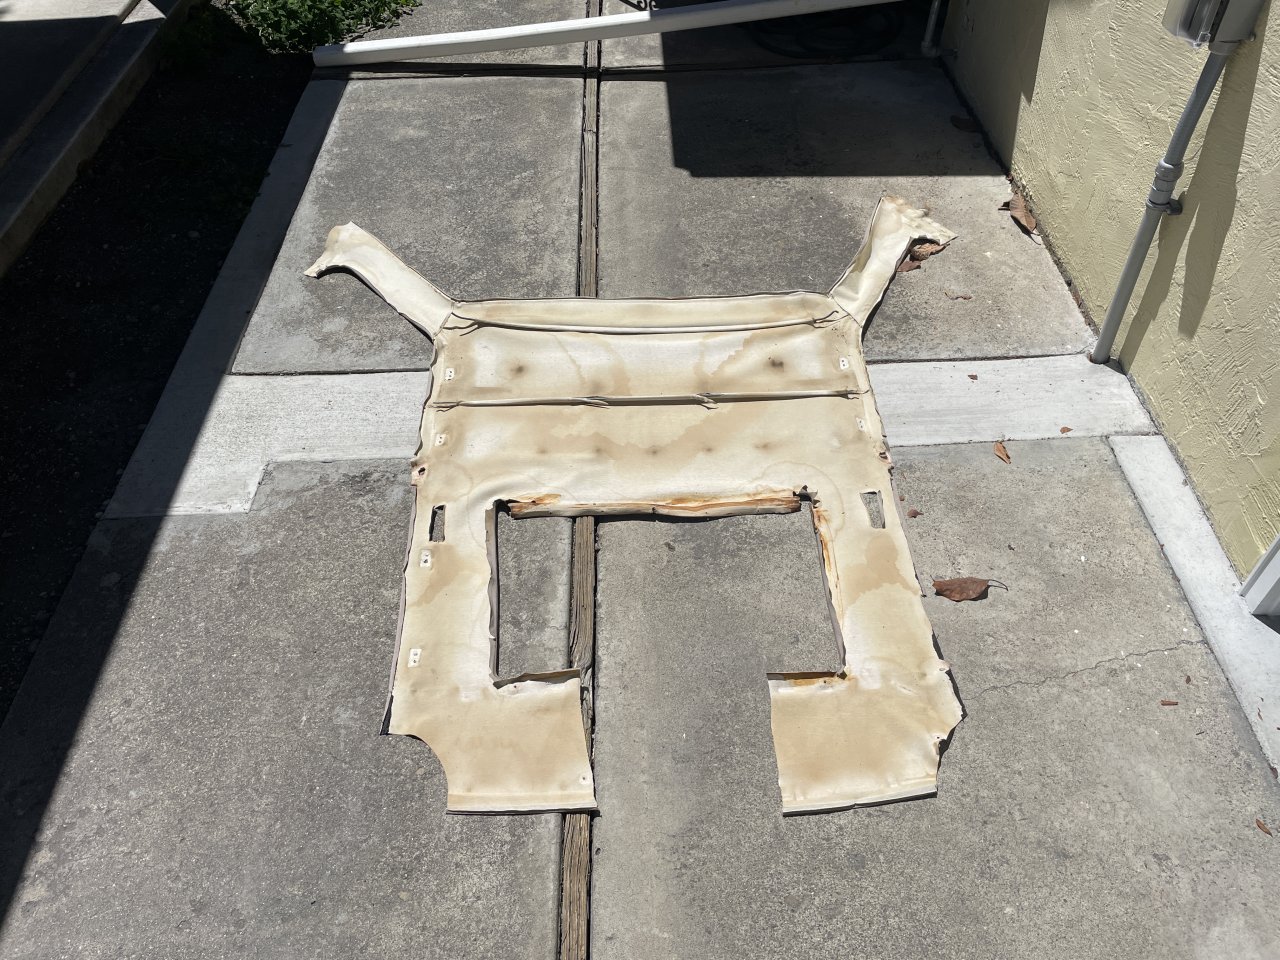
The headliner was honestly in pretty good shape, with no visible rips and no giant stains on it. There was a little chunk missing right at the edge near the middle of the driver's door seal (visible in the pics) which I had managed to keep pulled tight to the frame with some tape for many years. Given how fragile the material was by this point though, I made the decision to pull it. As you will see later on in this post, it was a good thing that I did pull it, and it very likely would have needed to come down anyway at the body shop.
The most difficult part of getting the sunroof parts out (not *strictly* necessary for the headliner, but I want to give everything a proper cleaning) was prying it up off of this non-curing sealant stuff without bending it. I did succeed, but it involved some mild cursing!
Does anyone know what this gray material is and if it can be purchased? It almost seems more like anti-vibration filler than any sort of water seal (and water should not be getting up that high anyway!
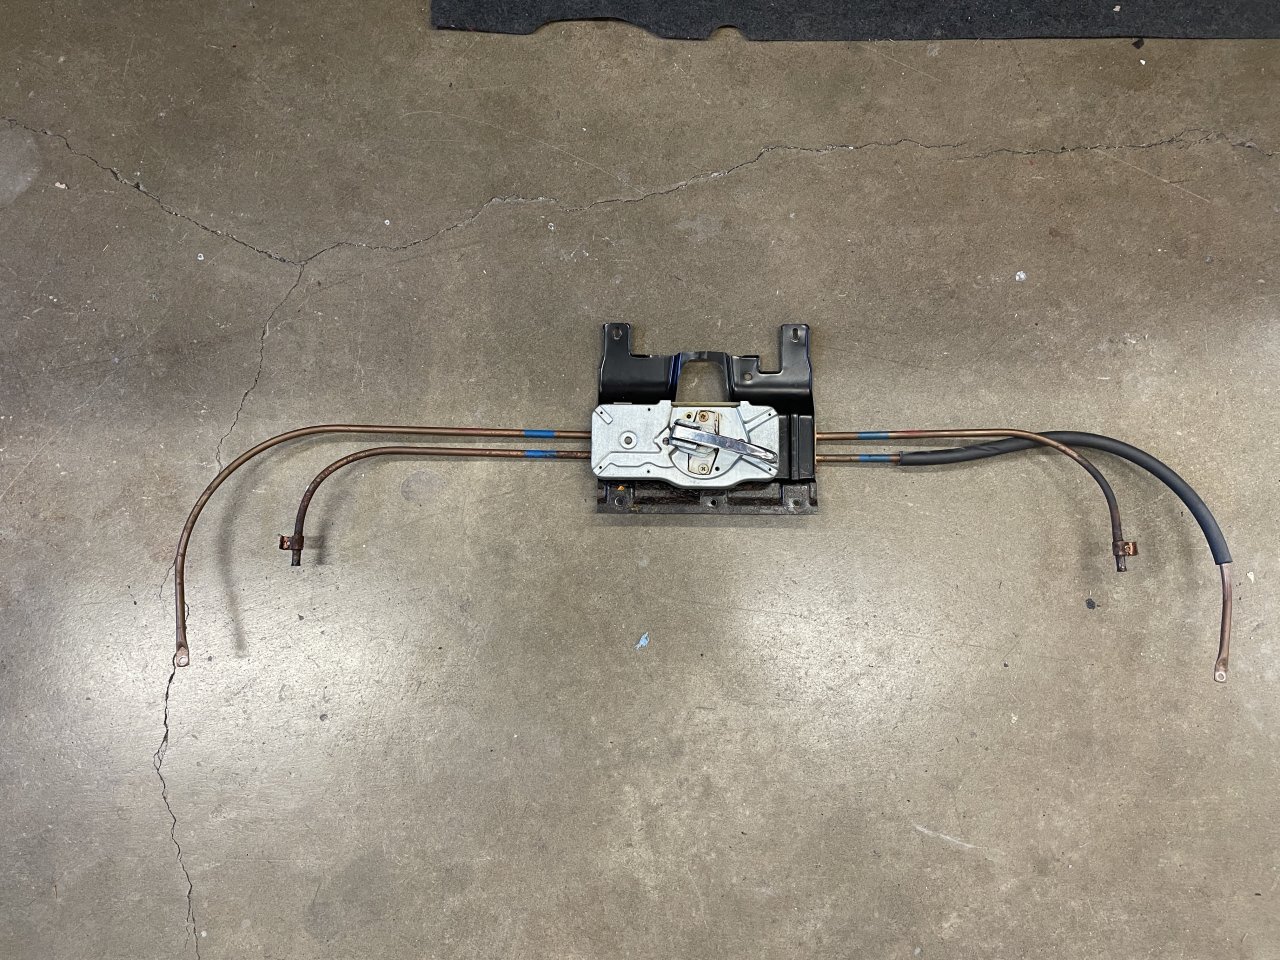
Just for kicks, I pulled the manual sunroof cable housing as well. With this out, there's really nothing left up there to be in the painter's way. There are a total of 9 fasteners holding this thing in.
- 2 up top in the sunroof opening: Philips head screws
- 2 on bottom at the outsides where the closed ends of the cable tubes are secured
- 5 in the middle holding the mechanism body (2 visible at the front, 3 hidden under the foam
For the ones under the foam, I cut a couple of holes with a hole saw, running it by hand. The foam is glued up there and I wanted to avoid breaking it, although in hindsight this was unnecessary since the middle part came unglued anyway when I was doing this.
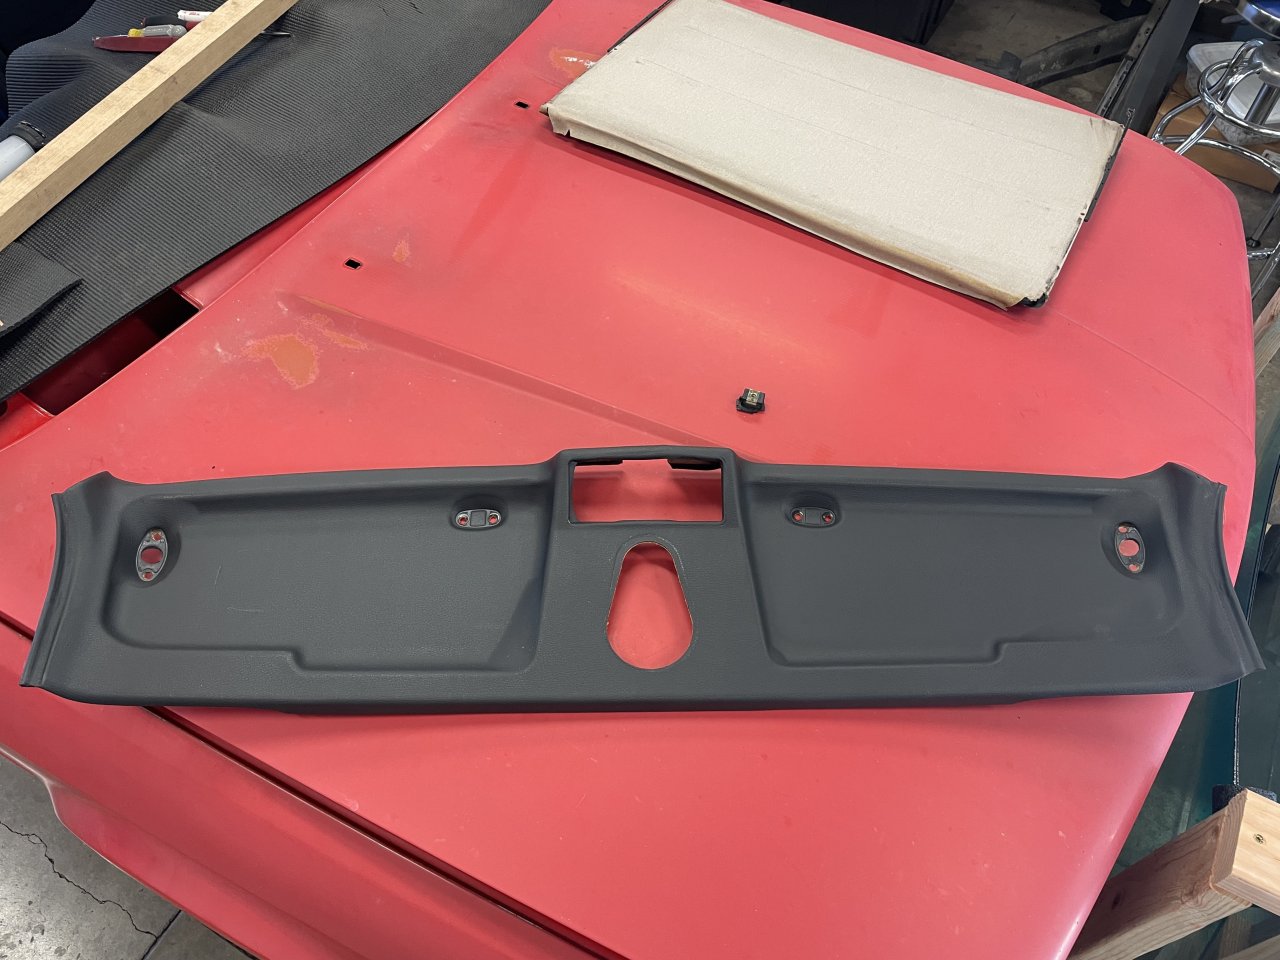
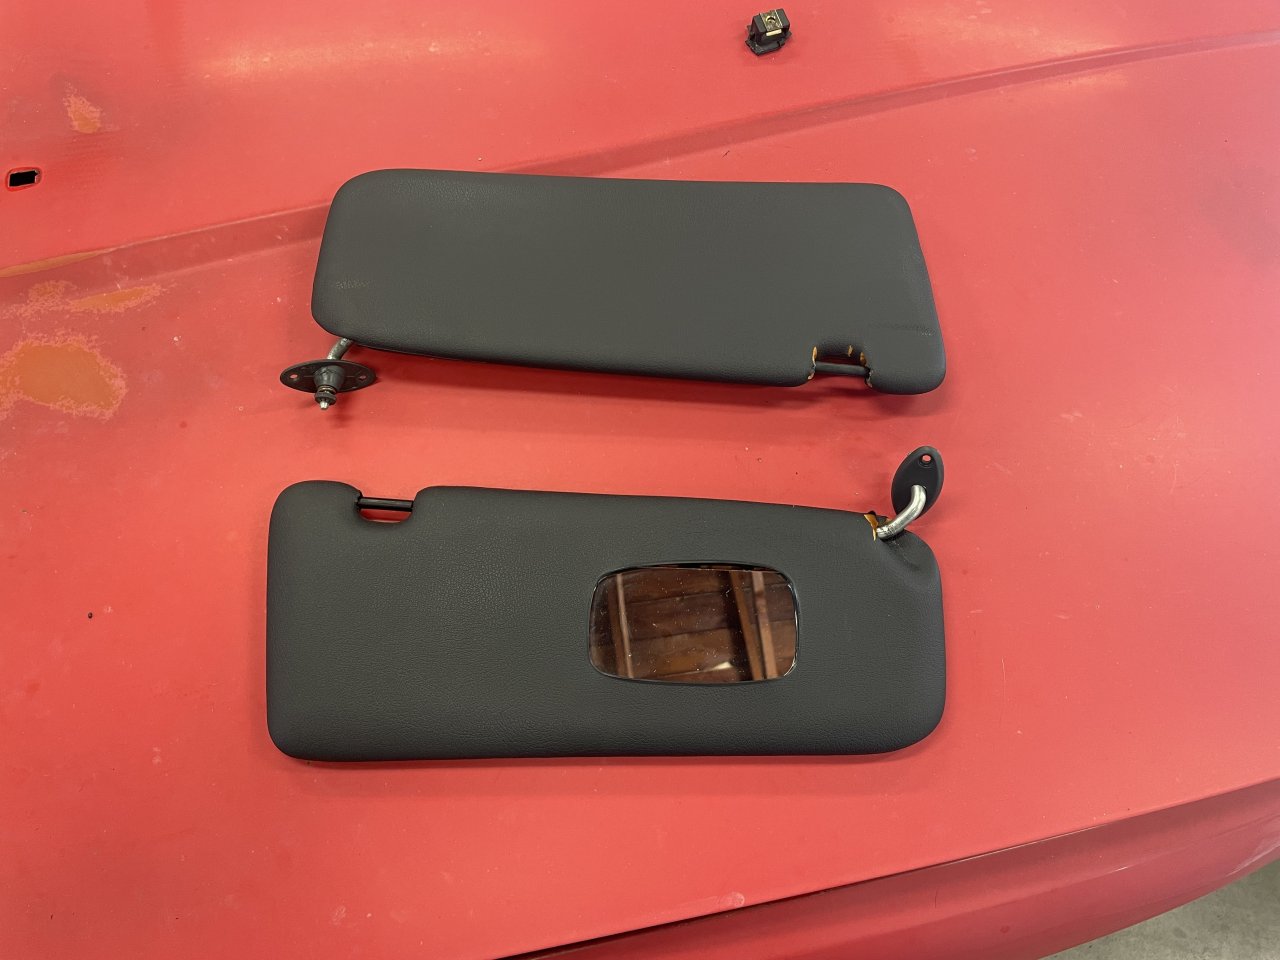
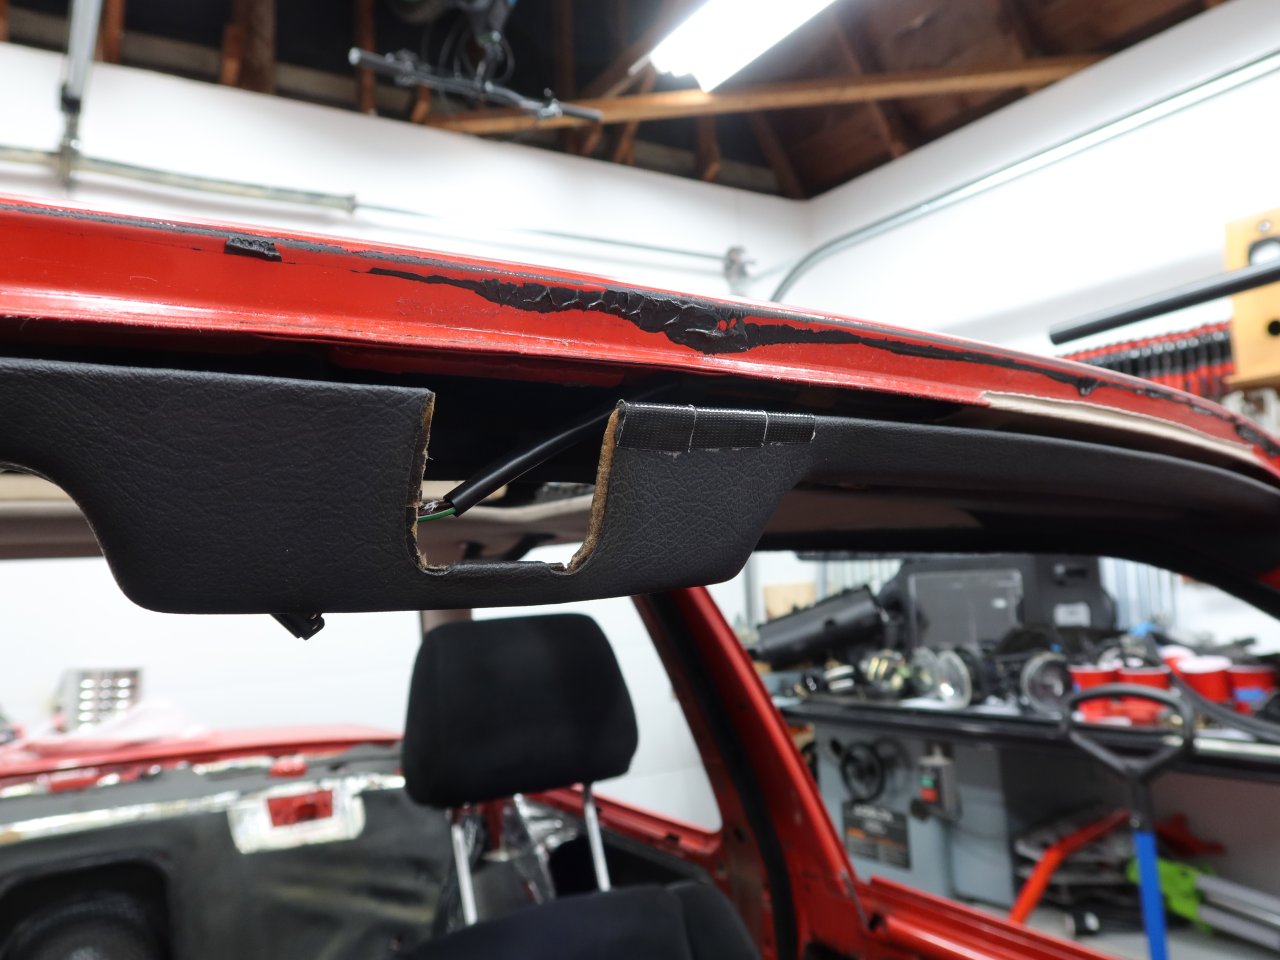
The front headliner cover thing was in pretty good shape for its age, but in need of some TLC. The vinyl is peeling off here and there, the black plastic mount boss things on the back side are broken off where they were glued on, and the thin region at the very front which is under the mirror mount is broken and in need of some reinforcing. Also the visors are starting to crack. Since I will be looking into having a shop do the headliner, I might as well see if they can re-cover these, and the A-pillar covers too, with fresh textured vinyl.
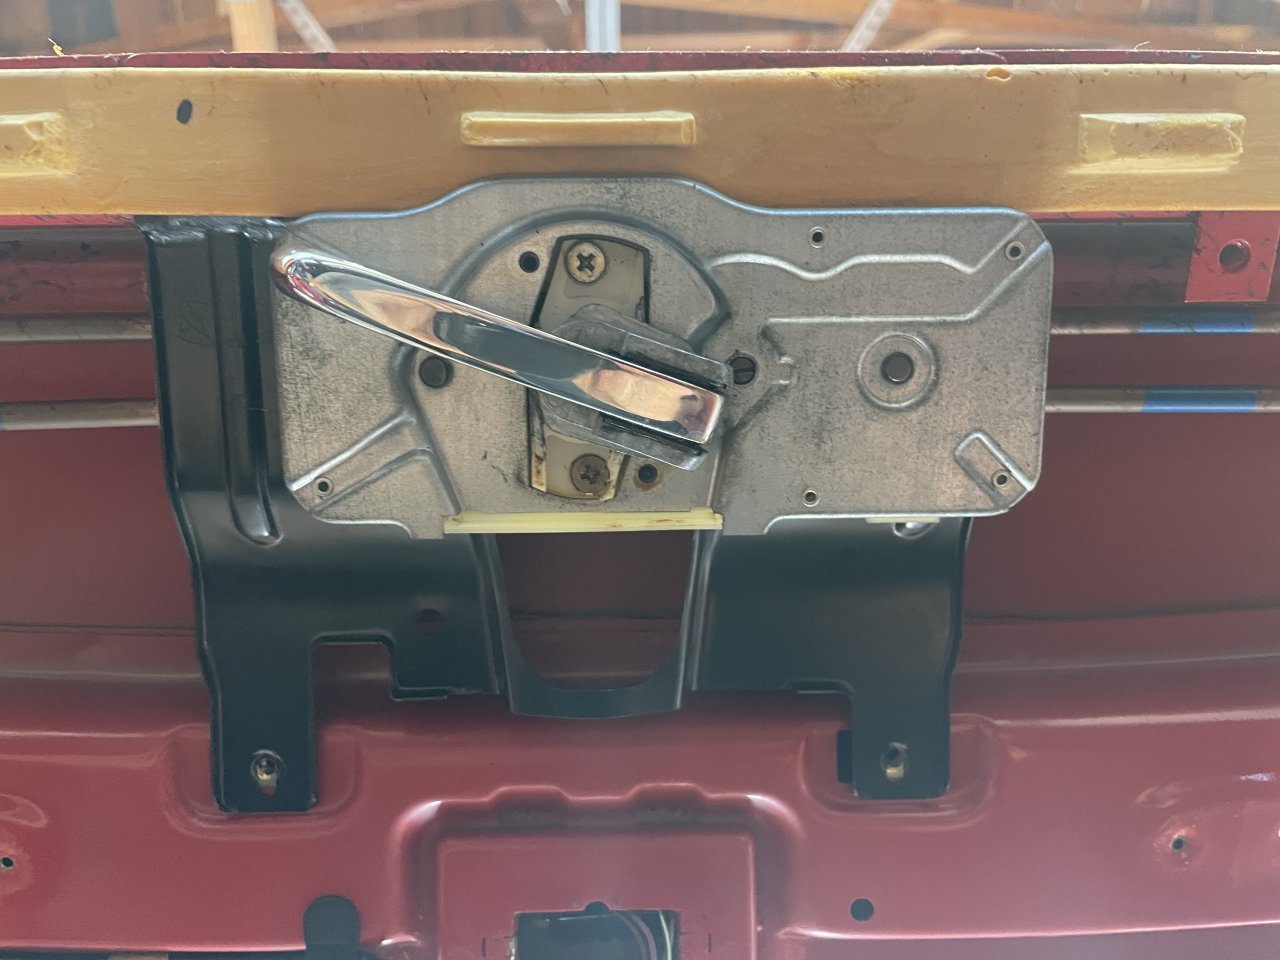
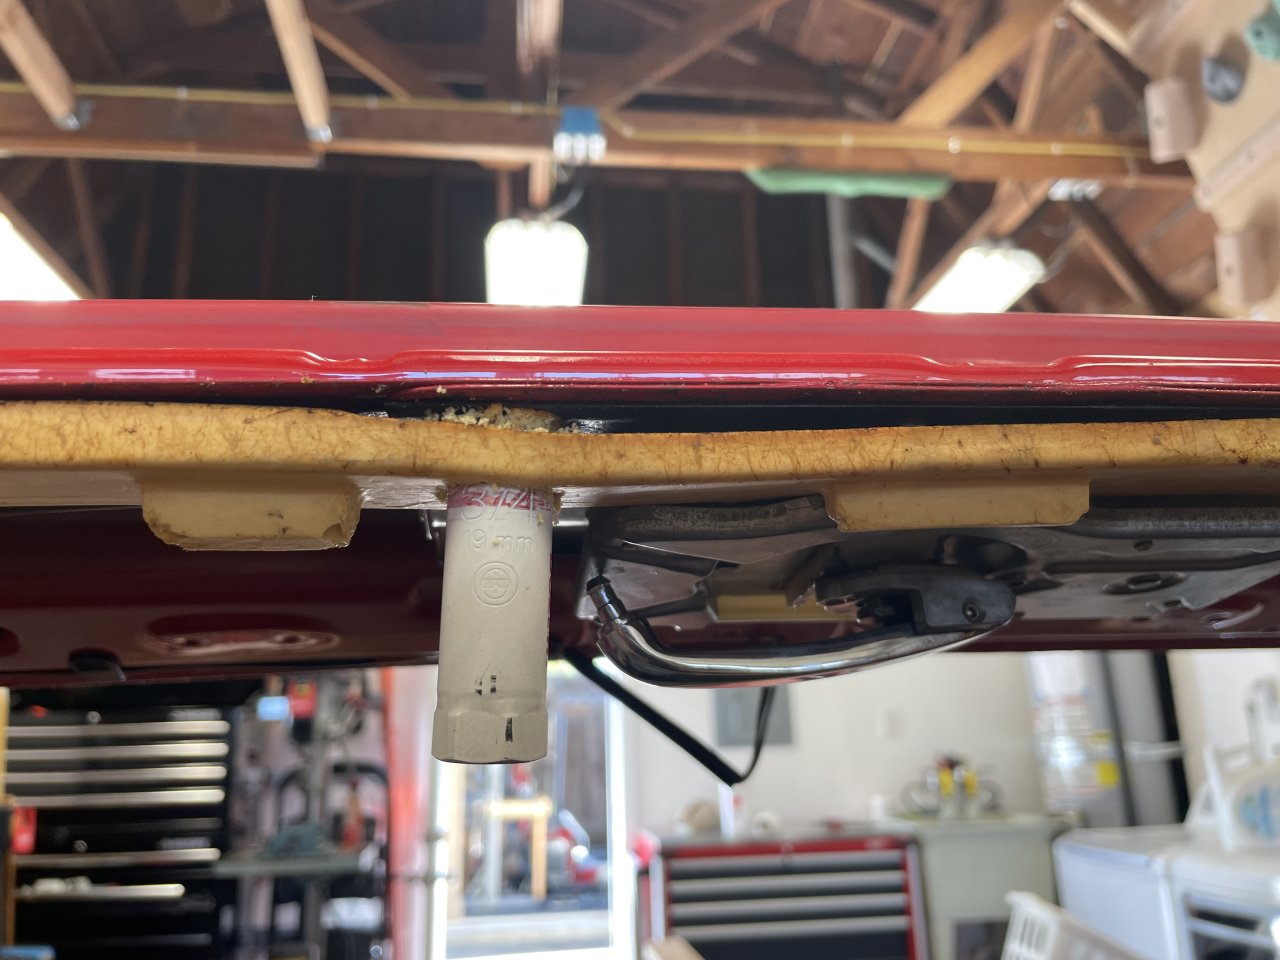
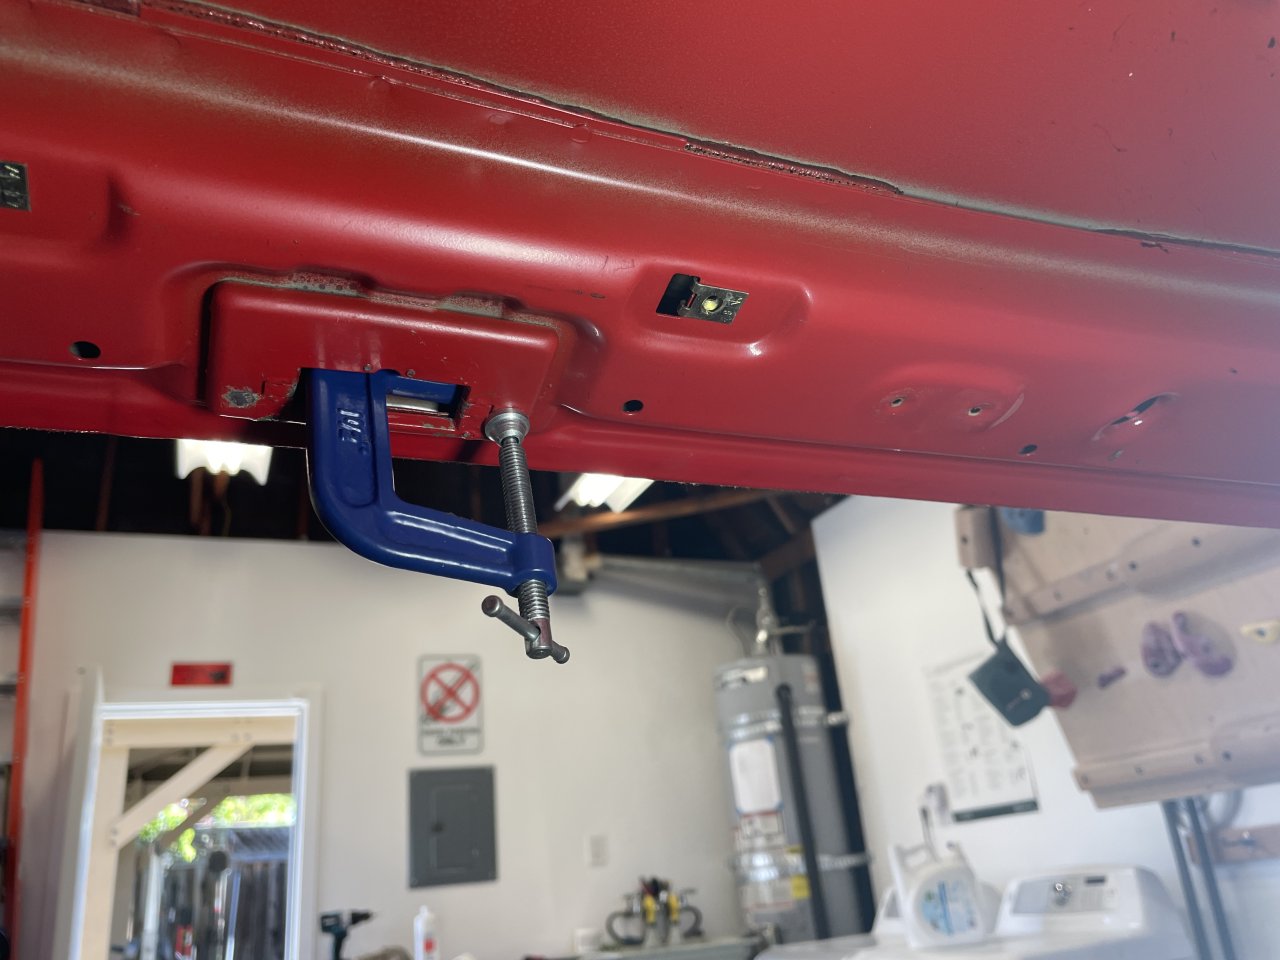
Now, one thing that has irked me with the map-light rear view mirror is that it has vibrated a lot while driving. This is due to two things. One is that the spring-loaded mirror mount just is not tight in the base plate up in the roof, and I can deal with this in the future with a rubber spacer on the mirror flange. The little adjustment screw that presses on the windshield helps, but it seems to have caused another issue (and it was maxed-out anyway), which is the second problem. The base plate thing is a separate part which is riveted in to the inner metal panel under the roof. The rivets are not accessible, and the base plate is NLA. There are a couple of threads on here where people had the rivets break off and that sort of thing.
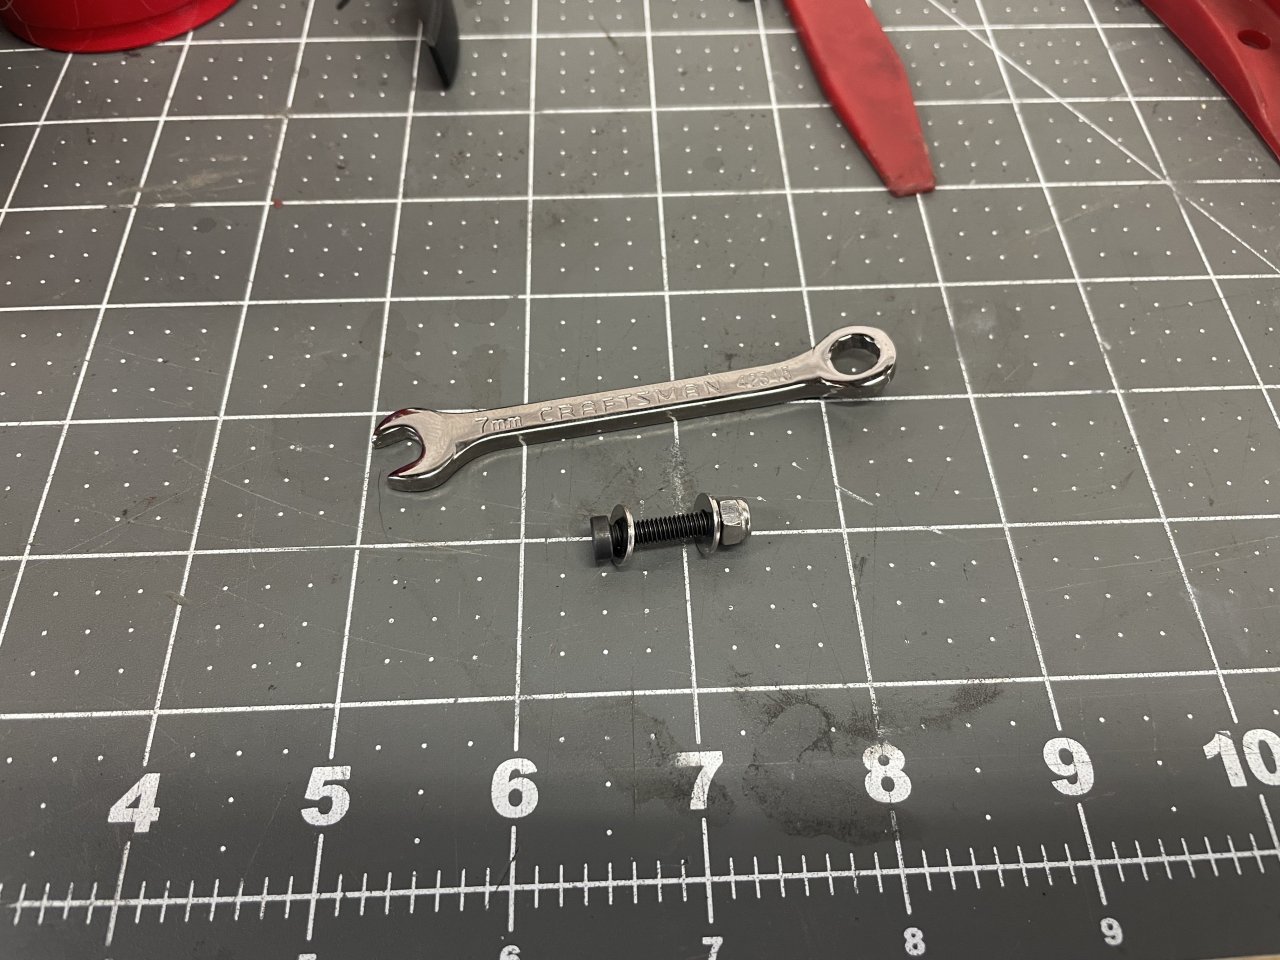
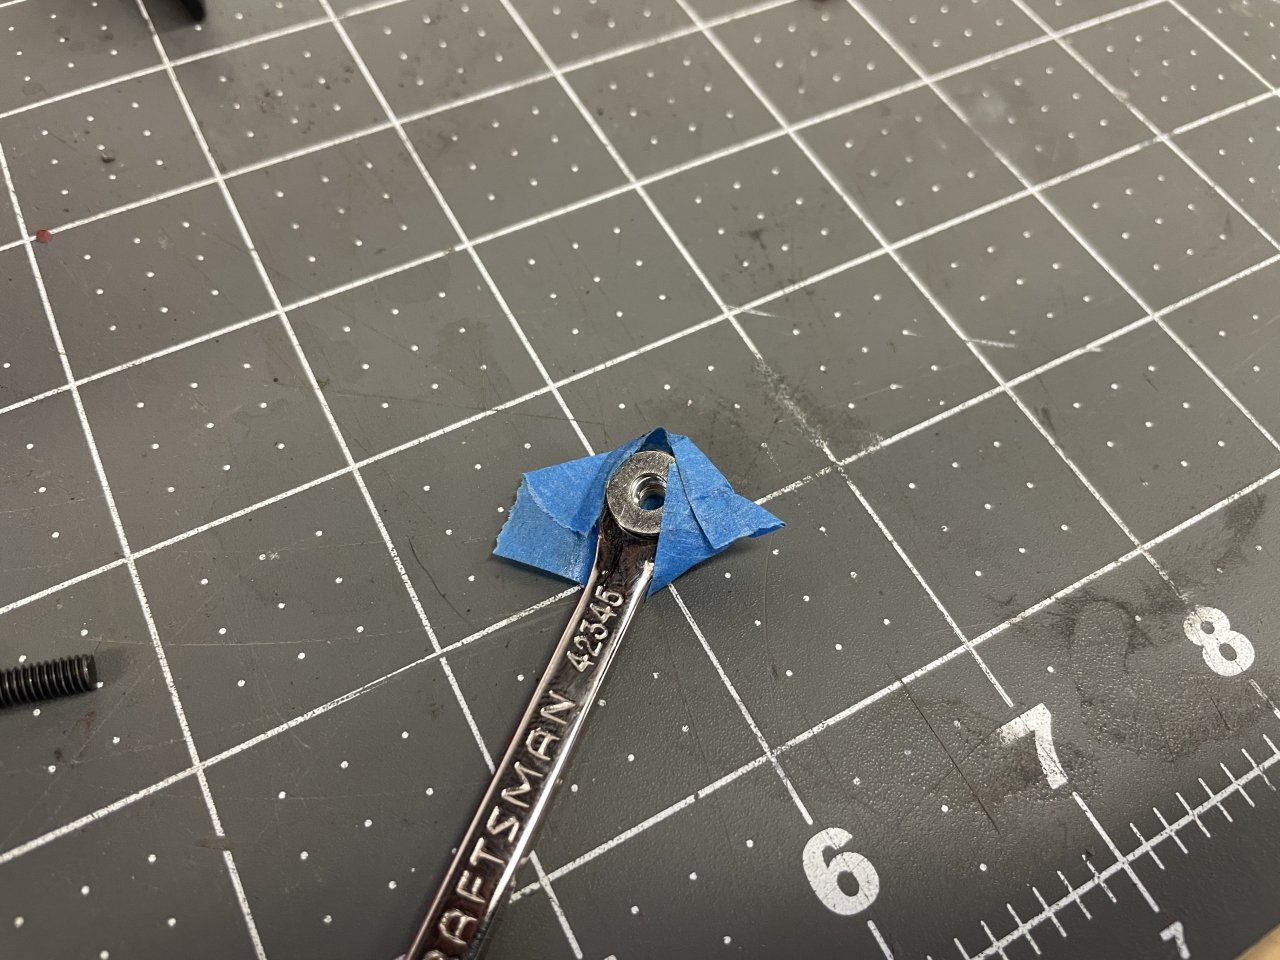
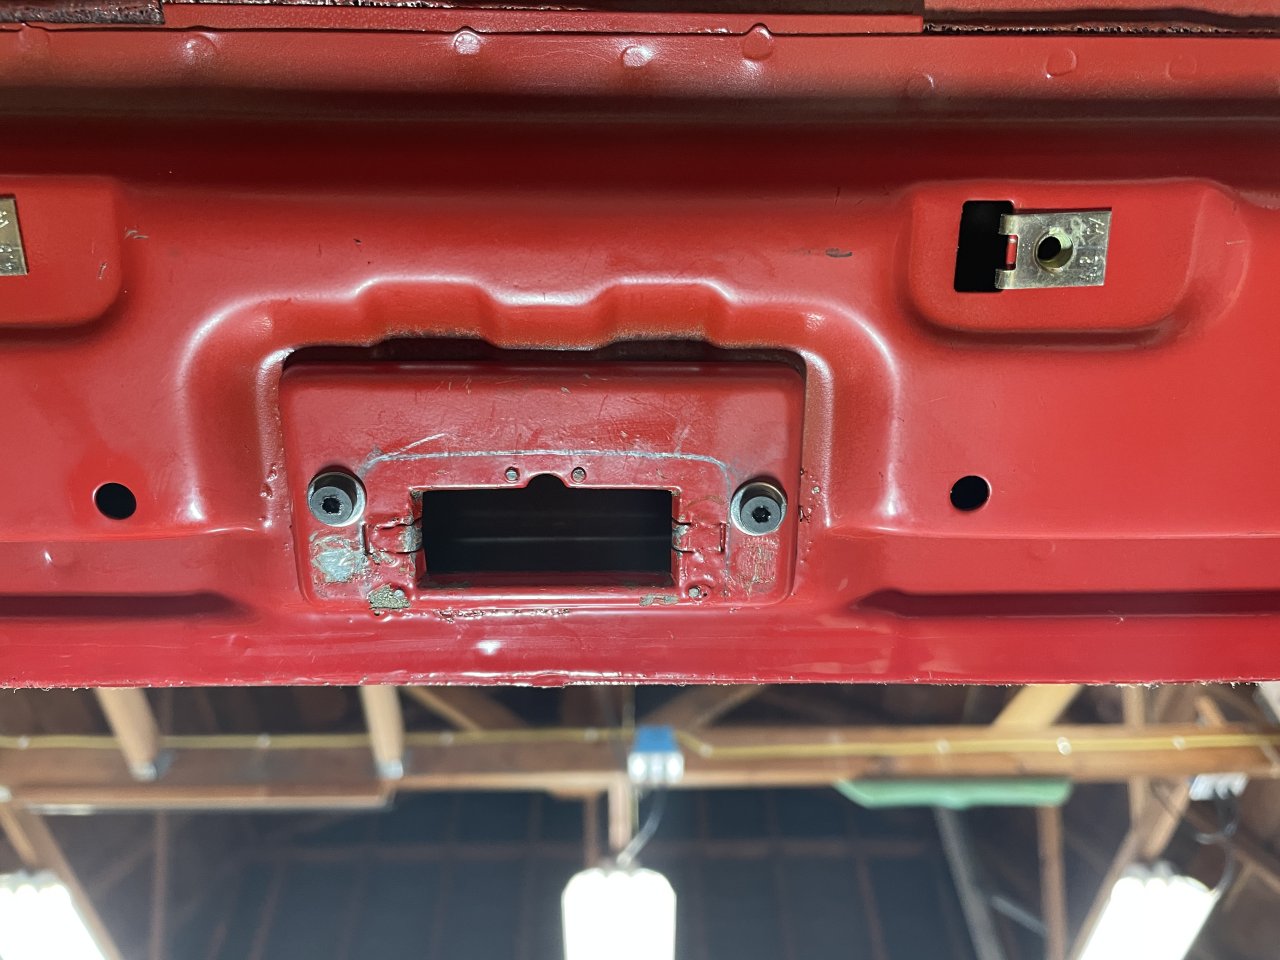
In my case, the rivets had started to loosen, likely from excessive pulling force from the mirror's spacer screw. I was able to fully reseat them with a small C-clamp, and the thing had zero play in it afterward (there was maybe 0.25mm of vertical play at the front before that). However, there is nothing stopping it from loosening up again, and who knows how secure those rivets even are after stretching and mashing. So, I drilled a couple of holes next to the rivets and added some M4 fasteners. This thing is not going to loosen up again. Getting the washers and locknuts up inside was a little bit of a pain, but masking tape and a mini wrench had me covered. Ugly and cheesy? Yes. Will I worry about this coming loose again? No.
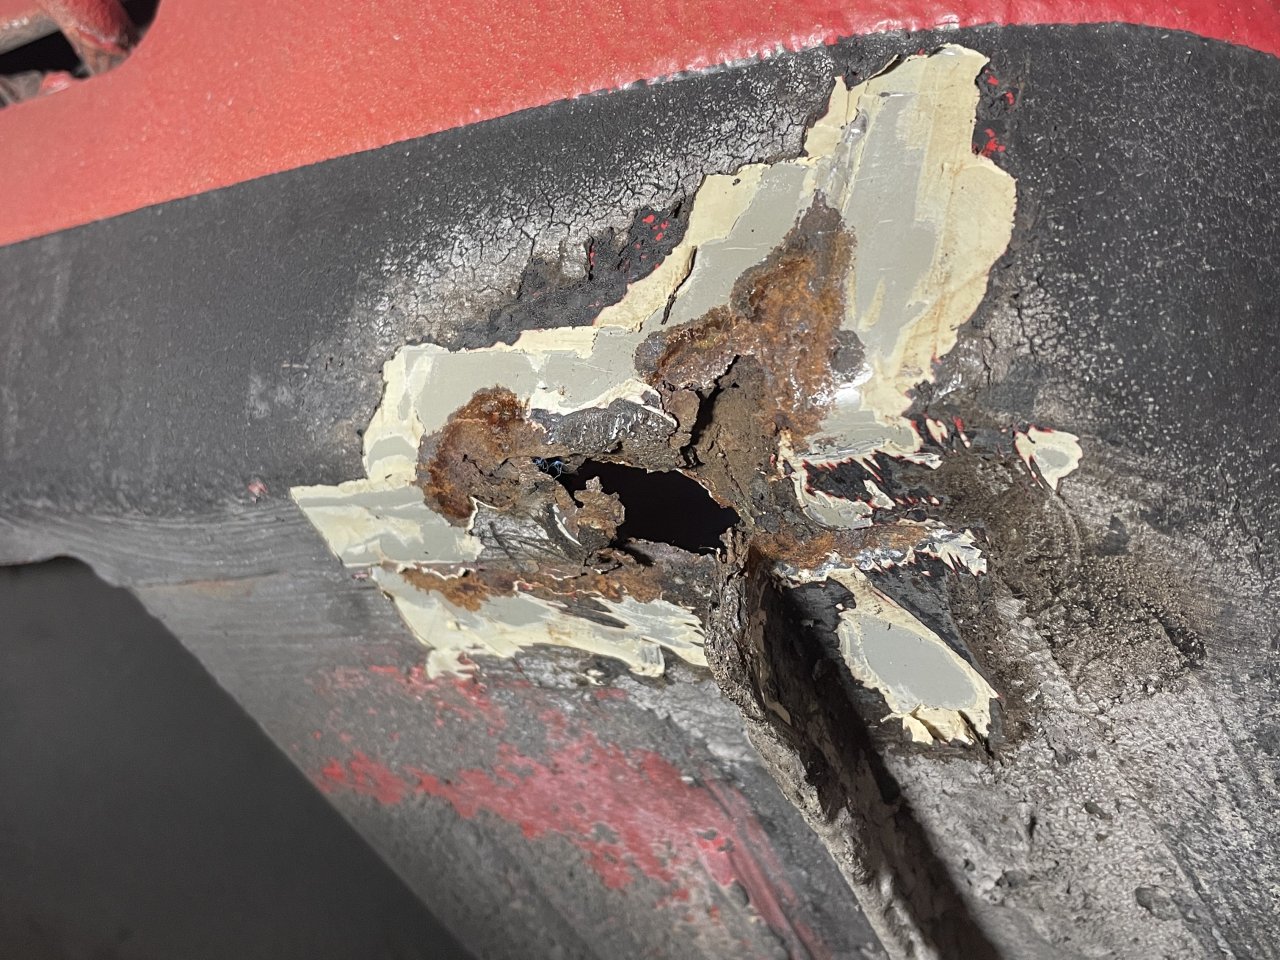
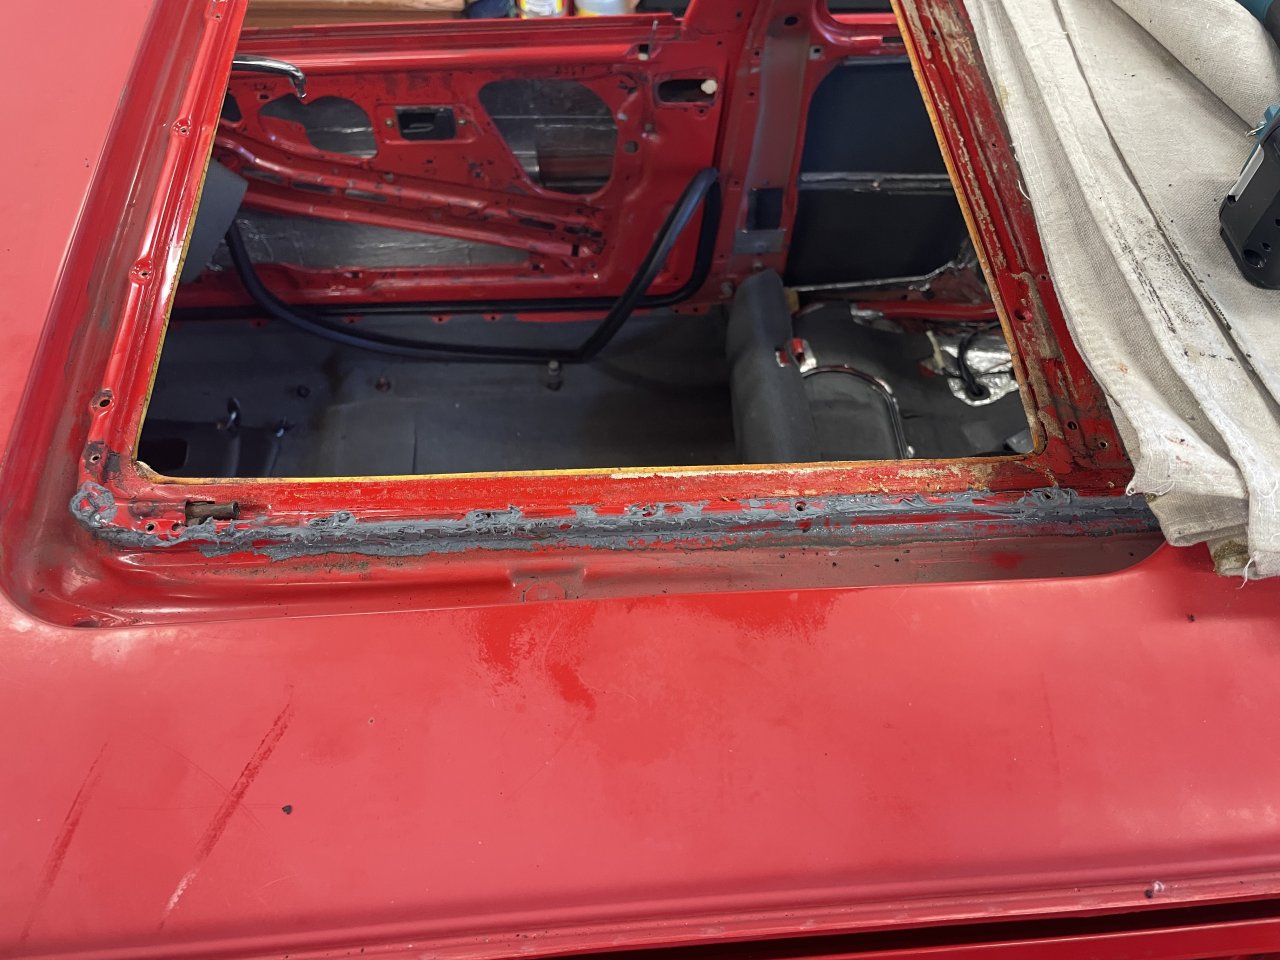
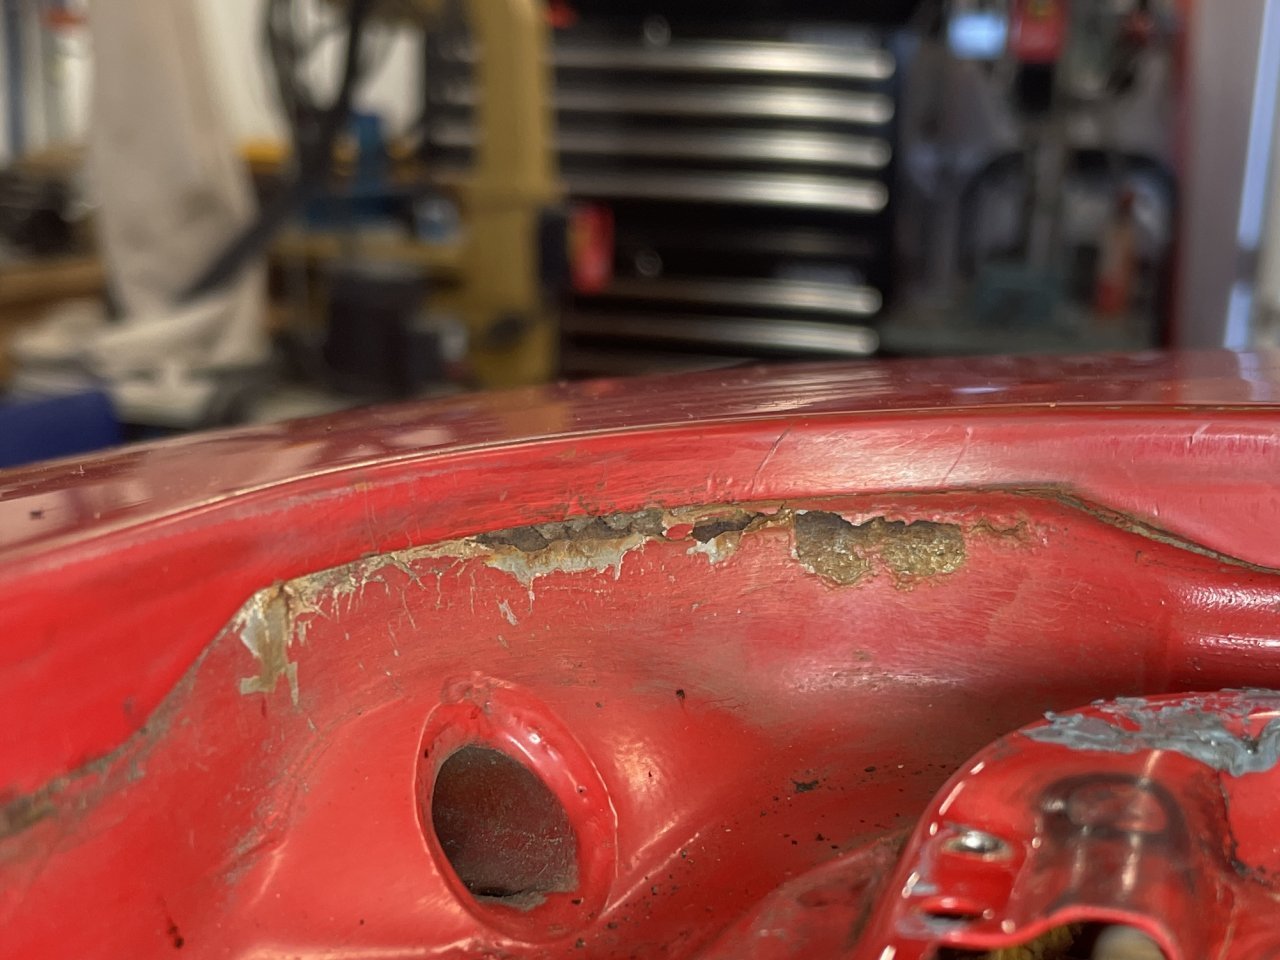
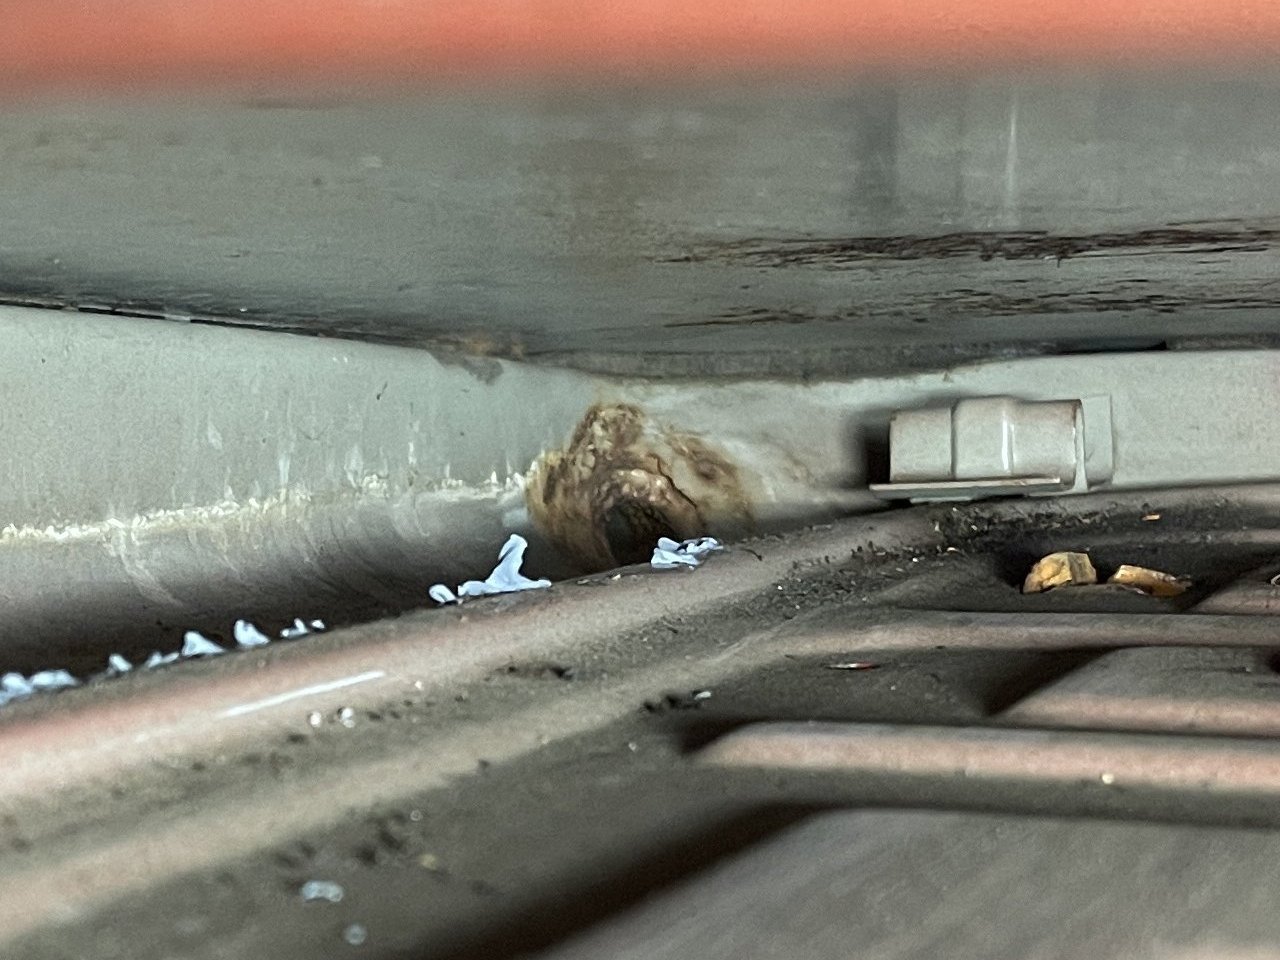
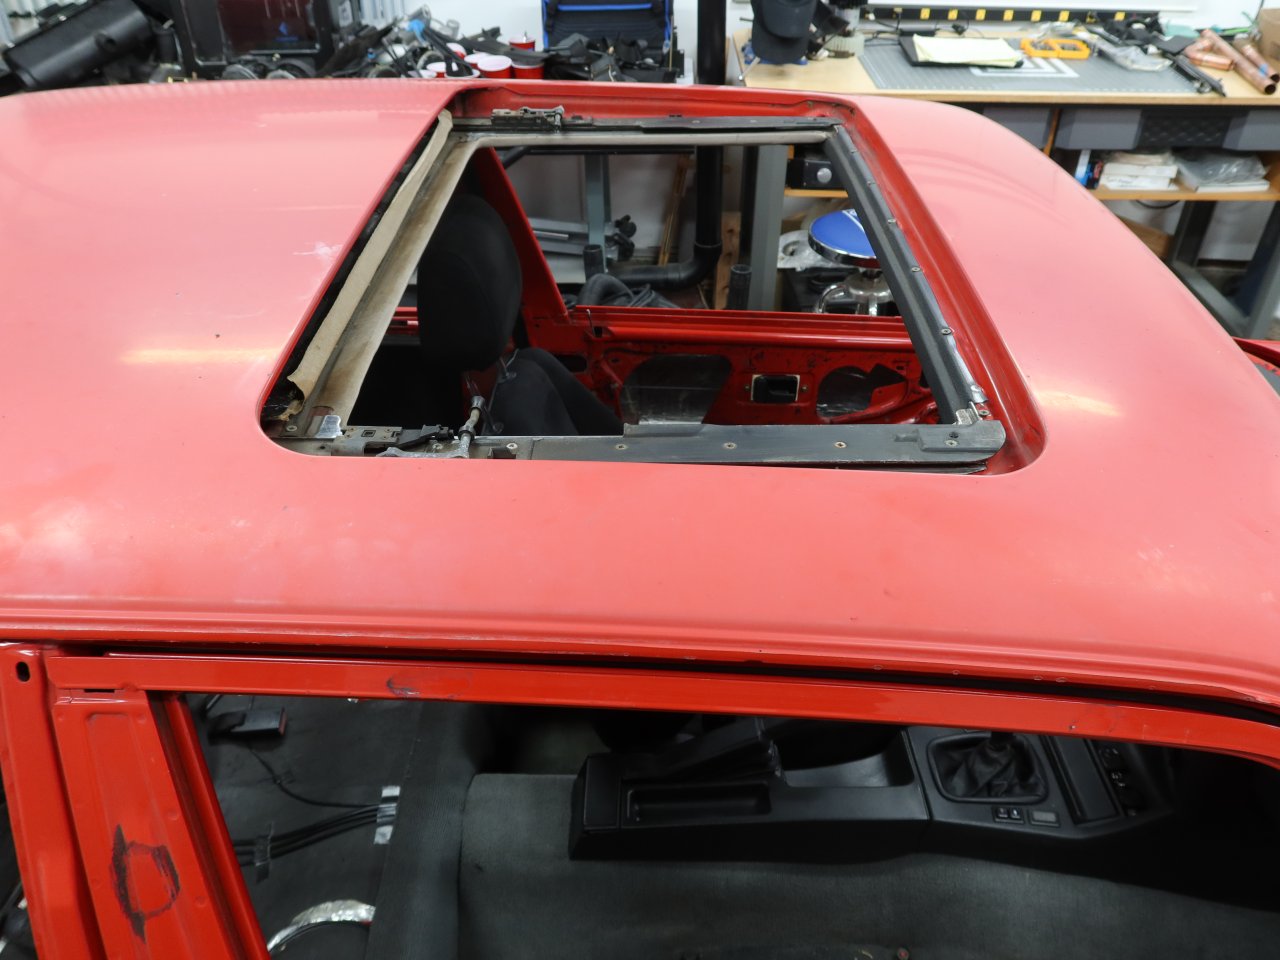
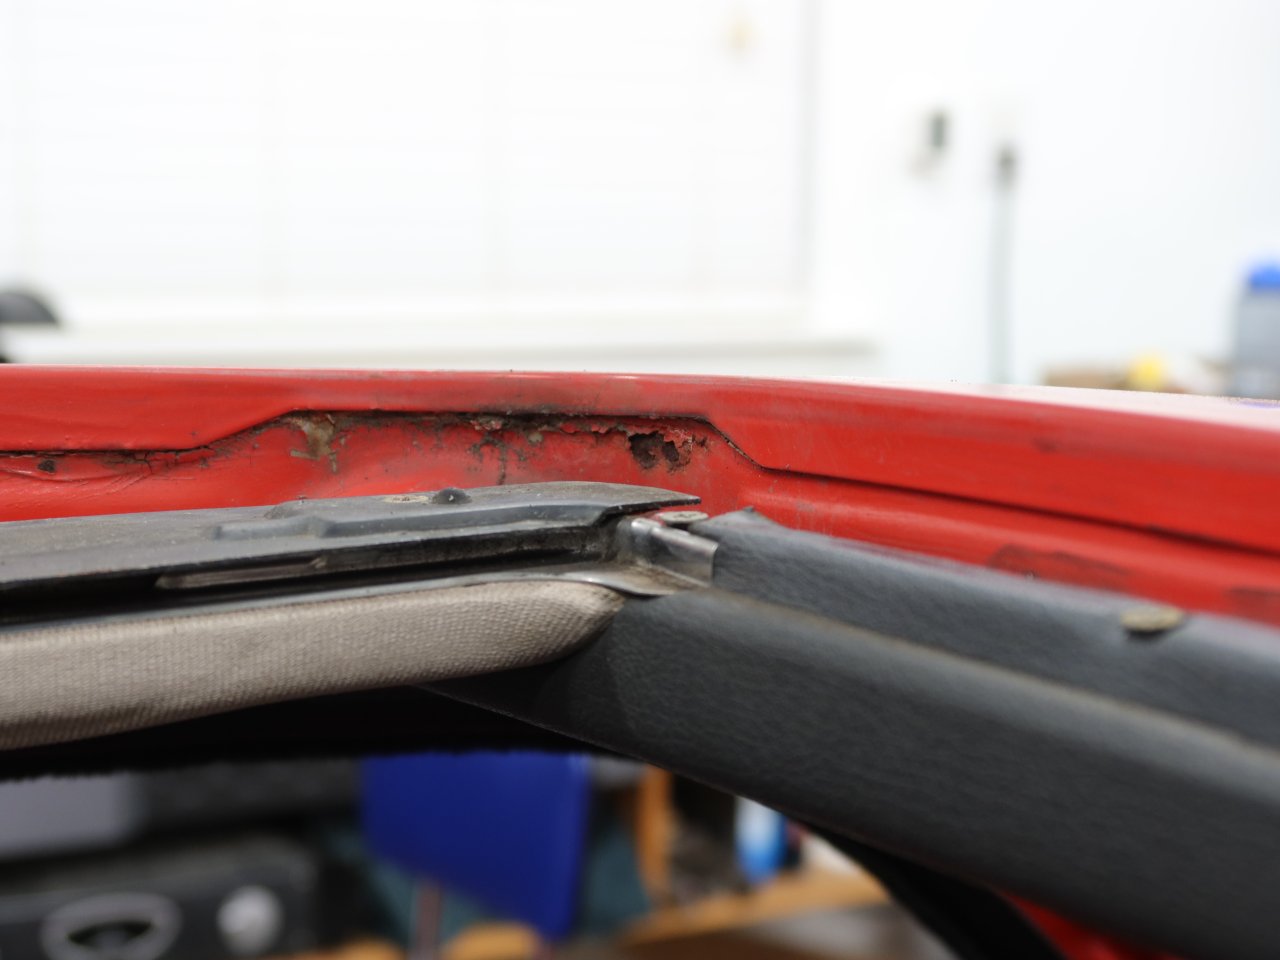
Now, on to an unfortunate discovery, albeit one that is not unfamiliar to many E30 owners. Enemy number one: RUST. I sent some pics off to my guy at the body shop for evaluation, so TBD what he thinks. At best this is a borderline case probably, which MIGHT be manageable with careful surface cleaning, conversion, and injection of body sealant. Also, I may need to keep the car covered or in the garage whenever it rains for the rest of time, and immediately dry this area after washing.
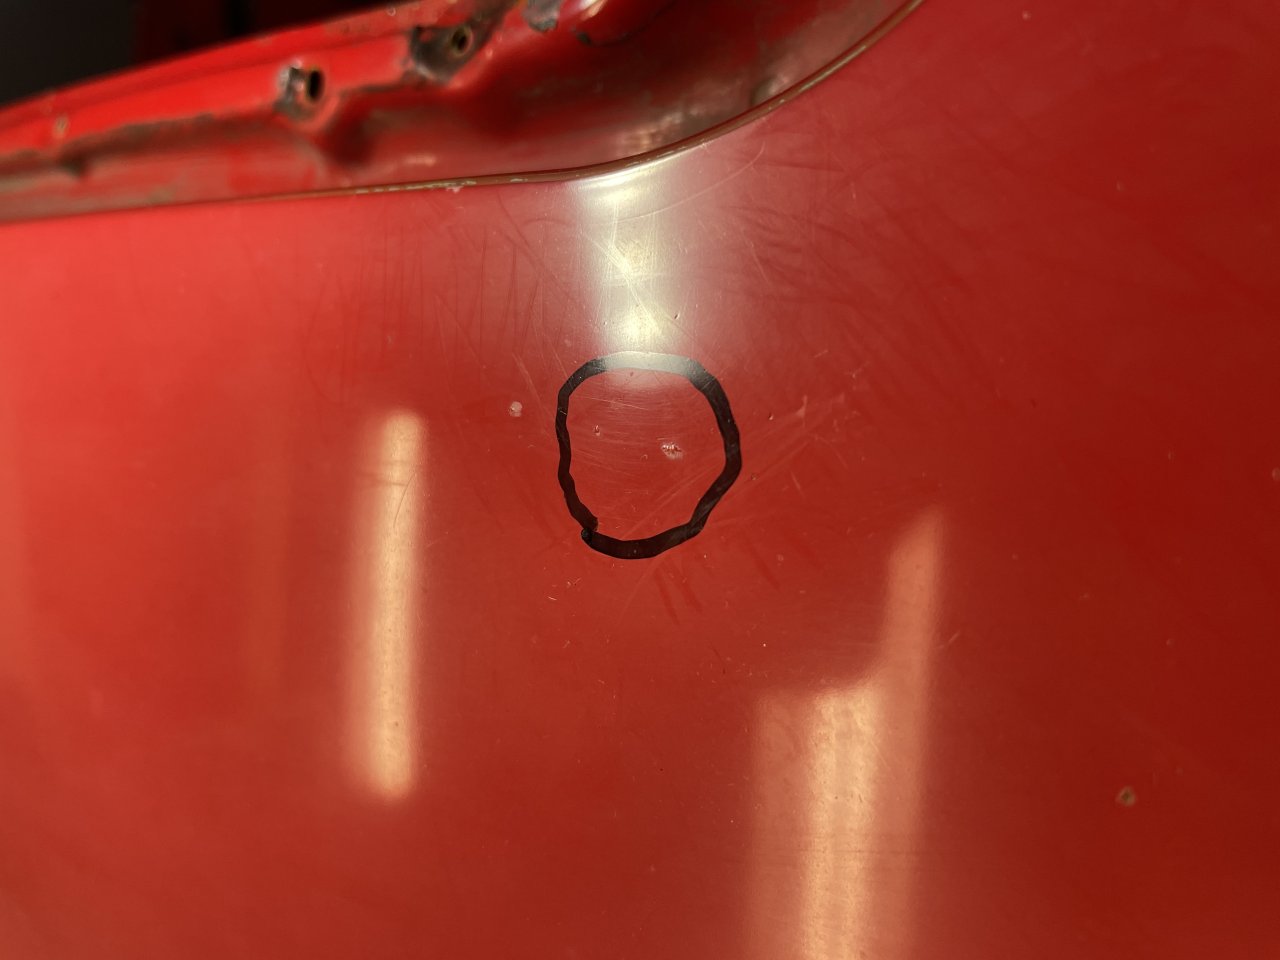
The metal is not completely compromised as far as I can tell. I ran a plastic trim tool over the whole area, driving it down hard, and nowhere did the metal crumble or give at all. However, there are a couple of very tiny raised spots in the paint, which make me think that there are pinholes or areas where things are getting way too close for comfort. Until this is sanded down to bare metal, we won't know. Obviously, the sunroof housing is also compromised to some level in the area too, but again I was not able to break through anywhere with the trim tool. I am really hoping that some love with a wire wheel, media blasting, rust converter, and body sealer this will get a reasonably long-lasting fix. If there are some pinholes, they may be repairable with some small TIG welds to fill them (hopefully?). Let me know your thoughts on this one!
As I said further up, it is good that I pulled the headliner.
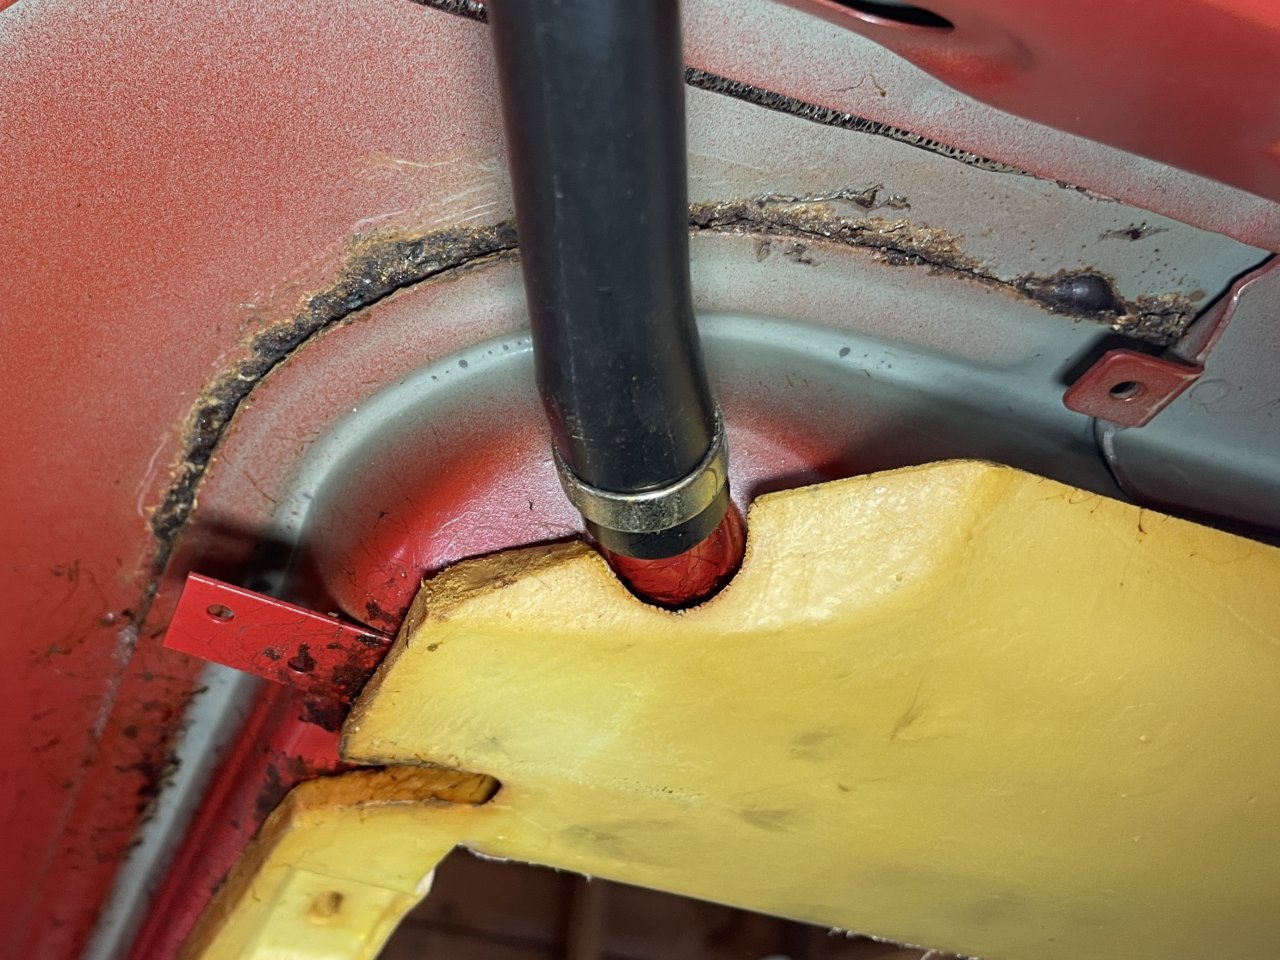
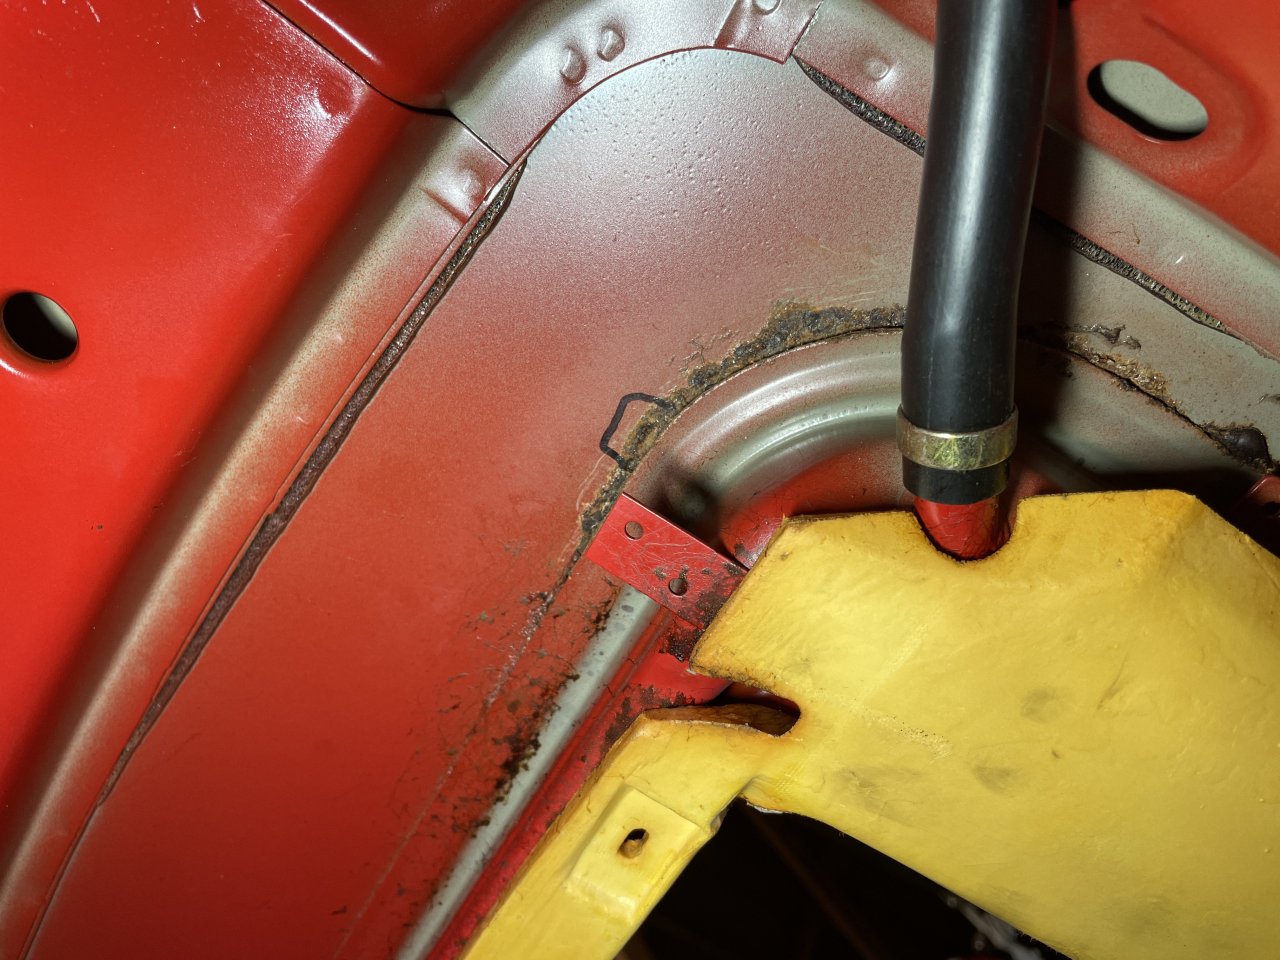
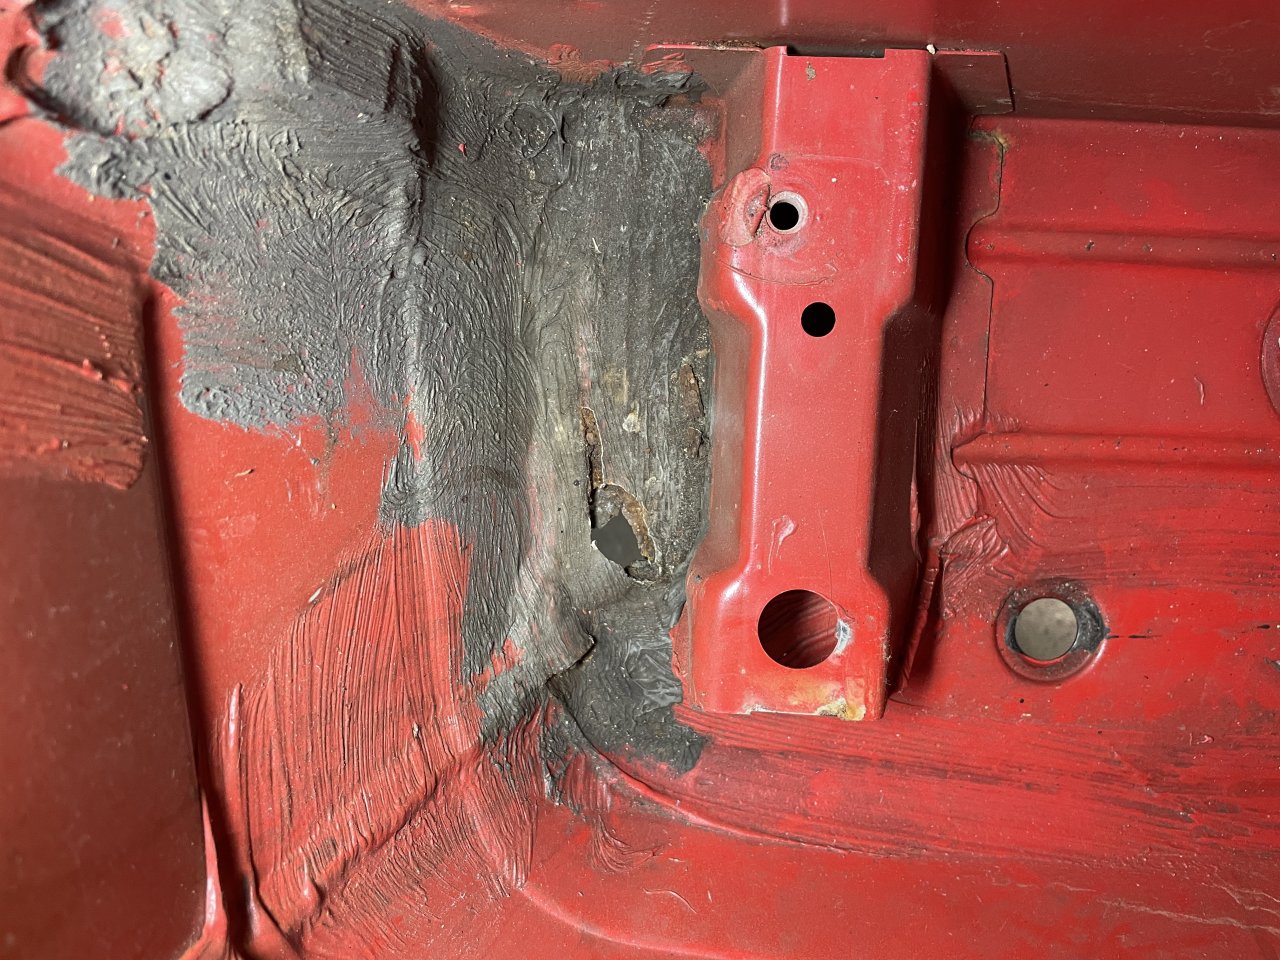
With the sunroof stuff out, I got a look at the back of the tray too. The passenger side shows that the cancer is getting a foothold there as well. The thing is that swapping in a clean used carrier is really getting well beyond the scope of my time and money limits for this project. There's not much that can be done back there without removing the tray, and there are zero signs inside the car that the rust has progressed much, so I am OK with leaving it and ensuring that the car spends as little time as possible exposed to falling water. I did snake-out the 4 drain tubes, and all 4 were clear, so whatever caused these issues was not due to plugged drains. The sunroof panel's seal was also a good tight fit with the roof, so I am really not sure how this was happening. Then again, 30 years is a long time and a lot can happen.
Also, the rust-looking stuff up on the roof in front of the drain hole is just overspray from when BMW was gluing the foam panels up. I definitely had a near heart-attack when I first saw dark brown spots all over up there!
So that is where things are at now. I am sort of bummed out about the roof, and I am hoping that there is still a "right" way to make a repair without getting into donor-roof territory. We'll see I suppose.Leave a comment:
-
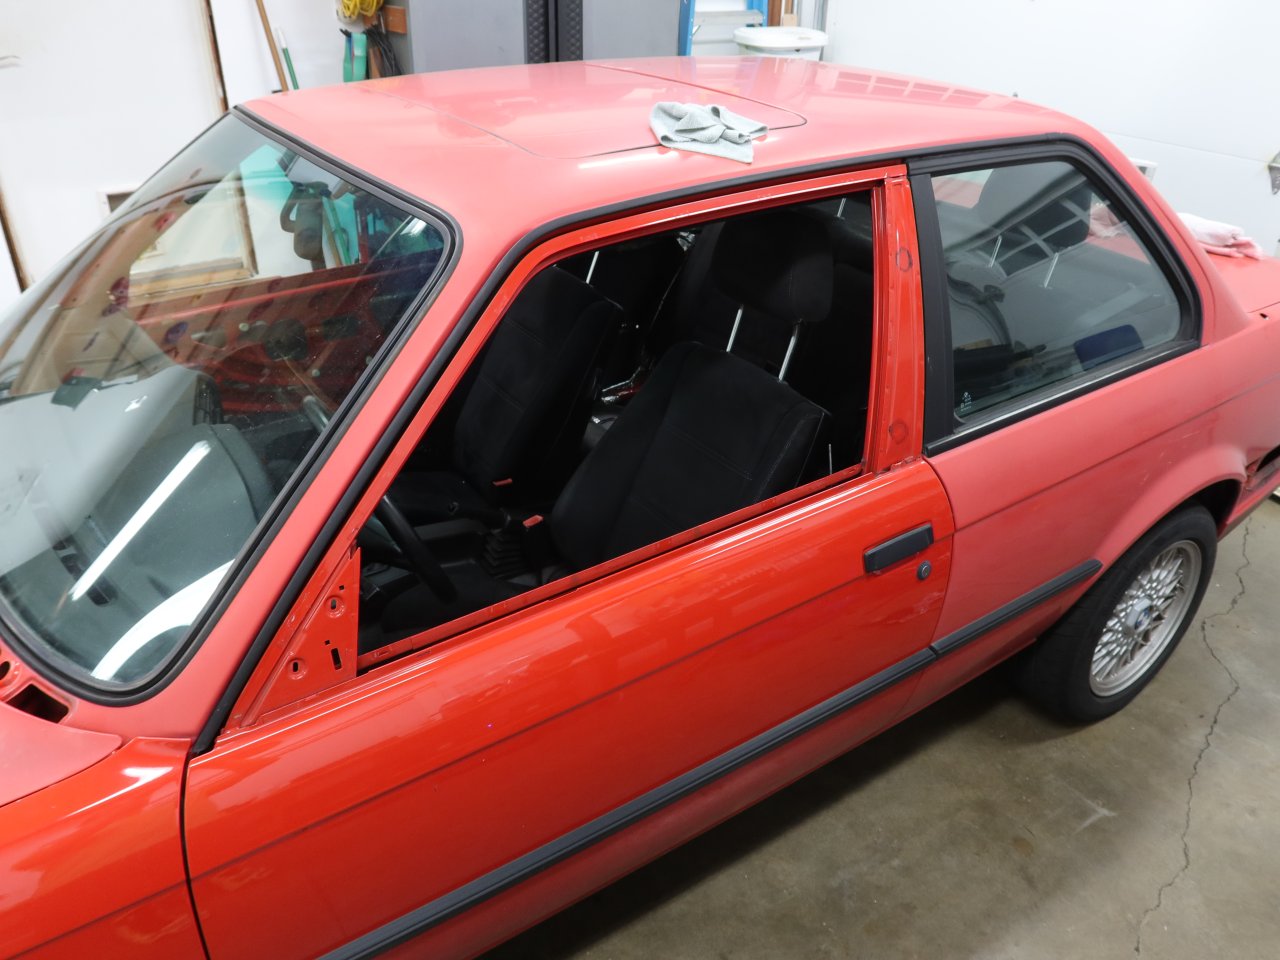
The last few days have been busy, but I have had some time here and there to make progress. The car is fully disassembled now, or at least as disassembled as I need it to be before delivery to the body shop.

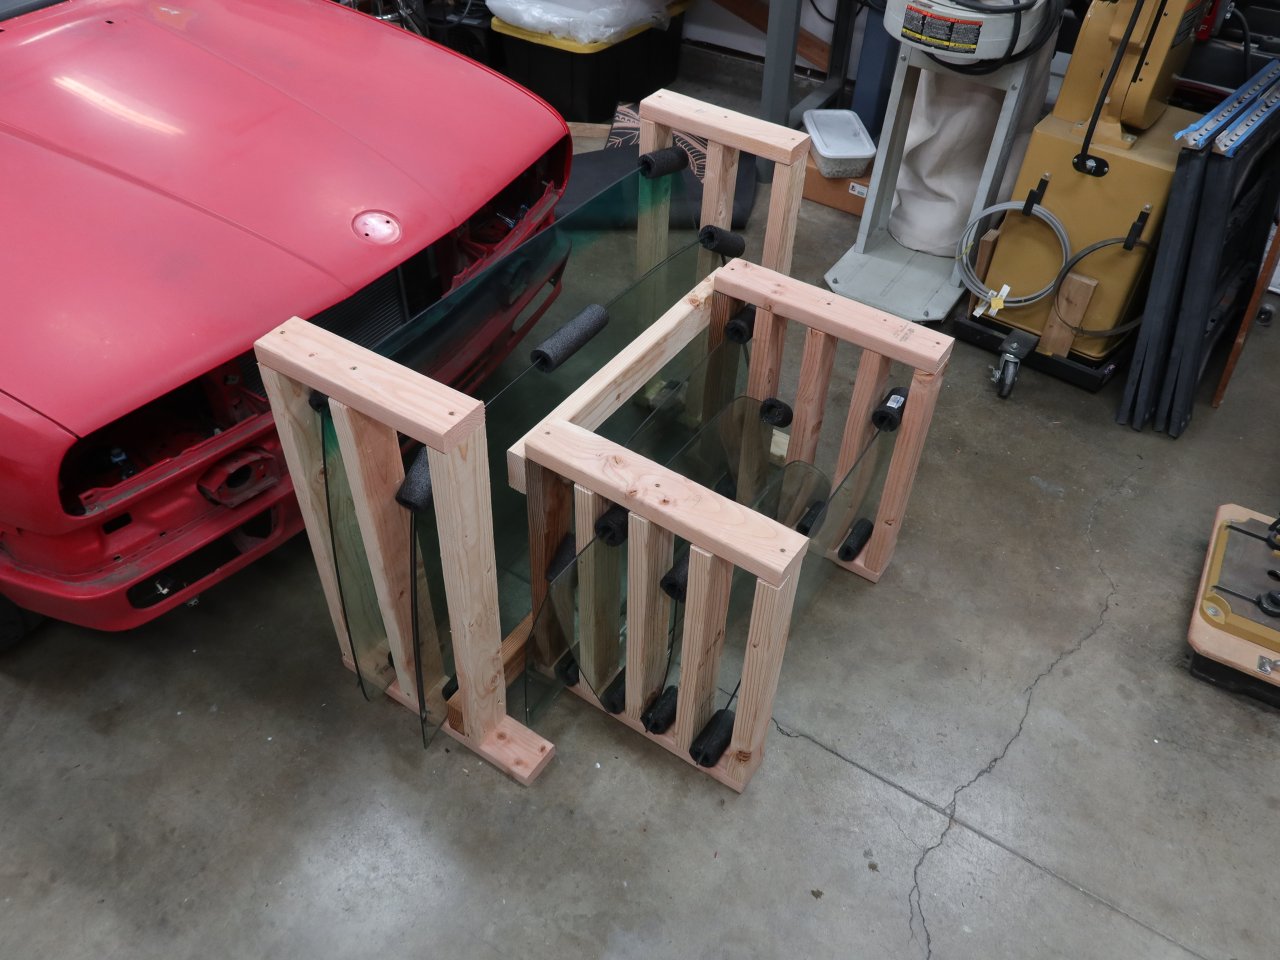
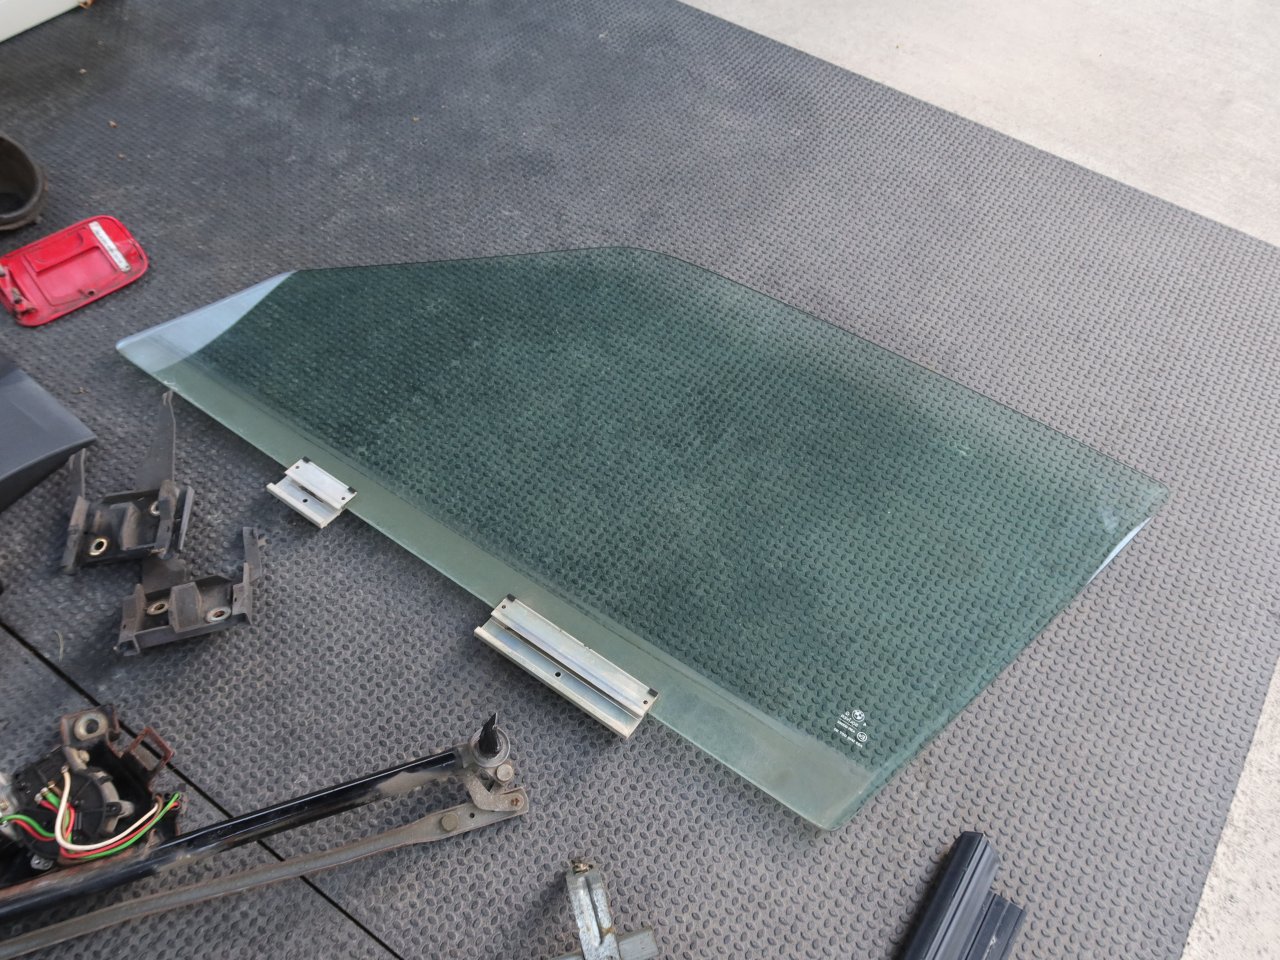
I made a little temporary rack for the glass out of some 2x4's and extra pipe insulation. While it is out I will give it a good cleaning.
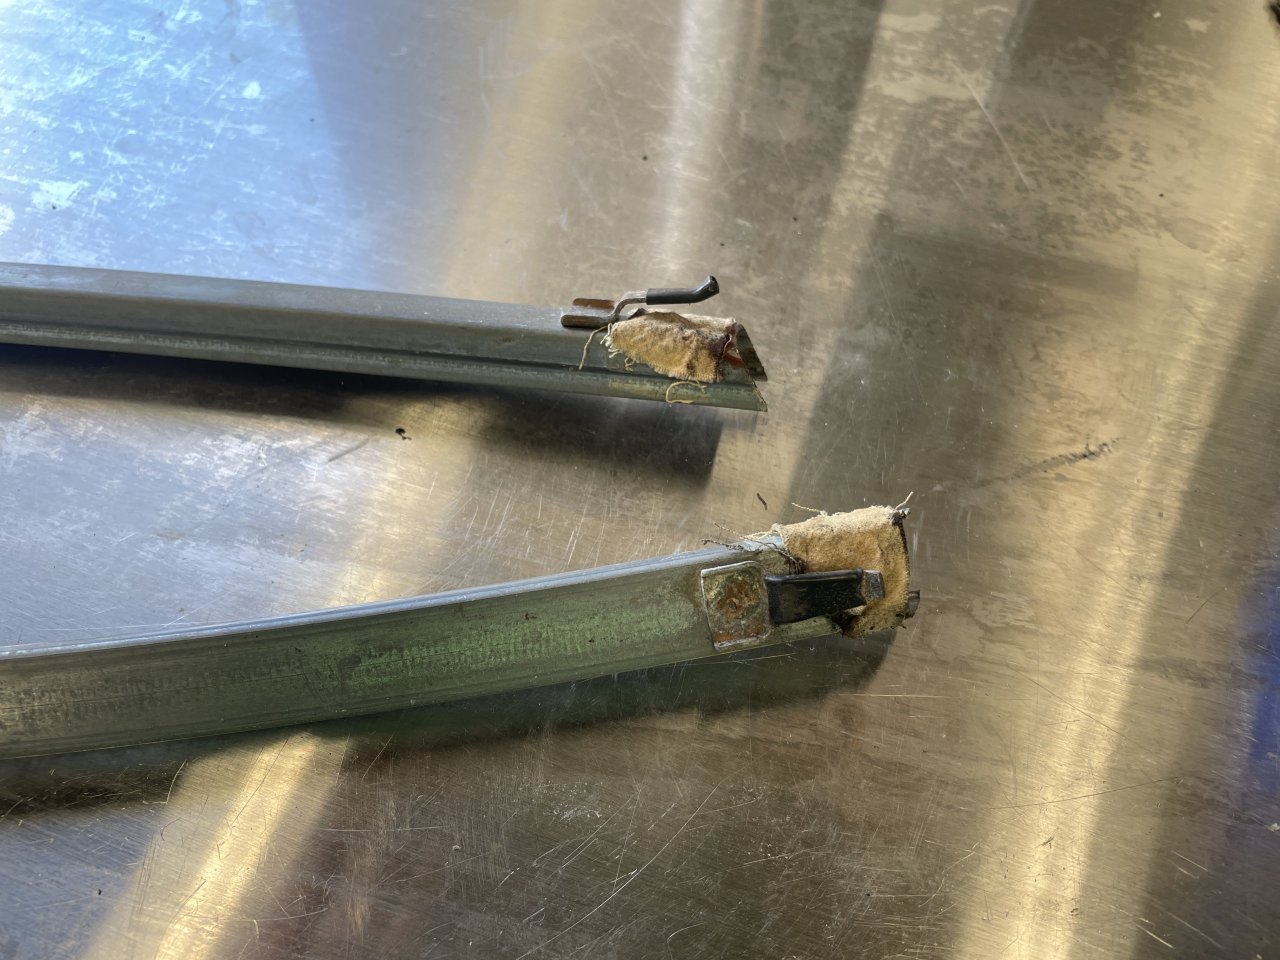
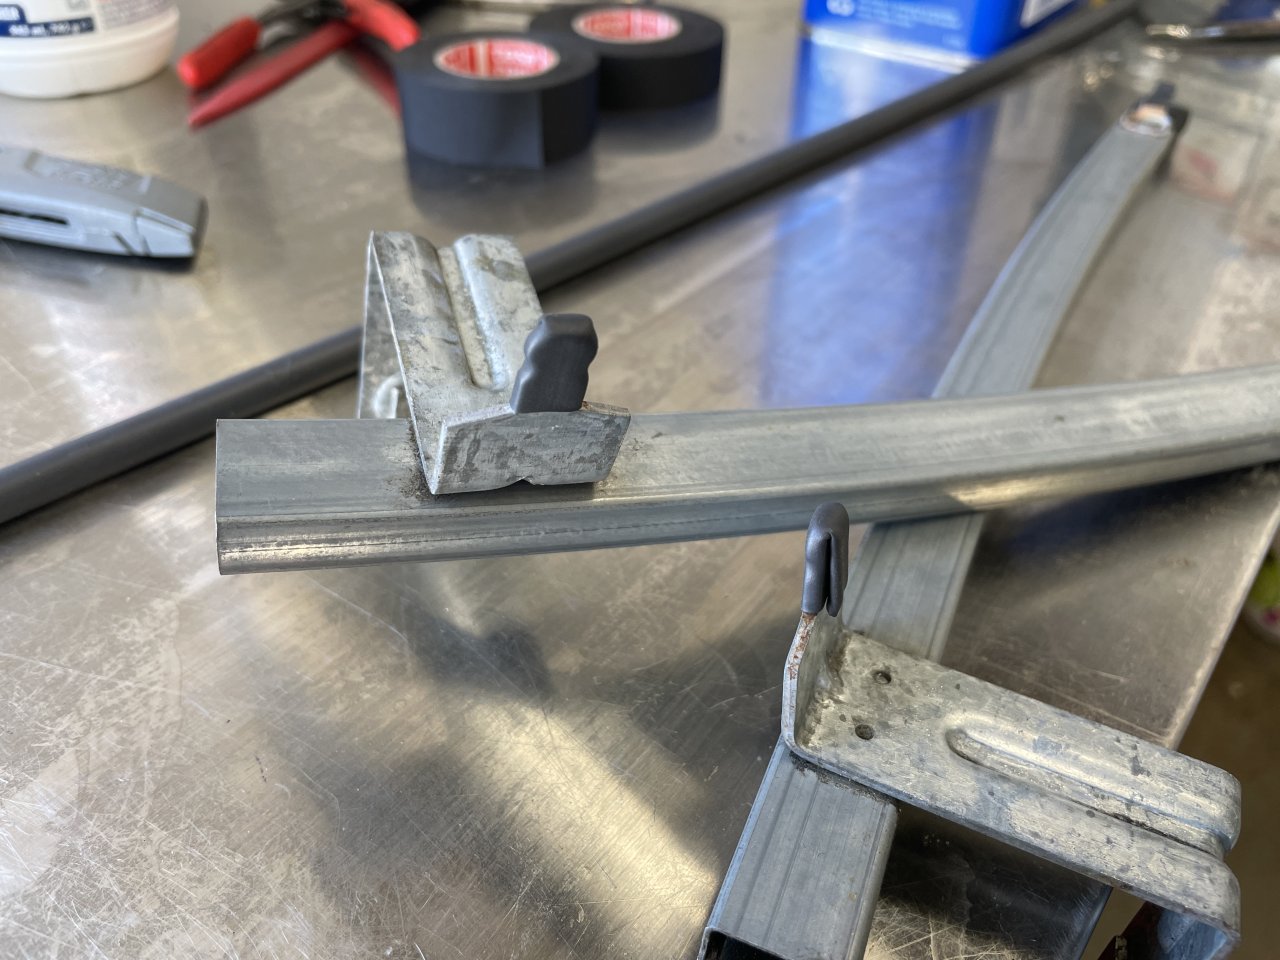
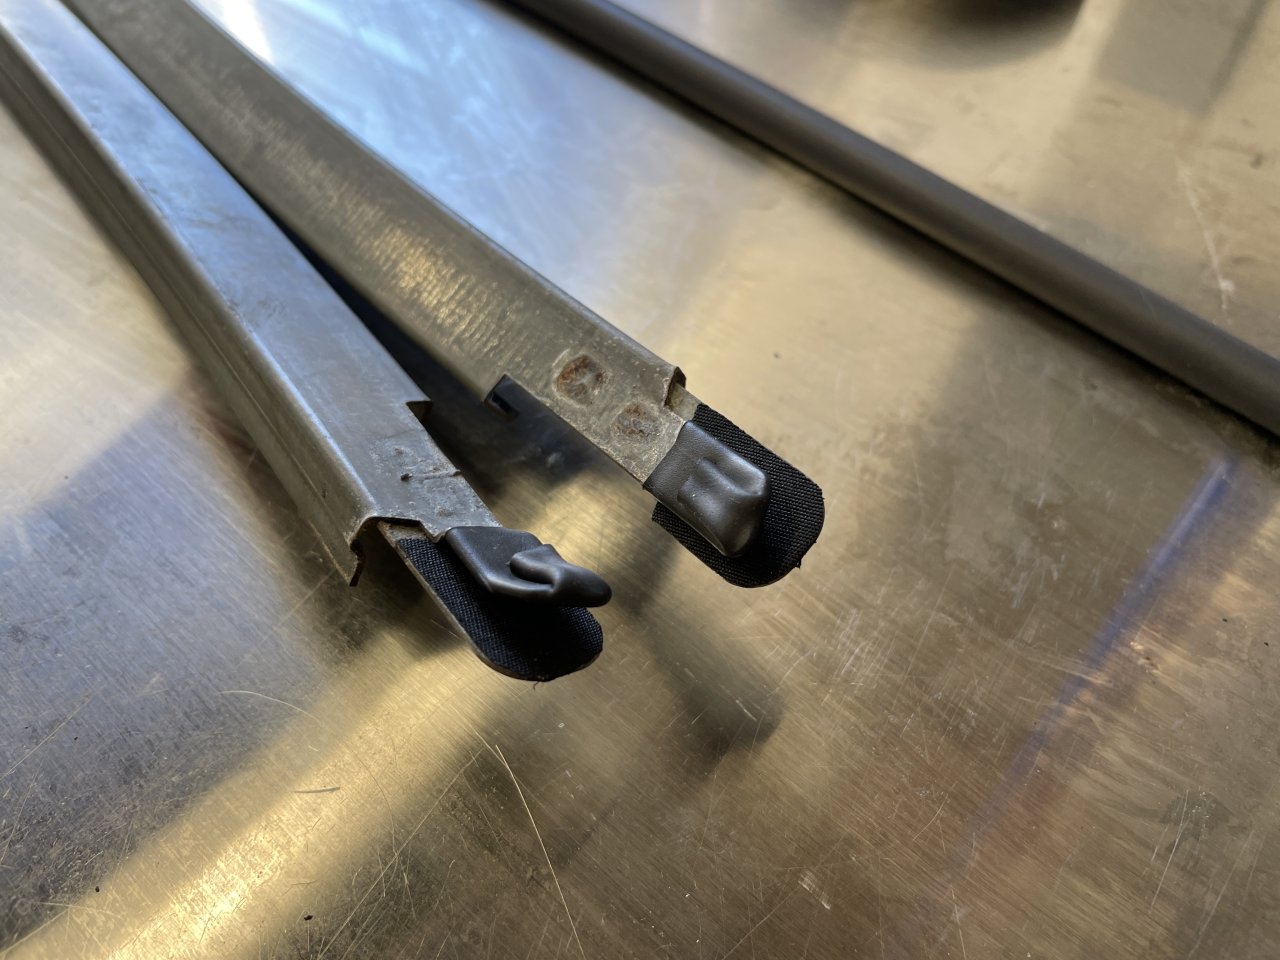
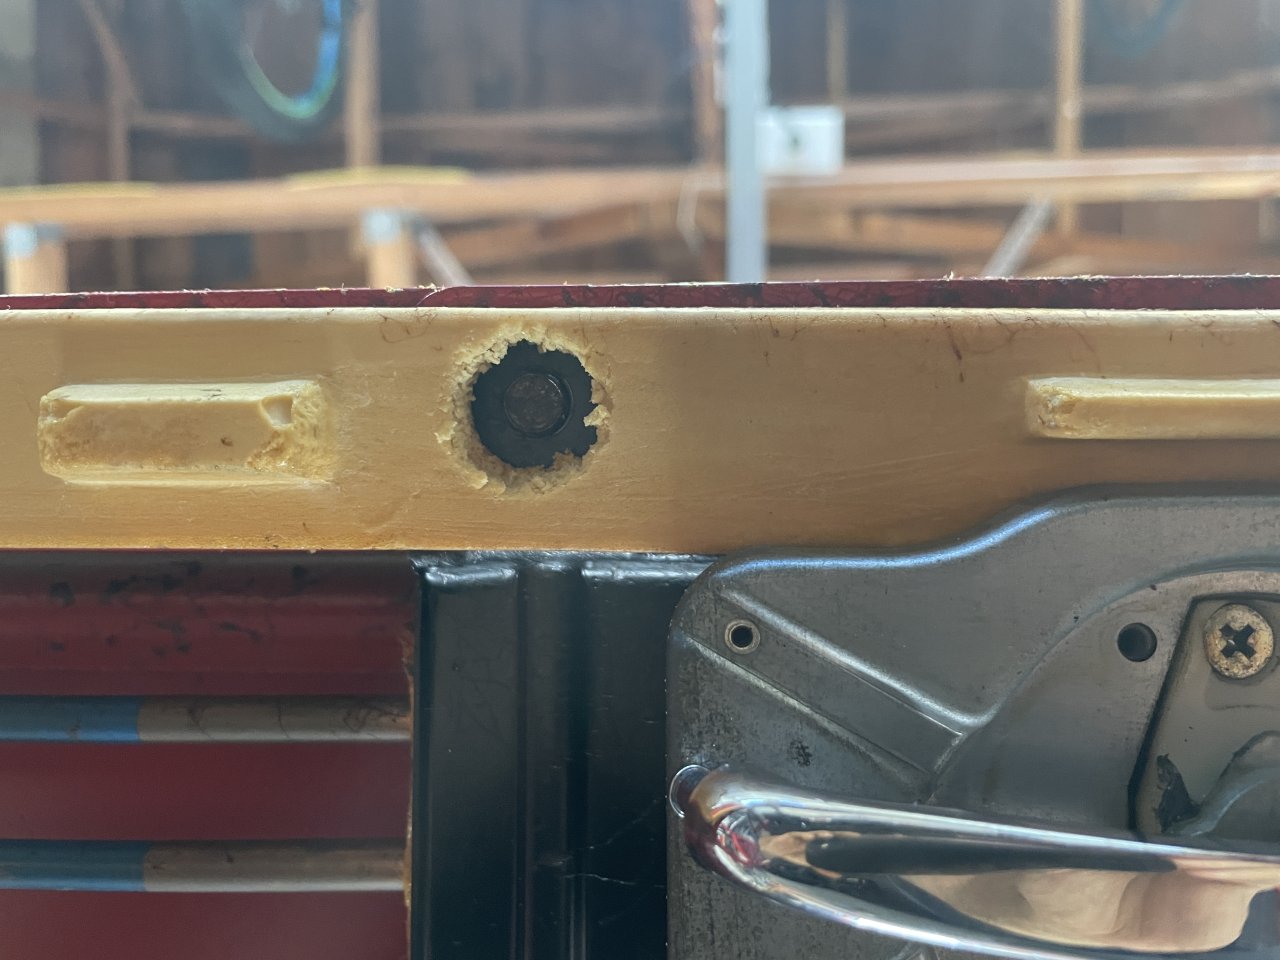
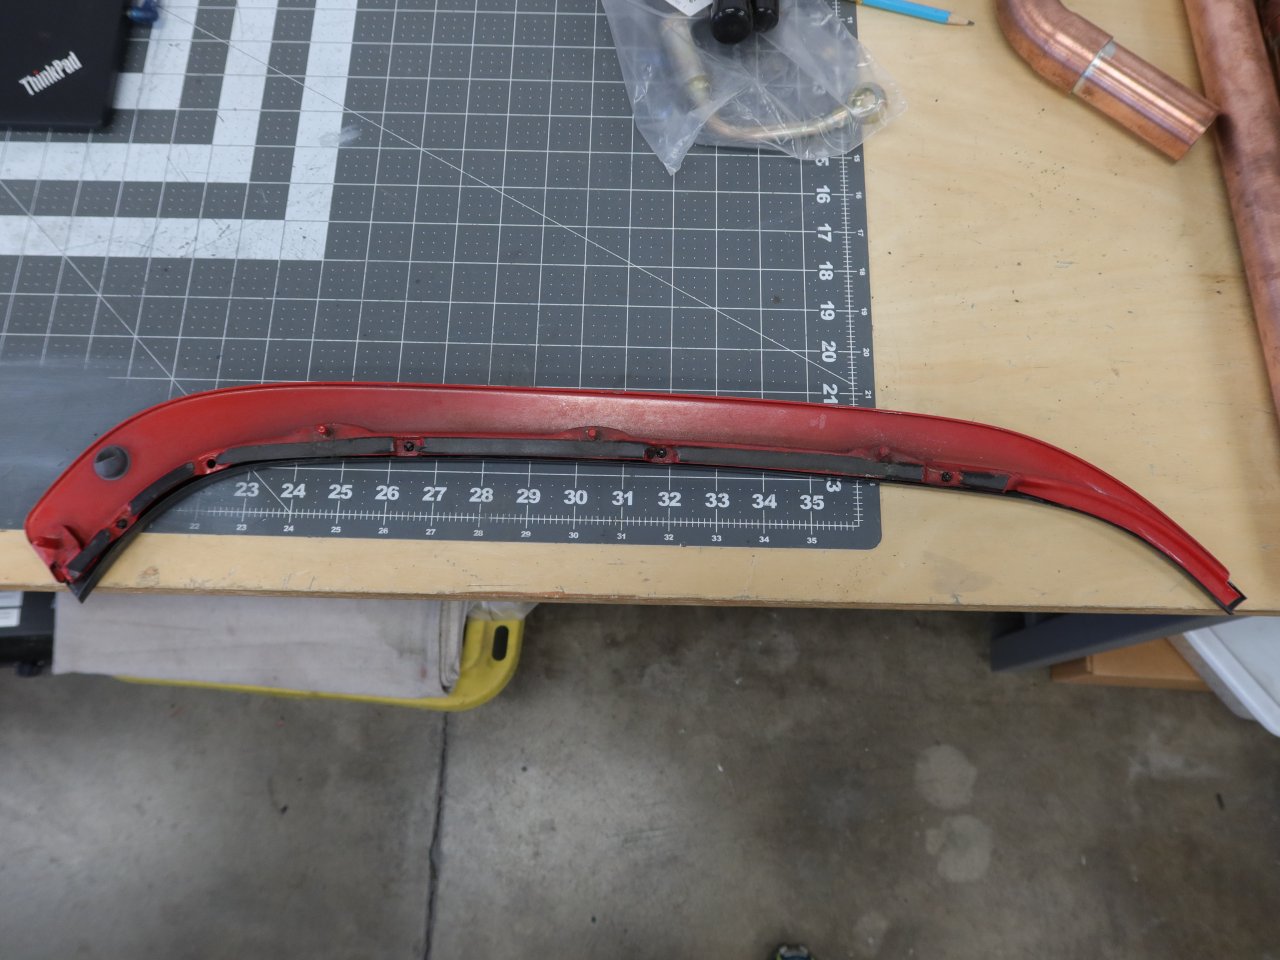
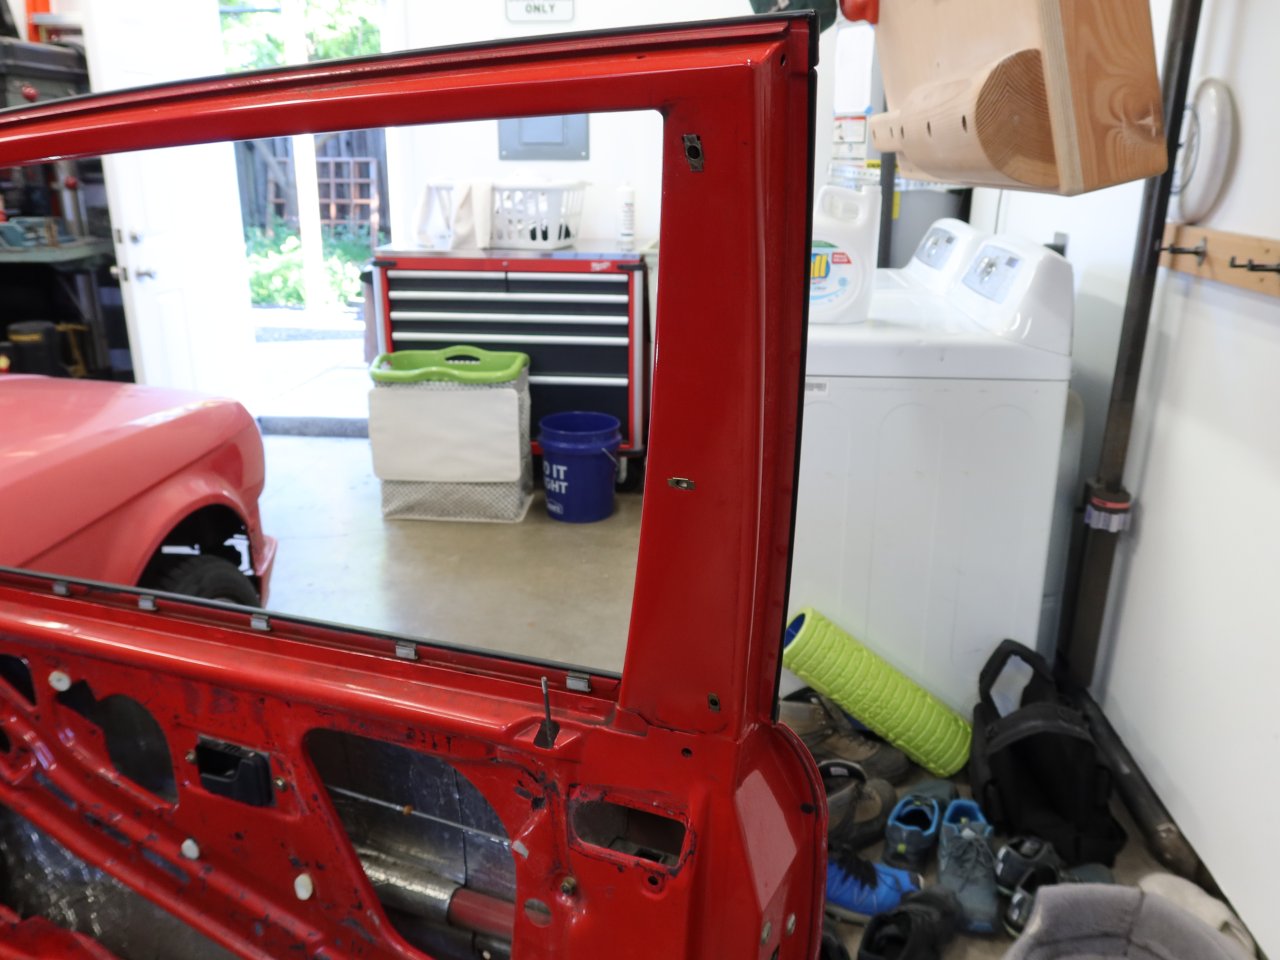
Does anyone know where to get the little goo-filled rubber pad thing that is on the left side of the trim piece in the image? These were getting pretty old and starting to leak. Maybe I missed them in RealOEM, but I did not find them there.
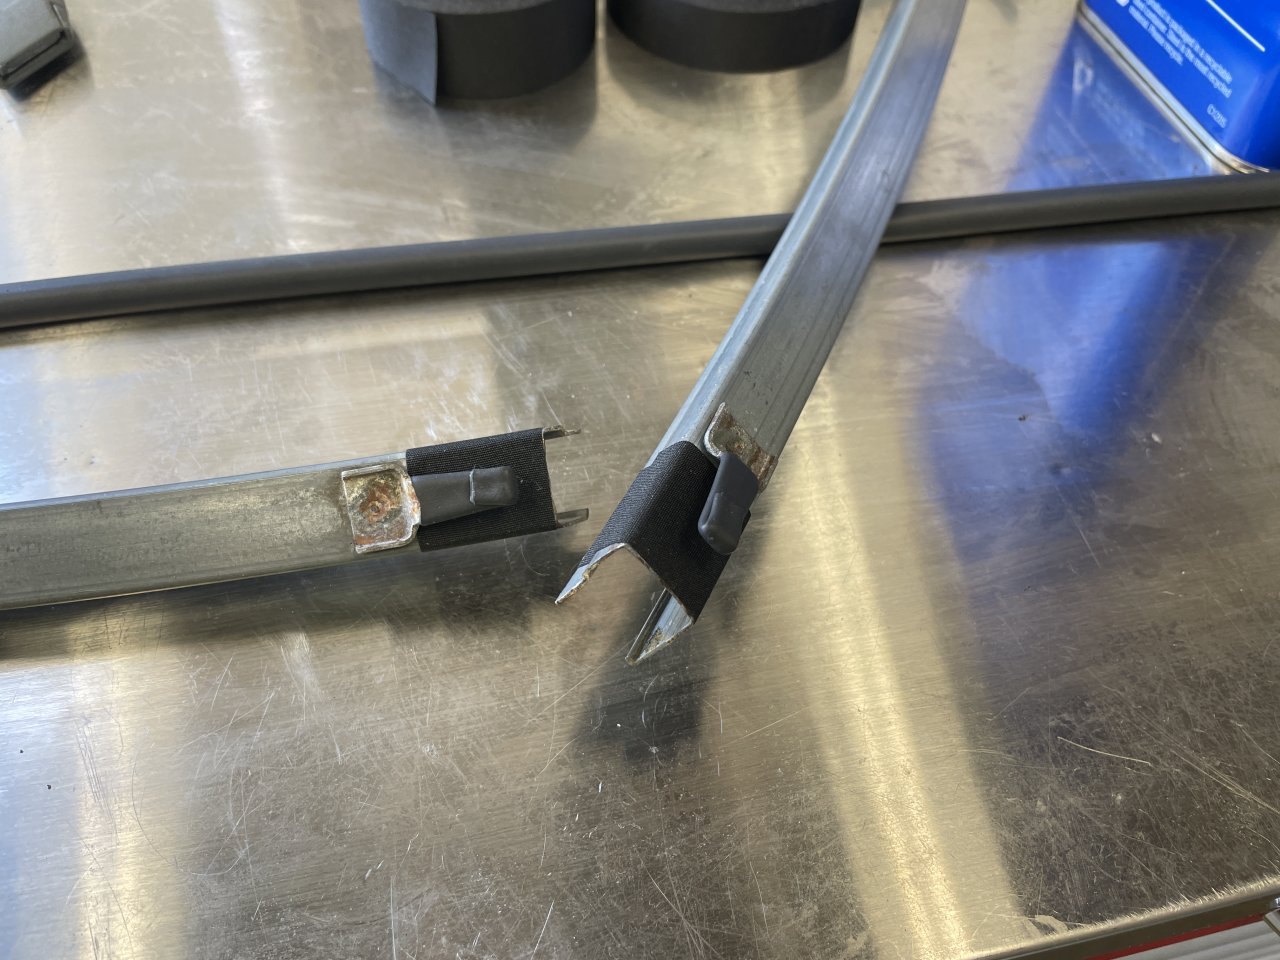
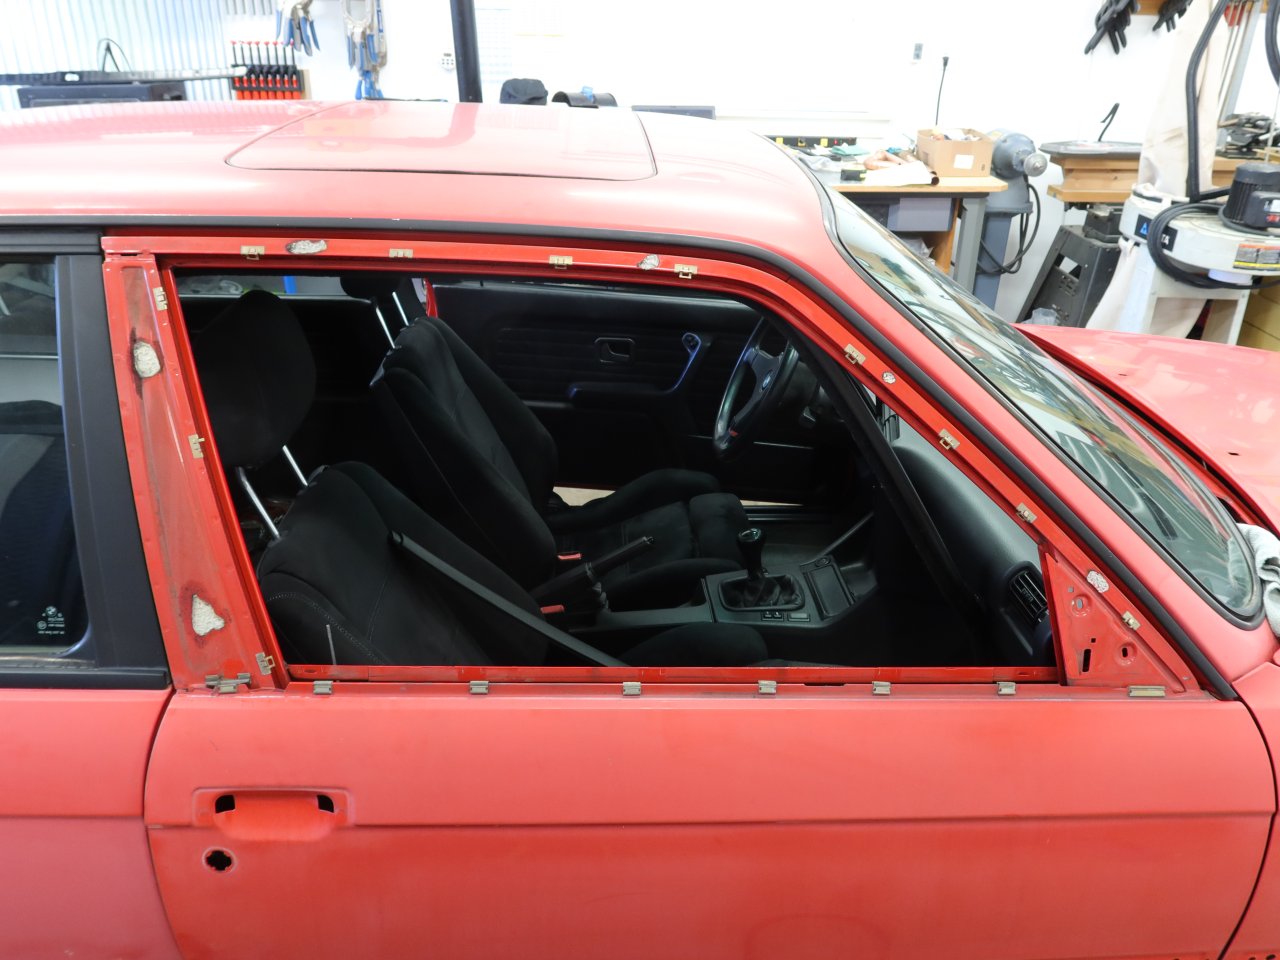
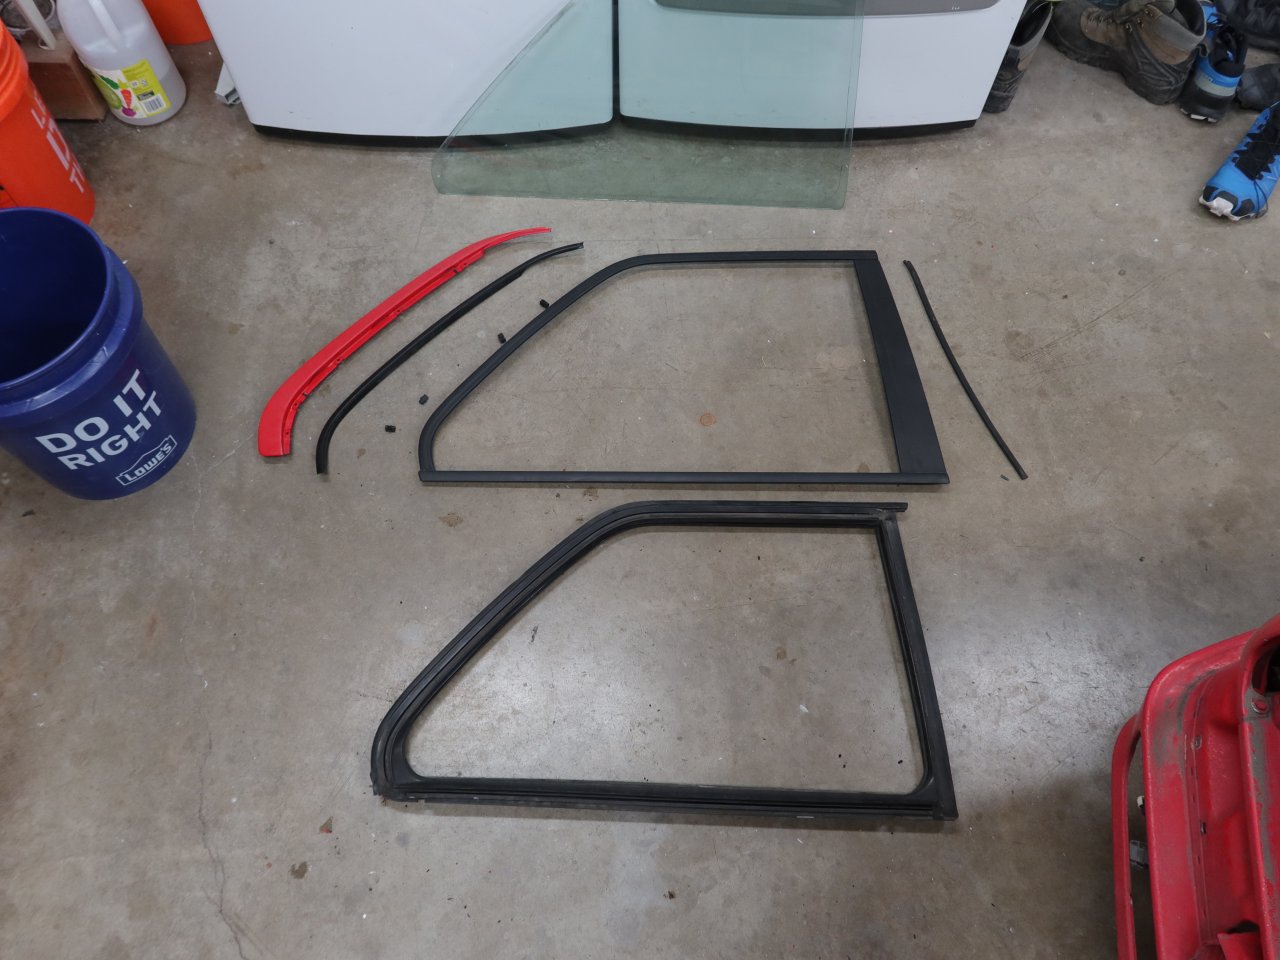
One thing that I decided to do was to disassemble the trim for the rear side windows. It will make painting easier and ensure that there are no funny lines or gaps. On top of that, a couple of the thinner spots got slightly bent during removal, and I have been able to straighten them out very well with the parts separated. The flat flanges in the thinner parts where the pop rivets go were the trouble spots, and some careful squishing with a C-clamp flattened them right out. The holes are sized for 3mm rivets, and 1/8" size ones seem to fit as well. Length-wise, I think that they need to be 3mm or shorter to actually work. So, somewhat TBD there, more to come.
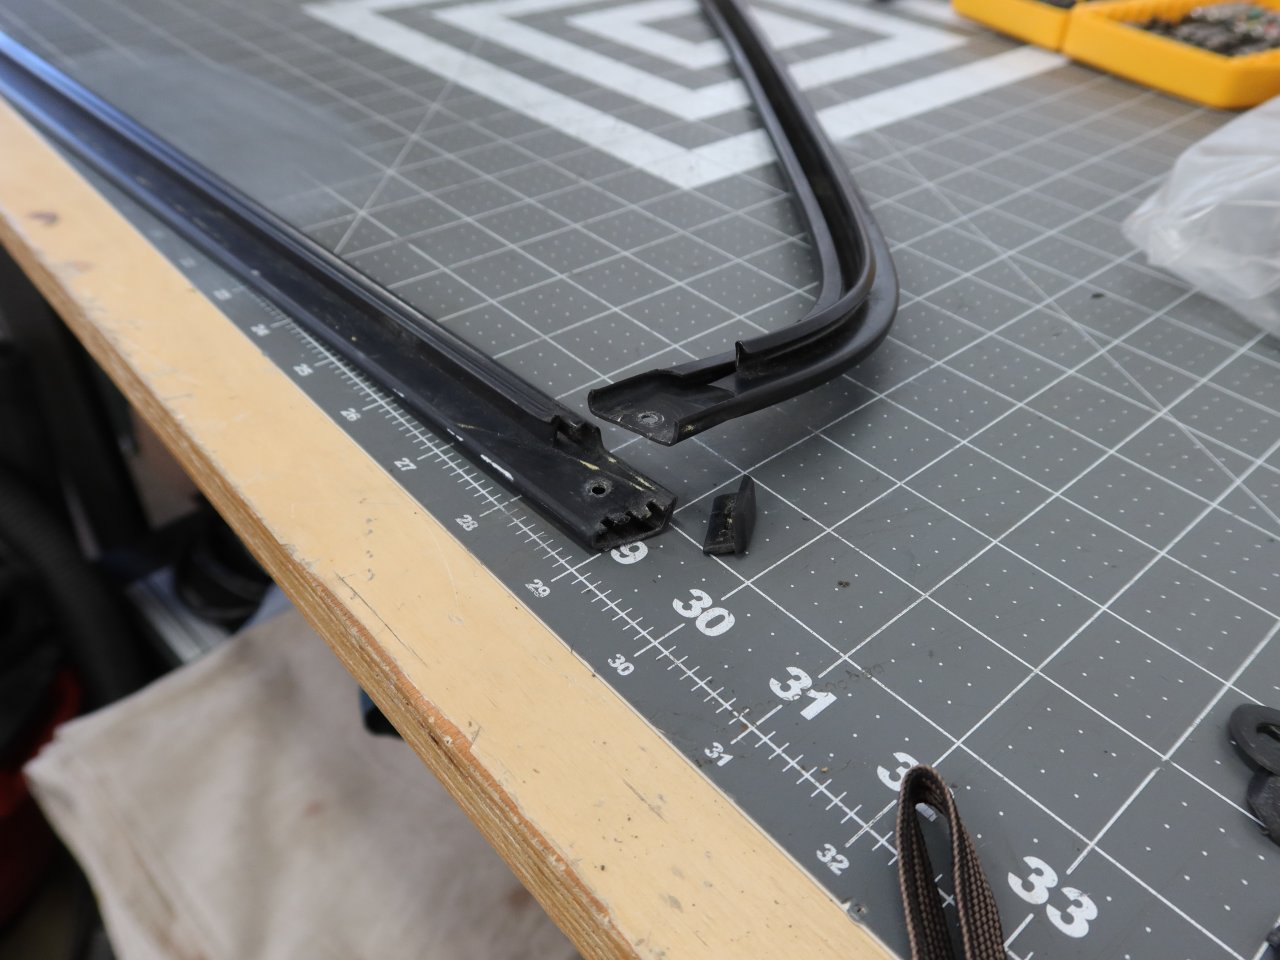
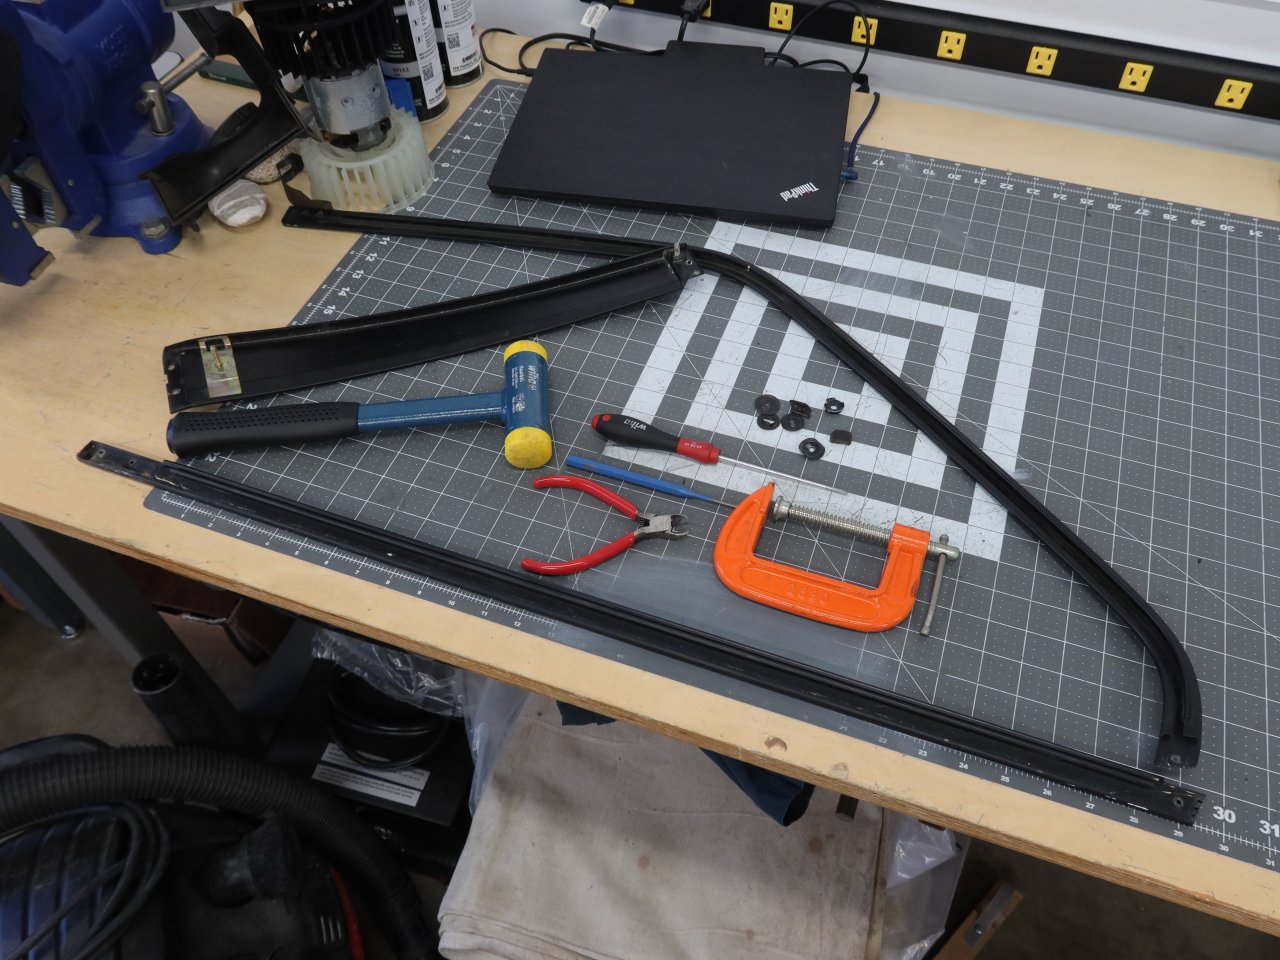
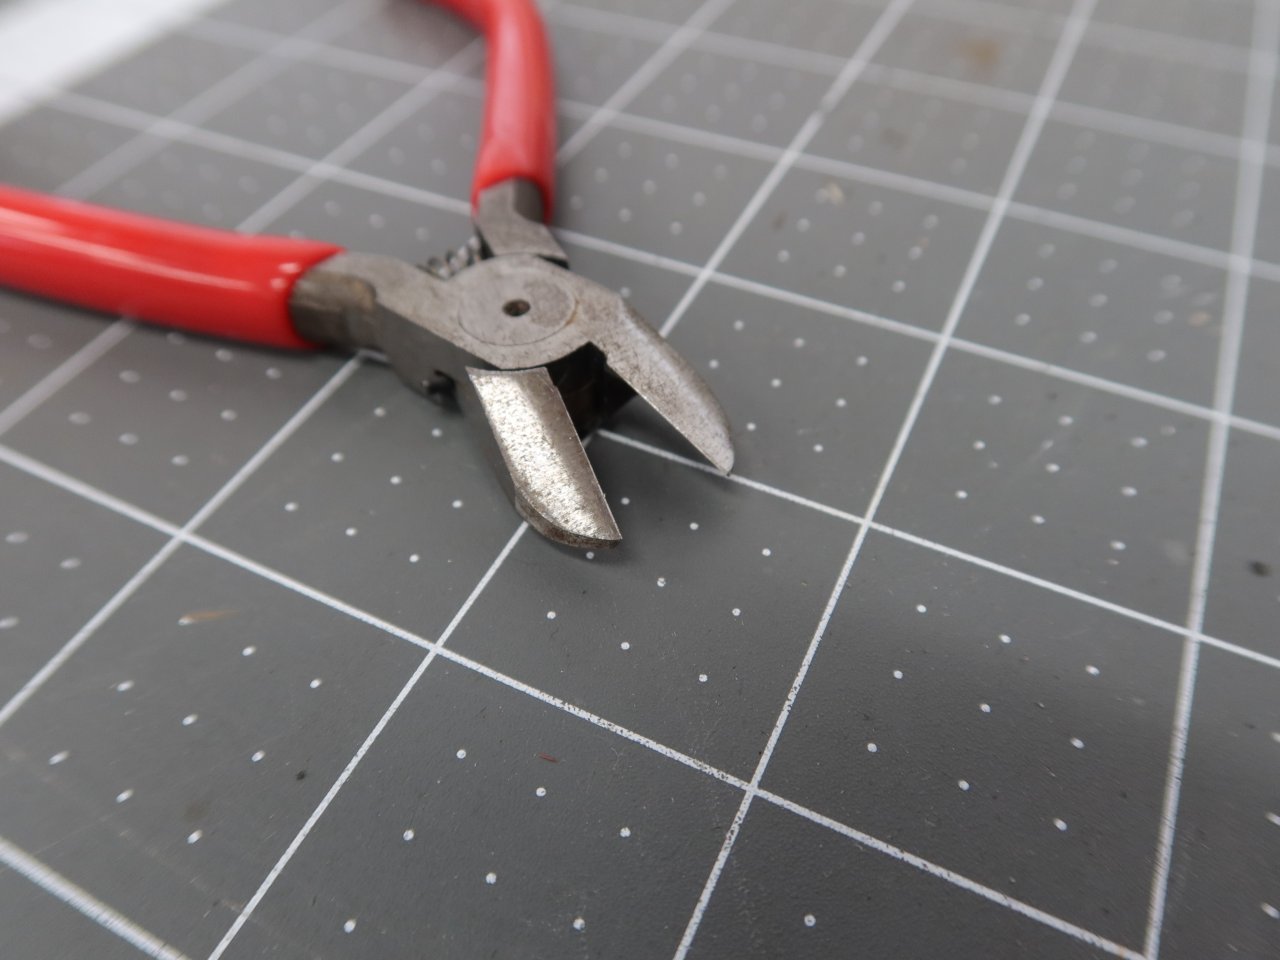
To get the old rivets off, since they were just aluminum, I used some flush cutters. Do not try to do this with normal diagonal cutters, it won't work. A couple of the old rivets were fairly corroded and almost fell off lol.
The sunroof came out, and I took the easily accessible moving parts out with it. The plastic and metal "gate" parts that the panel bolt on to developed some small cracks around the insert molded nuts. Nothing really problematic, but enough that I thought about replacing them. Holy crap, those things have become expensive! As much as I am trying to do a reasonable job of refreshing the car, I cannot justify the added expense at the moment, especially considering how bad the design is. They are still perfectly functional and only really cracked superficially, so I am probably going to 3D scan them and have some SLS Nylon ones printed which can take the metal parts from the originals. Anyway, there is no rush there, and I guess that I can always "give up" and buy new ones if needed someday. Project costs have been increasing steadily as I make lists of more necessary items, some of which have more than doubled in price since the last time I replaced them.
The sunroof recess has some minor surface rust in a couple of spots at the front, and the body sealer/paint are starting to fail. I knocked off the nasty bits with a brush, and it looks like something that rust converter and new sealer/paint can handle. The new sunroof seal should also help in the future.
I noticed that the vinyl on the driver's side of the front headliner box for the check panel was starting to delaminate and shrink, so I temporarily stretched it back into place with some Gorilla tape. I will be sanding the chipboard substrate under the covering with some 60 grit, cleaning things with alcohol, and applying some upholstery adhesive to get it all back into place more permanently.
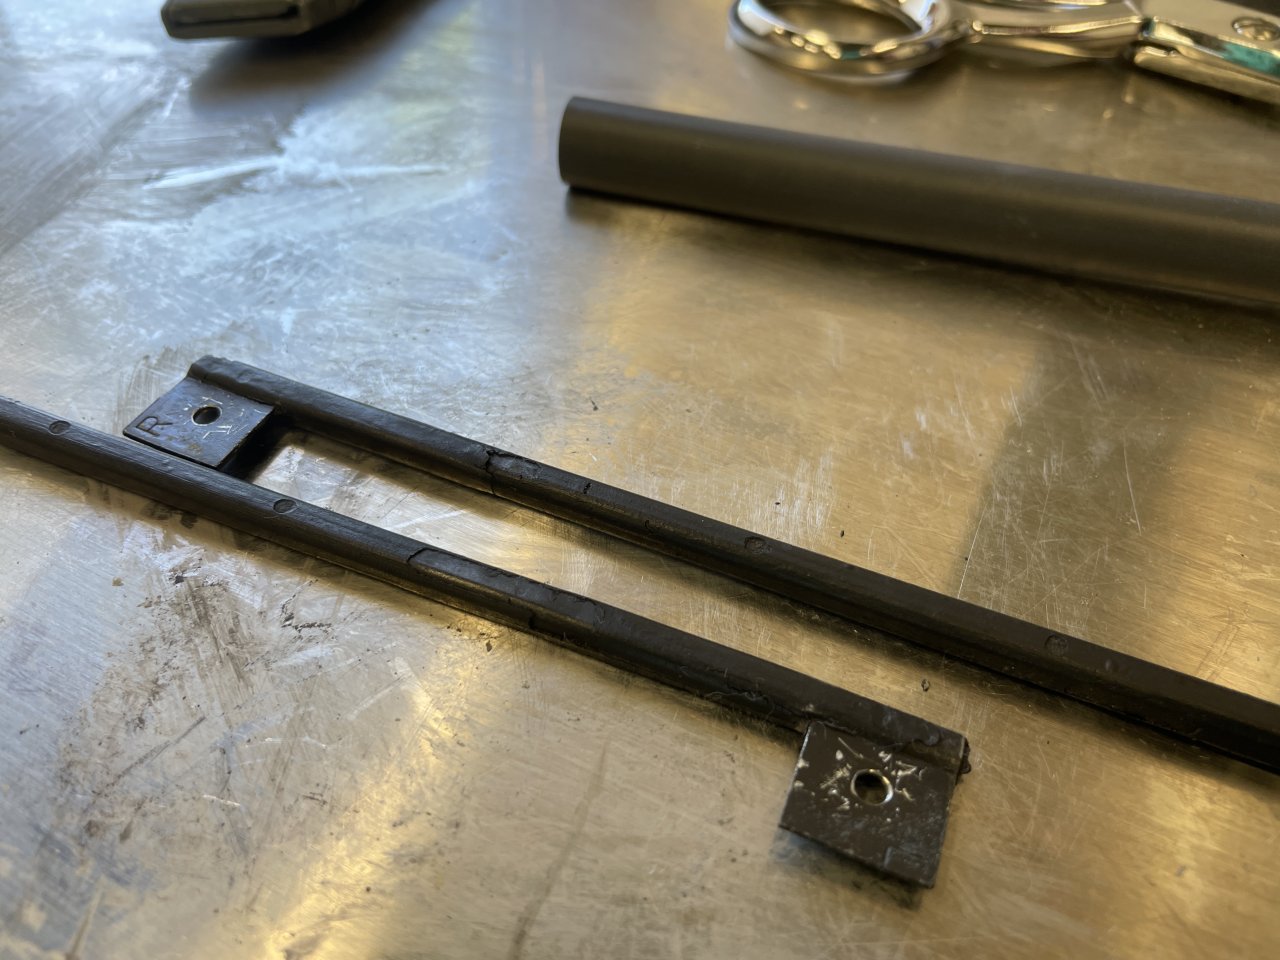
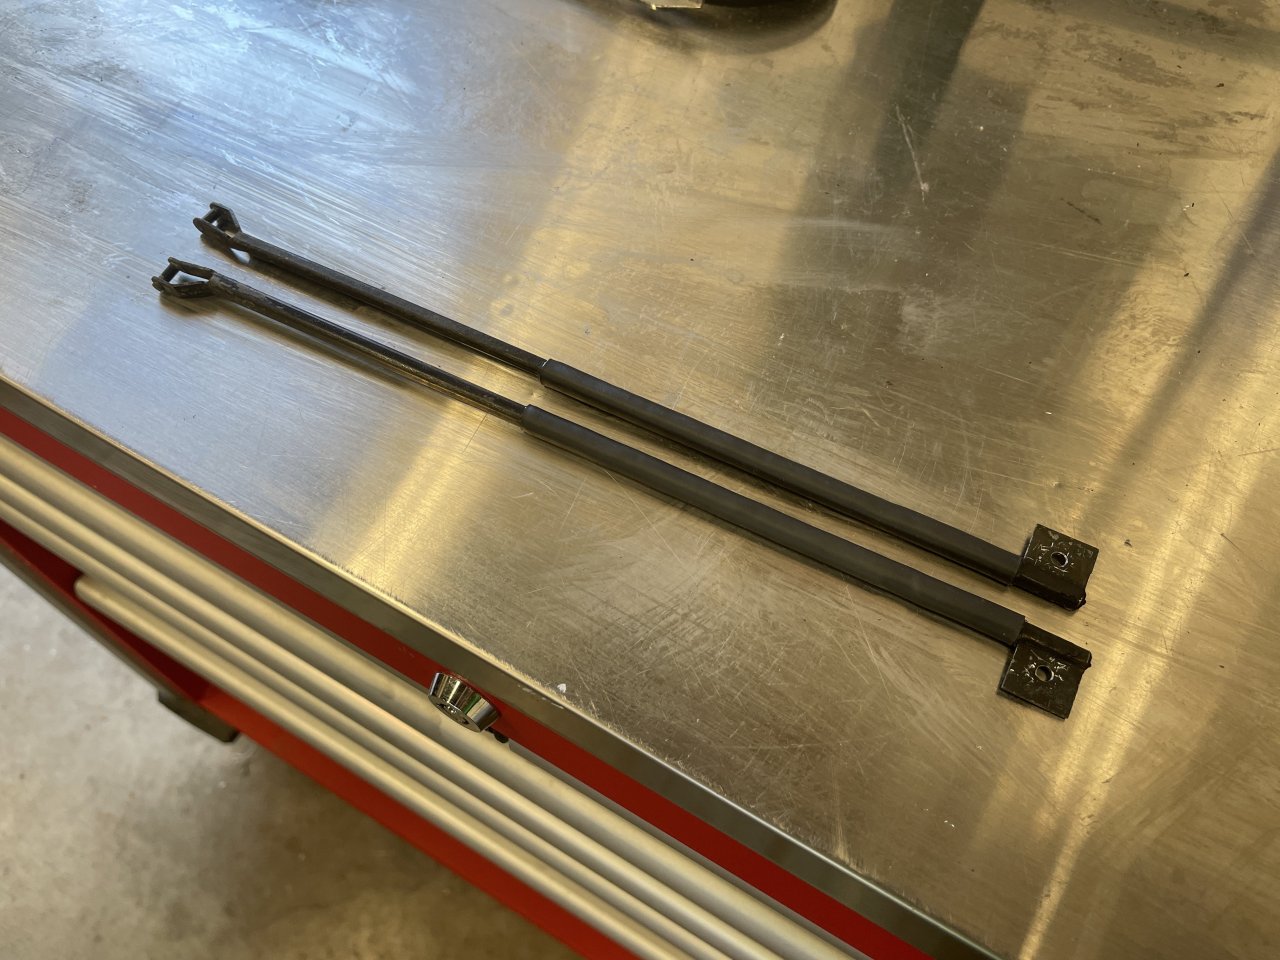
I did also take a closer look at the wiper arm linkage assembly. While I could drill out the rivets, disassemble it, and have the steel parts cleaned & re-powdercoated, I am just going to buy a new assembly. The price is a little high, but worth the peace of mind. The motor is a separate item, and even more expensive than the linkage. Being that I am looking to not waste money here, I gave the motor a quick inspection. The verdict is that it is in very good condition and perfectly usable with the new linkage. The plastic cover for it needs replacing as it developed a small hole, but the motor itself is perfectly reusable.
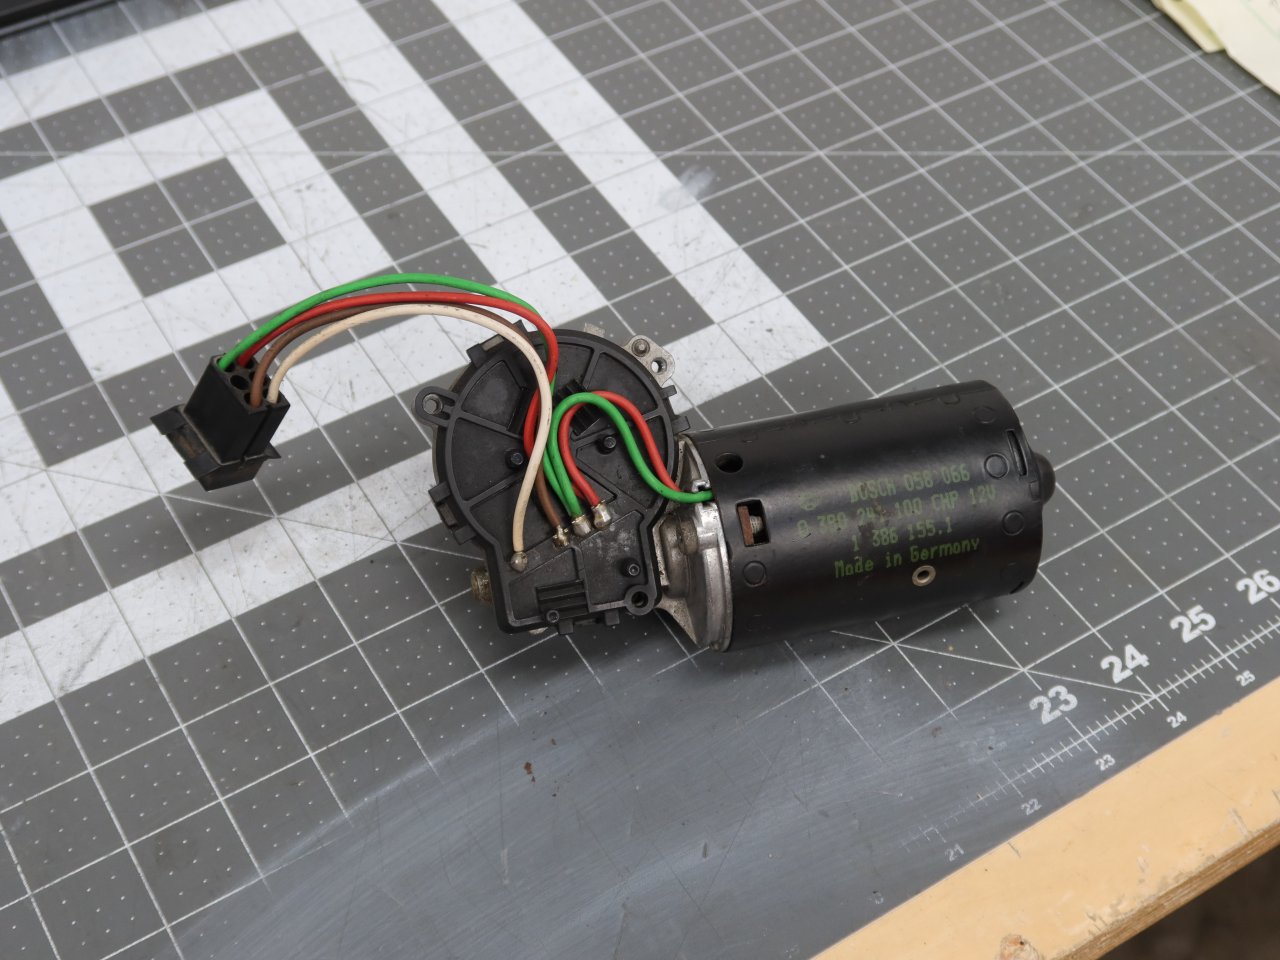
The wipers and track for the intermittent parking function were in fine shape.
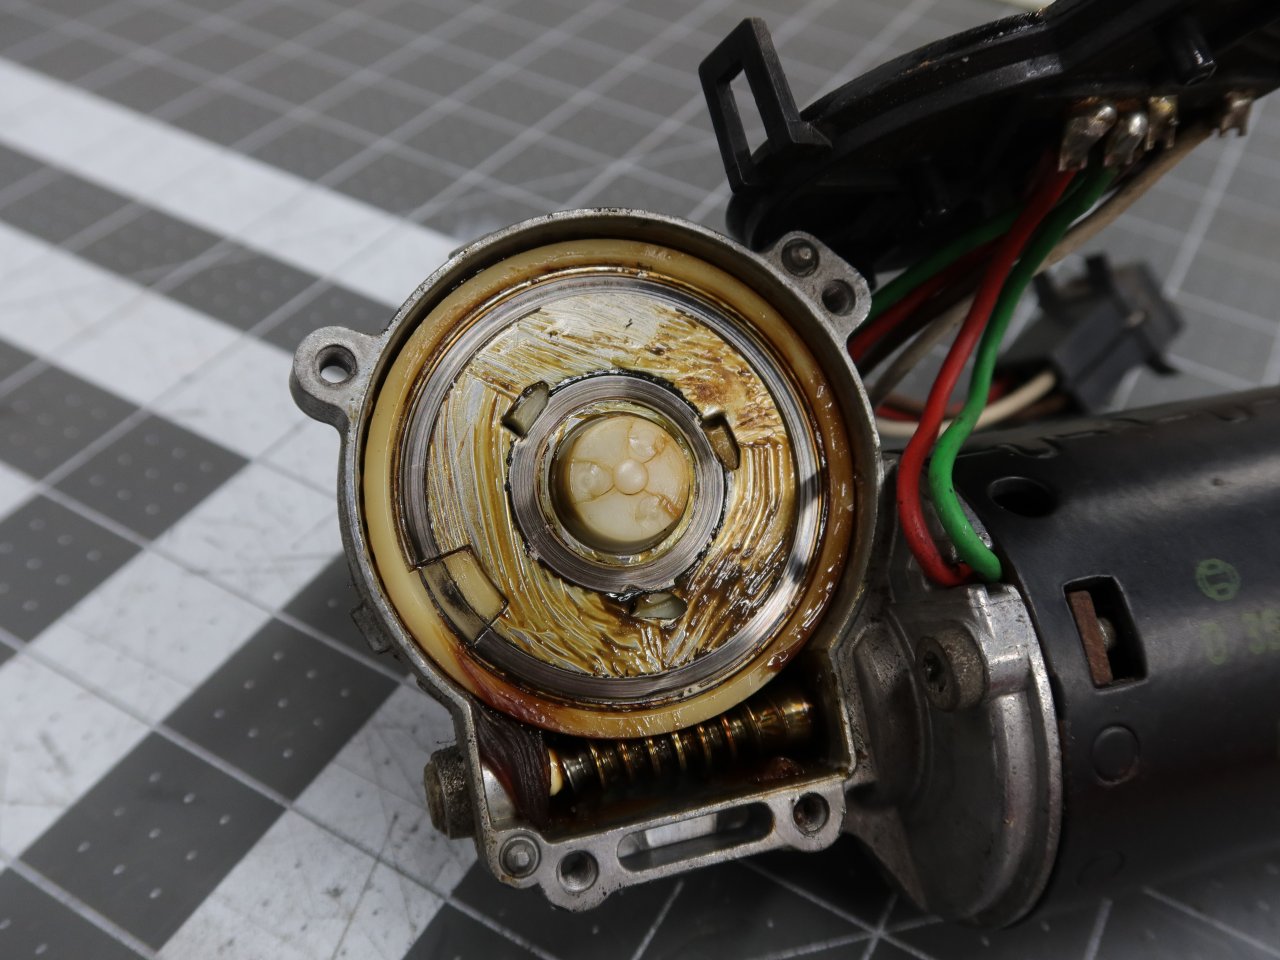
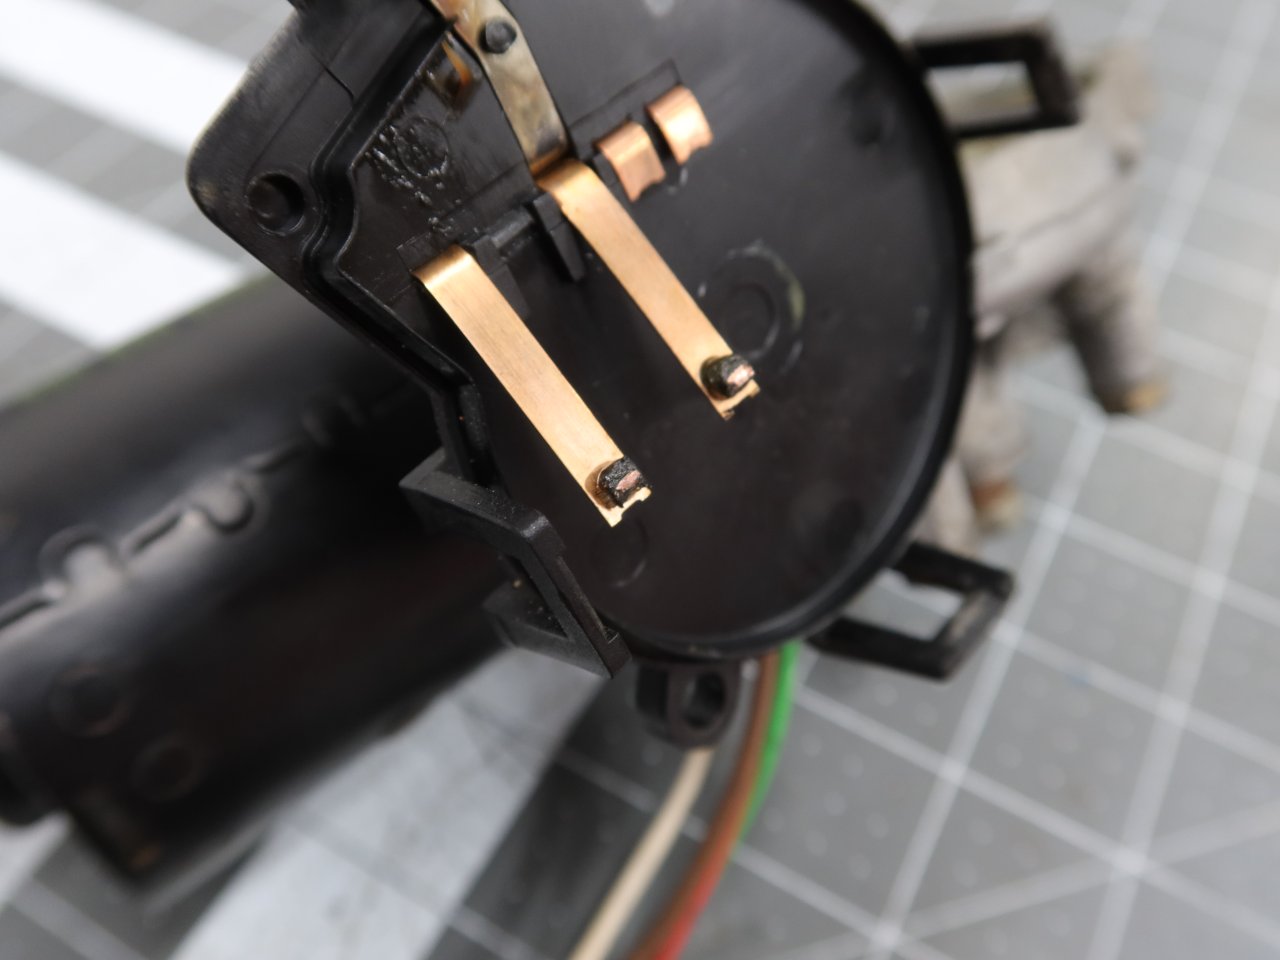
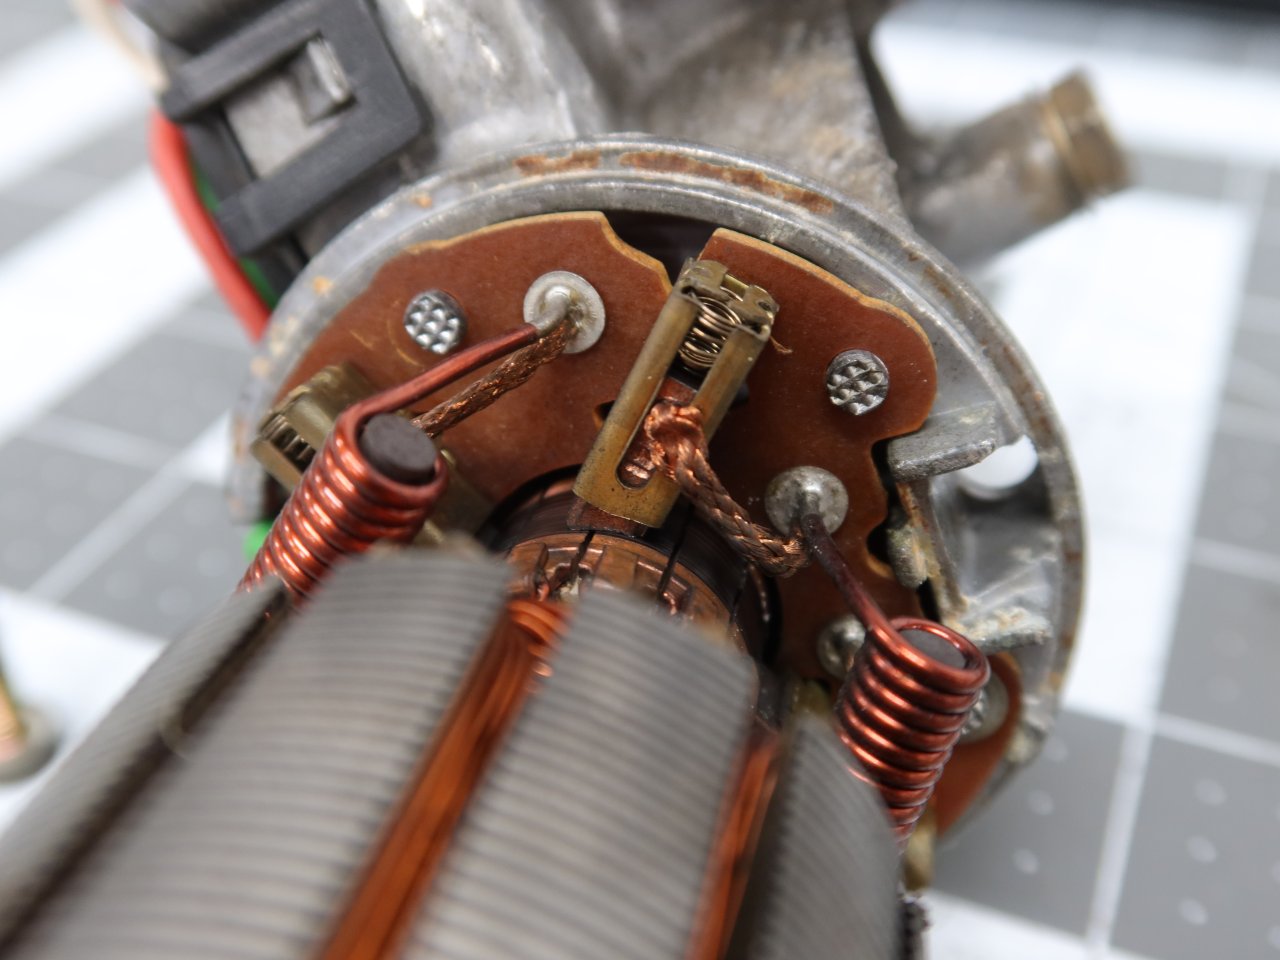
Getting the rotor and brushes out was very easy. Just grab the little lock nuts with some needle nosed pliers so that they do not fall in when you remove the screws (T25 heads), and it comes right apart.
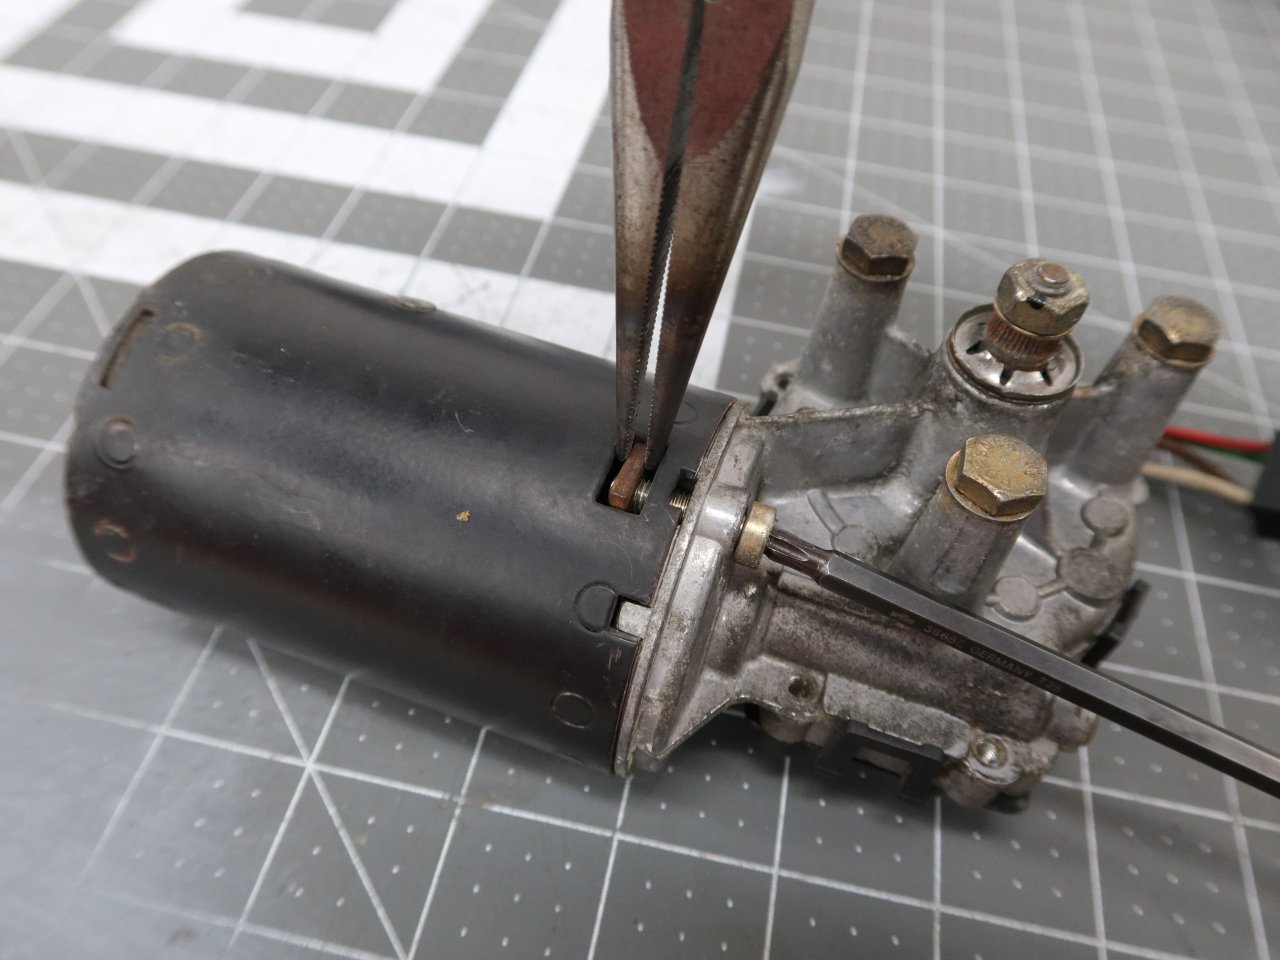
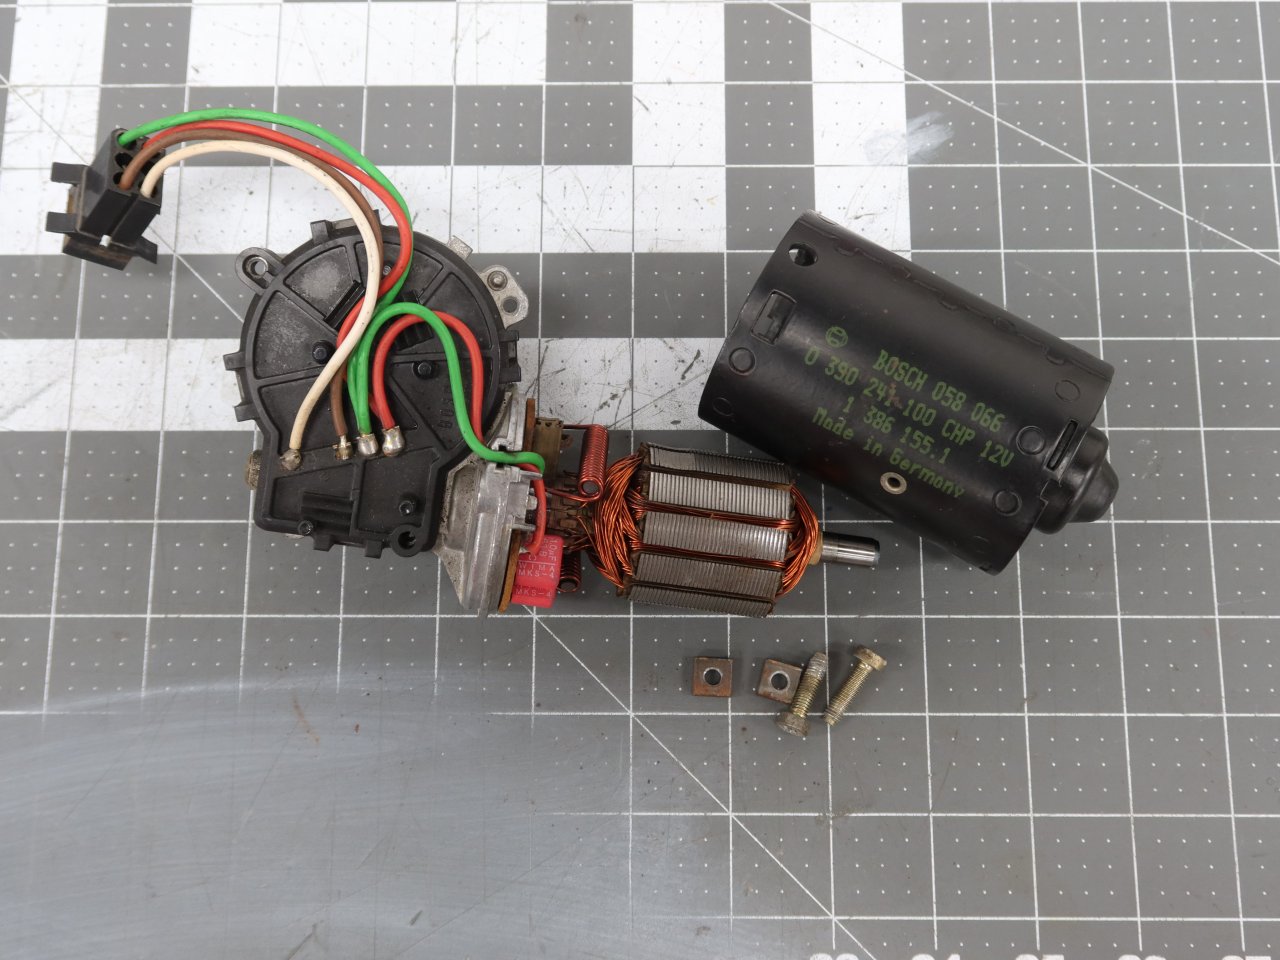
Brushes looked good and had plenty of life. I guess that is one "advantage" of living somewhere that has been in a varying state of drought for the last decade or more...the wiper motor is rarely used!
The old linkage...salvageable, but I don't have the time or interest. Maybe I will rebuild it and sell it later on.

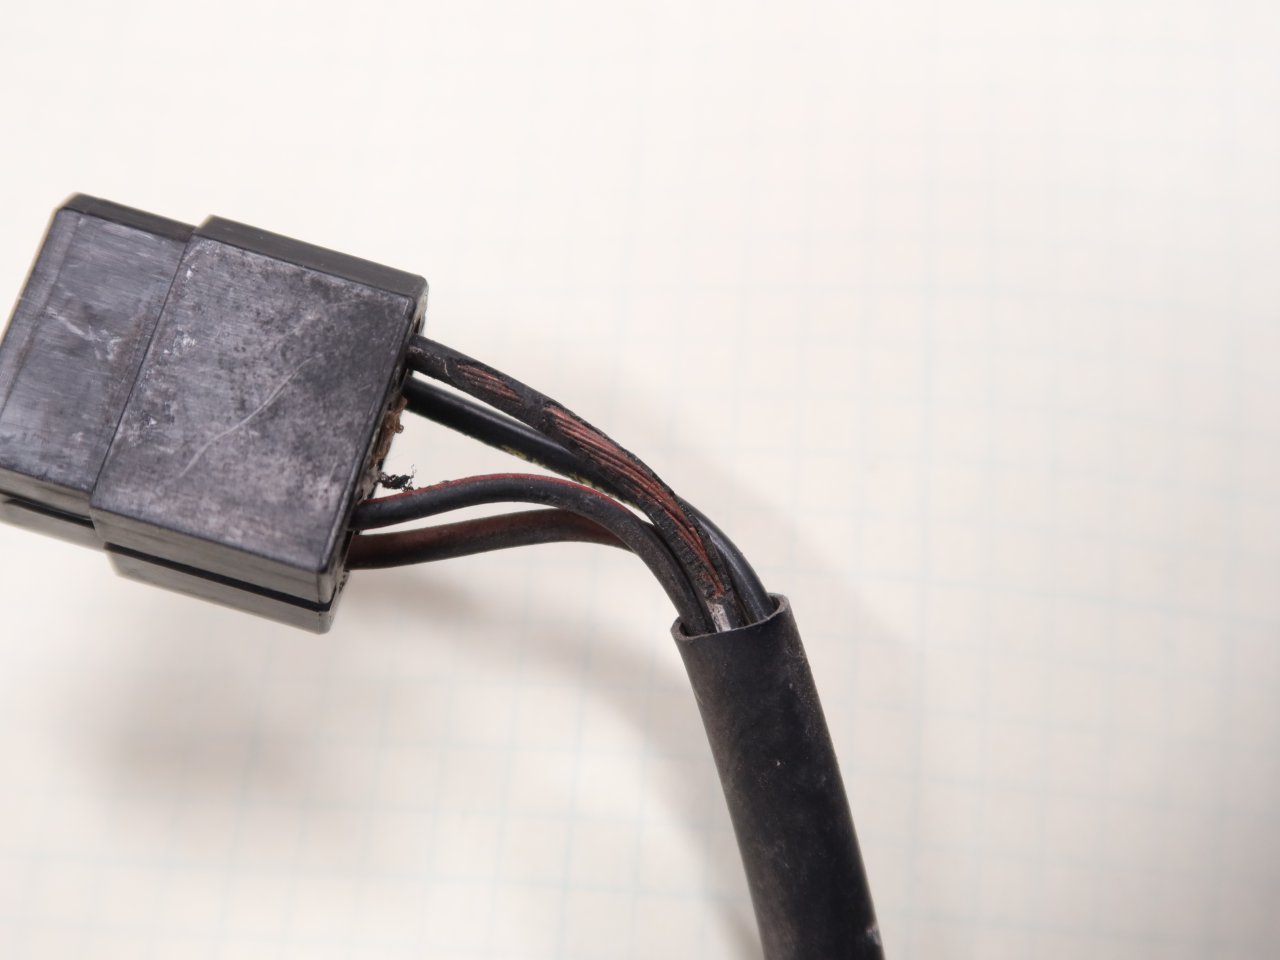
I tested out the motor on the car after cleaning and reassembling it. When I was doing that, I noticed that one of the wires on the (chassis side) harness had its insulation stripped off. I think that it was probably sticking up and rubbing on a linkage arm. Thankfully it does not look like the copper is damaged. I will use my terminal extraction tools to pop it out, clean it, and apply some Raychem DR-25 heat shrink tubing.
So that is where things are at as of this evening. I have some replacement black trim items on order now which I need to get ASAP since they will be painted with all of the rest of the black trim pieces, and it is best to do it all at once with the same batch of paint. The items include the driver's side bumper trim (Euro versions) inserts, the center rear bumper trim insert, windshield washer nozzles, and windshield wiper arm nut covers. Unfortunately, a couple of the bumper trim pieces seem to be "on order" from Europe with an ETA of early-to-mid June, and I really hope that those dates do not get moved out. The black trim parts may all end up being painted well after the rest of the car.
I also have new brake cooling duct inlets (the front-most ones in the valence) coming since the originals had some of the little clip retainer parts snap off during removal. Those will be painted red to match the rest of the car.Leave a comment:
-
regarding your roof lining, I would just drop the edges down around the doors and windows and tape them up to the roof. I wouldn't pull the material off the sunroof opening as its can be pretty touch and go not tearing it around the corners. Thankfully when putting it back on the edges that were previously glued down are already shaped to go back into roughly the same spot, its just a tensioning game with the seal. However if your sunroof cartridge looked like mine below, then you will need to pull it down with the foam to treat it otherwise it will just get stained . I actually had to make a new one from the corner tears
For the gummy dots on your door frame, I used a ball of blu-tac.
Door weather sheeting you could try a kit like this, otherwise you just need a thin enough clear plastic really you can cut to shape
The clear circles might have to get inventive as there was no part number I could find for these, clear vinyl sticker sheet you could cut down or roll of clear stickers in either vinyl or pvc? I used a roll of clear 3m edge protector tape and cut out some circlesLeave a comment:
-
Wow. Thank you so much for documenting this process. Will be invaluable if/when I decide to take this on.Leave a comment:
-
Great write up! Thanks for sharing your experience.
Yes unfortunately it is necessary for me as well, and as you now know the job is a tough one, which is why I'm nervous, but I gotta do it.
Also makes sense to paint inside the cavity while you have the panel out.
I'm gonna try to avoid hijacking this thread any more, so thanks everyone!Leave a comment:
-
I've replaced the cowl on mine and I would avoid it unless its absolutely essential. The brackets for the wiper motor and blower fan had rust developing under them, tiny dots of corrosion similar to yours on the panel itself. Rust had also
broken through to the fuse box bracket.. So I replaced mine so I could take all the seam sealer out and ensure there was zero rust. Removed all the brackets and rewelded them back on after rust was removed.
Painted everything up, welded the panel back in, seam sealed all the edges as per factory and hand brushed over the seam sealer up inside the cowl with BC and CC to seal it in. Its a bastard of a job tbh lol.
If it was just the brackets that needed attention I would probably just drill out the spot welds from the inside and repair it with the lid still on and rust treat the rest.
Last edited by bangn; 05-13-2023, 02:48 AM.Leave a comment:
-
Thanks!
I'm just not sure about how to remove the cowl.
I did see a garageholic video: https://www.youtube.com/watch?v=hotBBilIy-w
I guess this is as good of a guide as I can get. Wish me luck.
Leave a comment:
-
Good call. Right now I have my fasteners and clips in red party cups with labels written on masking tape. If a cat knocks them over...
Parts are in a couple of giant piles in my garage and back yard. The plastic tub idea is a better strategy.
Yeah the car is in pretty good shape overall, aside from the sad, sand paint. Minimal rust, and no real body damage to speak of. I guess it's one reason that California is still one of the best places for owning an older car, despite the state government's best efforts to make it a pain lol.
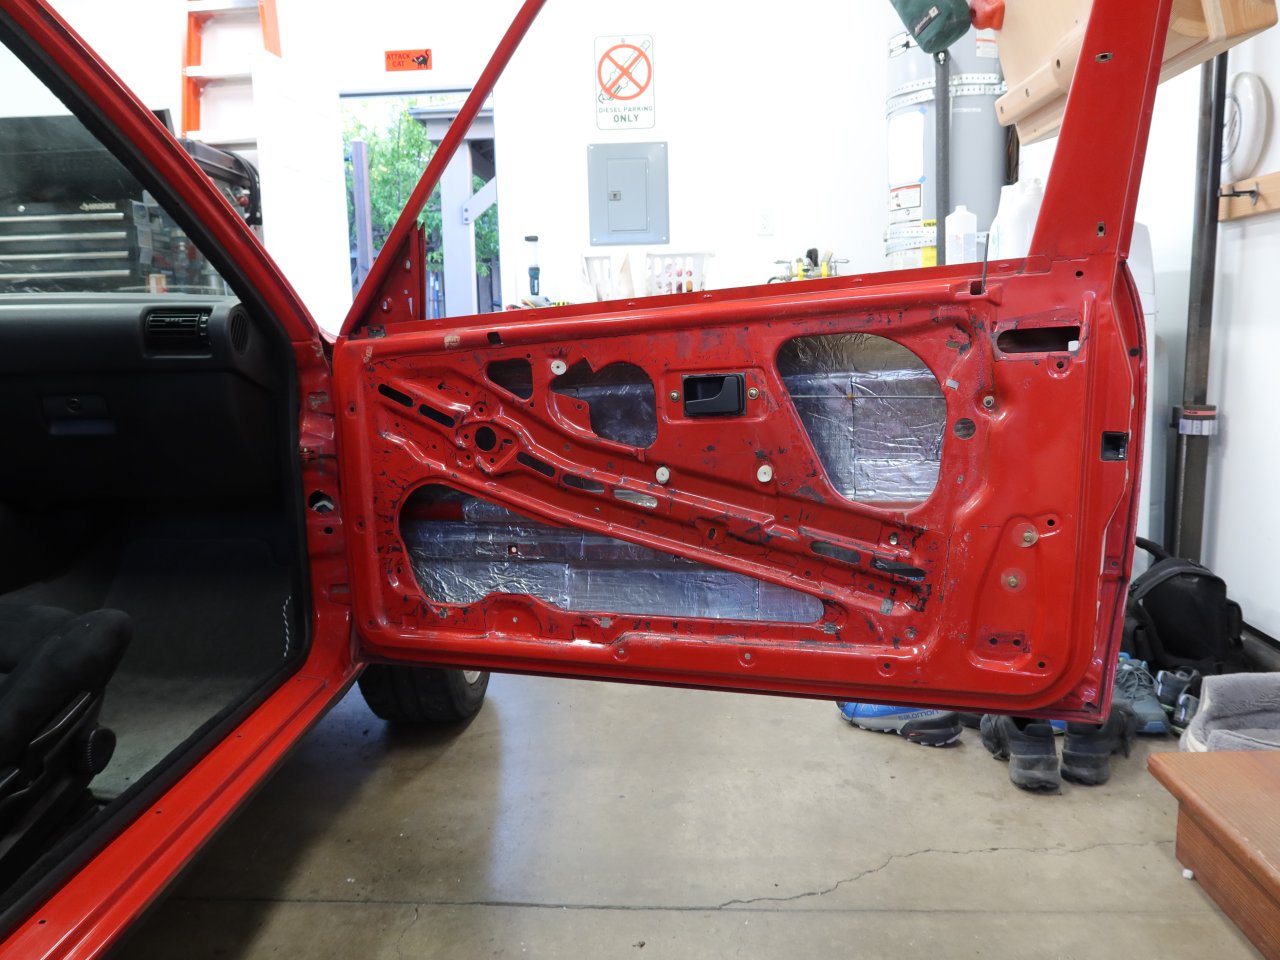
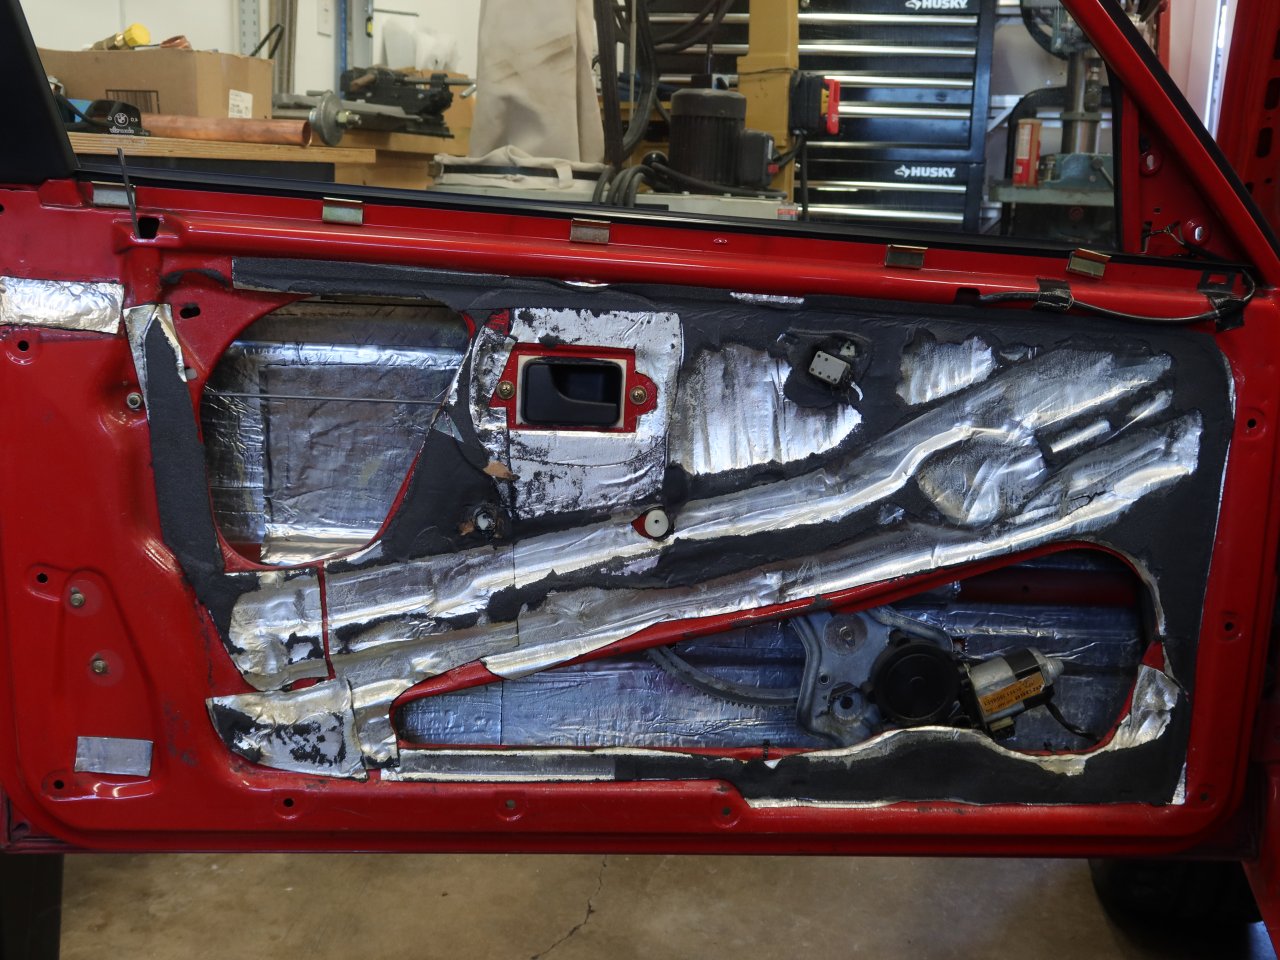
Sound deadening: 100% worth it! The doors sound like blocks of wood when closing them. I used a product called Damplifier from Second Skin Audio, and in some places added their Overkill 1/8" closed cell foam. There are some lessons that I can pass on.
- Wear gloves. The heavy duty metal foil layer is awesome for its purpose, but it will shred your hands when installing it
- Get a small roller that is like 1-2" wide and 1" in diameter. The deadening sheets only work if they are actually fully adhered to the sheet metal
- You will need to remove all of the old tar-based sound deadening, and then clean the surfaces that it was on since the oily residue will prevent any new sheet from sticking
- DO NOT PUT THE DEADENING ON EVERY LITTLE SURFACE! I went nuts and was trimming little pieces to cover every square inch; it a waste of material and time. You want to cover the large panel centers since those are the least damped areas. So, apply the material to the inside of the door skins (seen in my photos) and NOT the inner frame where the door cards go, the inside of the rear quarter panels next to the rear seat, the rear bulkhead between the seat and trunk, under the rear seat bottom, the floor pan and transmission tunnel, the sunroof panel, and up along the firewall. Again, you don't need to go out to the very edge of everything, just cover the central 90% of those areas. I would say that doing the doors made the most noticeable difference.
- I also did the underside of my hood in the 3 recessed areas, and then applied (IIRC?) the Mega Block heat shield product from Second Skin, with some high temperature aluminum HVAC tape around the perimeter. This made a HUGE difference in terms of quieting engine noise.
- If you want, you can also apply it to the flat inside faces of the door cards and rear seat side panels.
I will probably pull the carpet this weekend, and I can take some pictures showing where all I installed the deadening and foam.Leave a comment:
-
awesome work! looks like a real clean example to start from too. Best tip I can give you is buy some cheap storage tubs and sandwhich bags. Write everything on the bags and put everything you can in the tubs. Makes putting it back together easier as you can just grab a bag, clean/paint parts and put them back on and chip away at it
with the sound deadening, did you find it made the car feel more solid when closing doors ect? was it worth doing?Leave a comment:
-
The progress continues with the teardown, and I have like 3 full sheets of hand written notes listing things that I need (or in some cases want) to replace. This project has become a little more expensive lol. All I can say is that I am glad that I bought most of the big-ticket items 4 years ago before the COVID super-inflation.
Questions for r3v'ers:
- Headliner: If I break the edges loose from the door jamb and rear window, will it shrink / pull in and be impossible to get back into place? I have some industrial double-sided tape holding it to the edges for now just in case I need it to stay there, and worst-case I just have the shop mask it and paint up to it. I would prefer to peel the edges off so that the paint goes all the way to the ends, but won't do it if I risk having problems. I guess that I may want to consider having the headliner redone since it will be fully accessible...hmmmm. Anyone know of a good shop in the Bay Area?
- Door vapor barriers: What do you all make yours out of? Also, are there little circular stickers that you have used to cover things like the little fastener holes and whatnot in the inner door frame?
- Rear quarter glass: Based on taking it out, I am inclined to just pay someone to reinstall it. I have a new window gasket for both sides, and it will be even harder to get over the sheet metal than the original since the new ones are not all opened-up already. Reinstallation looks like a hell of a struggle, especially up at the headliner which I want to not damage!
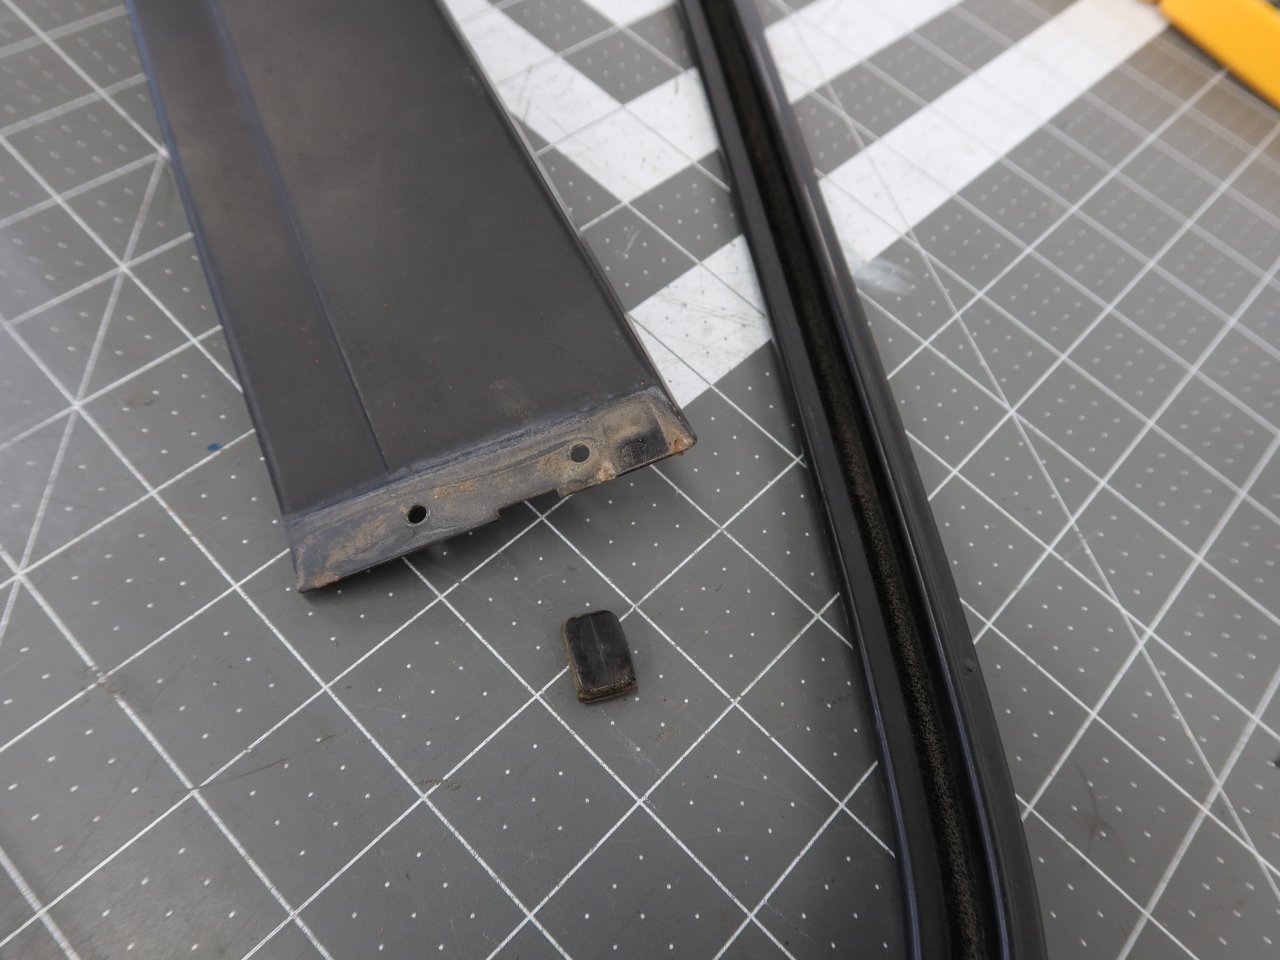
- What is the putty that is installed under the window trim pieces, and where can I buy it?
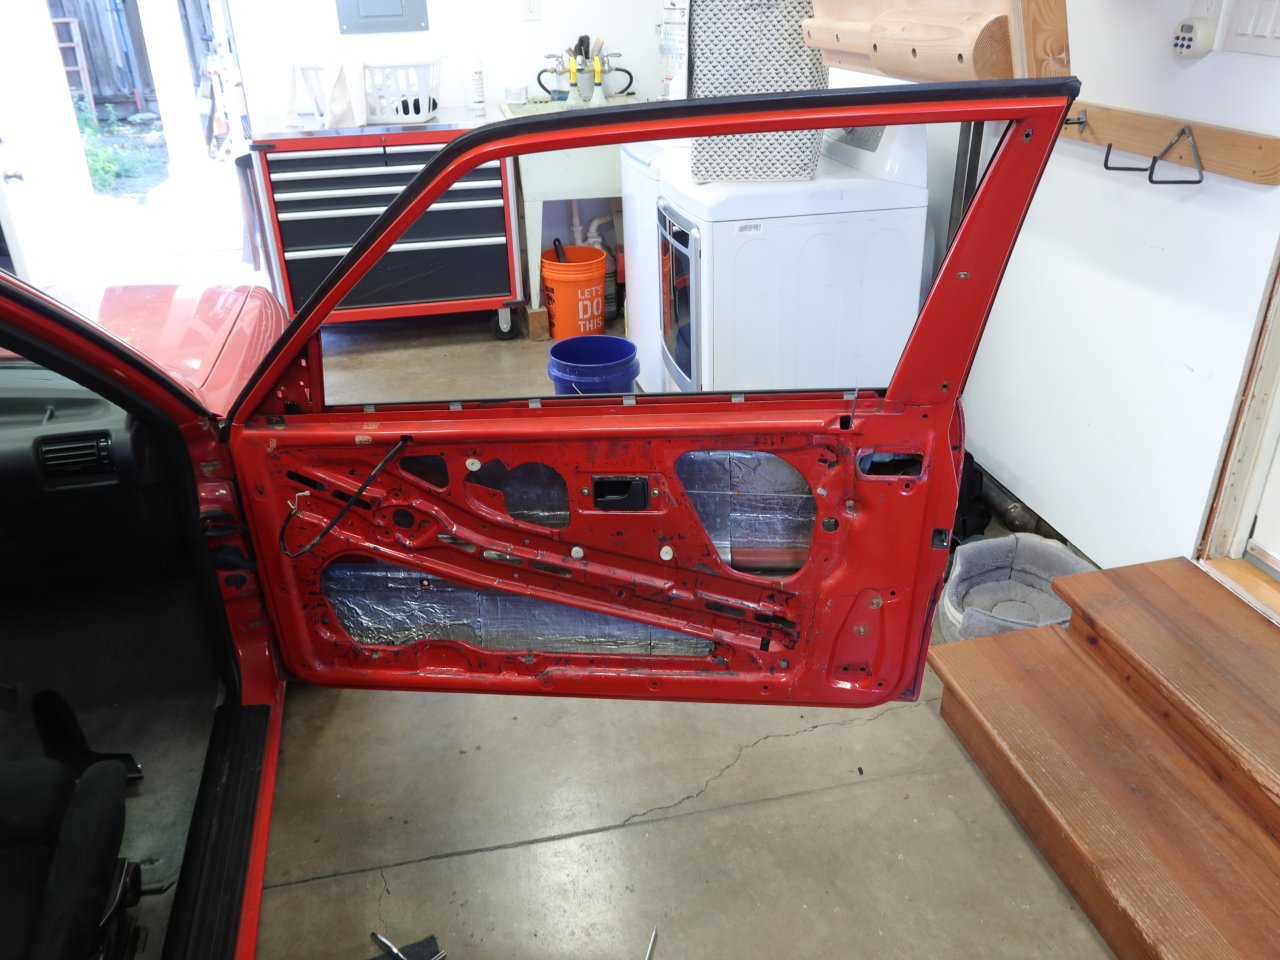
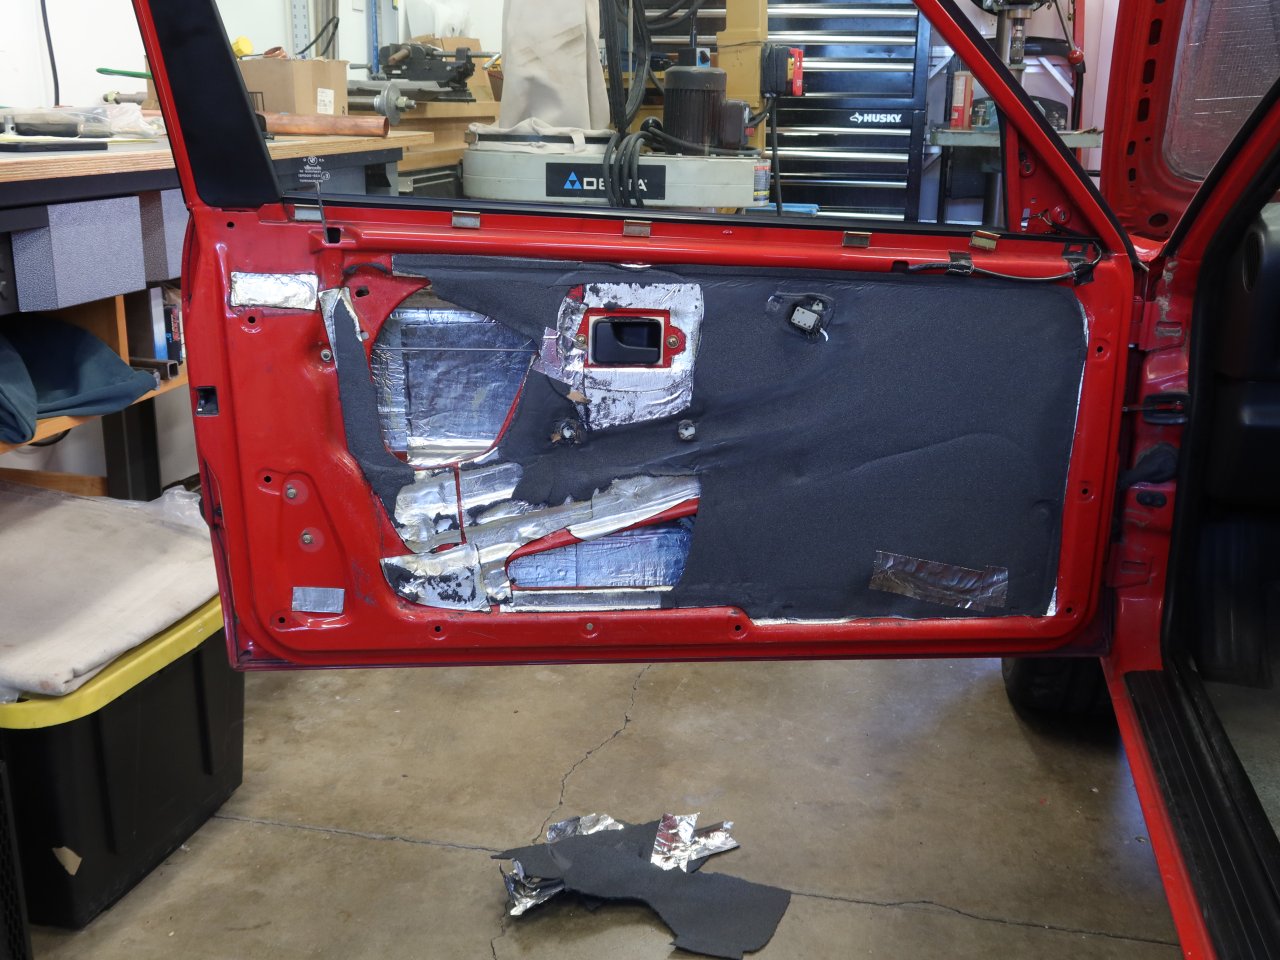
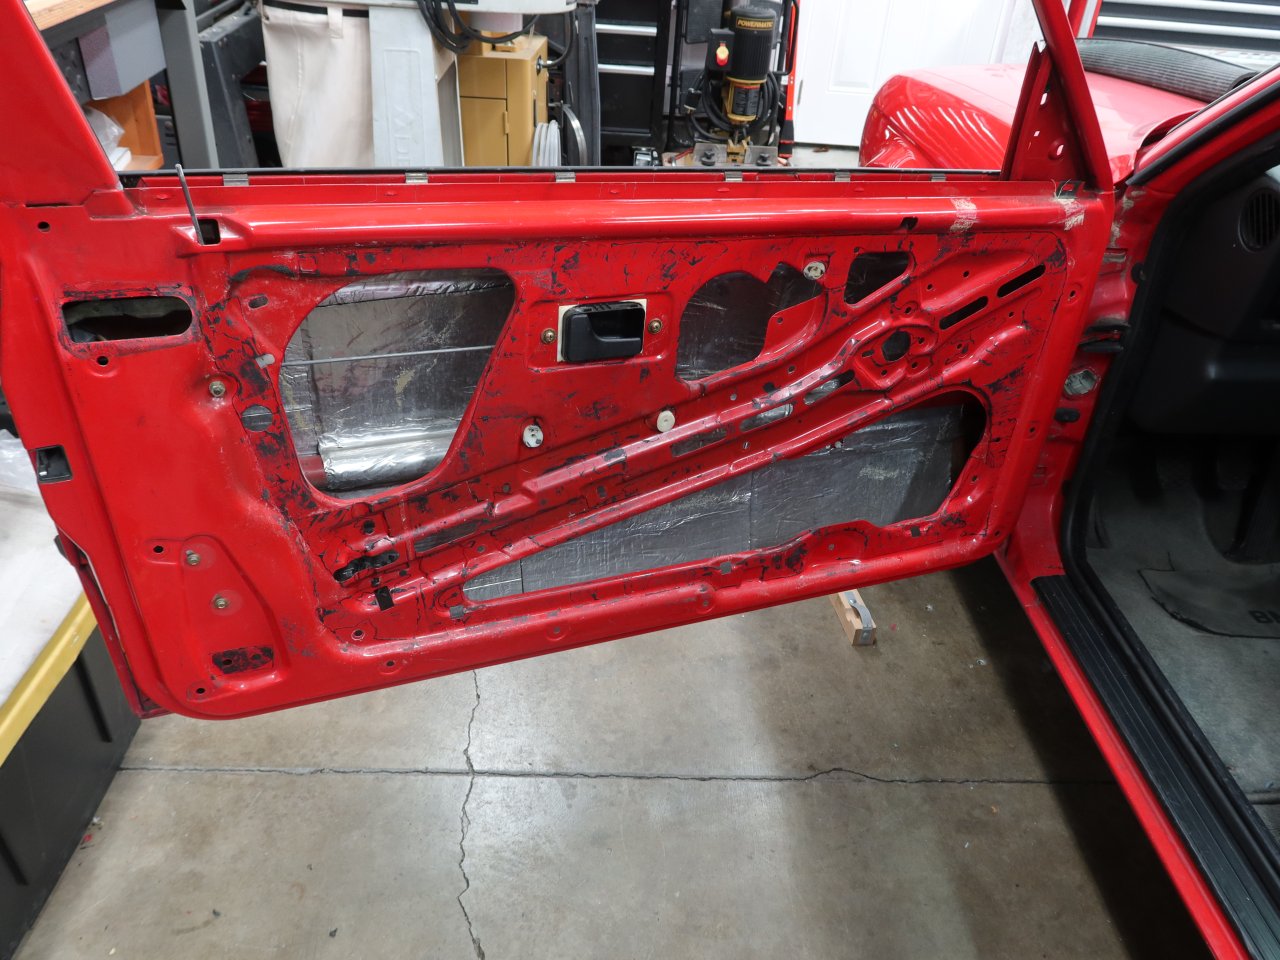
Yesterday I got the passenger side all torn down. Here is how it looked after removing all of the sound deadening that I (should not have) installed on the inner frame 12 years ago. Removing it was a real chore, and you can see the residue all over. With that out of the way, it was super simple to get the window, regulator, wire harness, and seals out.
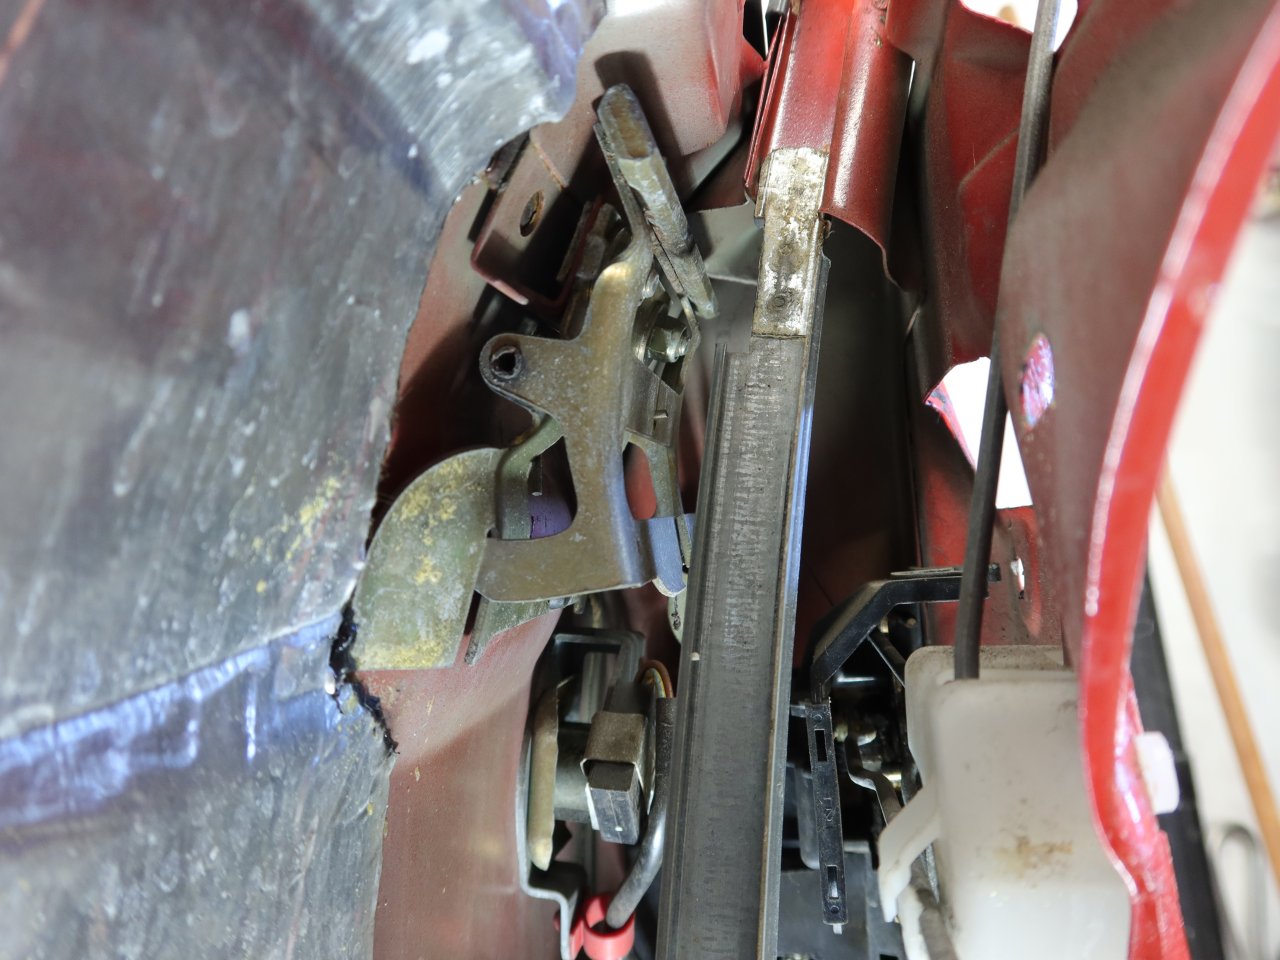
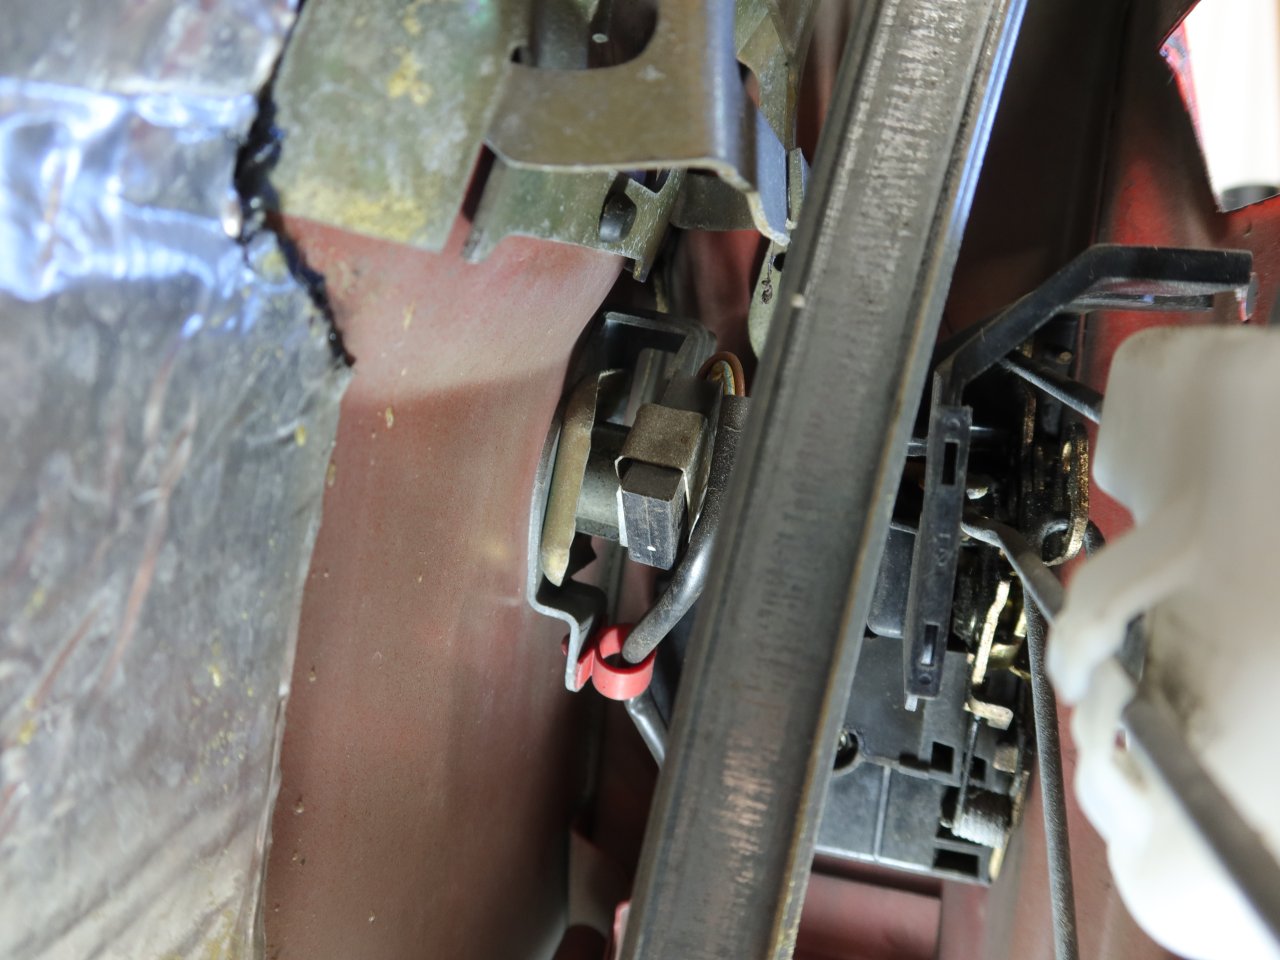
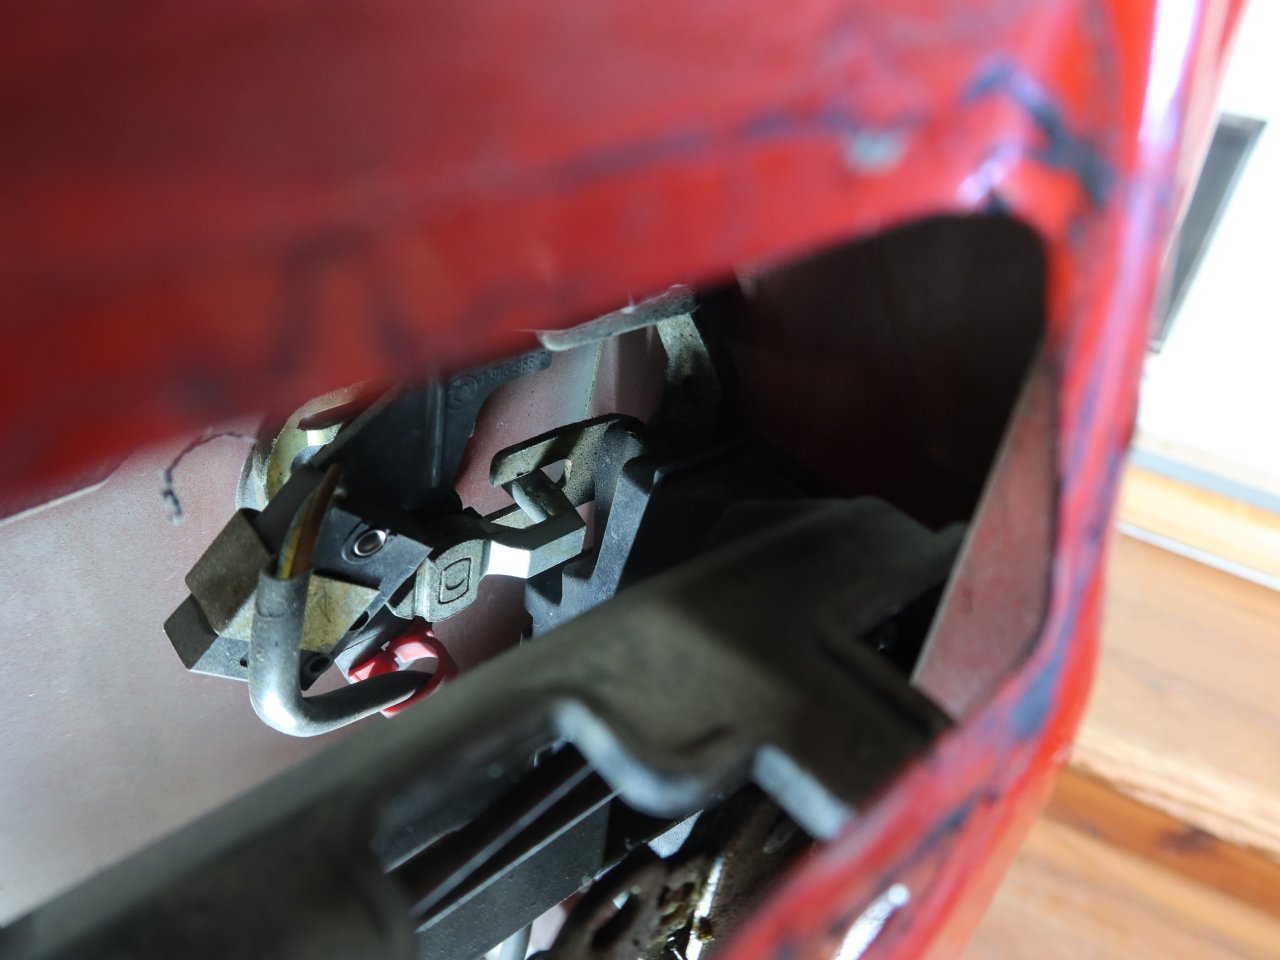
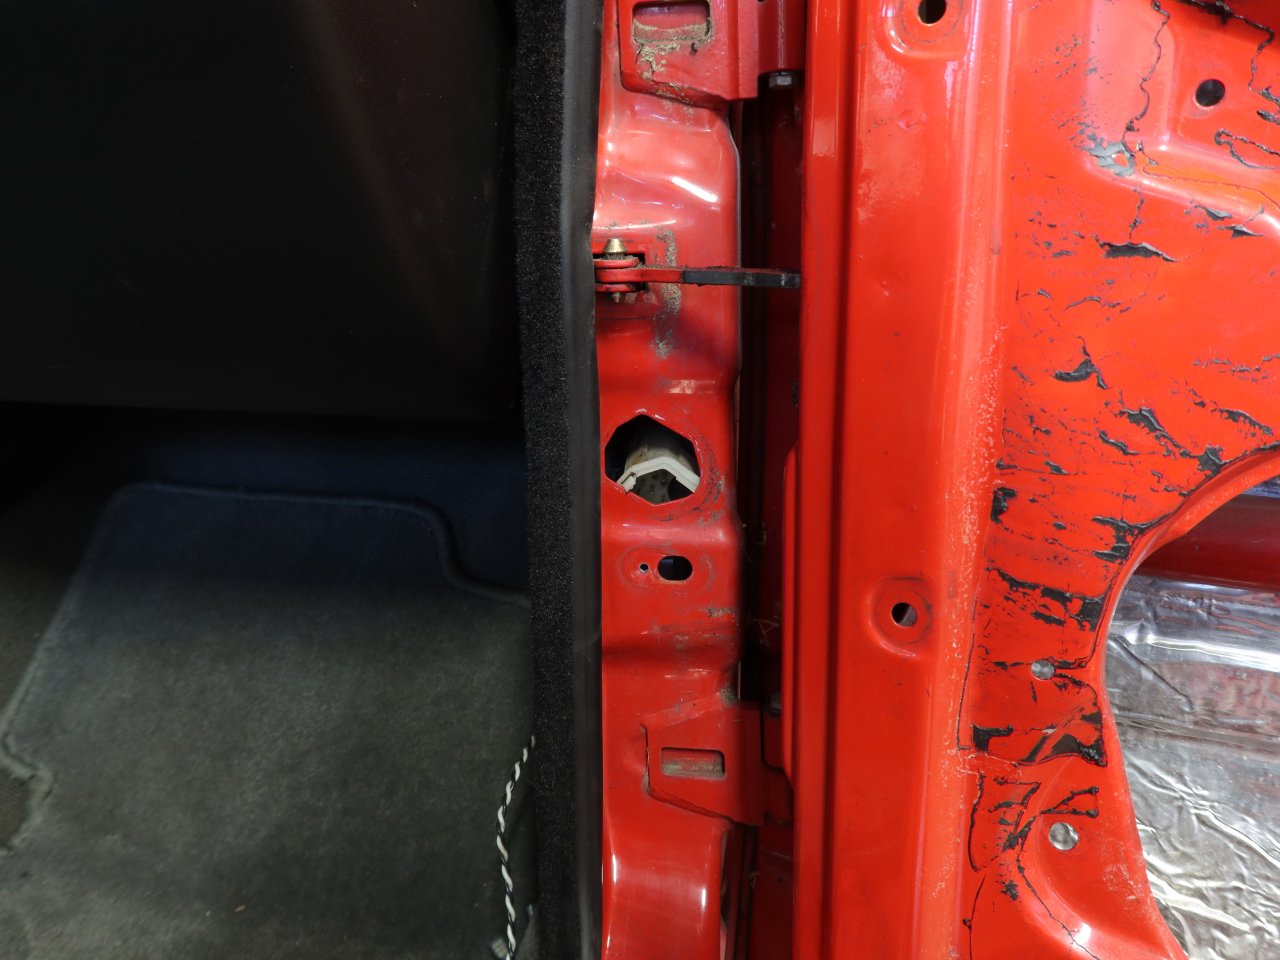
Getting the door handle and lock cylinder out was also fairly easy. The handle comes right out if you remove the window guide channel first, and the notorious C-clip that holds the lock cylinder in is fairly easy to pry out with a screwdriver. Here are some nice clear shots of those items before removal for reference.
Much to my surprise and delight, the plastic trim at the rear of the door came out without being damaged. Just get a plastic trim tool in under it and pry it out of these 3 clips.
As far as removing the aluminum window trim, it had me sweating a little since I had never done it before, and the stories of how easy to bend/kink it had me a little worried. Overall it is easy to remove, but it is equally easy to bend the crap out of it if you are not exceptionally careful. You know how you pull on a wrench with a stuck fastener in a tight space, where you want to apply a lot of force, but let up the nanosecond that the fastener comes loose so that you don't bash your hand into something? This is just like that, except you are letting up to avoid ruining the trim. I would say that this is most applicable to the bottom strip under the window in the door since it is probably the most securely clipped in, and also the flimsiest piece by far. I did bend it a little when it got stuck on one of the clips, but I was able to straighten it by hand VERY slowly and VERY carefully. If I hold it up and look down the length, there are a couple of very slightly bent spots, but they are only visible when looking right down the length while pointed at a fluorescent light. There is no kinking thankfully. Jordan's excellent guide was invaluable here, along with this YT video.
Also, there is some sort of putty under some of the trim pieces, I assume to prevent vibrations. It is soft and comes right off.
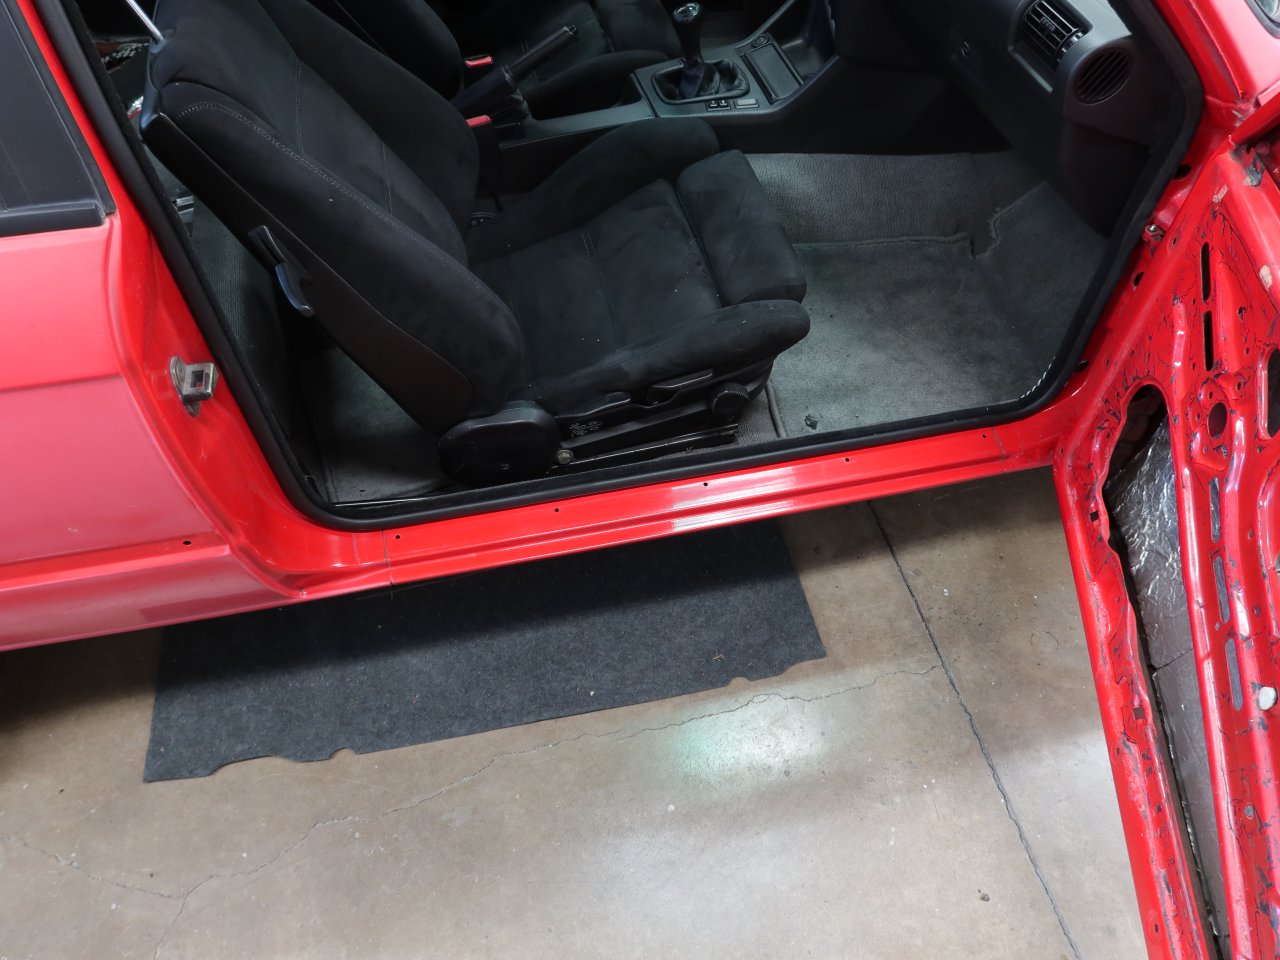
Here is the door and jamb area, all cleared out. The inner sill piece is such a damn PITA. I have had it off before, and it never gets any easier. Since I have new ones, I just ripped the old one straight out and let it shatter since it was cracked anyway. And the stupid little clips that it sits on...those were a real chore to try to pry out. Two of them are now living in the lower rocker channels as the tops just broke off. Oh well...
The door harness had like 4oz of water in it. It must have gotten up in the sheathing. Not my favorite design form BMW. I am going to clean these up and properly seal them before reinstallation.
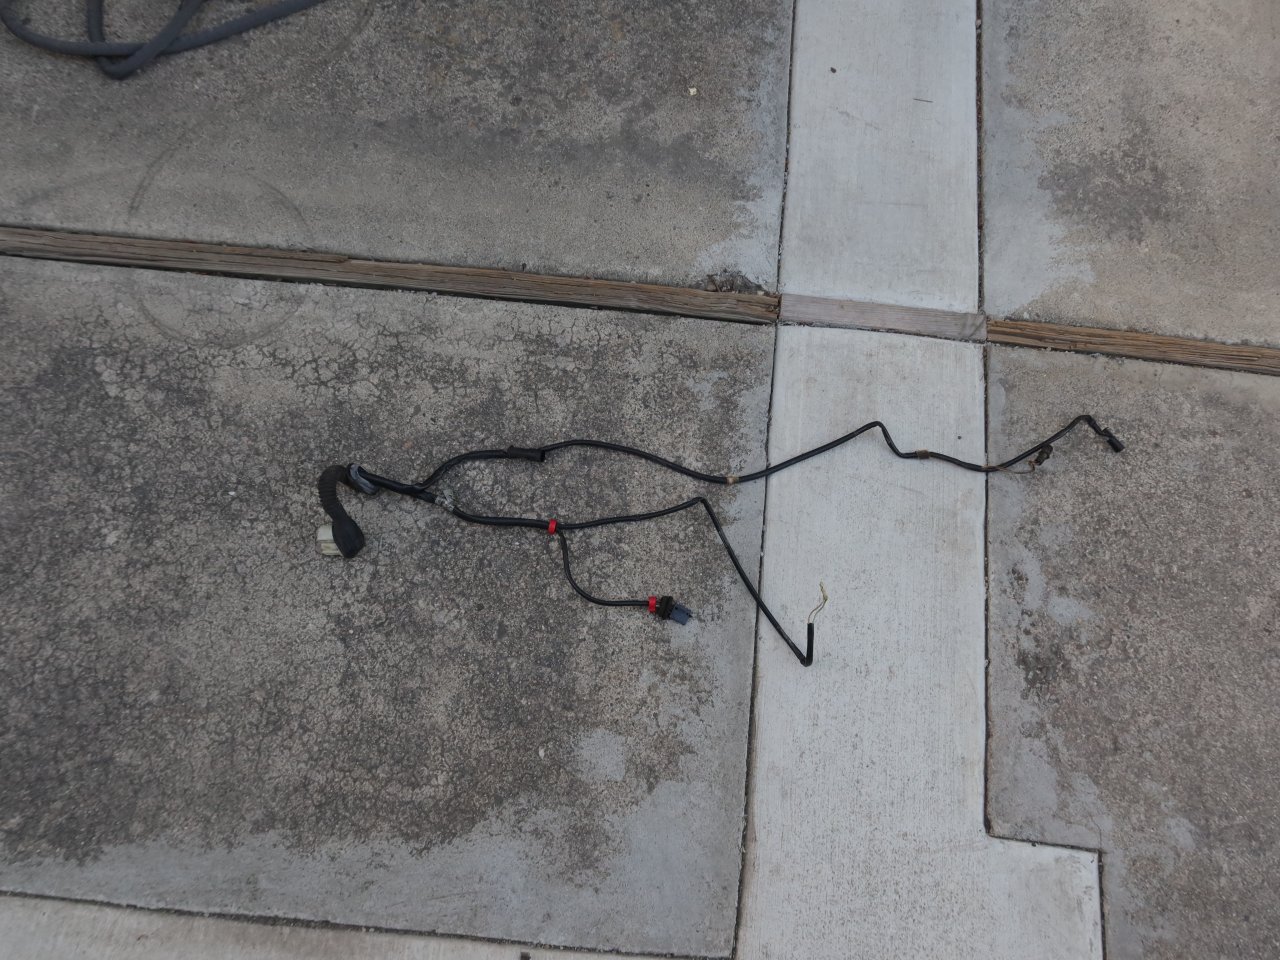
Now that I am removing glass, I need to get some 2-by lumber and make a rack for it. OEM replacements are obscenely expensive.
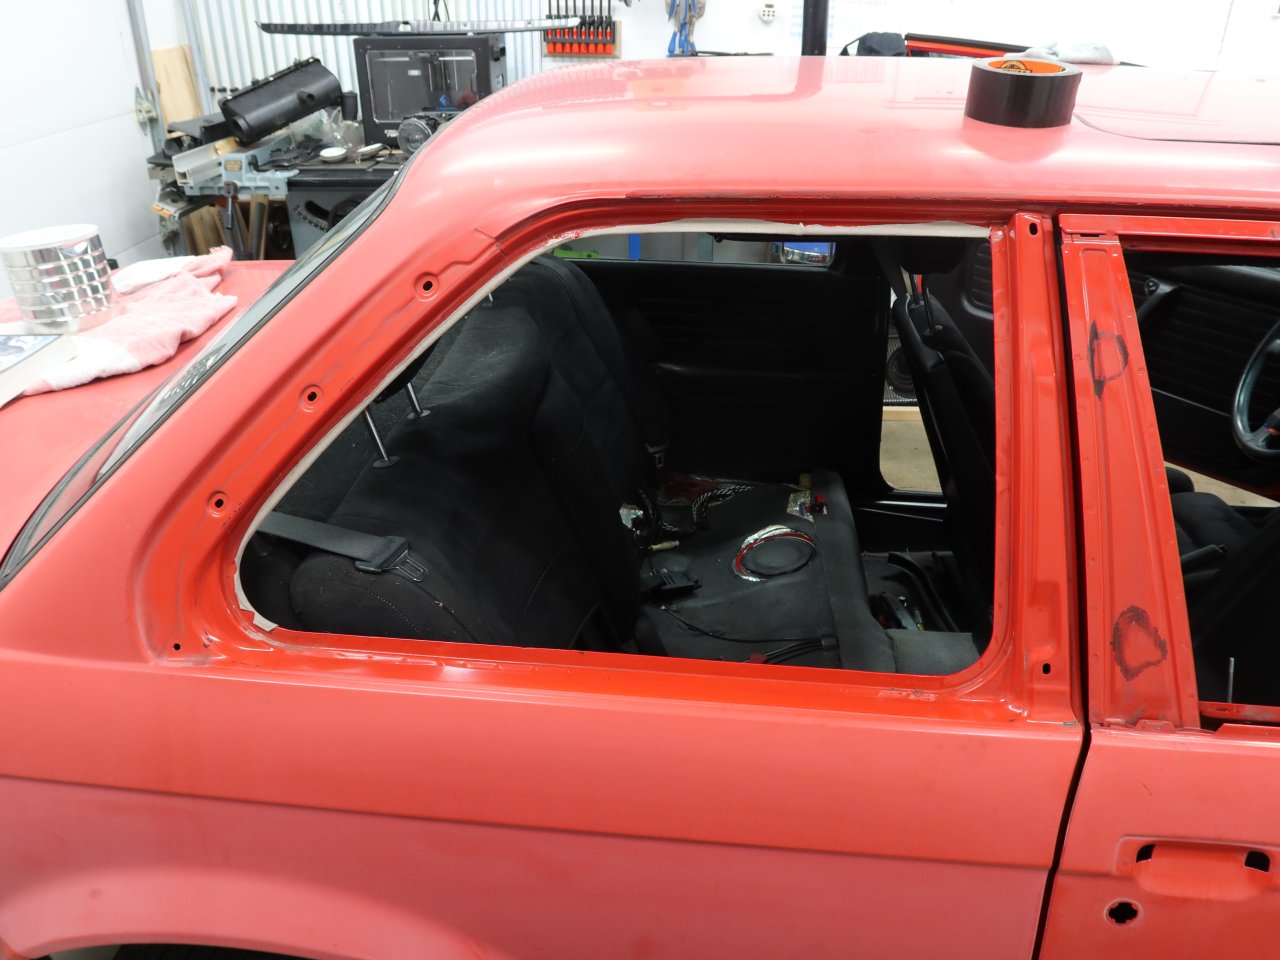
Another first for me was removing the rear quarter glass. Getting it out took some intense prying of the inner seal lip with trim tools, and some firm pushing. Reinstallation is starting to look to me like something that I will want to pay a professional for. Also, I had not realized that the rear window trim was a) a single assembly, and b) the lock strip (sort of) for the window glass in the seal. Interesting design. No rust found anywhere in the perimeter of the car window frame either!
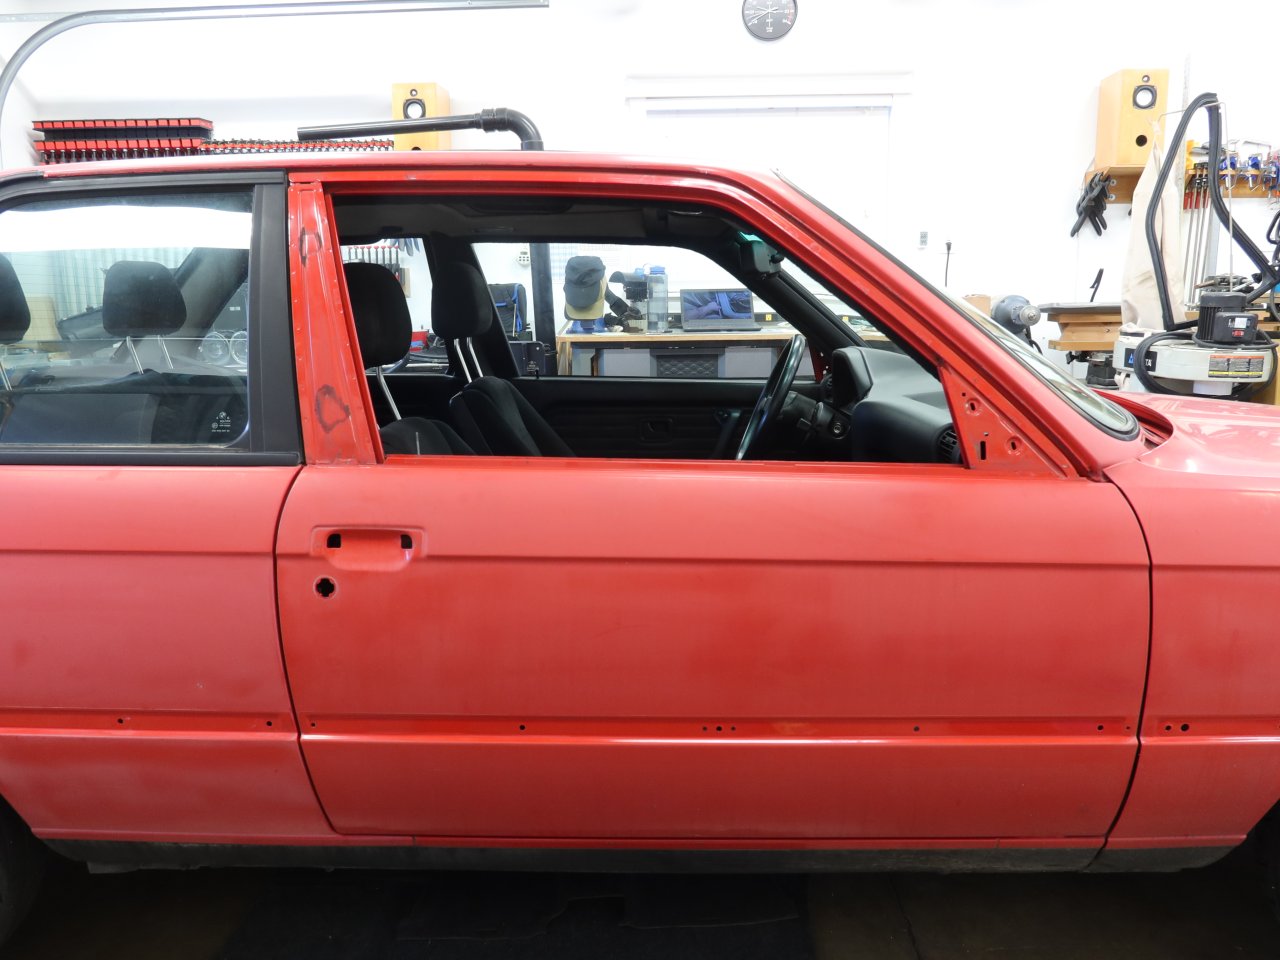
----- Driver's Side -----
Today I got some work done on the driver's side. Once again I was faced with removing all of the sound deadening that I had stupidly put there. This side was worse for some reason, maybe because it is the side which gets a lot more sun when parked at home? Whatever the case, it took a little over 2 hours to clear it off. There are a bunch of small nicks and scratches from the window scraper, so I will be using some touchup paint to seal them when this all goes back together.
I took out some of the door guts, found a few more ounces of water in this side's wire harness, and popped the door trim. There was much less bending involved this time since I knew what to expect, but I did still need to straighten the lower one from the door. Damn, that piece is flimsy!
So there it is for now. I just need to deal with the door jamb and rear quarter window to finish up the bulk of the work here. From there, I just need to remove the sunroof, pop out the windshields, and remove the muffler to make room around the rear valence. So far so good!Leave a comment:
-


Leave a comment: