
Sunroof Patch and Vent - Post 2 of 3
Here's the vent I bought:

9" by 4" opening, aluminum, 1.25 lbs. Very solid construction, from an online van supply store called Mill Supply. I applied some appropriate sealant to the vent (roof & flashing, I think):

As a note, the amount above turned out to be waaay too much, I would use half that much or less.
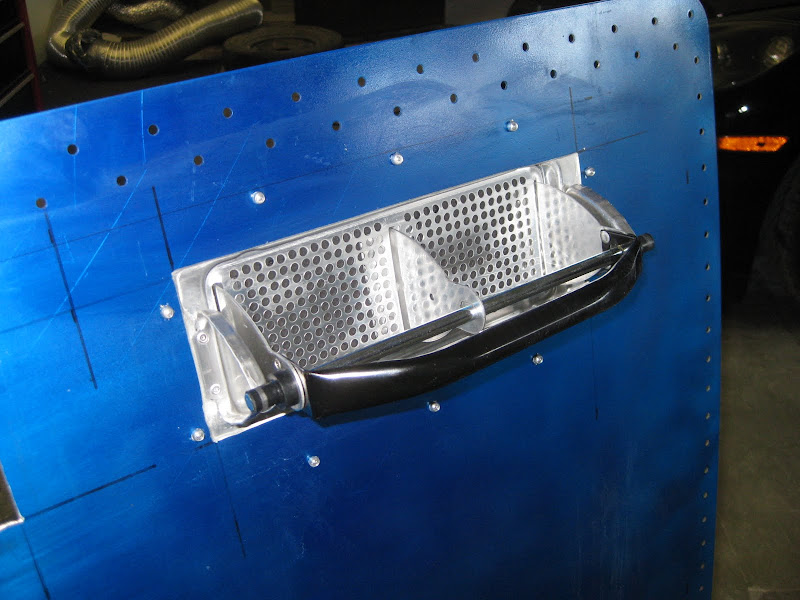
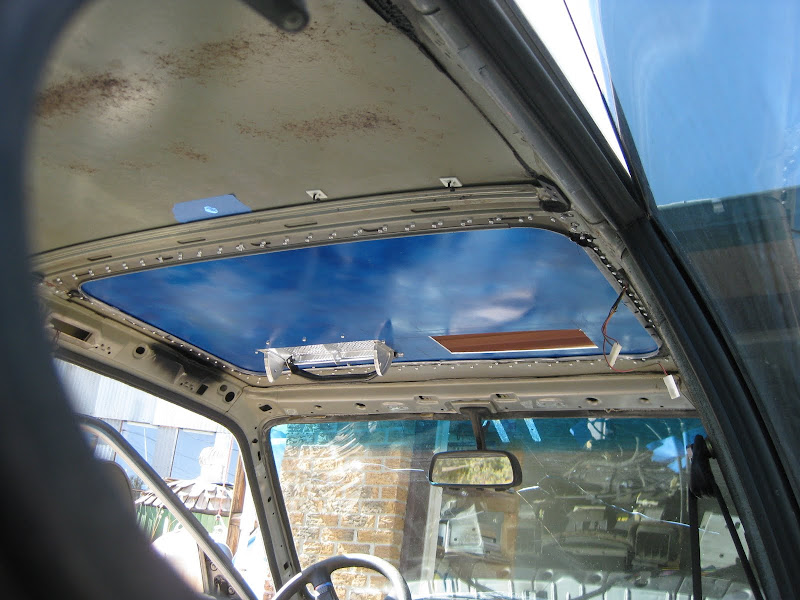
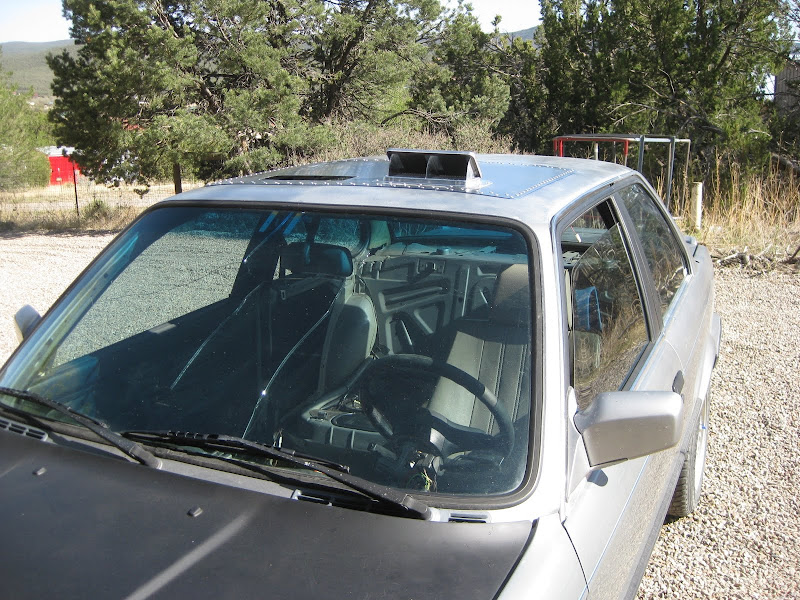
I slapped the vent in place and riveted it down, again with 3/16" aluminum rivets. Here's how it looks from inside and out:

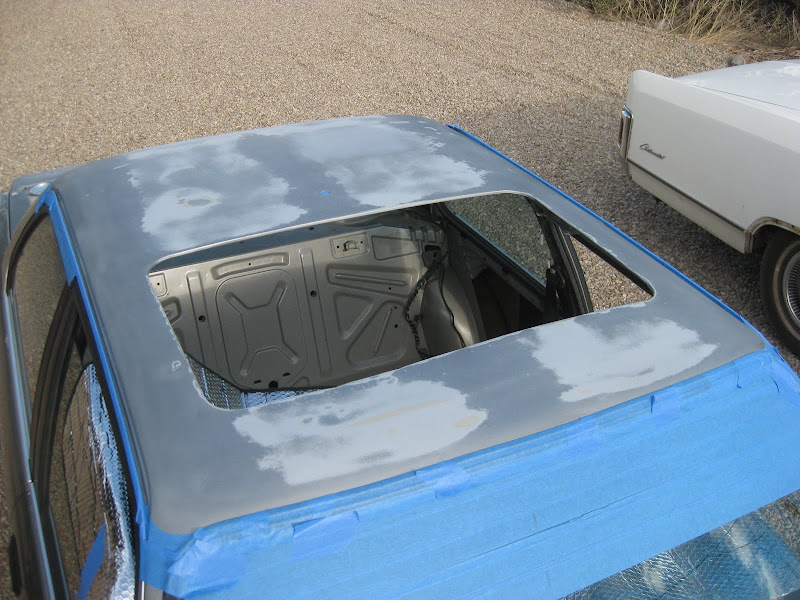
In the meantime, I was prepping the roof for a coat of paint since the original stuff was mostly gone and looked terrible. Mid prep:
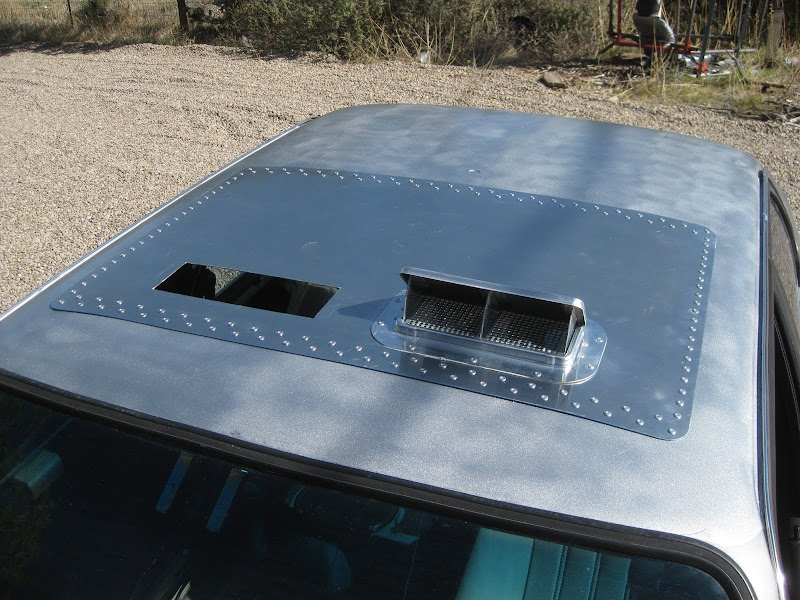
As has been discussed, the paint job was botched. I tried both rustoleum "aluminum" and "metallic silver" to no avail. The only good news is that the metallic silver has great reflectivity. At one point I measured surface temps of the colors on the car, all at the same angle and in the same light, on the same material. The flat black hood was 130 degrees, the stock silver paint 100, and the rustoleum metallic silver 90. So it functions, at least.
It was then time to apply the patch to the roof. First step was to align the patch on the roof. I was able to use a C-clamp to hold it in place while I lined it up from beneath using some lines I'd drawn to mark the edges of the hole.

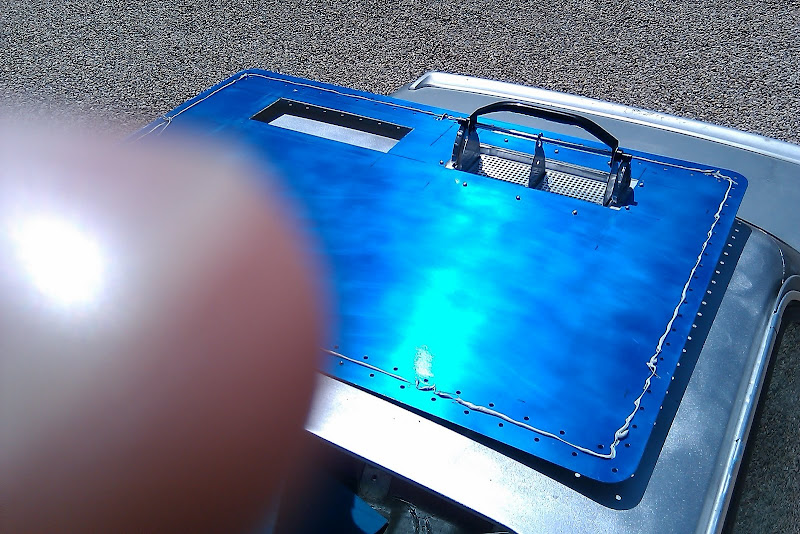
Once I had it aligned, I drilled the center holes front and rear but didn't rivet yet as I still had to apply the sealant. The two holes would let me line the patch back up and secure it quickly once I had done so. Here's a partially obscured cell-phone photo of the sealant:
That amount and location worked well, I had no overflow to the inside or outside of the patch.
Post 3 next.
Here's the vent I bought:
9" by 4" opening, aluminum, 1.25 lbs. Very solid construction, from an online van supply store called Mill Supply. I applied some appropriate sealant to the vent (roof & flashing, I think):
As a note, the amount above turned out to be waaay too much, I would use half that much or less.
I slapped the vent in place and riveted it down, again with 3/16" aluminum rivets. Here's how it looks from inside and out:
In the meantime, I was prepping the roof for a coat of paint since the original stuff was mostly gone and looked terrible. Mid prep:
As has been discussed, the paint job was botched. I tried both rustoleum "aluminum" and "metallic silver" to no avail. The only good news is that the metallic silver has great reflectivity. At one point I measured surface temps of the colors on the car, all at the same angle and in the same light, on the same material. The flat black hood was 130 degrees, the stock silver paint 100, and the rustoleum metallic silver 90. So it functions, at least.
It was then time to apply the patch to the roof. First step was to align the patch on the roof. I was able to use a C-clamp to hold it in place while I lined it up from beneath using some lines I'd drawn to mark the edges of the hole.
Once I had it aligned, I drilled the center holes front and rear but didn't rivet yet as I still had to apply the sealant. The two holes would let me line the patch back up and secure it quickly once I had done so. Here's a partially obscured cell-phone photo of the sealant:
That amount and location worked well, I had no overflow to the inside or outside of the patch.
Post 3 next.


Comment