-
-
No, I went to harrys in hazelton. I got a late start so I never made it out to joes. I need to run out though because I need two front fenders.Comment
-
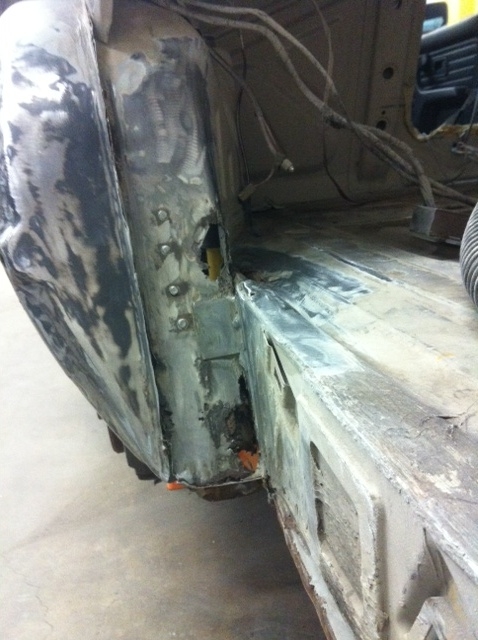
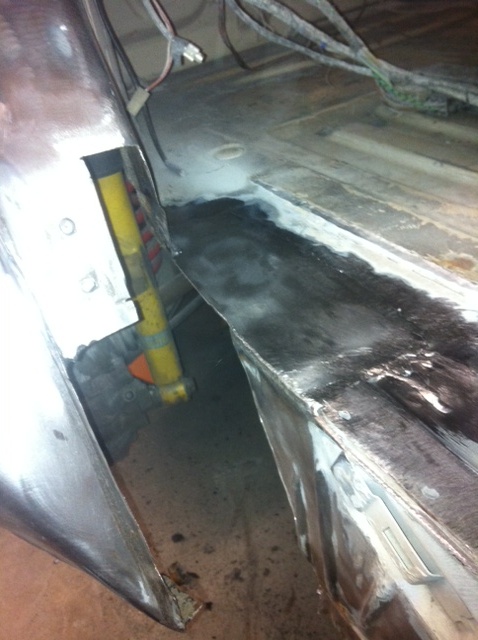
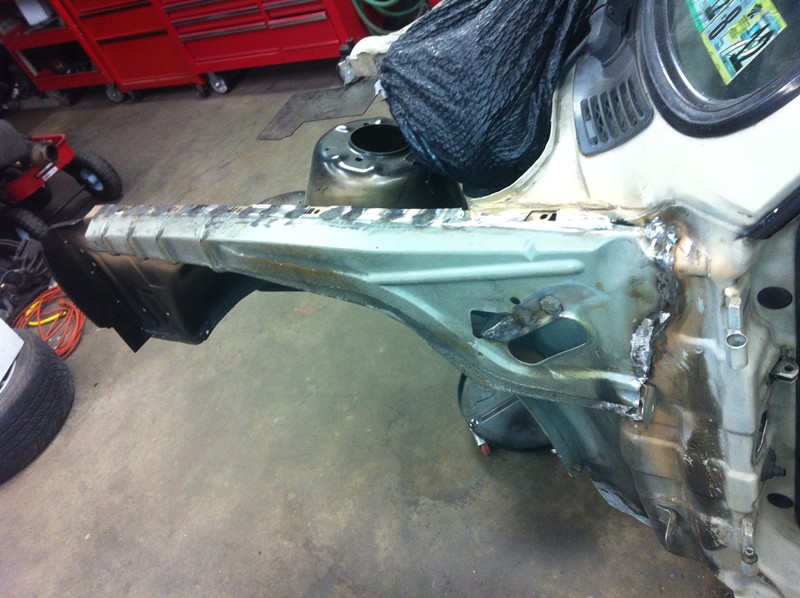
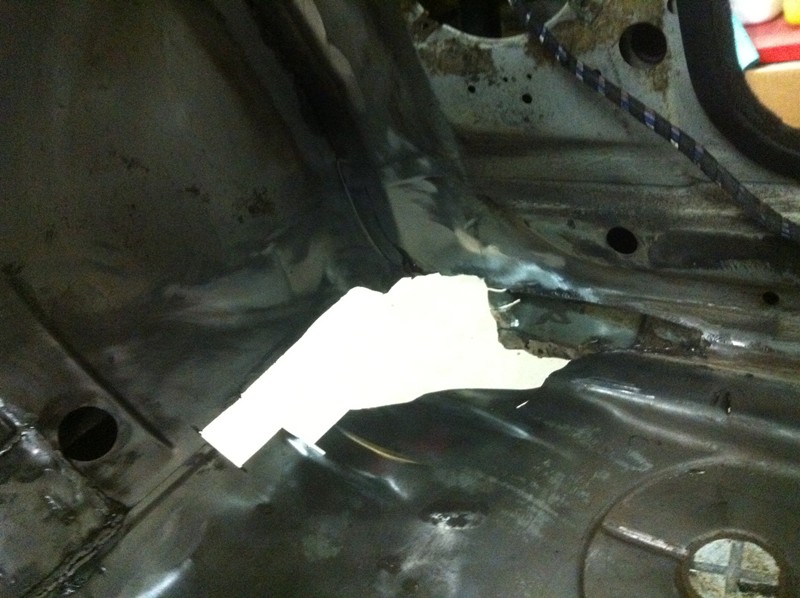
Big sigh of relief for me. Spent a few minutes today grinding the seam sealer out of the rusty area of the trunk floor and wheel well rust spot. It's actually not a very structural part of the car, and it should be very easy to repair. And since it's not really visible, nobody will see my gnarly welds and metal working. So I get more practice without making my car look like complete shit.
 Last edited by JGood; 12-26-2011, 11:45 AM.
Comment
-
no offense at all but wouldnt it have been cheaper and less time consuming finding a blown e30 to swap your drive train into rather than removing all that rust"God created turbo lag to give V8's a chance" Taylor D.

Comment
-
Thing is , at a meet you can casually say "Oh, I replaced the wheelhousing along with the strut tower" , light up a smoke and walk away. :D Besides , people I know say I have the rustiest E30 in the universe. And I reply by saying that they haven't looked at their E30s close enough. In other words, many of them do have extensive corrosion, in places you can't see. Or such difficult places that people don't want to take on the job and repair it really propelry.
Have you checked that the front axle support still fits in place? I bolted it on as a "guide" when I replaced a section of the engine support (well , I mean I replaced this)
I for one do think the rear wheel wells are structural parts of the car.. They support the rear shock mounting points anyway. As for the "grarly welds" , you'll know they're there if no one else. :) Just the other day I spent 2 hours grinding down welds that no one will ever see. Makes you feel good about what you've done once it's under 2 layers of epoxy paint on both sides.Last edited by petrolhead; 12-26-2011, 01:02 PM.Comment
-
Well obviously yes. I'm not doing this because I need too, I'm doing it because I want to. See post #4.
I didn't touch the frame rails, there's really no way they could significantly move. My shock tower measurements are spot on, and there's still flexibility in the front without the subframe and core support installed.
The wheel wells are structural, yes (technically, almost every panel of a unibody car is... the entire thing is just strategically placed sheet metal). The area that is rusting in mine and will need replaced, which I was referring to, is not a major stressed area, however. It's just a small area in the back of the wheel well. I can simply cut out the rusty metal and weld new stuff in without major concern of alignment issues.
And yes, I will spend time making the welds look as good as I can. What I meant was my welds are obviously not good enough for exterior body work yet (unless you like using 1/4" of filler), but for this area of the car that won't be an issue.Comment
-
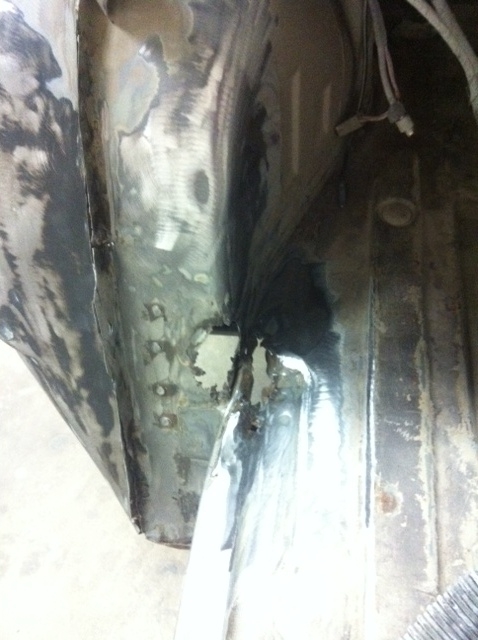
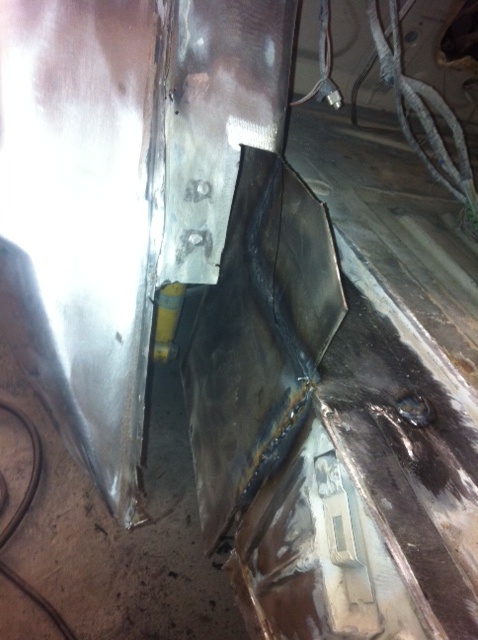
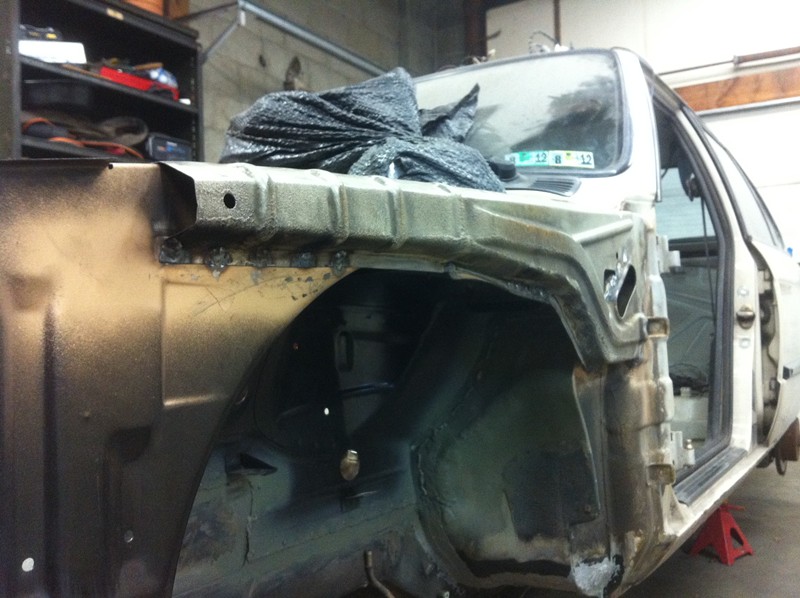
Today I cut out the rust and began putting some new metal back in there. Went pretty smooth, shouldn't take more then an hour or two to finish up. Just need to trim that vertical piece and then weld in a piece on the actual wheel well.
Comment
-
Question: Are these pics showing up right side up, or sideways and upside down? I'm using my phone for the pics, sending them to my PC, then rotating them upright, then uploading them. When I view this page on my PC they are normal, but when I view this page on my phone, they are sideways again, almost as if it recognizes the photos and orients them how the phone took it. Weird...Comment
-
there facing the right way- awesome work man! i know guys with years and years of body experience that wouldnt do this for thousands and thousands man. hard tedious shit, good luck! looking great :)sigpicFellow e30 enthusiast
Dont waste your time hating, aint nobody got time fo dat
1986 bronzit 325es- SOLD
1987 delphin 325i- parts car
1990 scwarz 325is- m50 drift slut
CHECK OUT THE BUILD!
http://www.r3vlimited.com/board/showthread.php?t=229234
Comment
-
Thats why my floorpan leaks, facepalm*
Comment
-
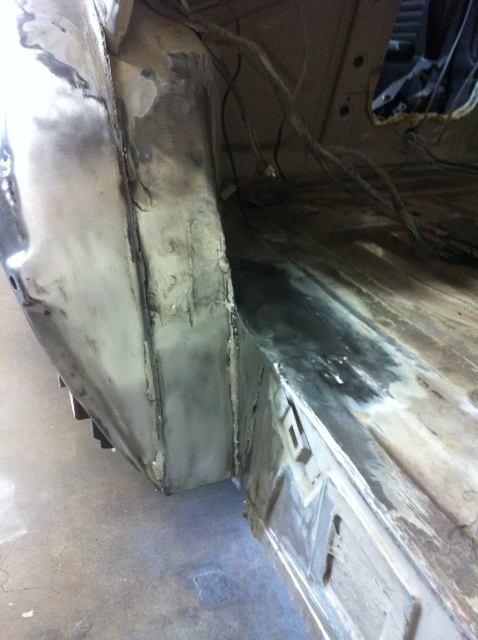
Wheel well work complete!
Comment
-
-
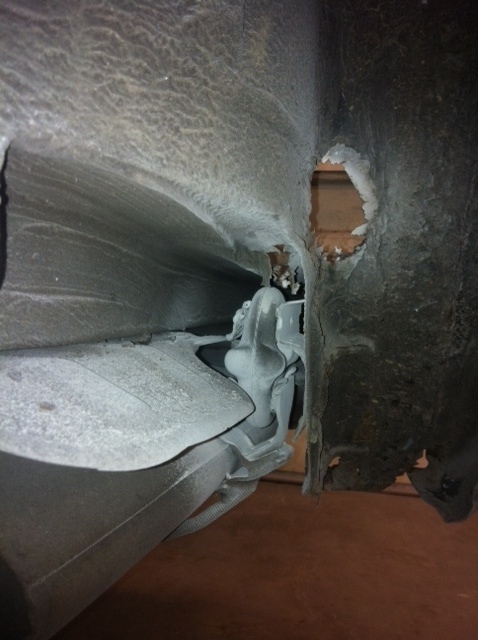
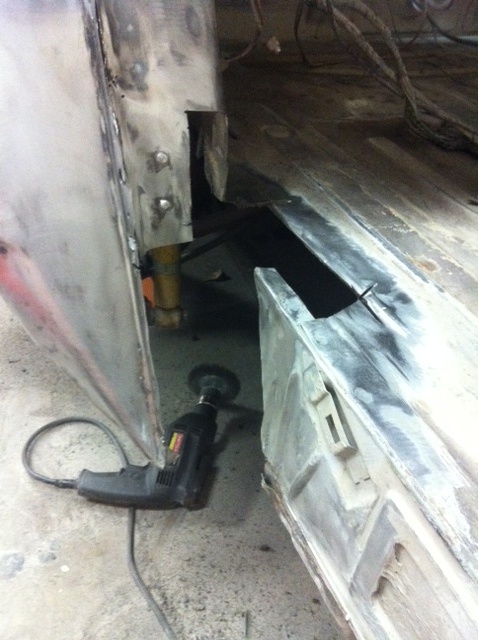
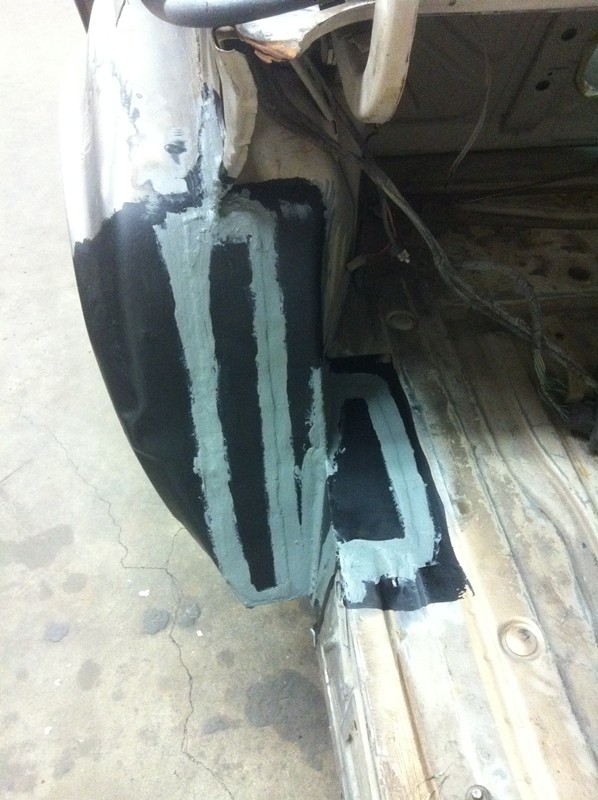
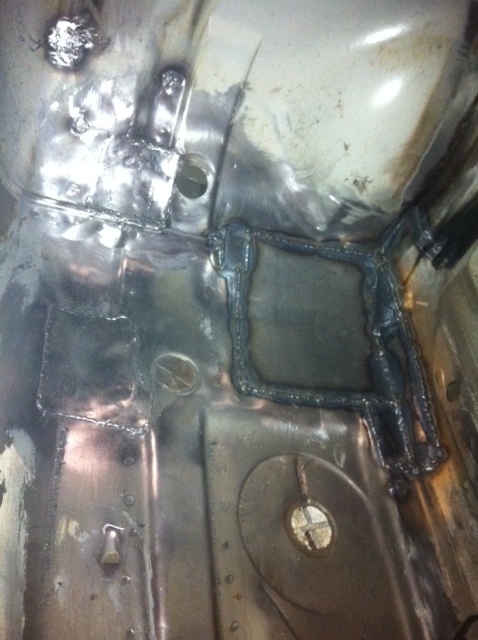
Well, I opted to tear out some of that wheel well, the pinch weld between the inner and outer wheel well, since there was corrosion in between them. Then I just welded a flat panel over and welded it up, threw rust encapsulator on it, then seam sealed it.
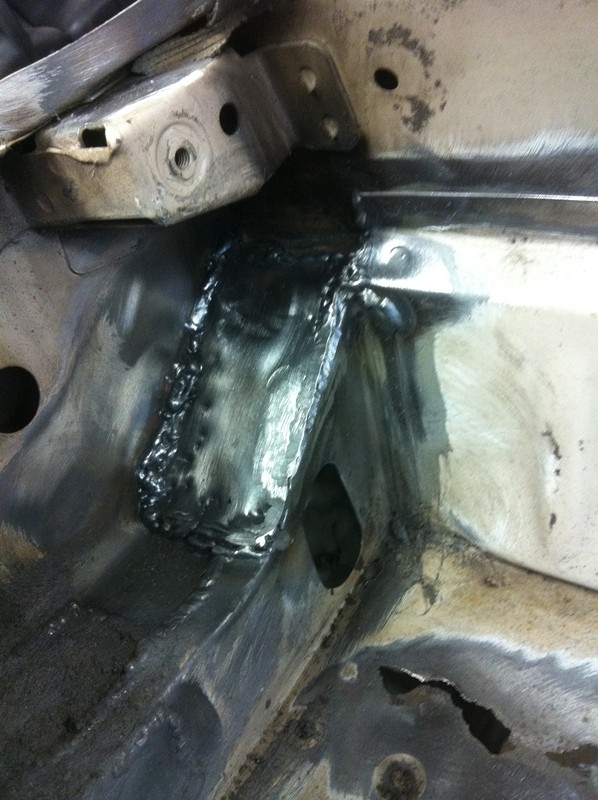
Also got the drivers side "wheel housing strut" welded in (the side support piece that goes outside the wheel housing, and under the fender). This is spot welded on from the factory, and mine had some hairline cracks and bends from stress. So I welded it almost all the way around, it stiffened up the front end a lot.
Plugged the A/C line hole in the firewall as well. I haven't had A/C for years, and don't intend on trying to get it all set up with the m60 anyway. This was just another spot that was corroded and leaking water.
Also welded the seal around the firewall where the blower motor sits. This was showing some pitting and very slight cracking, so I figured this should make it more solid.

Here are two patches I finished up on the passenger floor.
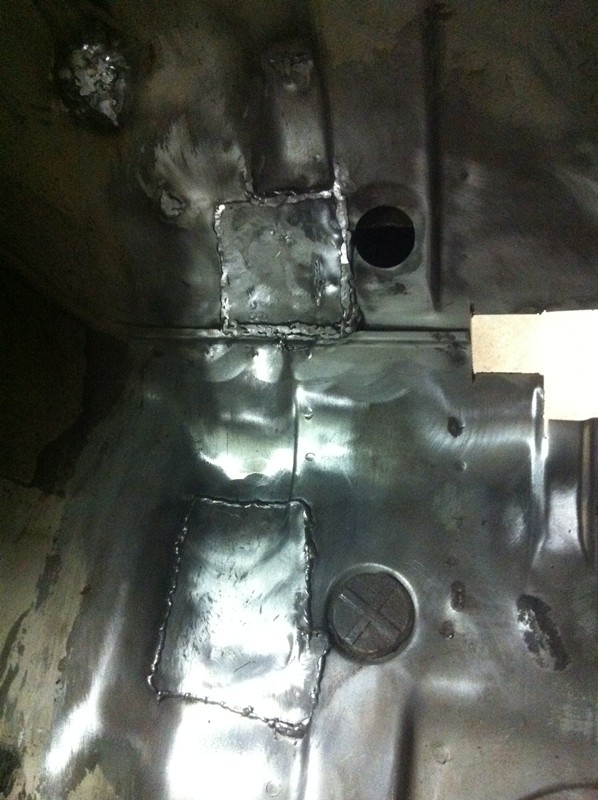
And here is what I still have to finish up on the passenger floor.
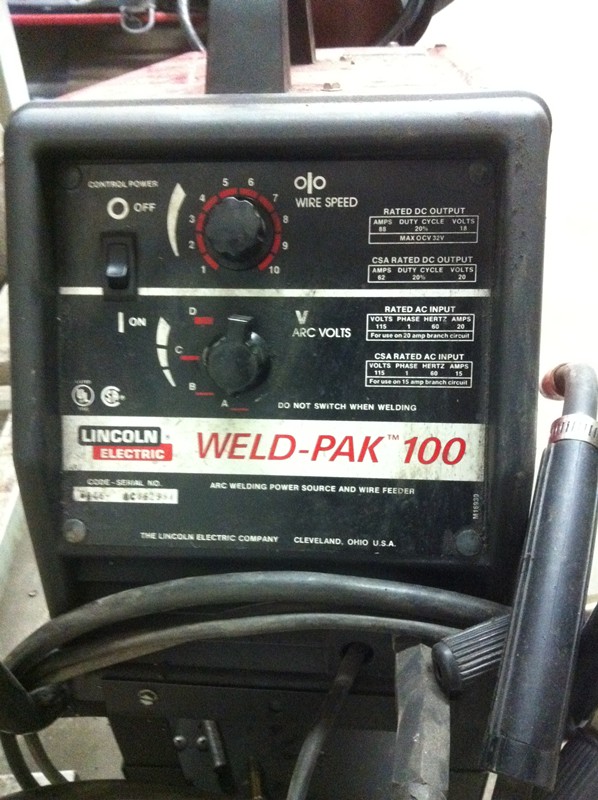
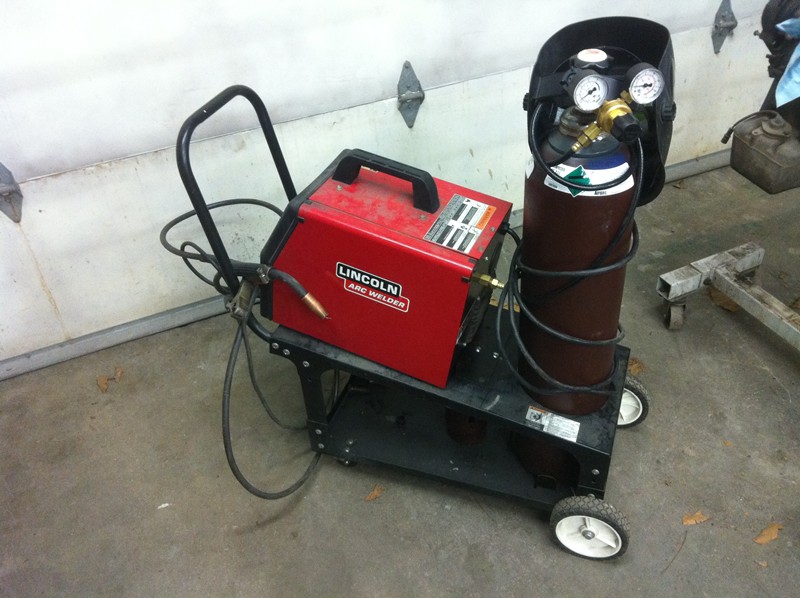
Someone had asked about the welder I'm using. Here it is. I got sick of swapping 40lb bottles for $36 each. I traded it in today on an 80lb bottle, which costs $40 to swap. The 80 lb bottle was about $100 after being credited for my old 40lb bottle, so it shouldn't take long to pay for itself.
Comment
-
Patched up the huge hole in the passenger floorboard/rocker today.
Comment
-
Looks like you are getting pretty good at this welding thing. Those beads already look 10x better than the ones you made the first day.Comment


Comment