

Sorry guys, nothing really exciting to post. I just got back from 10 days of vacation so she's still about 50% sandblasted. I did get some more body parts in while I was gone, so you can expect a small update in the next day or two.
-
This is insane. That's a ton of welding work. You're basically building a 2002 from scratch. Hats off to you man!Zinno '89 <24v swap in progress>

Comment
-
Wow, this build is amazing! I'm in awe of your fab skill and determination. Keep it up!Comment
-
-
So it's been a while since I had an update worth posting, between the crazy hot weather and my work schedule it's been hard to make any noticeable progress. Luckily today I managed to knock out enough that it was worth it to catch you guys up.
First thing first, the rest of the Turbo body parts came in from Blunttech (thanks again Steve). All together the kit consists of:
4 fender flares:
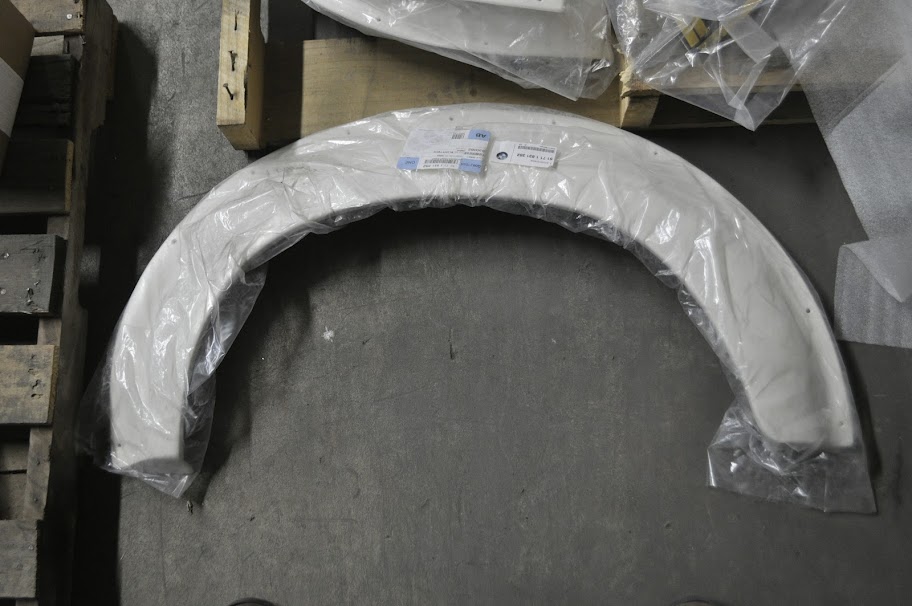
Rear Trunklid Spoiler:

Front Spoiler/Lip:

Gasket for between the Body and Flares, along with mounting nuts:

Sadly the Front Driver Side Flare is currently unavailable from anywhere. Supposedly BMW has then in production, but there is no telling when they will be available again. As of right now it's not holding me up, since mounting and trimming the front fenders won't take to long (the time consuming part is going to be the rear flares). Worst case scenario is I'll end up having to get a reproduction and use it until the OEM piece comes back in stock.Comment
-
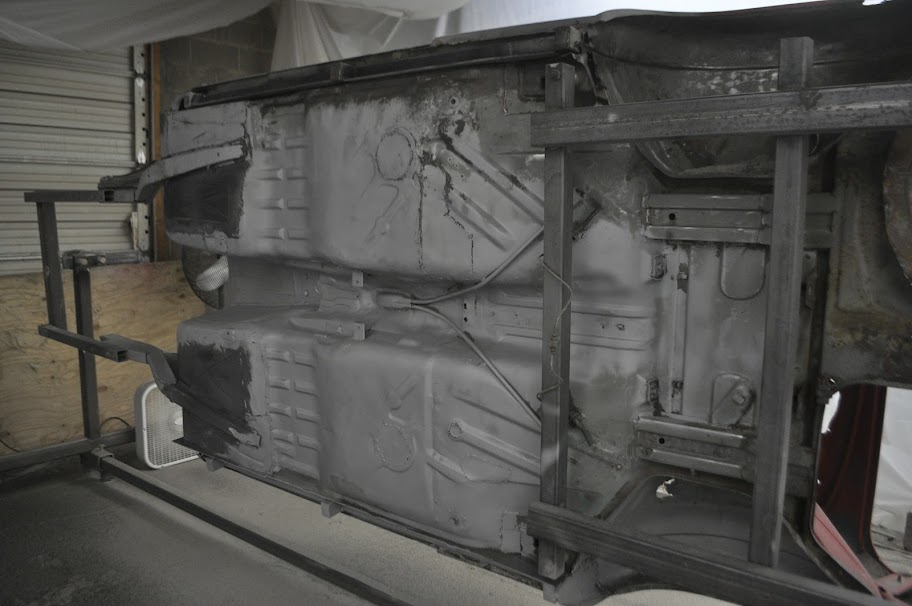
The rest of my time has been spend stripping the car down to bare metal. After finishing all of the exterior surfaces, I started working on the underbody. The sand blasting process worked great for the surfaces with just paint and bondo (in some cases LOTS of bondo lol), but it was pretty much useless on anything with rubberized undercoating. Which is the entire underside of the car. Because of this, I had to bust out the 4" grinder with the wire wheel attached and strip off all the rubbery material. This leaves the base metal primer, which I'll sandblast off as a final step.
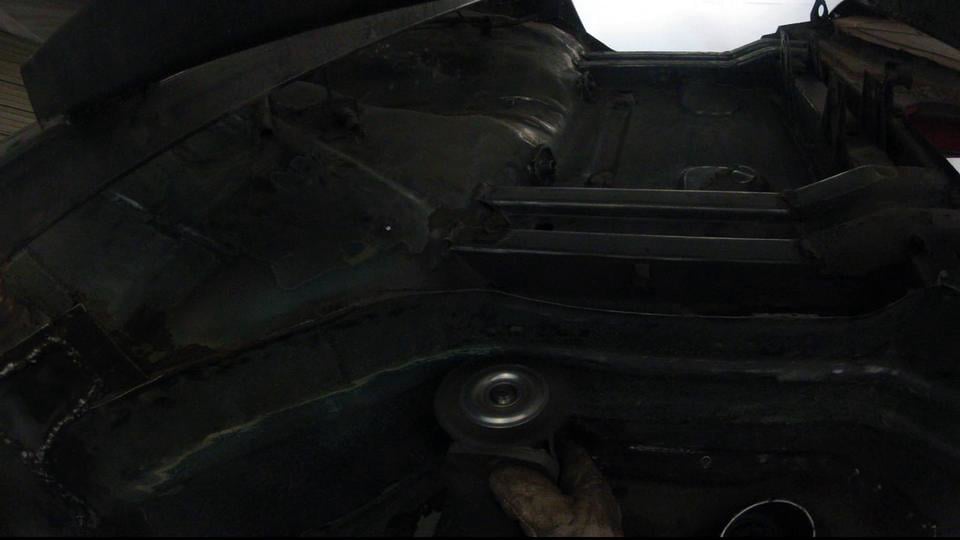
Here's a pic of the underbody after stripping off the rubbery undercoat. It's kinda hard to see, but the grey/greenish area's are the base metal primer ready to be sandblasted. The lighter grey area is already sandblasted metal, and the black is an aftermarket undercoating from my previous repairs. It will also be coming off to bare metal, but it needs to be ground off still.

What does half a car worth of undercoating look like?? This, the pile is about half and inch thick.

After spending a few hours working on the bottom of the car, I turned my attention to the rear fender wells. The first picture is after I wire wheeled out all of the undercoating. This showed me what places were rusty and needed attention.

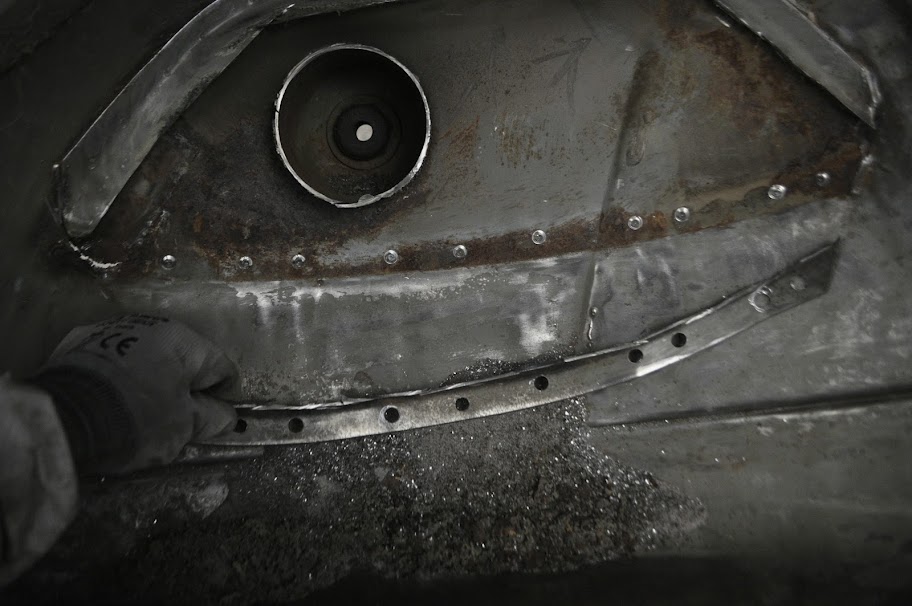
For my rear suspension, I'm going to be running a true coilover that ties into the roll cage in the trunk area. This means that the stock spring perch and reinforcement are just taking up space, so out they come.

With the inner section cut out, it just left the spot welded attachments which gave me a great chance to use my new spot weld cutters. Here you can see the individual spot welds on each piece.

First I punched the center of each spot weld so the cutter could locate properly.

And here you can see the cutter. The center rod is spring loaded, so it helps to locate the cutter without drilling into the second layer of metal.

As you push the bit in, the rod retracts keeping the bit centered.
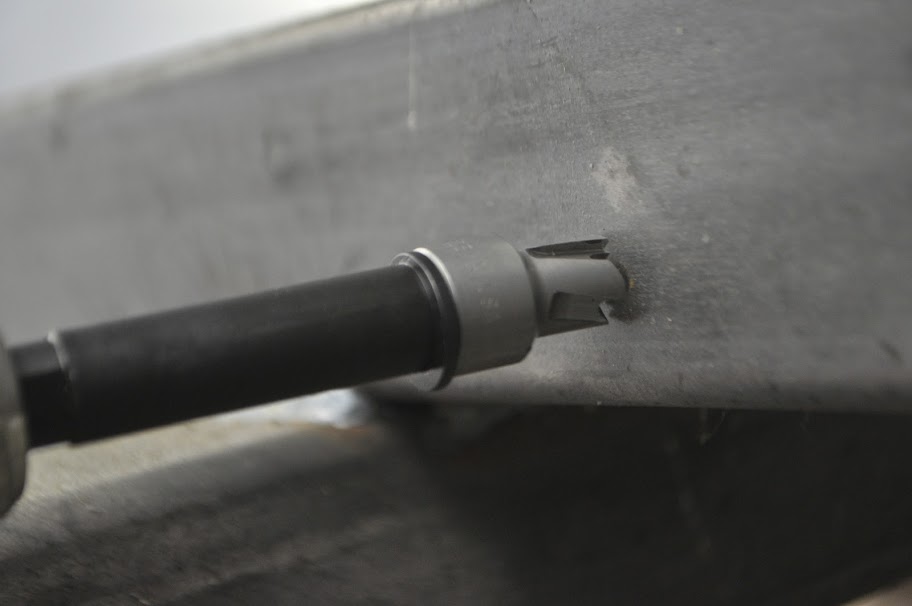
Now all that was left was to drill out all the spot welds for the spring perch support.

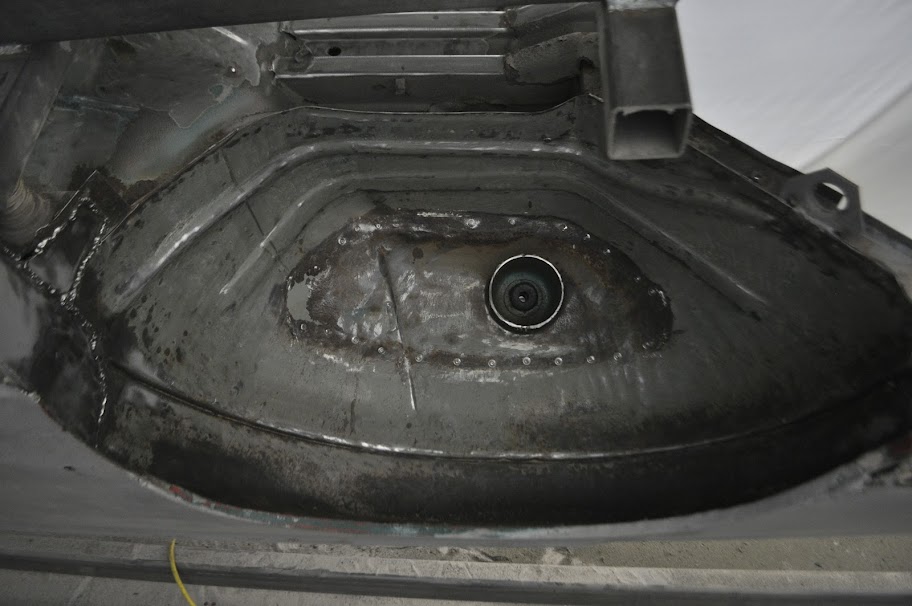
Bottom Side Done:
Top side Done:

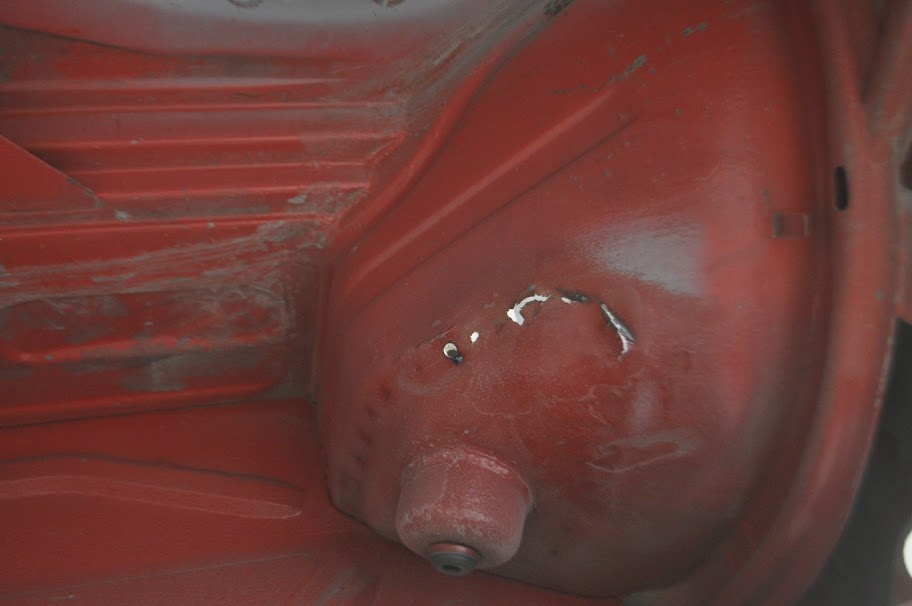
After removing it, I'm really glad I did. You can see all the rust that was hiding underneath it. Luckily with the perch out of they way it will be very simple to patch it and tie it into the cage with my shock mount.


The next steps are to remove the spring perch from the other side (passenger) and then sandblast the underbody for hopefully the last time. Then I just need to blast the interior, which shouldn't take much time at all thanks to the thin layer of paint, and the trunk.Comment
-
More progress on the underbody today. First up was removing the spring perch on the passenger side.
Hmm, I wonder what's under there:

Surprise!! More Rust!

Wheel Well after drilling out the spot welds and grinding off all of the undercoating. Now it's ready for sand blasting:
The worst of the rust was actually on the passenger compartment side this time. Either way, it'll get cutout and replaced.

And to think one of the reasons I bought this car was because it had solid shock towers. :rofl:
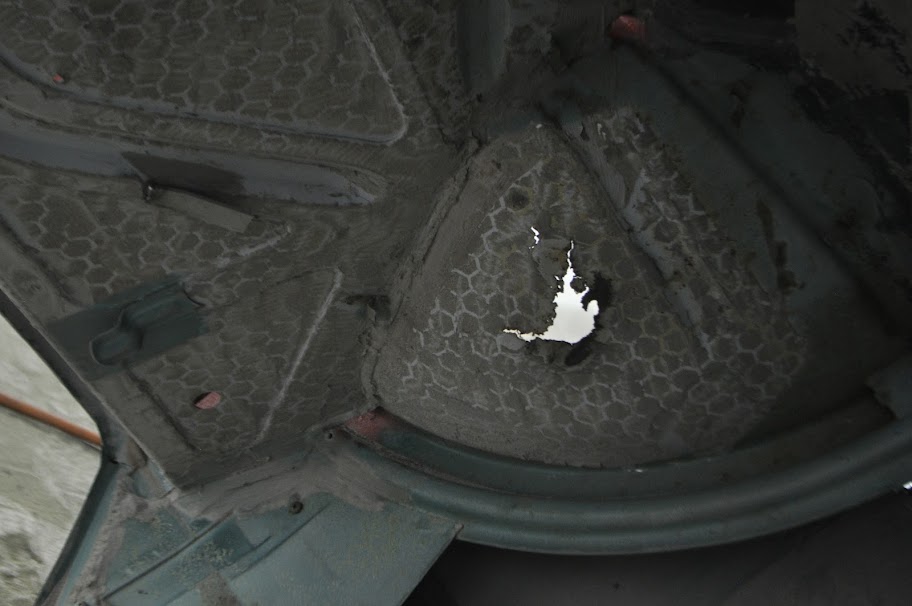
How it looks from the passenger compartment. Think of it as ventilation for the rear seat passengers.
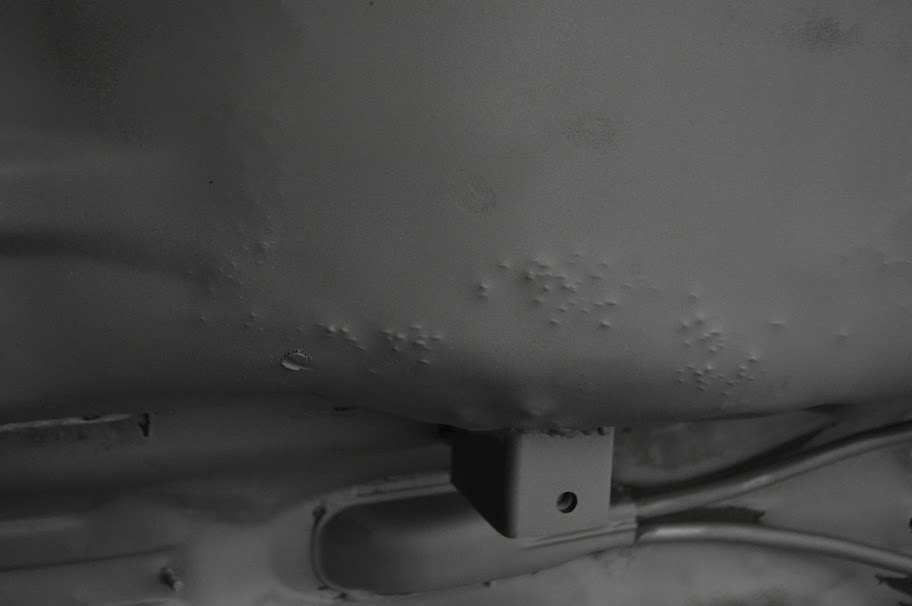
Here's the underbody after getting blasted. Pleasantly surprised with how solid the metal is here, both the original metal and my patches from two years ago are holding up well.
I think there may have been a hoard of angry chickens in my car at one point in time.
And finally here's the same wheel well after being blasted. Fairly clean, just needs the one patch and some modification for my true-coilover setup.

Last but not least, I picked up a GoPro Hero2 this past week. I got it mostly for recording drives and other outdoor activities (snowboarding, hiking etc), but until then I'm also going to use it to help document the build in a different way than just the pictures. That being said I don't really want to take it in the booth while I'm sandblasting, so that will have to wait until I'm done with this stage. Hopefully here soon.

Thanks for Looking!Comment
-
I'm only on page two, I cheated and read top of eight and all of nine.....
All I know is, this is one impressive build.....I will be following this closely.
Comment
-
Lol, I'm only just starting page 4.
Thanks! I'm trying to have much more regular updates so you'll hopefully have some catching up to do.Comment
-
^depends on your post count per page ;]
i haven't got around to changing mine. says we're on the 9th page1984 Eta
1987 Bagged
1988 I
1995 MX5
1998 C70T5M
2002 CL600Comment
-
You and Gary are my fucking heroes.Need a part? PM me.
Get your Bass on. Luke's r3v Boxes are here: http://www.r3vlimited.com/board/showthread.php?t=198123Comment
-
boss man, keep it up. im gona steal some ideas for my 74 2002. keep us posted.
Comment
-
The next 2002 I own will be done just like this one. Over a long time with much more detail, and patience taken on every part of the project over more then one year. I really regret rushing my last car which led to me having to sell it. Live and learn.
Keep up the good work!sigpic
"The bitterness of poor quality remains long after the sweetness of low price is forgotten."
Comment
-
Well duh, but all the cool kids have maximum posts/page. :rofl:
I gotta disagree there, I can't be mentioned in the same paragraph as Gary and his project.
Go for it! Just be sure to give me all the credit lol.
:jk:
Thanks for the kind words man. I'm was bummed to hear you had to sell your '02, but just think how nice your next one will be. I'm just very lucky to be able to do what I'm doing right now in my life!Comment
-
Let me start by saying that this was just something that I threw together very quick this afternoon. I was anxious to test out the Hero2, and so I took this video of some undercoating removal. Not the most glamorous topic I know, this was mainly just an exercise for me to be able to practice with. That way when the good stuff comes along I'll know what to do and how to do it.
Without further adieu:
Sorry about the link, I can't seem to figure out how to embed a Vimeo movie directly into my post on this forum.... If anybody has any experience please shoot me a pm.Comment
Comment