Announcement

Collapse
No announcement yet.

My 87 325e <3

Collapse
X
 
  • Filter
  • Time
  • Show
Clear All
new posts

    My 87 325e <3

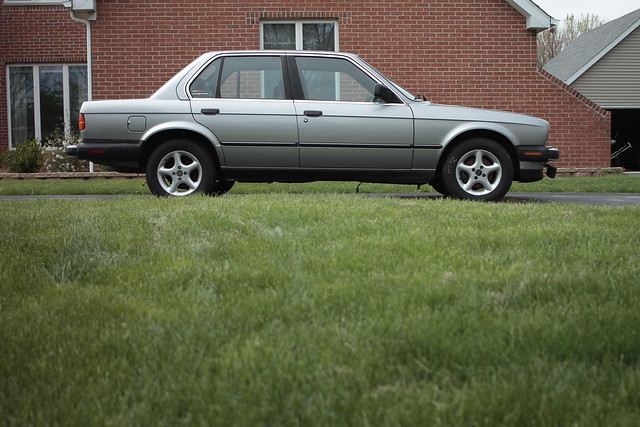
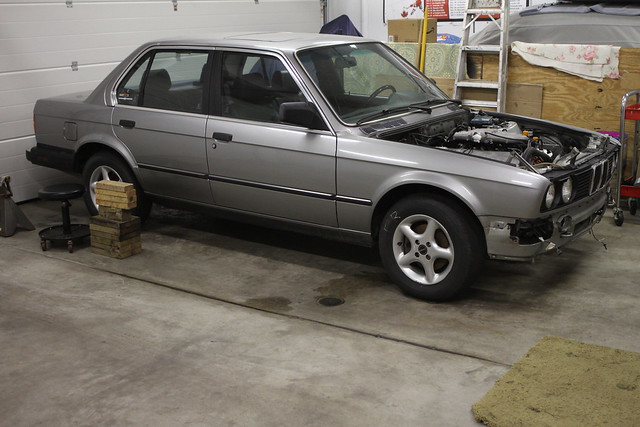
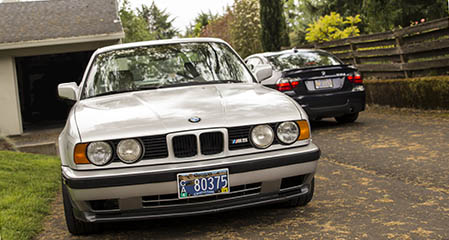
    Hello my name is Matt, and this is my 87 325e 4-door sedan….


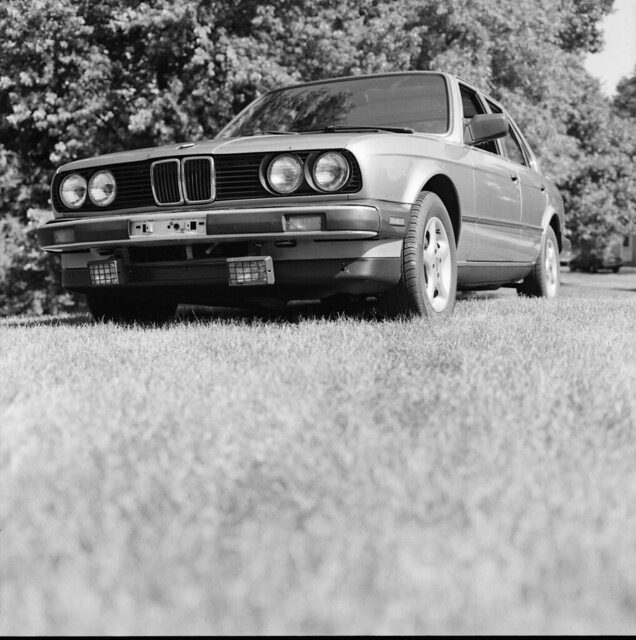
    Untitled by mattrides, on Flickr


    I have completed most of the build already, and I am posting this as a thank you to the forum for helping provide inspiration, knowledge, and of course free reign the classified ad section! Believe it or not, car wouldn’t be were it is today if it wasn’t for this forum. Thank you!

    A quick rundown of the car….

    The car came from the west coast (Washington) and has absolutely NO RUST!!!!! She was an automatic and has about 200,xxx miles on her; everything was original minus the wheels, exhaust, and driveshaft…. The drive shaft was the whole reason why I started to tear the thing apart to begin with (gnarly vibrations coming from the transmission tunnel), and it took about 8 months and 4 drive shafts to get it back on the road!

    What I have done to the car…
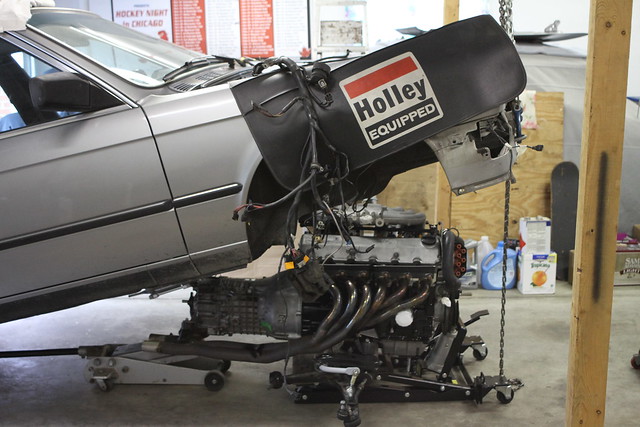
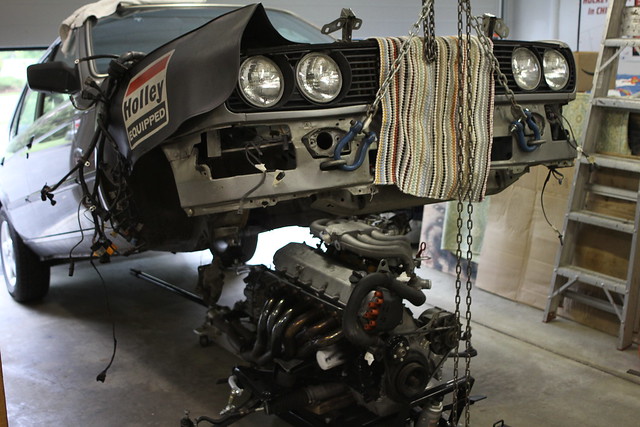
    Motor
    -Re-sealed (all gaskets replaced minus head gasket)
    -Cleaned everything and painted the block
    -Port matched intake to head
    -19lbs type III yellow top injectors (Then swapped back to rebuilt stock...)
    -eBay headers (OBX pieces of shit... should have kept stock manifolds)
    -A/C delete
    -P.S. delete
    -New motor mounts

    Transmission/Driveline (Manual swap)
    -Lightened ETA single mass flywheel (18lbs)
    -New clutch and associated parts
    -Cracked the trans and did a FULL re-seal
    -New drive shaft and associated parts
    -2.93 LSD re-sealed and inspected (Car already had one though?.... oops…)
    -AKG Dssr and Delrin carrier bushings
    -All new shift linkage and lever
    -New transmission mounts
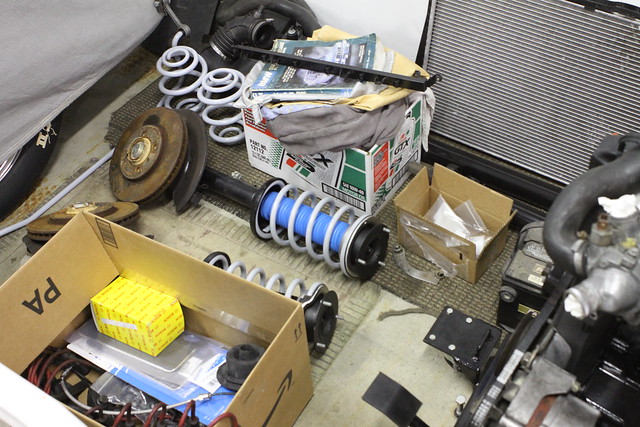
    Suspension
    -Cut front springs -1 coil paired with e90 drop hats
    -m3 rear springs
    -Bilstine HD’s all around (cut front bump stops)
    -21mm vert front sway paired with I.E. adjustable links and new rubber
    -14.5mm m3 rear sway with new links and rubber
    -AKG 80A poly rear sub-frame bushing set
    -AKG old soft poly front CAB’s (he just gave these to me when I picked up my order. Thanks Andy!)
    -OEM rear trailing arm bushings (Less noise than poly)
    -New front and rear strut mounts with AKG reinforcement plates in the rear
    -Standard 2.8L e36 3.2 turn rack (new tie-rods) with e30tech spacer kit and Silence P.S. delete
    -AKG 75D steering “not so flex” disk

    Other
    -Replaced sunroof seal
    -Replaced tail light seals
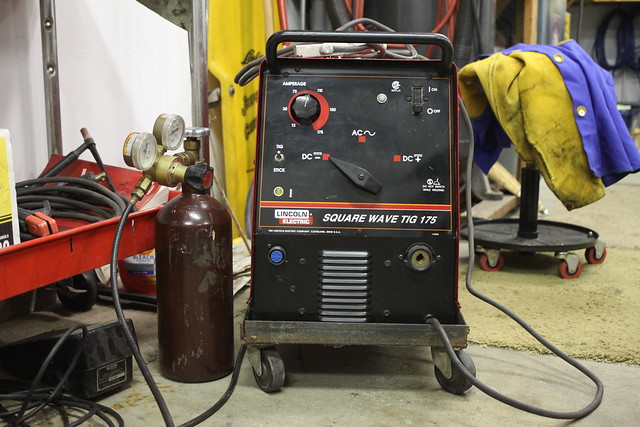
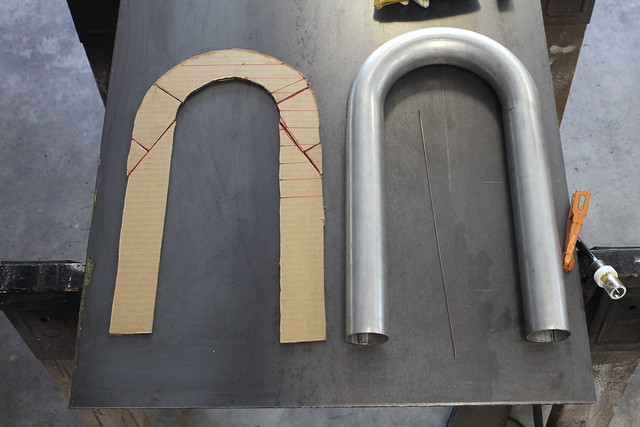
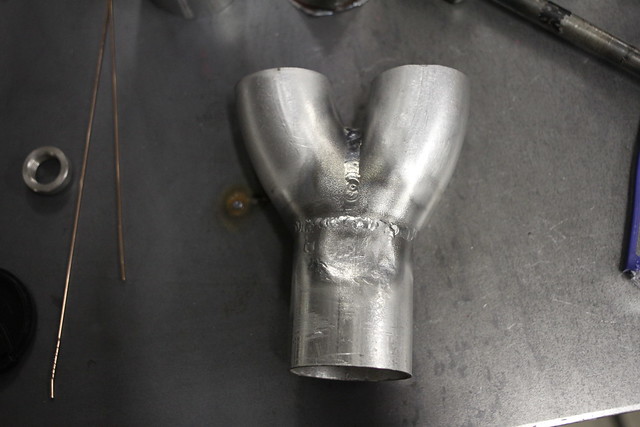
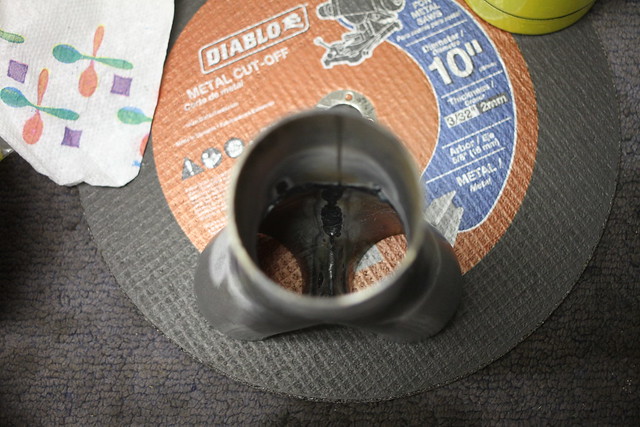
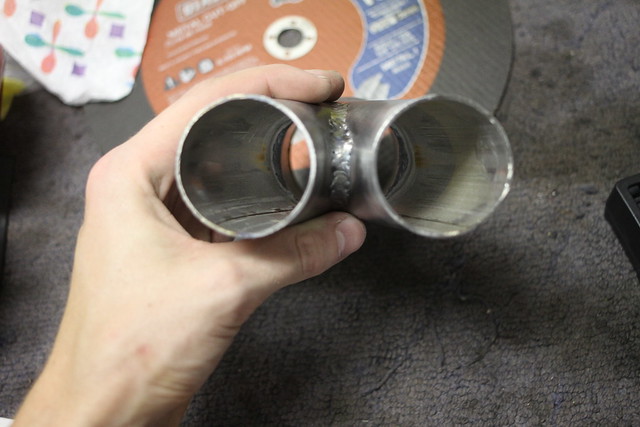
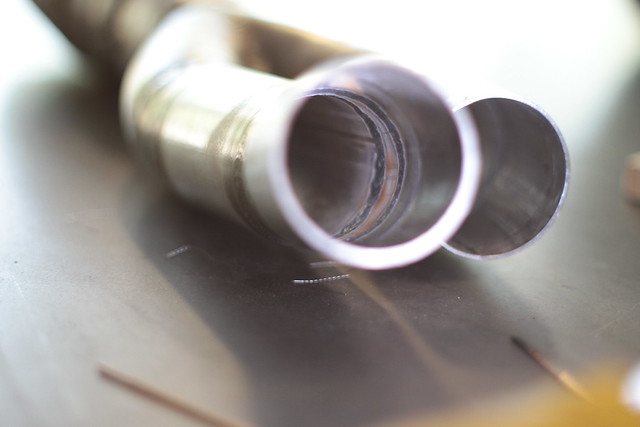
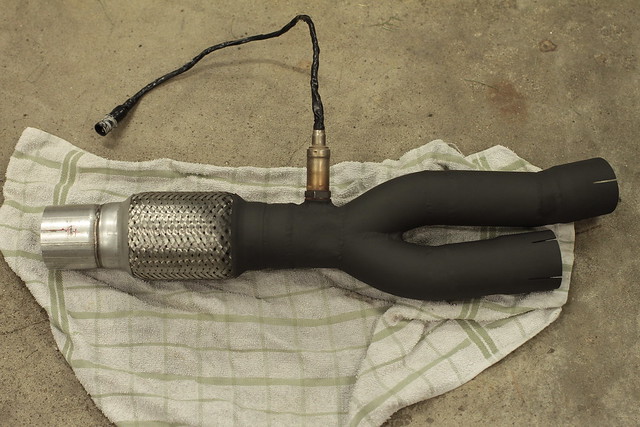
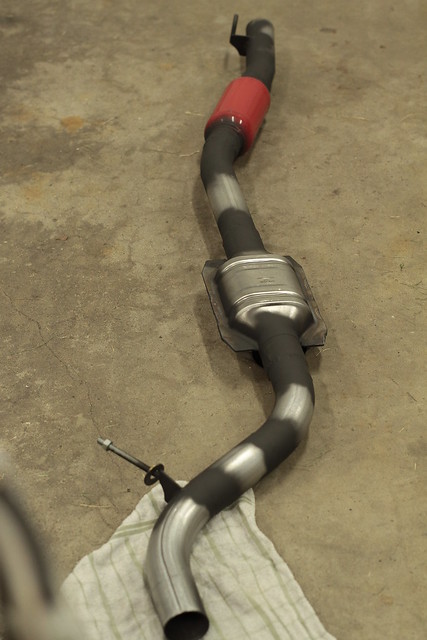
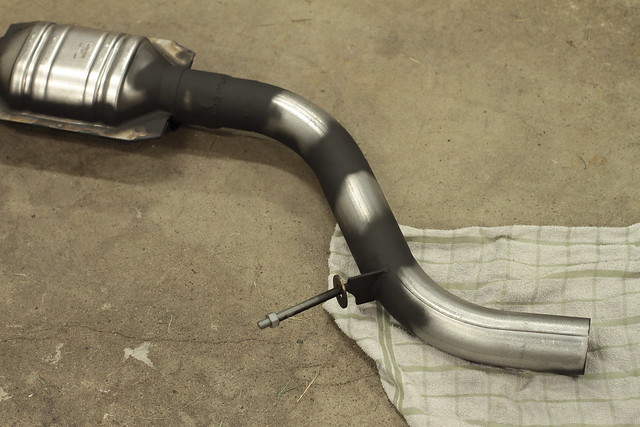
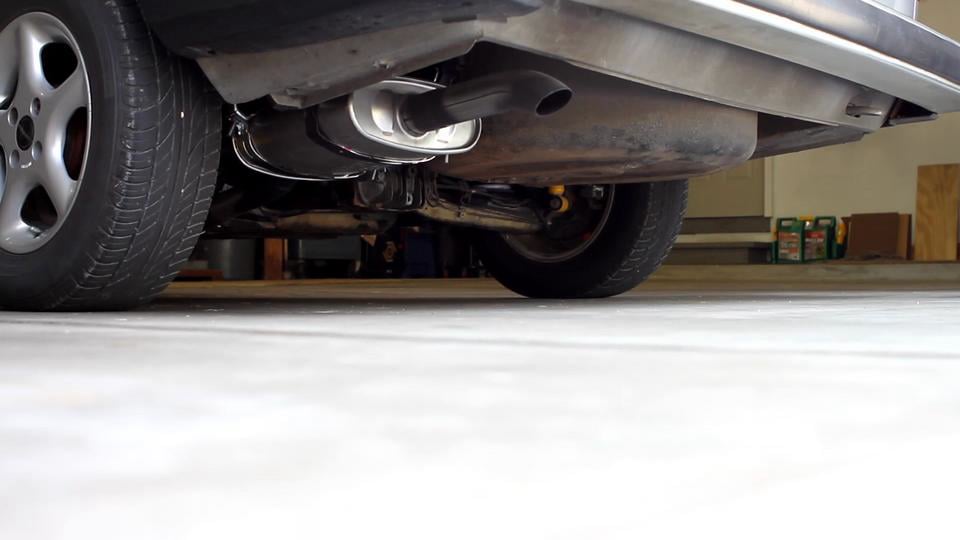
    -Full custom 2.25” exhaust (In the works as I type, buying TIG welder soon)
    -Plastic bumpers
    -Antenna delete with delete plug that is sold here on the forum
    -Replaced fuel filter and soft lines in the back
    -All new fluids and such

    I think that’s about all I did to it. The car already had some Borbet type ?’s on it, and it has a stock interior.

    Again I would like to thank all the members that I bought parts from, or members threads that used to help with the build. I would also like to thank the P.O. Chis for bringing the car out here from the west, Andy at AKG for hooking it up with free parts, and Steve at Blunt-tech for supplying all of the OEM stuff for the build. Thanks Everyone!

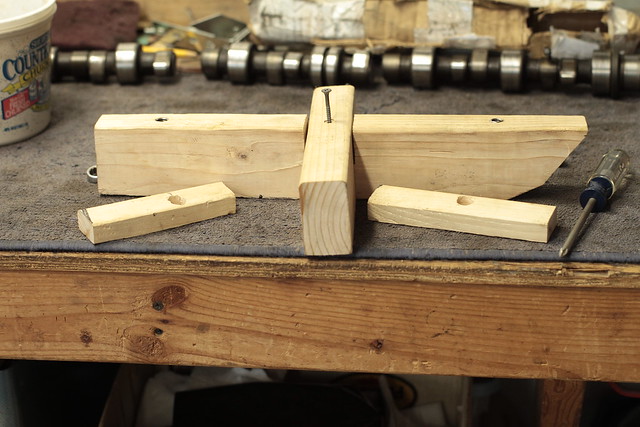
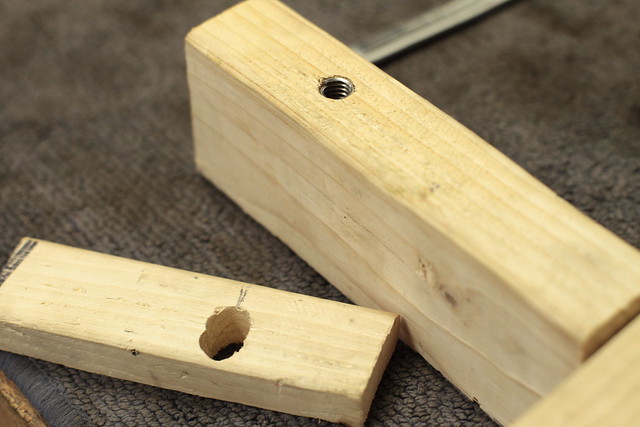
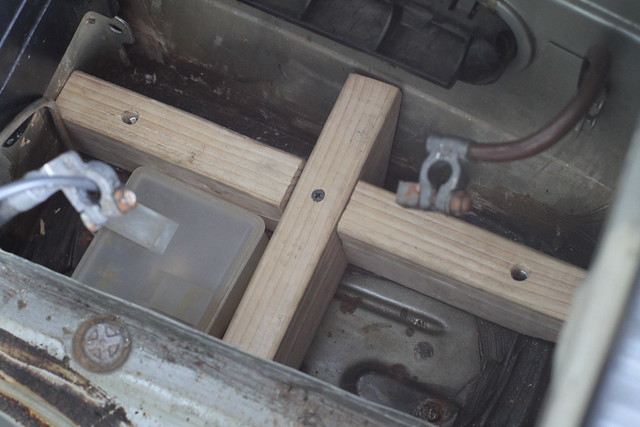
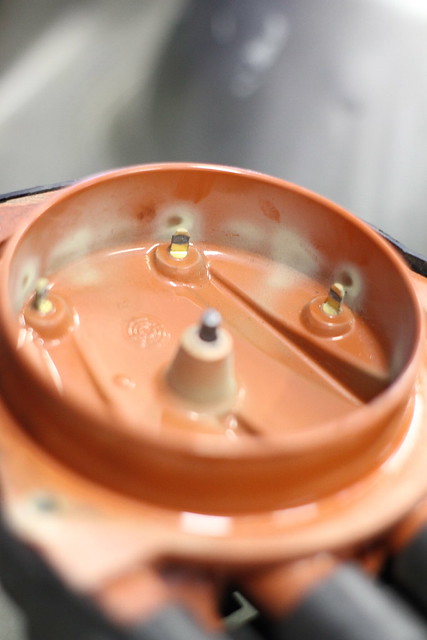
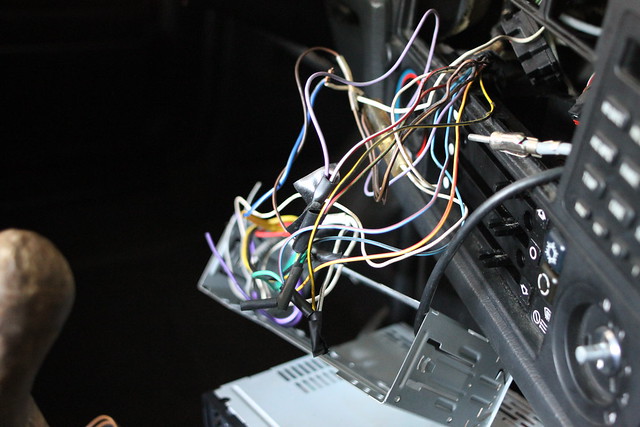
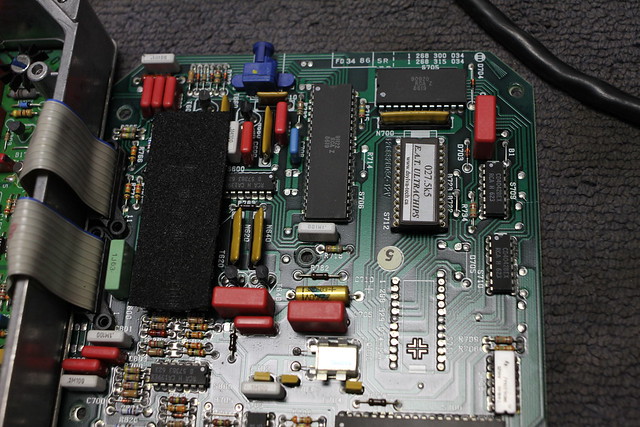
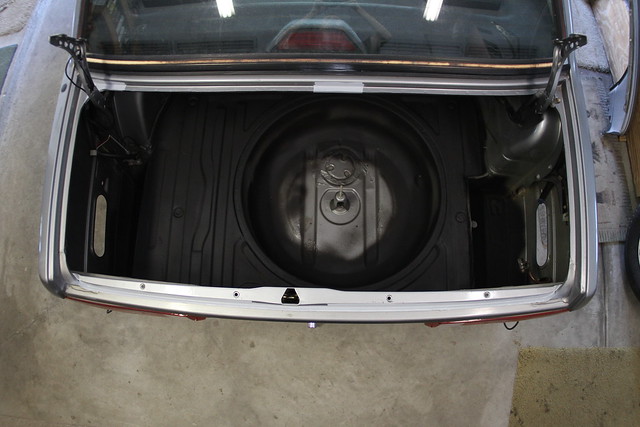
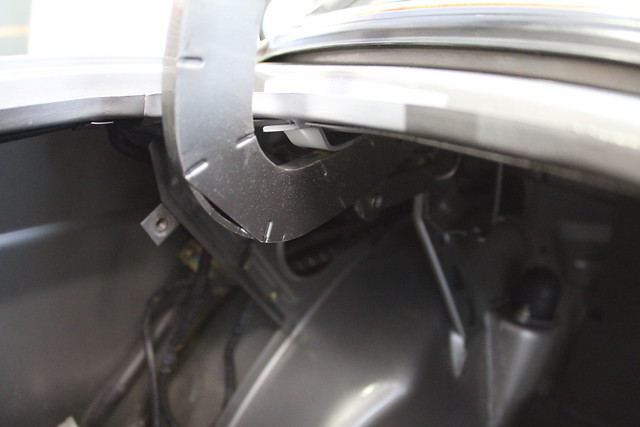
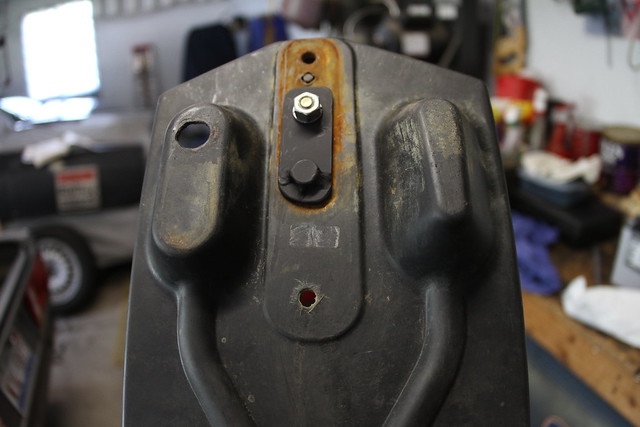
    Here are a few photos from the build that I liked; you can see the rest in the link below.

    Explore Los Pantelones!’s 439 photos on Flickr!


    IMG_3878 by Los Pantelones!, on Flickr


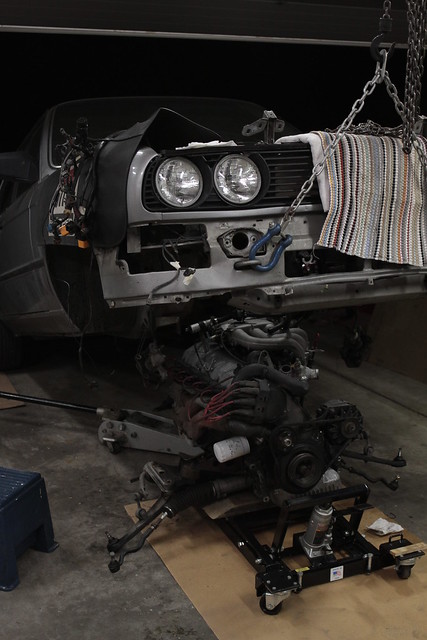
    IMG_3893 by Los Pantelones!, on Flickr


    IMG_3906 by Los Pantelones!, on Flickr


    IMG_3683 by mattrides, on Flickr


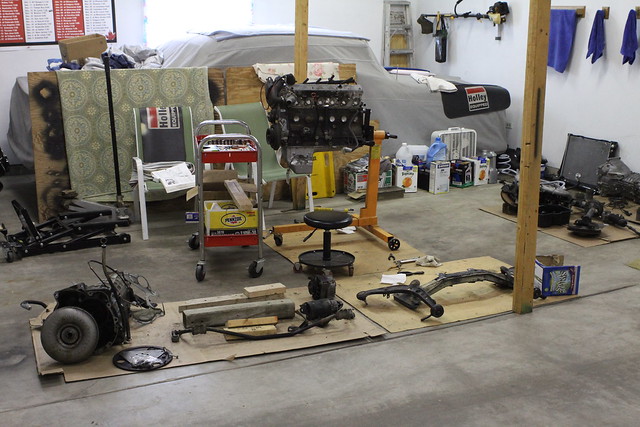
    IMG_3935 by Los Pantelones!, on Flickr


    IMG_3996 by Los Pantelones!, on Flickr


    IMG_3999 by Los Pantelones!, on Flickr


    IMG_4007 by Los Pantelones!, on Flickr


    IMG_4006 by Los Pantelones!, on Flickr


    IMG_4023 by Los Pantelones!, on Flickr


    IMG_4016 by Los Pantelones!, on Flickr
    Last edited by pantelones; 09-15-2013, 11:51 PM.
    sigpic

    A man chooses, a slave obeys... Would you kindly?

    #2
    Very nice work! What brand is that lift that you used to get the engine back in?
    '88 528e /// '88 M5 /// '89 951 /// '98 E430 /// '02 M5

    Comment


      #3
      Very very nice. You do some great work. '87 325e here also.
      sigpic

      2011 335i/1995 Mercedes C220 (rallyx)

      Comment


        #4
        Originally posted by euroshark View Post
        Very nice work! What brand is that lift that you used to get the engine back in?
        Thank you! You are referring to the one under the motor correct? I just took a look and it's a Pro-Lift motorcycle jack, not sure which model though, but it worked great! :)

        Originally posted by Gary Horneck View Post
        Very very nice. You do some great work. '87 325e here also.
        Thank you! I take pride in my work!
        sigpic

        A man chooses, a slave obeys... Would you kindly?

        Comment


          #5
          nice to see a clean well sorted work area/ garage

          Turbo M42 Build Thread :Here
          Ig:ryno_pzk
          I like the tuna here.
          Originally posted by lambo
          Buttchug. The official poster child of r3v.

          Comment


            #6
            Damn that bay looks clean!
            -Nick
            Originally posted by 87e30
            First of all: calm the fuck down; second of all; cool story bro.

            Comment


              #7
              love the organization!! keep it clean!
              1989 325i SETA stroker [delphin] R3V'd 8/31/2011
              1989 325ix [zinnoberrot] $OLD
              1970 2002 [Nevada]

              Originally posted by Herr Faust Schinken
              guy must have slid into something that doesn't look like a car vs car hit
              Originally posted by ak-
              Must of slid into Rob

              Comment


                #8
                Well, I am a welder/machinist, and clean is the name of the game. I guess it shows through my work eh? Thanks guys!


                On a side note, I picked up my welder today....


                IMG_4080 by Los Pantelones!, on Flickr

                It's Lincoln Square Wave 175, but I'm sure you could read that. I was originally going to get a Miller Diversion 180, but I just couldn't justify dropping close to two stacks on the same machine that I bought for $900. I wish it was an inverter, but I already have another machine in mind once I out grow this one....

                I played with it tonight and man do I LOVE TIG! I can see exactly why they recommend we take a gas class before beginning to learn TIG. So far I have just been playing around, and it's a lot easier than I though it would be. Granted I haven't been using filler rod, but the pedal was much easier to get used to than most people make it out to be.

                An edge joint I did on a triangle...


                IMG_4116 by Los Pantelones!, on Flickr


                And what I get to play with once I pick up a real bottle tomorrow from Air-gas.......


                IMG_4081 by Los Pantelones!, on Flickr
                sigpic

                A man chooses, a slave obeys... Would you kindly?

                Comment


                  #9
                  Very Nice. Is that red thing a cat?
                  -Nick
                  Originally posted by 87e30
                  First of all: calm the fuck down; second of all; cool story bro.

                  Comment


                    #10
                    Originally posted by BeemerBuyer View Post
                    Very Nice. Is that red thing a cat?
                    Nope, it's a cherry bomb that I'm using after the cat (one on the right of the red thing). I don't like the police, and I don't put up with their shit, so I try to avoid confrontation at all cost. No exhaust tickets for me....
                    sigpic

                    A man chooses, a slave obeys... Would you kindly?

                    Comment


                      #11
                      Exhaust...

                      Over the past two weekends I have been working on my exhaust, and I must say this has been a lot more work than I thought it was going to be. I know the first time you do anything it takes longer, but god damn this has taken a long time. I have about a full work week into it (50 hours maybe), and I have the down pipe and mid section finished/mounted. I have the rear section left to go, but I have to get new mounting hard/soft ware to properly mount the muffler.

                      It sounds mean right now (just the cat and the cherry-bomb), and I am a little worried it's still going to be pretty loud with the muffler. I'll post a sound clip if I remember......

                      On to the pictures! :)


                      IMG_4117 by Los Pantelones!, on Flickr


                      IMG_4118 by Los Pantelones!, on Flickr


                      IMG_4119 by Los Pantelones!, on Flickr


                      IMG_4120 by Los Pantelones!, on Flickr


                      IMG_4122 by Los Pantelones!, on Flickr


                      IMG_4123 by Los Pantelones!, on Flickr


                      So in hindsight, I should have bought this piece instead of making it. You can get them from Columbia river mandrel bending for $50, and its a better piece. Mine turned out ok, but I do not get penetration between the two pipes seen in the photo above. I think if I were to do it now I could probably get it, but this was some of the first real welding done with the new TIG machine other than a few practice butt welds. I got better as I went along....


                      IMG_4144 by Los Pantelones!, on Flickr


                      IMG_4143 by Los Pantelones!, on Flickr


                      IMG_4151 by Los Pantelones!, on Flickr


                      IMG_4149 by Los Pantelones!, on Flickr

                      I learned how to get great equal penetration toward the end of making the down pipe! The O2 bung gave me hell...... Welding stainless (not sure of series) to aluminized tubing probably didn't help, but I definitely did not have good penetration. I think that was due to poor tack welds and a combination of poor fit up and not enough filler rod. It should seal, but I know what to try for next time....

                      So for those of you who are interested in OBX or what ever ebay knock-offs they go by now, this is what you have to make to have your down pipe come on and off. ( I had to cut the one they make off ) You may be using a duel set up instead of a 2-1 merge, but this is what it should look like.....


                      IMG_4158 by Los Pantelones!, on Flickr


                      So on to the mid pipe........


                      IMG_4163 by Los Pantelones!, on Flickr


                      IMG_4161 by Los Pantelones!, on Flickr


                      IMG_4160 by Los Pantelones!, on Flickr


                      I didn't take any pictures during the process of making it, but I should have. I had a few really nice welds that you can't even see now that it has paint.

                      Also I chose to make my own mounting hardware for the mid section. I mounted it using the outer bolt on the right side of the chaise support, and the stock mount on the rear sub-frame. I used 12 gauge stock that I stole from welding class last semester and welded 3/8ths threaded rod to it. Then used old bicycle inter-tubes for vibration dampening, maybe, the thing is pretty stiff. It's a good thing I have that flex pipe Hahaha.


                      IMG_4165 by Los Pantelones!, on Flickr


                      IMG_4164 by Los Pantelones!, on Flickr
                      Last edited by pantelones; 09-24-2012, 08:24 PM.
                      sigpic

                      A man chooses, a slave obeys... Would you kindly?

                      Comment


                        #12
                        Progress/Update

                        I finished the rear section of the exhaust, and I must say that the stock rear hanger system sucks. I should have just made my own mounts, but I didn't want to have to weld to the body and I thought it was going to be a direct fit type of deal. I had to section the straps about 6 times to get them to work, and putting the new rubber hangers in was a joke. $60 down the toilet....

                        I didn't take any photos of building it, I just wanted to get it done and no one really showed any interest in the first section of the exhaust. My water pump also took a shit so I had to replace that, and do another valve adjustment so you could actually hear the exhaust in the sound clip. On to the photos......


                        IMG_4182 by Los Pantelones!, on Flickr


                        IMG_4180 by Los Pantelones!, on Flickr


                        I am relatively pleased with the way it sits underneath the car. I could have tucked it up a little bit better, but due to the crappy ebay headers I couldn't place the cat and cherry bomb in line with one another. I know what to do for next time, and I probably will make a set of headers so they will sit perfect. And if you were wondering, my fender heights are 25 3/8" in the front and 25" in the rear. 3/4 tank of gas and a spare tire.

                        I am also pleased with the way it sounds. It does have some drone between 1500 and 2000 when the motor has to work, but other than that it doesn't drone or rasp at all. It sounds great when I get on it and go through the gears. For $300 it's about as good as it's going to get. Sound clip for now. I'll post a better one later.


                        This is "MVI 4185" by matt arentz on Vimeo, the home for high quality videos and the people who love them.


                        Anyone know how to embed Vimeo?

                        The primary's are too big (1 5/8" I believe?), and the tubing (2 1/4") is also probably too big. If I understand exhaust theory correctly. this will kill my scavenging, and I am actually loosing low end torque/power by running the system. I do plan on making a set of equal length, and proper primary diameter headers at some point. I think I am going to use the PVC and clamp skeleton system (a jig basically) to make them. So I could make sets to order if there is any interest.


                        I also had my battery out to charge the other day so I took some photos of my tray that I made. I used 2by4's that are cut down, notched both to fit together, and stainless helicoils for the threads in the wood. I need to fix the way it locks the battery down though. Every once and a while it will come loose and I need to readjust the clamps.


                        IMG_4166 by Los Pantelones!, on Flickr


                        IMG_4167 by Los Pantelones!, on Flickr


                        IMG_4168 by Los Pantelones!, on Flickr


                        When I was replacing the water pump I saw that my ignition looked really corroded. I asked my dad and he said it looked ok, but it looked like it was much older than a year or two old. (the P.O. said he replaced it about a year ago.) Anyone have any knowledge about this?


                        IMG_4176 by Los Pantelones!, on Flickr


                        And finally, my buddy has been having a no start problem (Coil doesn't get signal to spark). He has tried everything that could be done to fix it. Last night we tried testing the OBC and ECU from his car in mine, sure enough it starts, and my car actually ran smoother with his ECU. Go figure? Anyways when we took my radio out we found this lovely work...... No solder, just twisted and half assed electrical taped.


                        IMG_4186 by Los Pantelones!, on Flickr


                        IMG_4187 by Los Pantelones!, on Flickr
                        Last edited by pantelones; 07-11-2012, 09:35 AM.
                        sigpic

                        A man chooses, a slave obeys... Would you kindly?

                        Comment


                          #13
                          Engine bay looks great, That is what I am going for my build.

                          Comment


                            #14
                            Small Update.....

                            I must say that this is probably the most fun, and practical car that I have driven. After getting to know the car and breaking everything in, she really is a nice ride. I recently bought a MarkD chip, and I did the 94-98 mustang 3-wre o2 sensor trick for the early motronic ECU. (Cost $25) I also called Mark before I bought the chip to ask him a few questions, and he is really a great guy to have in the BMW community. It's really a shame that people aren't willing to spend $200 on a chip that yes, only cost maybe $5, but it funds his research and development for new stuff. Thanks again for talking to me, and the chip was worth every penny!


                            IMG_4261 by Los Pantelones!, on Flickr


                            I also am considering selling the car...... I have come to realize that due to school, and not being able to work consistently I am never going to pay off what I owe. I originally had no intentions of selling the car, so I put A LOT of effort and work that I wouldn't have if it wasn't my personal car. I honestly probably have $7000-8000 into the car and I'm sure that is on the low side. I think I would take $6000 or a good offer. I also would consider trades, but the car MUST have no rust or major leaks.
                            sigpic

                            A man chooses, a slave obeys... Would you kindly?

                            Comment


                              #15
                              Update

                              Over the last couple months I have been doing final prep to the car before it is sold. I fixed various small issues with the drive-train, and now I am on the the cosmetic and structural stuff. First up is the trunk... Now, my trunk leaked like a sieve. And I mean like a .500 save average disaster hahaha I had water everywhere, and I could not for the life of me find out why. Then I noticed something about the trunk lid bracket that made me LOL! The spot weld was broken on the driver side, but was covered with some ducting tape. It caused the lid to sit a 1/4" low in the left front, and had worn out the gasket to the point of it not sealing. Another wonderful gift from the P.O. On to the photos of repair...


                              I'll start with this photo just for some background info.


                              IMG_4510 by Los Pantelones!, on Flickr


                              I didn't take any before pictures. I should have, but I didn't. This was my first experience with doing body work with my TIG welder. I will say that I screwed up on my ground location, and I burned a hole in the sheet metal 
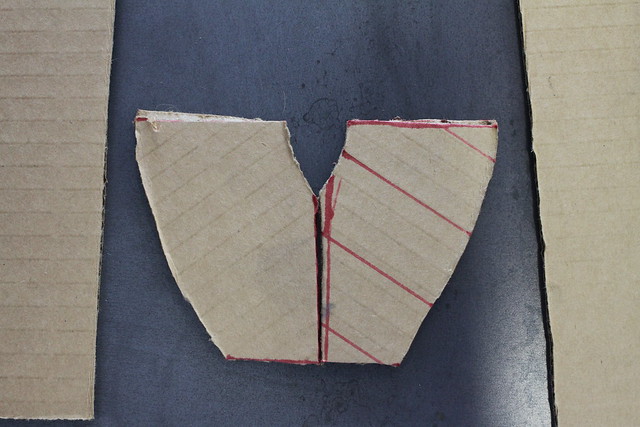
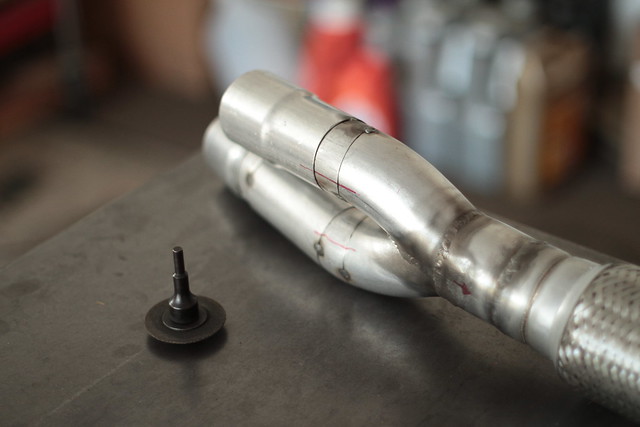
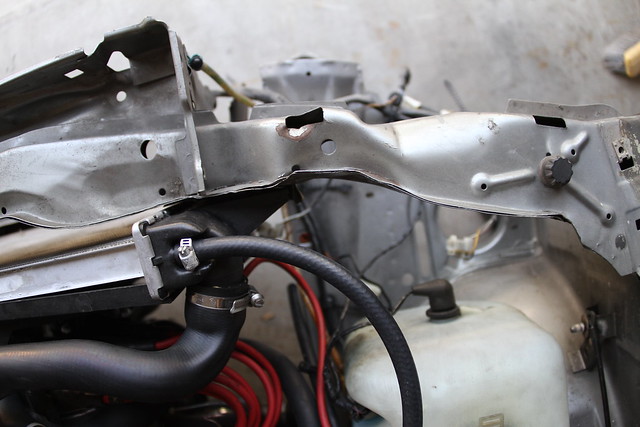
If you look in the center you can see the small gray patch of primer, and that's where the ground was at first. As I quickly learned, the arc went straight to the sheet metal and not the thicker bracket! Fuck! My original plan was toast... I had intended to: tack from the top, the get a nice solid beefy tack on the bottom, and then finish weld the top. What I had to do instead was: tack from the top, then fill/finish weld the top, and then I had metal to tack the bottom. By this time the bracket was not sitting 100% flush and I deemed it to be good enough...
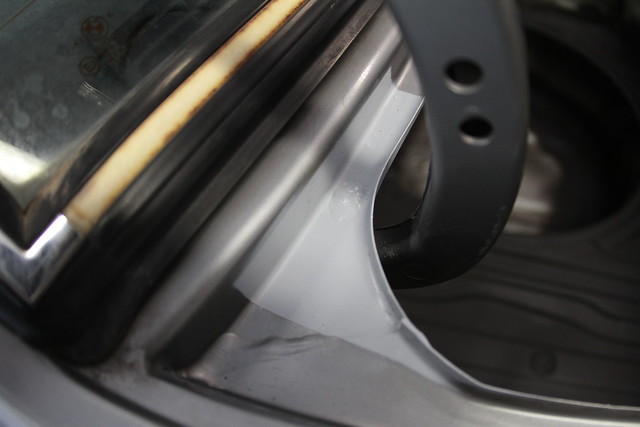


                              IMG_4511 by Los Pantelones!, on Flickr


                              IMG_4513 by Los Pantelones!, on Flickr

                              The corner with the tack is contacting 99%, but obviously the rest of the bracket isn't close... The weld is 100% structurally strong, but it is fugly for me. :roll:


                              The rear lip was also starting to rust, so it got sanded down and painted.


                              IMG_4515 by Los Pantelones!, on Flickr


                              And I also decided to fix the original battery tray that was all rusted out. My wooden 2by4 shenanigans was pretty silly considering how east this was to fix.


                              IMG_4518 by Los Pantelones!, on Flickr


                              IMG_4520 by Los Pantelones!, on Flickr

                              That's all for now! I will take some photos of the finished trunk, and I also will be tackling an issue to with this...
                              With a little bit of this?


                              IMG_4517 by Los Pantelones!, on Flickr
                              sigpic

                              A man chooses, a slave obeys... Would you kindly?

                              Comment

                              Working...
                              X