
Not insulting your work friend, just the quality of the cluster refurb. BavRest.com
-
Owner - Bavarian Restoration
BMW and European Electronics Repair and Restoration
www.BavRest.com
My Feedback Thread
Our Facebook!
Follow our Instagram!
-
I spoke with Diego after seeing a post with needles that look much better than mine, he is going to redo my cluster. I'll give him the opportunity, and if it doesn't go well I'll be in touch with Greg.
Once it isn't so muggy out I'll try and get some good up-to-date photos, but I figured I should post an update.
I came across Chemical Guy's VRP and wanted to give it a shot, this car has lots of external rubber and plastic. I treated a window frame for a 50/50 and it has held up very well for the past several weeks, through rain and plenty of sun.
Note that my window trim is done in black signing vinyl, still looking awesome after 3+ years. Plasti-dip has its uses, but no doubt it would be peeling/chipping/faded by now.
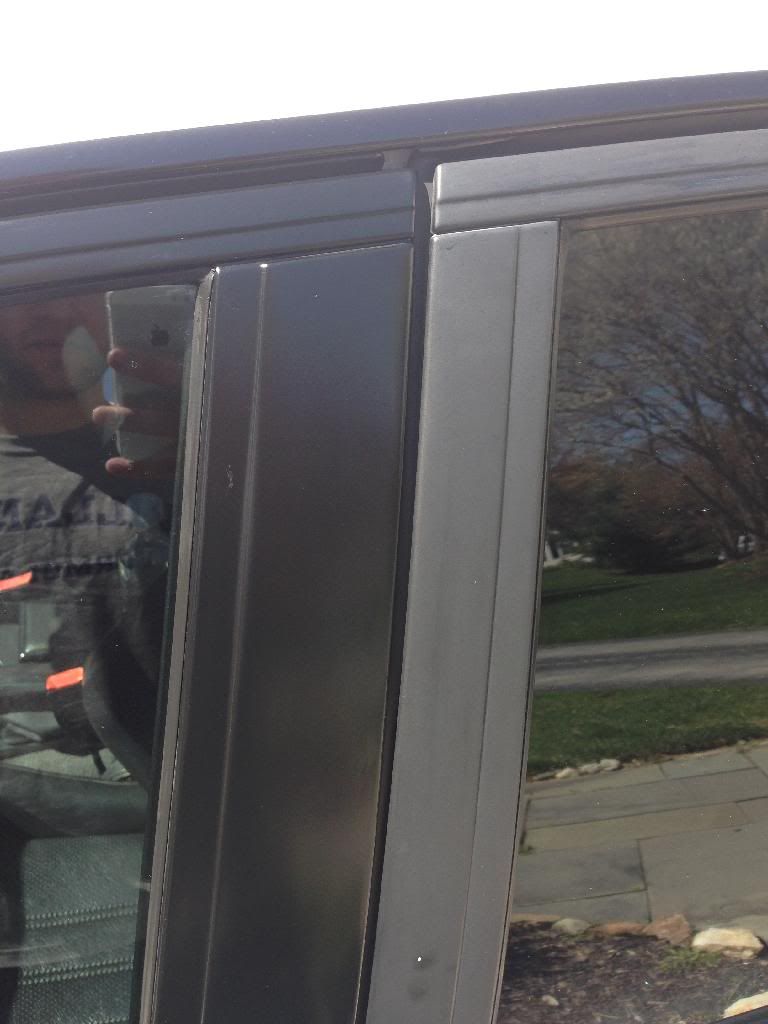
Definitely recommended for sprucing up the door rub strips, the bumper trim, the window frames and seals - even the front/rear.
I also went with 303 Aerospace for the dash, seats, and door cards. No pics yet but that stuff is remarkable, and buffs a bit cleaner. I didn't like it so much on the exterior, the VRP is a bit stronger but I wouldn't want it on my interior, so I think this is a good strategy for interior/exterior vinyl/rubbers/plastics.Last edited by butters; 07-14-2014, 06:41 AM.Comment
-
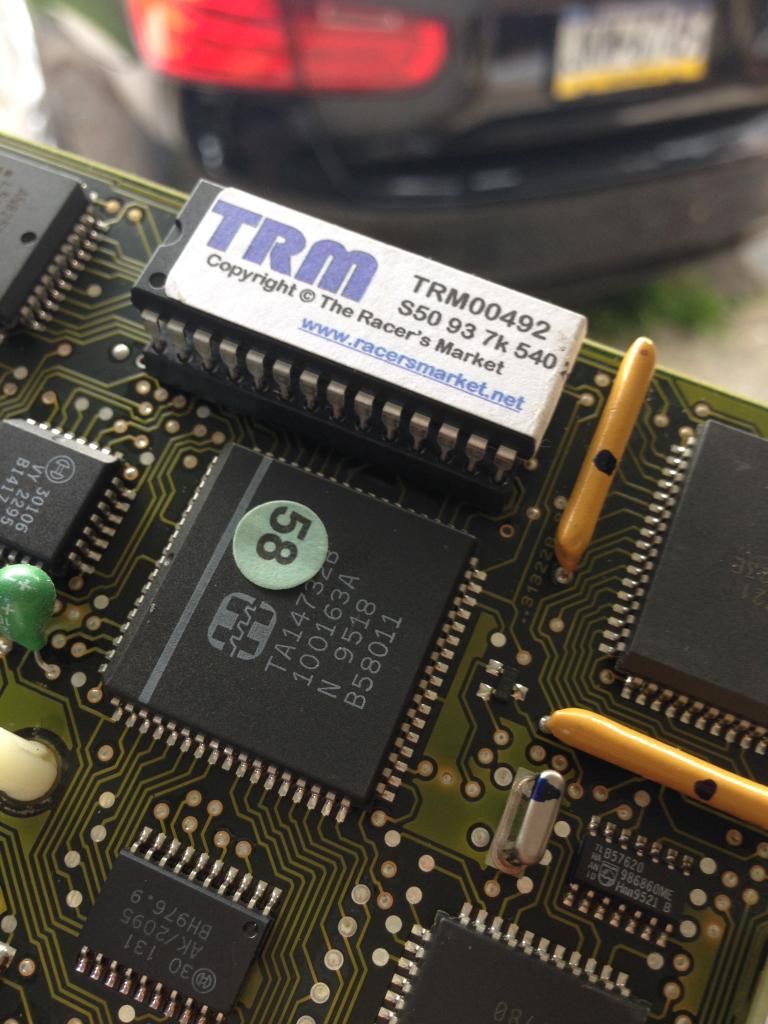
Pulled the trigger awhile back on a TRM 93 octane chip to bump my idle in an effort to smooth things out. The chip is also for 3.5" HFM and 21# pink injectors, so I figured why not and got those too.
Before fully seating and installing the white plastic cover:
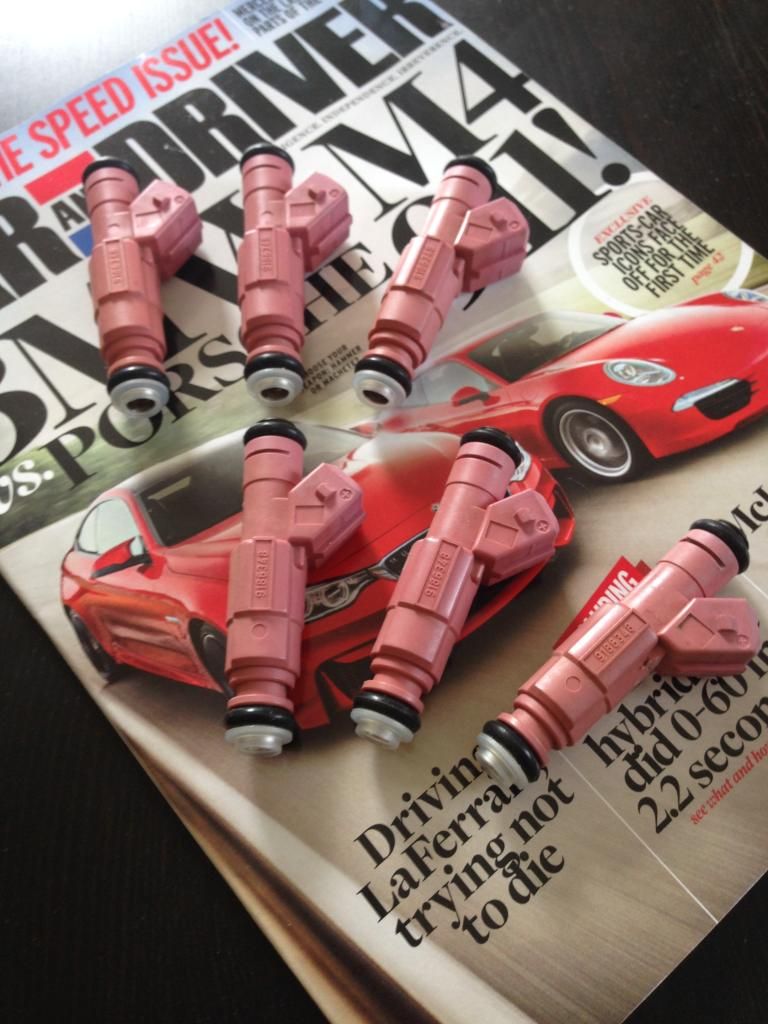
Updated Bosch "design III" pink injectors, rebuilt by e30ultimate on BFc:
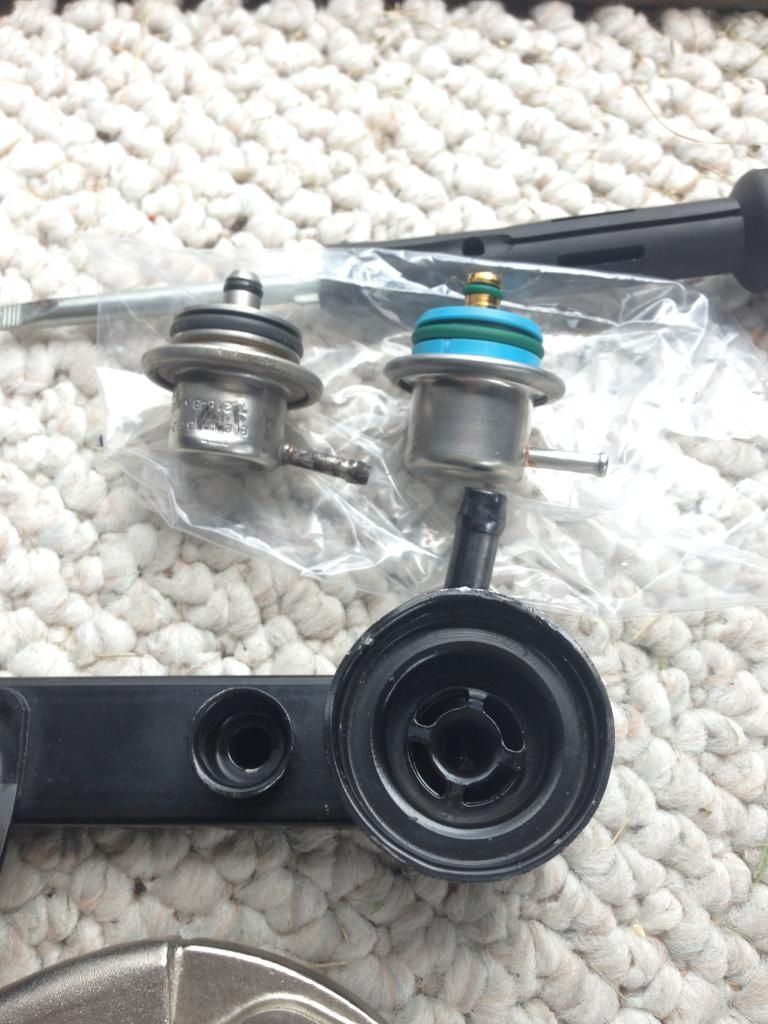
The motor always turns over and fires up consistently, but it's not as instant-on as I had hoped coming from the M42. I have had this replacement FPR (stock) laying around for awhile and finally got around to installing it, I'll report back on whether it makes a difference. Yanking out the old one was not as easy as it looked...
Stopping by my dealership today to pick up a 3.5" hose clamp and ICV hose to replace the cracking one I discovered on my engine, then I'll just be waiting for a 3" to 3.5" silicone coupler to arrive in the mail before I can reconnect my Kamotors intake and fire it up. I'm open to suggestions on a 3.5" intake similar to the kamotors - simple to put in, small form factor, insulated and snorkeled to the plastic headlight panel. Until then I'll keep the kamotors.Comment
-
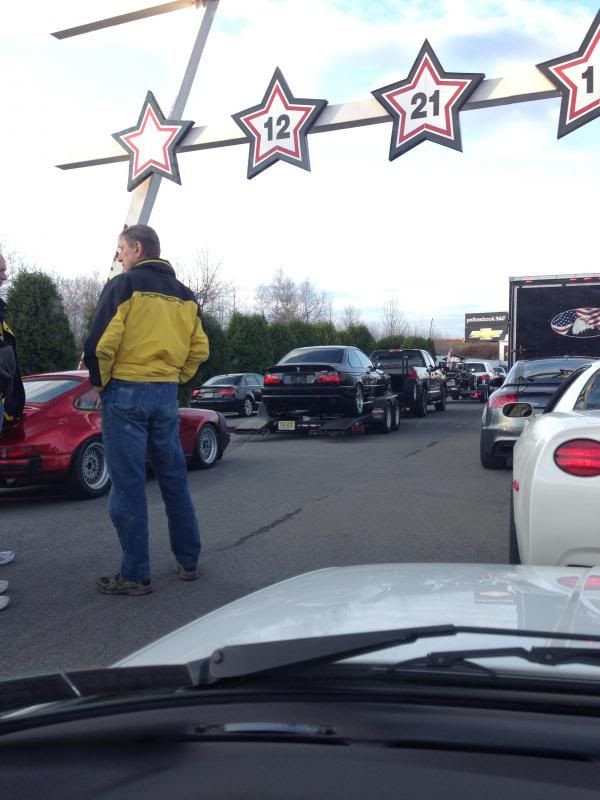
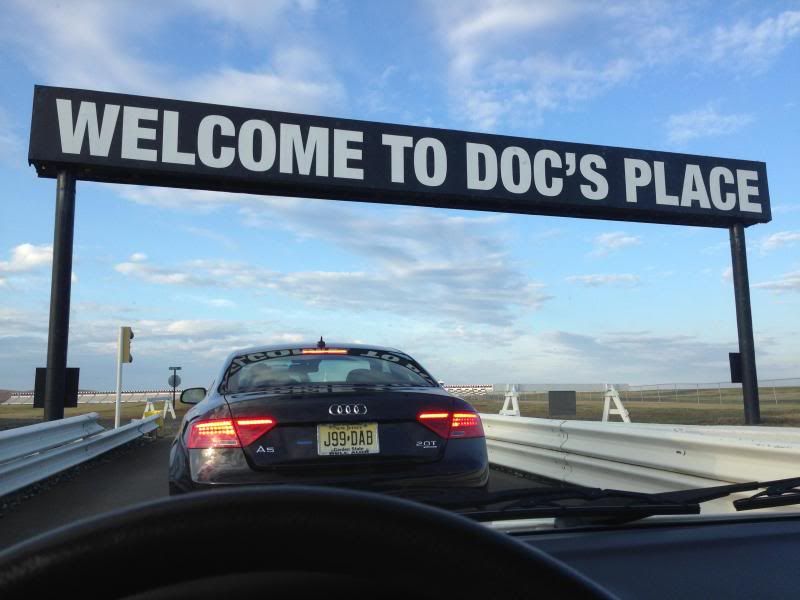
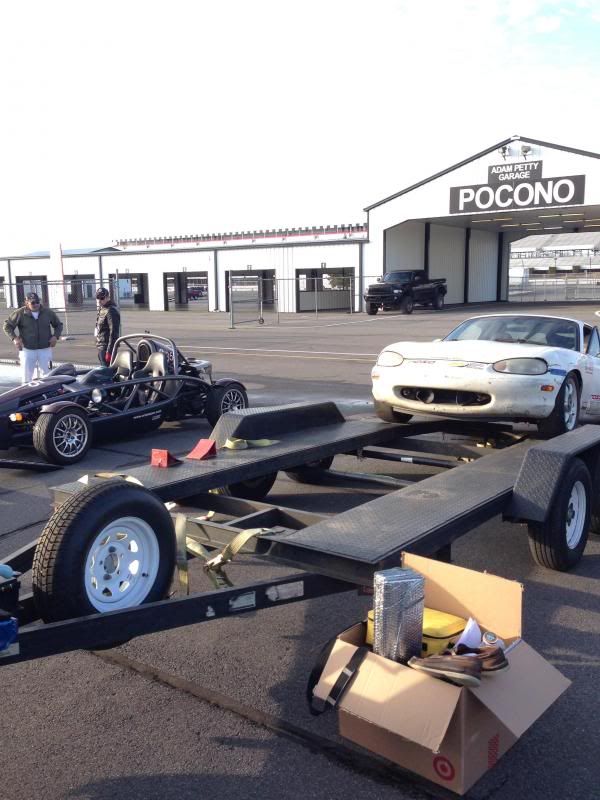
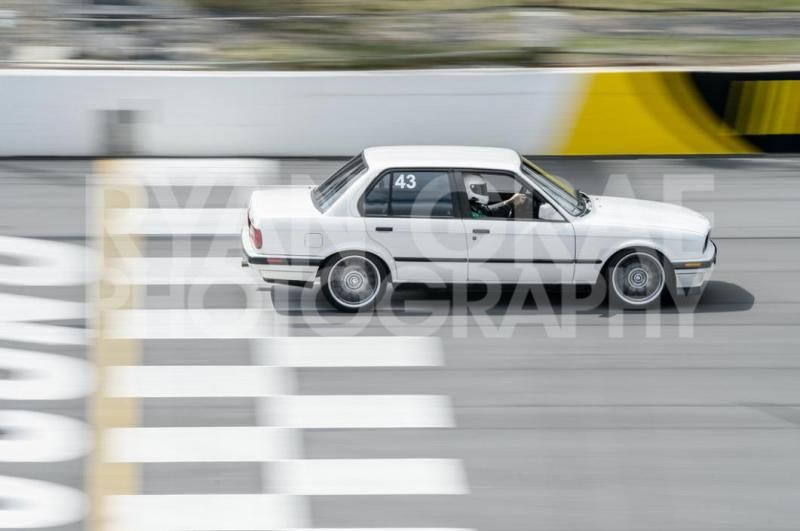
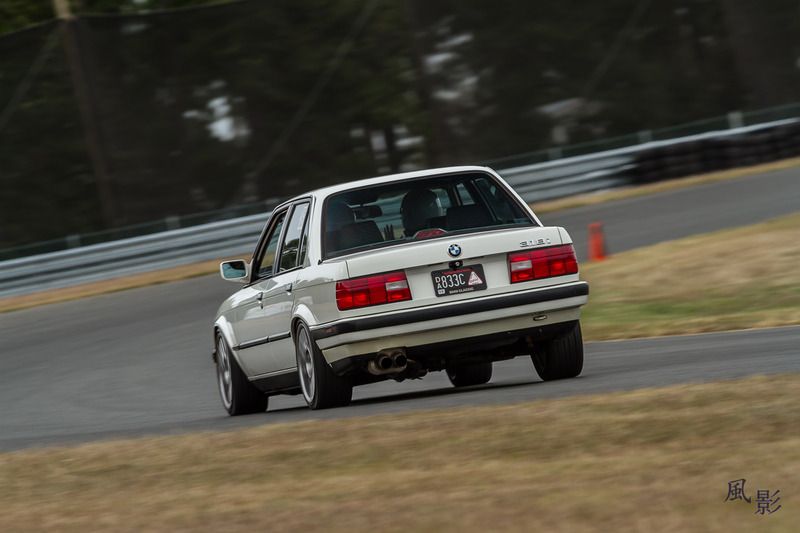
In early May I finally made it out to my first HPDE.
Audi Club NA put it on at Pocono Raceway, which is not far from my current location, running the clockwise double-infield and IMSA (which is the north infield + nascar turn 1 connected by the front and back straight) configurations.
I got there on time to be about 15 minutes early, and got in line. I was feeling some adrenaline as I checked out the other cars, many on trailers, realizing that I'd be on track with some serious metal (though I was of course in the green group).
I had read the Track subforum sticky and felt prepared with everything from the requisite go-to tools to my floor jack & stands, to my power bleeder and water/oil/brake fluid. I was by myself, but being surrounded by mechanics was reassuring.
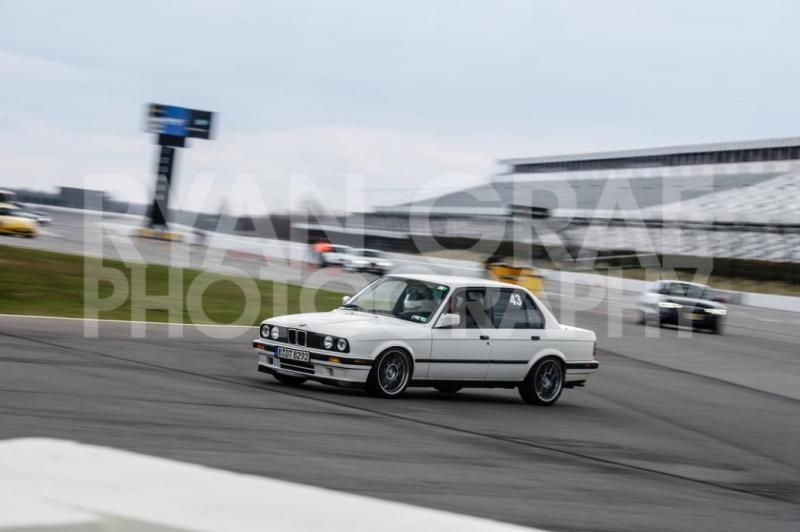
My instructor was a Russian fellow with a gutted, track-prepped Miata that looked like it had seen better days. But damn, that thing ripped and the guy could certainly drive it well.

I got through tech early, and after a class session it was time to hit the track. First my instructor drove around slowly in my car, pointing out the flags and reviewing etiquette, then we swapped seats. I won't lie, I was very nervous and even shaking a bit while lining up. A mixture of nerves regarding my first time in a street car on a closed track, and whether I'd see the flags and make the right moves, and whether my car would hold up and whether I'd keep it off the grass.
The skies were mostly gray and the temperatures were very low - 50s in the morning, maybe got up to the mid-upper 60s in the afternoon. The conditions helped me to retain confidence, and the car stayed in a comfortable range of operating temperatures. The brakes.... not so much.
As the morning went on I got more and more comfortable with the line, the way the car felt, and my areas for improvement. My instructor had a microphone setup - maybe this is common - but it wasn't so great with my borrowed open-face helmet. At speed with just the front windows down, the wind is extreme.
The infield sections are technical enough for some real enjoyment in the way the car handles and speaks to me through the seat and steering wheel. The engine loves to rev, though with a 2.93 diff I lose some of the torque multiplication I'd get with a shorter rear end. For me it is plenty.
The brakes, though, are not. Or maybe they are and the master cylinder sizing is throwing me off, or maybe it's gone bad. The pedal does not inspire confidence - when I really get on it, there's not the sudden bite I might expect, just a slow engagement and a slow settling of the pedal into mushiness. The pedal is very hard, yes, but the feedback isn't there and I don't think I could lock them up. Maybe I'm afraid to try..
The braking performance was reasonable/adequate, but definitely needs work. I also sprung a bit of a leak before lunch, which was lucky timing. It was clear based on the brake dust situation at my right rear. Happily I had everything needed to tighten things up (short of 1 wrench necessary to deal with a somewhat stripped fitting, likely the culprit in the first place, but I borrowed it). I bled all 4 corners for good measure. This helped some and I was at least able to get a groove going.
Oh and the brakes squeaked like a mofo after every session. Embarassing :roll: They still squeak in certain situations on the street, never did before. I must have burned out all the anti-squeal
In the afternoon on the IMSA configuration, the back straight and nascar turn 1 were actually quite thrilling. I was able to hit about 130 mph indicated (not really looking down at that speed) with relative ease, and work towards just a brief lift for the nascar turn.
I got some props for my driving as a first-timer and the car survived, so I am very pleased. I may make it out again soon on the stock brakes, but I've already eyed up the IE bbk and the Massive offerings.
Comment
-
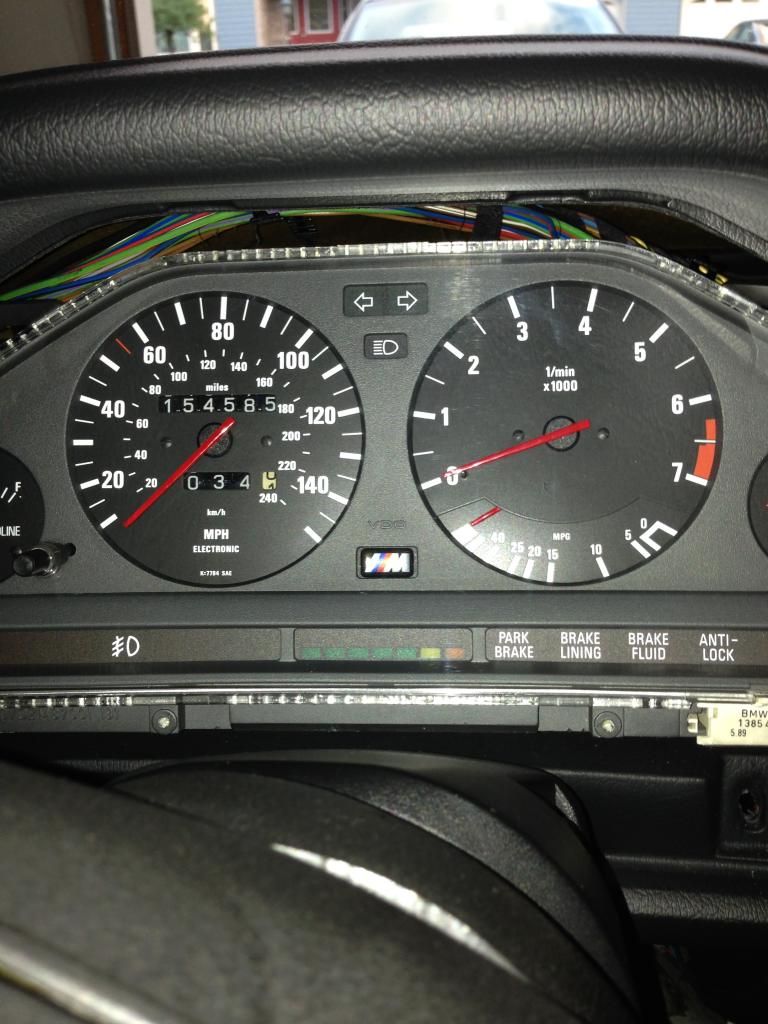
I learned the hard way that insuring a Priority Mail package means you need to apply separate tracking otherwise there is no way to check the status of a shipment, so I waited anxiously for nearly 2 weeks while my cluster was in transit back to SoCal for re-doing the needles. Thankfully it made it there and back (via FedEx) in one piece.
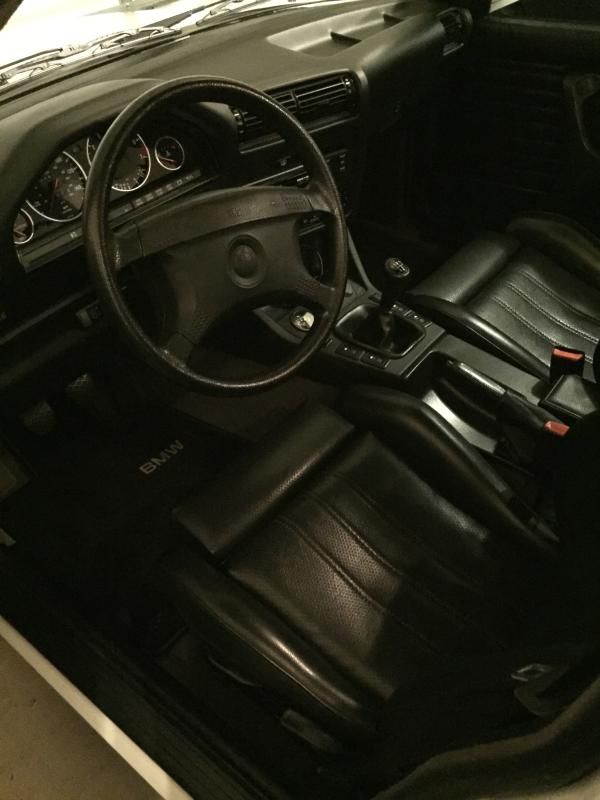
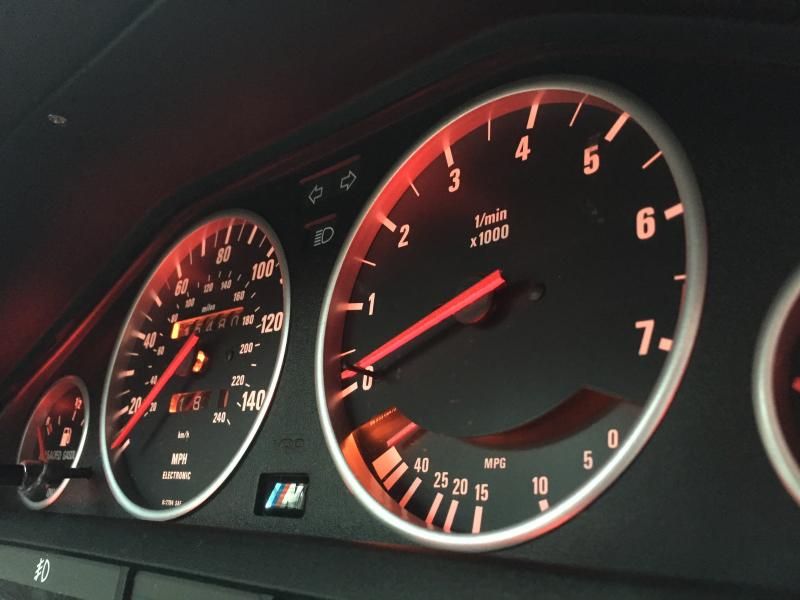
I was beginning to see twitchiness in the coolant temp gauge so I asked for the cluster to be completely gone through. The SI board hadn't failed completely, but a capacitor burst so I pulled the trigger on a proper replacement. As long as the thing was apart I also went for matte silver / aluminum trim rings for a subtly updated look, in my shape of choice - not beveled like some I see, but slightly rounded in the face akin to most modern styles. The "background" was also painted black, I prefer it to the faded-looking factory gray. I am very happy with the result, I think it looks great.
Before:
After:
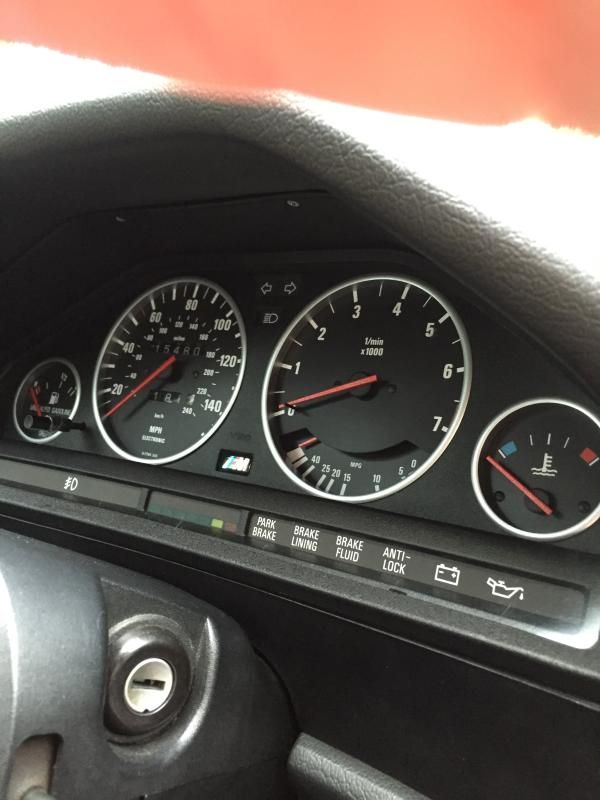
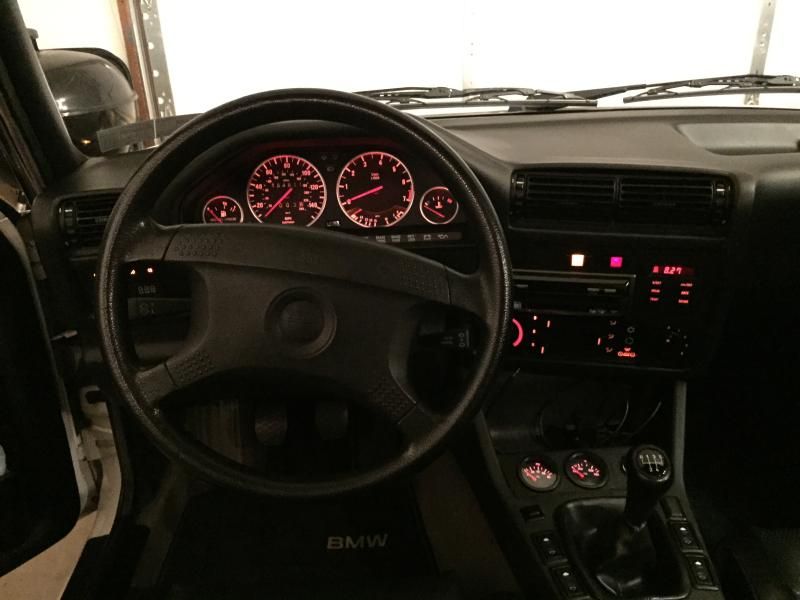
Not sure if I want to somehow switch to silver bezels for the VDO gauges at this point to bring the look together. That with a ZHP knob I think might be ideal.
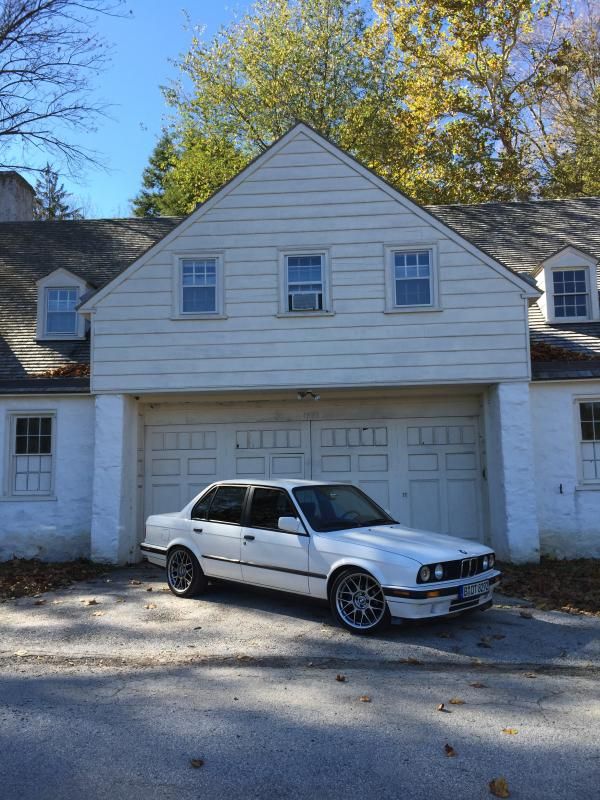
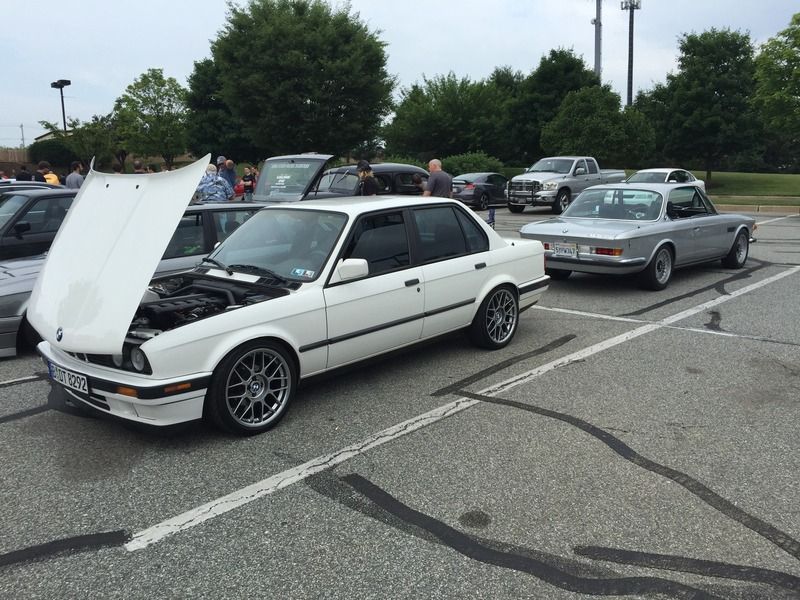
Oh and here's a random shot of the exterior at some Valley Forge historic building:
Comment
-
This is really cool. i think i saw your car at the bbqs.sigpicComment
-
The gauges came out great.
I'd like to know about the headers in the first post, are they the Schmiedmann ones (scm3436typ2) or something else, and if they are, how's the fitment, and do they clear the subframe and lower control arm bushing? I'm looking at some headers for my own swap, and would find the Schmiedmann ones preferable to the Chinese stuff, assuming they fit that is.
Thanks.
'93 Daytonaviolett Touring Design Edition

Comment
-
Thanks! You probably did a few years back.Originally posted by brutus87 View Post
If I had to guess I'd say that they appear to be the same, but I can't be sure. I haven't actually seen the Schmiedmann setup before, I always assumed mine were from eBay (not to say that Schmiedmann don't show up on eBay). They came with the bundle of parts included in the engine transaction.Originally posted by Thujalvi View Post
Fitment was good, the subframe and lollipop were cleared with plenty of room. If you look at the photo where the car is on the hauler from below, you can kind of see how the pipes terminate.Comment
-
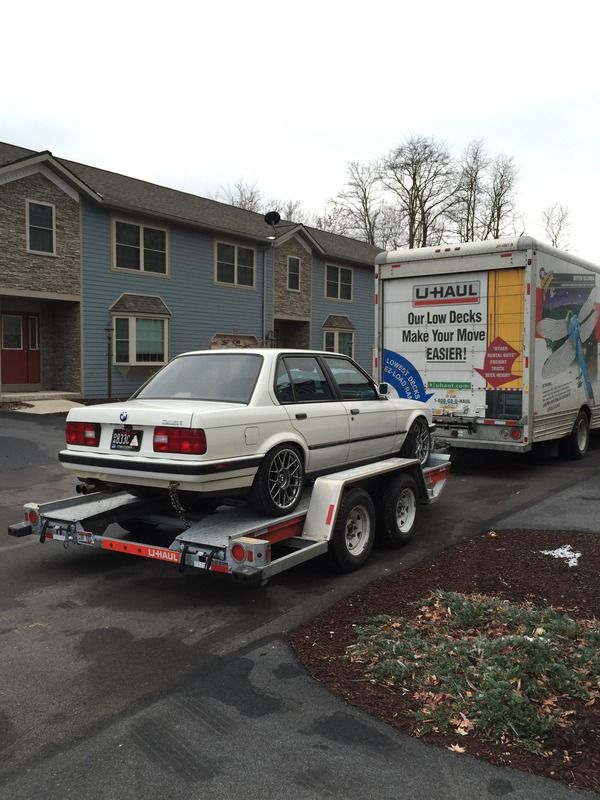
Wow, so it's been almost 2 years since I last posted here... don't worry I still have the car! I don't think I can ever get rid of it at this point, even as I look towards purchasing a house in the hopefully not-too-distant future.
The past couple of years I relocated again, finally getting back to my hometown outside of Philly. The E30 went back on a U-Haul trailer once more:
Last summer I made it out to a few Cars & Coffee events, and Bimmerzone's annual free BBQ in West Chester PA (pretty cool little gathering):

I finally took a closer look at how the rear bumper works, because I've been toting a replacement around for a couple years. When I saw that it's a skin on a backbone of support, I figured I would try gluing the wavy spots down to the support to see if I could avoid needing to prep and paint my used replacement bumper skin:

It worked, for a few months:
Unfortunately, it is now back to how it was, so it looks like I'll need to prep that new skin after all.
My new place of employment has a truck scale that I was eyeing for awhile with curiosity as to what my E30 would weigh, and how the F/R distribution looks with S50 and a 10" lukebox. I have to cover a few Saturdays a year, so on one occasion I kindly asked to bring the car inside the gate for a moment.
That's 2800 lbs, noting that the scale goes in 20-lb increments. Not bad for a full interior, the sub box, and the iron block 24v motor.
If we call it a 250 hp motor, that's 11.2 lb/hp. For reference, an F30 335i 6-speed RWD comes in at 11.9 lb/hp (on paper, but 300hp is understated). In 2014 there were no cars available for under $25k with less than about 11.5 lb/hp - the V6 Mustang and Camaro (source here).
I then positioned the rear wheels off the scale to get a reading on front %..
52% front isn't too far from modern 6-cylinder 3-series, but obviously the bigger motor does have an effect.Comment
-
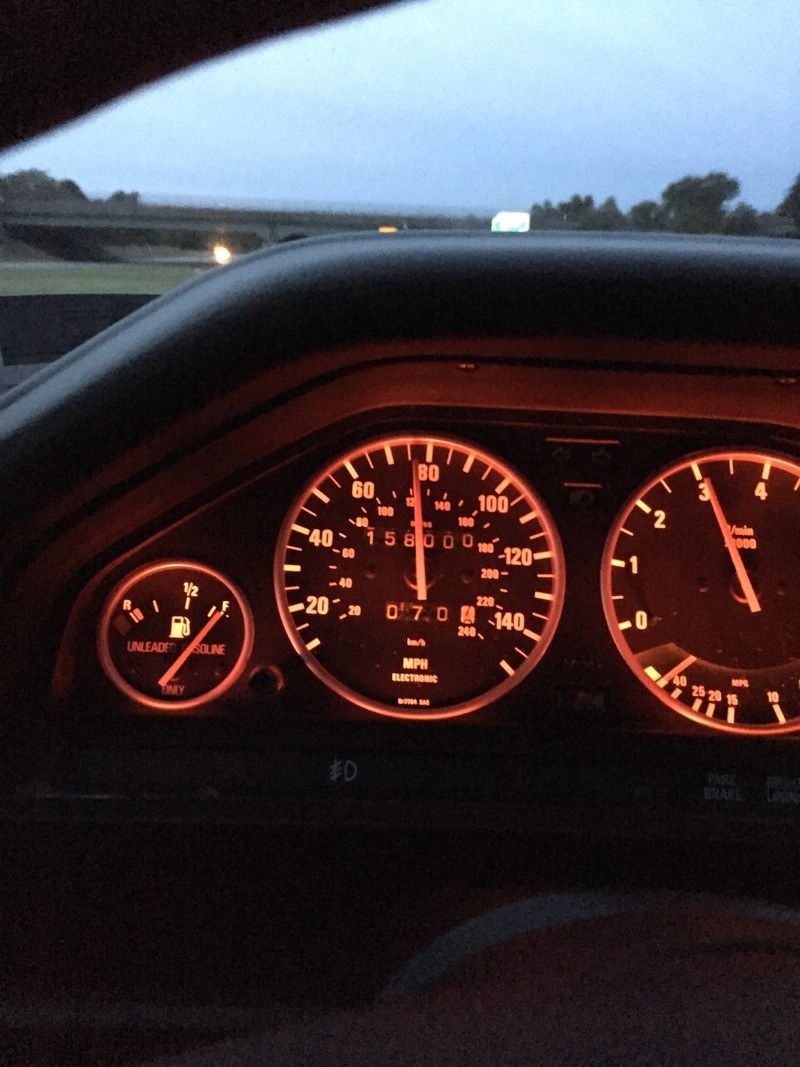
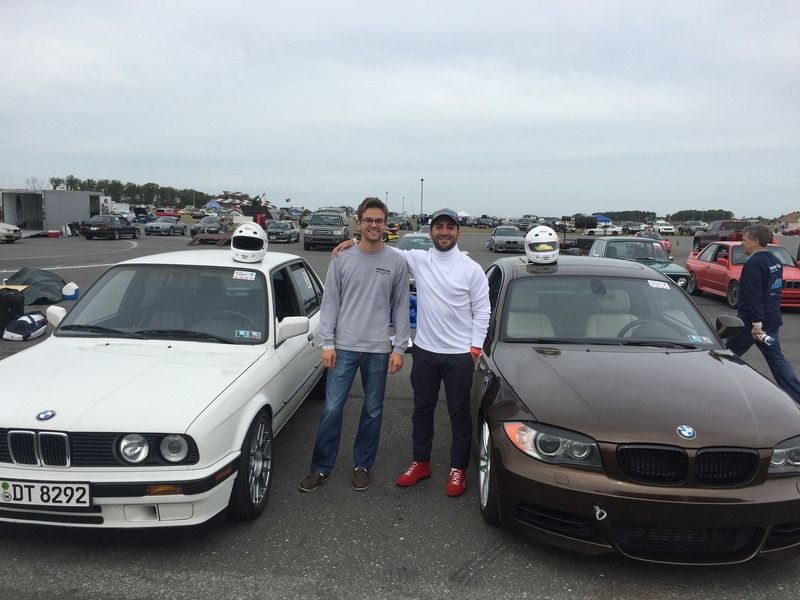
Last September I made it out to BMW CCA Oktoberfest at NJMP, and got a friend of mine to come out for his first track day. On the way there I hit 158k miles - I've been keeping it under 5k annually to avoid PA emissions inspections, mainly just to save on the expense and keep the miles down.
You can put a face to this name now, here's my friend and me after getting through tech inspection (I'm on the left of course):
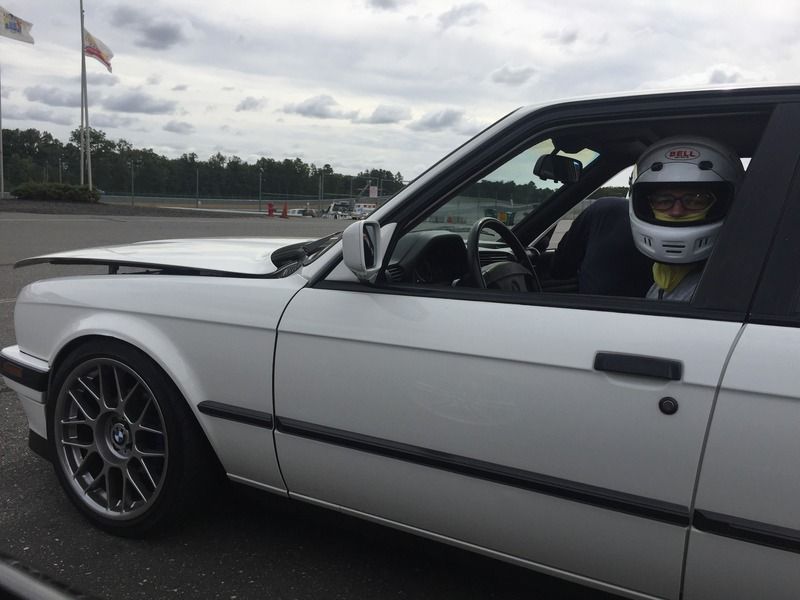
The car performed beautifully, I felt a lot more confident with a fresh set of Stoptech Street Performance pads and one previous track day under my belt. My brakes held up great, I didn't have to turn a wrench although I was prepared to. I wanted to get PF pads but they were seriously backordered so I will save that for next set.
The only problem was that I burned through enough fuel that on my 2nd to last session, I was having serious fuel cut on the long right-hand sweeper. I didn't run into it nearly as badly at Pocono, so I really wasn't sure how long I could go, and I wound up missing half the session while I went to refuel. Turned out I probably had about a quarter tank... I should probably look into starvation prevention measures.
Aside from that, NJMP Lightning was loads more fun than Pocono's infield - it's smoother, with more elevation change and even has it's own banked turn (granted it's no Nascar turn).
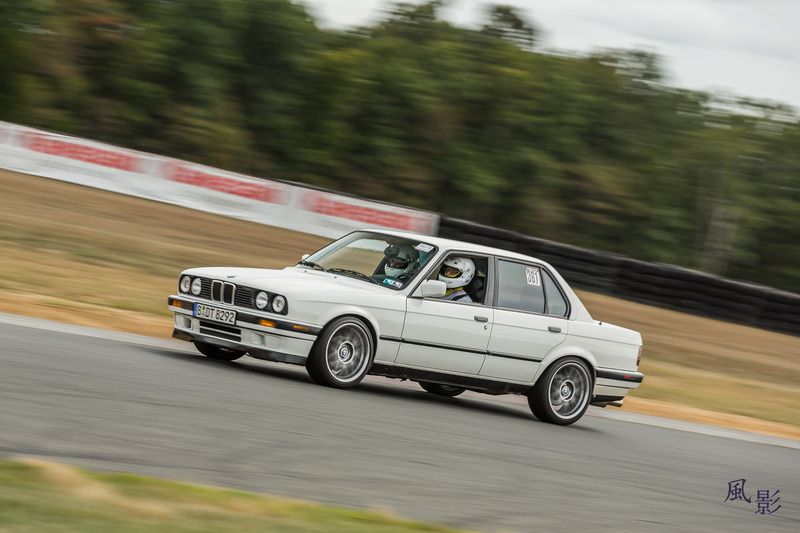
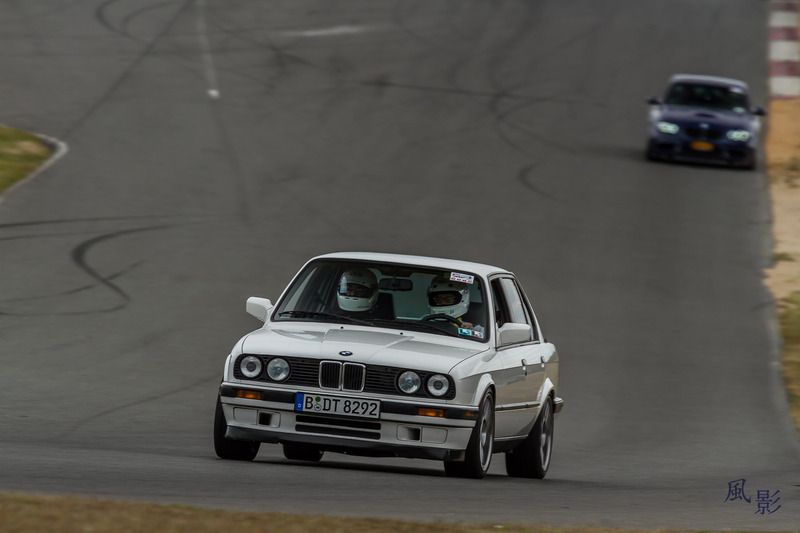
HPDE events are heavily dependent on driver comfort, but I was still proud to be getting the point-by from cars like V8 M3s, even with the fairly long straight on this course.Last edited by butters; 07-16-2016, 01:24 PM.Comment
-
So getting back to the project side of things is what has me continuing this journal again.
I can recall a few years back, the S54 swap was just becoming viable although at a seriously high cost to "crack" the DME. I checked into it again last winter and was shocked to find that the cost had reduced by nearly an order of magnitude - this could really be feasible!
Having gone through the S50 swap with a bit of a haphazard approach, buying parts as I went along and the cost bulging perhaps a little too high, I want to approach this with lessons learned.
I set out putting together a spreadsheet for what I could most accurately predict as every essential component, and those maintenance items I would want to complete prior to installation, along with a realistic price for each. My thinking is to keep the cost down, I will retain my transmission and final drive, but go with the ArcAsylum oil pan and subframe for peace of mind on track and in any road situation.
I then figured what might be a reasonable price for my rebuilt-S50 swap as a package with all necessary components, and it began to really look doable once I got in touch with a BMW recycler on the east coast who dismantles E46 M3s often and agreed to a price that I liked. So my swap package went up for sale, and within a few weeks I had a deposit.
I've started to prepare for the engine pull, and I am planning to do it from the bottom without a lift - the furniture dolly method. Jordan and hoveringuy documented how they did it, and I think it's totally doable.
I'm thinking I will try to document the whole process in a little more detail, starting with step 1 for me which was the removal of the DME and pushing the harness back through the firewall. I really hope I can get the E46 wiring harness into this factory location, which I've heard is possible by reversing the wiring inside the block-mounted plastic container.
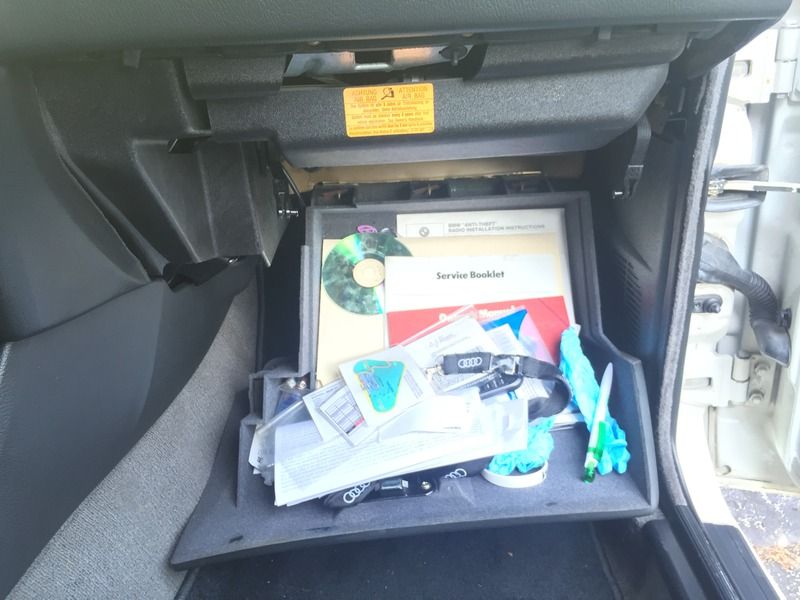
So here we go... glove box dropped:
Here's that DME sitting nicely in the 318 mount:
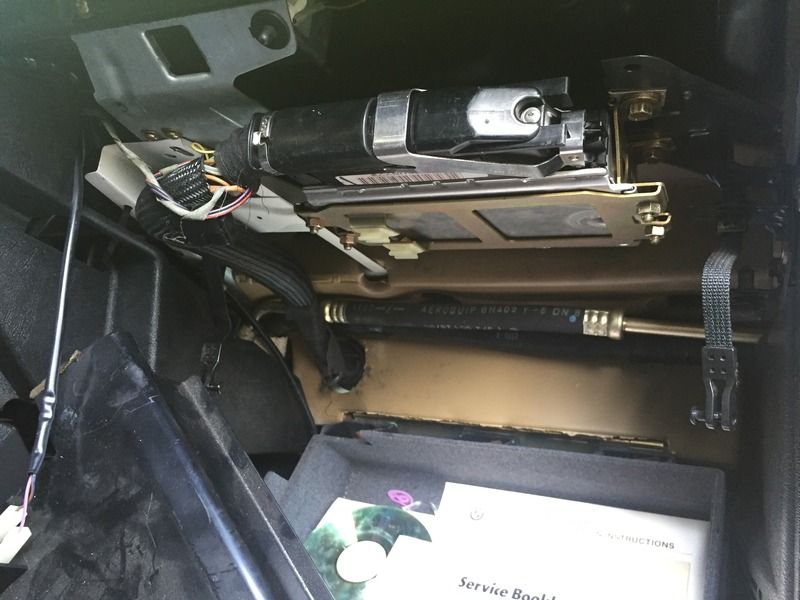
Aaaaaand it's out:
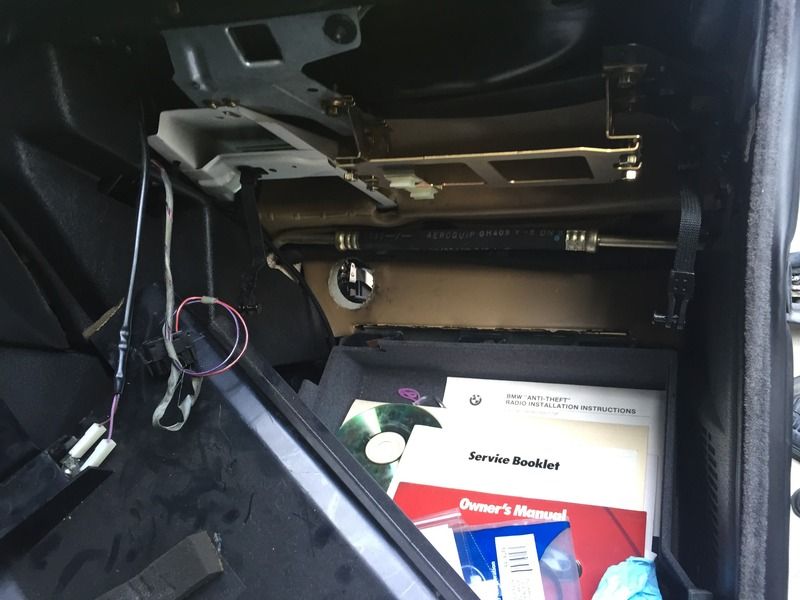
After freeing the harness from the 318 plastic cover I'm now working on disconnecting everything from underneath, except for the subframe bolts and transmission crossmember. If only it wasn't 90 degrees every damn day here in PA lately..Comment
-
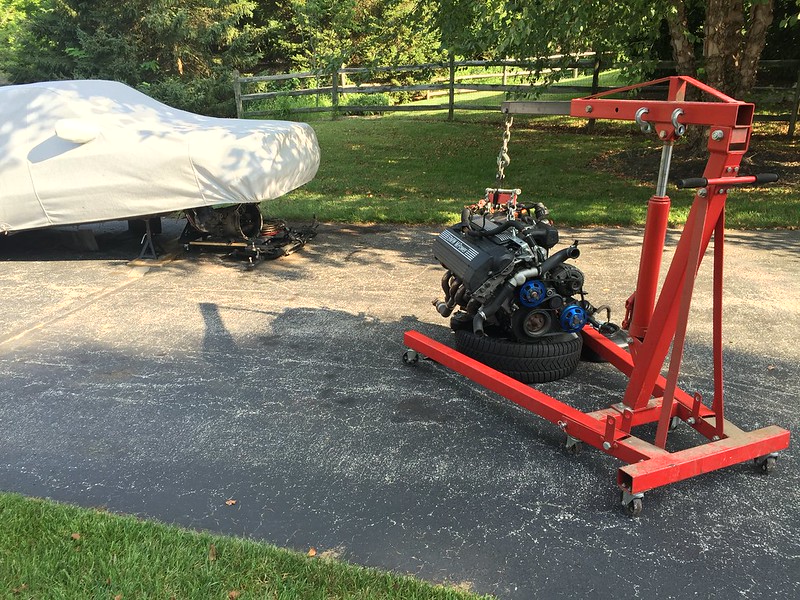
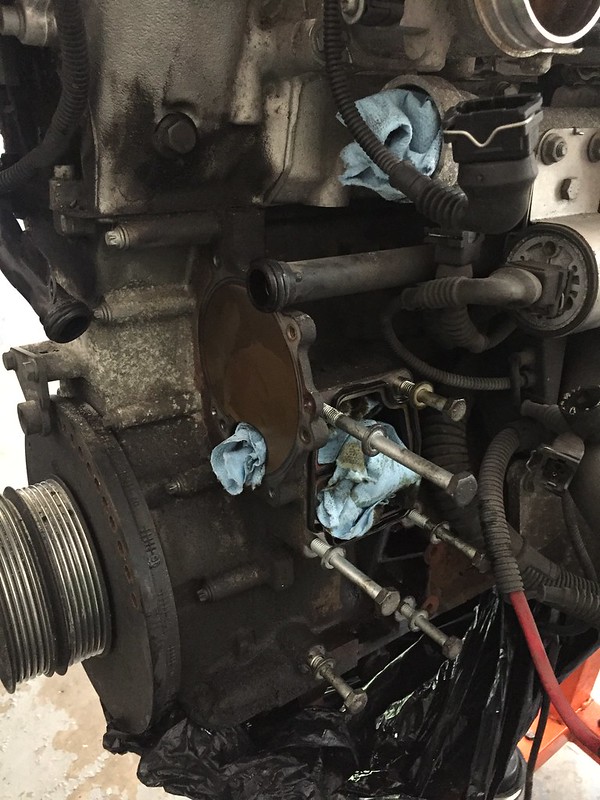
I didn't get a lot of photos under the car, but the process of disconnecting everything was fairly straightforward. The subframe and motor with trans can be dropped onto a dolly using 2 slim aluminum floor jacks to lift the body, but I wound up borrowing an engine hoist and lifting from the frame rails to get the core support to clear the intake manifold. The height I needed was over 31".
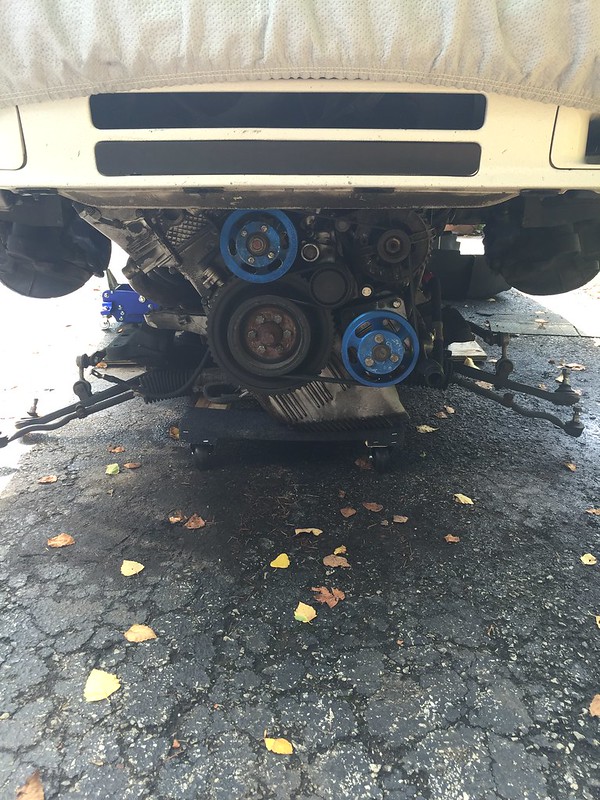

Disconnecting the trans, clutch and flywheel is a breeze with the motor out.
 Last edited by butters; 10-07-2016, 06:04 PM.
Comment
-
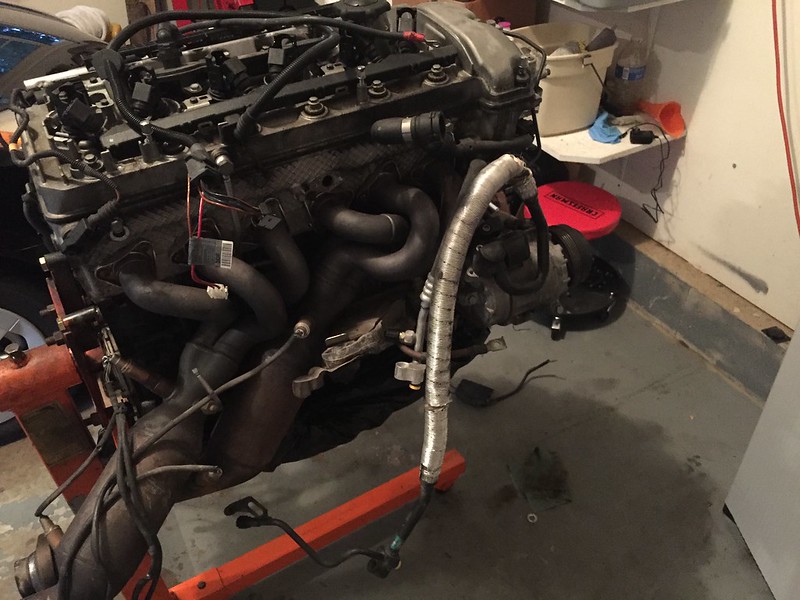
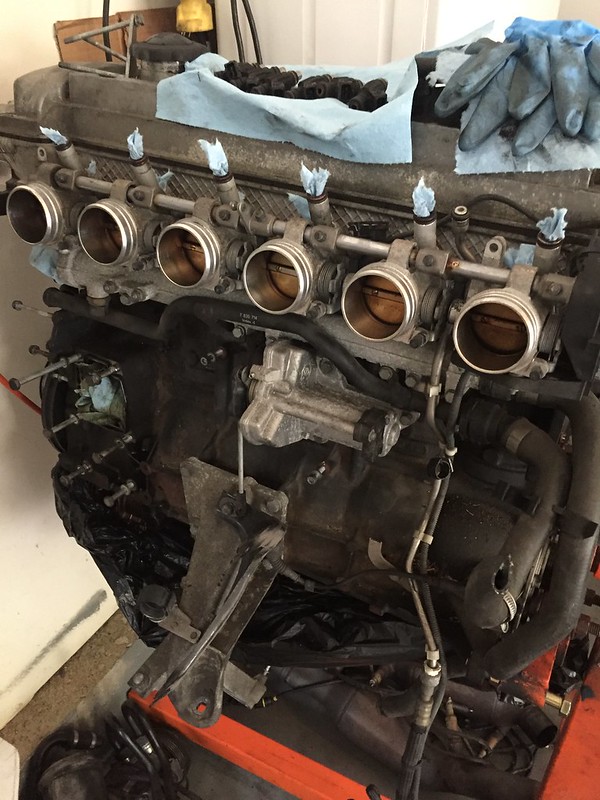
The motor I picked up is out of a 2002 M3 with 101k miles - the seller provided video of startup and everything looked and sounded good. I called my dealership and a service writer read me the dealer records, which showed that the rod bearing recall was done at 30k miles.
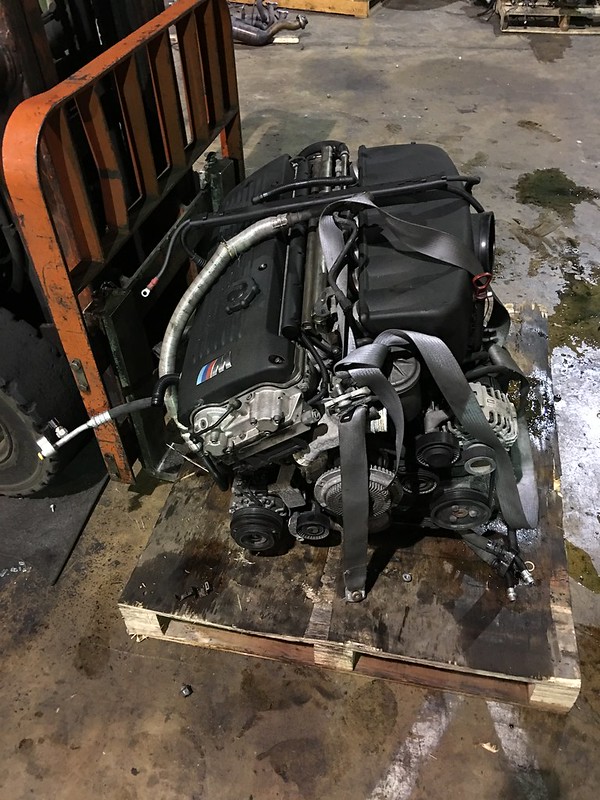
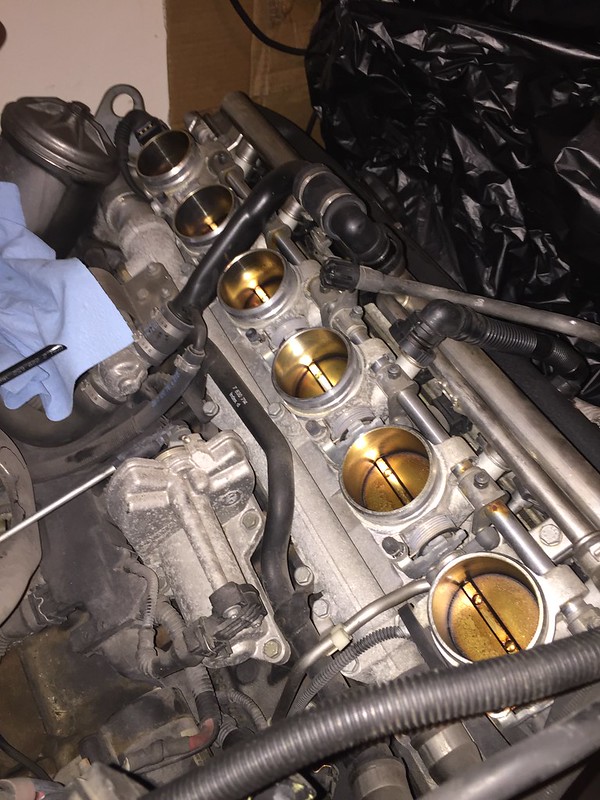
Had to check out those throttles:
I'm going to cut the cats off and make a fitted connection to the exhaust that's in the car. Hopefully it's not a roadblock.
 Last edited by butters; 10-07-2016, 06:07 PM.
Comment
-
I can't not clean the block, and if there's a little surface rust I'll feel the need to paint it. I'm thinking I'll do blue again, but maybe a lighter shade. In any case, I set about stripping it down to the shortblock..
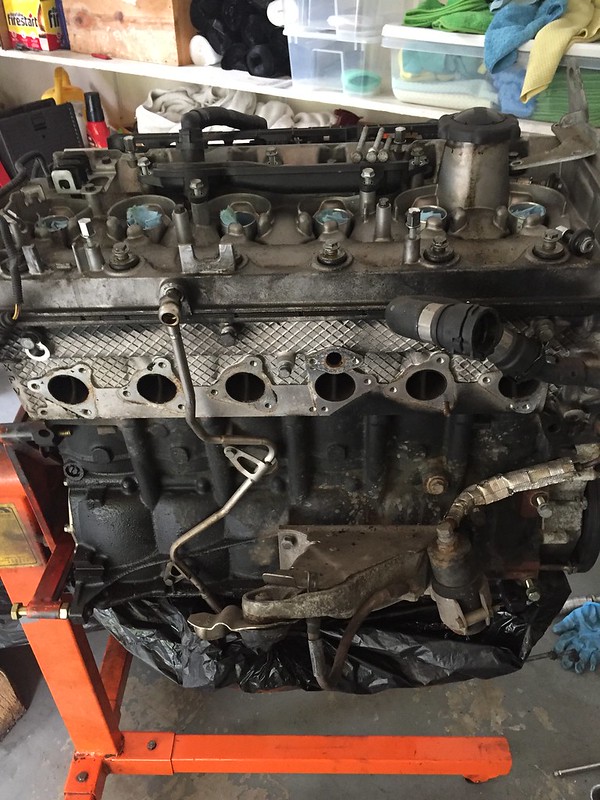
I like the idea of hiding the temp sensor behind the thermostat housing, and Technica sells an adapter pipe to do it cleanly for $40. I might see if I can get one made up for any less.

The thermostat housing was pretty oxidized, I'll use it to play around with sanding and polishing using a dremel.

I'm tempted to leave the water pump in, but I don't think it's worth the risk and hassle of doing the job with the motor in the car. I'm also tempted to save some cash on an OEM brand marketed with metal impeller, but I'm convinced that the Genuine BMW with plastic impeller was engineered to be better and is a worthy upgrade.
The oil filter housing gasket is a no-brainer at $10 for the part.
I'll shine up the air and fuel pipes, and sent the injectors out for rebuild and sonic cleaning.
I don't have any photos of removing the oil pan, I was moving quickly to get it out to ArcAsylum along with my subframe.Last edited by butters; 10-07-2016, 06:12 PM.Comment
-
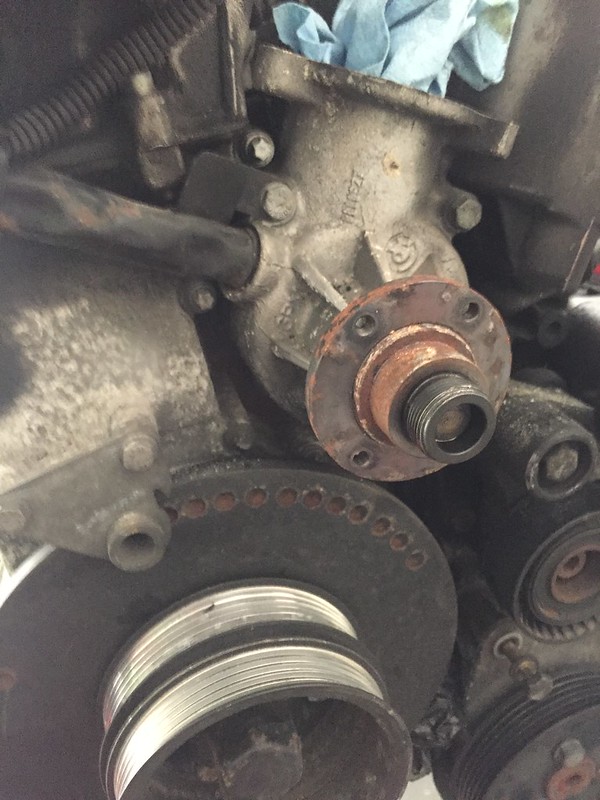
I borrowed a Dremel and gave it a whirl using a brass brush, then an abrasive buff, and then finally got somewhere with a 60-grit disc.
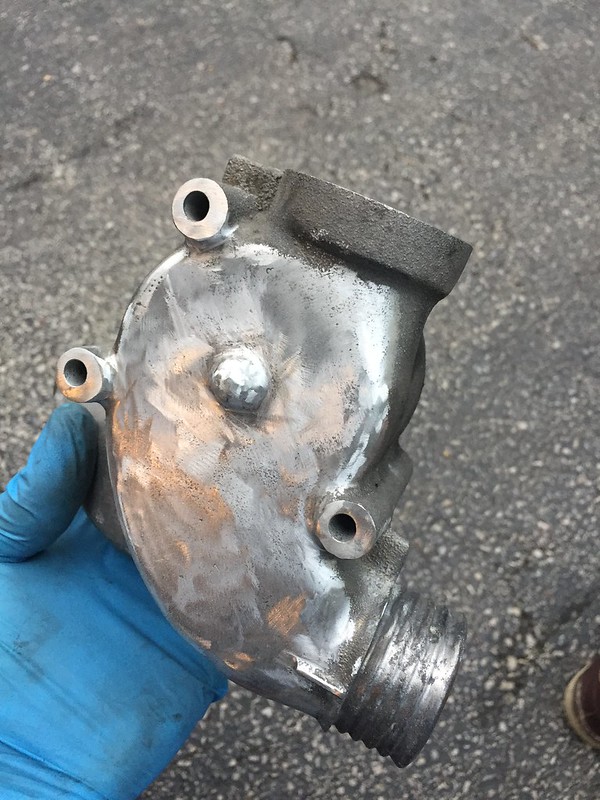
But clearly had more work to do. This thing was rough, so I'm not sure this process will compare much with the vanos unit that I plan on attempting to shine up.Last edited by butters; 10-07-2016, 06:12 PM.Comment
Comment