Overlord475: 1988 SETA 2.7i Build Thread (Turbo Prep)

Collapse
X
 
  • Time
  • Show
Clear All
new posts

  • Overlord475
    replied
    End of Teardown Day #4

    Mostly just cleaning stuff:


    ..


    My cheater bar set up to get to 302 ftlb on the front crank bolt.
    The larger piece and adaptor on the bottom is to fit over my large torque wrench

    Last edited by Overlord475; 04-01-2014, 06:04 AM.

    Leave a comment:


  • Overlord475
    replied
    Getting back to the teardown/cleaning this afternoon!

    Ordered some AN fitting from Earl's to pre-prep my pan for turbo oil return.

    Last edited by Overlord475; 03-26-2014, 01:26 PM.

    Leave a comment:


  • AlphaE
    replied
    SUPER curious about the chip?! Have a seta converted to i myself. W the green top inj also. Hit me up w any questions, not that you need it, seems you got it all covered.

    Leave a comment:


  • Overlord475
    replied
    Originally posted by blue plates
    What coolant ports did you have to weld shut?
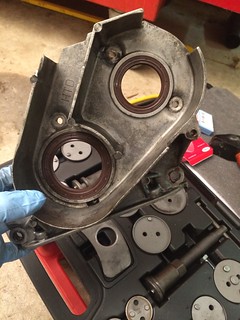
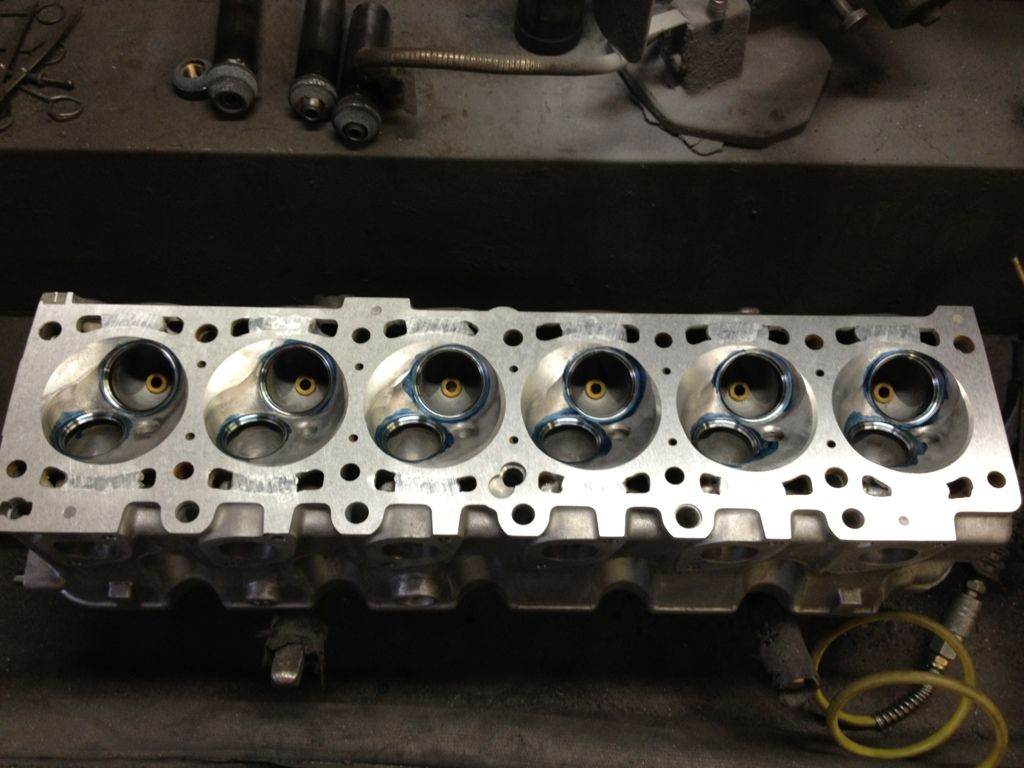
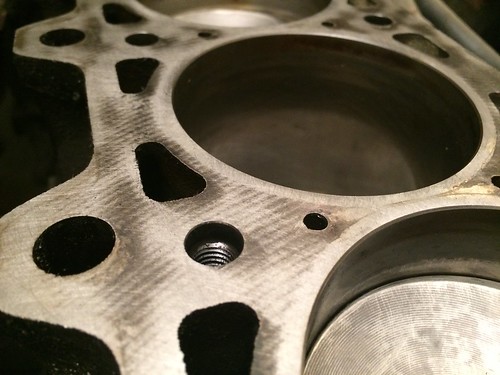
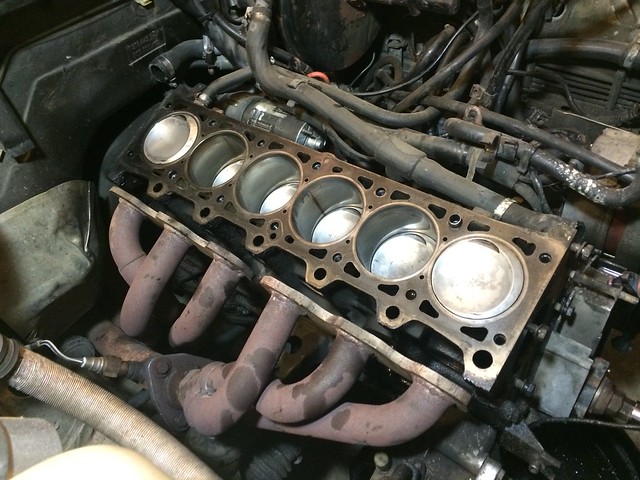
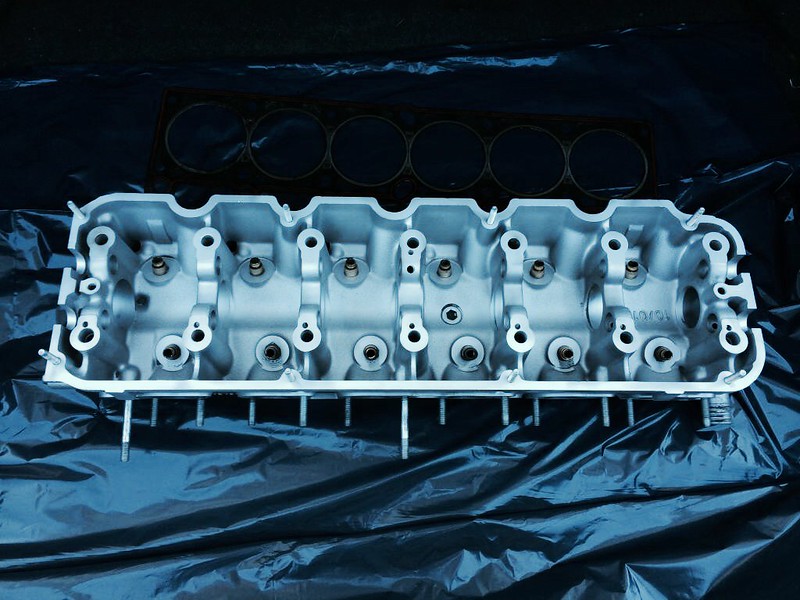
    The head casting's unused coolant reassess are welded as they are a weak point for blowing the HG under boost if the head lifts at all. When un-welded the head is allowed to flex which creates a great place for the HG to blow.

    Info:


    Not my head, but a good example:

    Leave a comment:


  • Overlord475
    replied
    End of Teardown Day #3

    Stoned the block deck, removed the oil pan & prep'd for new gasket, and removed the front main seal carrier:

    ..

    ..

    ..

    Last edited by Overlord475; 04-01-2014, 06:03 AM.

    Leave a comment:


  • blue plates
    replied
    What coolant ports did you have to weld shut?

    Leave a comment:


  • E30NJ
    replied
    nice!

    Leave a comment:


  • D J
    replied
    Very nice I'm about to have the I swap done on my seta here soon. I'm going to be watching this one.

    Leave a comment:


  • Overlord475
    replied
    End of teardown day # 2:


    About to pull the head:


    There was a lot of carbon build up on the pistons, but the factory cross hatching still present in all 6 cylinders:


    After cleaning pistons (deck still to be cleaned and stoned):

    Last edited by Overlord475; 03-28-2014, 11:50 AM.

    Leave a comment:


  • Overlord475
    replied
    New wheels on the way:

    16" x 8" / 4x100 / 20 ET / CB 73.1

    Picked up a set of these from Black Forest to take care of the 73.1 to 57.1 CB issue:
    At Black Forest Industries we manufacture performance parts for your VW / Volkswagen, Audi, BMW, Porsche, and Mini but we also provide maintenance repair parts as well. Keep your ride on the road, make it faster, or make it look better than it did on the showroom floor!


    And these are the tires I'll wrapping them in:
    Discount Tire Direct is retiring, but check out our partners at Tire Rack! With tires and wheels for virtually every vehicle make and model, Tire Rack is your new source for the best prices and selection for online and mail-order purchases.


    Leave a comment:


  • Overlord475
    replied
    It has begun!

    Teardown day 1:


    Last edited by Overlord475; 03-28-2014, 10:48 AM.

    Leave a comment:


  • squidmaster
    replied
    Looks squeaky! I know you're probably excited

    Leave a comment:


  • Overlord475
    replied
    2.7i Swap Info:

    885 Head (Prof. Clean/Checked/Welded Coolant Passages/New Valve Guides/3 Angle Valve Job)
    ARP Head Studs
    173 ECU w/ SSSquid 2.7i Stage 1 Chip
    Gates Race Timing Belt (BLUE!)
    m50 17.5# Rebuilt Injectors (by MEPEH)
    HiPerformance Silicon Vacuum Hose Kit
    Silicon Coolant Hose Kit
    M20B25 Intake Man., AFM, 7k Cluster, etc
    Misc. Required Parts (PelicanParts)

    Update (3/1/14):

    Head back from cleaning and disassemble. Looks awesome!
    Now out for Coolant Passage Welding


    There's a bit of grease on the surface from an old HG that was laying on top of it for welding reference:

    Last edited by Overlord475; 03-28-2014, 11:34 AM.

    Leave a comment:


  • Overlord475
    replied
    Just performed a leak down test, and all looks good.

    Here are the results (cylinders in firing order):

    1 - 13% (Rings)
    5 - 10%
    3 - 5%
    6 - 13% (Rings)
    2 - 10%
    4 - 15% (Rings)

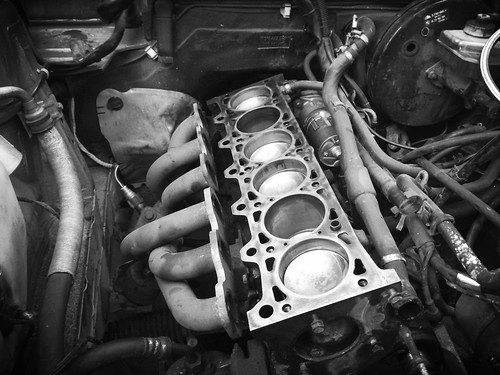
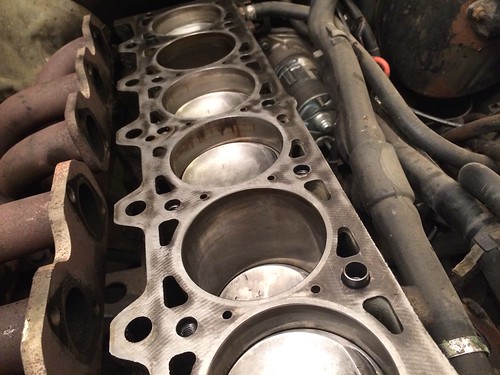
    Leak percentage should be preferably between 10% and 15% or lower. But, technically it is acceptable to have leakage all the way to 40%, but.... questionable.
    It is best if each cylinder is within 5 to 8% of each other.

    It should be noted that the above test was performed on a "cold" engine.

    If the engine is allowed to heat up prior to the test (preferred, I just don't like burning myself) then all the metal expands (rings specifically) and creates for better sealing. The leak percentages will be even small with a heated motor.

    Most of the cylinders barely made it into the green "Low" section. Good sign!

    A leak down should be performed prior to any major upper end (head) work to determine the general health of the engine. It would be dumb to put a new head on without rebuilding the block if the rings were bad.

    Used the HF leak down gauge set:
    Last edited by Overlord475; 03-01-2014, 08:37 PM.

    Leave a comment:


  • Overlord475
    replied
    Fixed a few rust spots and repainted. POR 15 is the stuff!

    Also repainted the black strip around the bottom:

    Last edited by Overlord475; 03-28-2014, 11:33 AM.

    Leave a comment:

Working...