

Nice pics, it's coming along nicely!
-

________________________1988 528e Rally-xmobile___________________
2014 WDCR Rally-X MR Season Champion, 2014 NE Div. Challenge MR Winner -
Comment
-
Thank you.
Thank you!
So more stereo updates:
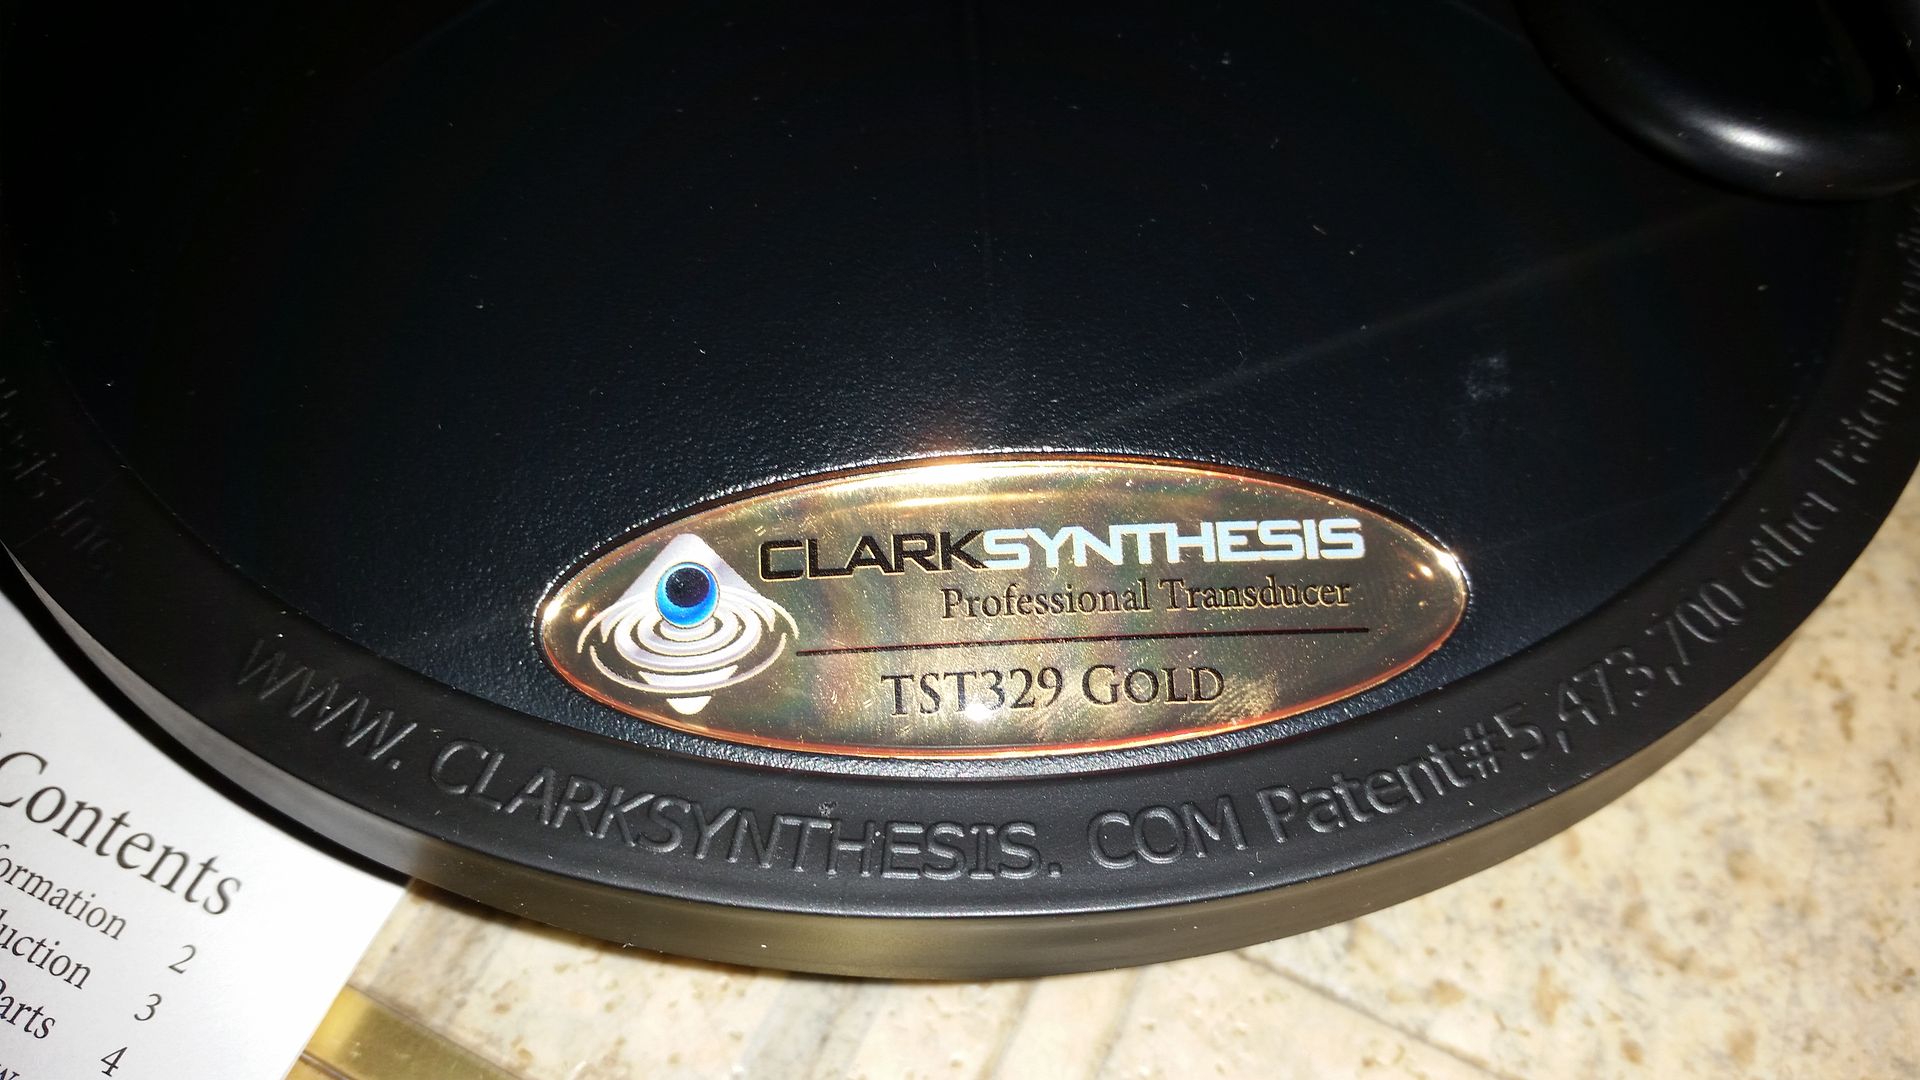
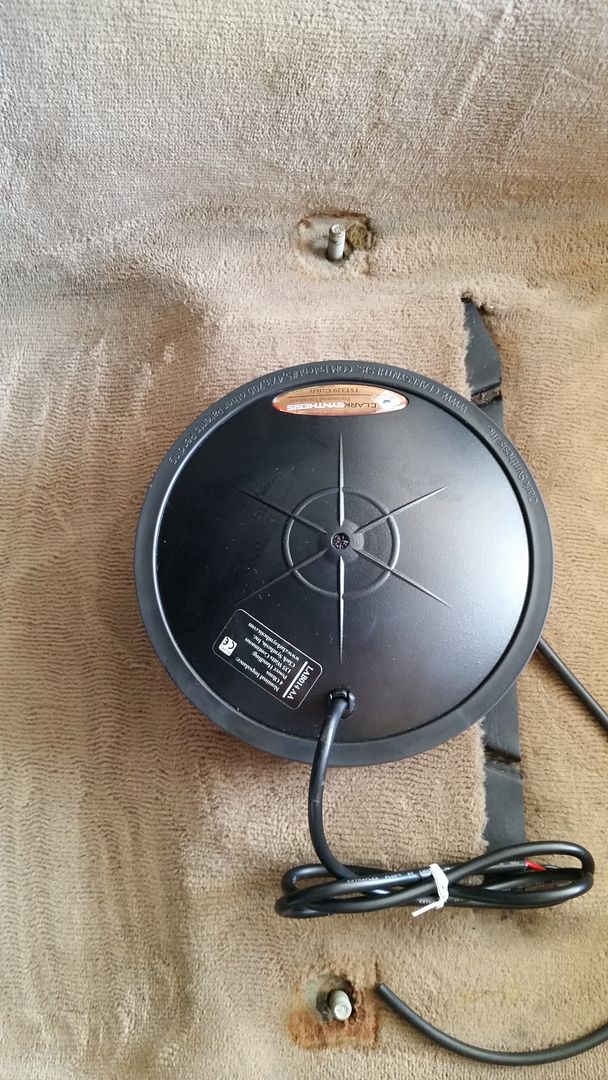
The Clark Synthesis TST329 transducer arrived:
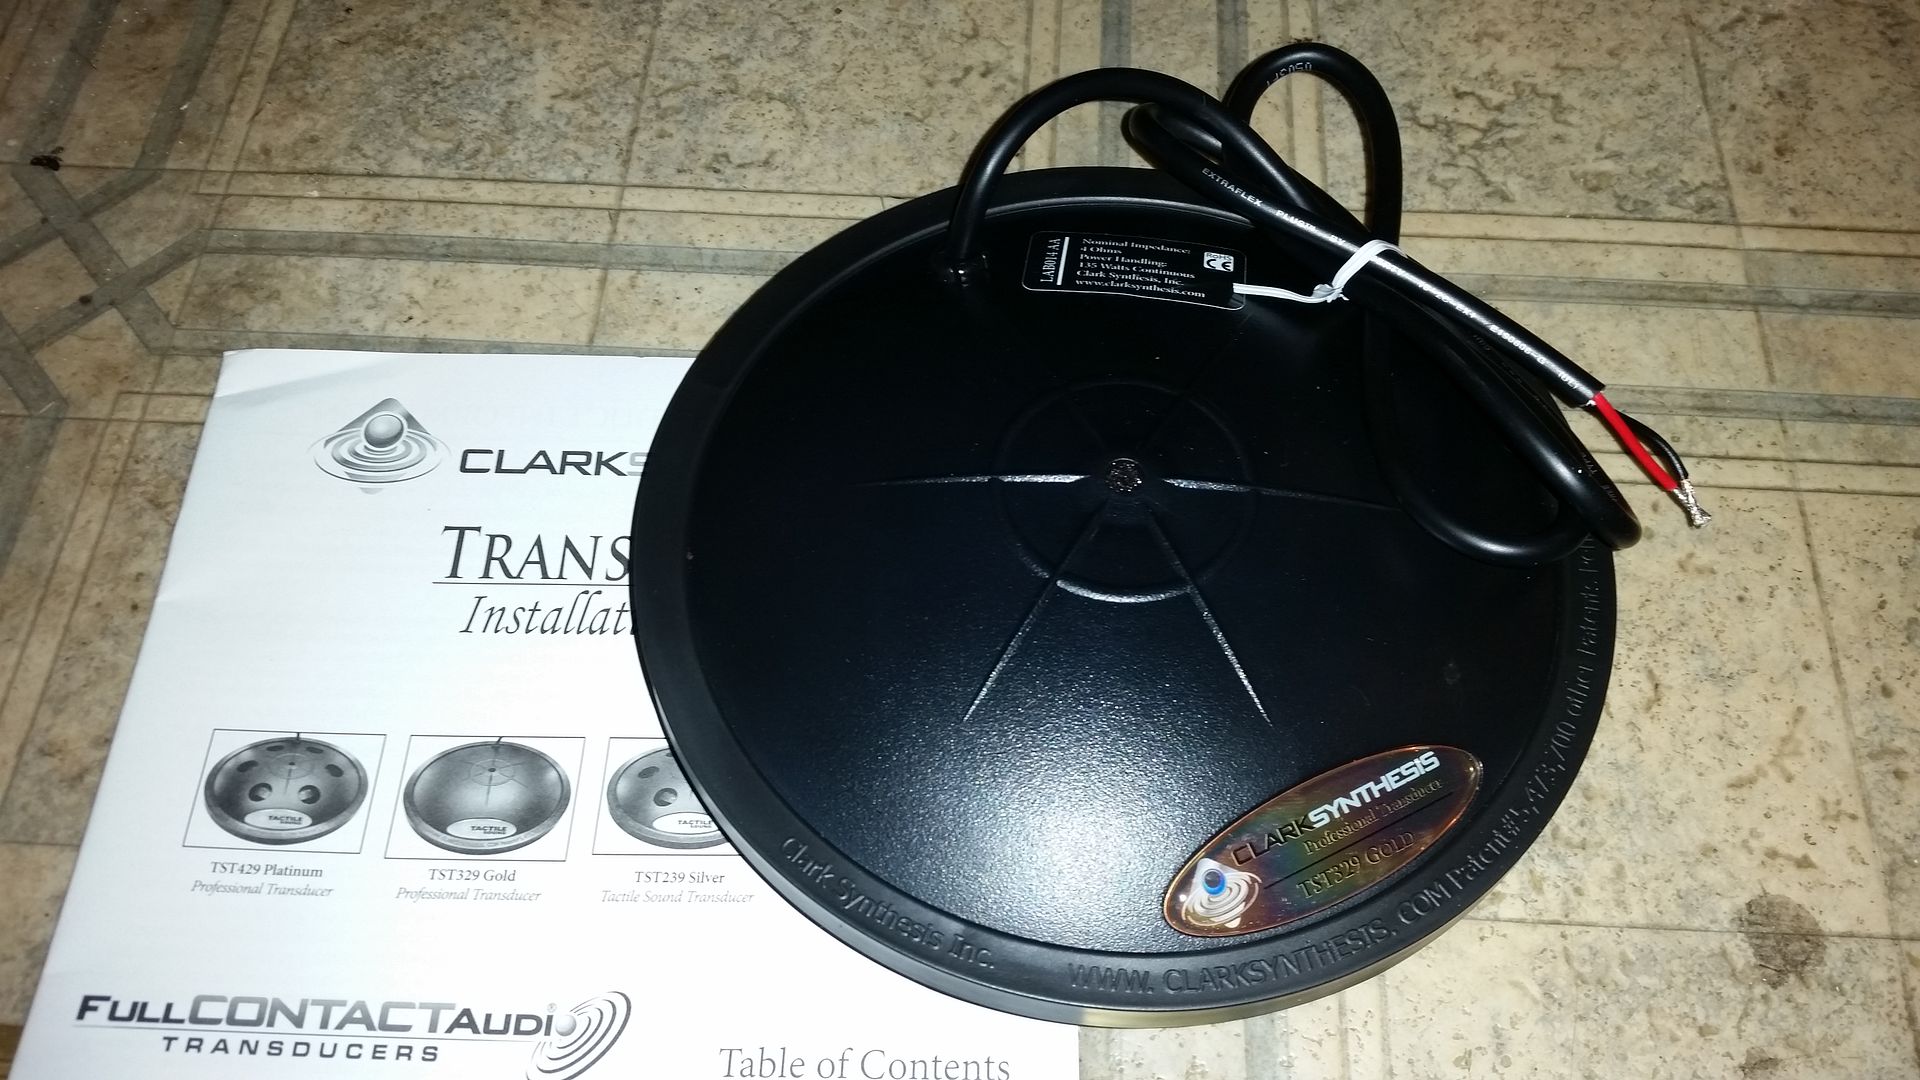
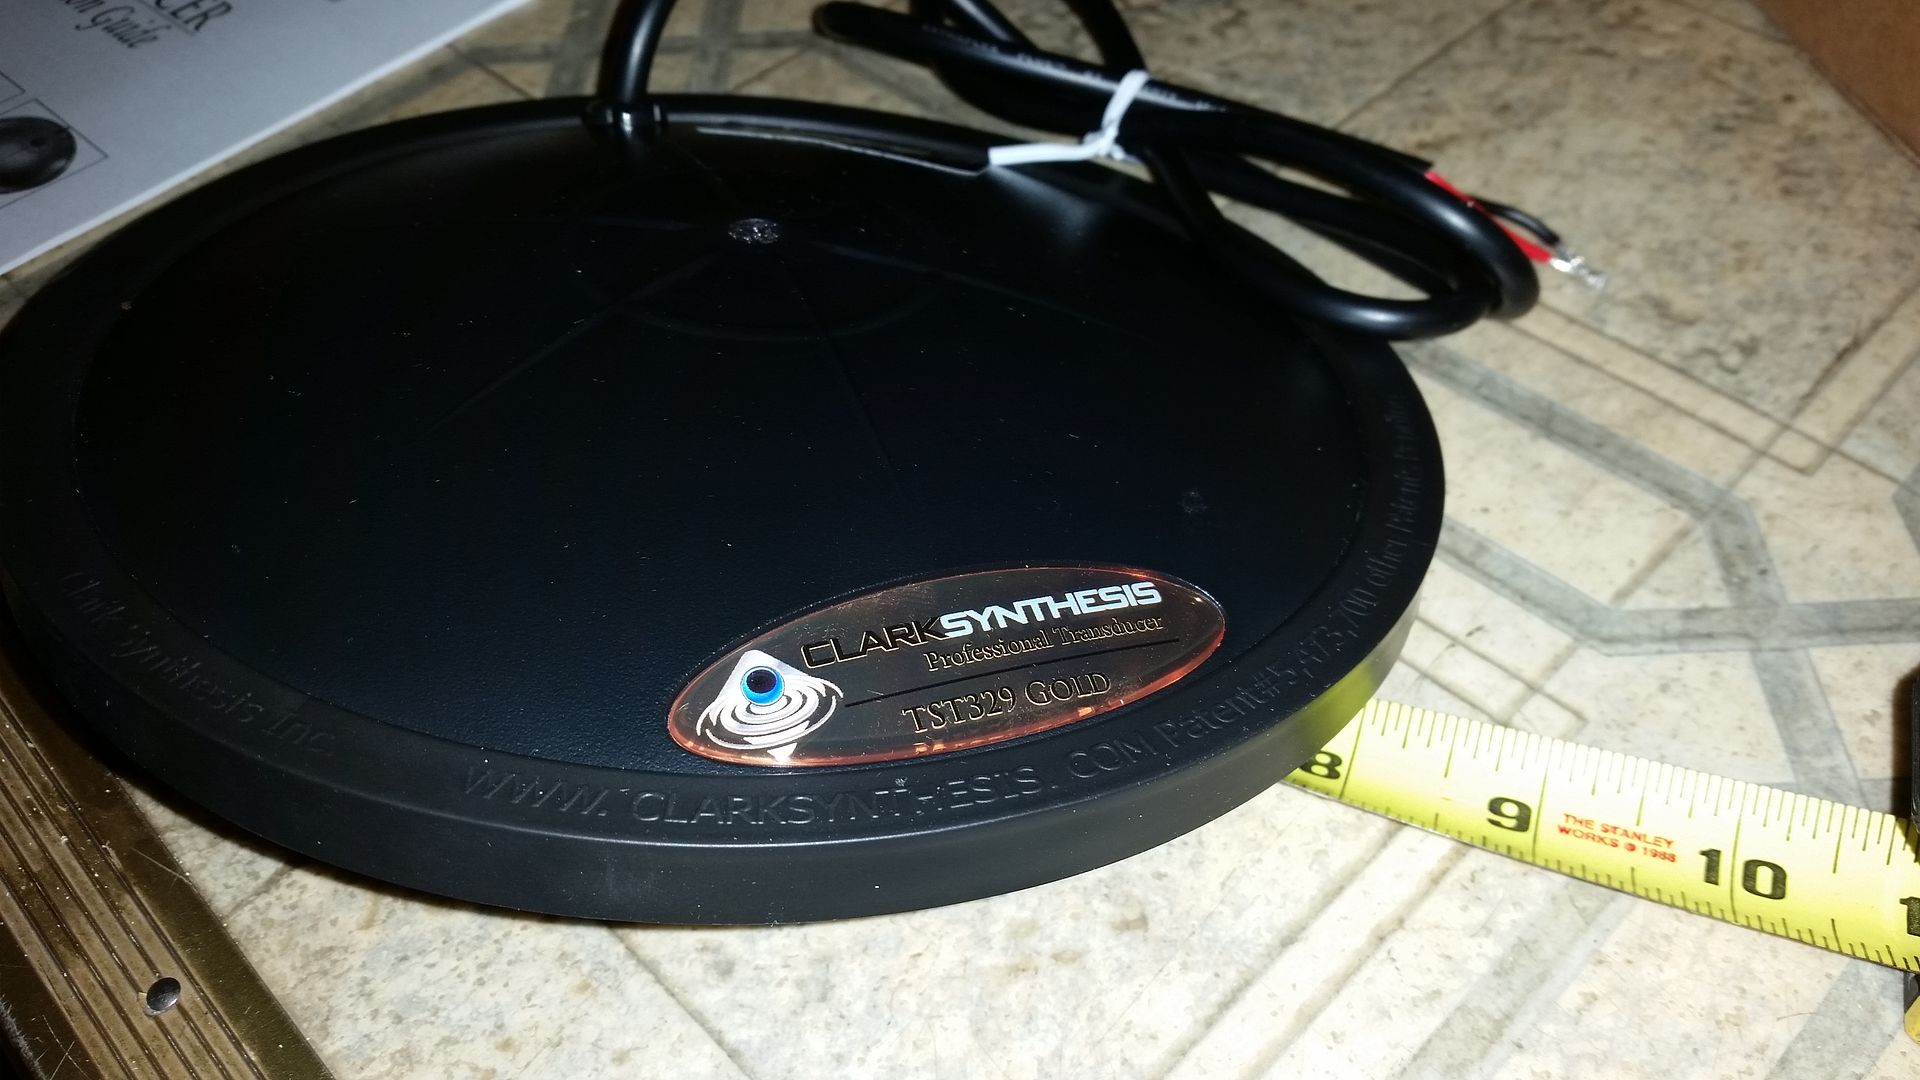
Looks like the measurements from the spec sheet were accurate. Fitting an 8" disc between the seat rails should not be an issue.
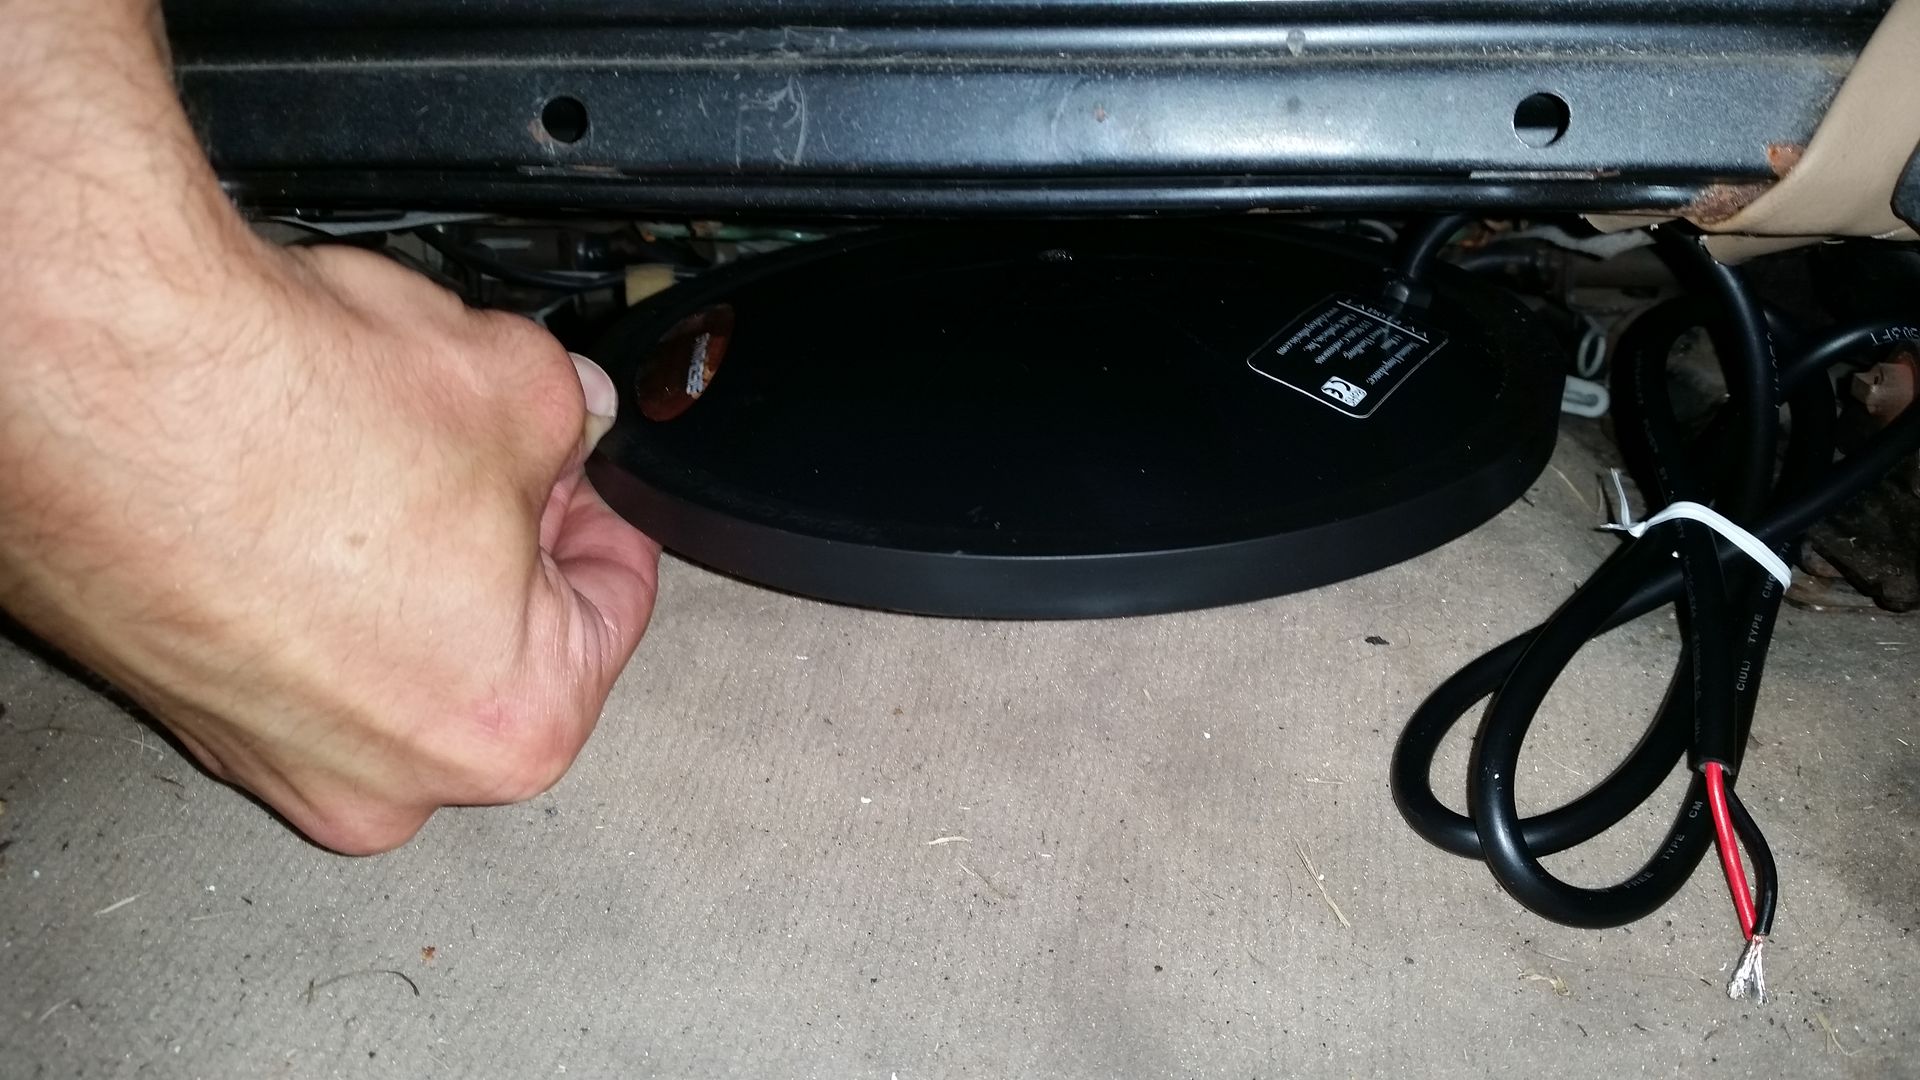
Bad picture but my mock-up was pretty accurate:

And the test fit of the actual unit shows that the fit should be spot on.
Comment
-
I BUY/SELL REFURBISHED CM5907s & CM5908s
HOWTOs:
DB vert plastic bumpers
OEM Keys
MTech1 docs
88 ix Lach/Card
91 ic Calypso 3.1
86 Cosmo 2.7
OEM+ or bust!

reelizmpro: I will always be an e30 guy.. I still do all of my own labor
TrentW: There's just something so right about a well-built M20 in an E30
e30m3s54turbo: I save my money for tuner parts.Comment
-
-
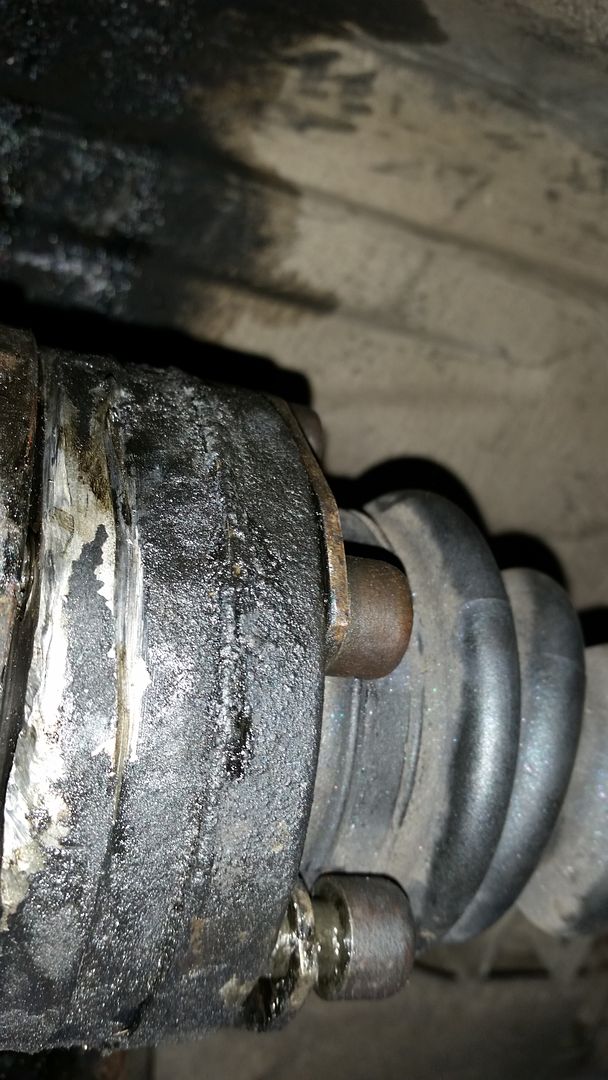
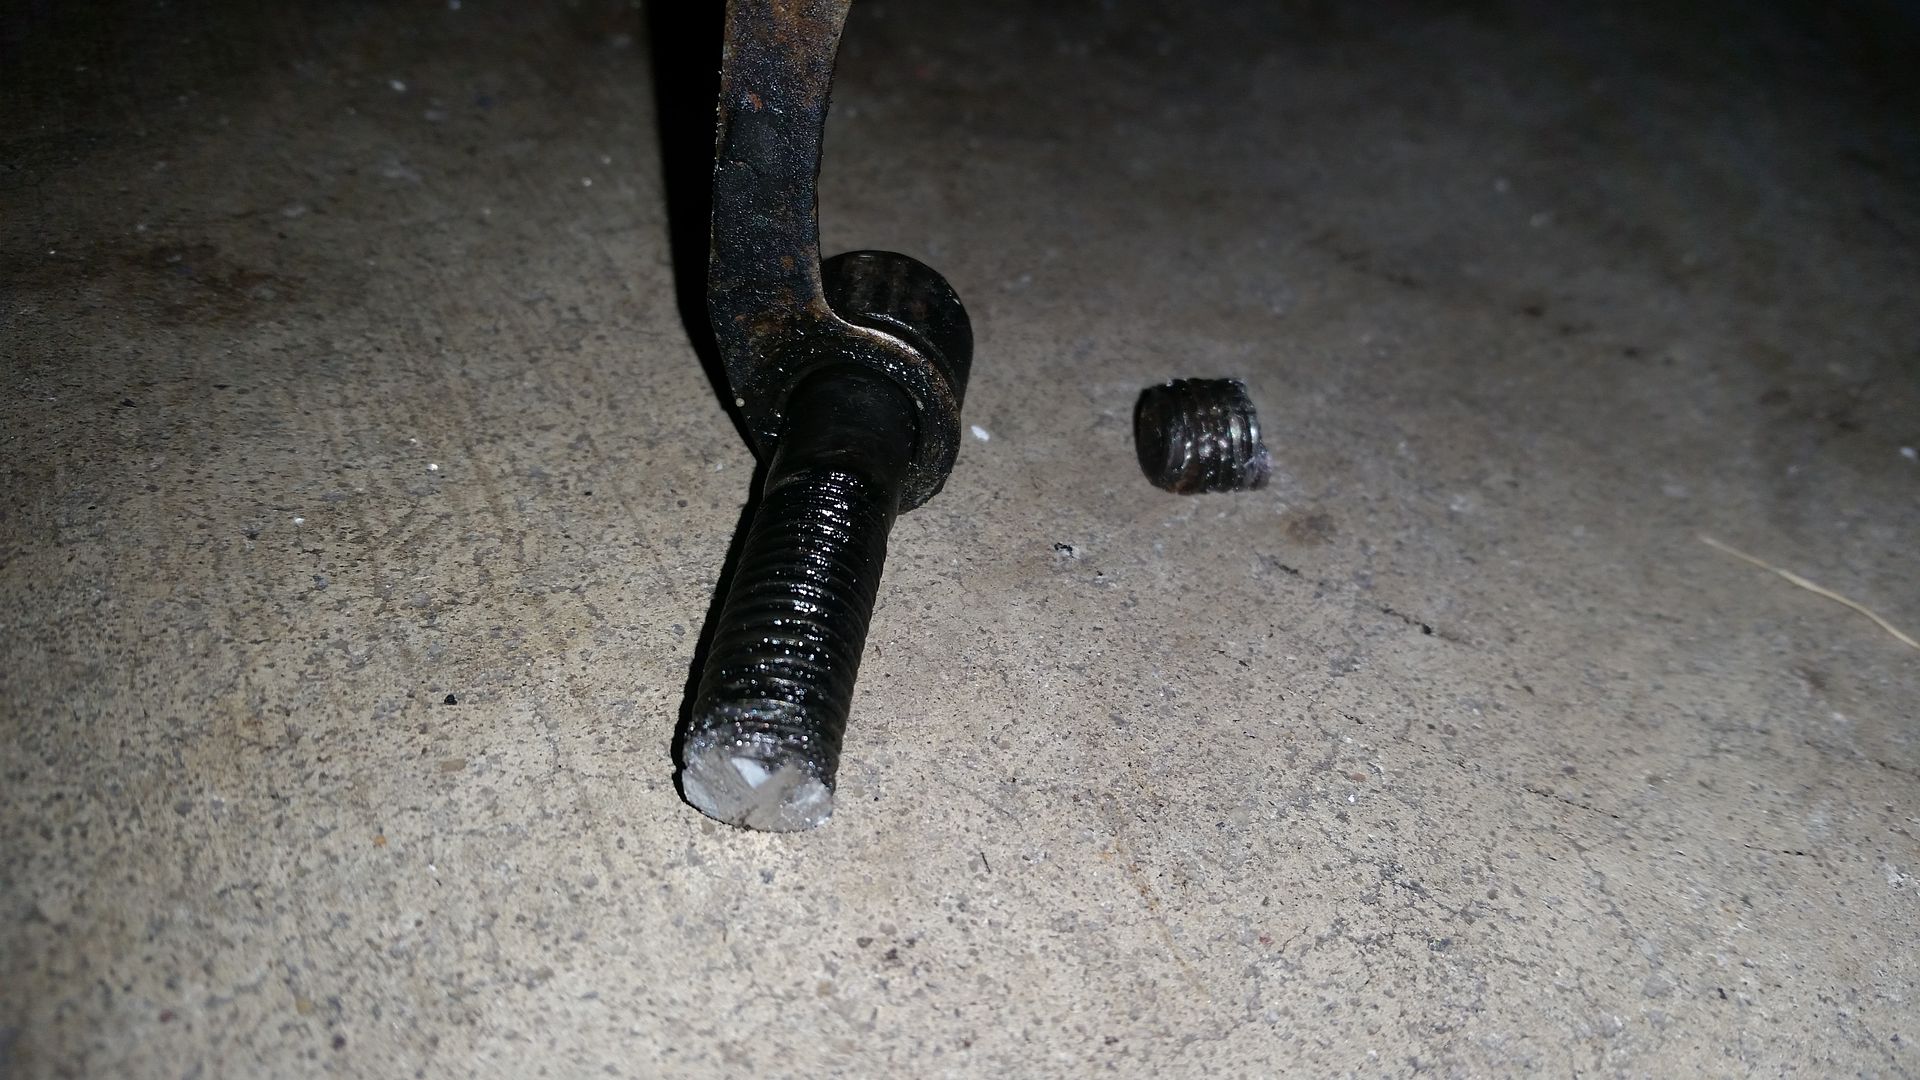
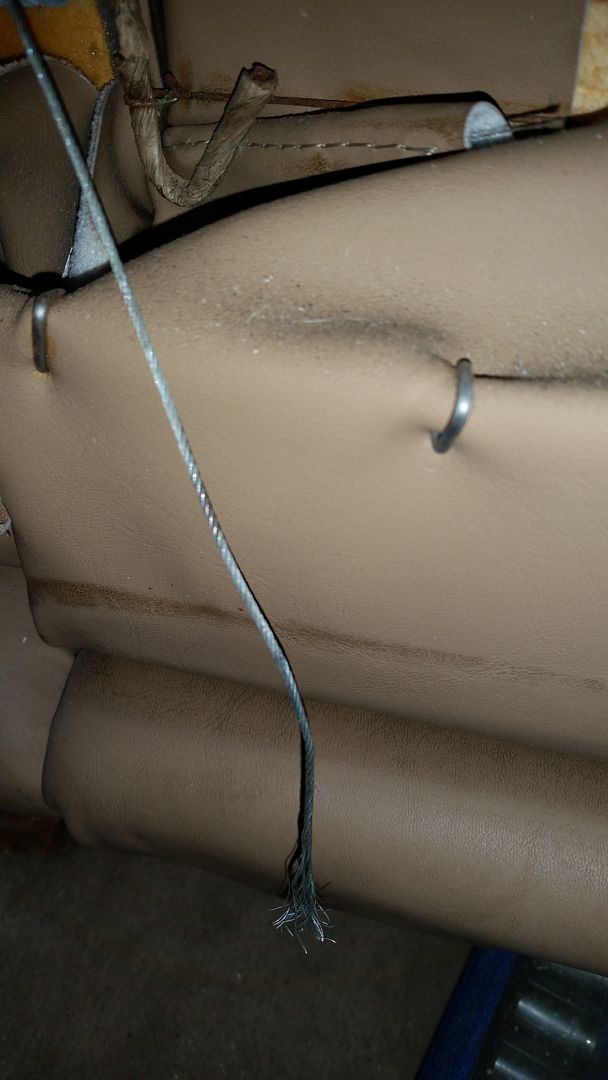
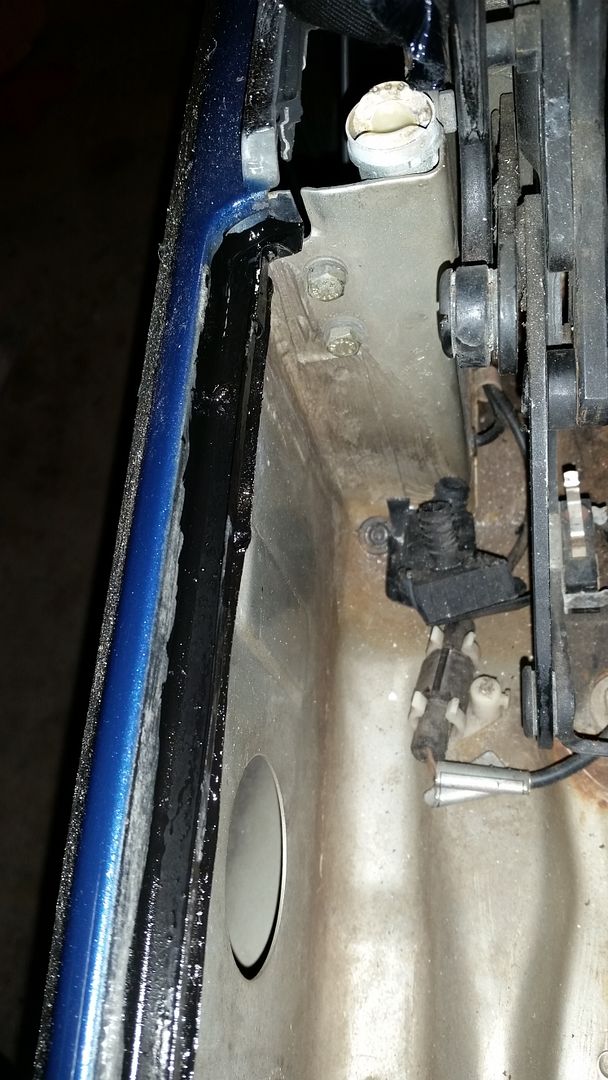
So some bad news (balanced with good).
Last Thursday I was driving along like normal, other than having the top up due to some pop up thunderstorms. I was meeting my wife and kids for dinner and went to make a right turn into the parking lot when I heard a loud bang/clang from the rear of the car and felt the car lose forward momentum. I gave it gas but continued to coast. I managed to maintain enough momentum to drift (almost) into a parking space and got out to check.
I found this:
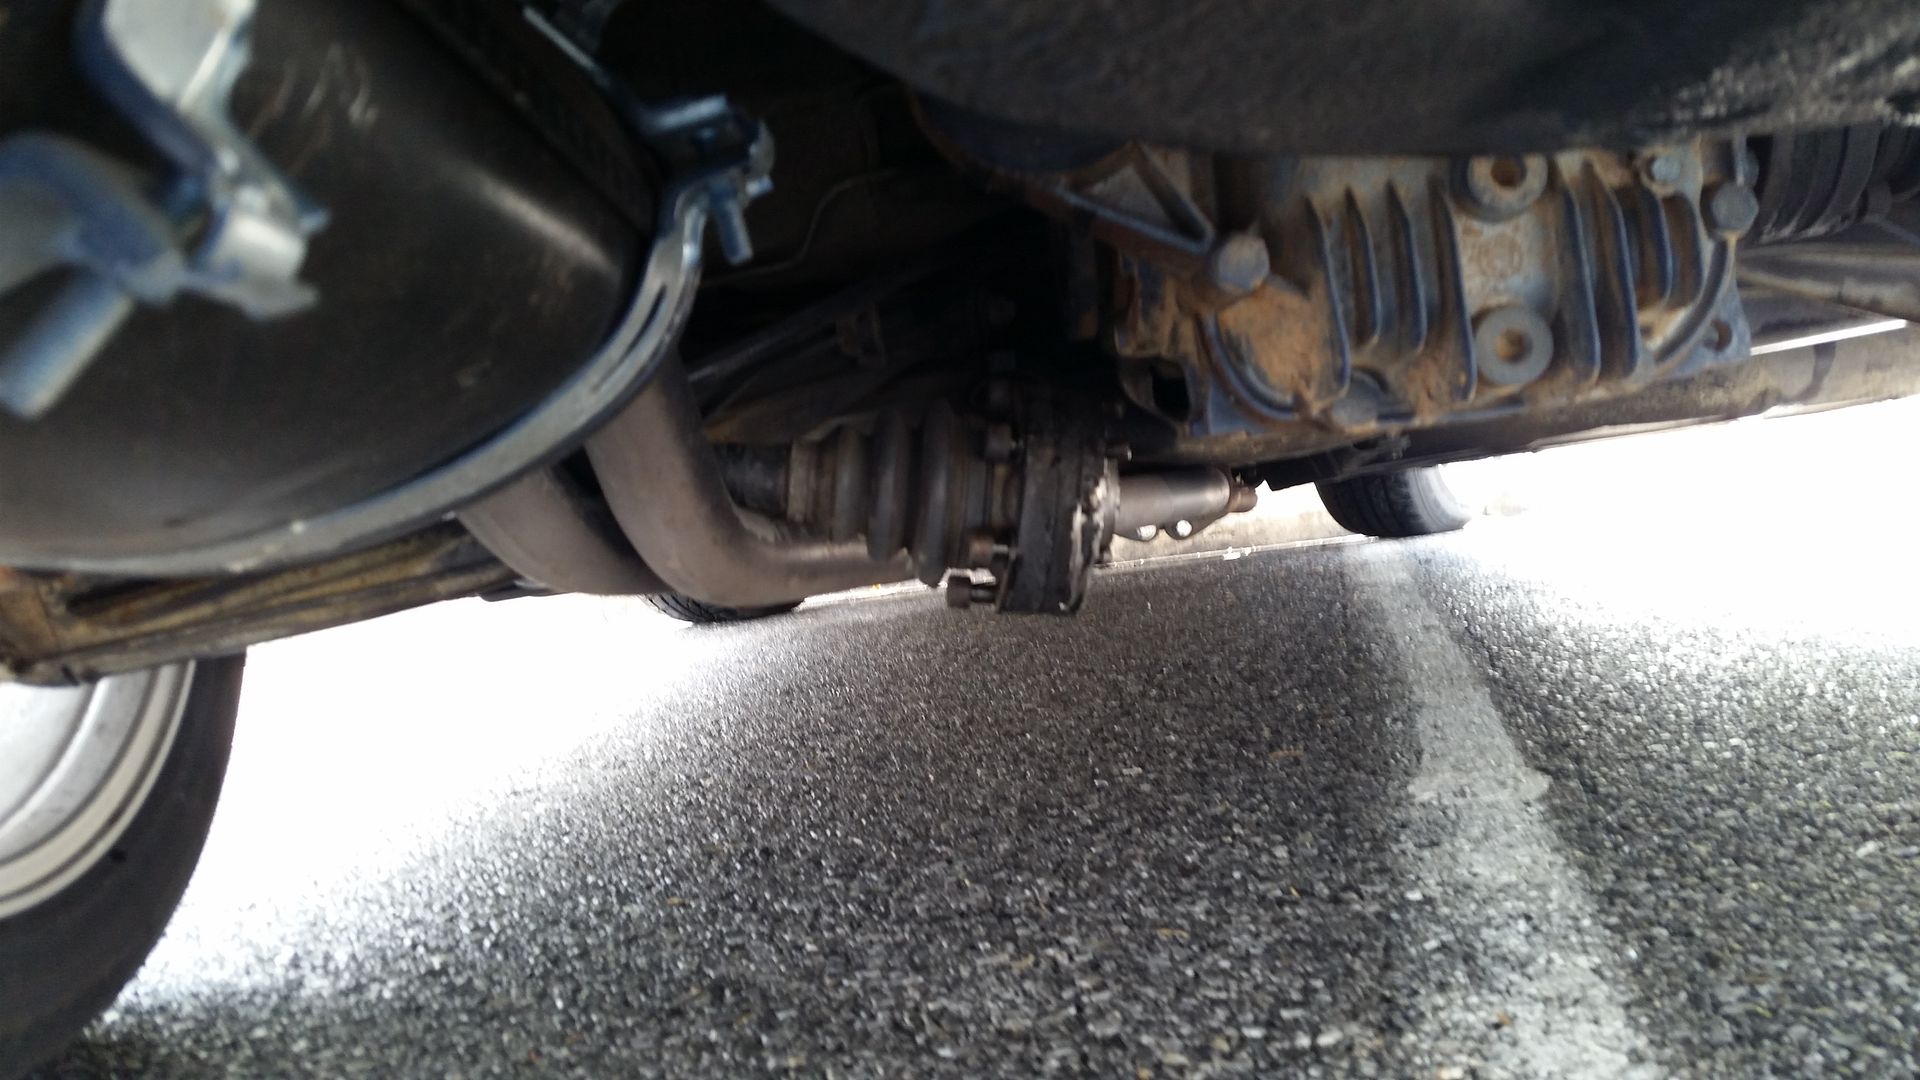
I climbed under the (lowered) car (in my work clothes) and found this at the end of the halfshaft:
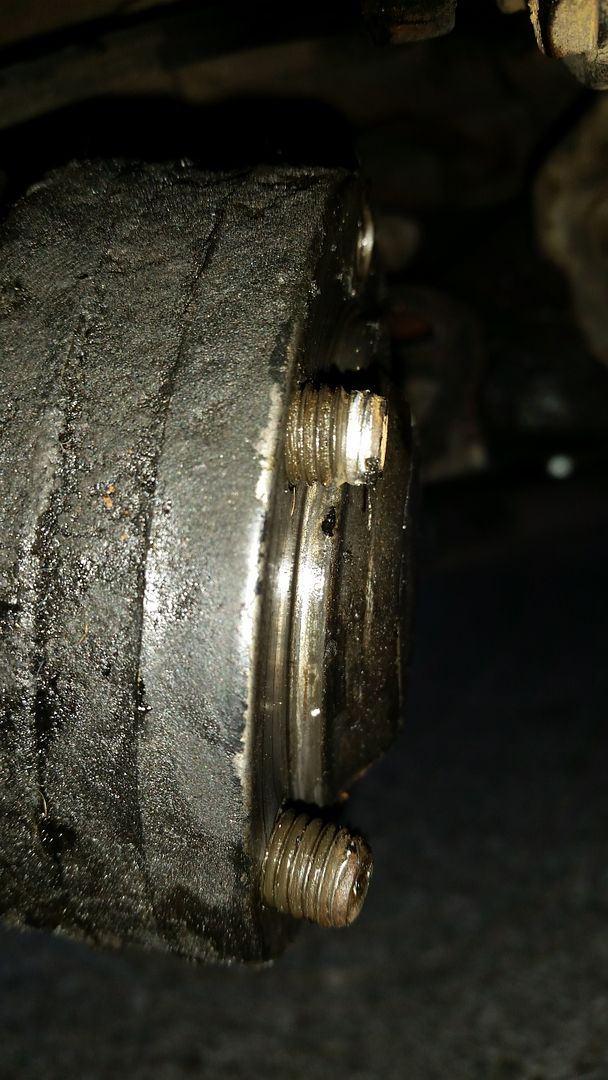
The last bolt to work loose had actually bent as it pulled out.
I quickly called my wife at home and had her bring a few tools to the restaurant, ate dinner, and went to do the repair in the parking lot rather than to pay for a tow for the ~2 mile trip home.
After changing my clothes I realized that i did not have the jack in the car to allow me to align the halfshaft holes with the differential flange holes. I managed to get my father to run my jack in to the lot, as I was losing daylight.
15 minutes after the jack arrived I was back down and ready to go.
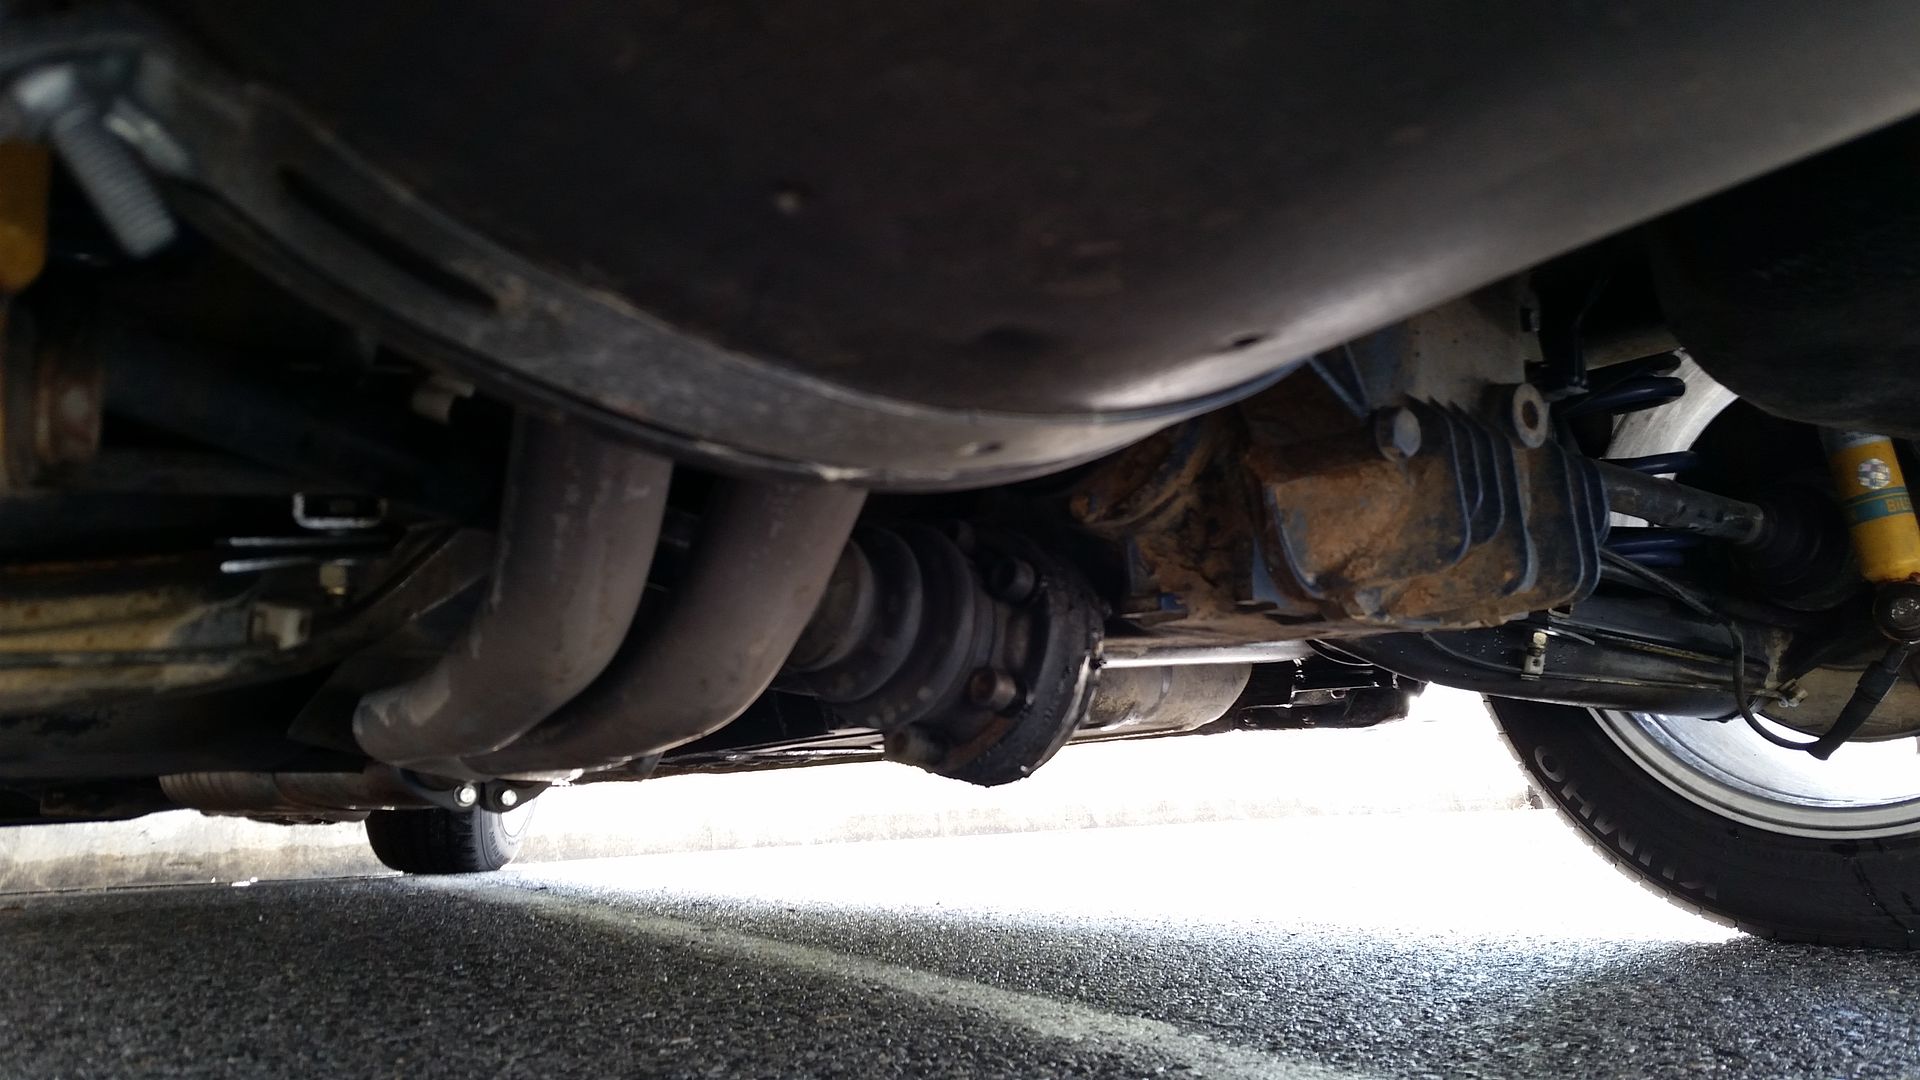
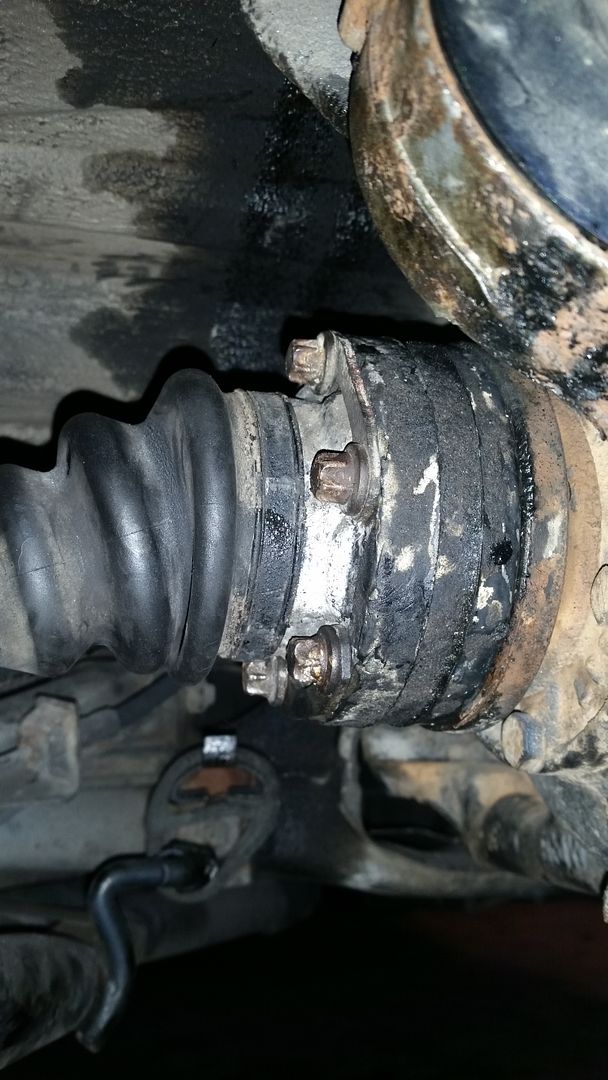
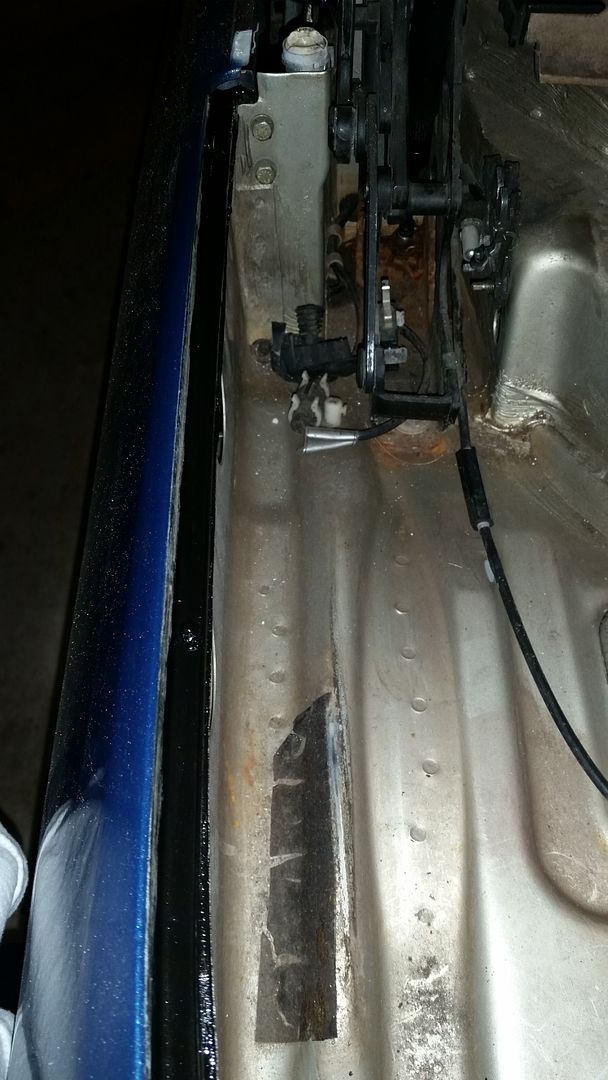
That bent last bolt was not going to come out easily so I just left it disconnected.
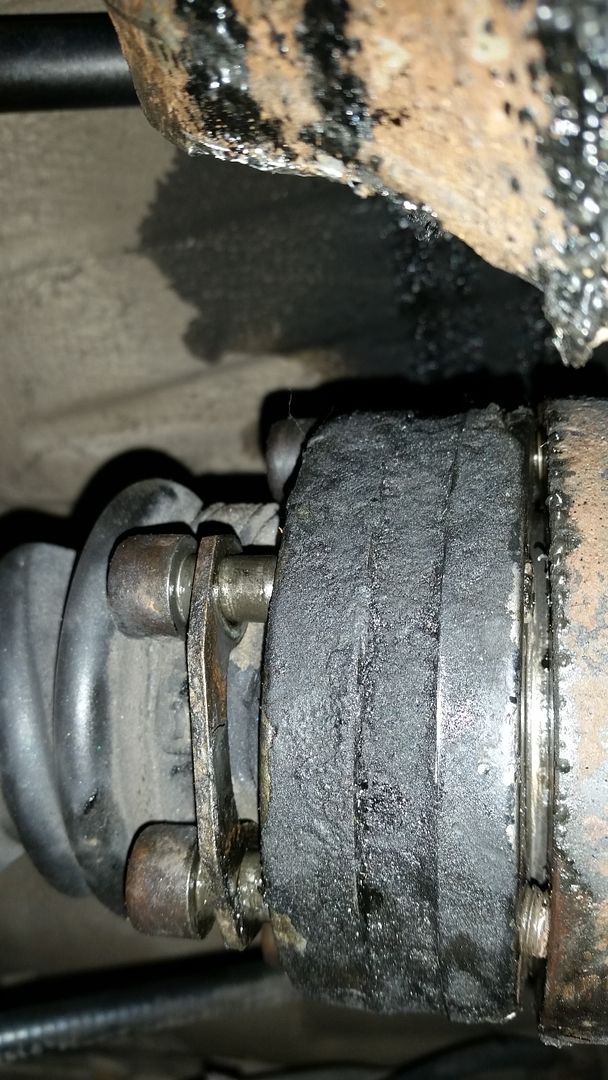
With it in the way the other 5 bolts would not fully tighten but I figure that I have been driving around for days/weeks with less than 6 bolts in place so 5 fully tight but not fully nested bolts is better than is was driving in so I'd risk it for the short trip home. I also tightened the passenger side bolts while I was at it. All looked fine at a glance but were no more then finger tight.
Made it!

So that part was the bad news but I did manage to get a set of the updated E-Torx bolts off of the parts car. I plan to clean them and add some blue LocTite to them and then check them regularly.
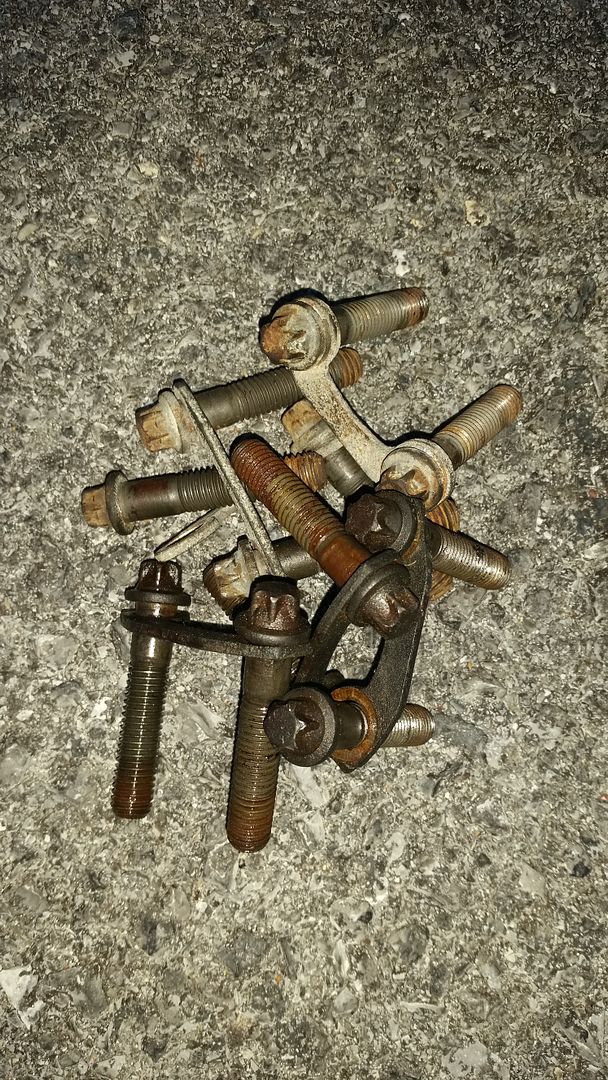
At $9 per bolt I am willing to give that a try before buying a whole new set.
On a positive note, my NOS OEM convertible floor mats arrived!!!
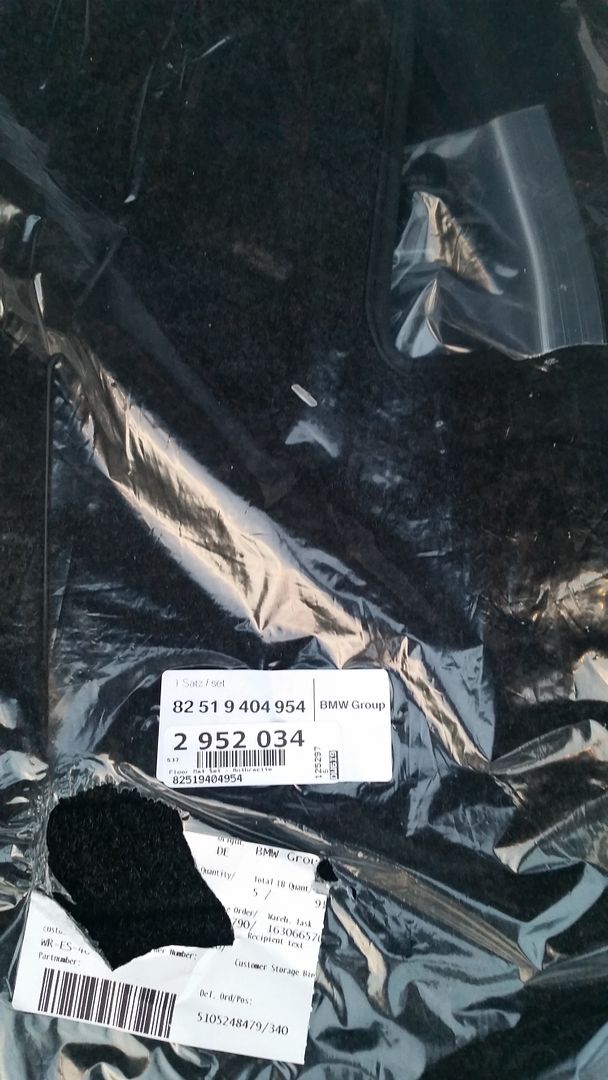
These were listed as NLA for a while but I found them as available from ECS Tuning ( http://www.ecstuning.com/Search/Site...ats/ES2952034/ ). I ordered them about a month (maybe 6 weeks) ago and they finally arrived stateside last week.
They have a tiny BMW roundel on them-

Test fit -
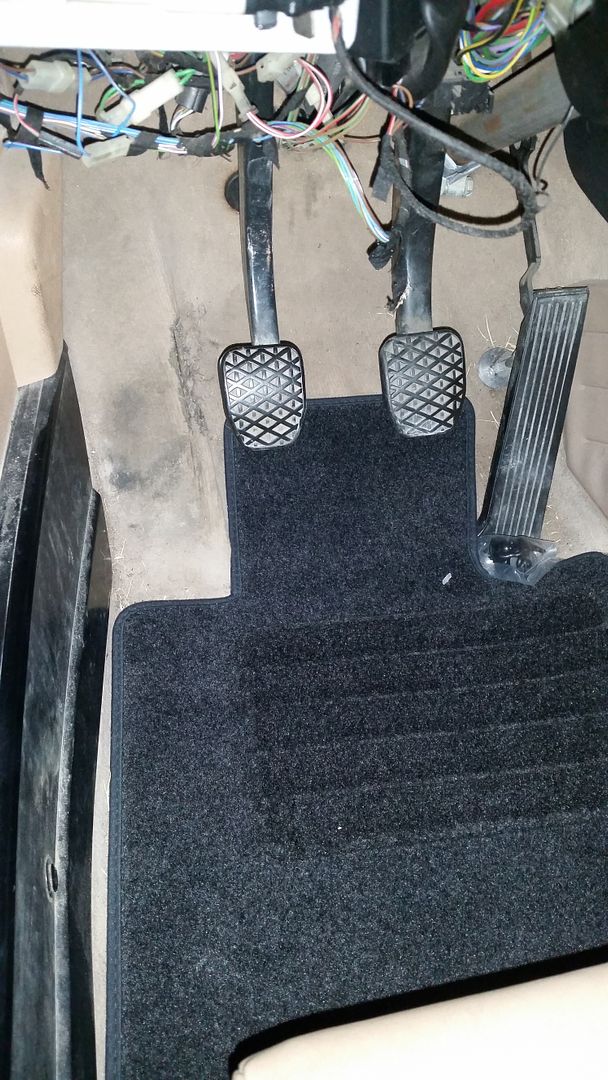
(Yes, I know I need ot address the dead pedal area!!!)
I would have preferred tan but this is the only OEM color still available. With the rest of the black/charcoal parts in the car I can live with it.
FYI - ECS ordered several sets but now jacked the price by $30.
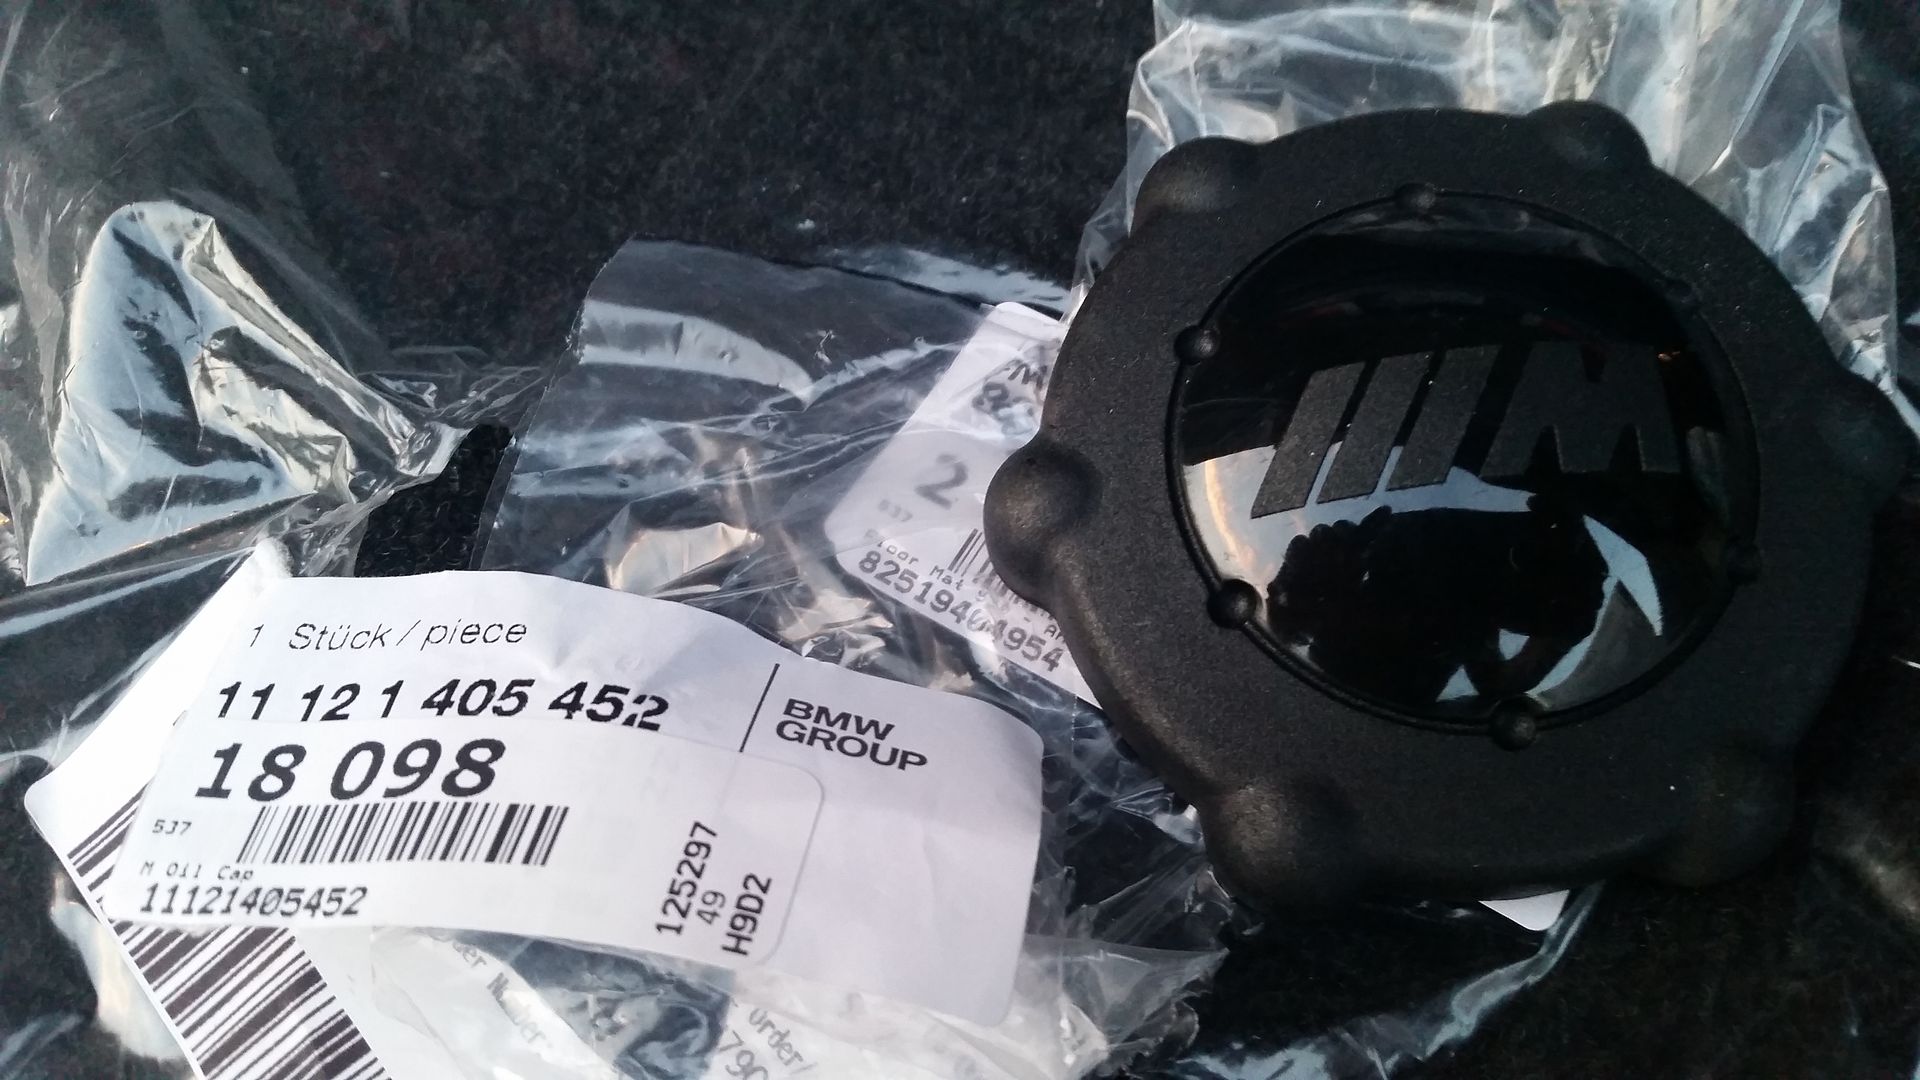
While I was at it I also picked up an ///M oil cap:
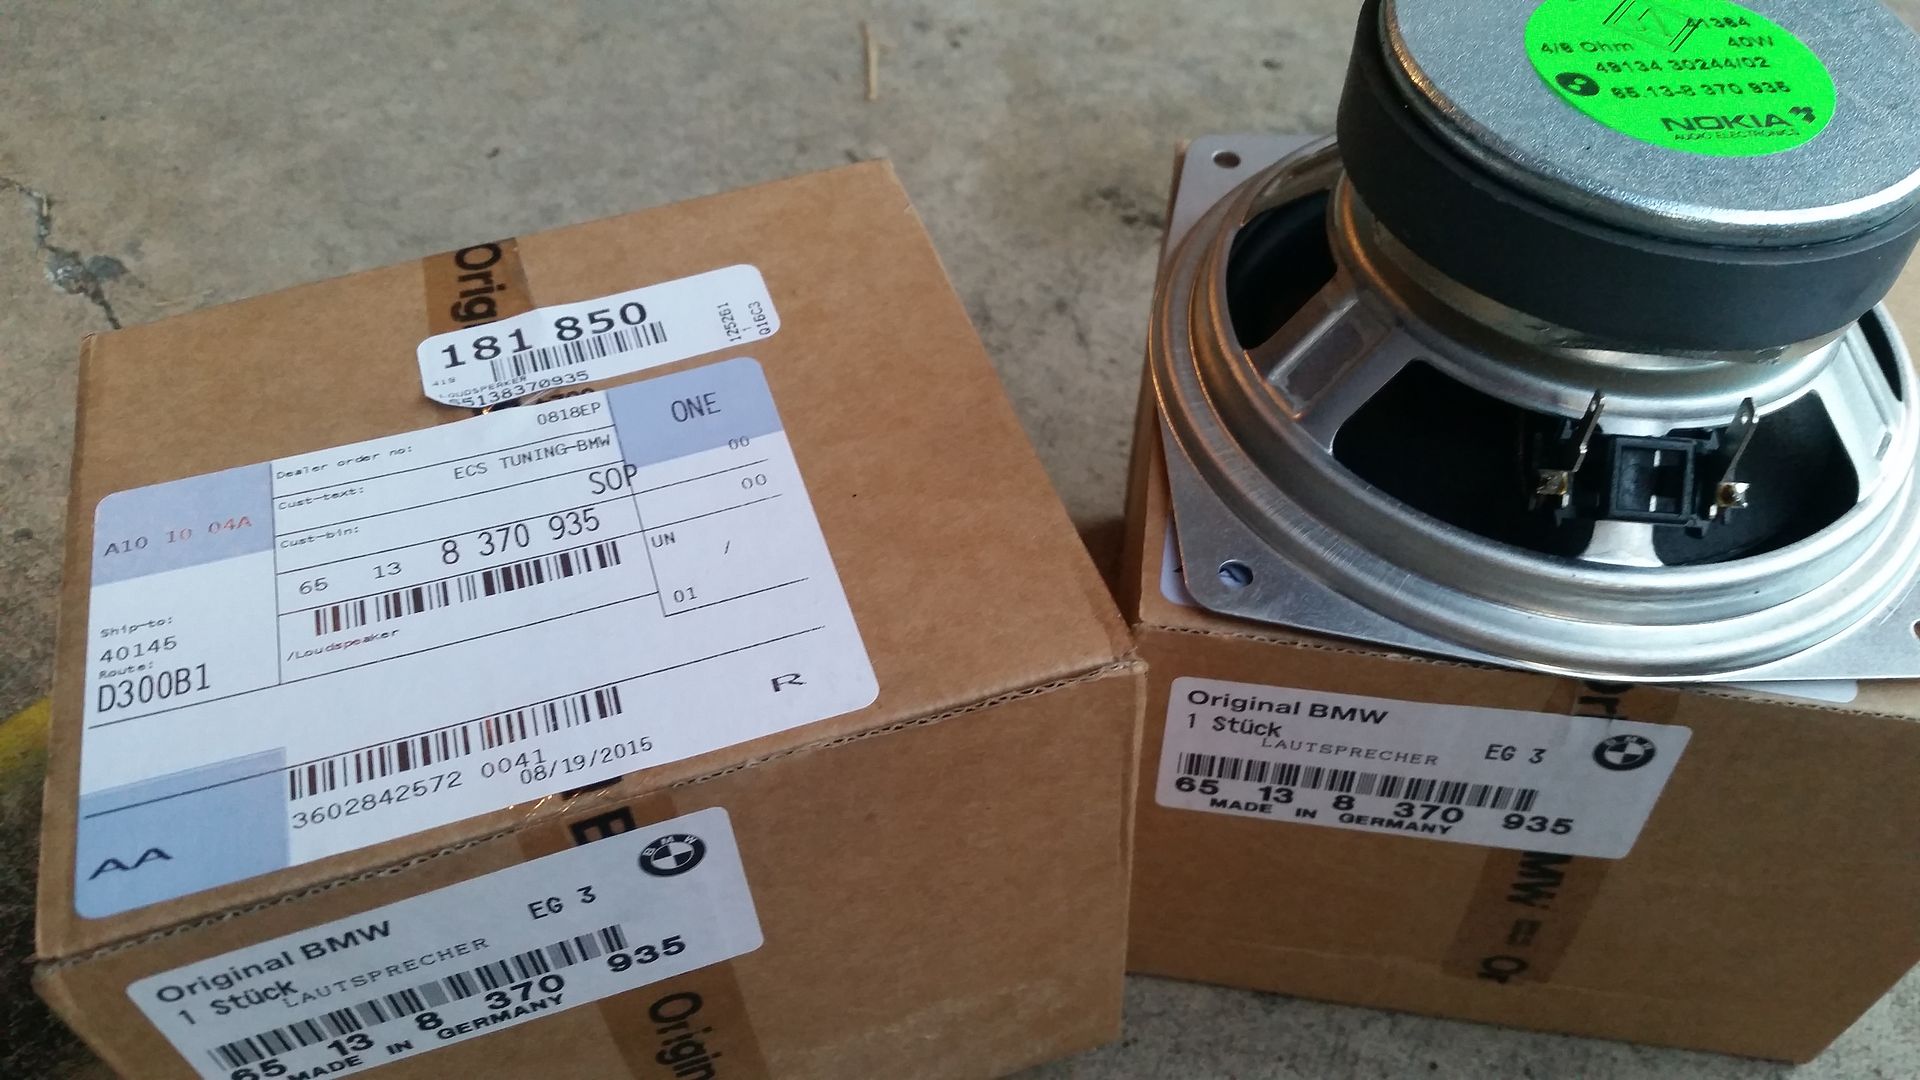
And last but not least my brand new E34 Premium speakers arrived. I had resisted ordering these, trying to buy used. I wasted about $40 on used ones that were damaged or otherwise not what I wanted. I should have just bought new form the beginning.
Comment
-
Shit, that same thing happened to me with a half shaft once too. Weird, never could figure out why...
How much were the e34 speakers? I hear they're a significant upgrade over the stock e30 speakers.Comment
-
I think about $40. I can't remember exactly.
http://www.ecstuning.com/ES181850/
ECS changes prices (they jacked the floor mats $30 after I ordered mine). I think I paid $37-41 for the speakers.Comment
-
Back on the road!
My WRX got new tires over the weekend and I managed to pick up a nail within the first 150 miles. While I await the replacement tire (I was having to add air every 50 miles) I decided to get to work replacing the axle bolts on the e30 and to get it back on the road now rather than to wait for the weekend.
I cut off the bent/damaged bolt and removed it:
And then used the E12 Eurotorx bolts from the parts car, along with a liberal application of Blue Threadlocker:
Comment
-
I got the 935 mids and both GAS PCNs installed.
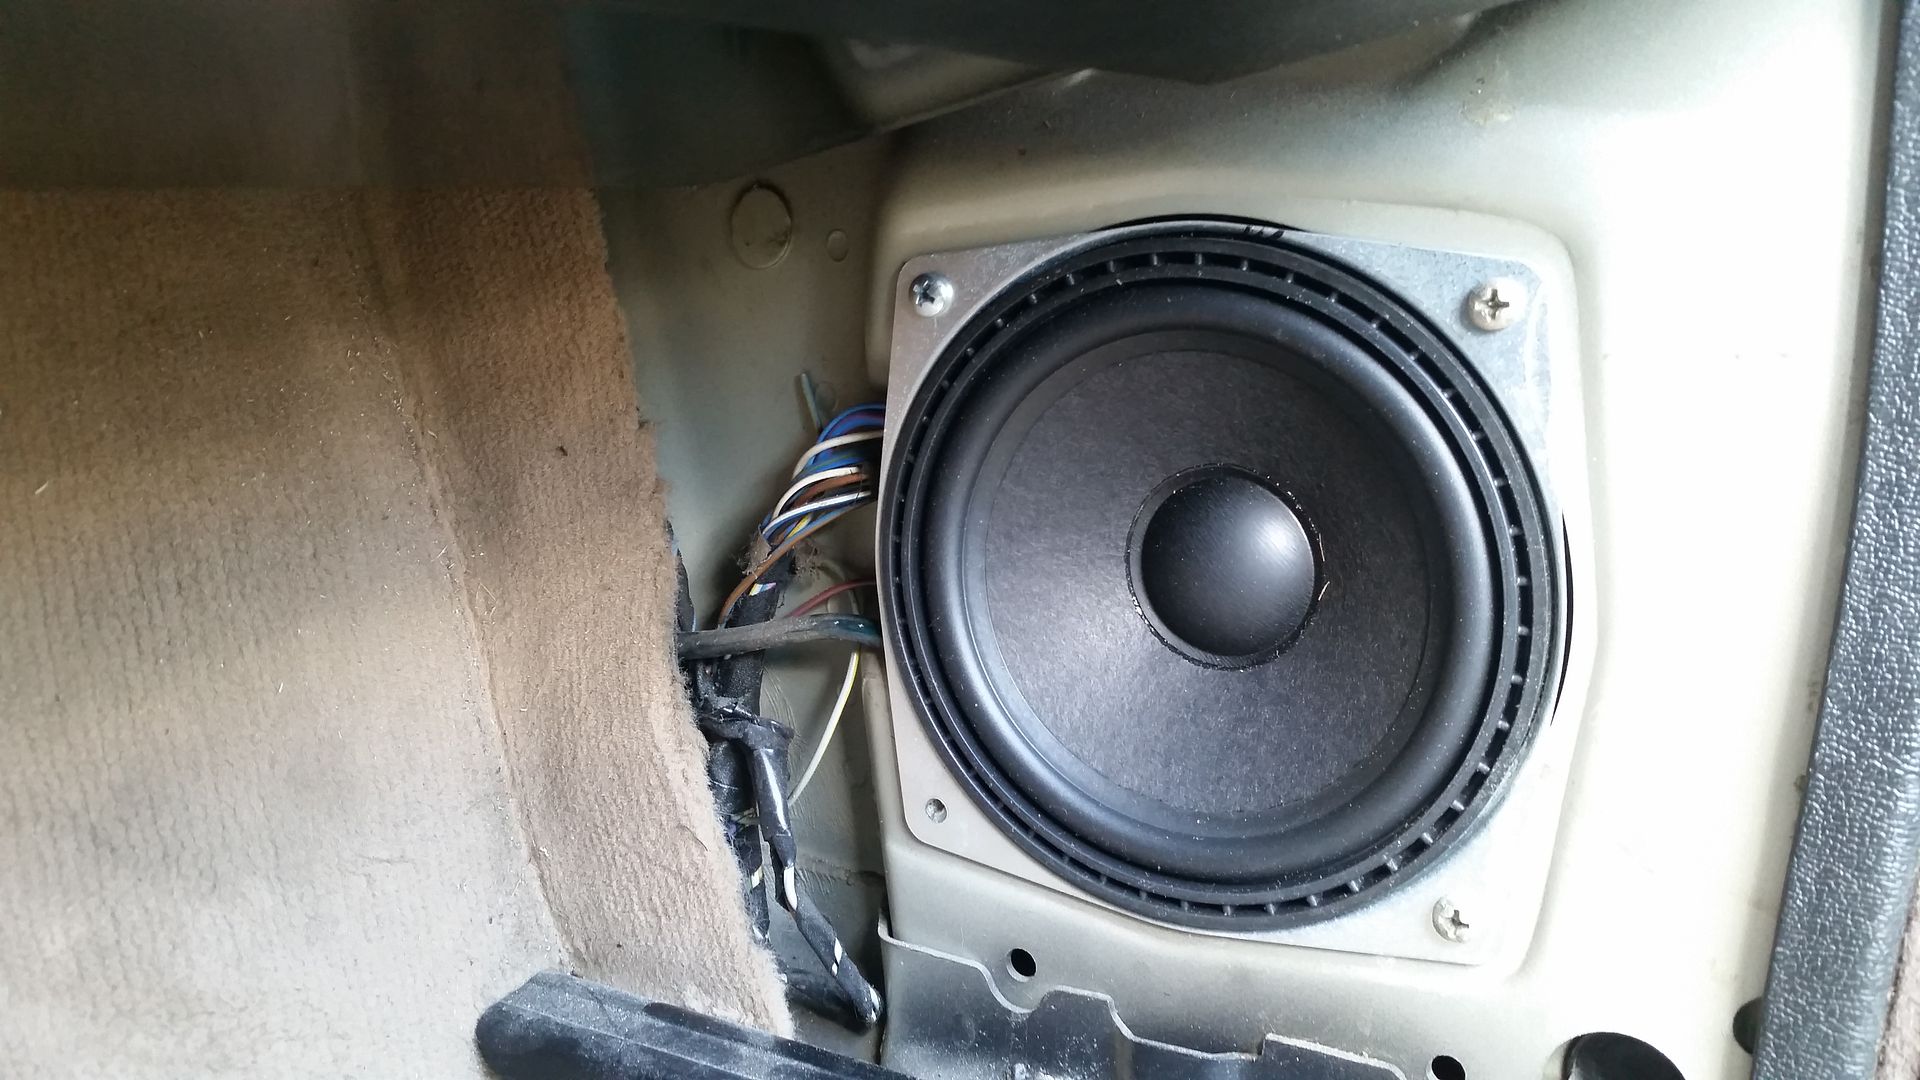
I still need to install the Dayton tweeters and to play with the EQ. I can't say that the bass from the E34 speakers is anything special. I have had 5.25" fronts before- I was into car stereo in the 1990s so I have some clue how 5.25" mids respond. These are not lacking bass, but nothing earth shattering.
I would venture to say that the Pioneer coaxials (TS-A1357) actually have as much or more bass. I am somewhat regretting not trying the Pioneer TS-D1320C or TS-D1330C (or even the TS-A1305C) but I will give these E34 speakers some time to break in before I decide that they were a mistake.
I also gave up on having the display on my Pioneer HU match the dash. The amber display color was impossible to read in a convertible. After some experimenting I went with white- or at least what Pioneer calls white. It is somewhat blue-ish. Ricer HID fans would be stoked.
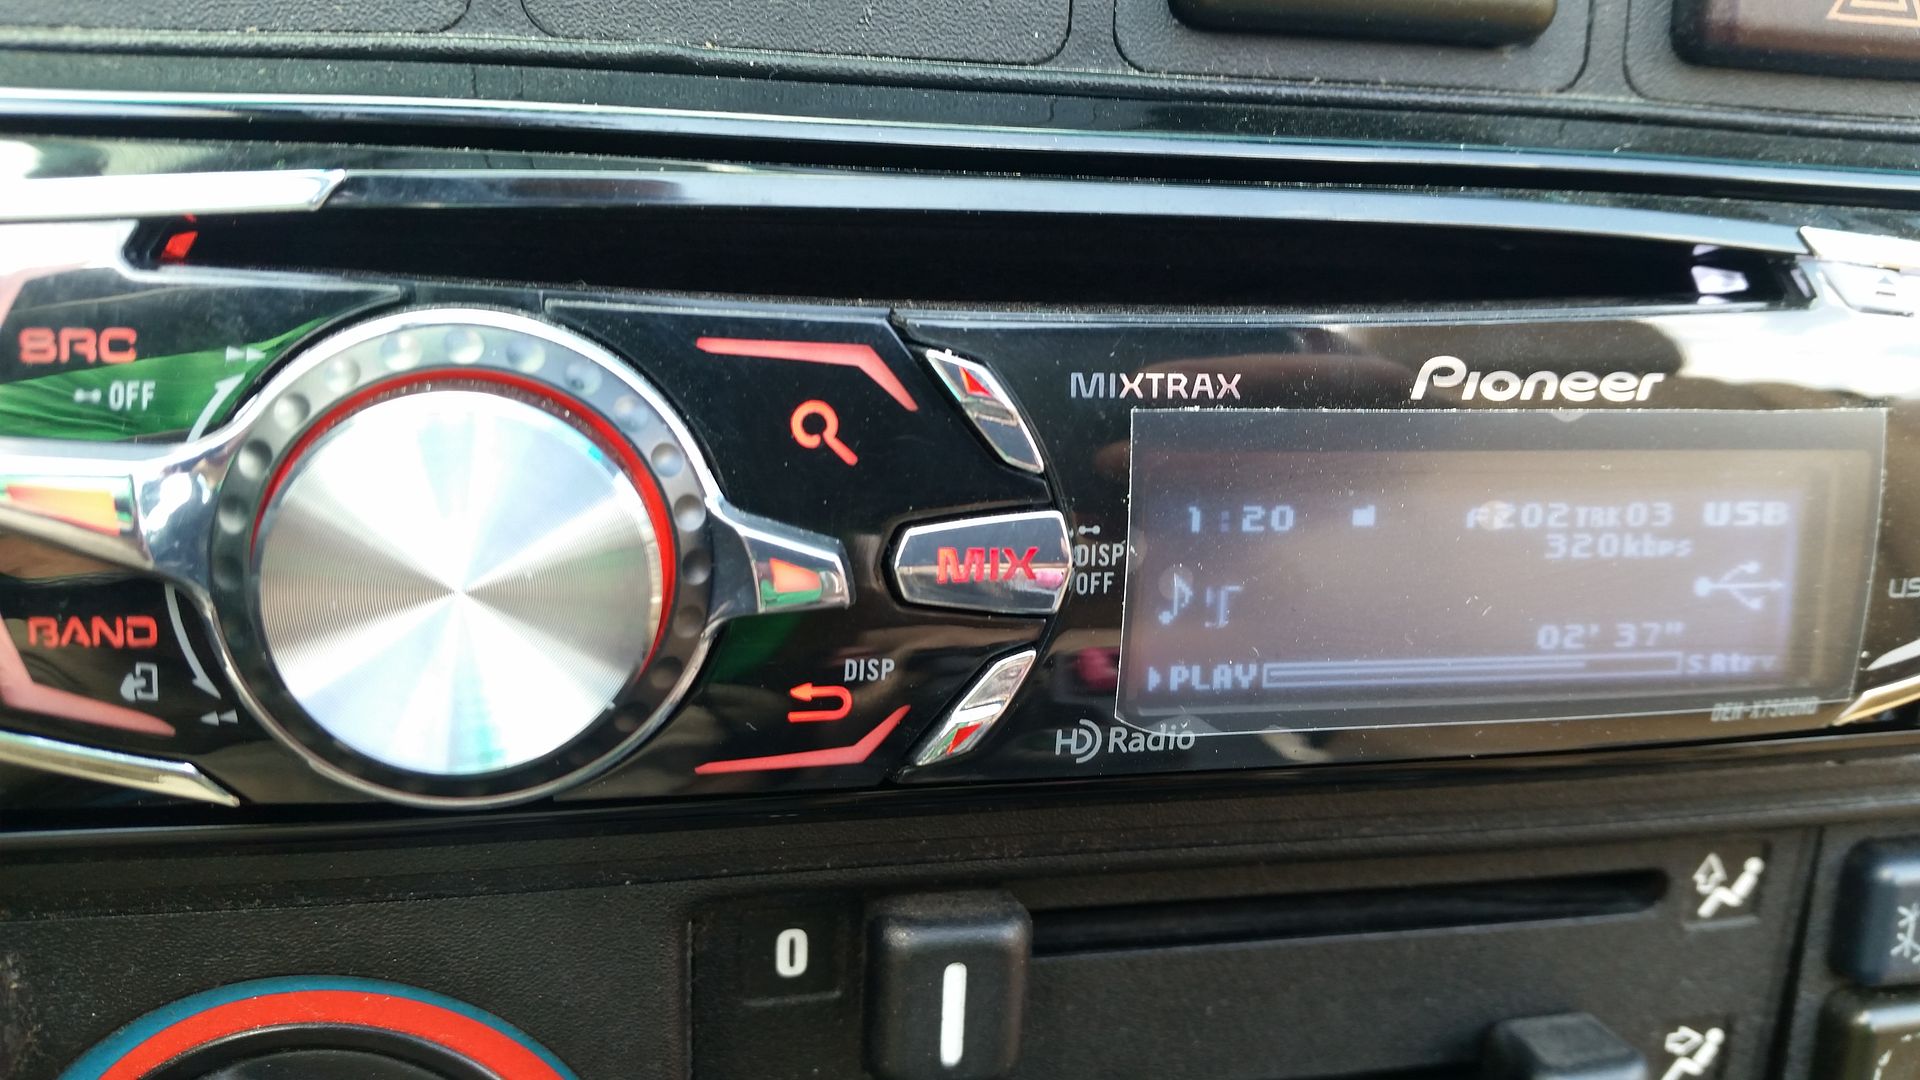
What is really stupid is that the when I changed the display to white and left the "control" side of the HU amber, the few buttons on the right (display) side of the HU are also now white. It is a piss poor design overall, but to have a couple buttons controlled by the display color and the rest on their own circuit is weird. At least the left side is still amber so the whole unit isn't white. And I CAN read the display now, so that is an improvement.Comment
-
So...a monumental weekend for the stereo but the "cost" was pretty high.
I set out this Saturday AM to try to install the amp and run the wiring for the transducer setup. Of course, nothing ever goes as planned, plus I got into "while I am in there" mode and basically burned all of my free time this weekend working on the car. What should have taken an hour or 3 took about 8-9 hours of garage time.
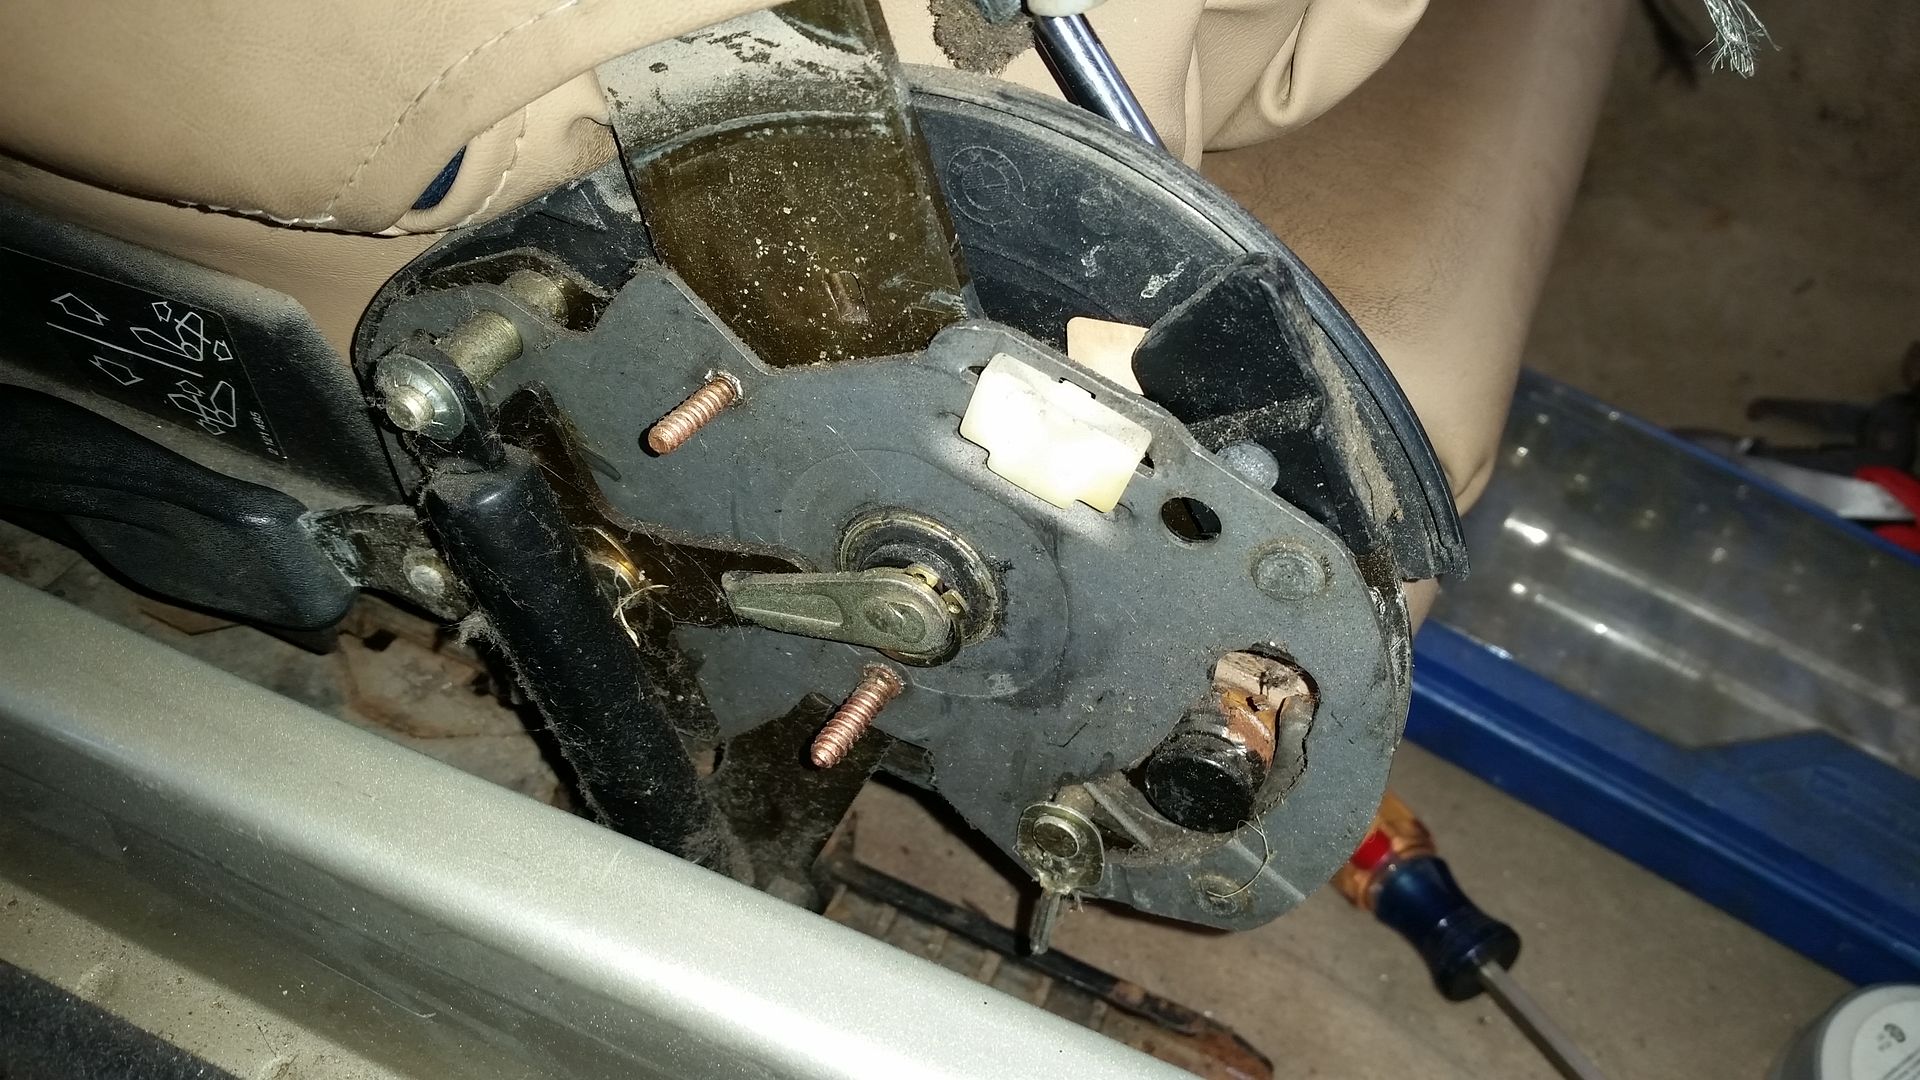
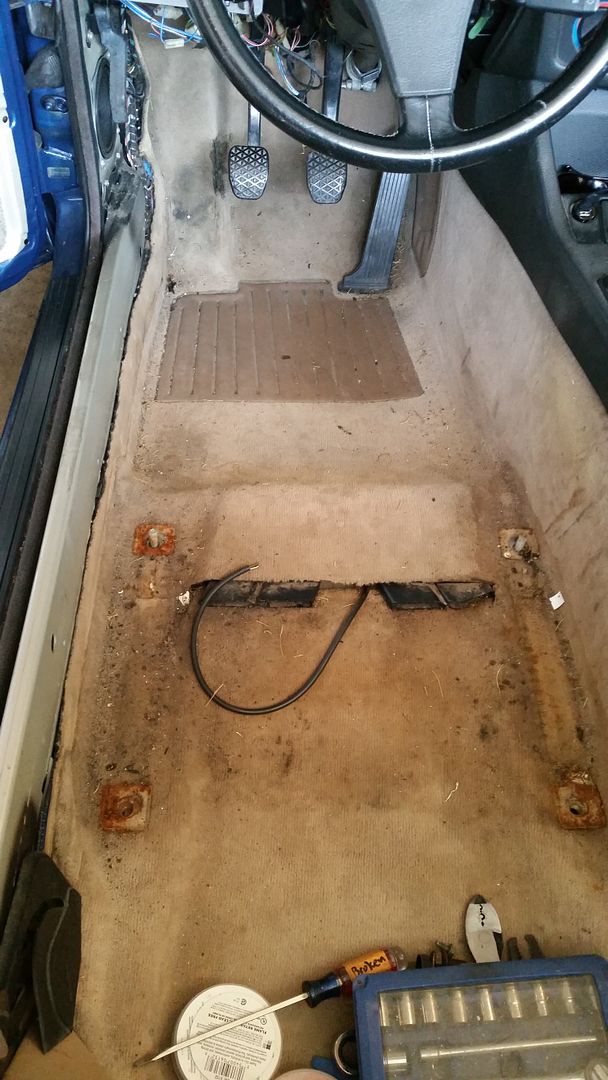
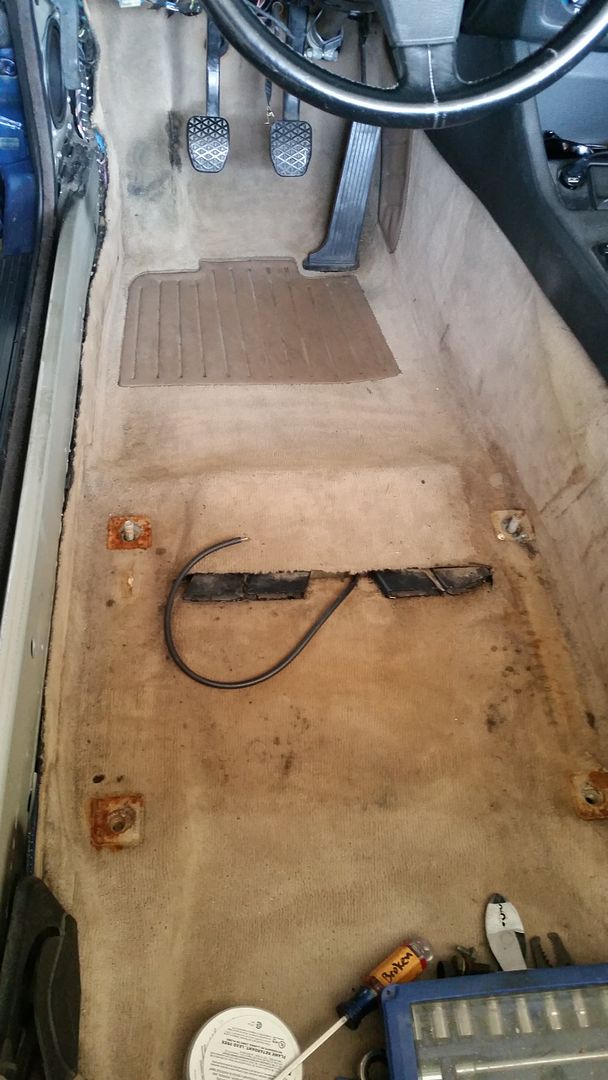
So the first hurdle was in getting the seats out. Since I bought the car the driver's seat has not "flopped" properly, and I suspected that it was due to a broken cable. I pulled the parts on RealOEM and ordered the replacement cable (more in a minute) and decided to wait until I had any additional reason to pull the seat to make the replacement.
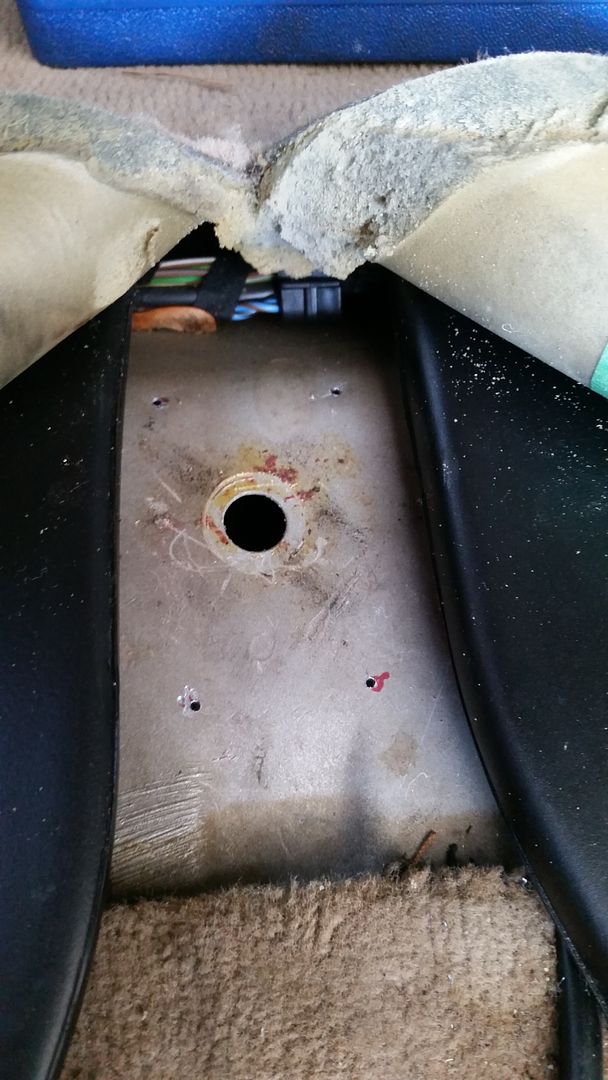
So to even remove a coupe/convertible seat you have to flop the seat forward to access the rear bolts so we already had our first hurdle. Removed the back cover to find this:
And took about 15 more minutes to remove the outer cover on the hinge (without breaking it):
Fortunately I had a couple spare seats around to use to figure out how to get this one out without damage.
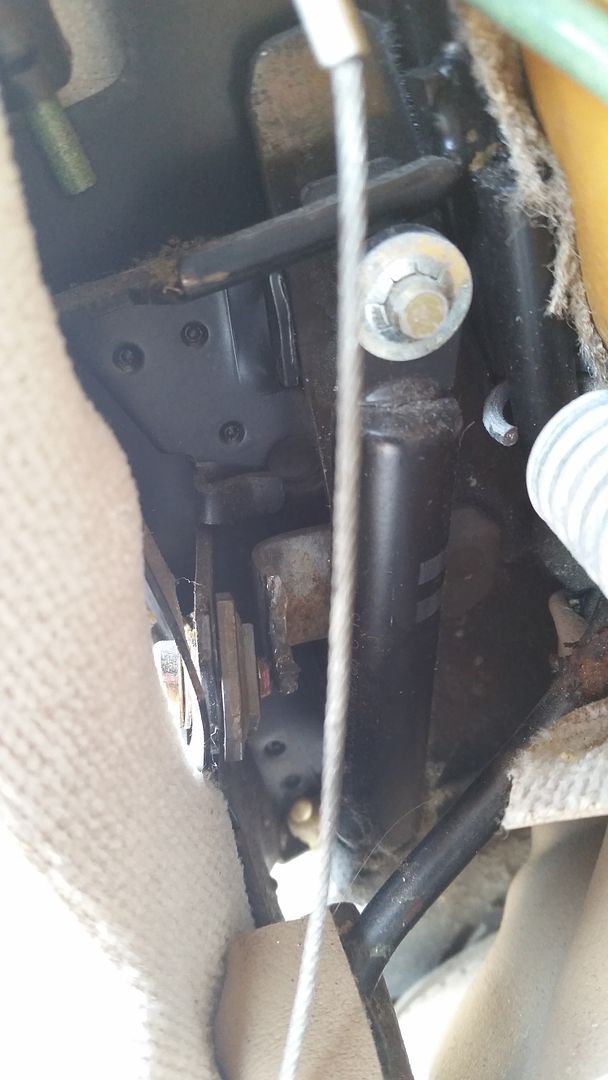
Look at that filth!
First round with the vacuum:
So I mentioned that the "flop" function was failing...also the back was not very stable on the left side. With the back off I think I may have uncovered the issue - broken bracket to hold the back to the base:
All that was well and good, and it does provide a foundation for repairing the seat (I installed a spare passenger seat to allow time to repair the seat that I have) but let's get to the fun part!
A couple of weeks ago my Clark Synthesis Tactile Transducer arrived. I did some fit testing and mapped out how I wanted to install it, where I wanted the amp, how I planned to run the cabling, etc...but then I went on vacation and have been busy.
Now that I had the seat out it is time to get to business.
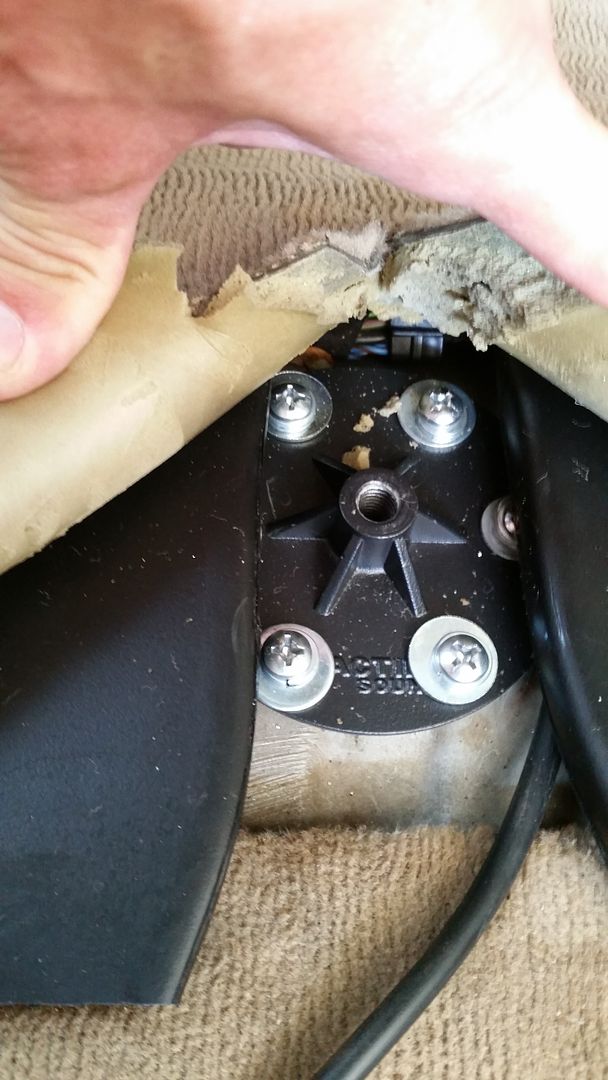
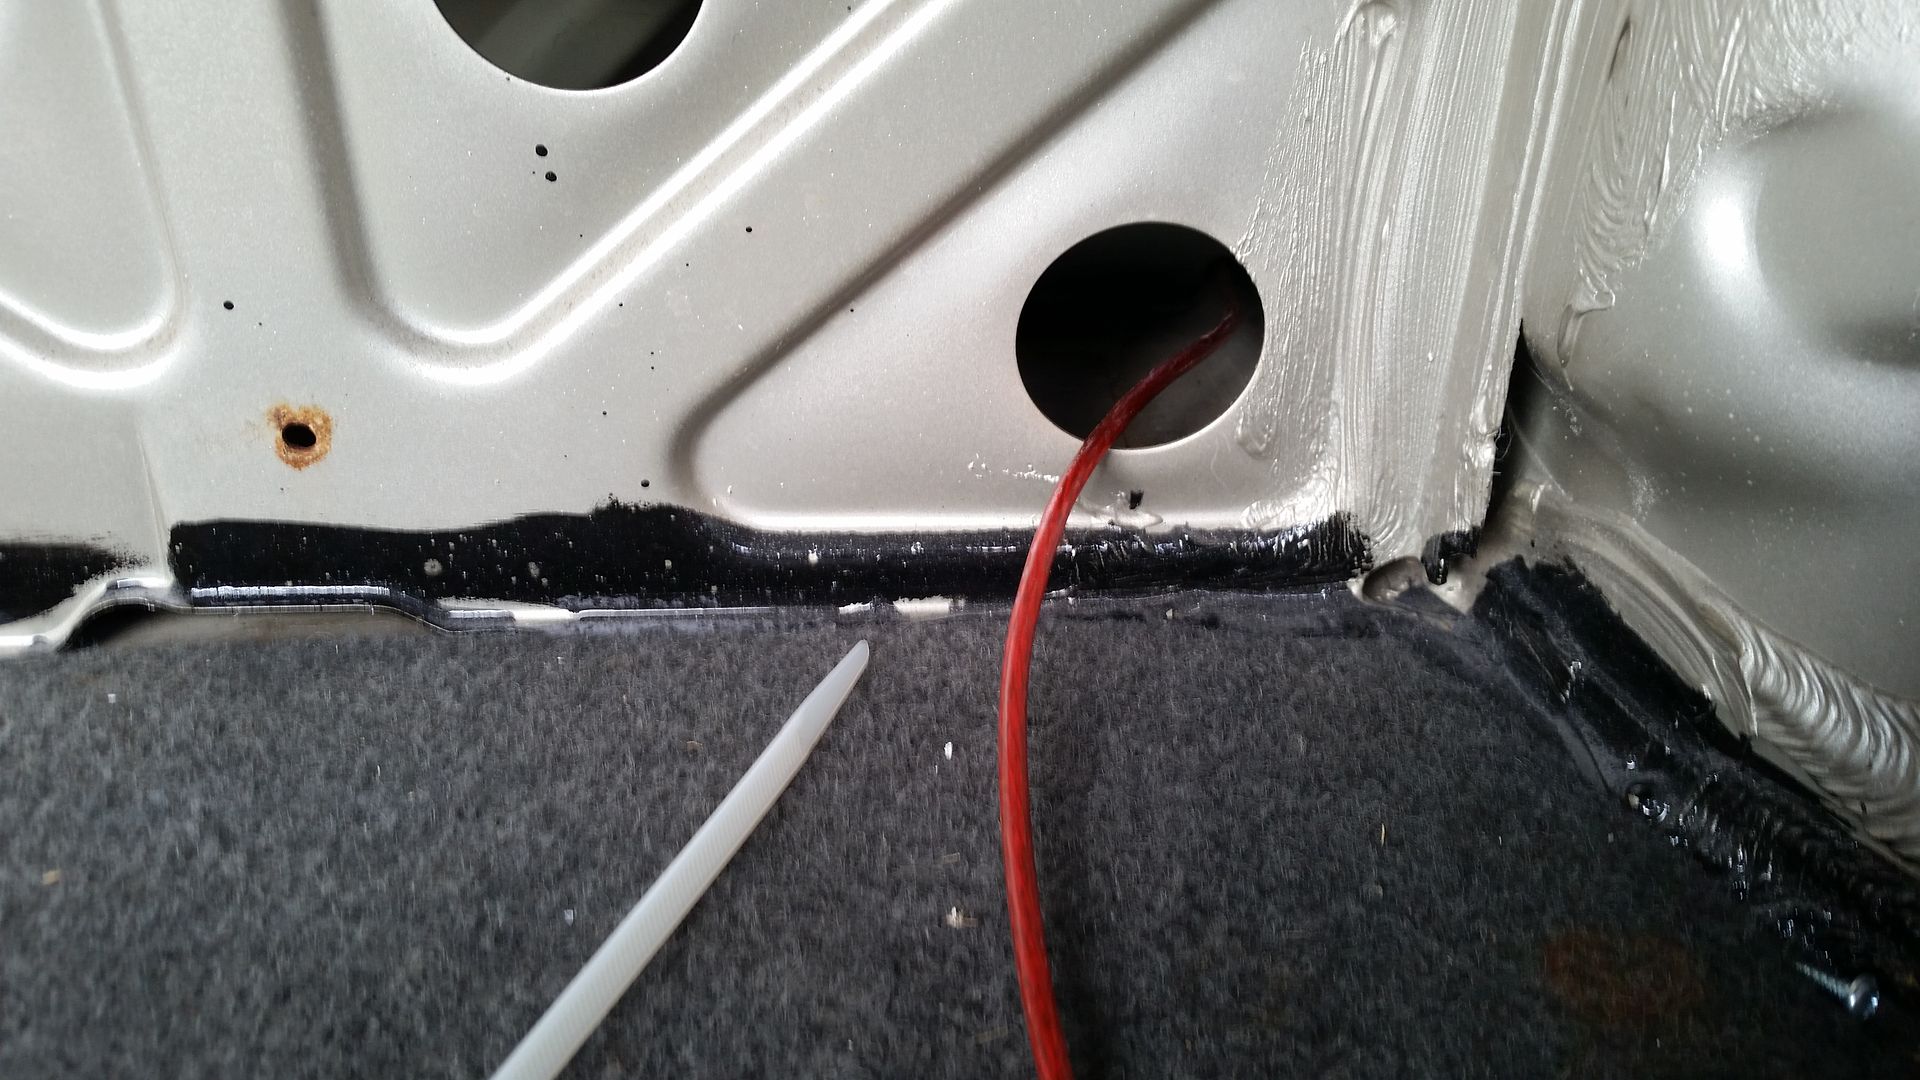
TO facilitate the install I had to cut the carpet between the vents and folded it back to position the base on the floor pan. A note about this location- there are brake lines below it!!! BE CAREFUL!!!
So 4 of the 6 mounting holes are over a frame rail so there was no access to use a nut & bolt combo as I had planned. The other 2 could use a nut and bolt but with 6 fasteners I should be good with quality, wide-tooth sheet metal screws. Since Clark shipped the unit with screws (which I initially did not see in the hardware pack) I ended up using those.
First I positioned it and marked the holes:
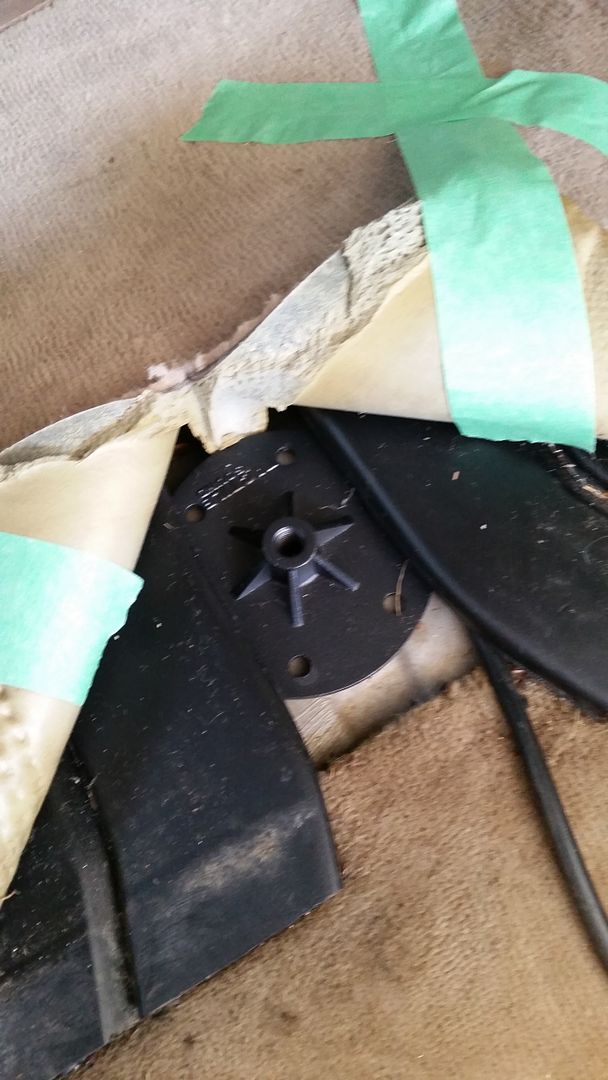
Then I removed the bracket, center punched, drilled a pilot, and enlarged them:
Test-fit with some wide-head sheet metal screws that I had for another project:

Around this time I saw the larger screws and lock washers in the hardware pack so I enlarged the holes further and used the included hardware:
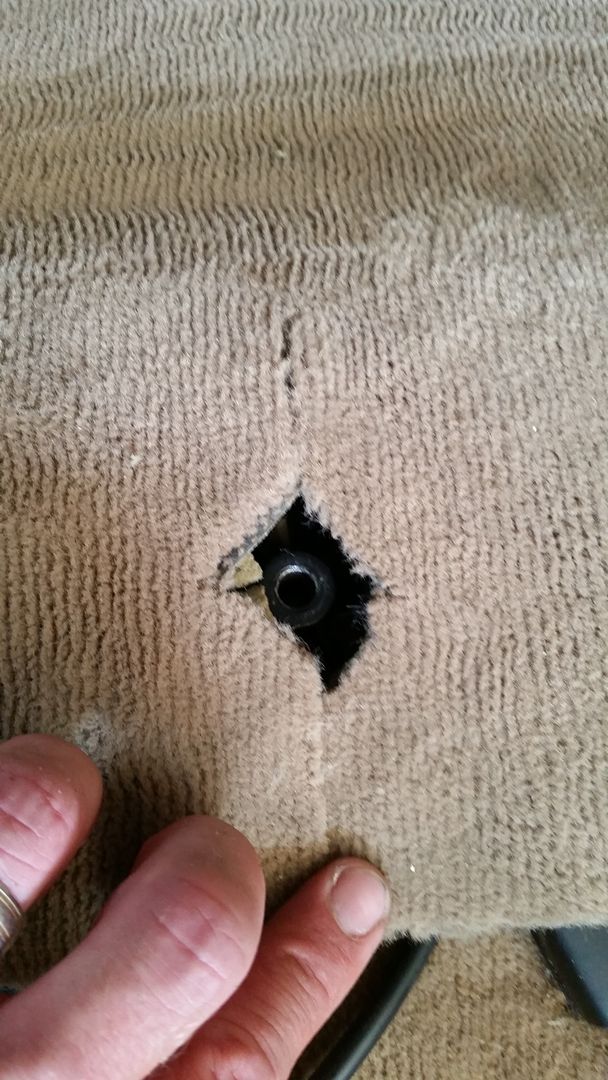
By now I had used some carpet cleaner and let it dry for a few hours while I took my kids swimming so I returned to find things were dry and ready to keep moving. I cut a small diamond-shaped hole to give the transducer a more solid connection to the bracket without any material to inhibit the transfer of the vibrations:
Next up I mounted the transducer using the threaded shaft and 2 jamb nuts:
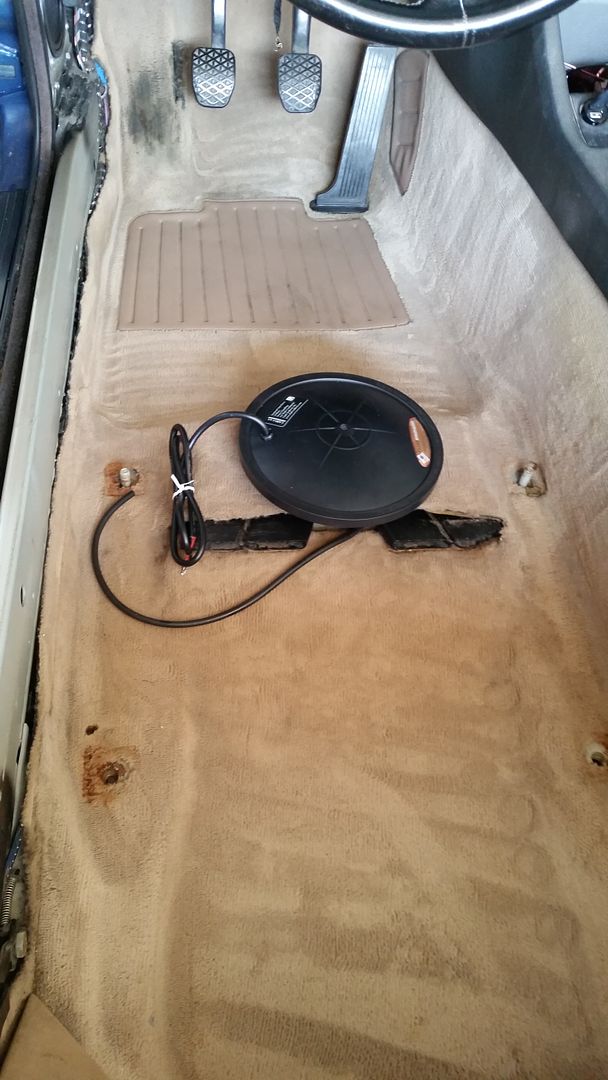
With the spare Sport seat back in place there was plenty of clearance:
Now it was time to wire up the amp.
As the car is a convertible, I still have the battery in the front. I decided to leave it there (at least for the time being) and to run the wires for the amps right through the firewall. Yes, I said "amps" and meant it. I told you I did some "while I was in there" stuff.
Anyway, I used a flathead to mark the path through the existing grommet:
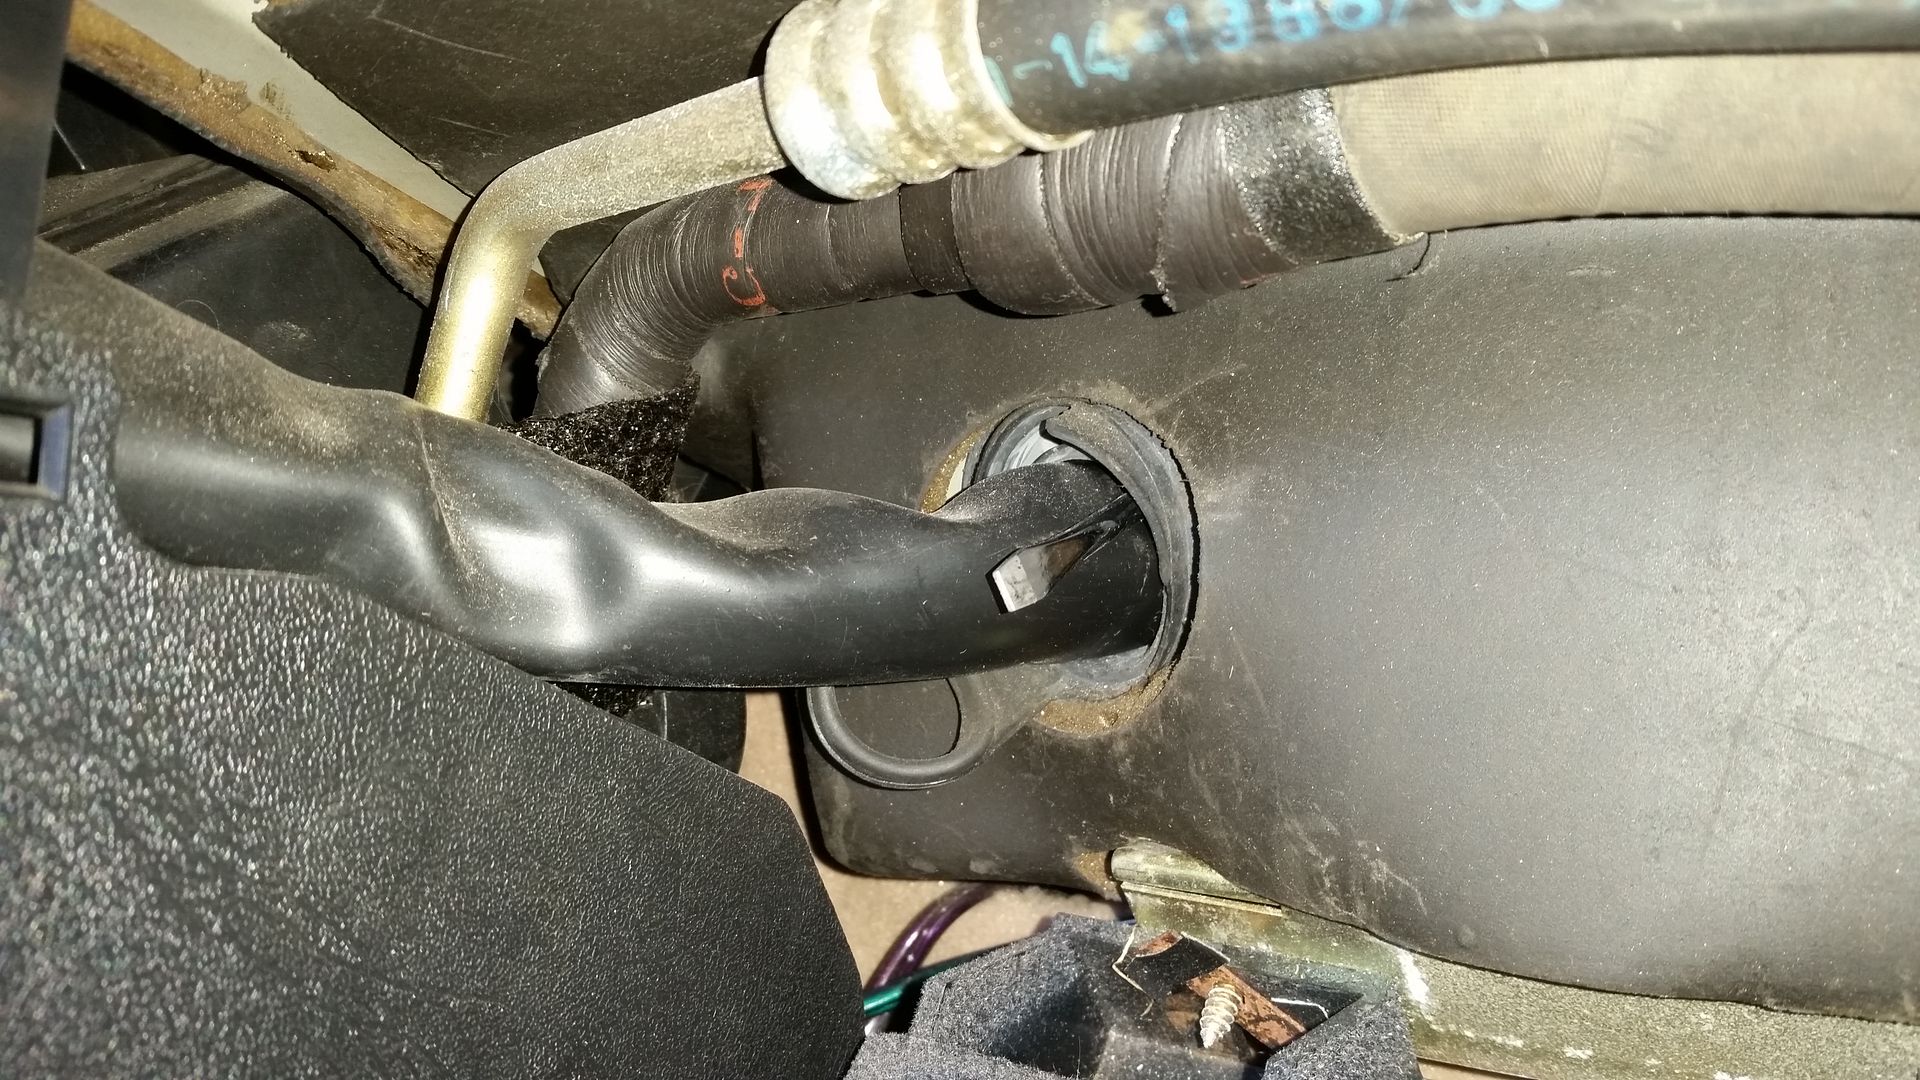
Then I poked the small amp power wires through the firewall.
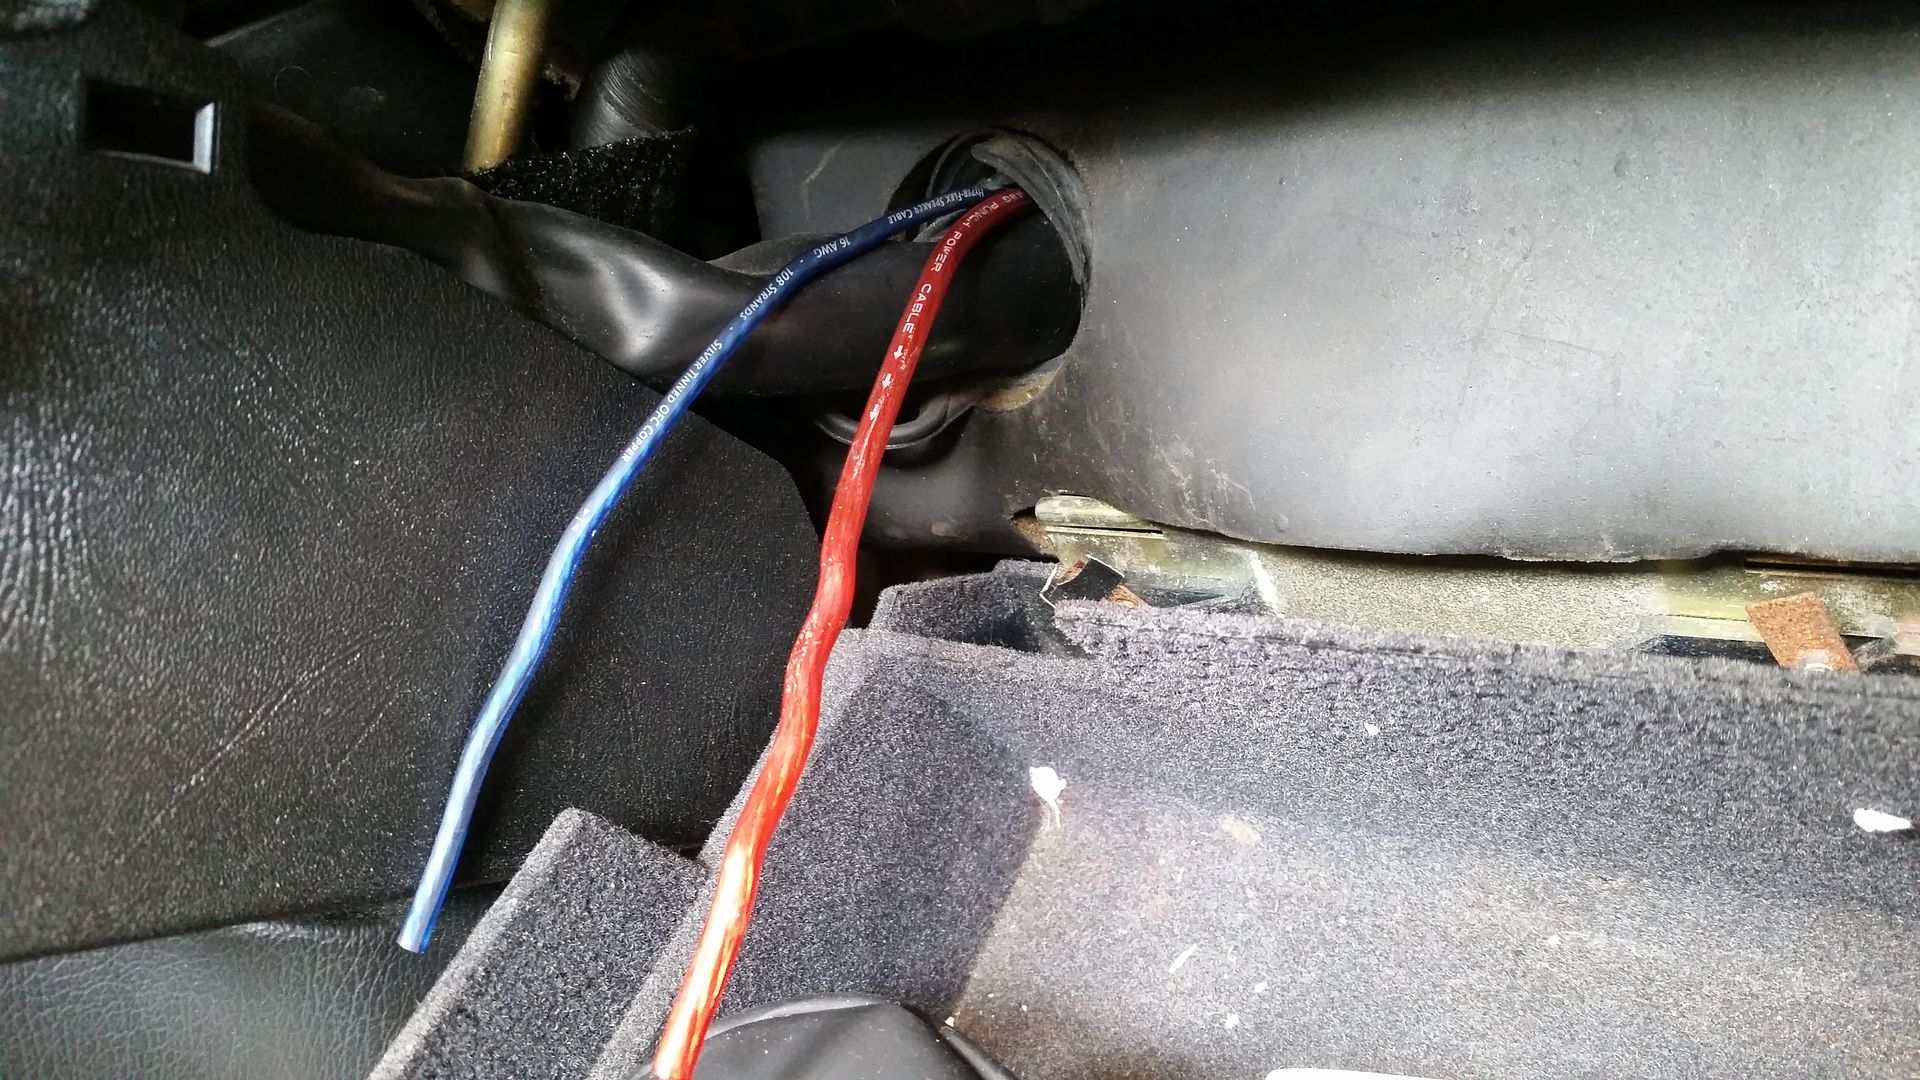
Added terminals:
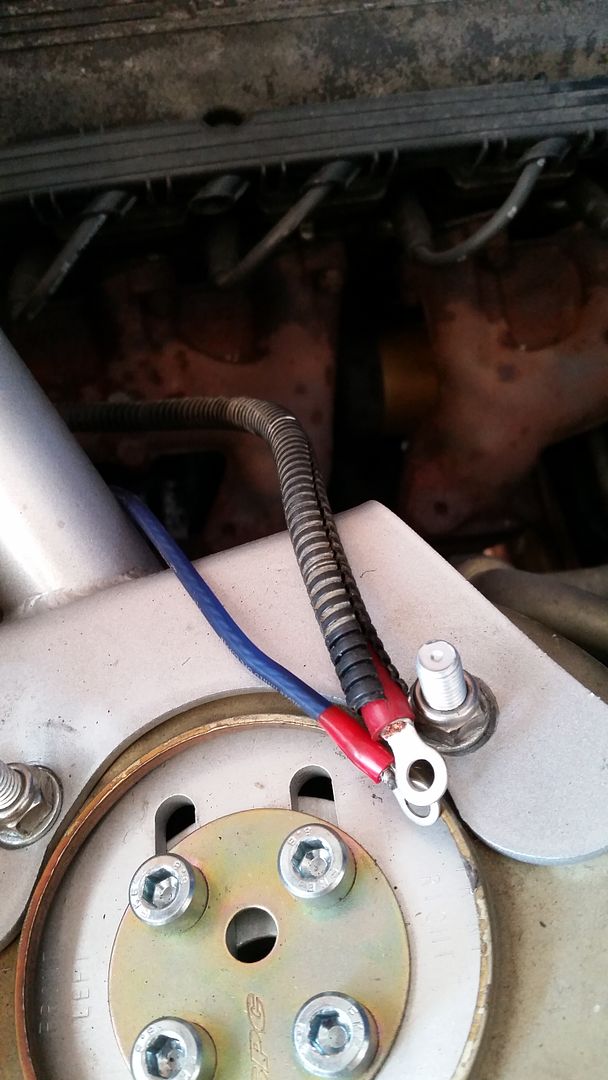
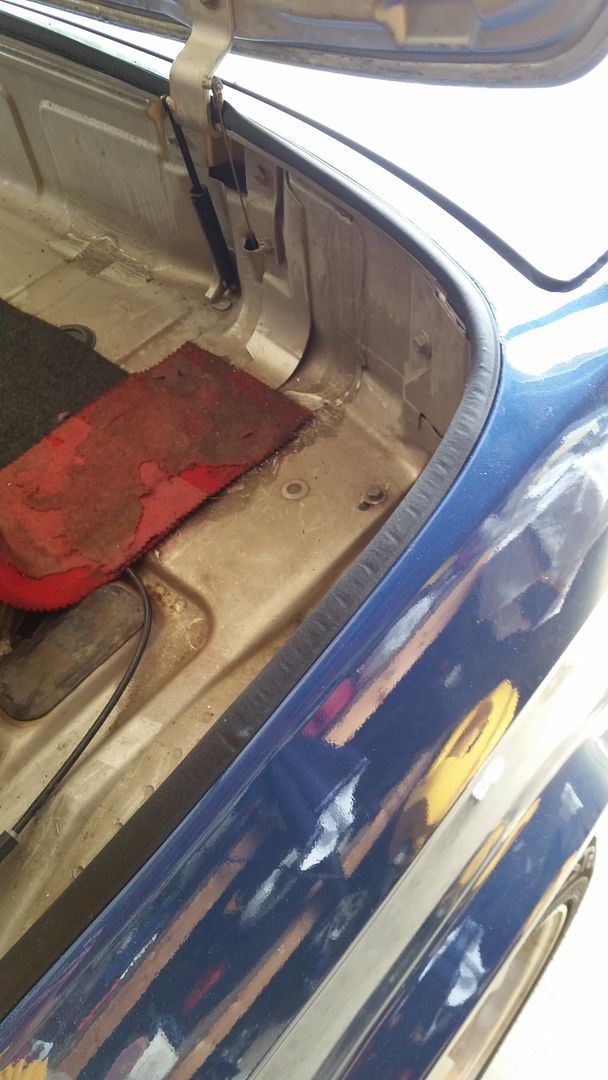
Next up I ran the power cable to the trunk via the factory cable "keepers" on the passenger side.
I made it to the area below the seat using all OEM pathways:
I brought it into the cavity below the convertible top storage area:
Then I snaked it through the cavity (using a long ziptie as a cable snake) to bring it out on the driver's side. Note: The picture above shows it in the main part of the trunk but it went on the inside of that partition and is not in the main trunk area.
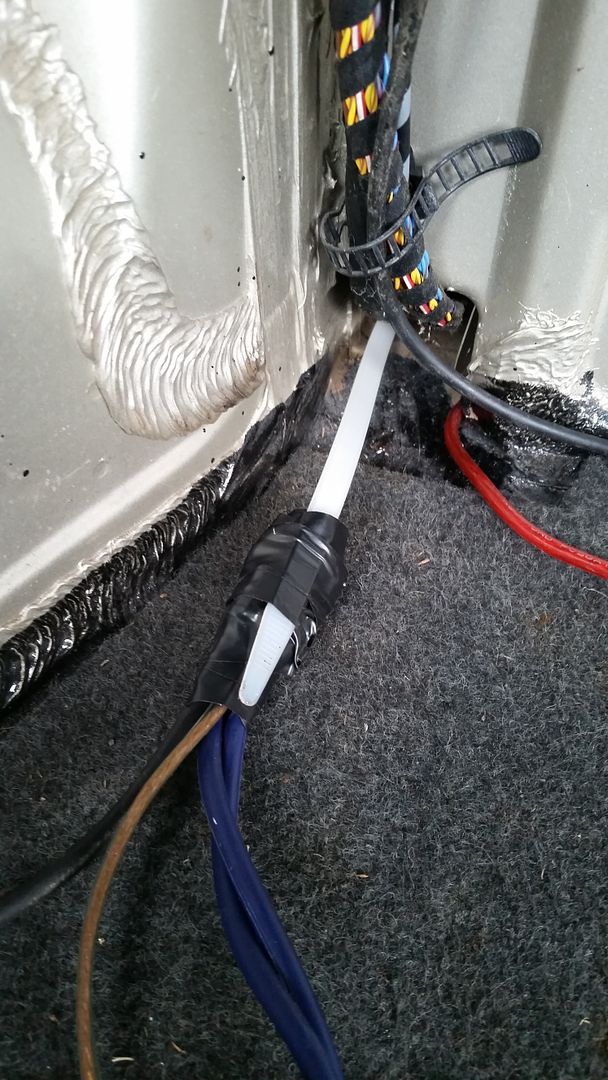
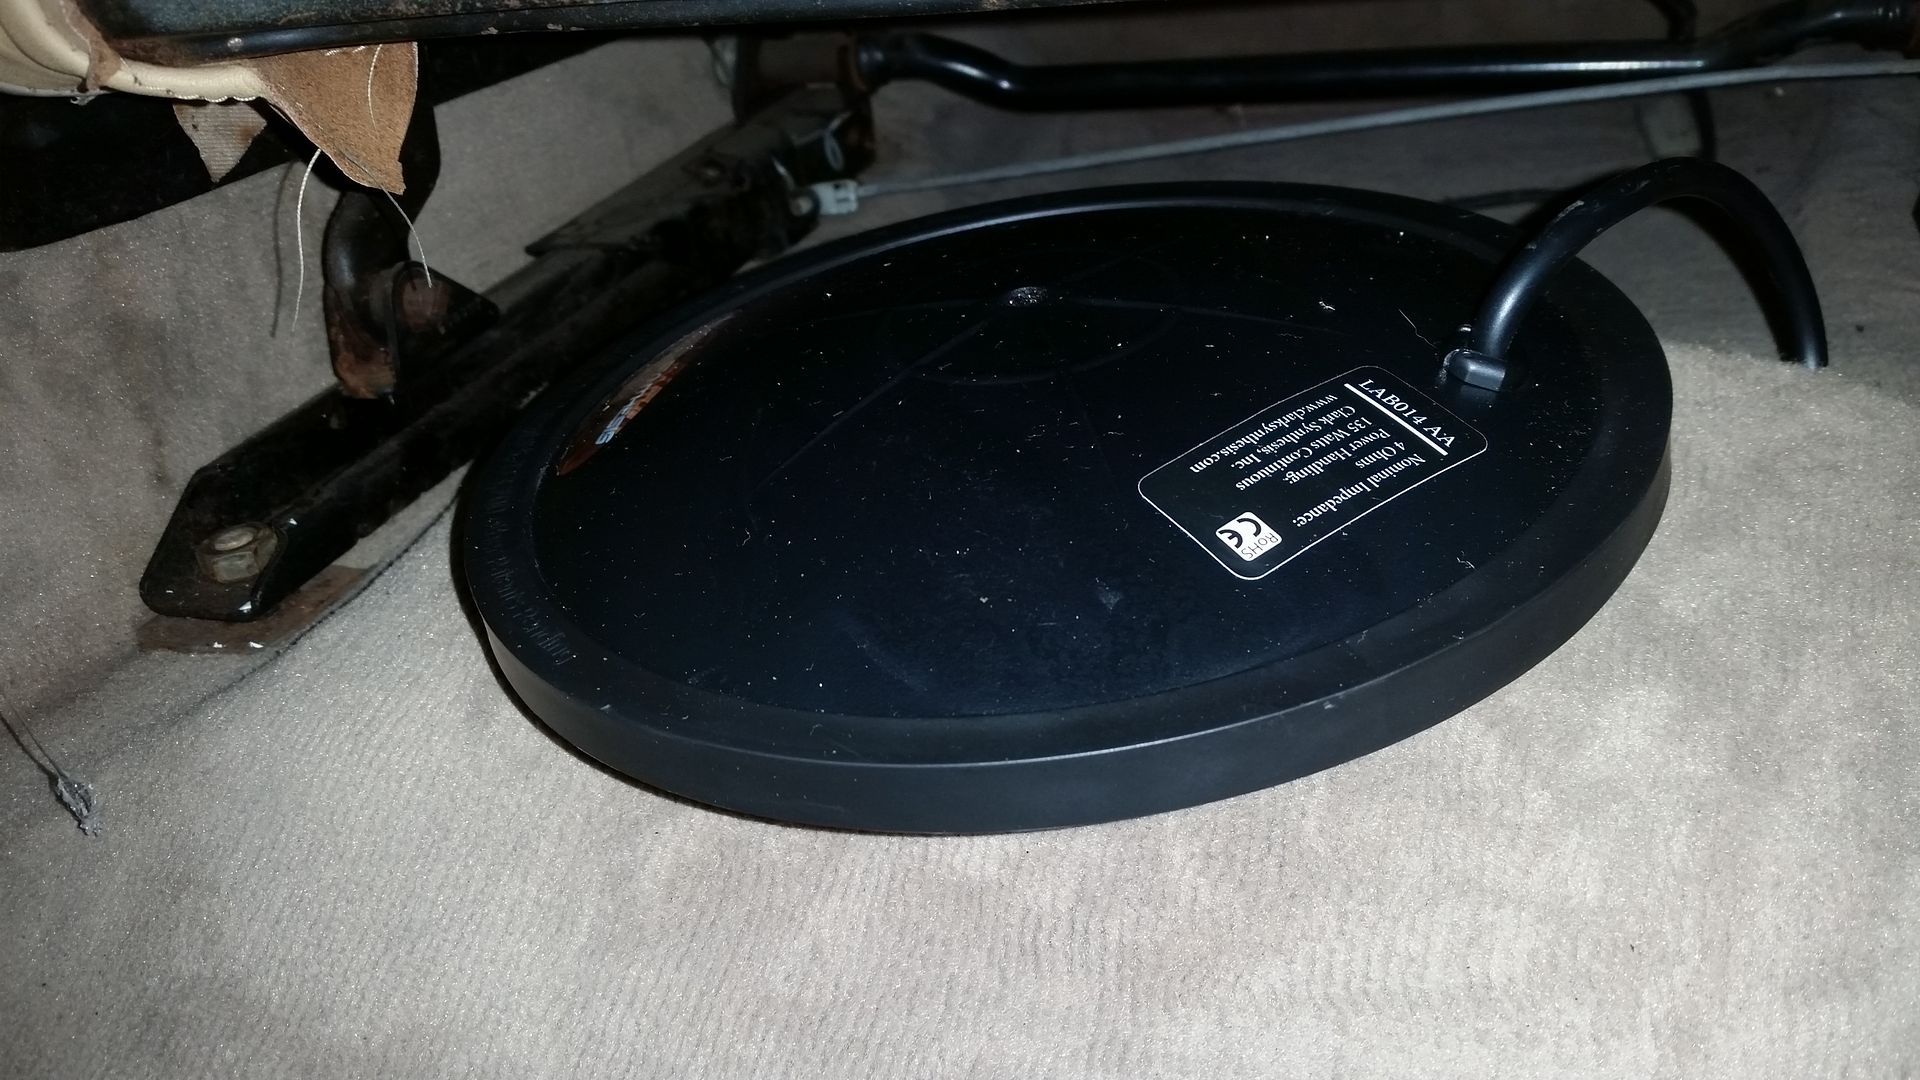
Temporary home (to facilitate tuning) until i mount it to the back wall.
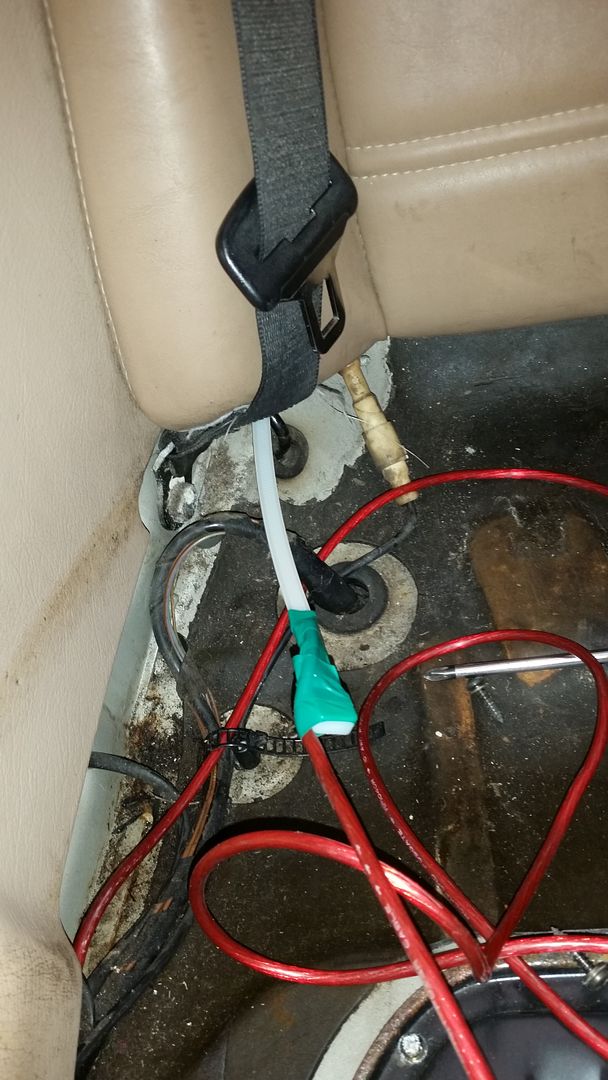
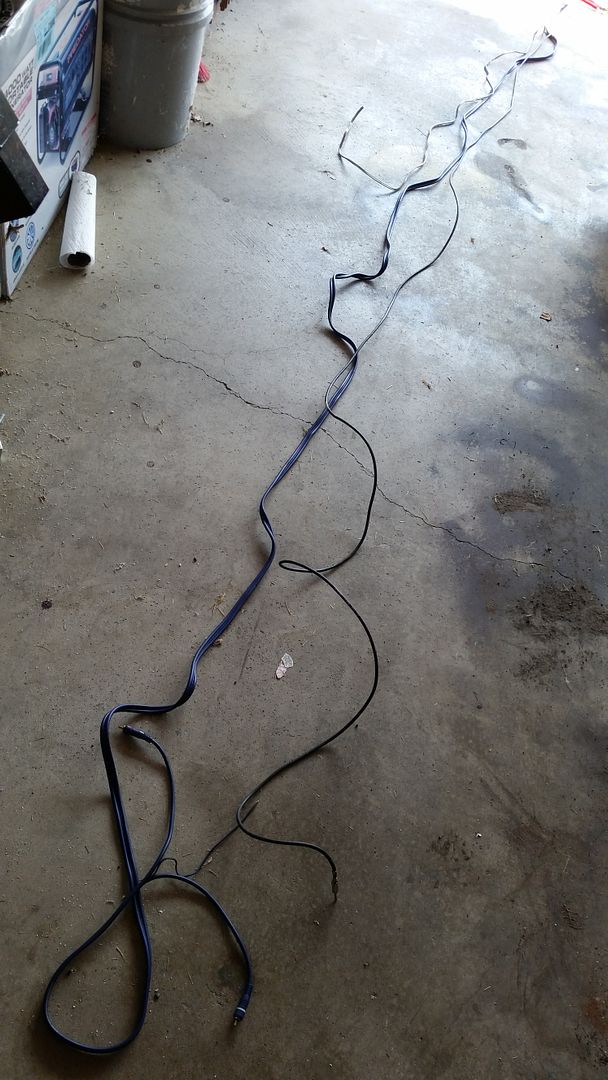
Now I was on to the signal side. I laid out all of my cabling- speaker cable (to the transducer from the amp), RCA (with integrated turn-on lead- more on that later), and a new antenna cable to replace the one that the PO cut in the trunk.
I then used a zip tie to feed the bundle through the OEM grommet that leads to the back seat. Photo is above.
So from there I use the OEM keepers for the antenna and speaker cable but the RCAs were too fat to fit in. I ran them below the keepers. The hardest part was passing them (all of them, for that matter) past the lower seat belt bolt. I had to remove about 47 trim parts, many of which are old, fragile, and specific to the convertible so they took 4x as long to remove than if I could more easily source replacements.
Additionally, I used the nano-gauge integrated turn on wire in the RCA pair, which was a colossal mistake. It was fragile, thin, and generally a PITA to work with. I had to add terminals multiple times to make it work, since the terminals broke off.
Also, "while I was in there" I decided to install my Alpine PowerPack KTP-445U for the fornt stage. I used short barrel connectors to connect the HU RCA outs to the Alpine RCA cables. The Alpine leads are comically short- about 4-5" after the connector- and limited the ability to mount the Alpine more than a few inches fron the HU. I literally wrestled with this for 20-30 minutes before I finally found a location for the 445U off to the right, above the OBC.
At this point I was still figuring out the configuration:
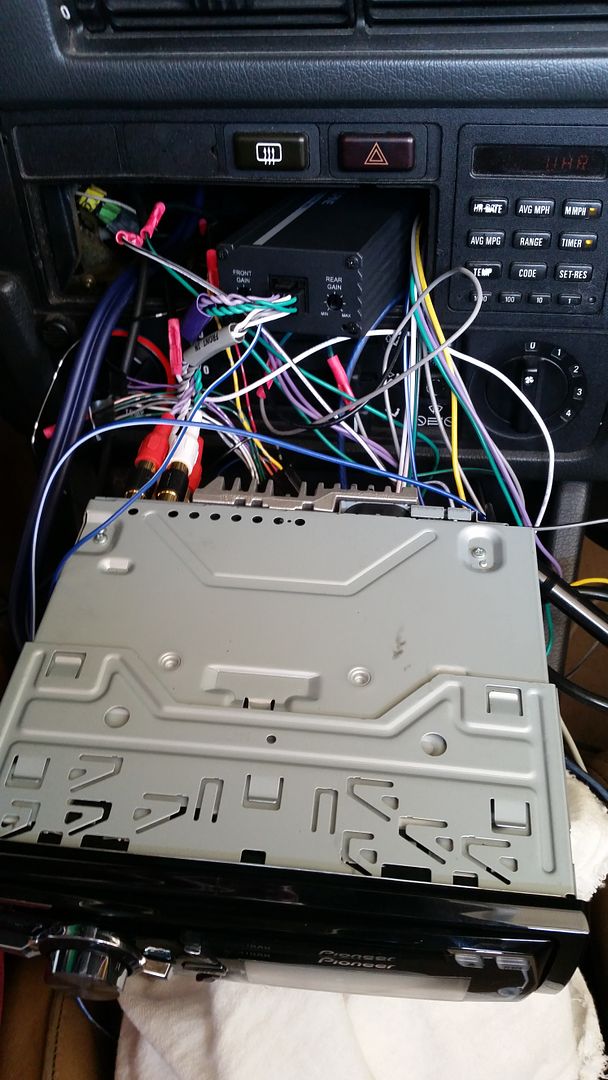
I slid the HU back, only to find that the combination of the barrel male-to-male RCA connectors and the Alpine leads made the assembly too deep. Having no other option I dug out a 3' and a 6' RCA cable from my parts box and crammed them in behind the HU, but the HU still won't fit flush. At that point I was willing to live with that until a shorter 4-channel RCA cable arrives.
Here is how it sits as of now:
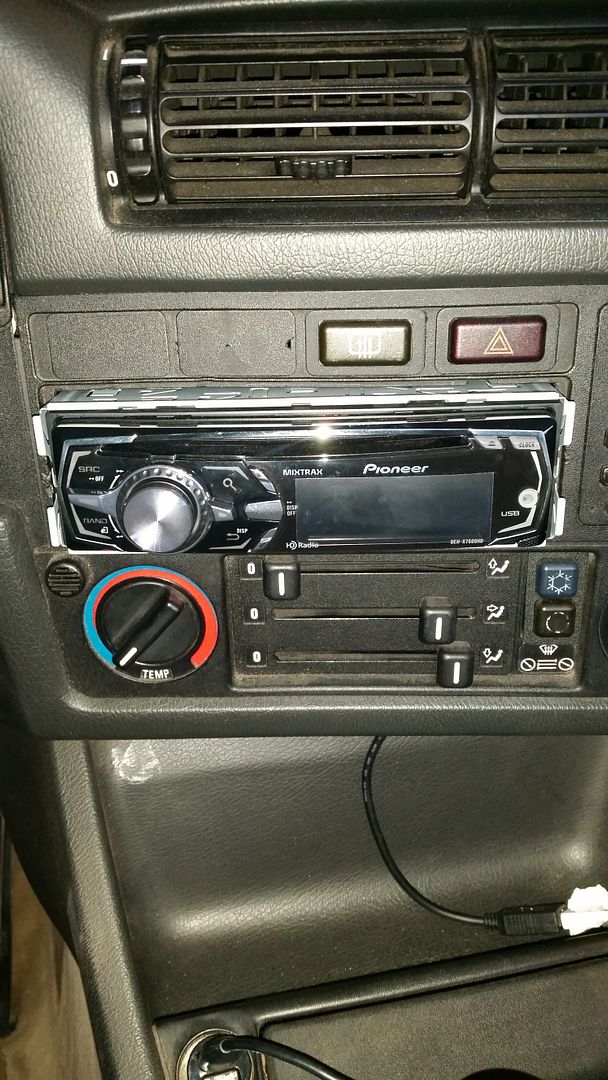
At any rate, I got everything up to the dash, wired it up to the HU, and life was good- sort of.
So the impressions:
Even with the new antenna cable the FM reception sucks.
Even with 45W per channel, the E34 midbass speakers disappoint. I was expecting some legit midbass. So far - nothing after ~3 hours of listening. I still need to tune it so I am not giving up yet but so far they are lacking.
E30 Premium tweeters are too bright. I have the Daytons to install but for now things sound harsh, even with the PCNs in place. Again, not giving up yet but still not totally happy.
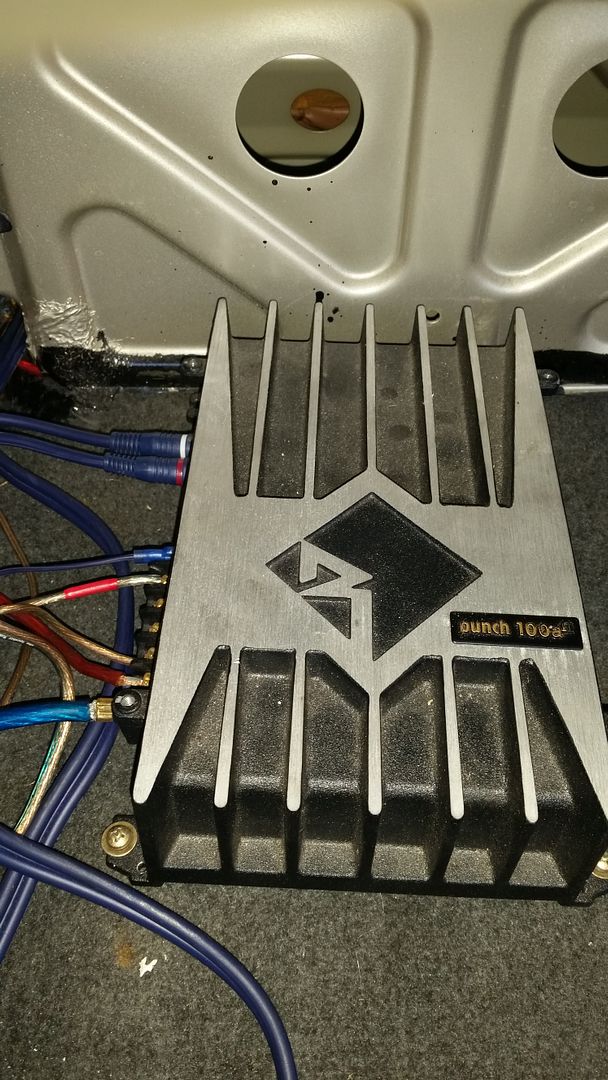
ALL THAT SAID...The Clark transducer is AMAZING. I love the feeling of bass, though the noted lack of midbass is still a bit odd, especially at cruising levels. I need to play with the gains, boost levels, EQ, and other factors, but the end result is that even run off of a small RF 100a2 amp this Clark TST329 adds a sensation of bass that I would never have with a convertible, even with a large amp and the GAS enclosure (still an option to add that, if I want to).
In related, frustrating news I did manage to get "locked" in my seatbelt by a broken receiver on the spare seat that I swapped in. It took me about 15 minutes to get out of it without damaging the belt, but the receiver was destroyed in the process. I had to move a new buckle to the set to make the car drive-able but it was frustrating to have that happen in 85* heat after all that time in the car this weekend.Last edited by phenryiv1; 09-01-2015, 05:35 AM.Comment
-
Patrick please make sure you seal those holes you drilled in the floorpan or you will get rust and water seepage inside the car..I BUY/SELL REFURBISHED CM5907s & CM5908s
HOWTOs:
DB vert plastic bumpers
OEM Keys
MTech1 docs
88 ix Lach/Card
91 ic Calypso 3.1
86 Cosmo 2.7
OEM+ or bust!
reelizmpro: I will always be an e30 guy.. I still do all of my own labor
TrentW: There's just something so right about a well-built M20 in an E30
e30m3s54turbo: I save my money for tuner parts.Comment
-
-
Update following the long weekend:
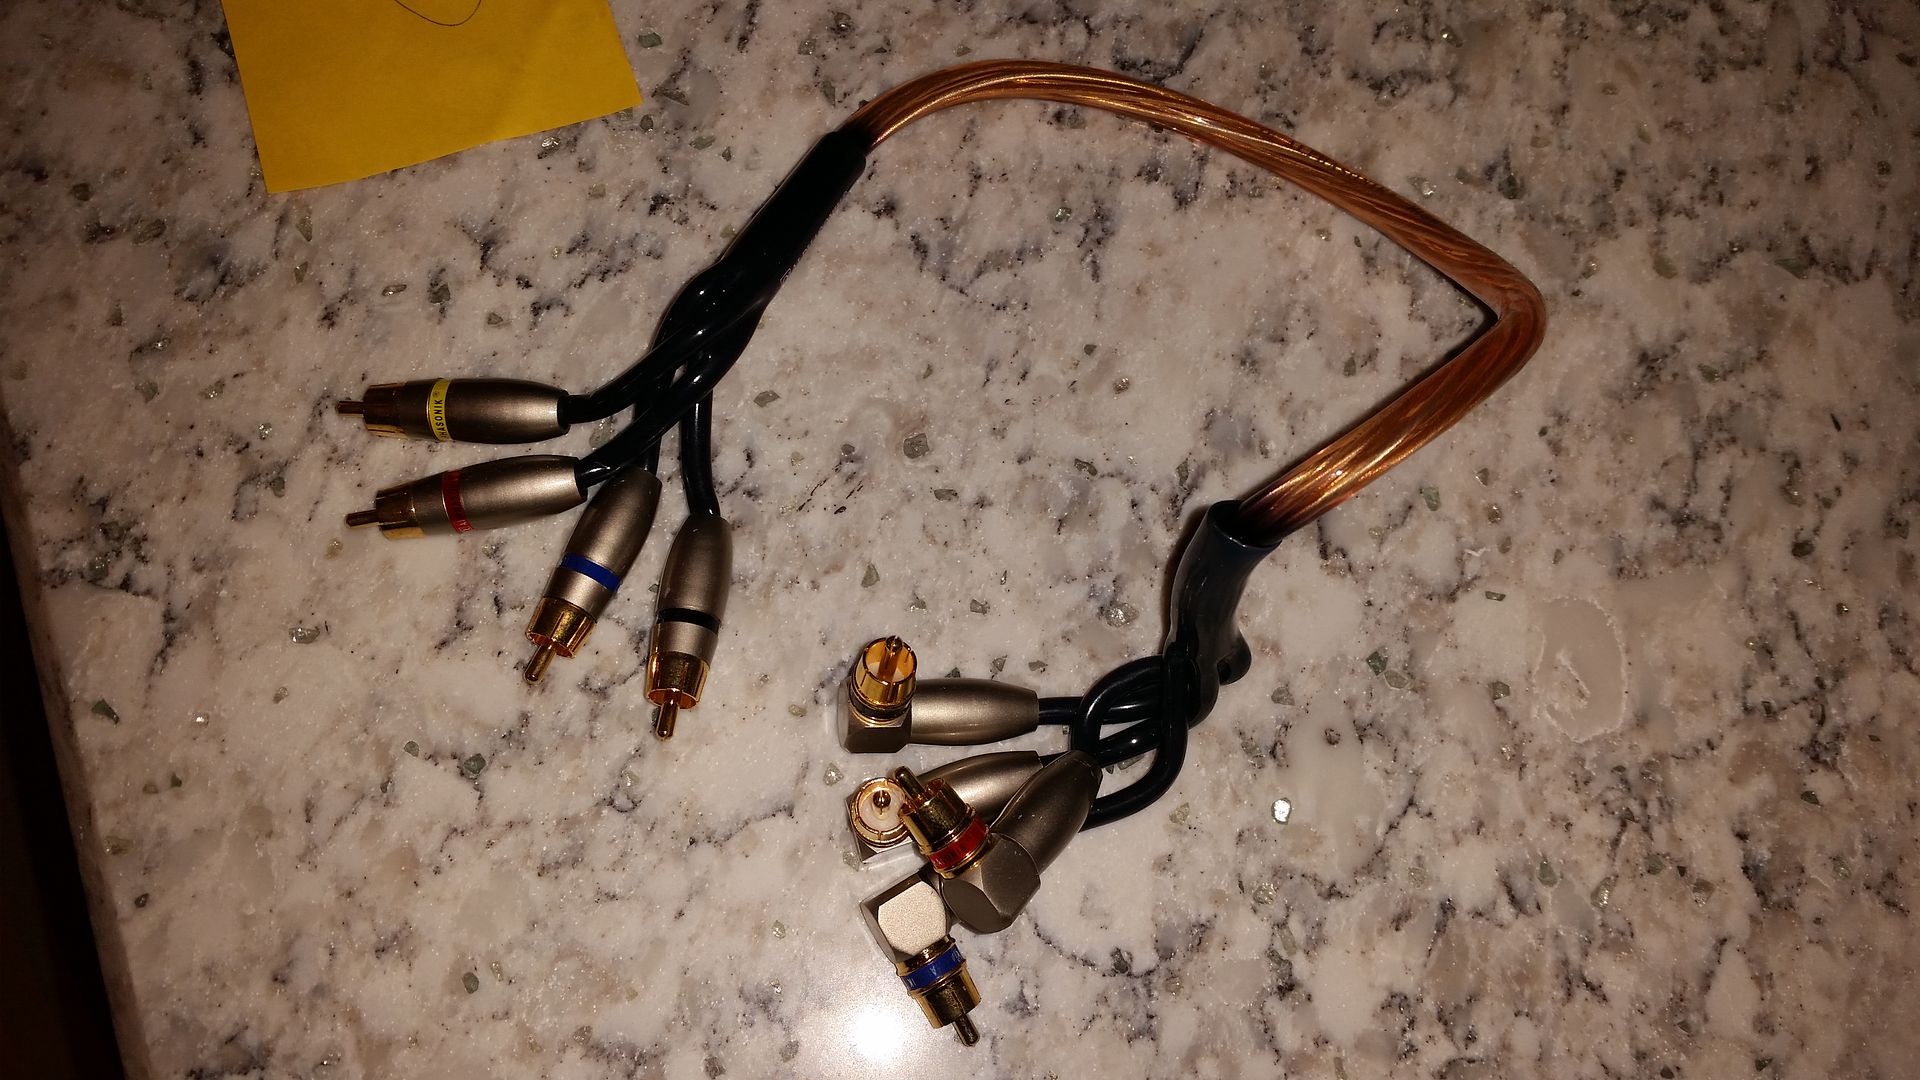
Needed shorter RCA cables for the Alpine amp. The wiring was way too long and the connectors themselves made the HU too deep. Picked up theis shorter set on Amazon last week:
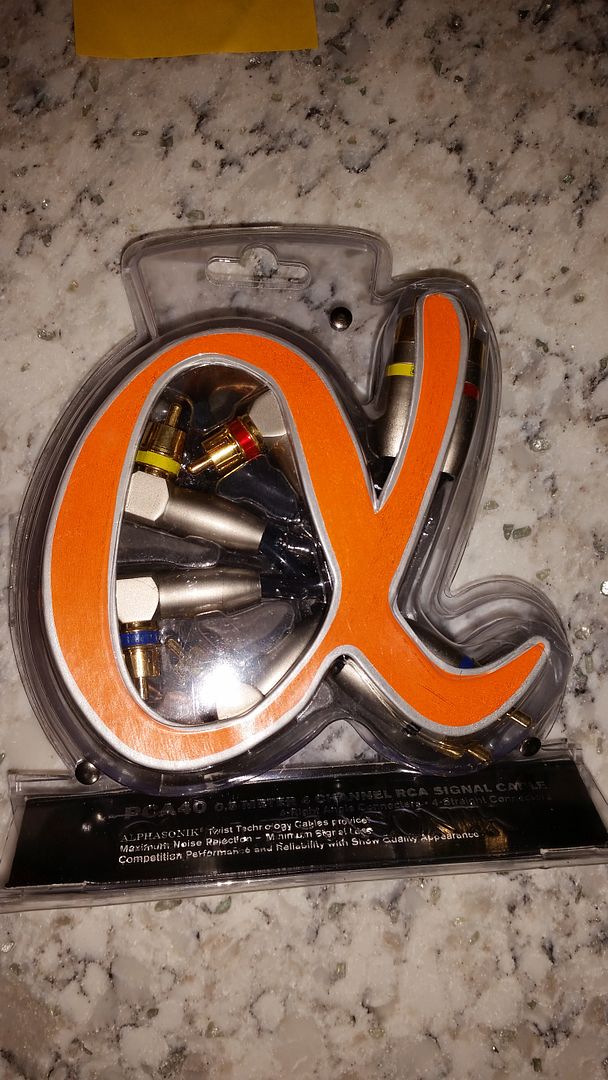
The 90* bend was perfect for the depth needed and the short (~18") length was appropriate.
I still need to secure the HU "cage" but I want to install my Euro clock first and it will be easier to do that without the cage secured to the trim panel.
I also decided to get the amp off of the trunk floor and to mount it to the back wall, where it should stay for a while:

The cabling feeding the amp is a bit long but I will pull it back through the next time I pull the rear seat.
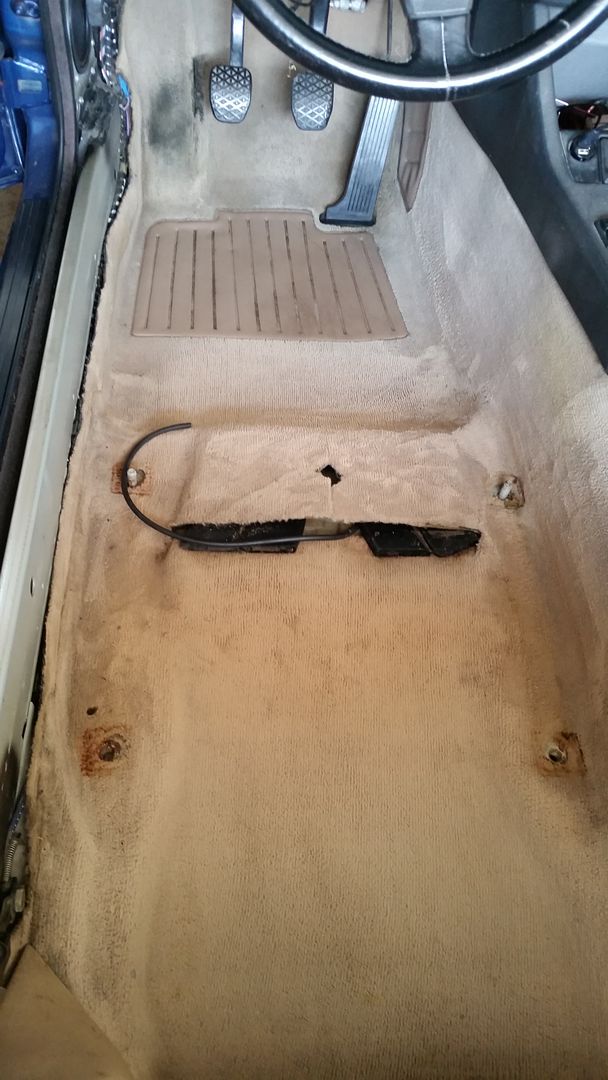
In other interior news, I replaced the kick panel grilles and replaced the sill panels, then finally put in my new convertible floor mats. These are real OEM mats that were NLA but they did another production run. I know that the black & tan theme may not be for everybody but I am working on making it consistent throughout the interior as I refurbish different parts.
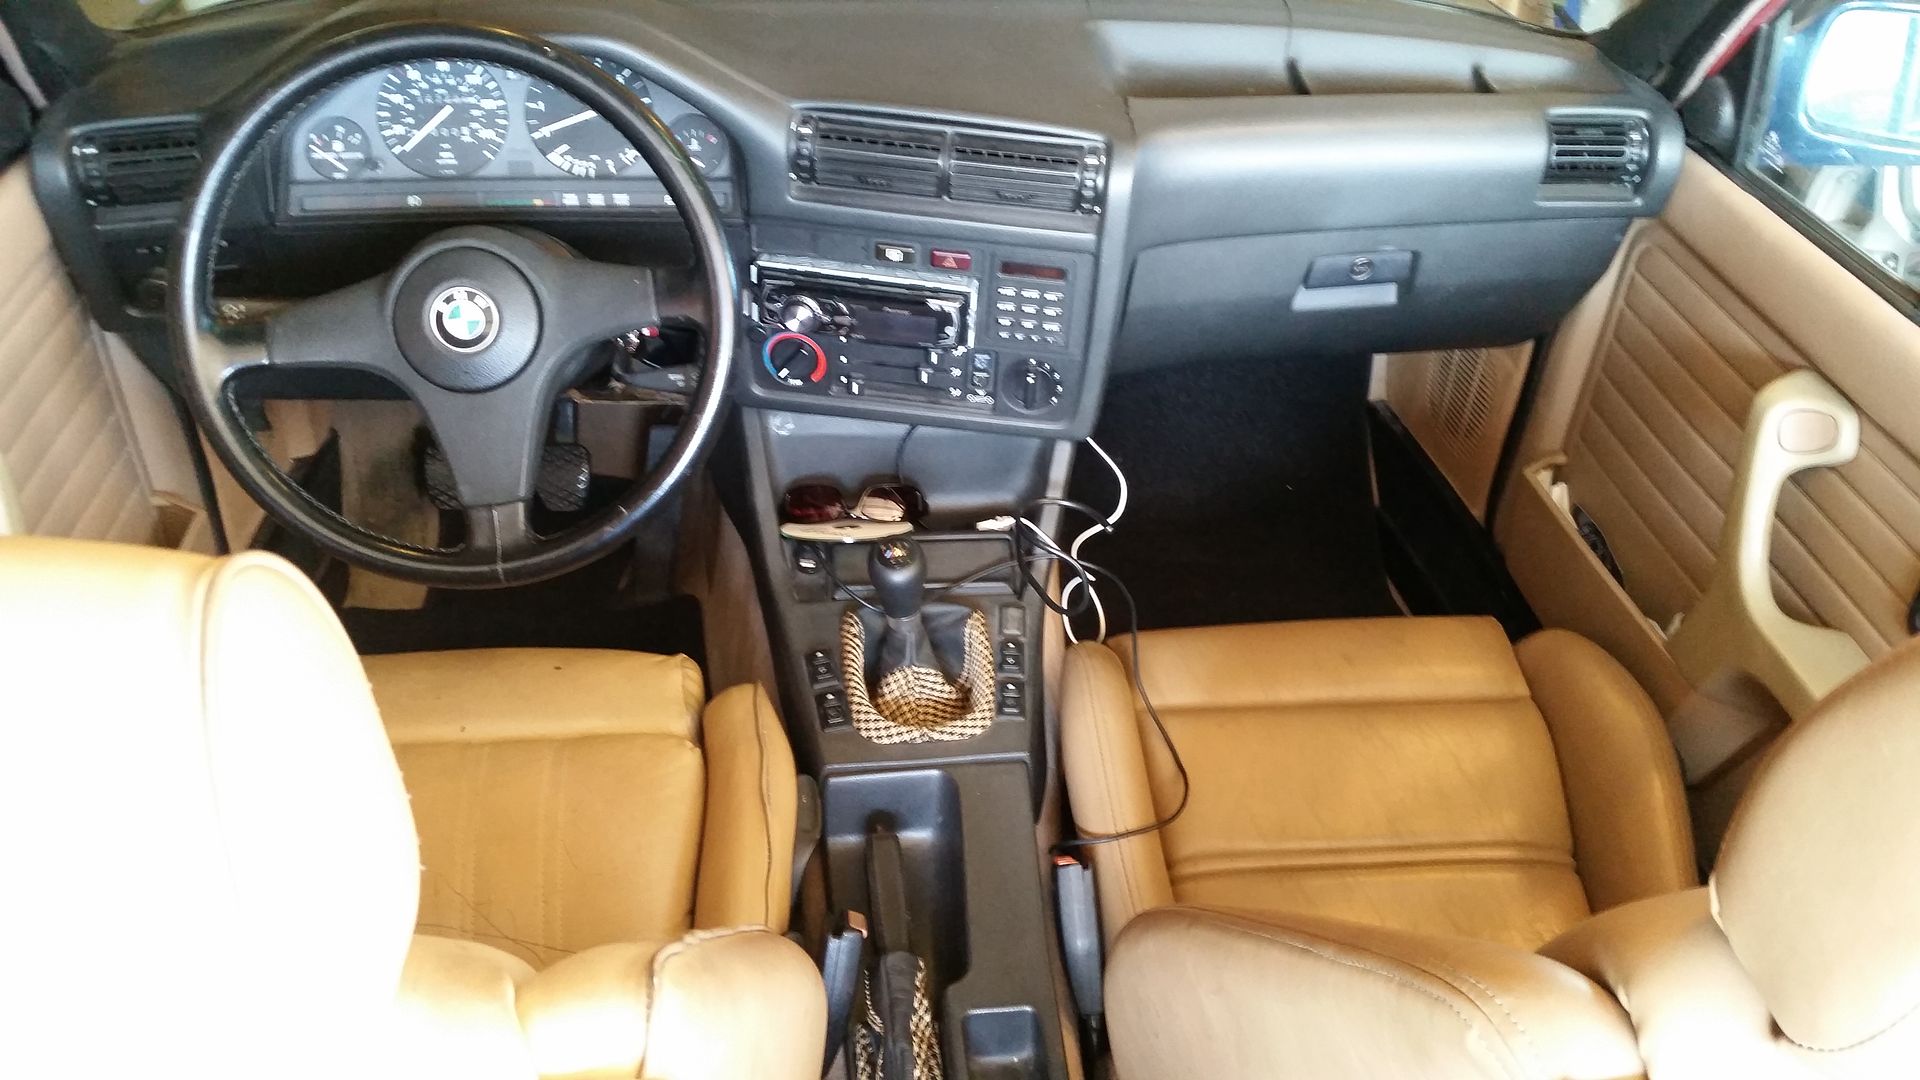
I also added my custom cupholder console. I have been holding it for a while but I wanted to get it installed as I get more of the interior done.
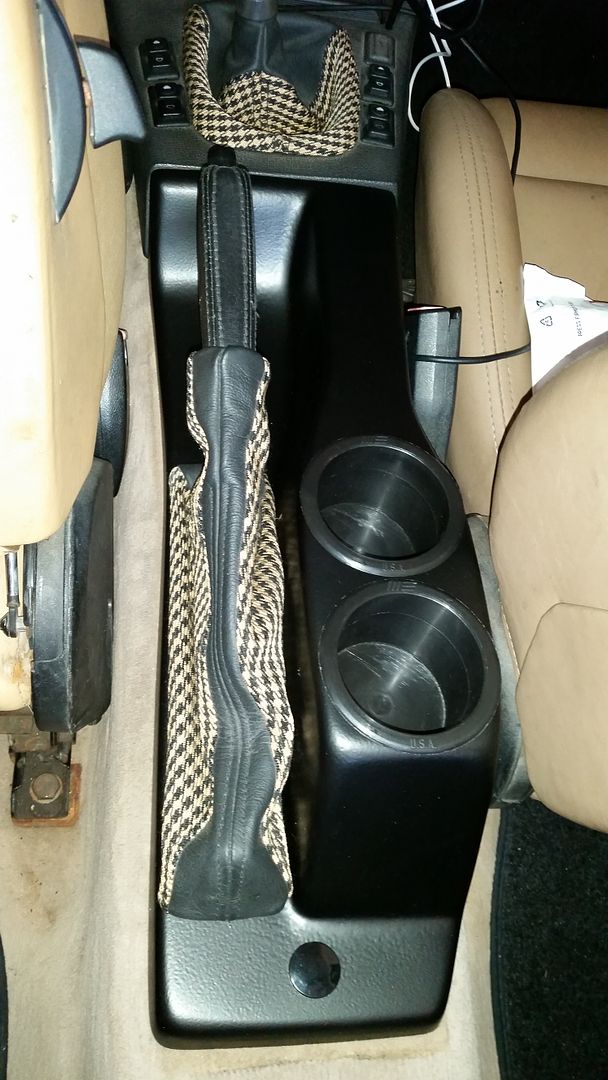
This thing is AWESOME. I wish that I had bought a pair of them, just in the event that I ever buy another e30.
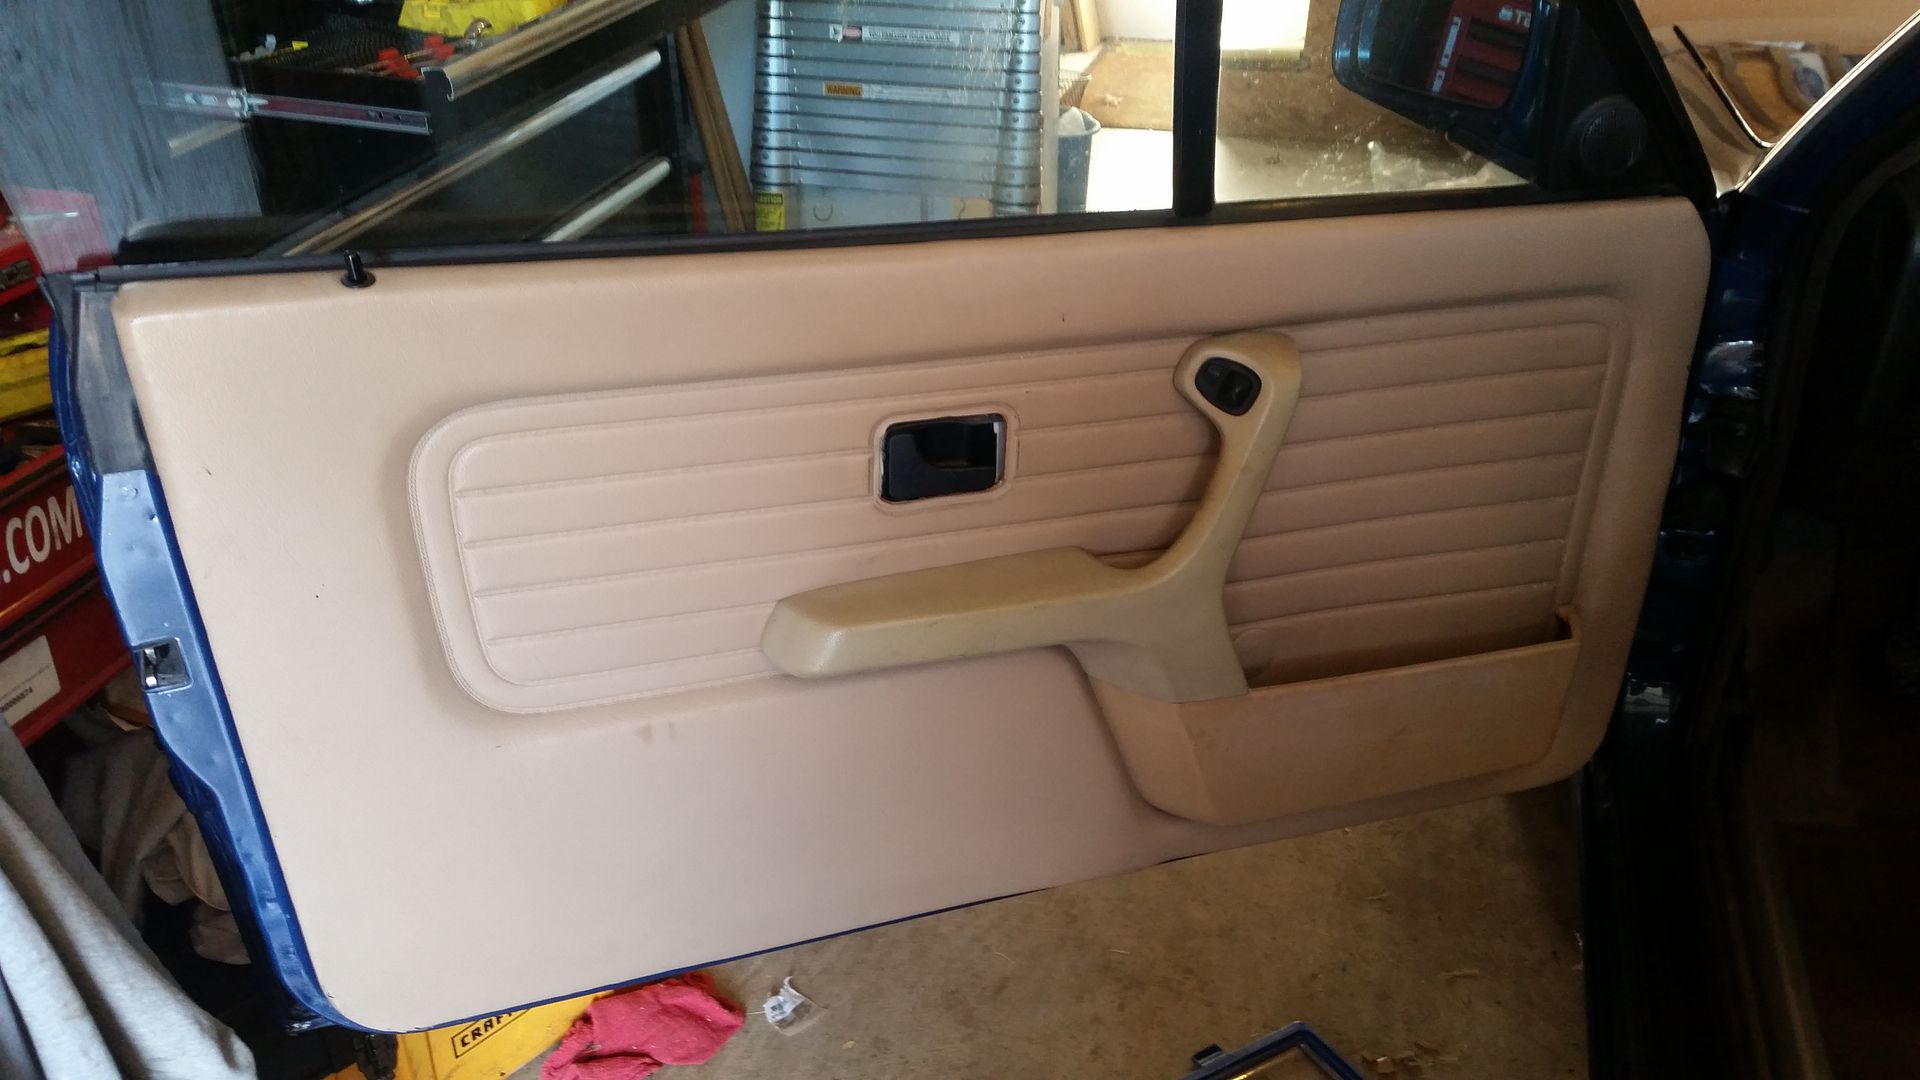
I also finally adjusted my driver's side window. I had put this off over and over again and I don't know why. My window had not closed properly and interfered with the convertible top. I had not felt like fooling with it and consequently I left the door panel off of the driver's door, making it a rattle-y and uncomfortable (and unsightly) element of the car. I feel pretty damn silly because after just 10 minutes with a 10mm socket the window closes properly. I have driven about 5-6K with no door panel or armrest...WHY?!?
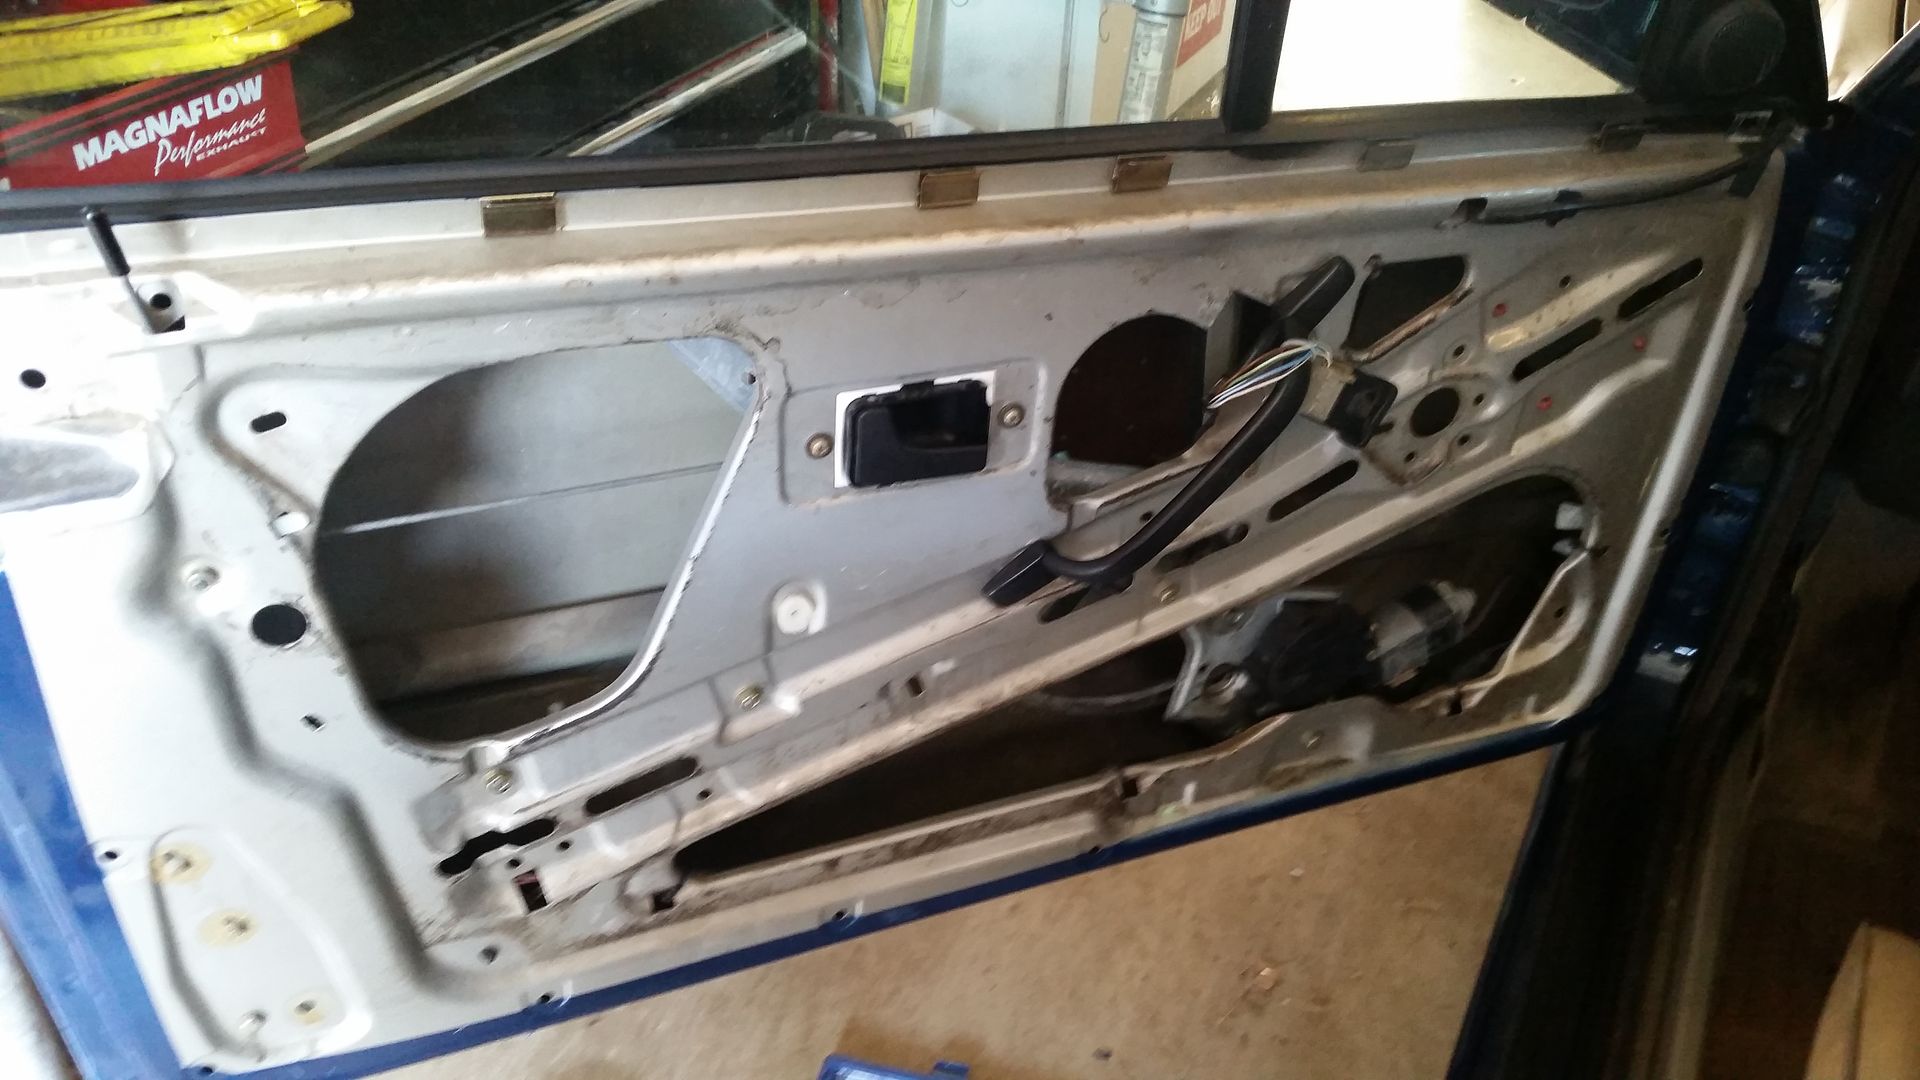
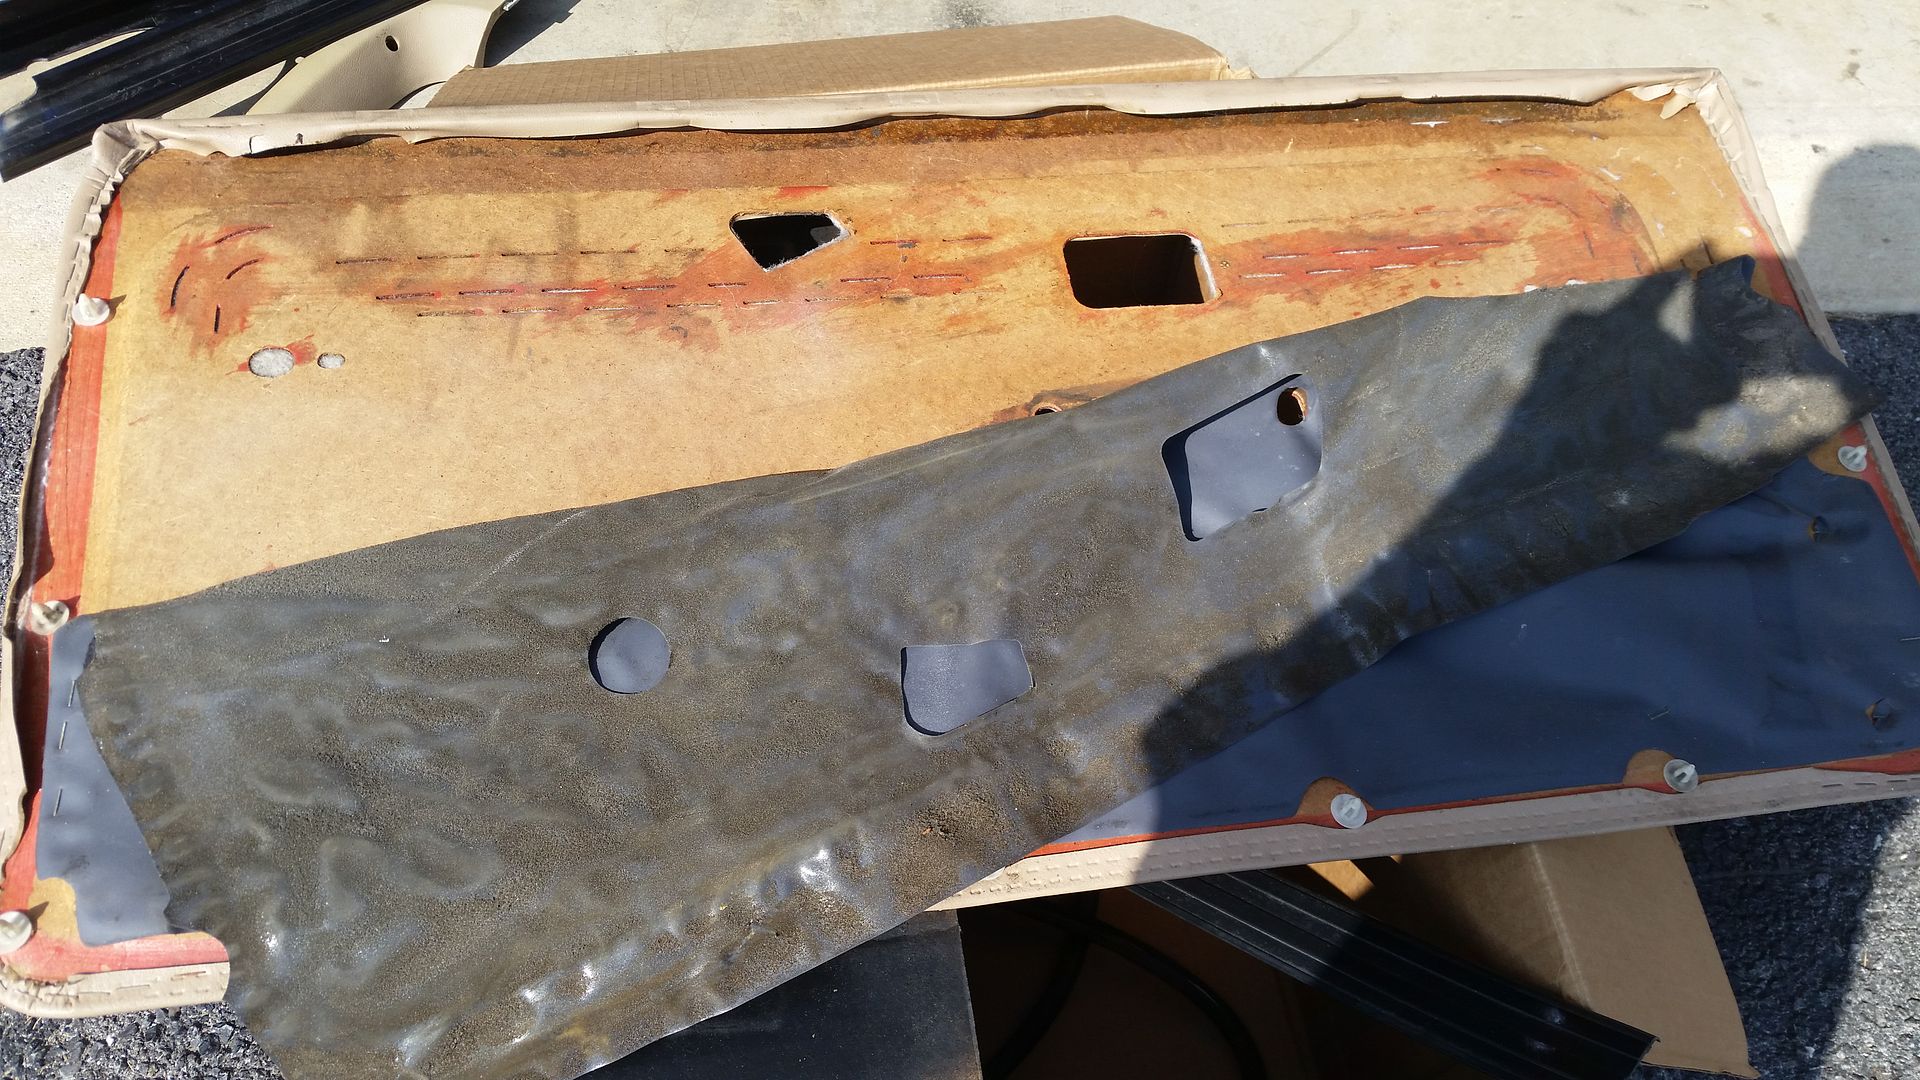
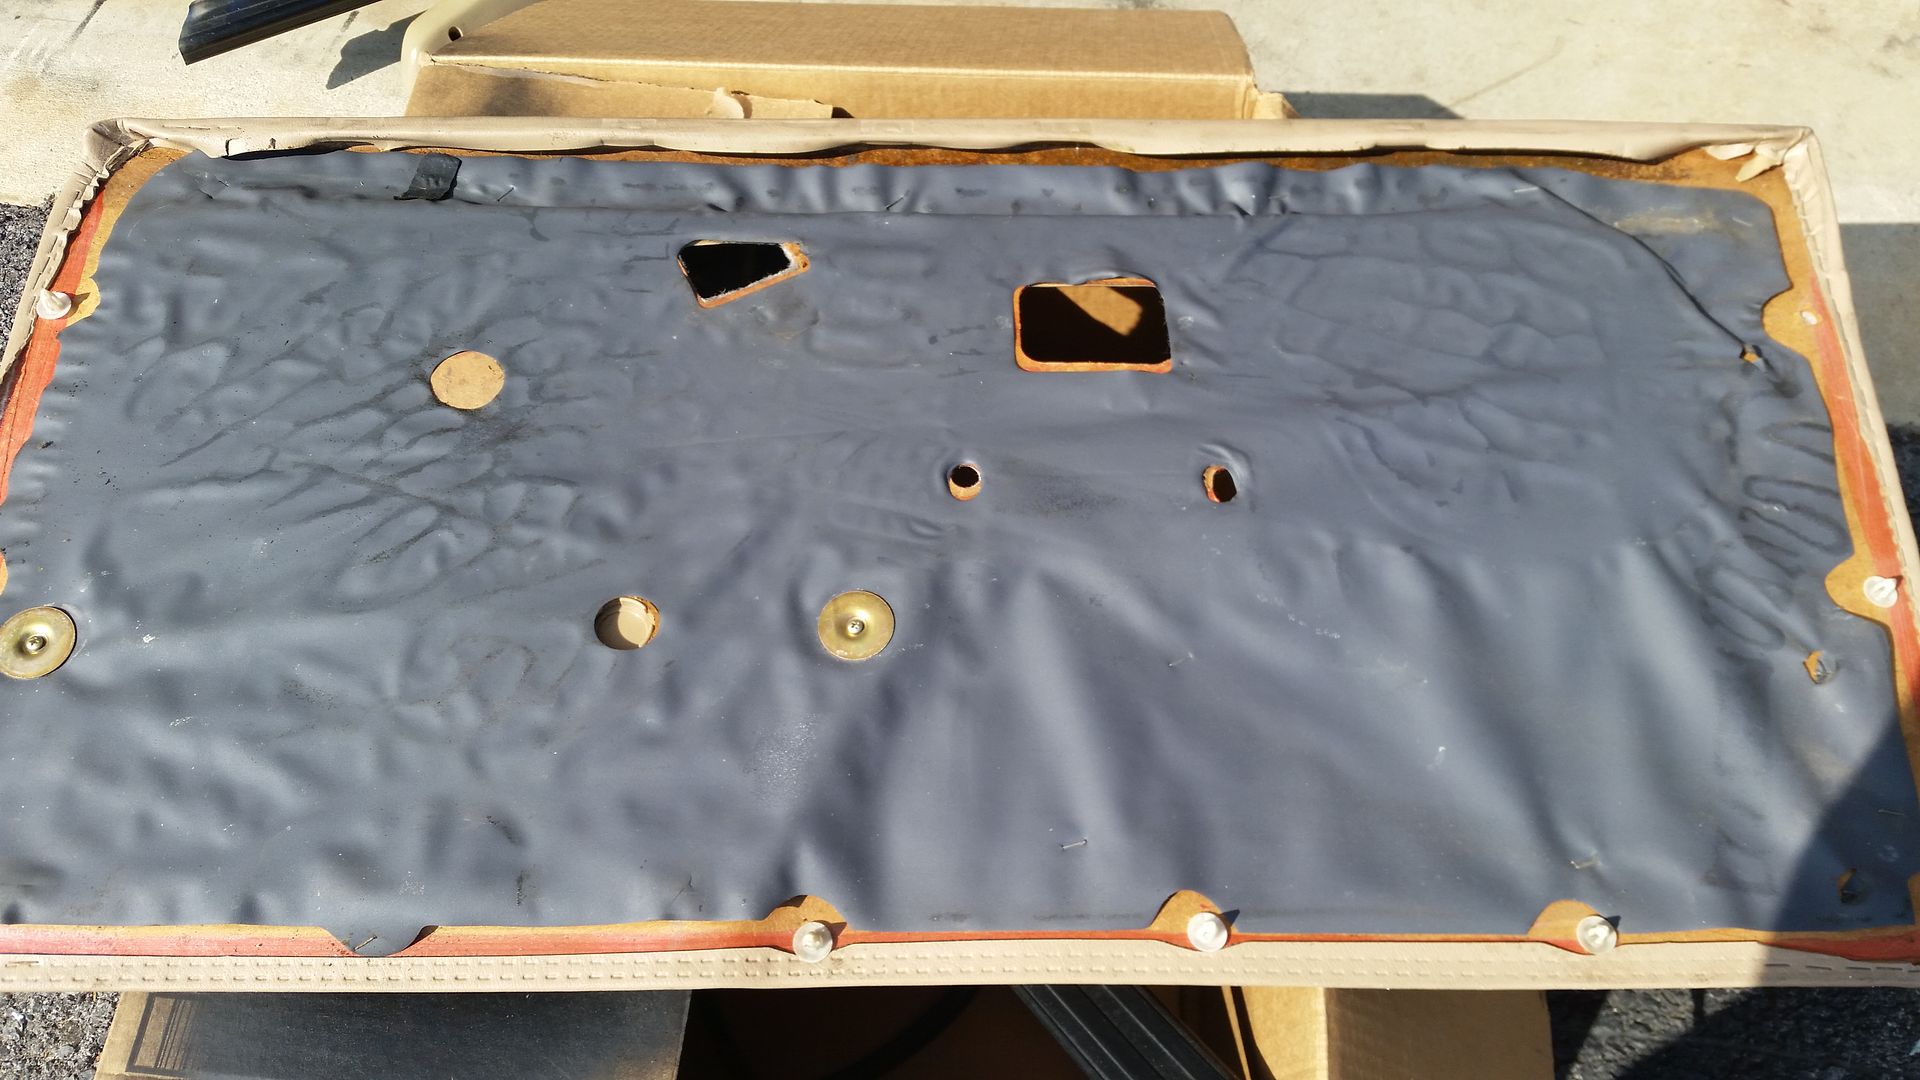
Anyway, with that fixed I went ahead and installed the door panel. I used some Super77 to reapply the rubber isolator and installed the door panel & armrest.
I had some time to do some more body assembly so I pulled out the beat up weatherstripping form the convertible top boot and POR-15'd the channel, since there was a little surface rust:
In the morning I installed the new stripping:
Comment
-
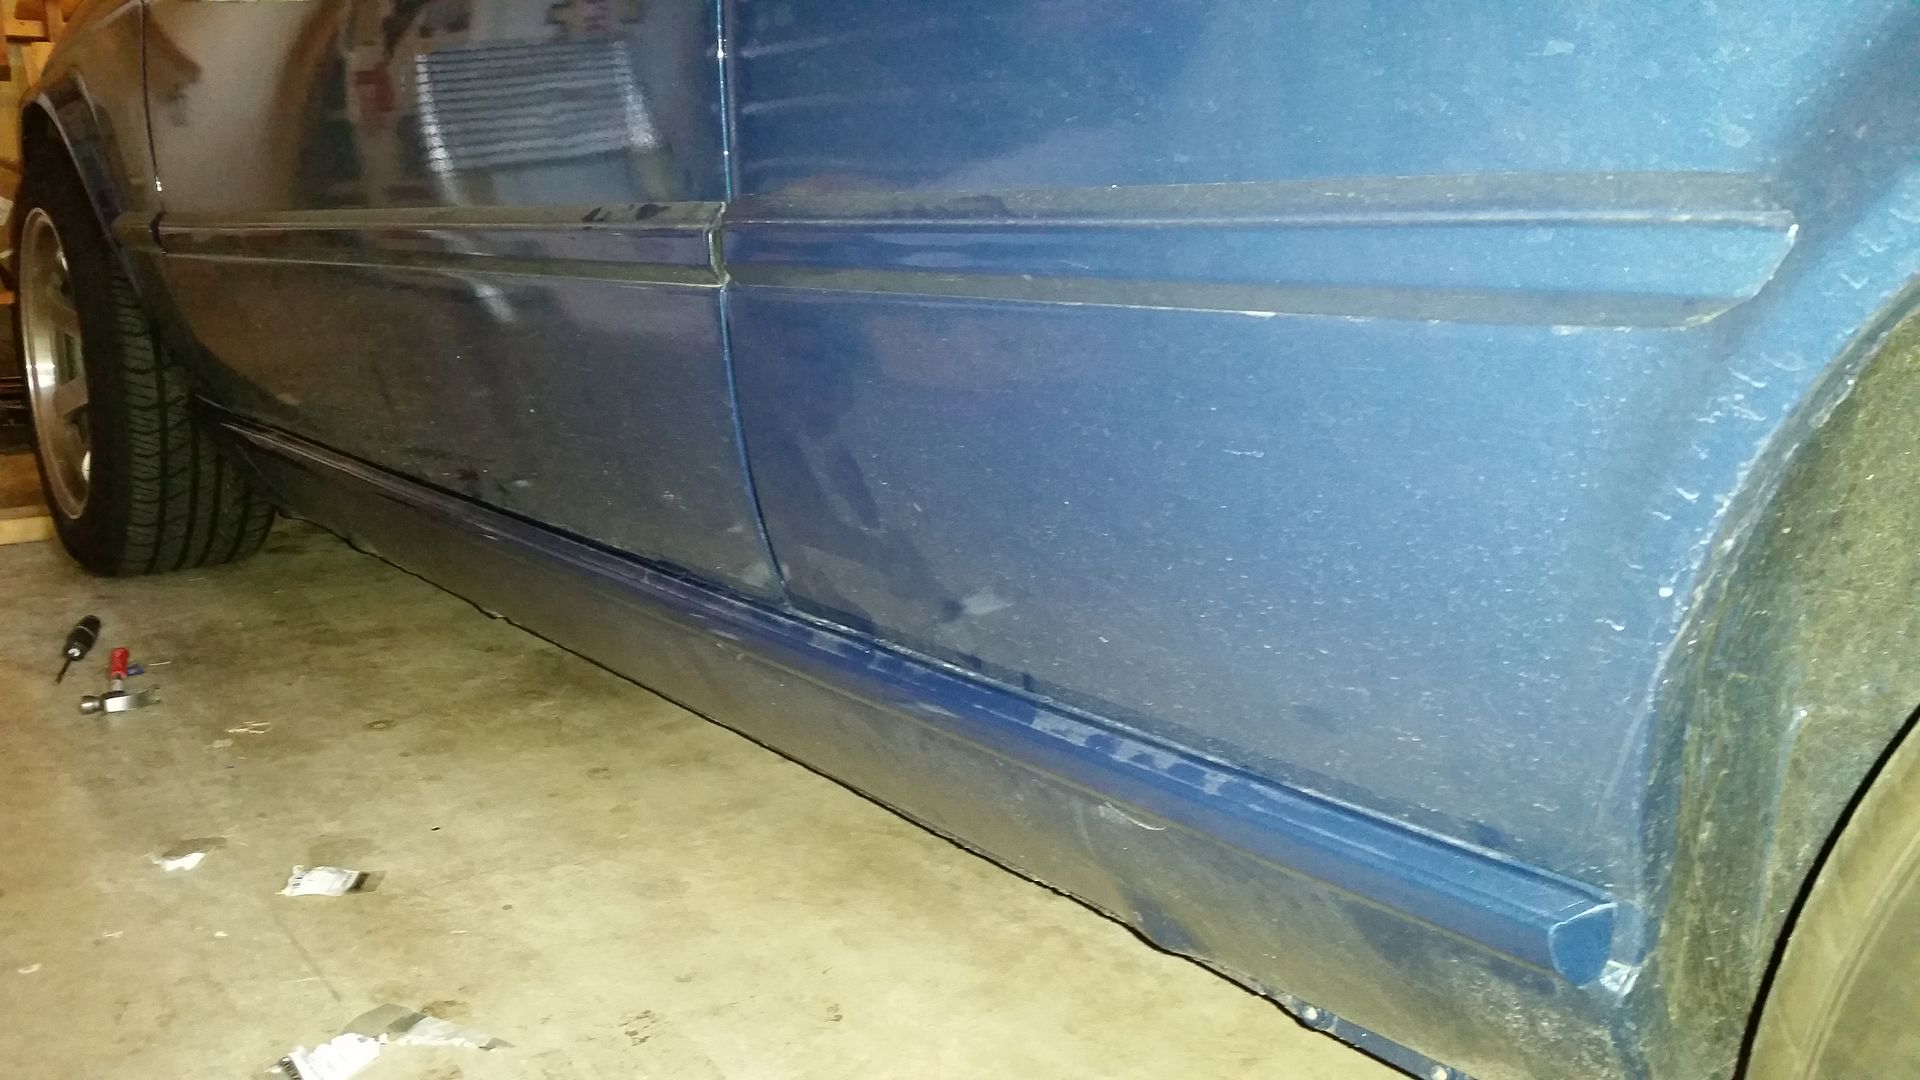
And a little exterior update (very minor):
I wanted to get my lower rocker side trim installed but I encountered a snag.
First off, this is one of those areas where RealOEM fails me.
Here is the page for the body trim:
http://www.realoem.com/bmw/enUS/show...diagId=51_0760
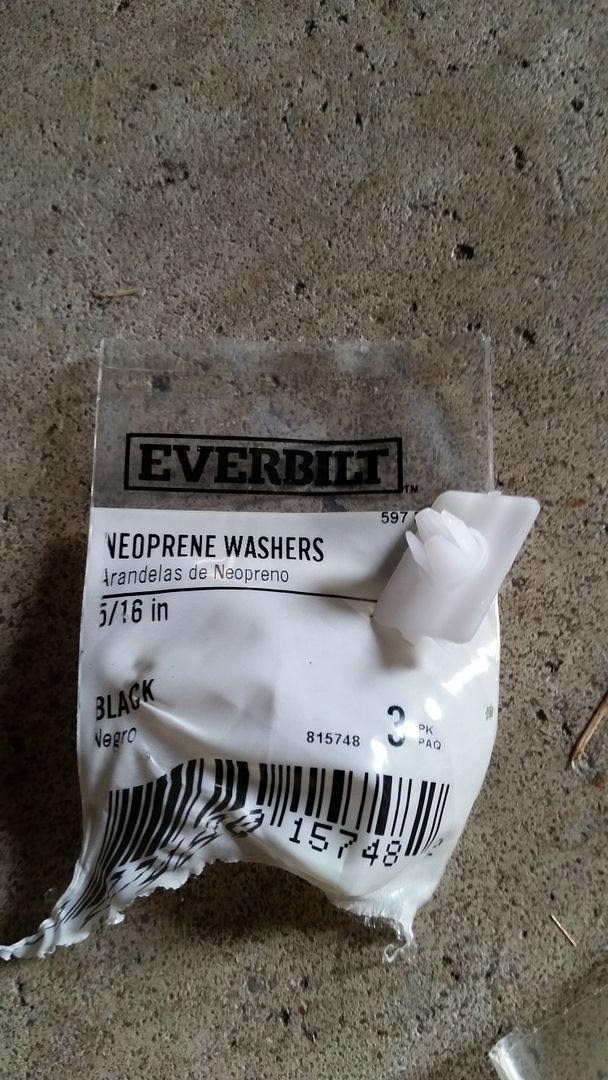
It lists needing a quantity of clamp 51131932865 to attach the lower rocker trim. It is missing multiple parts, however. First off, every 'vert that I have ever seen has has a rubber washer behind the clamps. Not hard to remedy, but an omission in RealOEM.
I went to Home Depot and bought a few bags of rubber washers in 5/16" and 3/8" size. Either one seems to work but I'd to all of them in 3/8" if I had to do it a gain- slightly thicker and it was easier to get the trim to "snap" in place with the clamp installed, yet it was not so thick that it left a gap between the trim and the body.
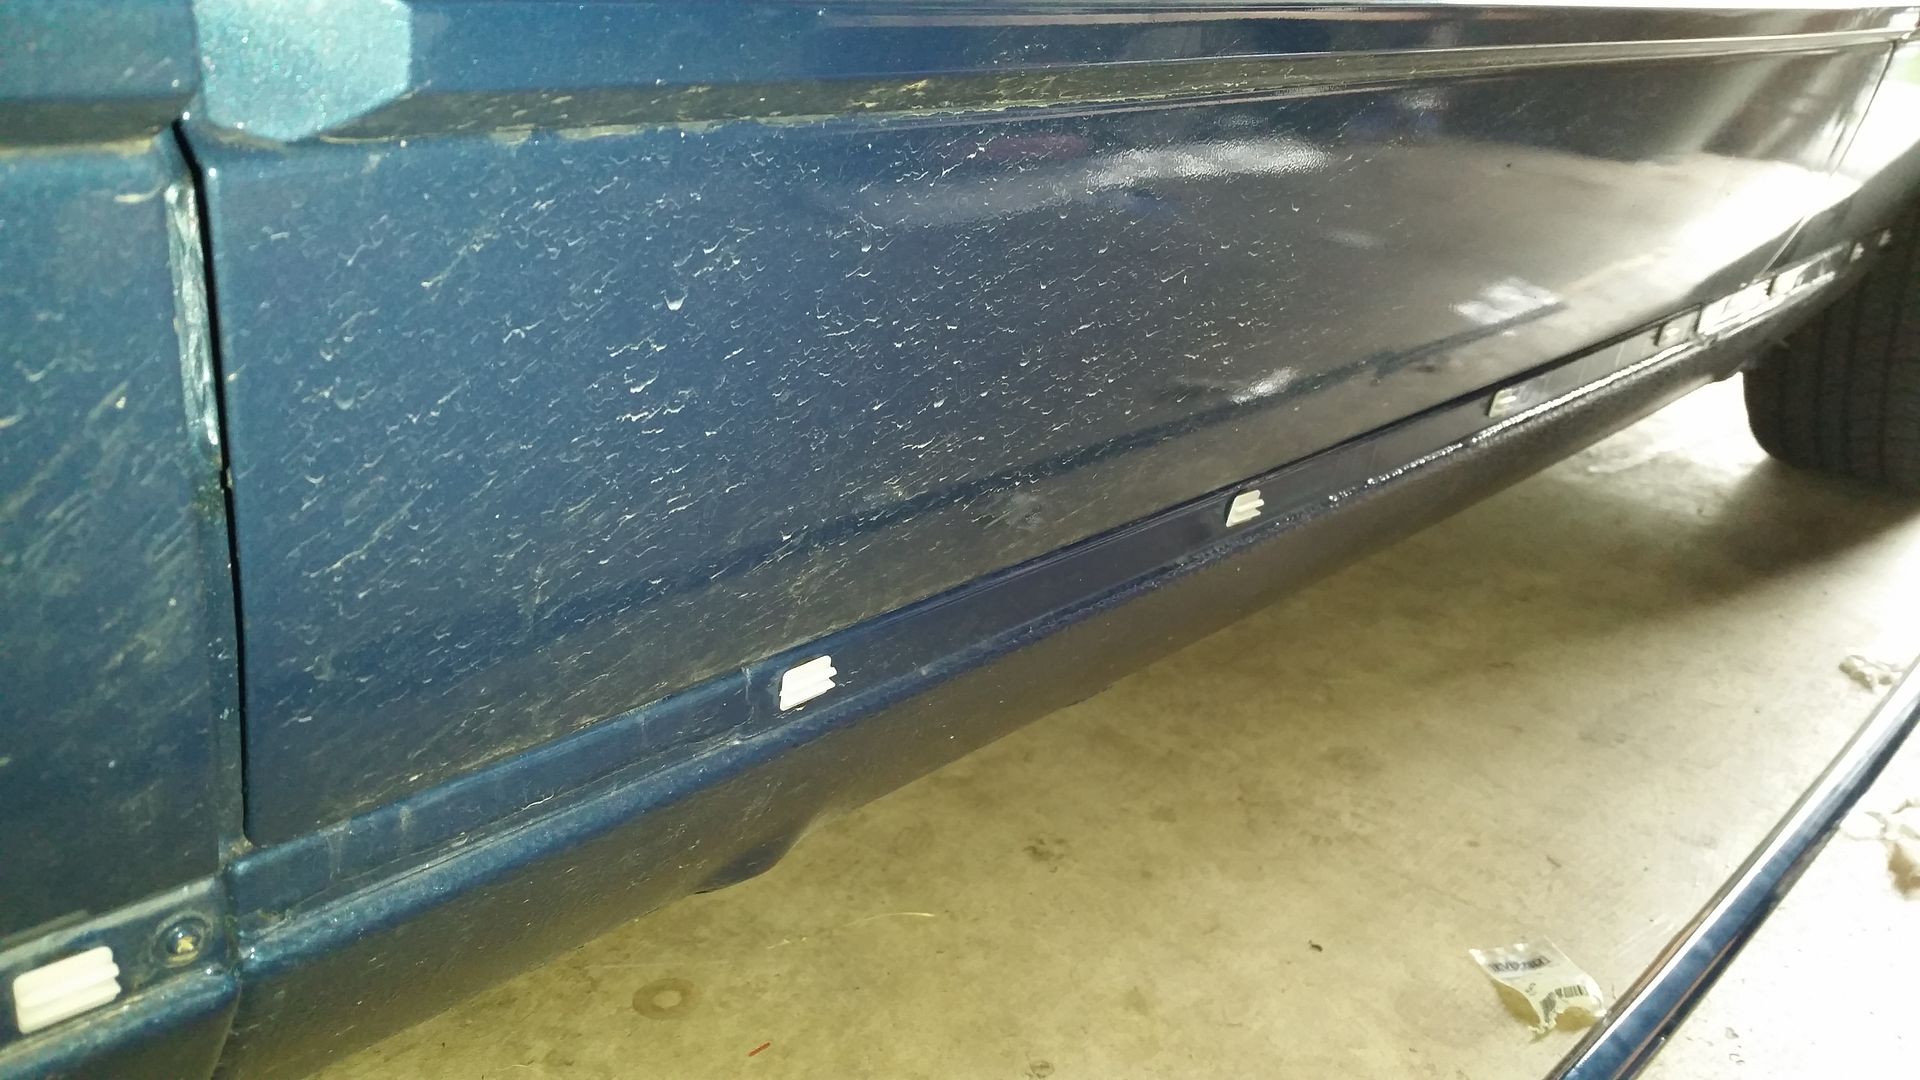
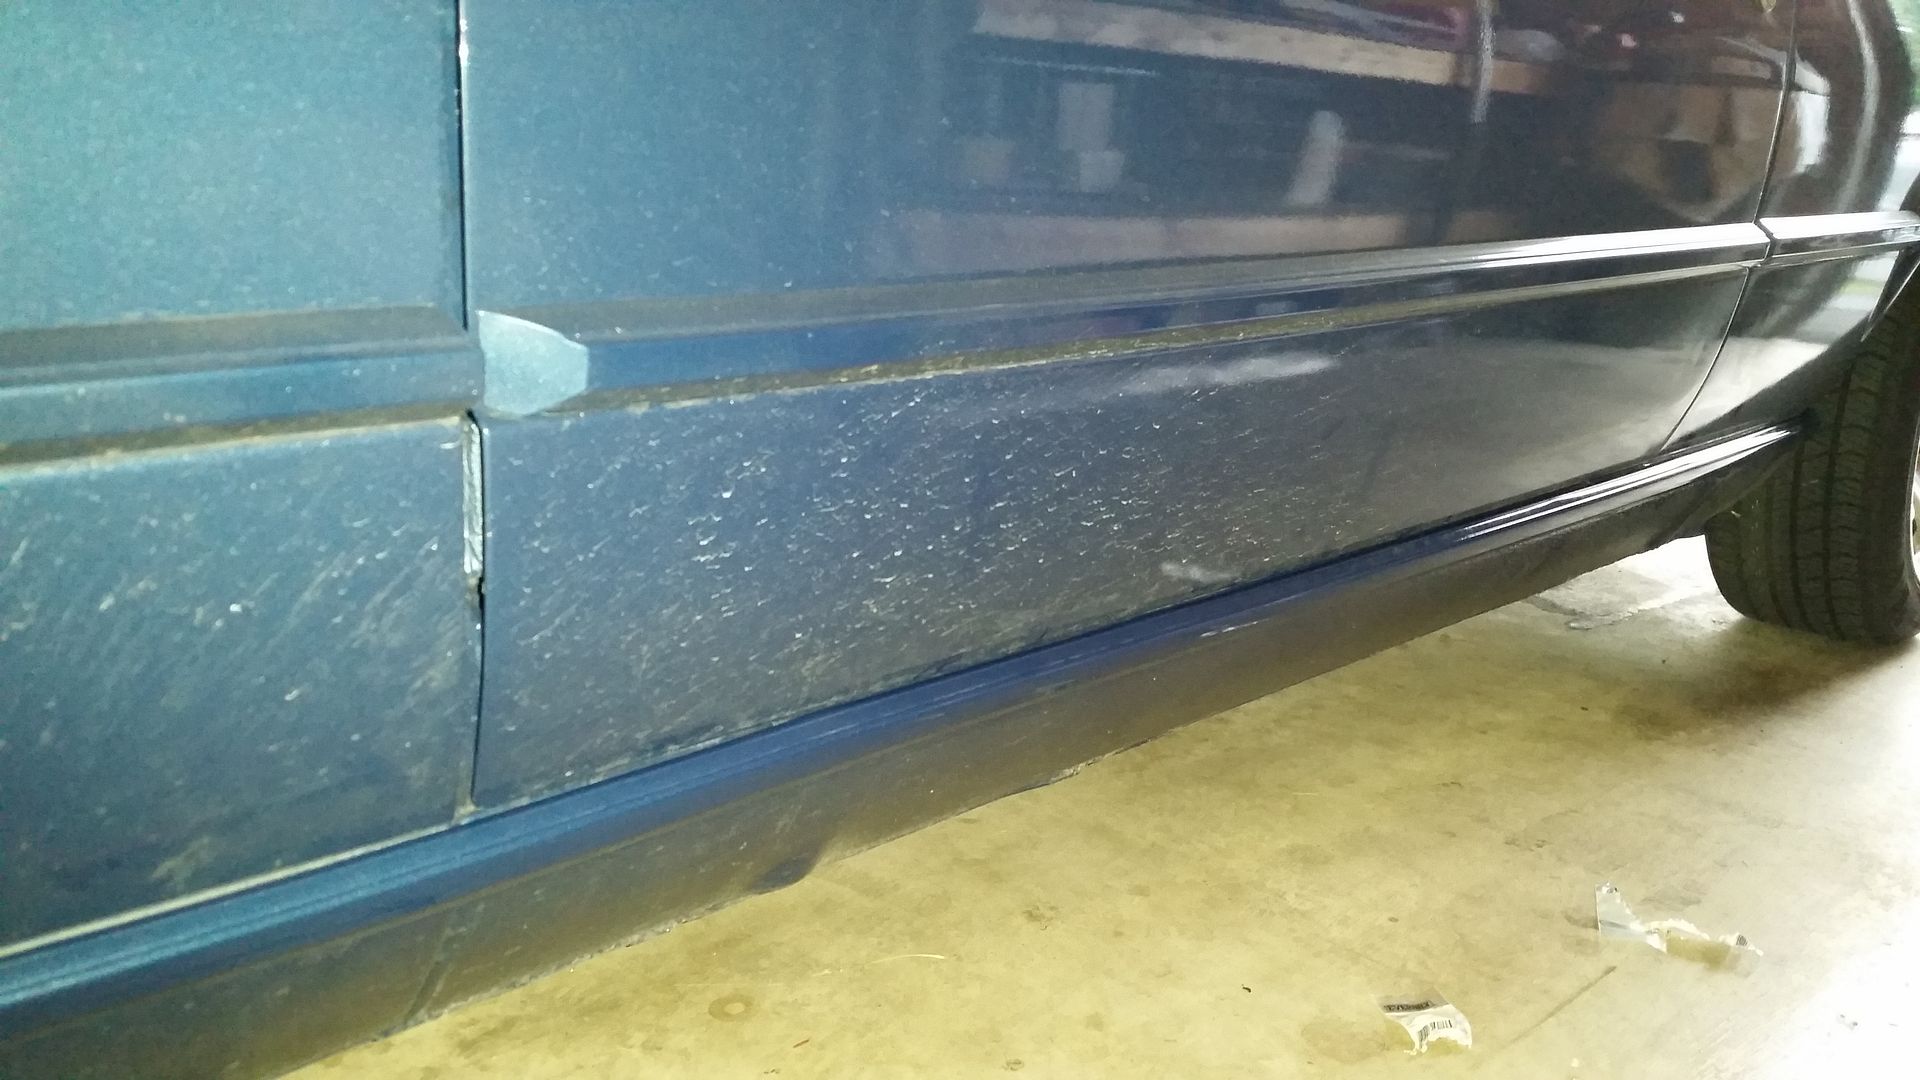
Next up I installed the white clips:
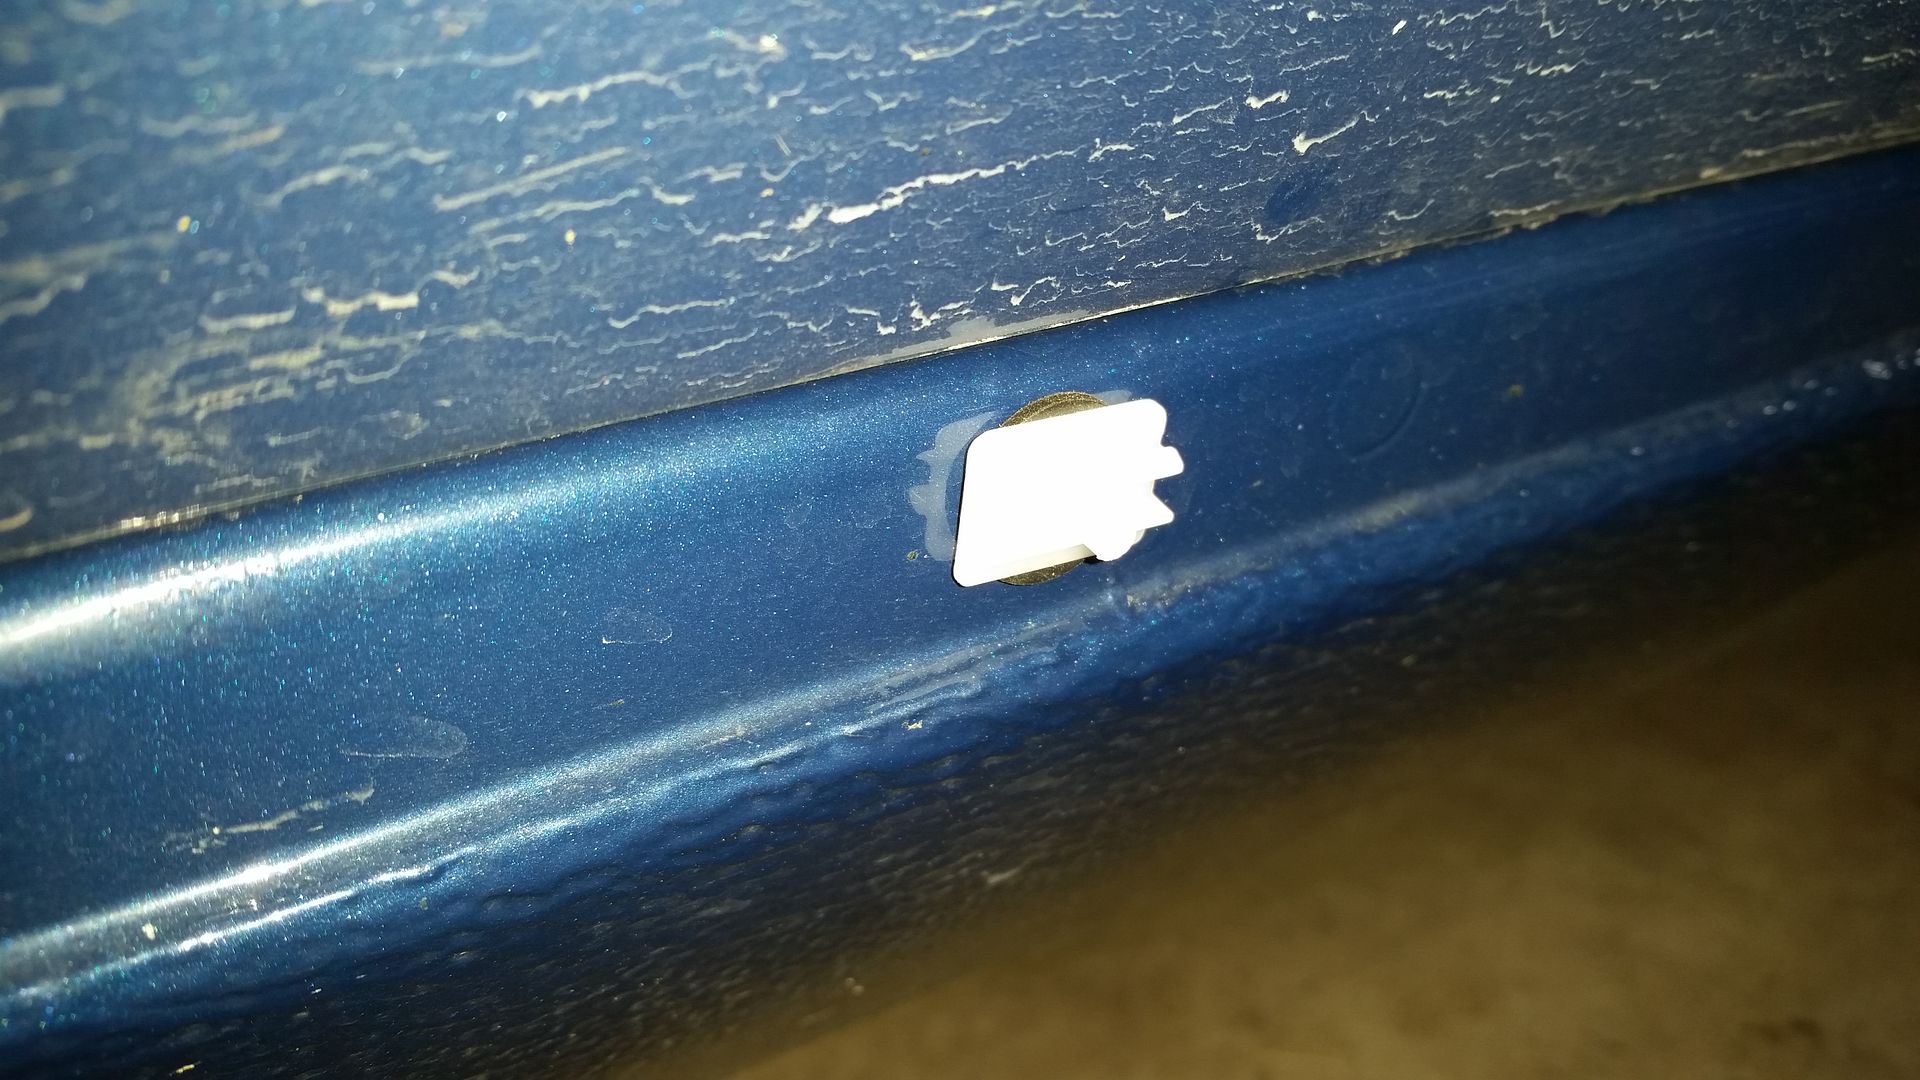
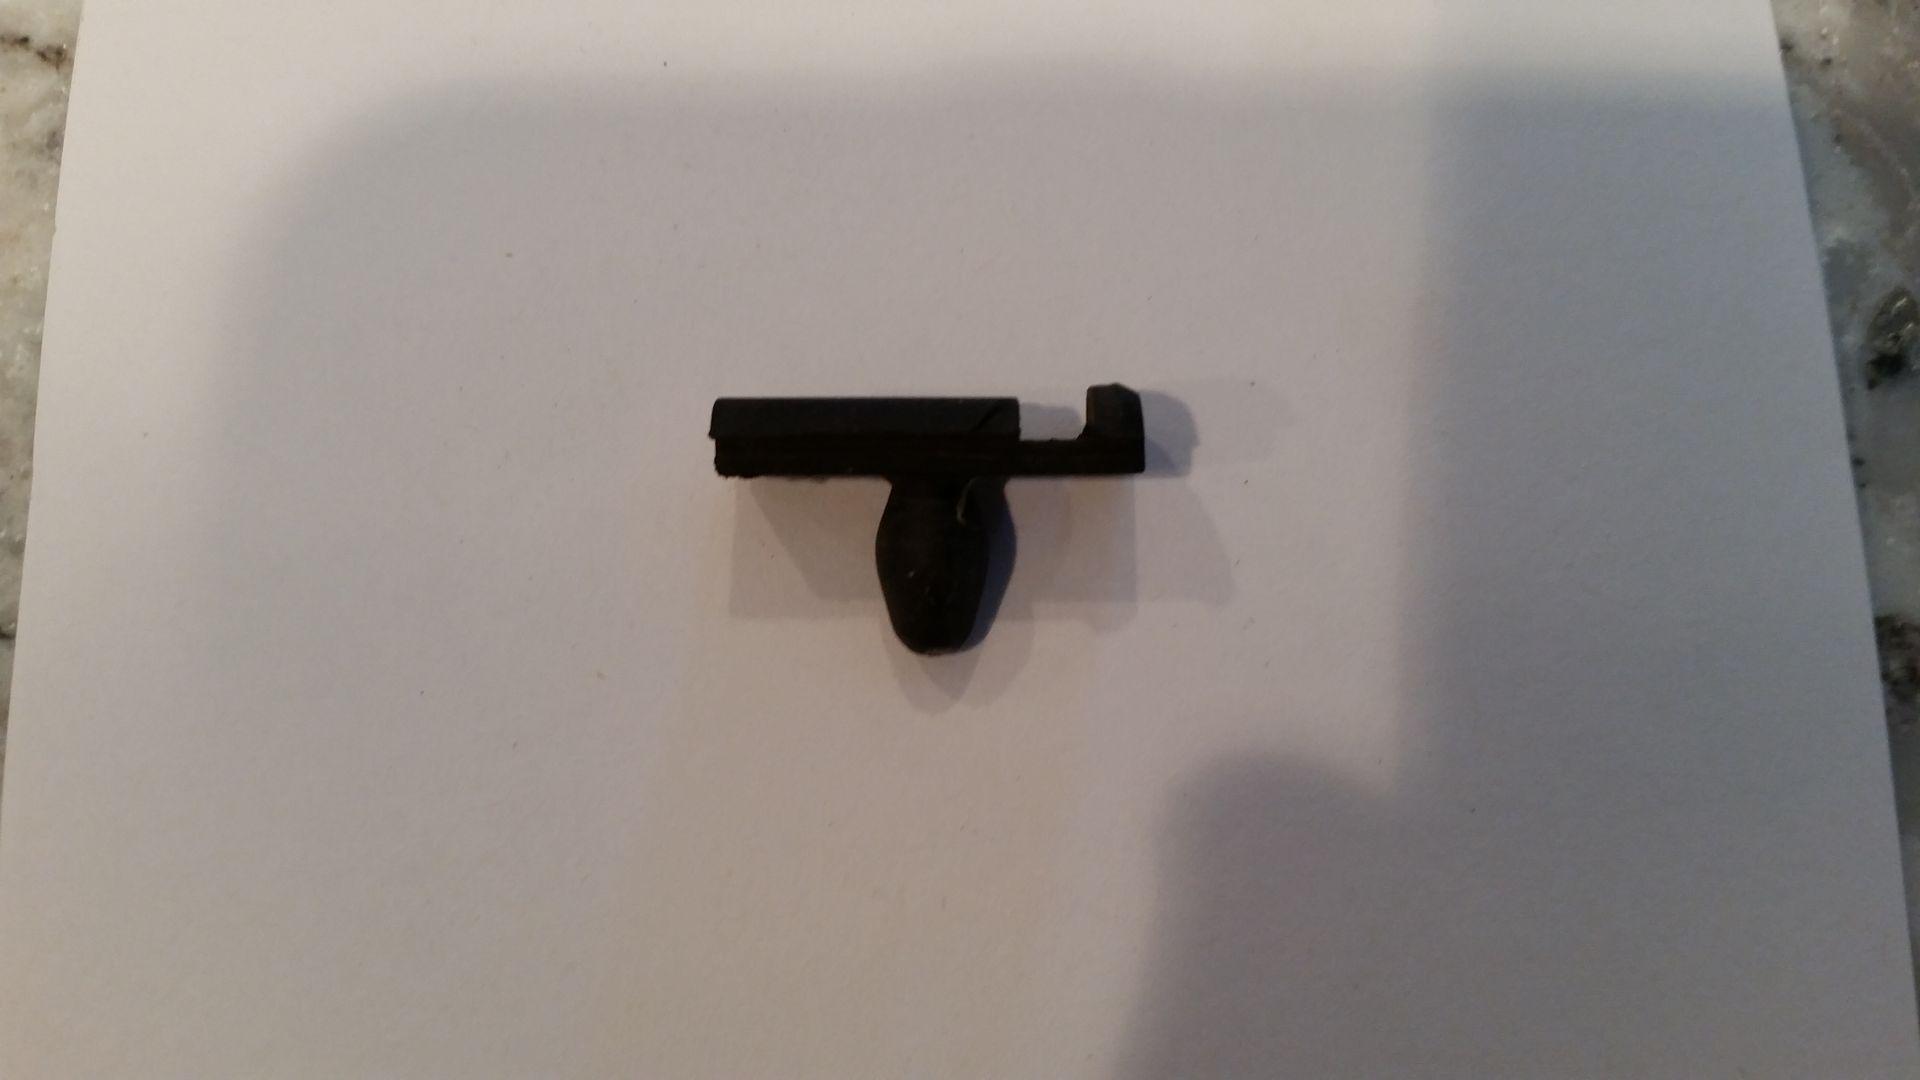
The next part is a more serious omission. The front attachment point of the lower trim is a small "nub" fastener that snaps in the channel in the trim and secures in a grommet in the lower front fender trim.
I had 1- just 1 out of 4 trim pieces on 2 cars- and used it on the driver's side. It looks like this:

Not only is the part number not listed, the part itself is not listed. I checked other diagrams and still cannot find reference to the part number.
I checked the M-Technic page: http://www.realoem.com/bmw/enUS/show...diagId=51_2003
I checked the fender page: http://www.realoem.com/bmw/enUS/show...diagId=41_0212
Nothing. Even the grommet is not listed on any page but I have a bag of those from other parts of the car.
Also, the trim (which did not come on my car so I had to buy it used from a forum member) has a weird rubber section right in the channel where the nub clip should go.
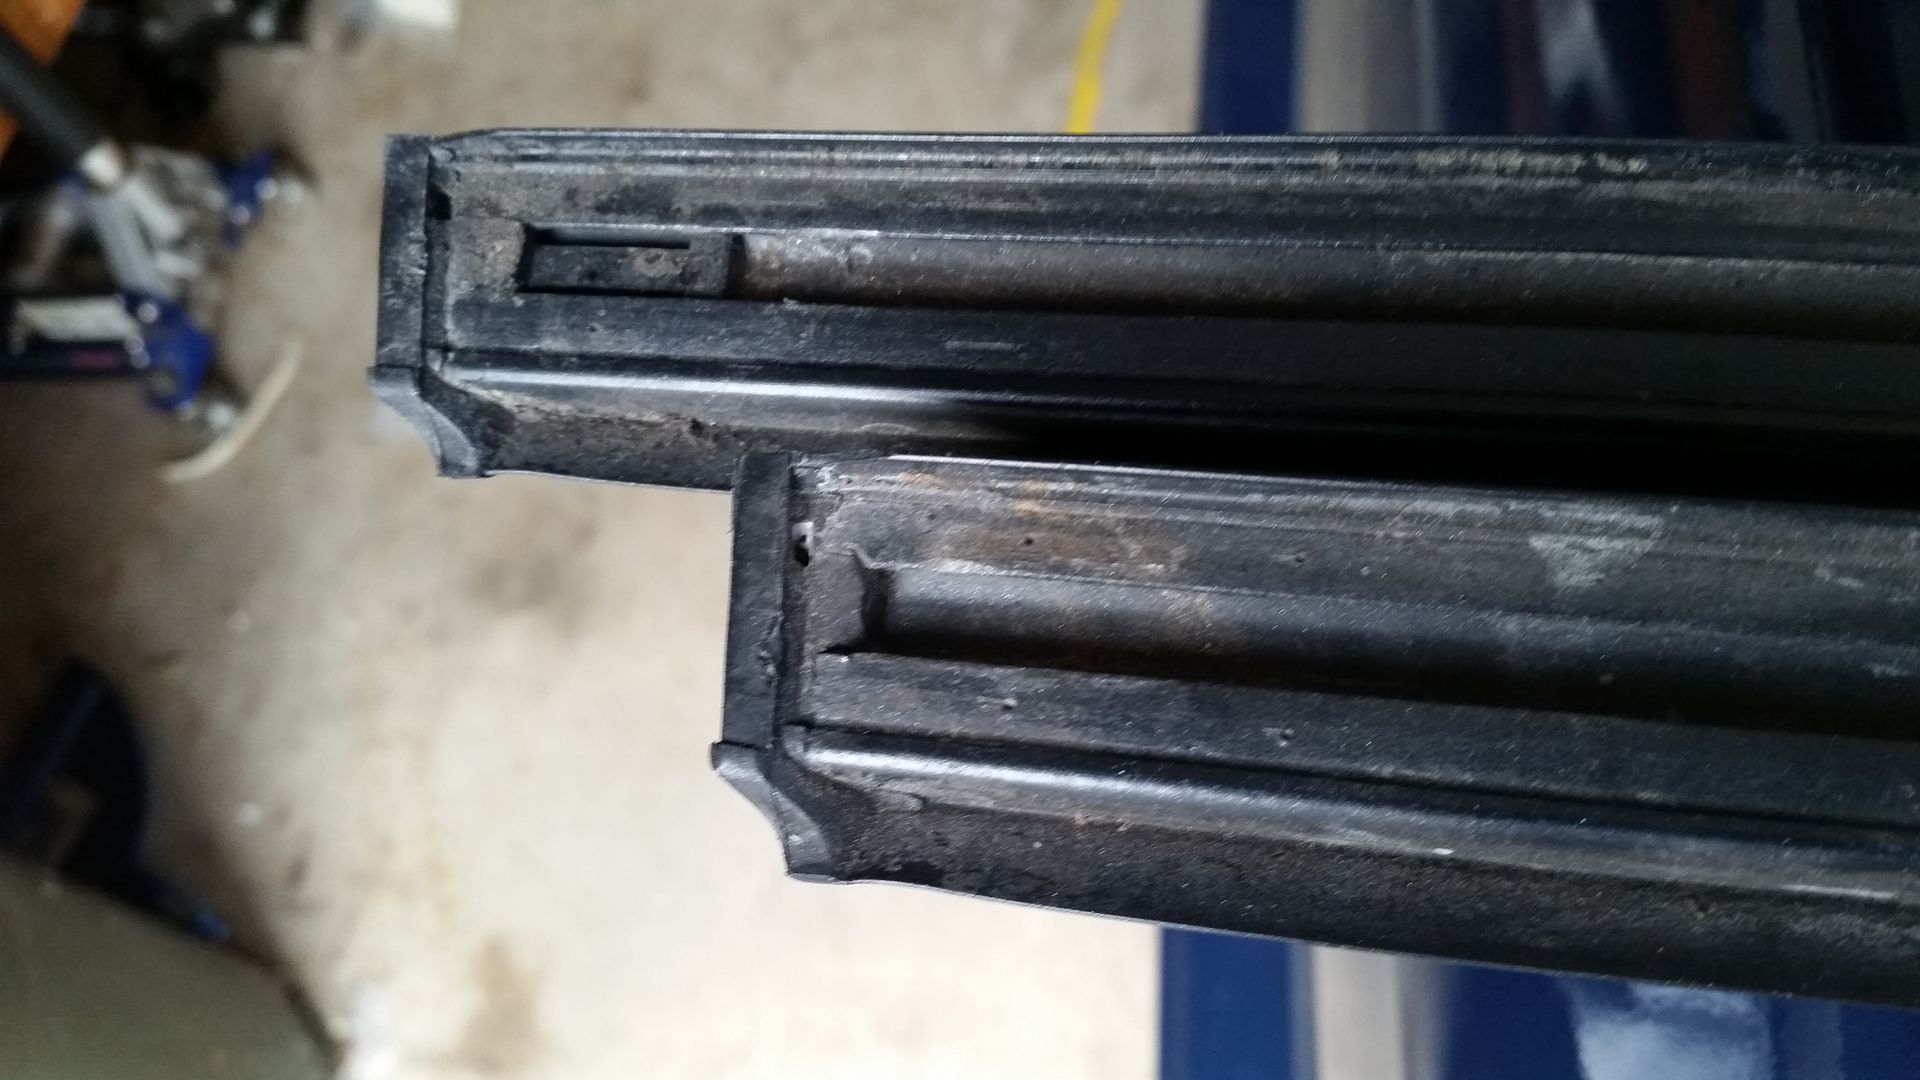
If I did not know better I'd say that they had updated the design to not require the nub clip but both this '89 and my late ('92) parts car have the same grommet & nub clip mounting mechanism and the hole in the lower body/fender is too large to accept one of the white clips - only a grommet & nub configuration will work.
I was able to remove the rubber part with needle nose pliers:
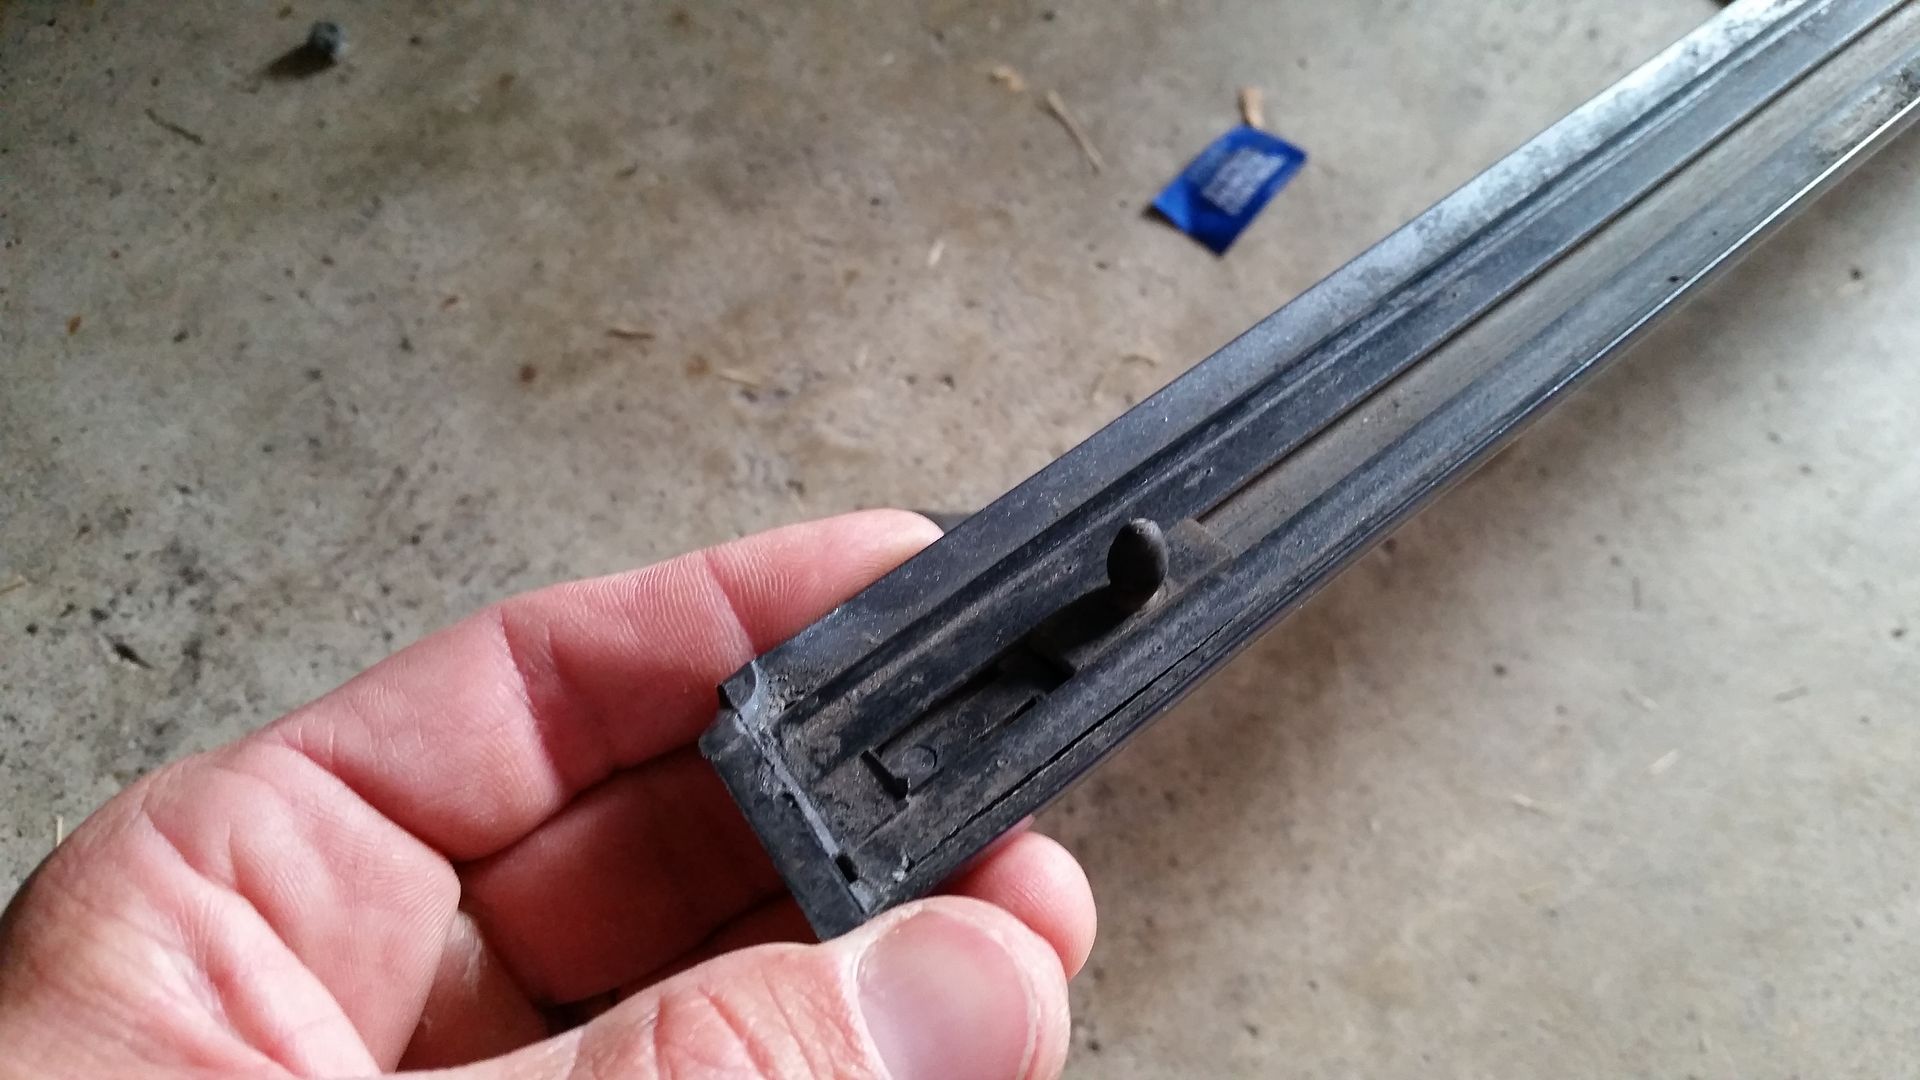
With the nub clip installed on the driver's side I installed the trim:
Still trying to locate a clip for the passenger side before I install that trim.Comment


Comment