1986 325iX 3.1L Stroker + Turbo

Collapse
X
 
  • Time
  • Show
Clear All
new posts

  • downforce22
    replied
    Sorry it has been so long for an update, it didn't go as fast as expected.

    Regardless, here is an update of what has been cooking.

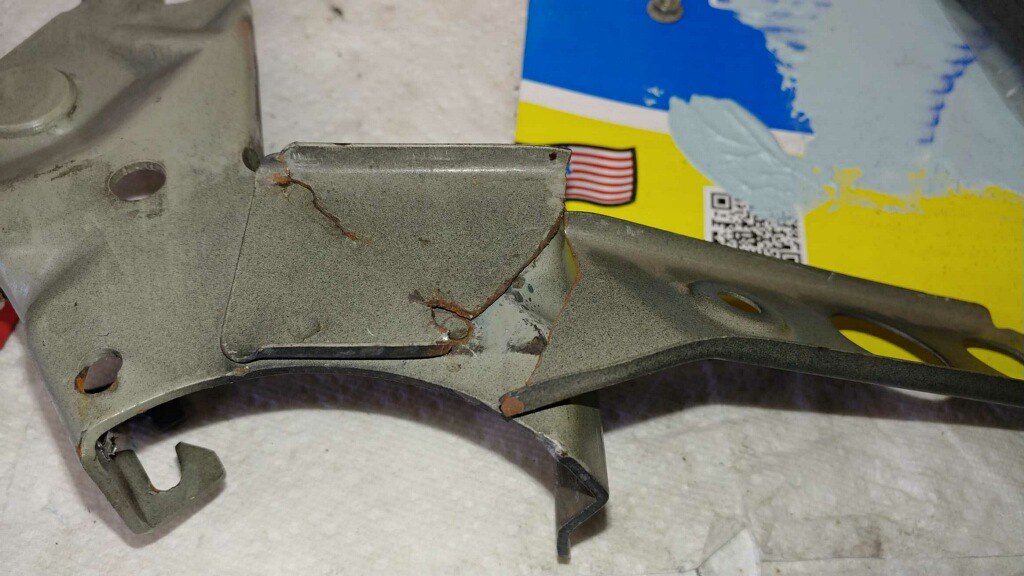
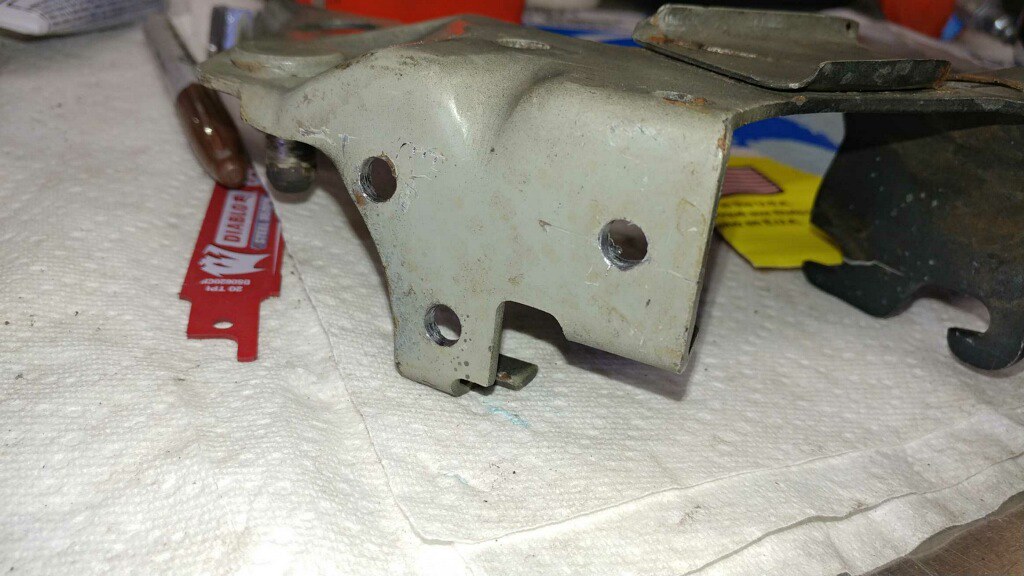
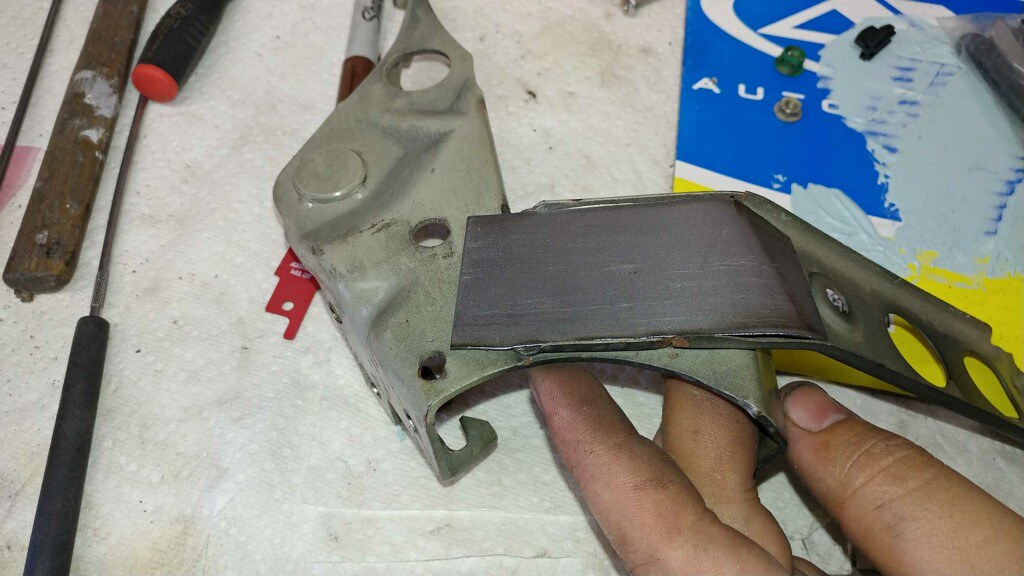
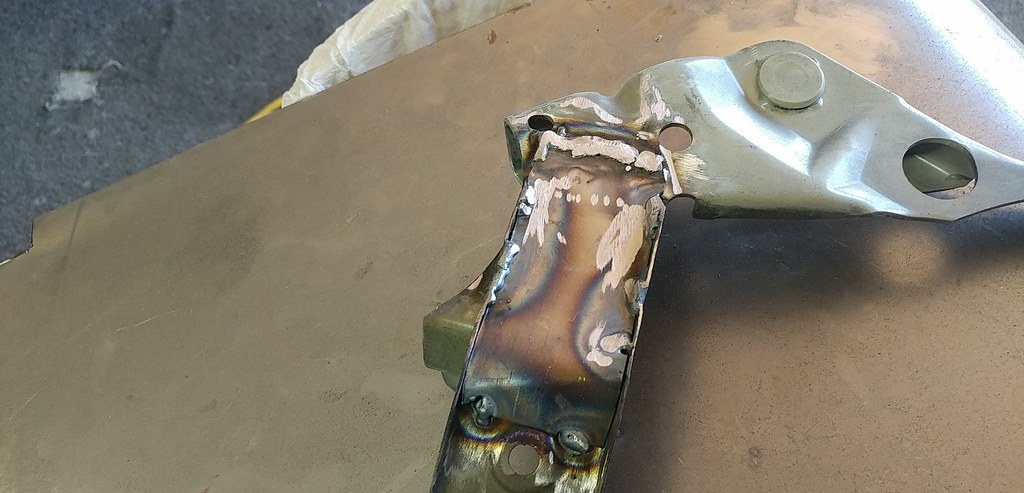
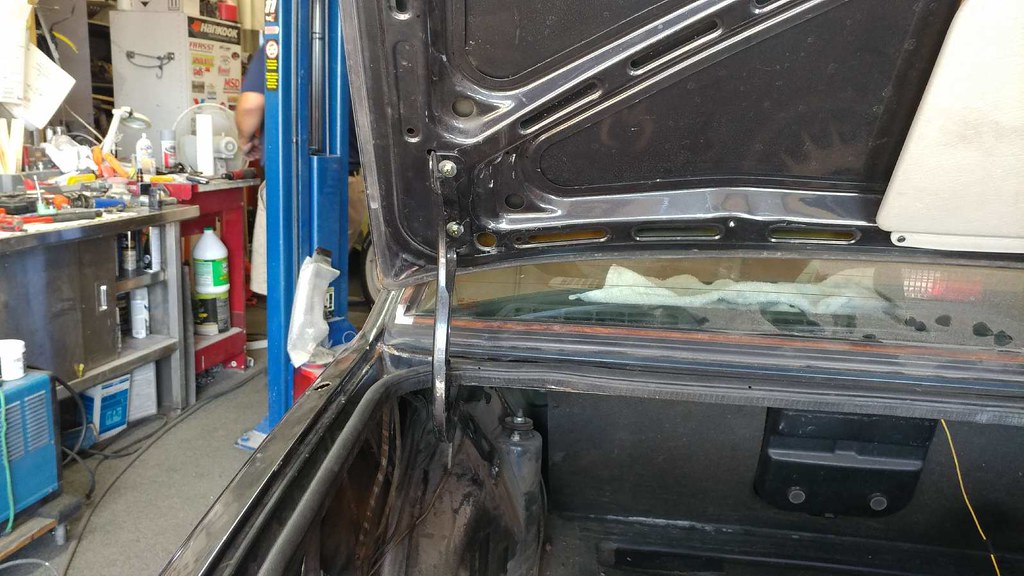
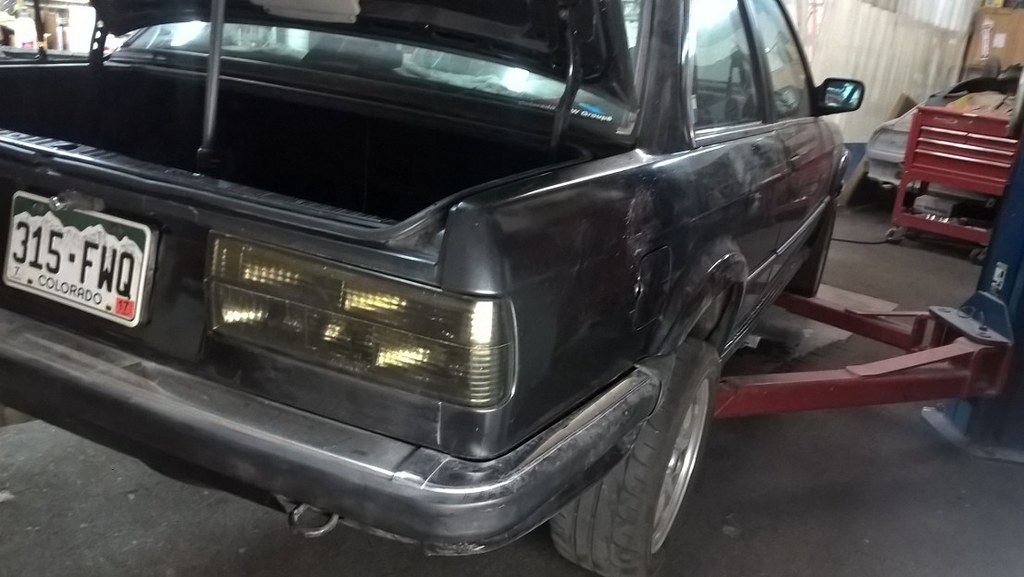
    The rear trunk hinge had broken at some point. The spot weld came off holding the hinge to the trunk and the hinge started splitting in half and I had been driving around with the hinge and hinge bars disconnected. The spot welds were drilled out and a bracket was used to repair the hinge. It is amazing how munch torsion is on the trunk bars an a huge repair because the only thing holding the trunk to the car was the trunk latch and one trunk hinge.


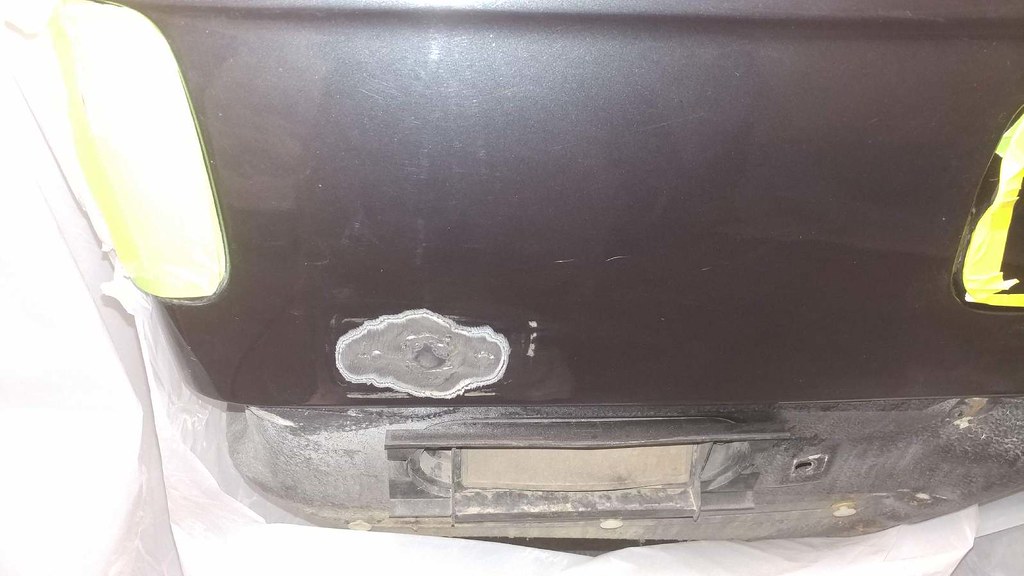
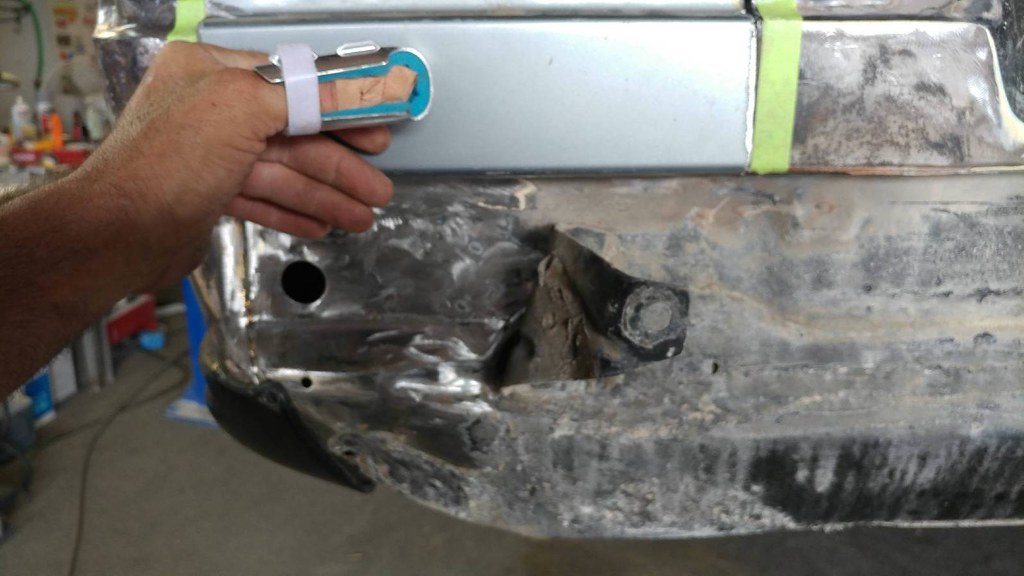
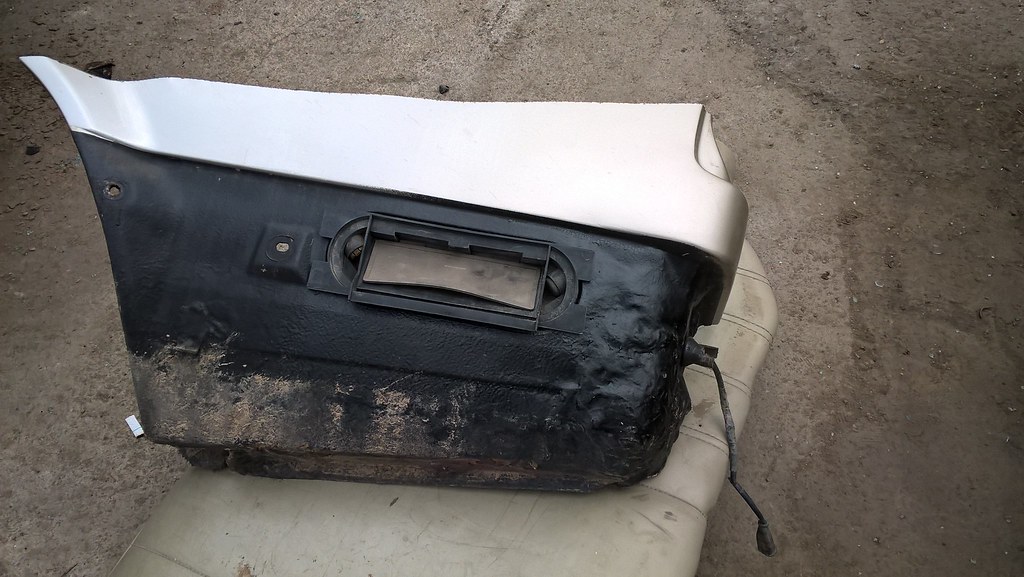
    Next up was those fugly federalized sidemarkers ruining the lines of the car. This should really clean up the look. Here was the before, rust and all.


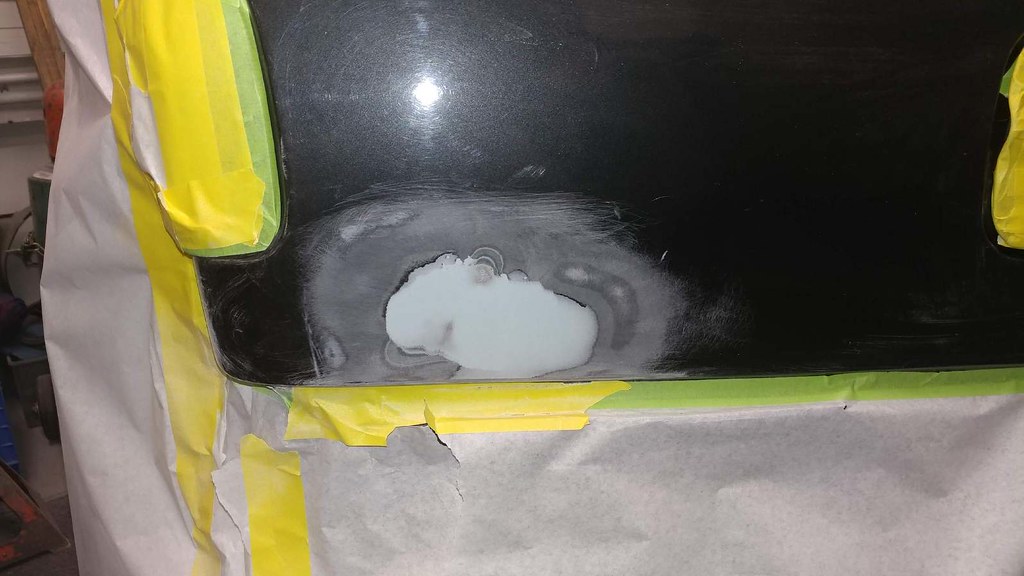
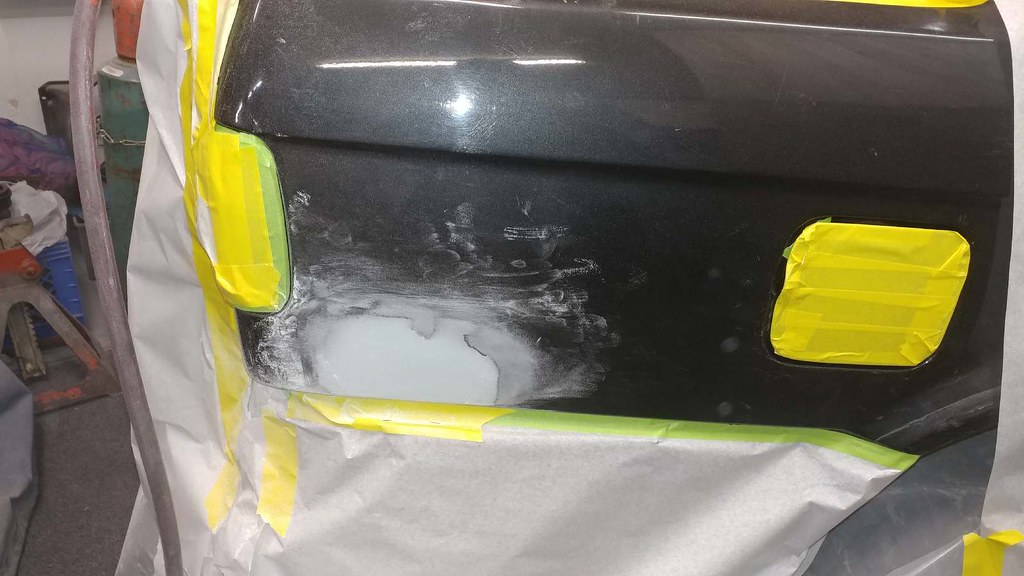
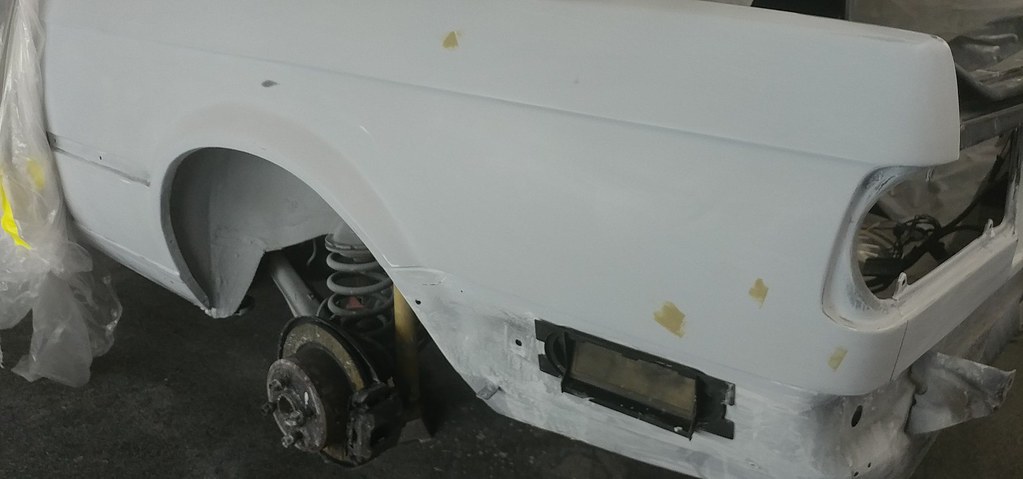
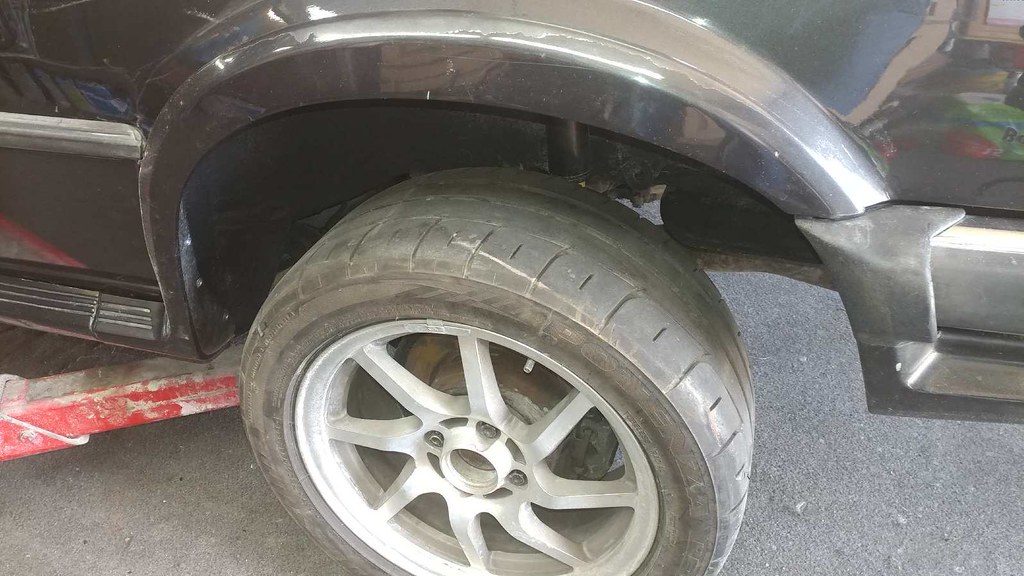
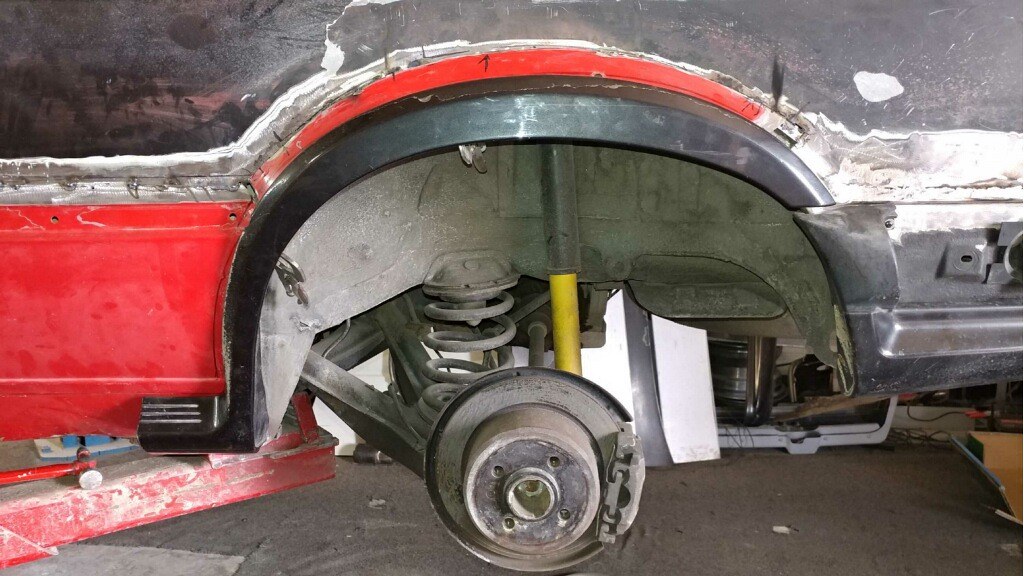
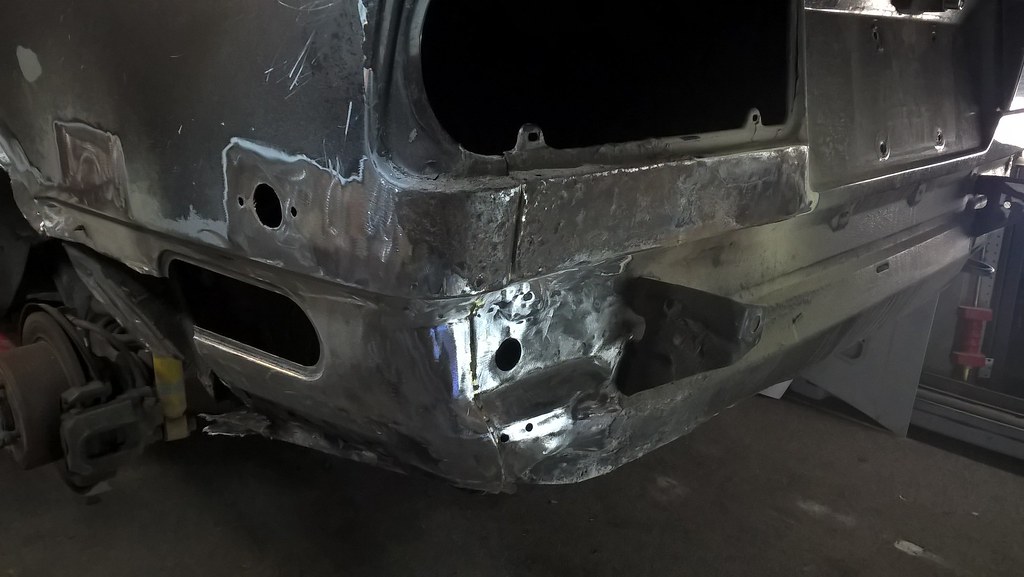
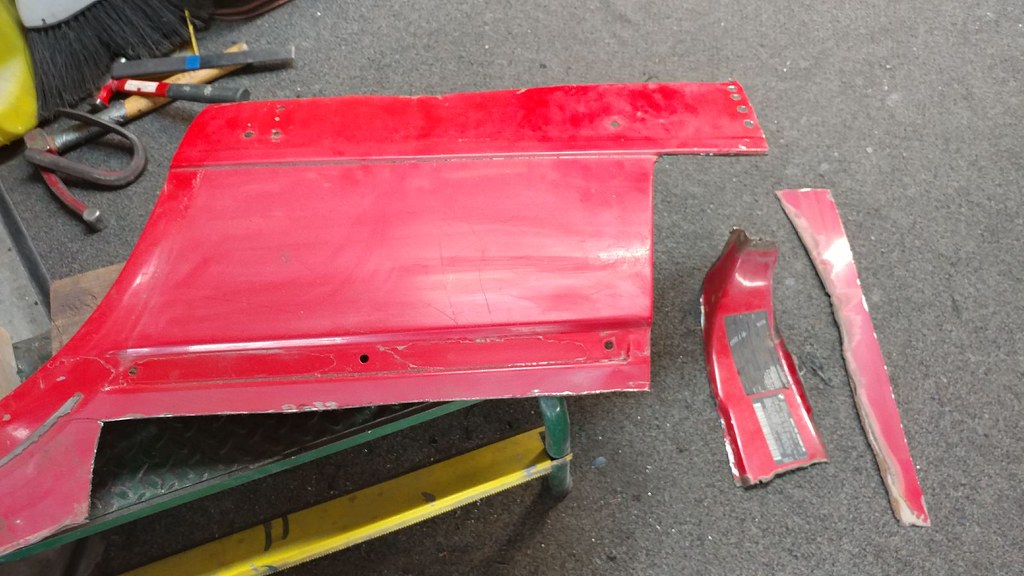
    The rust had gotten so bad under the flare that it ate the metal away to where it attaches to the frame. If you recall the previous pictures there were holes in the body under the door and in the trunk. The patch panels used were fitted, but there were a couple problems. The main problem was the red panel was from a us spec iX and the euro spec panels are different. I am not sure if it was just early model only or early model iX specific, but the us spec fender arches were folded under the body with two layers while the rear fenders on my car had a single layer of metal. The hole under the door was patched with the piece from the red iX.


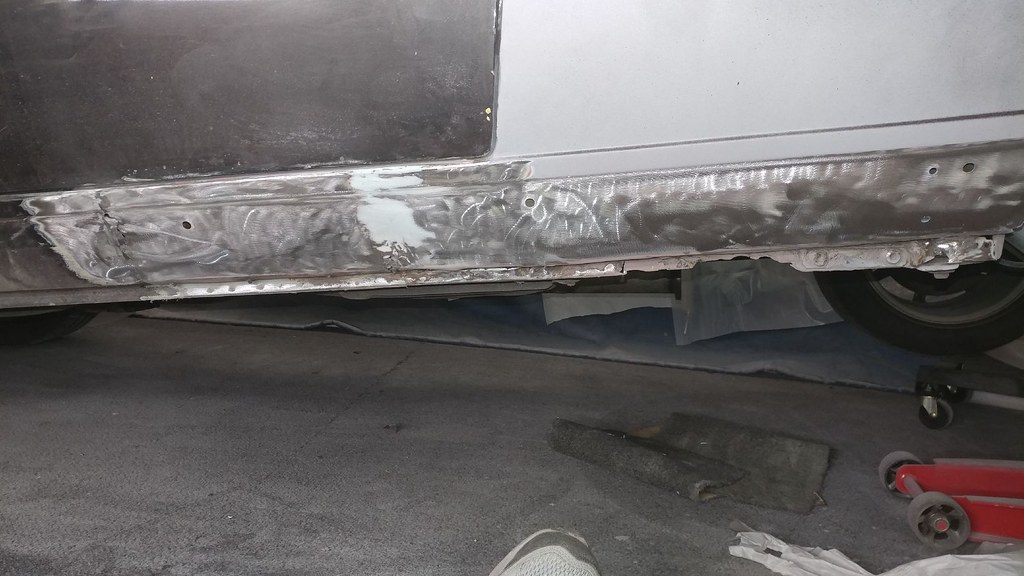
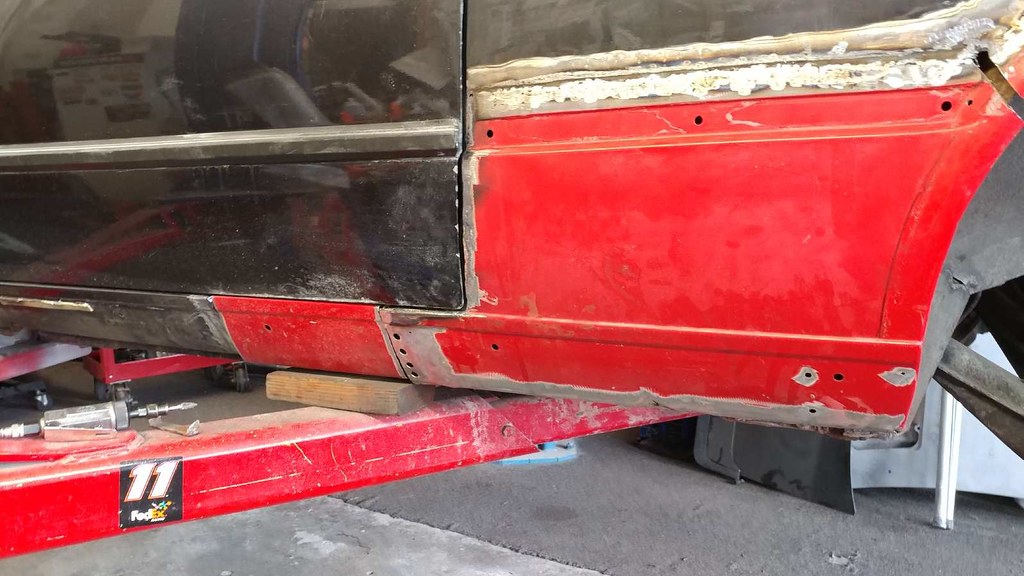
    With the way the fender flares mount, a lip on the euro spec flares mounts to the body, but with the double lip of the us fender, there was nowhere to mount and the actual fender was flare was different meaning the rear flare did not line up with the rear euro bumper and rear flare pod that sits under the bumper on the euro ix body kit. This meant the rear panel had to be welded with multiple pieces and shaped to fit so my body guy used the passenger side to make a template of the shape of the rear fender and fabricated the fender to match the shape correctly.

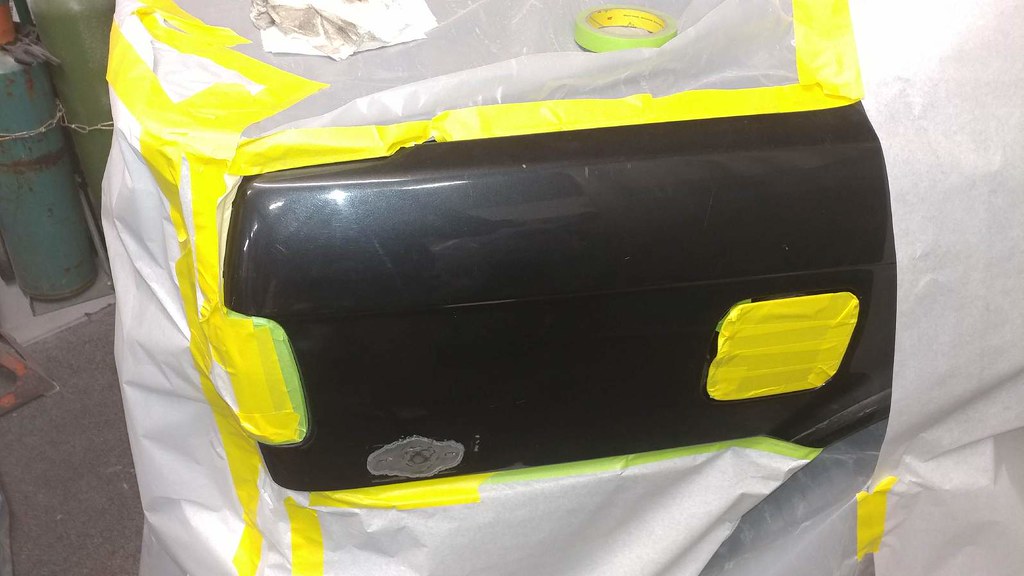
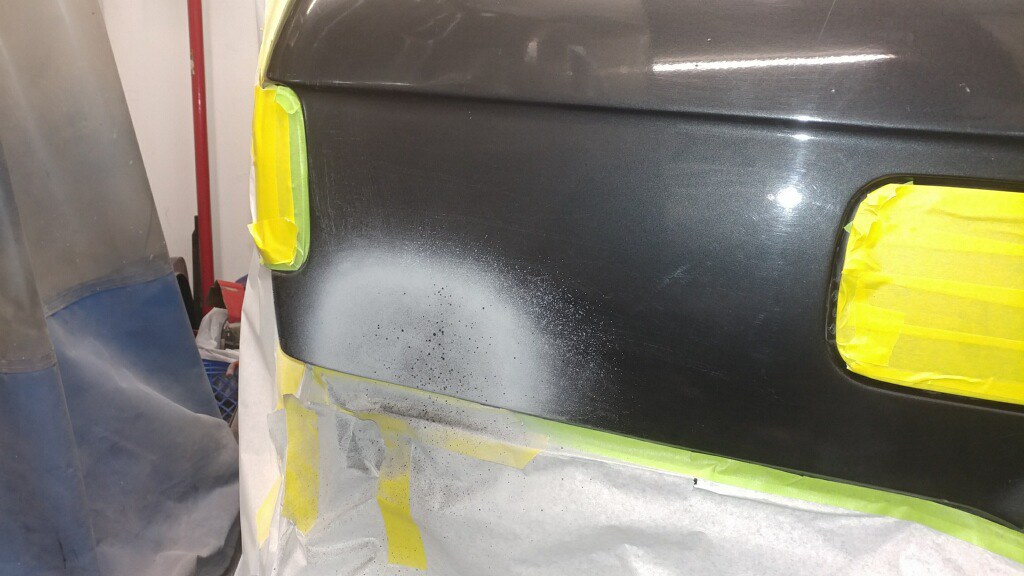
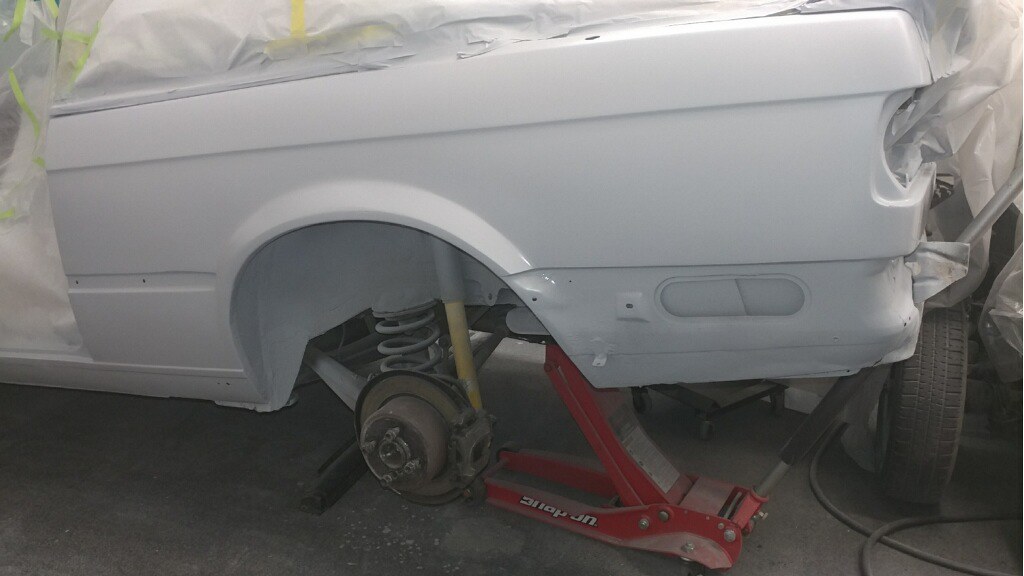
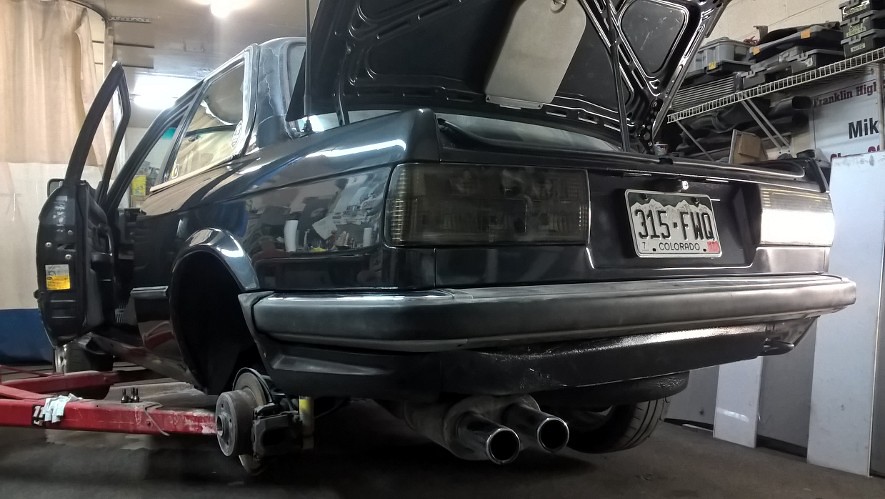
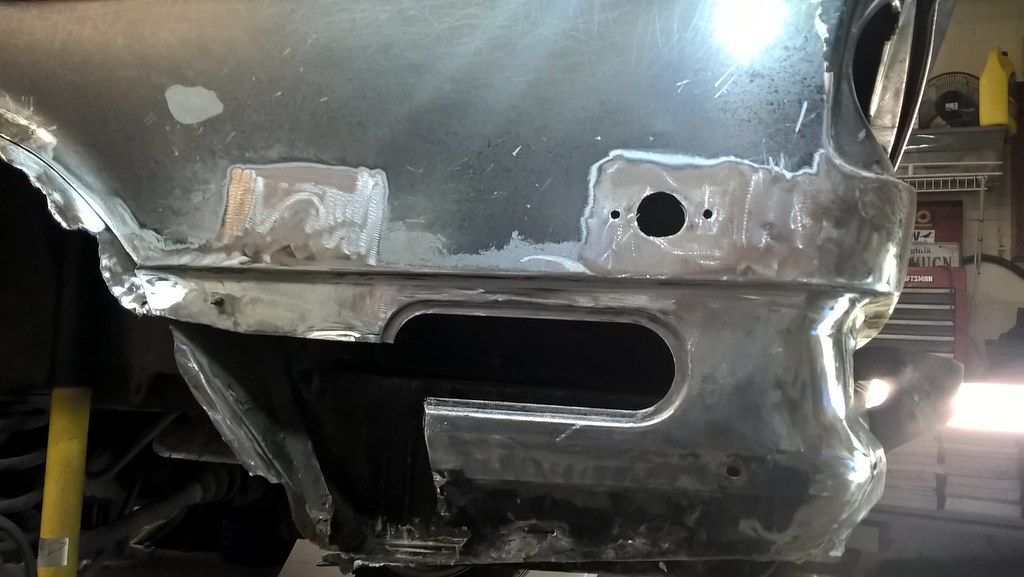
    It quickly got more involved than anticipated. I don't have photos of that process but I fitted the flare up are the first mock up and it did not fit correctly (this was late 2017) so the fender had to be redone. The corner where the jack goes fit correctly and that helped determine where the fender flare needed to align. This is after the fender was completed during the primer stage. You can see the area under the rear taillight was fixed also.


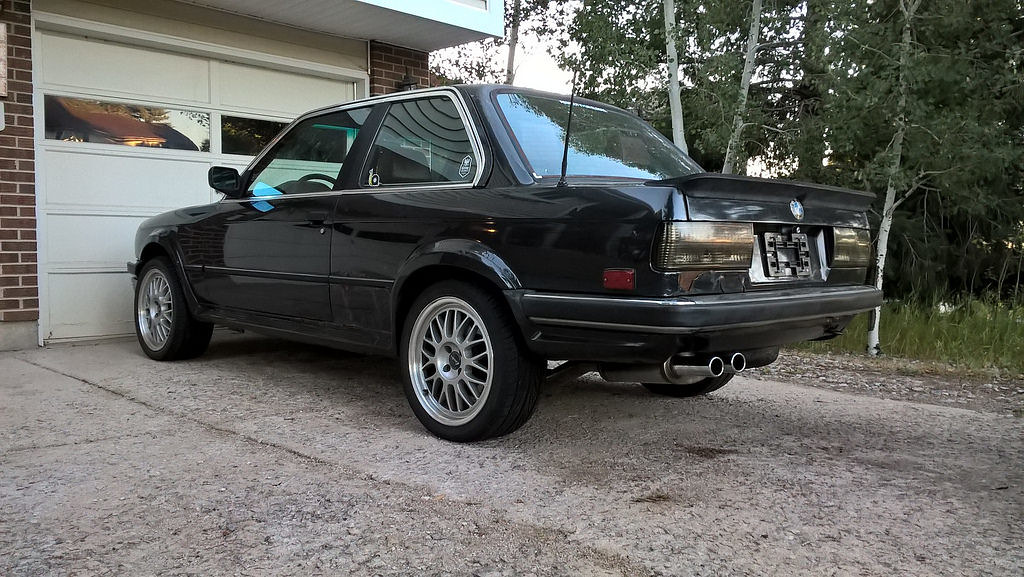
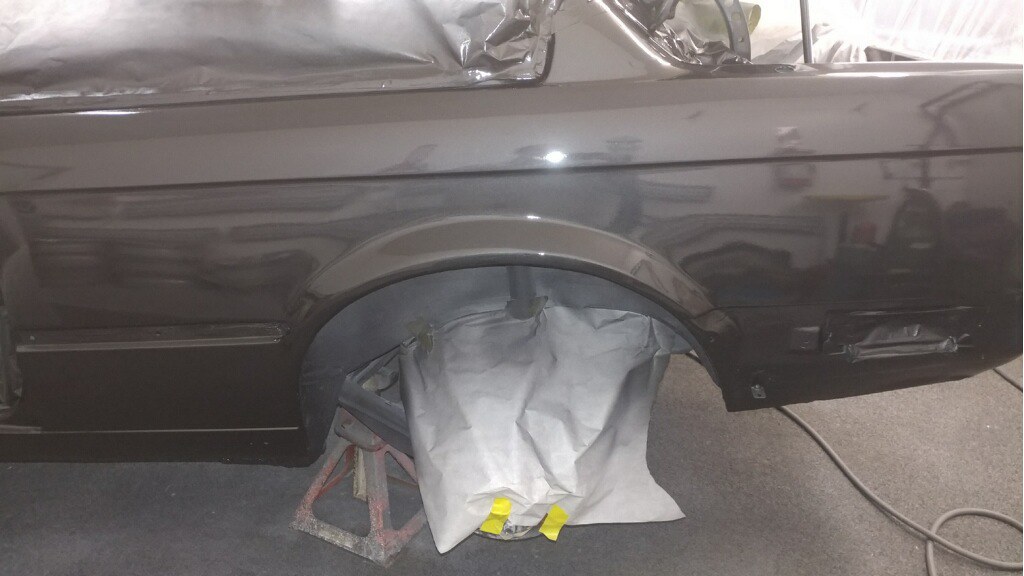
    Diamondschwartz sure is a pretty color. Everything fits well.


    Another iX was at the shop with some rust issues but this one did not have a fate as cheery as mine. I hear it is going to the crusher after the engine is pulled. It was a 4 door automatic regardless but it gave its trunk mat to my car.


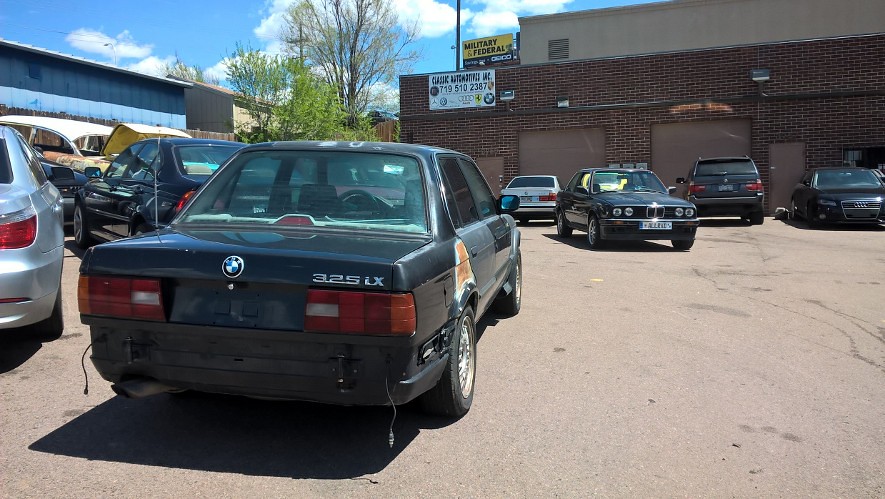
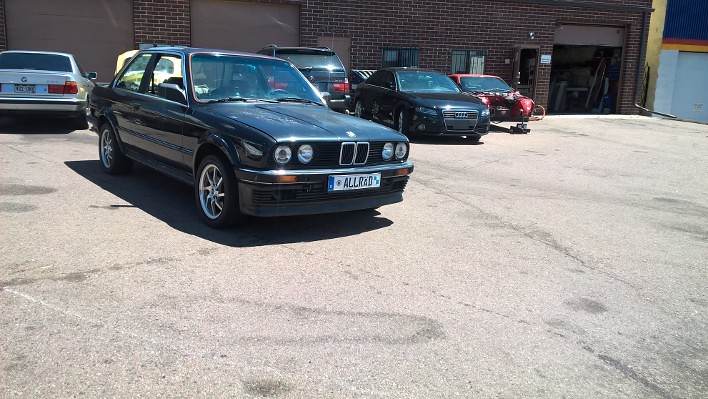
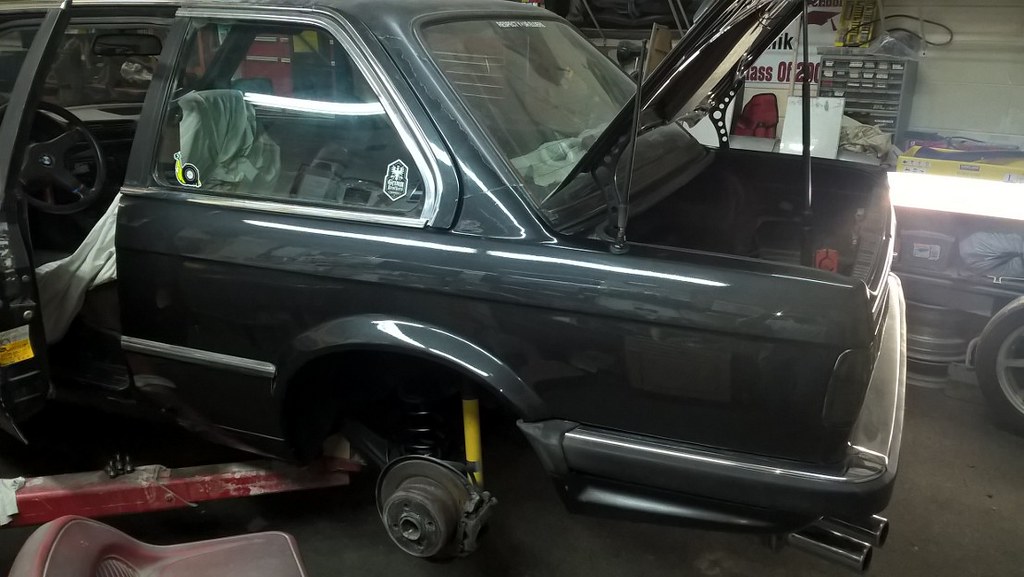
    And its first tank of gas in many months. I will have to try to get some better photos to detail the side profile of the car a little better. Th guys who did the body work also says he could get my hood fixed up and my driver door looking better so I am contemplating that as the next step along with a tune and some 42# lucas disc style injectors that I picked up.

    Leave a comment:


  • 2mAn
    replied
    Updates?

    Leave a comment:


  • fiftytakedowns
    replied
    Happy to see an IX being restored!

    Leave a comment:


  • downforce22
    replied
    Its been a long time without an update.There has been some progress made on the car but the repair process has taken significantly longer than anticipated.

    There were a couple of issues with the donor panels. The trunk panel had some rust under the weather stripping seal so it has become a patch panel beneath the tail light as the majority of the structure was intact. The Spare tire jack box was saved with the bronzit donor panel above. It was cut at the seam inside the trunk and welded in near the federalized side marker. Then we hit a snag with the fender. I had heard about a difference in early vs late rear fender/ arches but hadn't thought much of it. As it turns out the later cars have the fender folded under the arch and sealed together with a bonding agent. IT was very thick. The early cars do not have this. Also, the location of the fender is just ever so slightly rotated differently on the later cars.

    The thought process was to repair the area that holds the spare tire jack to ensure the early model 325iX rear fender pod lined up with the bumper. This went according to plan. Then once that was all set, the rust area below and behind the door was to be done and the side fender flares lined up and checked before welding. In short, until you physically put the side skirt under the door and onto the wheel arch, you would never know it didn't line up. And the fender flare almost fit but did not sit correctly and caused the back of the flare to be about an inch out of position due to the shape of the arches.

    The bottom strip and fender flare would be lined up but the flare would not make the nice transition around the wheel arch and into the rear pod area. It is also interesting that the early model 325iX rear pods contain the black plastic euro bumper cover at the wheel arch, so this area is critical because it is where all of these areas come together. Without another euro 325iX around, all of this had to be done and checked after the problem was found.

    The solution was to cut the wheel arch section and shift the actual arch into the correct position by half an inch or so. Two new pieces are required; one on each side of that arch piece to transition it into the correct position. The rest of the piece fits great; the arch has the correct shape to fit the side skirt correctly, and the lower portion fits the body line with the indentation at the bottom.

    Needless to say, the car is still not done but here are some progress photos showing what I attempted to describe.


    Leave a comment:


  • tschultz
    replied
    Was there any sort of rust in the floor drains?

    Leave a comment:


  • downforce22
    replied
    I decided to go ahead and remove the sidemarker lights in the rear.

    The rust has been treated and is mostly removed. After seeing it closely, the panel under the driver taillight had repair work done to it. It had been straightened and then a layer of filler was on top. I'm not sure why the whole panel was not replaced. Either way, that is ready to be replaced and the fender is looking pretty good. I was worried about the extent of the rust under the flares but most of it seems to be intact and salvageable. The rust by the rear quater panel was pretty bad but will be replaced. Most everything should be able to be resealed at the factory spot welds.

    Here are a couple of pictures as it went down to metal.


    That last picture shows the extent of the rust on the rear quarter. It definitely spread out of control so this should get it under control. While at it, the trunk hinge sheared off and broke the bracket in the trunk so I am getting that fixed along with those sidemarker lights. If I keep the sidemarker lights hooked up, I could use them to power some sort of trunk lights, one on each side, since the e30 trunk is always so dark.

    I am planning to drive this to drive4corners this year at the end of august so I have one month to get this back and get a few things fixed before then. Here are most of the items I have on the list.

    - Transfer case output shaft seals - This was noticed once on the lift, the seal was leaking and slinging oil onto the exhaust. I ordered 2 and am having the shop do it while it is on the lift.
    - Oil pressure Gauge - My oil pressure gauge broke at some point so I bought an Autometer electric oil pressure gauge. Just need to wire it and install it
    - Hirschman antenna - The antenna on the car is ugly and I found a local hirschman antenna locally for a decent price. I need to check the wiring connections and maybe grease the mast, but I'm looking forward to having a 3 foot chrome antenna and the best radio reception since I got the car.
    - ABS unit - The ABS unit gives me problems so I had pulled the relay. At the junkyard I grabbed the ABS unit relays and am going to try to switch those out to see if that is part of the problem. I have a few extra sensors but am not sure i have time to troubleshoot which one is the problem.
    - E-fan - I have a spare spal electric fan that I may put on this car. It is a puller and would replace the fan clutch. I hate how hard it is to get to the front of the engine and wouldn't mind a high flowing fan to pull air through the radiator and intercooler when stuck in high temps. Also useful for timing belt changes and checking for leaks on the front of the engine.
    - Tune - My IAT map needs some work with temps above 90 F I get some detonation in boost (100+ degrees) so I need to pull out a couple of degrees timing under these temps. I don't think lower AFRs alone will fix this.
    - I bought a black coupler for the IAT sensor, so I need to install that
    - Heat Shield - I would like to build an aluminum heat shield for the intake but am not sure I have enough time to get that done before the event and make it look half way decent.
    - City Lights - I had wired up the euro headlights and got one city light working, but I noticed neither work right now. It uses W5W bulbs but I am wondering if the connector is bad. I am using the front federalized side marker wiring to power these lights and I've tested that they are getting 12 volts. I ended up searching and finding the part number which is 63121385603. Blunttech had them listed but emailed me saying he needed a euro title which I was able to provide so I ordered them and hope that new connectors will fix the problem. They look like this.

    Its number 7 on the page

    http://www.realoem.com/bmw/enUS/show...45#63121385603
    The bulb is this one, 12v 4w according to bmw:
    http://www.pelicanparts.com/More_Inf...-9-063-576-M97
    - Dash - I got a crack free dash and may replace the one in there but don't know that I can get to it before the meet

    That list should keep me busy up until the meet when I'll have to reinstall the interior and get it all cleaned up.
    Last edited by downforce22; 07-25-2017, 05:35 AM.

    Leave a comment:


  • pandaboo911
    replied
    Damn that's alot of rust.. Fuckin early models

    good luck

    Leave a comment:


  • bradnic
    replied
    Yeah def pull the carpet and address whatever you find.

    Agree on dumping the fed markers. Rear lights are visible from side already. Only the front has the side visibility issue

    Leave a comment:


  • ThatOneEuroE30
    replied
    Glad to see the rust getting fixed.I would remove the side markers it will look so much better. I would also check the pans too, I thought mine were good but clearly wasn't the case.

    Leave a comment:


  • downforce22
    replied
    Originally posted by bradnic
    no question there's a lot of repair work ahead of you.. I'm in a similar boat with my lachs/cardinal. How are your floor pans? Have you pulled the carpet?
    I have not pulled the carpet but the rust has been isolated to under the flares (front fenders and the pictures shown on the last page). There is some surface rust under the rear subframe but nothing too bad.

    The body guy I have fixing the rust said he wanted to check the yards to see if an e30 was there. I haven't seen an e30 show up at the local u-pull for about 6 months. Apparently one came in to a yard south of denver and was pretty much all there so he said he would go with me and bring all the necessary tools to remove the rear panel where the jack is supposed to go. As you saw on my last page, mine is toast and would have to be fabricated.

    We got up there and there is a decently nice '86 325e with some good stuff on it. Not sure why it was there but the rear panel we needed was there, likely repaired at some point, but definitely reusable. The ignition had the key in it so I got a full lock set (minus glove box), and the early model rear tail lights were in pretty decent shape. The lights had the bulb holders with the plastic twists still intact so I snagged those too.


    After grabbing a couple of relays and the washer bottle wiring/ connectors and OEM hose, we were out the door for a steal of a deal. I can use these wiring connectors to lengthen mine since I switched to the later style ix washer reservoir and went with the later coolant reservoir.

    Here are a couple of pictures of what I got. This panel has the piece to correctly drain the sunroof. It looks like there was a repair on the rear of the car at some point and the repair did not drain the sunroofs correctly possibly accelerating the rust on this side of the car. The other side of the car is not rusty.


    A decision I have to make it whether to keep the federalized rear side marker lights. This new panel does not have one since it was a US spec car with big bumpers. I either need to add the cutout for the side marker on this panel, remove the side marker on the other side, or keep one and leave the other :shifty

    I like having them in the rear because they give some additional visibility to the vehicle at night and in inclement weather without being too terrible on the eyes since I removed the front ones.

    With the car up on the lift it looks like my t-case has been spewing some oil from the output shaft seal and it is on the exhaust. I'll see if I can get that changed while it is easy to access on the lift.

    Leave a comment:


  • bradnic
    replied
    no question there's a lot of repair work ahead of you.. I'm in a similar boat with my lachs/cardinal. How are your floor pans? Have you pulled the carpet?

    Leave a comment:


  • litu
    replied
    Wow, that rust...I also have coming to rust repair time

    Leave a comment:


  • stonea
    replied
    Good luck on the rust repair! I hope to do the same to my ix some day.

    Leave a comment:


  • downforce22
    replied
    I had been on the lookout for some body panels for a while knowing the rust on the car was getting worse as I drove it over the winter and in the rain. When I drove it to moab, dust from the dirt roads made its way into the cabin. I figured it was coming from behind the drivers door where I could see some daylight and hear some road noise in the cabin.

    A while back I was able to plasma cut a quarter panel off of a late iX. After that I found a rear panel listed on ebay for an early model car. I contacted the seller and was able to get him to cut a section from the left rear license plate light to around the corner where I had some rust bubbling. With those 2 components I dropped them off to see if they could be used to repair the damage. The body guy I know had some tie in his calendar and his lift open so I decided i might as well get it fixed. It needs to be fixed eventually and i figured I might as well have it done with a chance to have it back together before 2017 Drive 4 Corners and look half way presentable without rust holes through the body.

    Here are some photos after he got it on the lift and took the flares off. The thick paint under the rear tail light and red primer points to a previous incident on the left rear corner. The sunroof drain did not drain outside the car, but rather into the driver floor jack fender wheel which may have been the cause of the rust in that area. If you don't like seeing rusty e30s, avert your eyes!

    Here is the panel I got from the us spec ix set next to my car. It doesn't look that bad, right?


    Yeah, it's pretty bad. Remember that road noise I was talking about? I think I found the problem... 
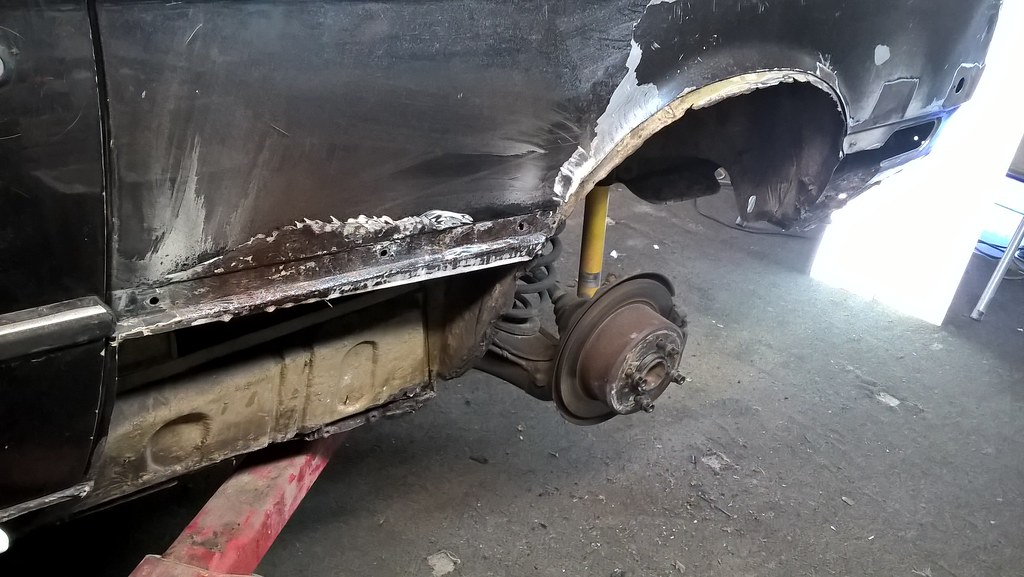
My guy will have to fab up the driver floor jack area from scratch because I do not have a replacement section for that, but luckily that will all be covered by the rear early model iX fender flare. Assuming the repair gets done right, it should be looking good and i'll have the paint matched close enough. It will still look like a beater but if that fixed the rust i will be stoked.


    Stay tuned. should be getting worked on the over the next 2 weeks.

    Leave a comment:


  • downforce22
    replied
    Yeah the undersize tires limit speed, but from this calculator: http://www.apexgarage.com/tech/gear_ratios.shtml
    4500 rpm in 5th puts me at 105 MPH. I'll add some fuel up top after figuring out the autotune from megalog viewer.


    I was looking at Lucifer's Hammer thread and it got me to revisit my engine specs to see how it compares to that one.


    This ended up with the 94.36 mm bore and the 95 mm stroke.

    Yah, I know, some guys have gone out to 95 mm+ on bore diameter. IMHO, this leaves very little material between the cylinder walls. Keep in mind the S38 cylinders are 100 mm center-to-center. Go to a 95 mm hole and you have around 5 mm of material between the bores. So we stayed as thick as we could in the interests of strength and durability.

    Knowing that the B38 blocks have a reputation for less-than-bulletproof strength, we also made te decision to give up some measure of top-end/high rpm output for engine longevity. While the motor can and will certainly turn 7000 rpm, the redline has been set at 6300 rpm.

    Using the formula that max RPM is: 600,000/stroke length in mm, we get 600,000/95 = or 6315 rpm. Keep in mind this was built as an endurance motor, and I fully expect to see 120,000 miles (200,000 km) out of it.

    In the same vein, 95 mm is probably on the long side for stroke. Rod length is 141 mm, so the rod-to-stroke ratio is 1.48.

    The Big six (M30/S38) has 100 mm cylinder spacing, the M20/S50/S54 has 91 mm spacing.
    With a 94.36 mm bore that leave 5.64 mm wall thickness on Lucifer's Hammer.
    Lucifer's hammer has a Rod length of 141 mm, so the rod-to-stroke ratio is 1.48.

    I'm running 86 mm bore with a 5 mm wall thickness on the M20B31. I'm running the 89.6mm m54b30/s52 crank. Using his formula 600,000/stroke length in mm = 6696 RPM rev limit based on crank stroke. My engine has rod length 135 mm, for a rod to stroke ratio of 1.506. Not sure rod ratio is really all that important.

    I've got my revlimiter set to 6300 but the engine only makes more power up high due to boost and hits peak torque near 4500 rpm. I'll have to try another datalog. Revving higher on a stroker engine like this doesn't really gain much when you have torque down low that you aren't taking advantage of. Obviously this engine isn't a 'high hp' car.
    Last edited by downforce22; 06-12-2017, 02:54 PM.

    Leave a comment:

Working...