-
Well, the Bring a Trailer auction has ended and the car will be going to its new home in short order. Thanks to everyone who's followed this build, I'm hoping the new owner will be involved in this community in some capacity and I'll make sure to direct him here. It's bittersweet, but rest assured you haven't seen the end of IronJoe ;)
I couldn't share these before the auction went live, but here are some of my favorite photos from the shoot:
 L1001208 by IronJoeT16S, on Flickr
 L1001199 by IronJoeT16S, on Flickr
 L1001155 by IronJoeT16S, on Flickr
 L1001151 by IronJoeT16S, on Flickr
 L1001138 by IronJoeT16S, on Flickr
Leave a comment:
-
Flyboy,
I’m not a Facebook member either. Just click on link & you can still view the juicy goodness..!
CAPP :-)Leave a comment:
-

Check out the metalwork pix at this link.
Leave a comment:
-
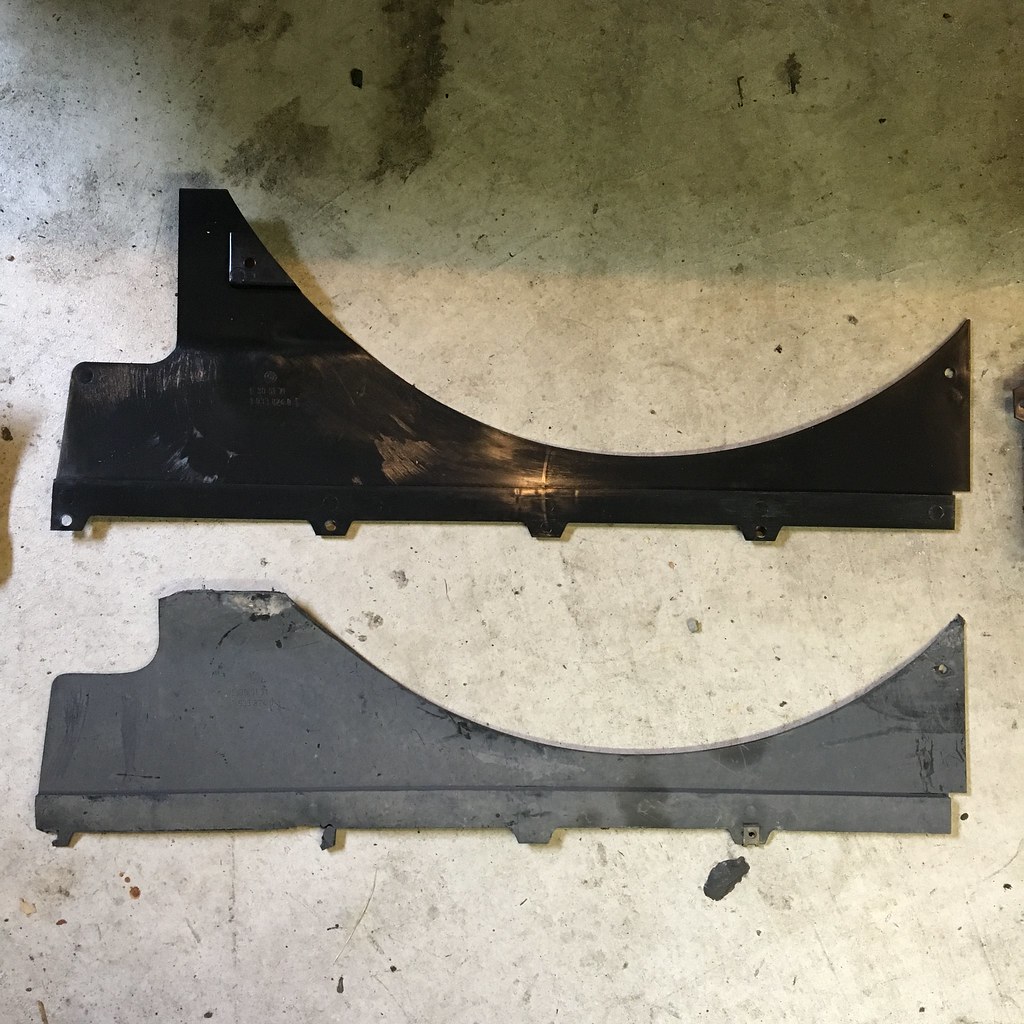
The car looks awesome! By the way, is there any chance you might have photos of attaching these? I'm interested in the shape and position of brackets at the spare wheel well and the attachment to rear bumber. Am I correct when assuming the plastic plates attach to the bumber with plastic rivets and kind of metal washers? Is there some shape in the rear bumber to keep the metal washers in place? I'm adapting these plates for M-tech 1 rear skirt and the spare part catalogue is not very exact on which fastener goes where.Last edited by Skarpa; 07-12-2018, 09:29 AM.Leave a comment:
-
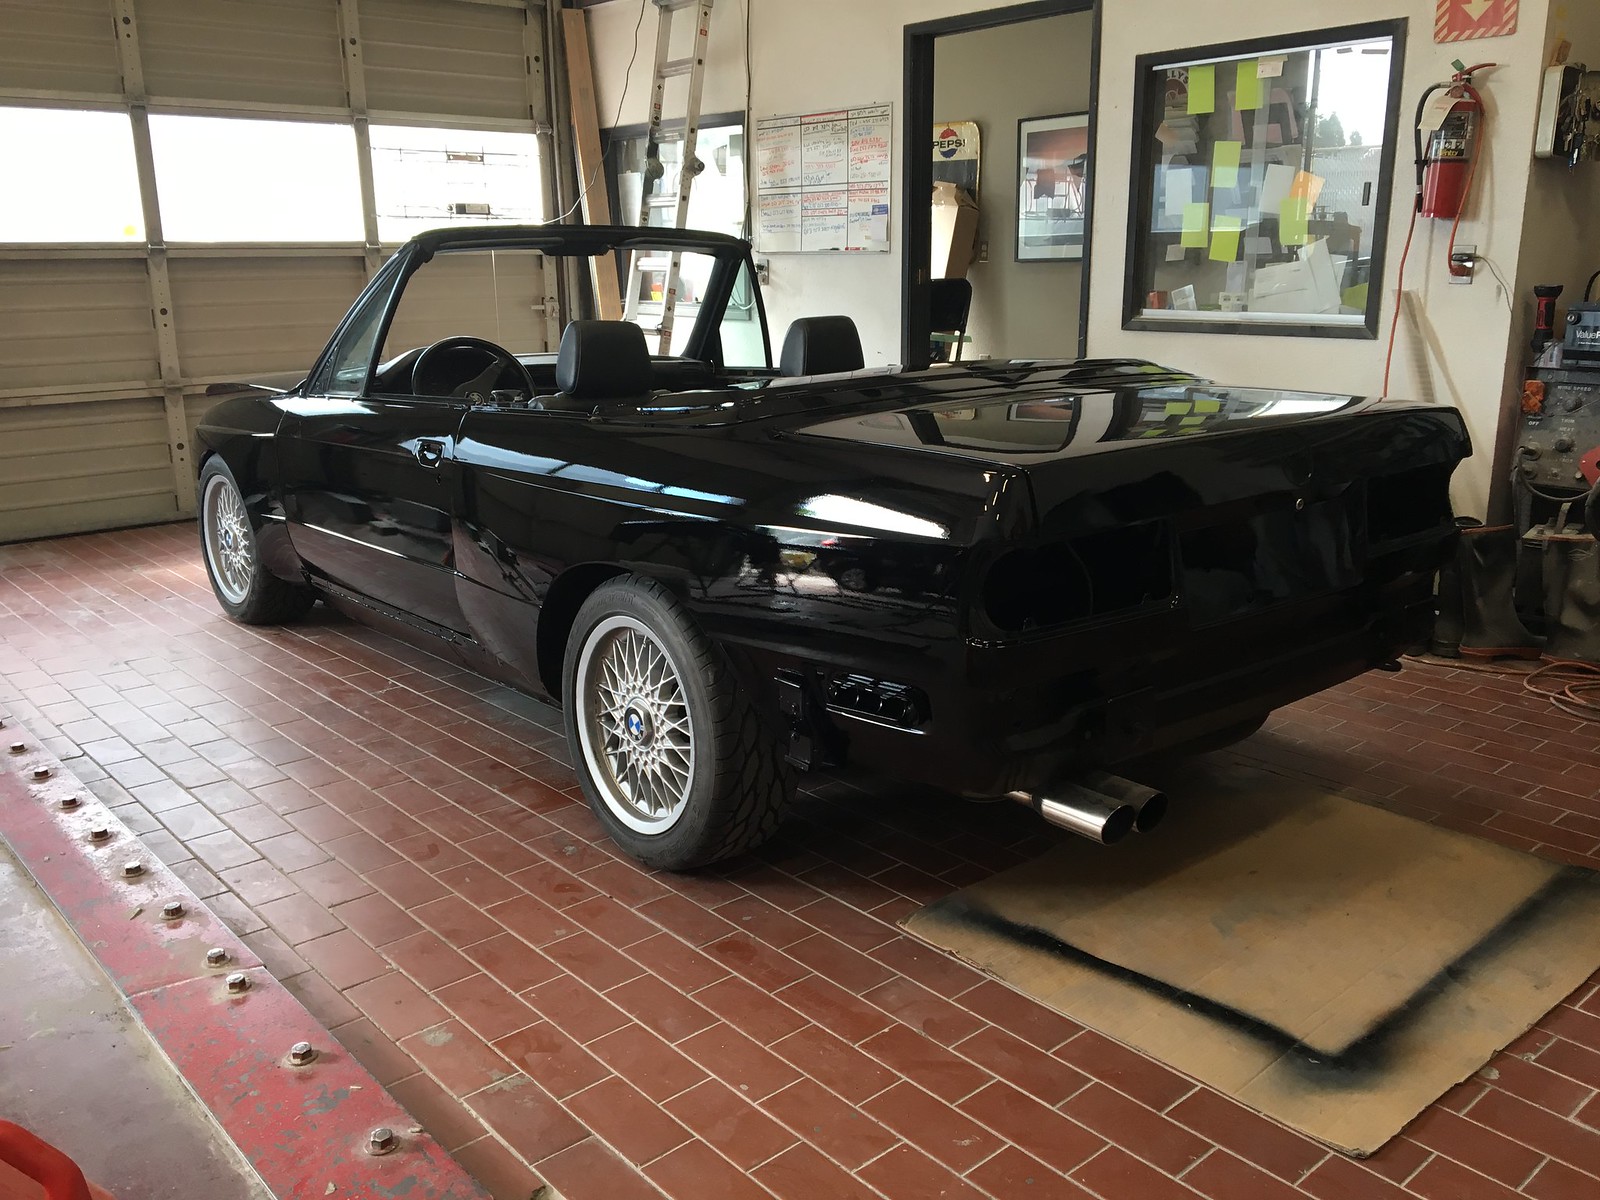
Good catch UNHCLL, the entire body needs a wet sand & polish to get that "glass" effect. We're waiting a bit longer before digging into that part of the project. It was fresh out of the booth a matter of days before the show :p
The car definitely isn't "done", the picnic was a good rollout but there's a lot of work left. I still have some wiring to finish, A/C to install, and a new soft top to put on (no one was aware that the car was a roadster at the picnic!)
Many little things to do before I can consider it "done" but having a deadline was a good way to light a fire under me to finish.
You know, I actually bought both red and black bumper tape for this car, and I think I'm going to leave it off completely. I've seen M3 cabriolets that were delivered without it and the channel in the bumper was left body color which I quite like (I'm not sure if this was an option, a region thing, or what. There's so little information on these cars and I haven't found a definitive answer.)Leave a comment:
-
Nice work!
I know you had a deadline to achieve, but please make sure the body shop is going to finish the job now that the Picnic has come and gone. That body needs a serious wetsand and polish to reflect (no pun intended) all the work you've put in to it!
Enjoy it for many years!!!Leave a comment:
-
So stoked for you man! I happy everything came together and everyone at the picnic made notice your hard work. Enjoy it. I was serious about all of us getting together and doing a bbq or reviving the Joeys meat for a one night affair.Leave a comment:
-
Stunning
and congrats on all that you have been through.
I am sure, you will dial a few more things in or simply change things up to refresh the look down the road as the car needs nothing!
Wheels with a bit more poke would set the stance off more down the road. I mean those flares are just begging to be filled in a touch.
Regardless, you are living the dream. That is one helleva car!Leave a comment:
-
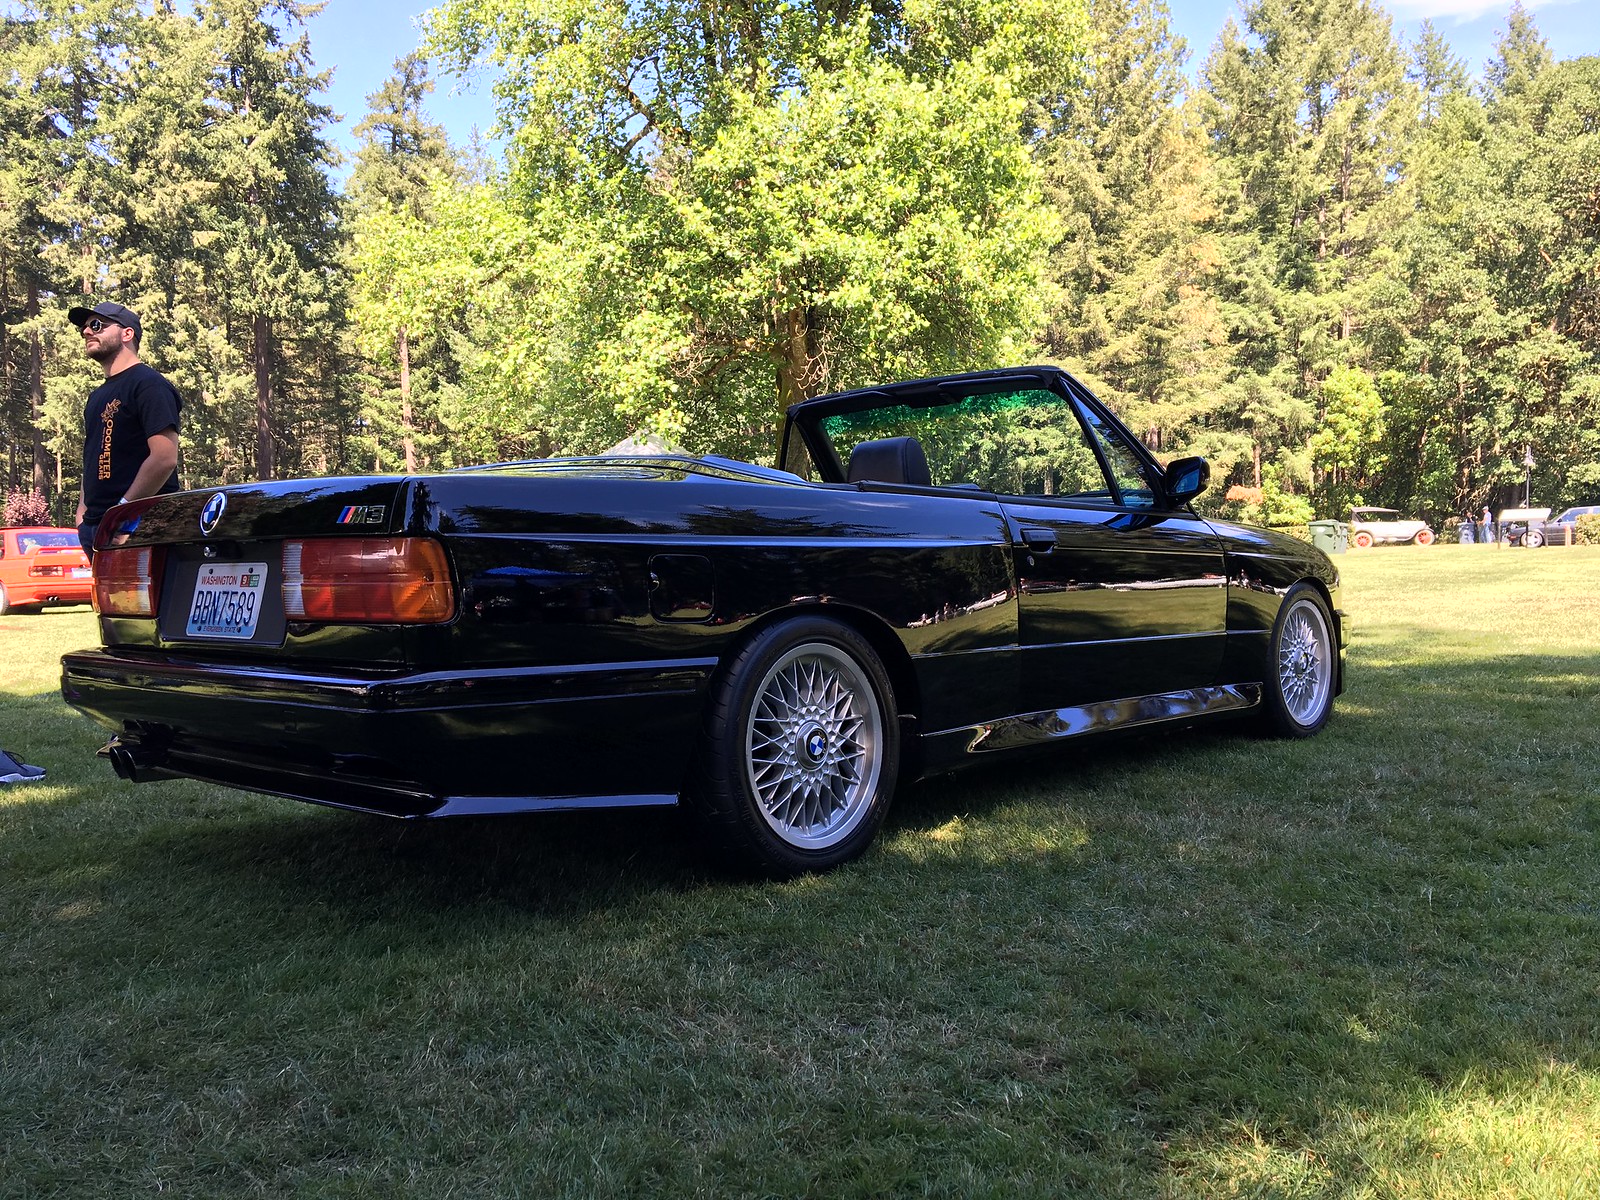
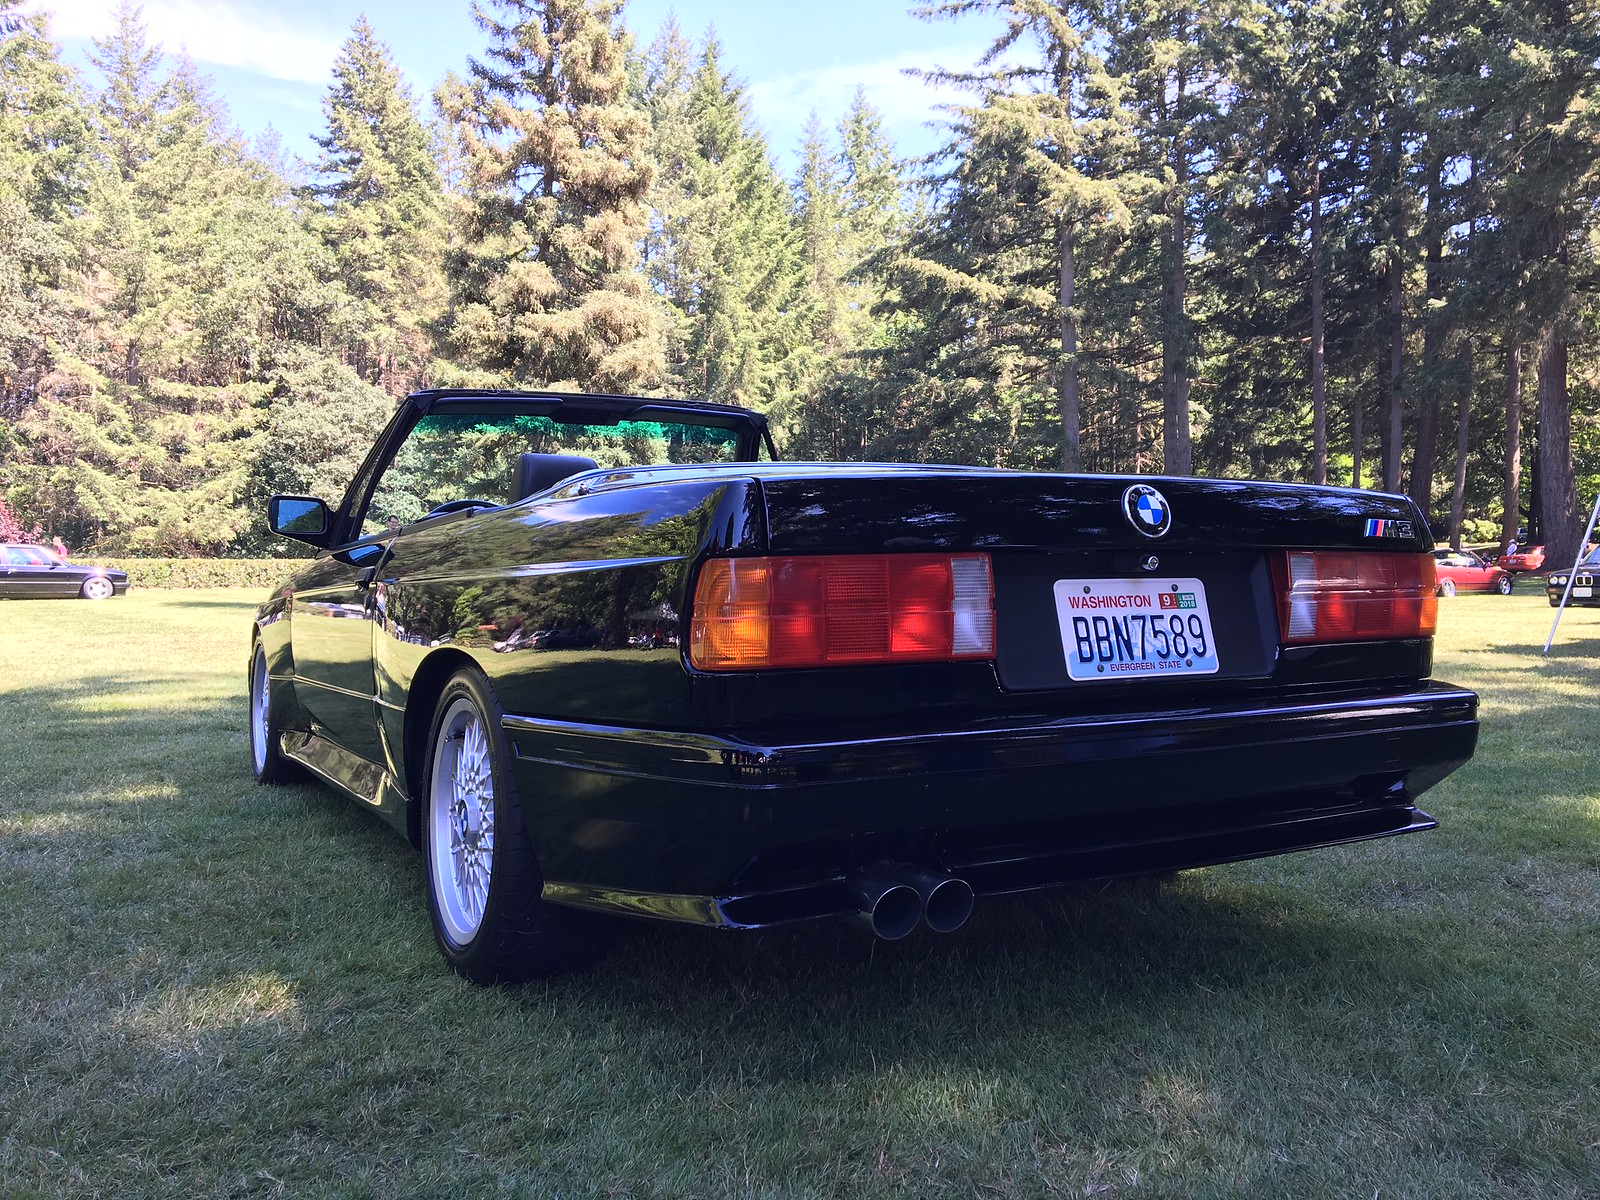
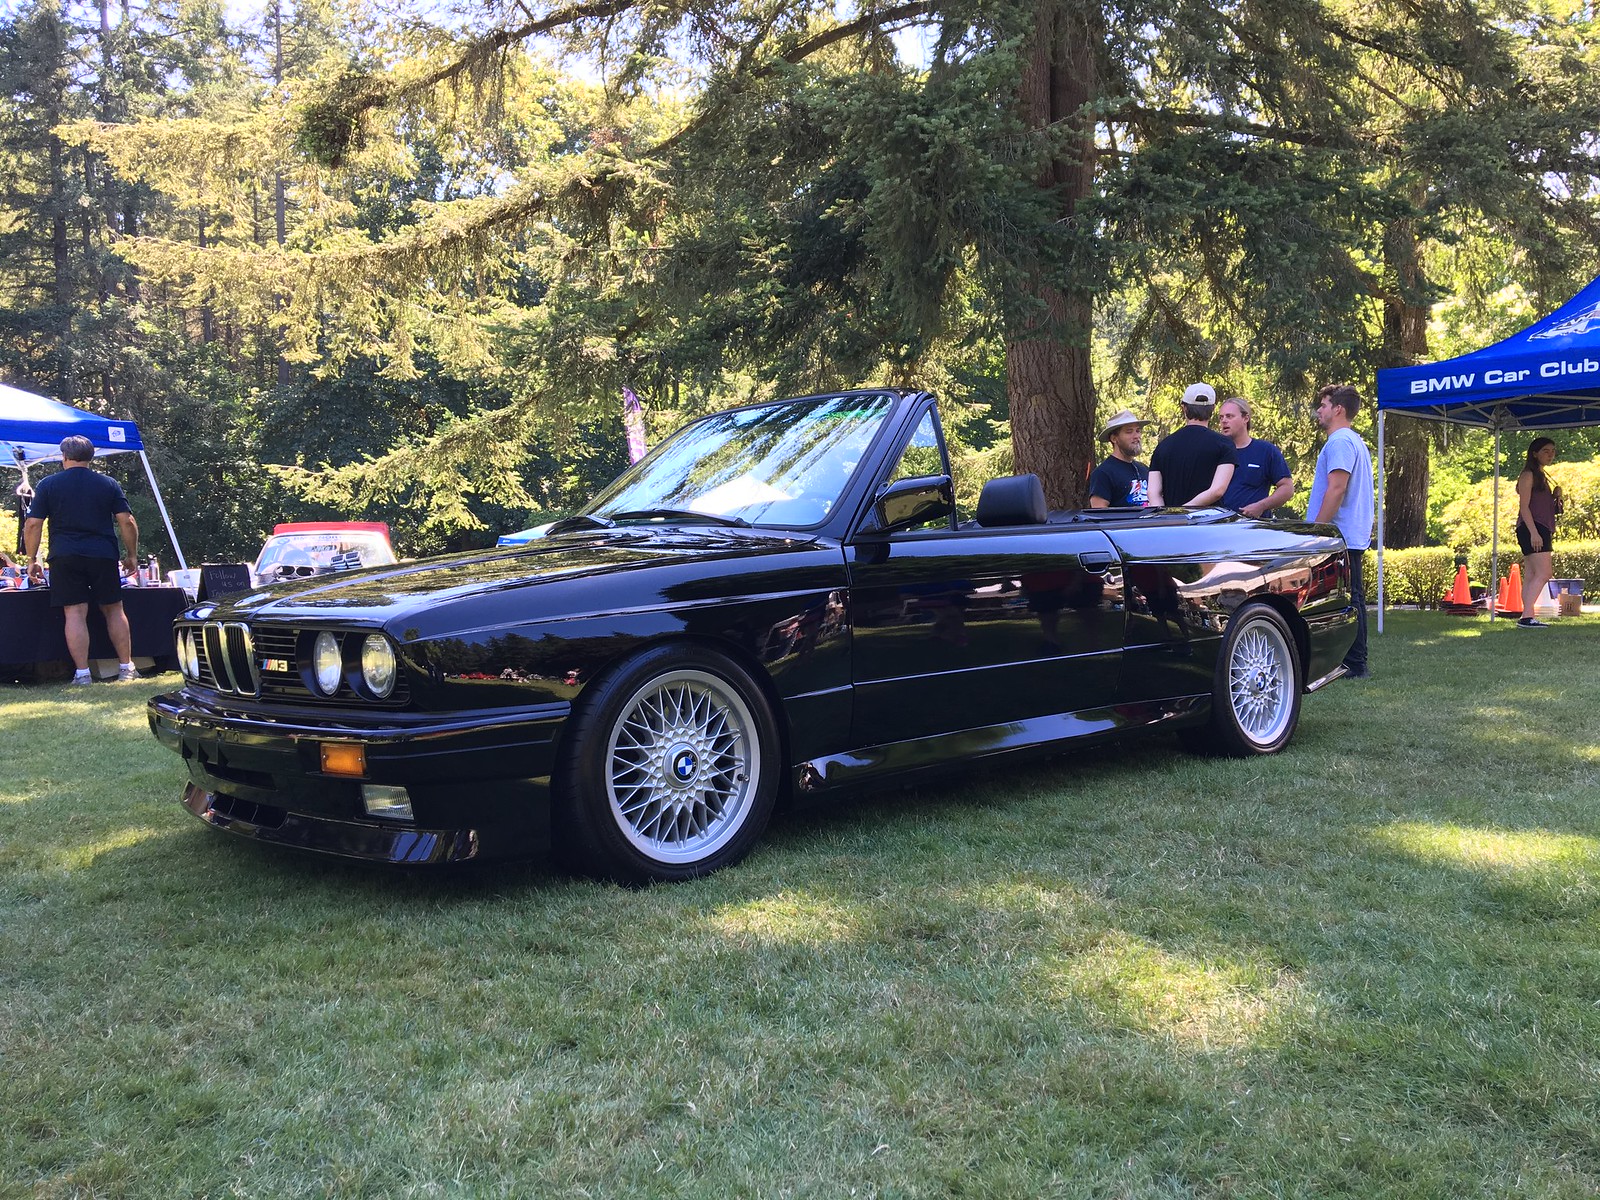
Hey gang, yes it's true! We finished the car up *just* in the nick of time and made it to the picnic. There were several setbacks and misadventures along the way, so I was really too busy to post updates and pictures until now.
Here's the recap of the week before the picnic:
Tuesday:
I get the call that the car is in color!
Fresh out of the booth:
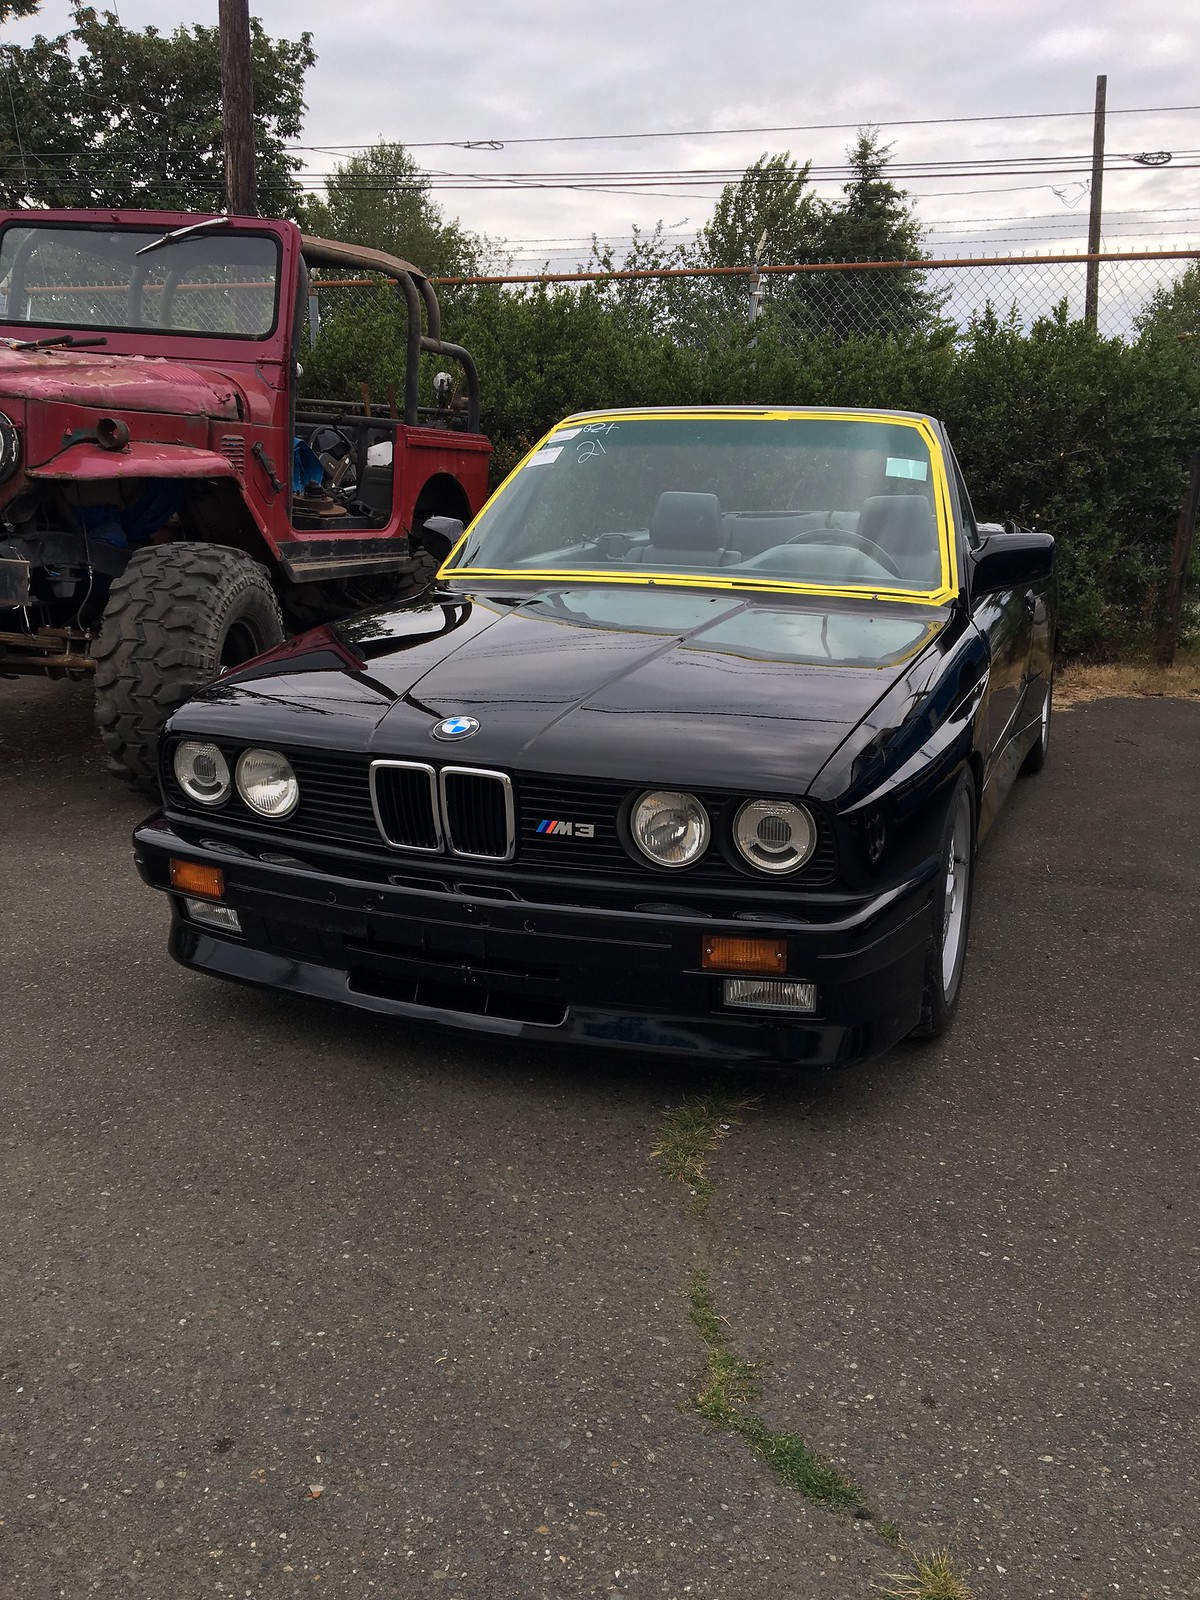
Which leads to a problem - the car won't start.
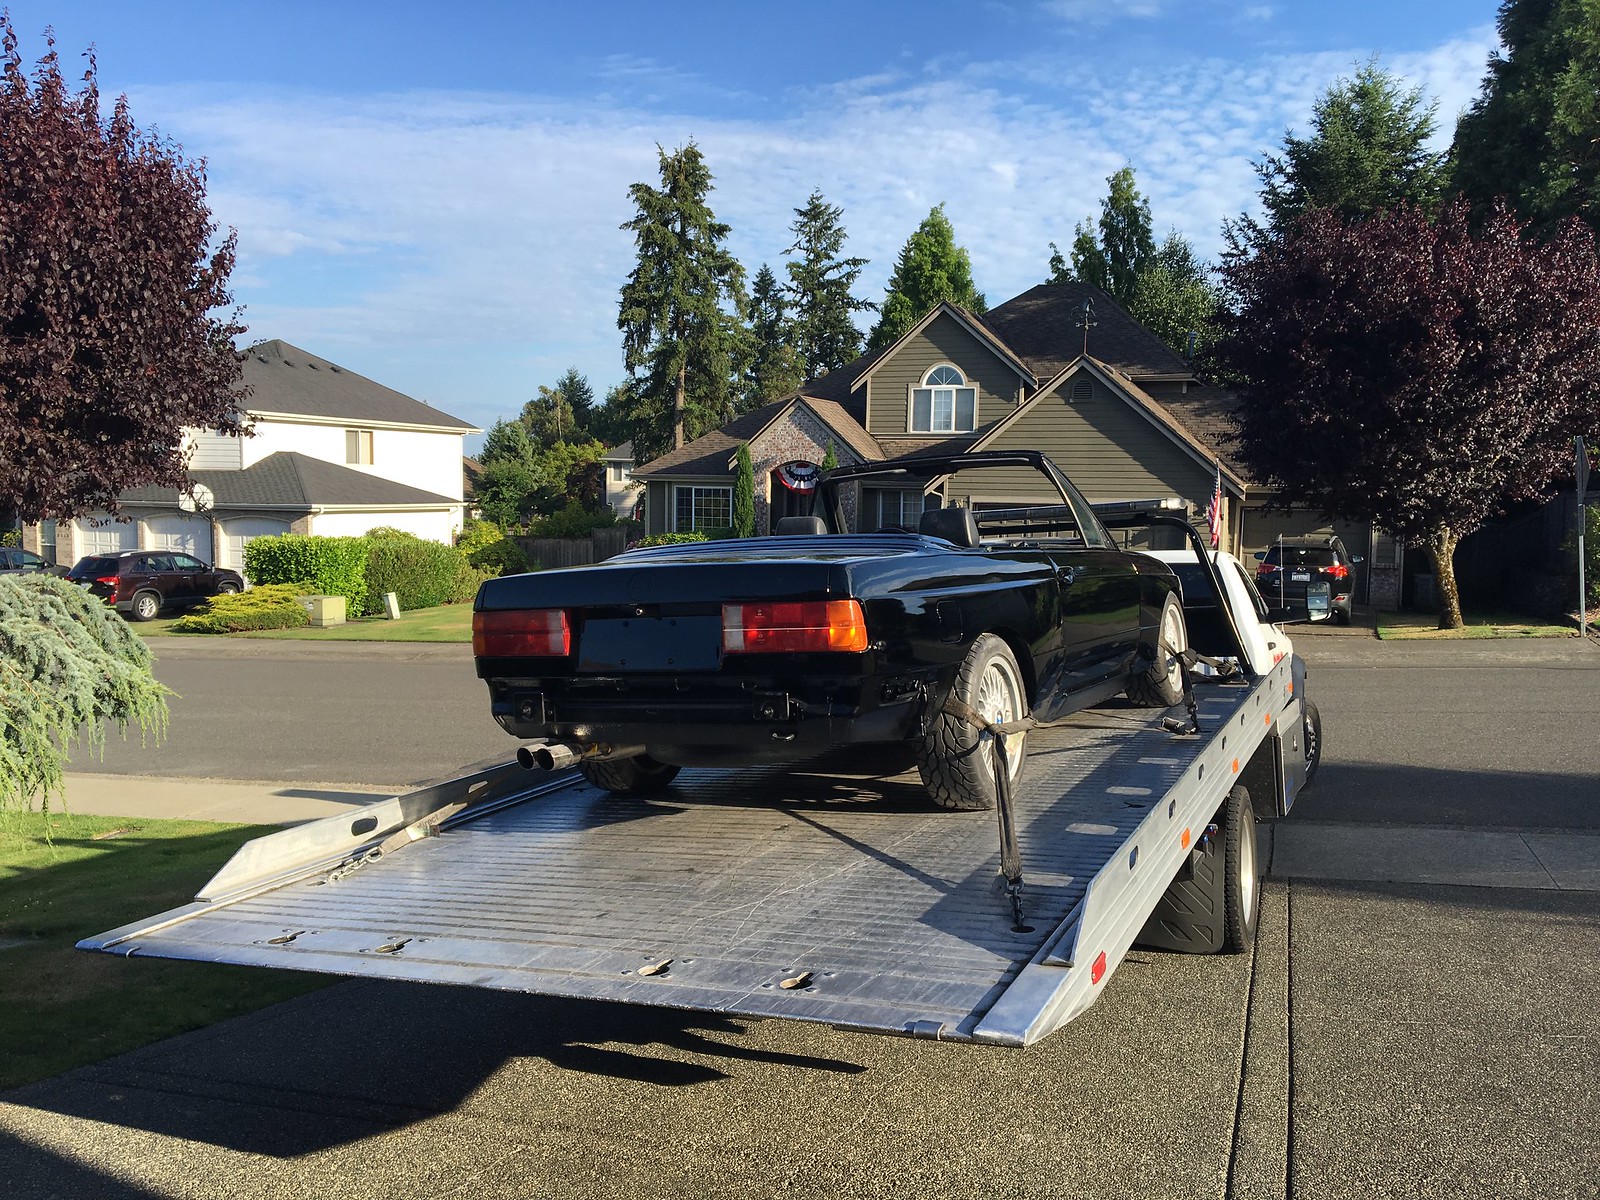
I spend the afternoon at his shop trying to diagnose this mystery no-start condition. I come to the conclusion that there's spark but no fuel. We end up getting the car towed home as I don't have any tools there to work on it.
After going through the car, around midnight I get it running (poorly) by jumping the fuel pump relay and building a ton of pressure in the system before cranking it. After diagnosing with Austin!, we think the fuel pump is on its way out and just happened to die while at the shop.
Luckily I had already planned three days of vacation time to button up the car.
Coming home on the flatbed:
Wednesday:[/B]
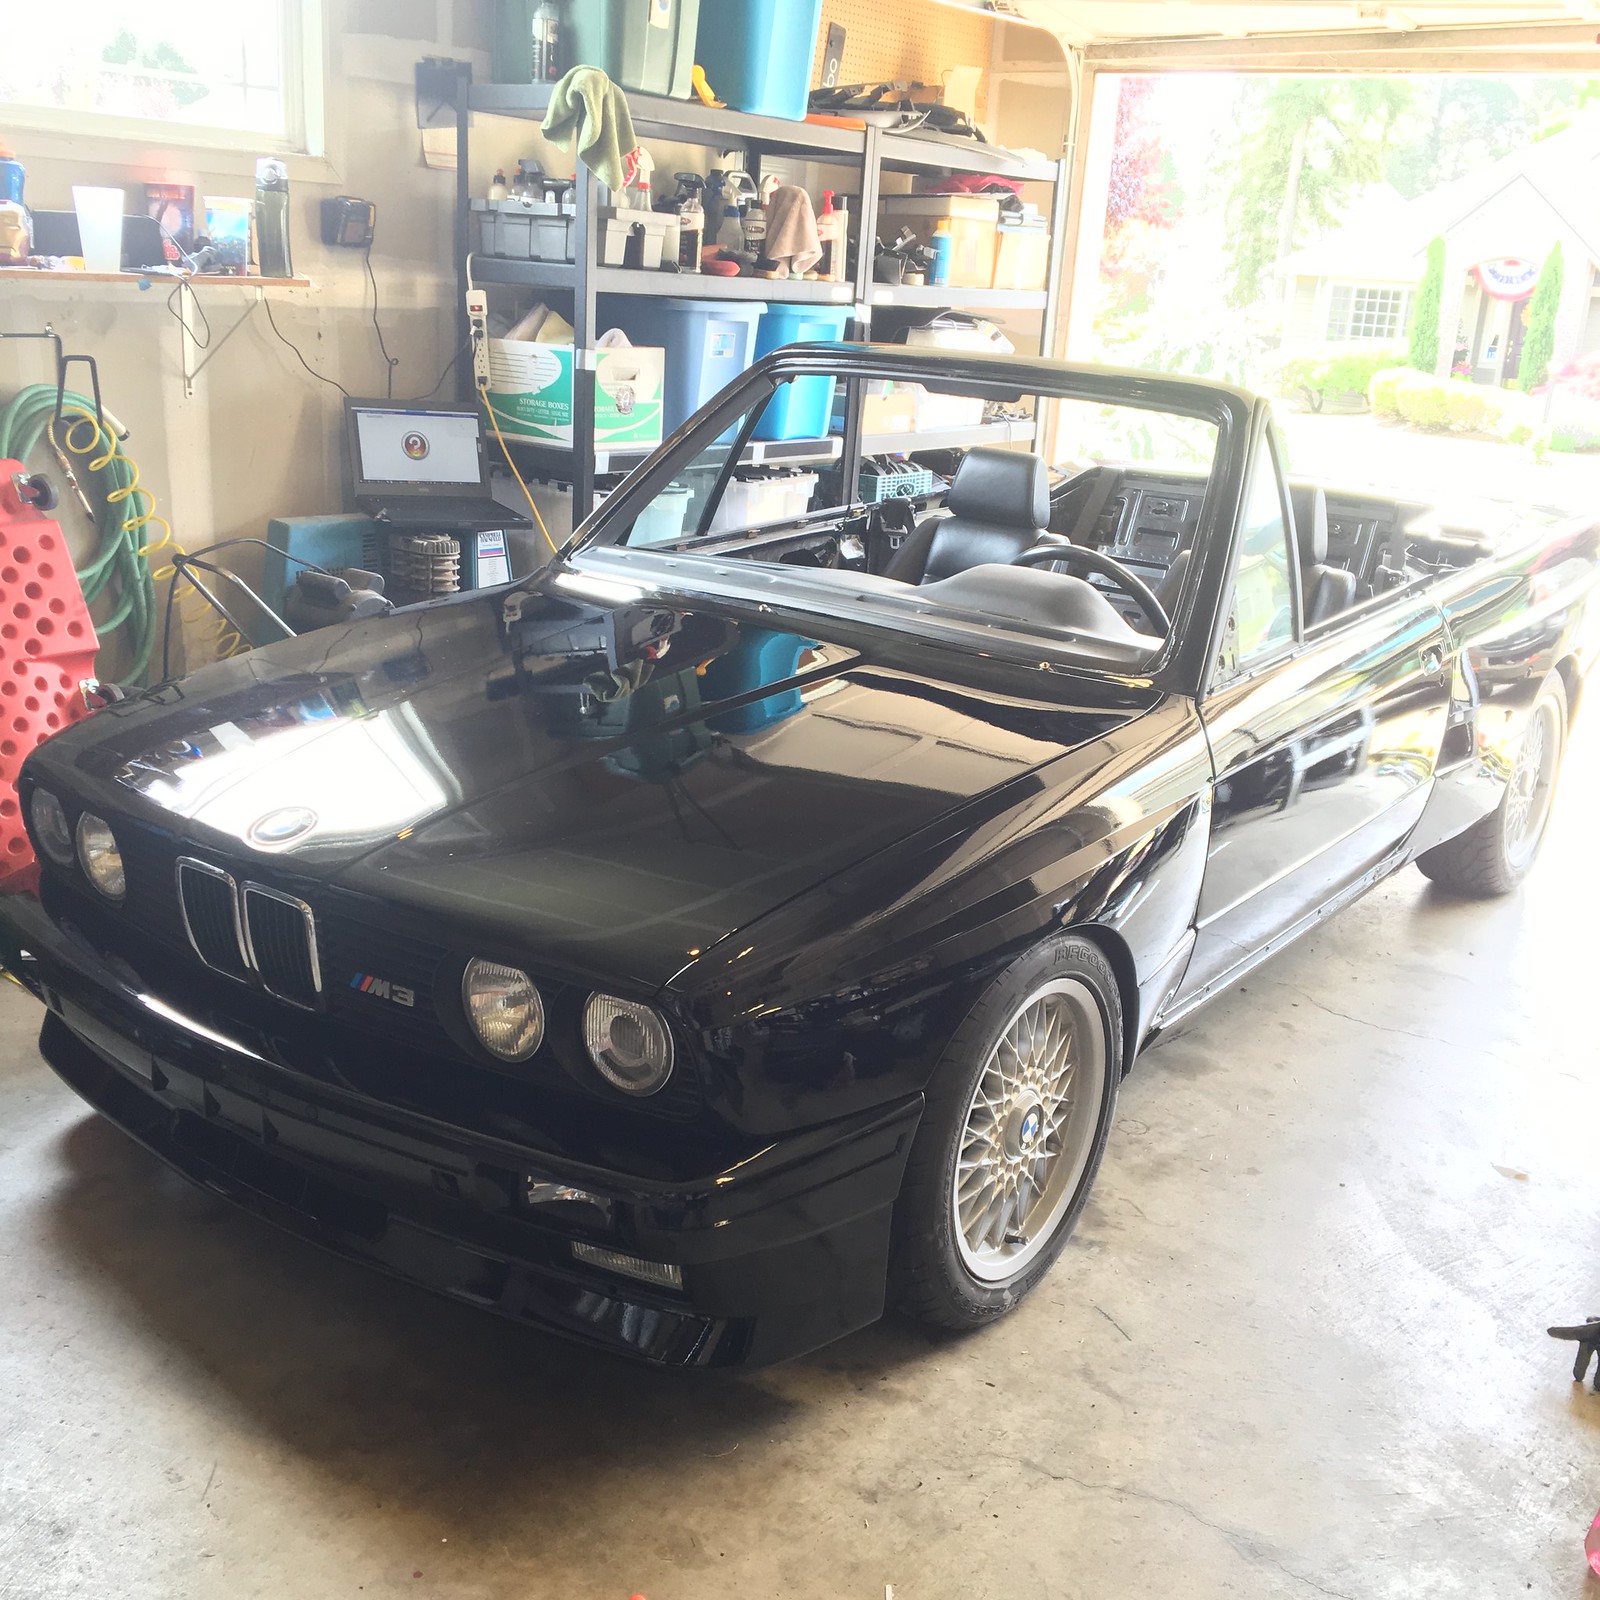
I started the day by bolting up the front & rear bumpers and side skirts. The skirts attach to the bottom of the body very differently than an M3 coupe, and use specific clips that were a little tricky. At this point it's looking like a car again. I also used all new undertray plastic which was really cool to see, as my Henna car had lost some of that and I really liked having every piece on this car.
Bumpers on:
I scramble to find an OEM fuel pump locally, and eventually score. I swap the fuel pump and throw in a new filter just to be on the safe side. It appeared to be running well at this point.
Thursday:
I spent the majority of the day getting the interior put back together. This included:
- Major cleaning due to all the dust it had collected
- Installed windows
- Door gaskets
- Door panels
- Rear seats
- Glove box
- Speaker covers
- Door sills
[FONT=Verdana][SIZE=2]This took most of the day.
Friday:
This was where things hit a snag - windshield replacement.
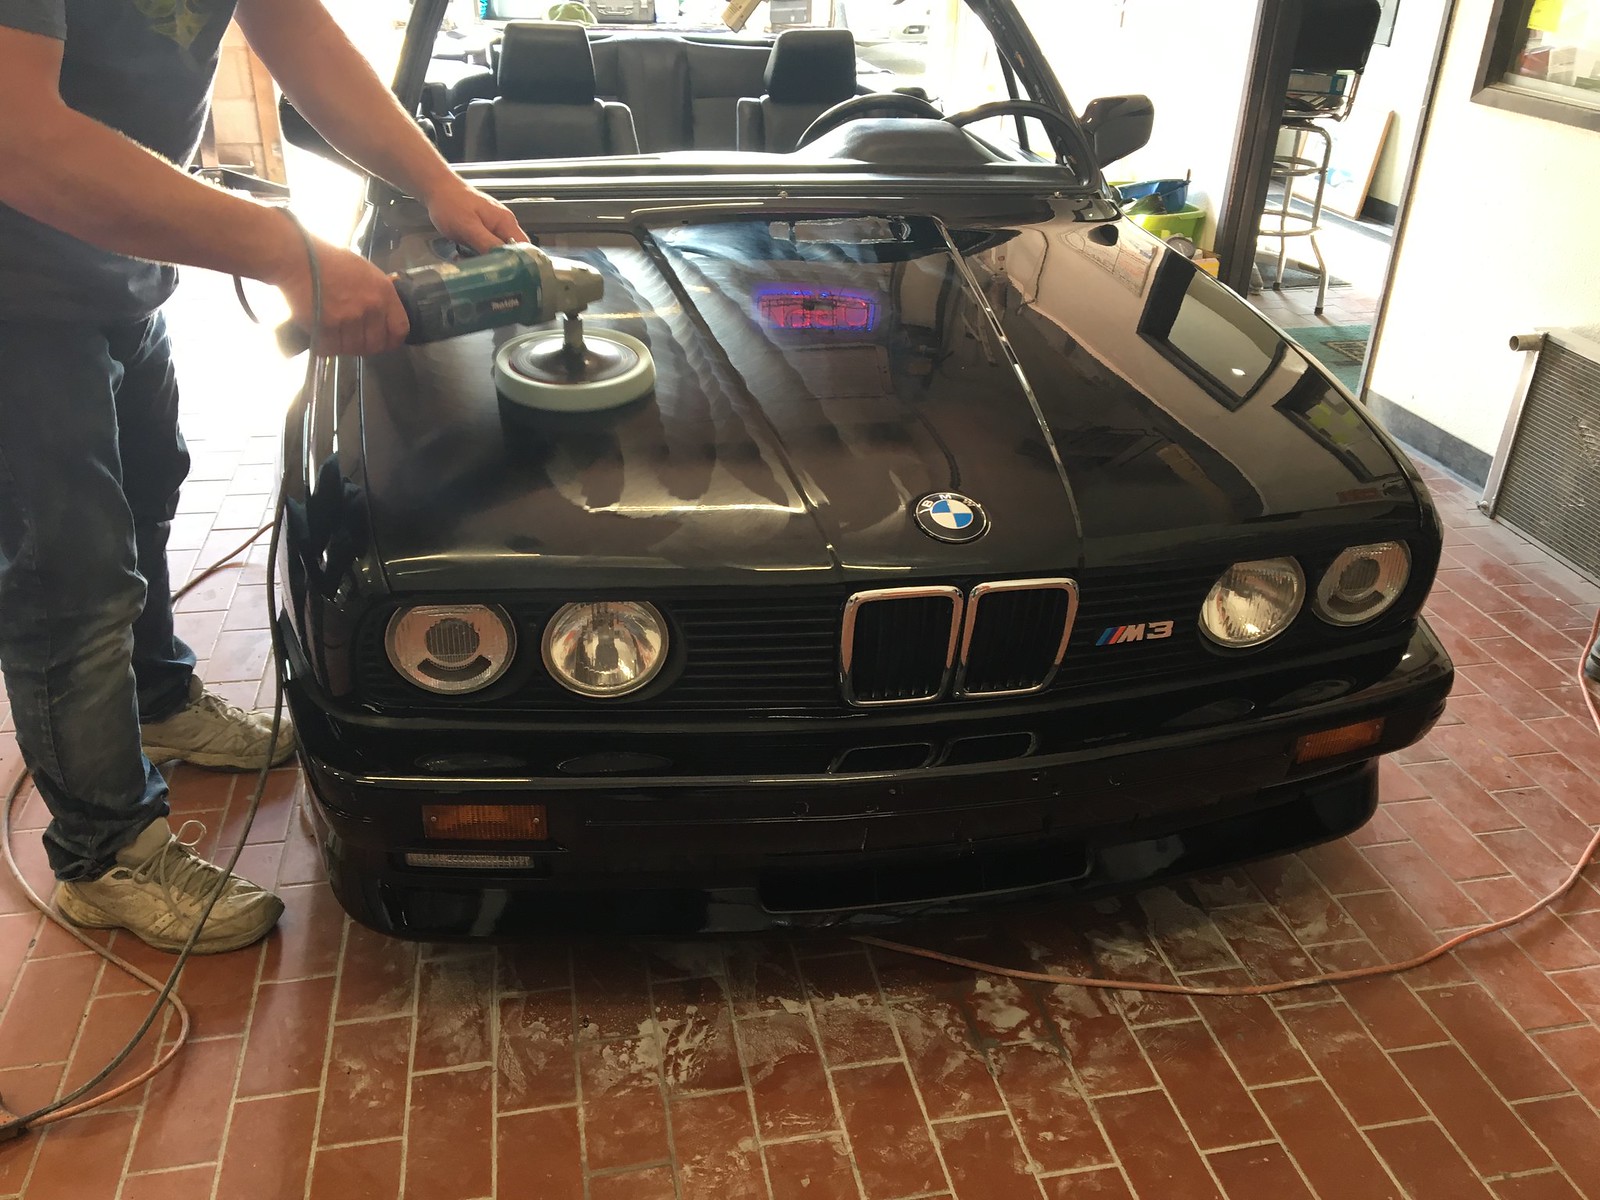
Mike, the shop owner carefully smoothing out some of the imperfections:
This turned out to be a huge cluster. The person who usually did these sort of jobs was away on guard duty, so another installer was sent who had never done this sort of window job before (new windshields are much different). It took hours to get the window gasket in (with me helping) and once we finally got the glass in, he didn’t have a lock strip tool. We attempted to install the lock strip without one but it wasn't happening. I ended up driving home with the glass taped in with the plan to try again tomorrow with the correct tool.
Not how this was supposed to go:
Saturday:
Getting down to the wire! The installer came to my house with the lock strip installer tool, and it still took us 6 hours and two tries to get it in. At around midnight Saturday we get the lock strip seated properly. I still have a few items left to install (rear wheel arch plastics, new emblems) at this point.
Here's how she sat around 12:30 AM day of show:

Sunday:
Everything was finished except for the rear wheel arch plastics (that bridge the gap between the rear bumper and quarter panel). I had about 30 minutes before I had to leave, so what the heck - I pulled the rear wheels off and drilled the holes to mount them! With that finally complete, I headed out for the show.
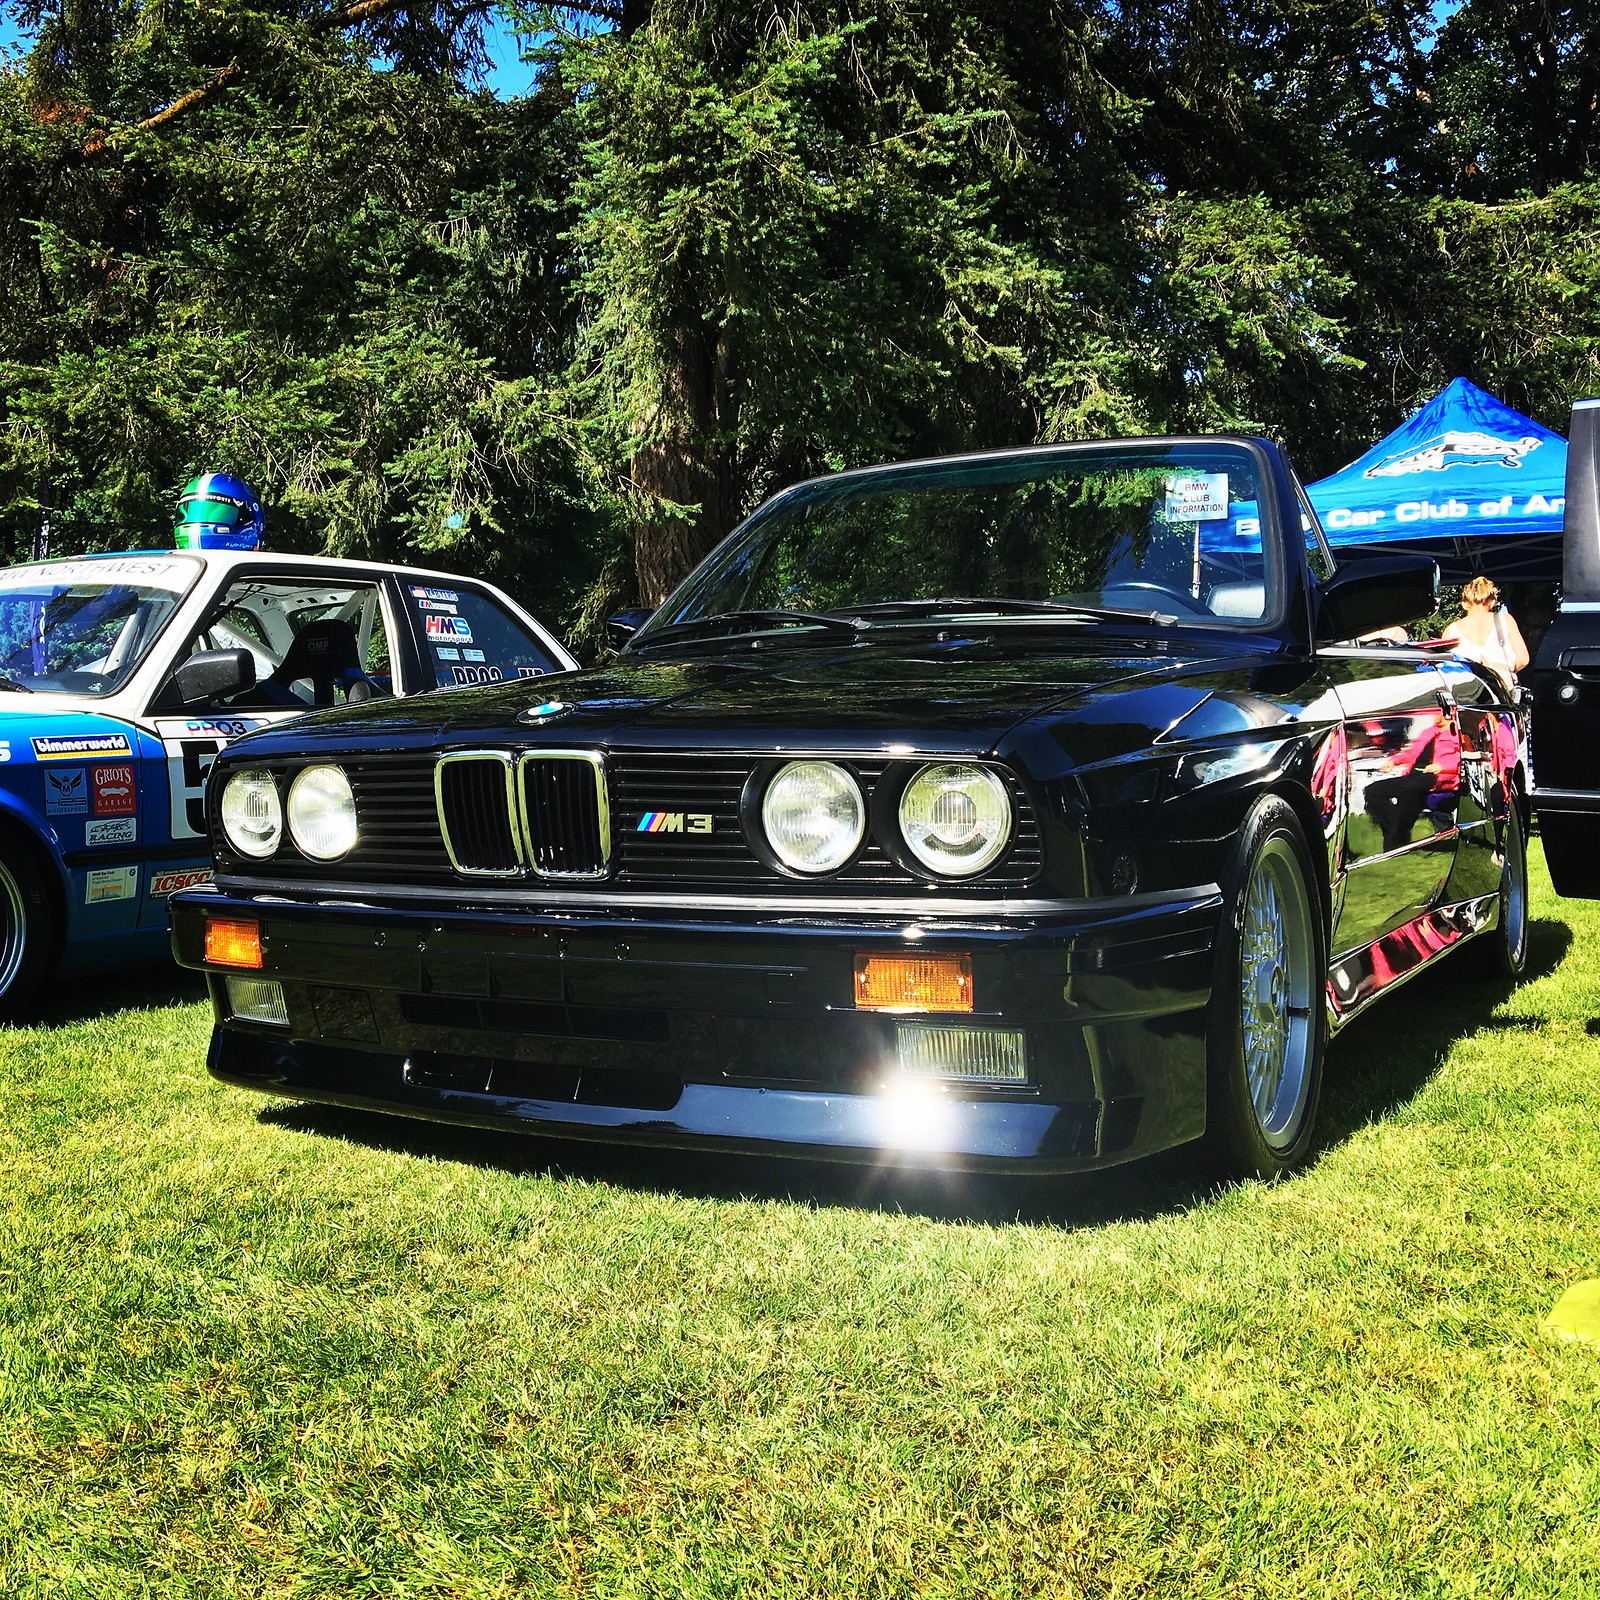
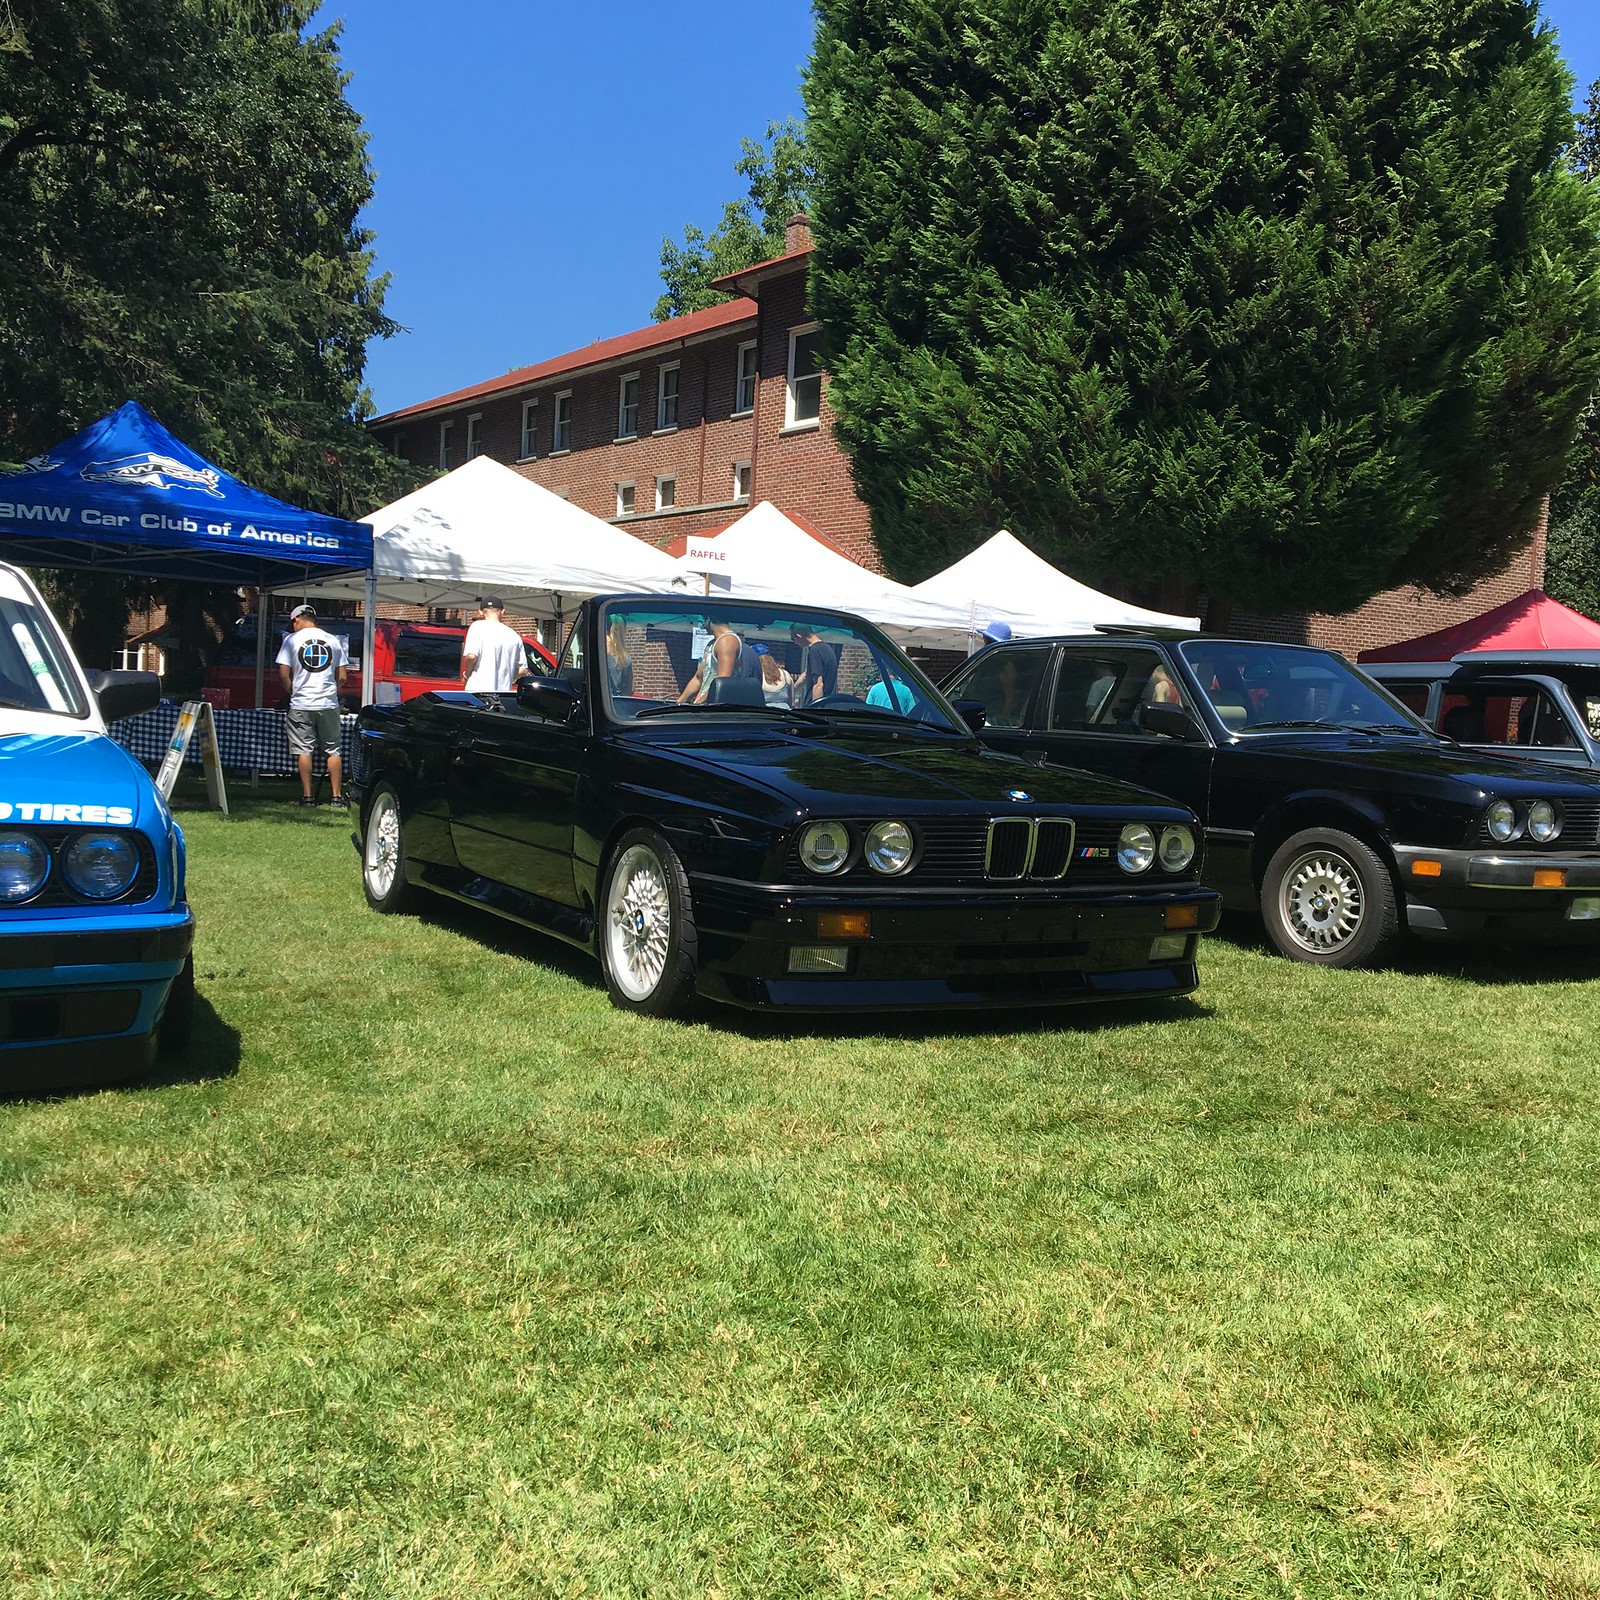
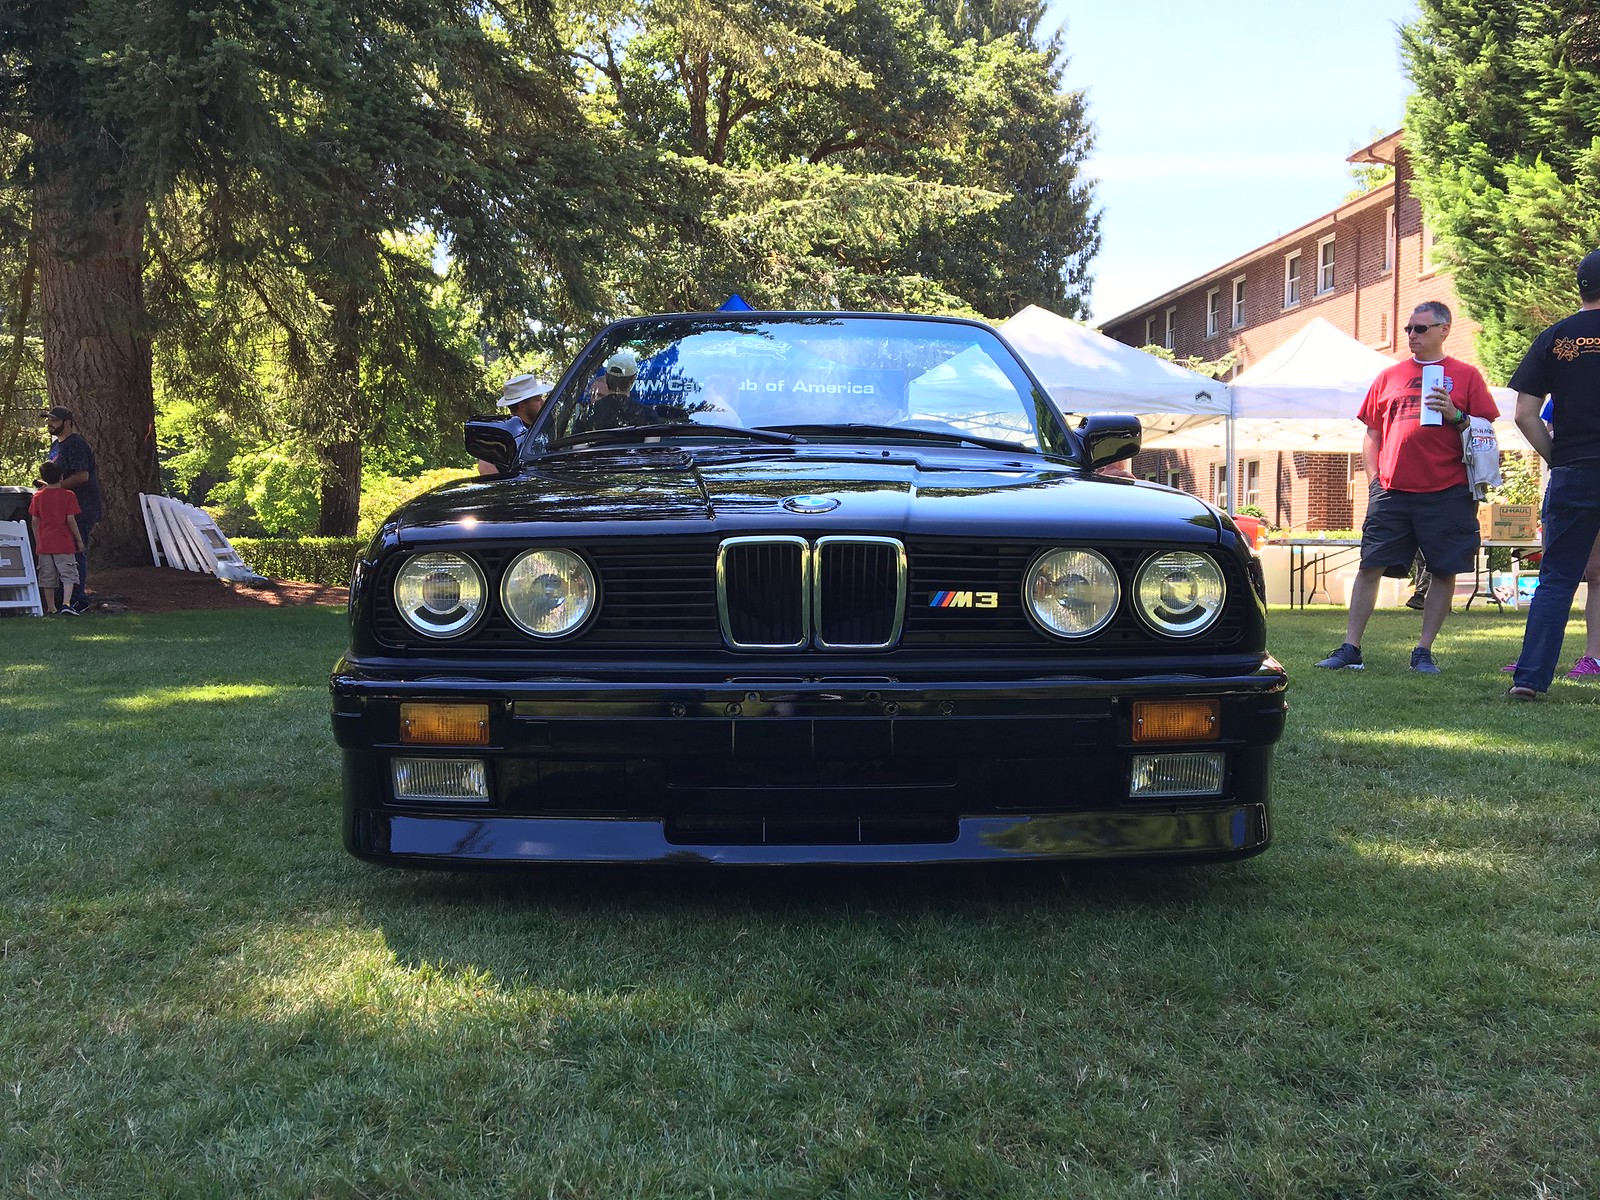
Here it is, sitting in the Featured Showcase of the 2018 E30 Picnic. On one side of me is a brilliantly executed PRO3 race car, and on the other is one of the first E30s ever built (a euro delivery car and the original owner!) And down the line was Adam Nonis' amazing Volvo Amazon bodied E30! Needless to say I was in good company :)
Being in the showcase was an honor. I got a few minutes with the mic at the end of the show to share my story, and shared some of the now-infamous Henna accident photos along with the build process. I'm so grateful to Lance and all the organizers of the picnic for giving me the opportunity to share and thank everyone!
Sorry for the potato photos but hopefully some folks better than me got some nice pics!
 Last edited by IronJoe; 07-15-2019, 10:24 AM.
Leave a comment:


Leave a comment: