
Looking good! Which gauges are those? And the shifts lights are super cool
Sent from my SM-G920T using Tapatalk
-
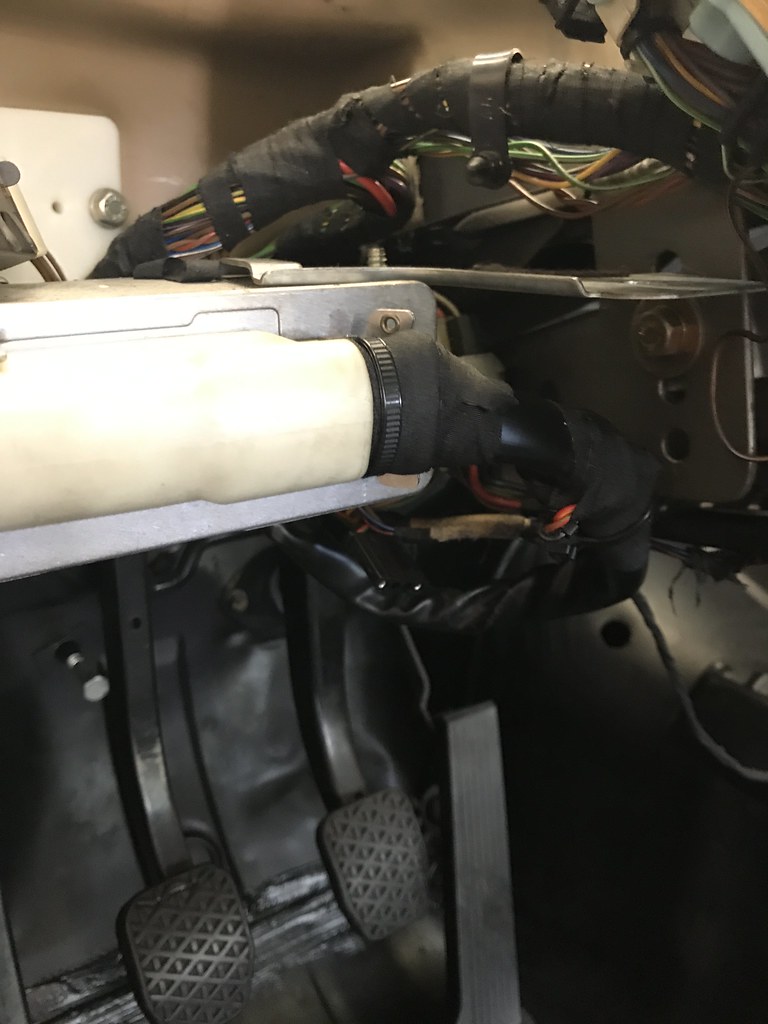
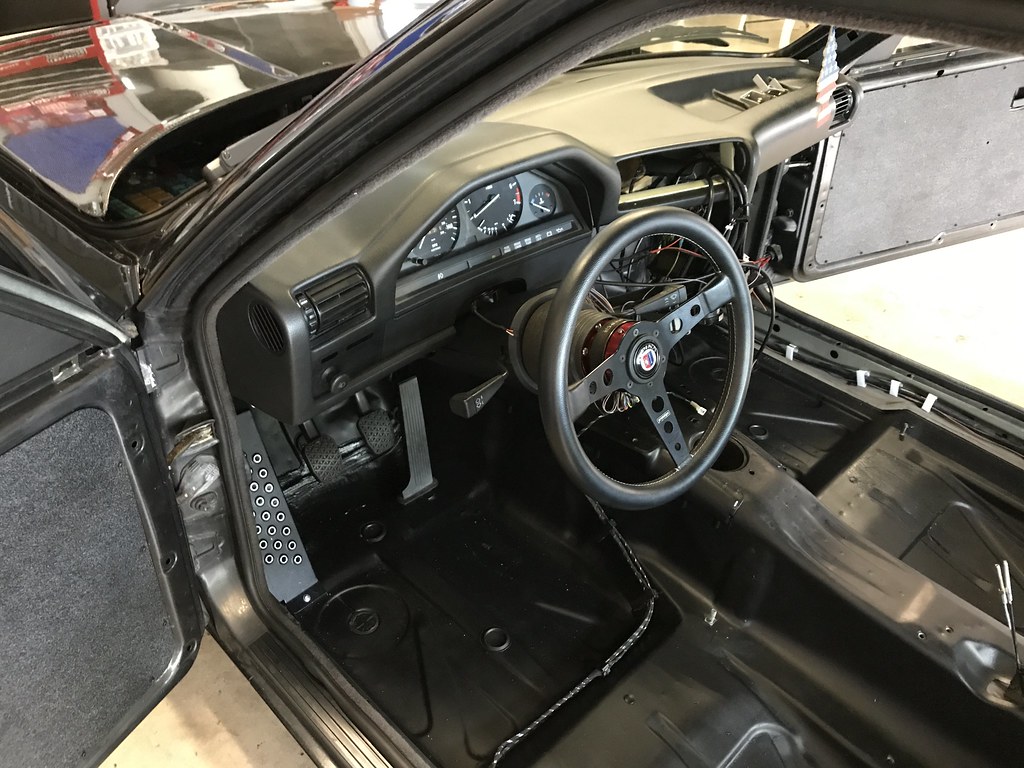
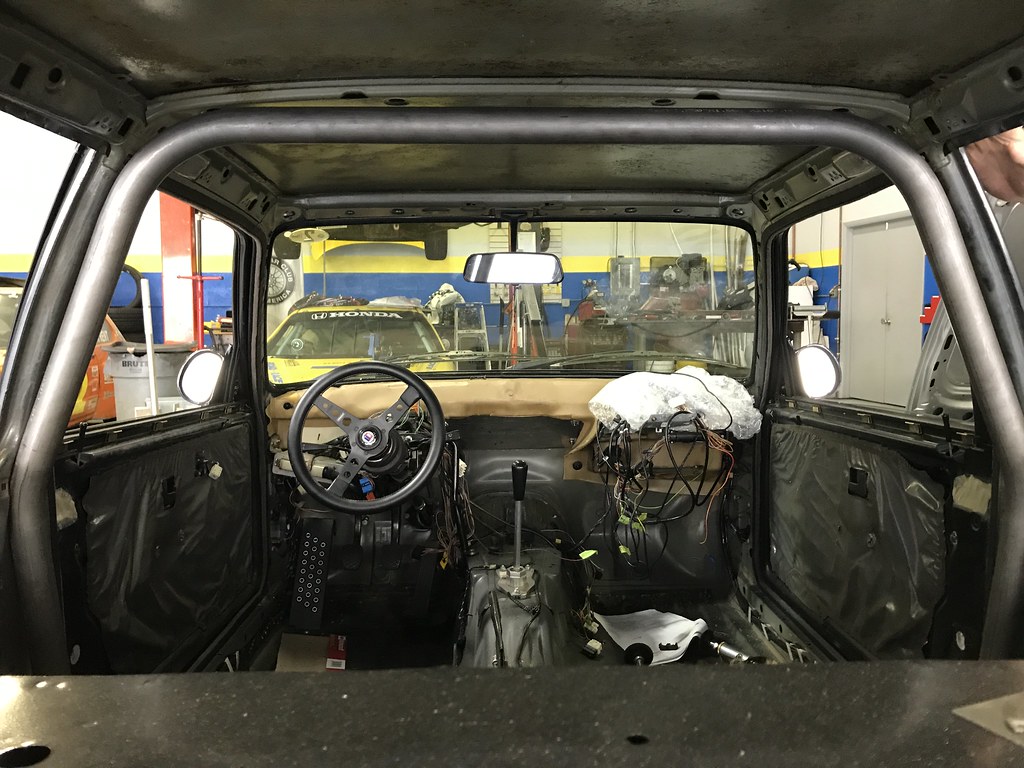
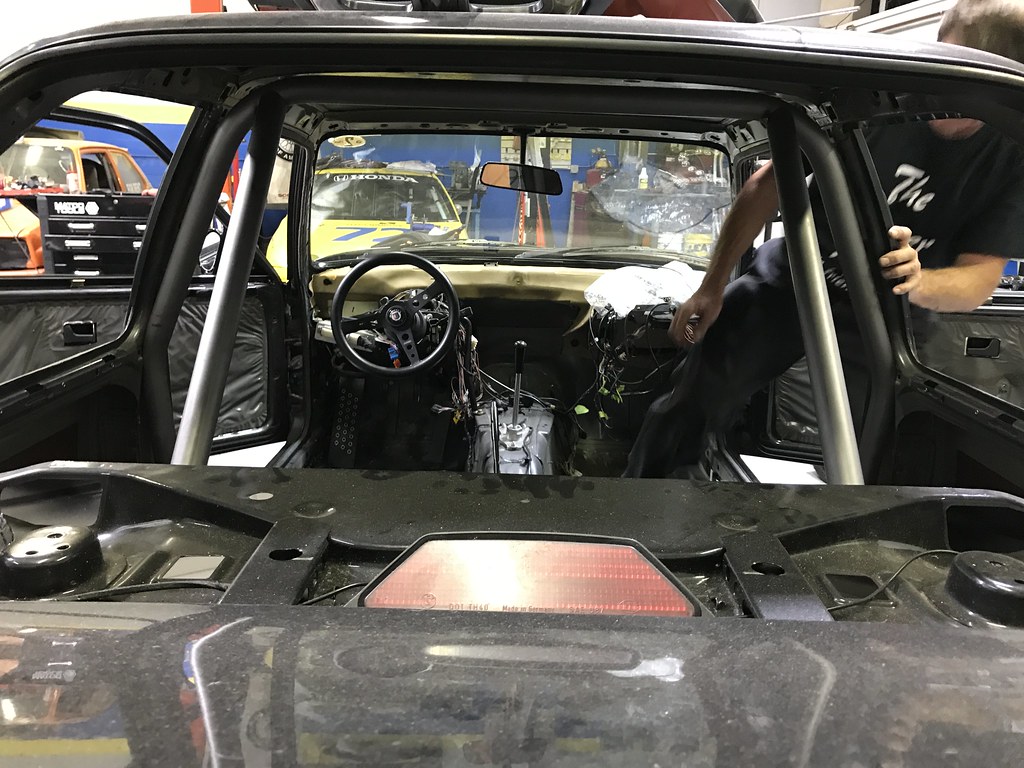
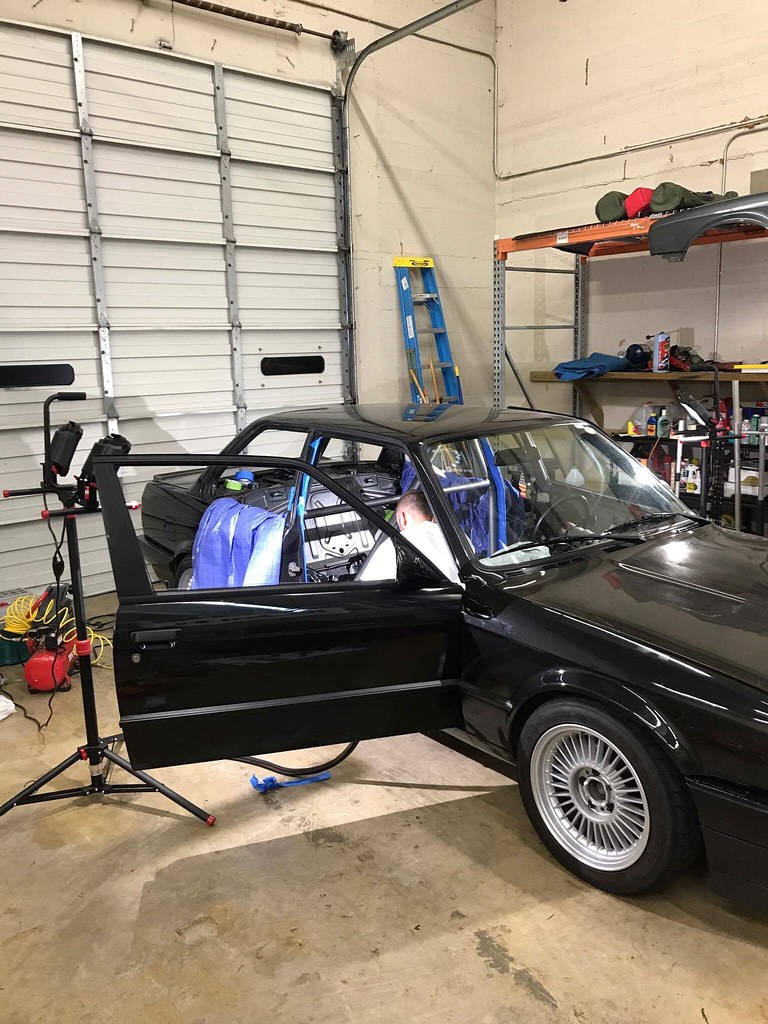
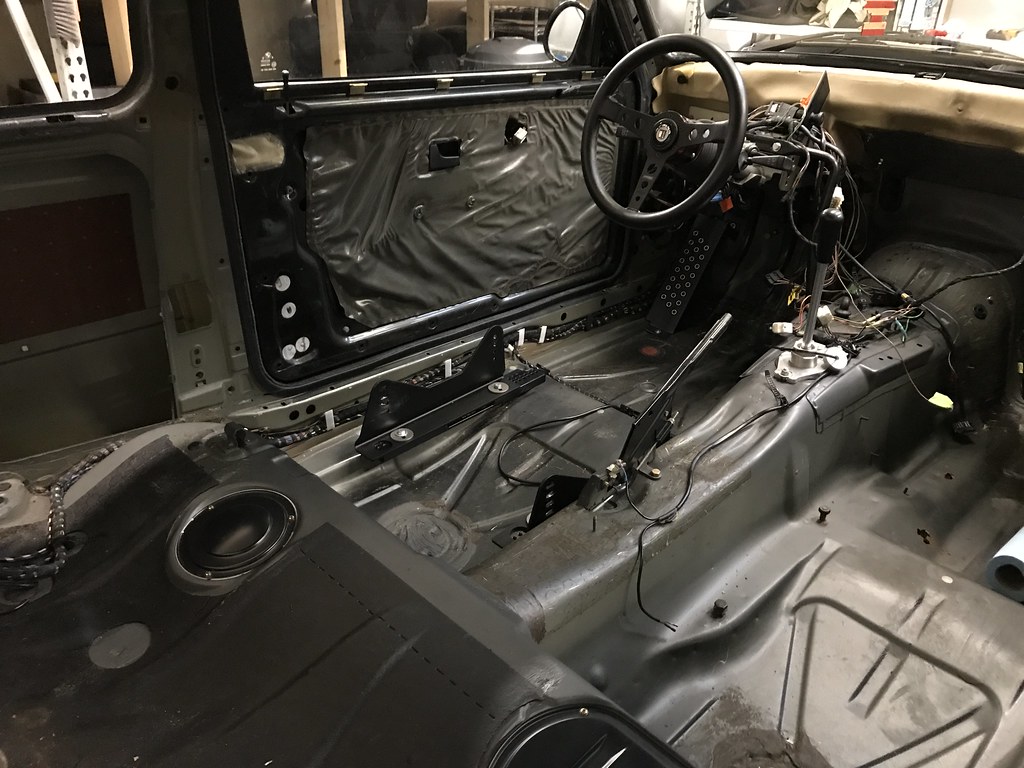
I made a lot of progress on buttoning up the interior, but I still have a bit to go. My ABS switch isn't working as intending, so I need to try splicing a different wire for that. I need to figure out how to use a relay to wire the defroster and hazard switches to one of my toggle switches on my switch panel. I'm probably going to wait on doing that so I can finish up some other more important projects.
The shift light is mounted and working well. You can see it on the steering column. I'm glad to have that, because with my low seat and lowered steering column, I cannot see much of the cluster at all.
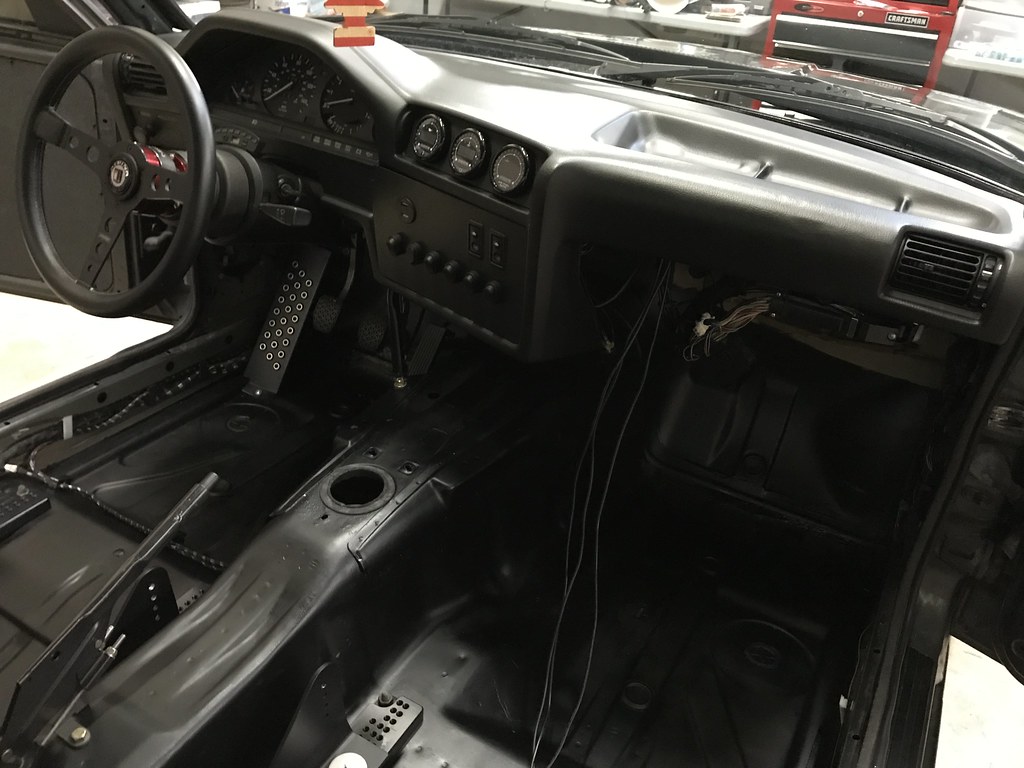
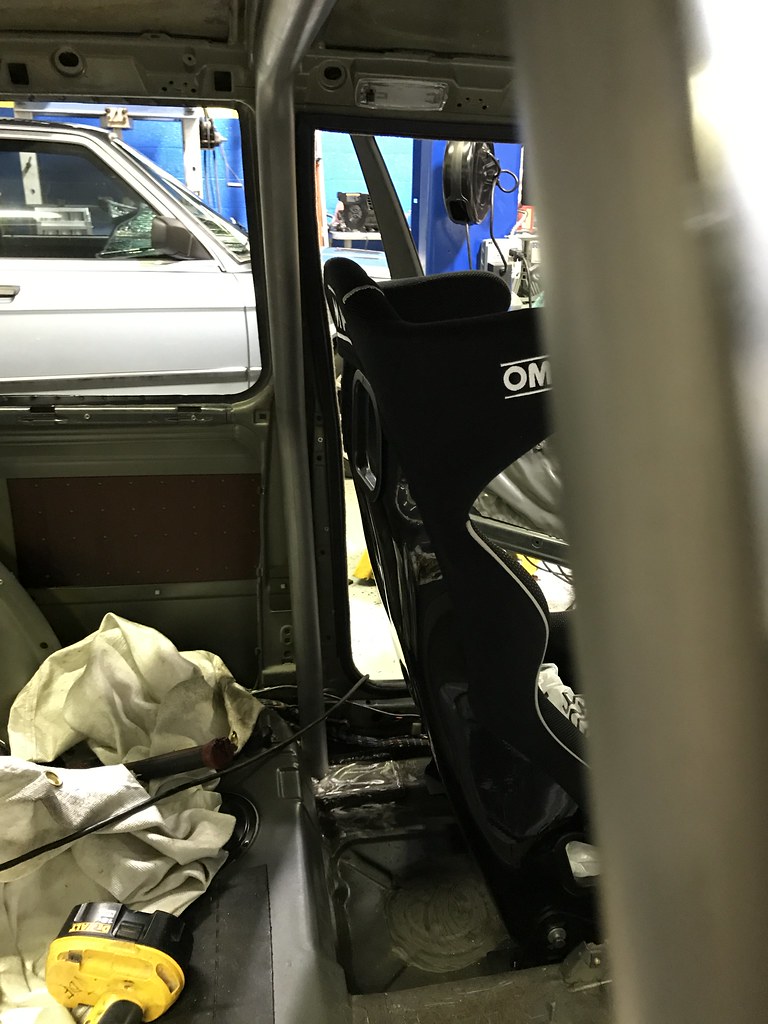
I cleaned up the wiring to/from my gauges. Note that the switch panel and gauge panel aren't really mounted in these pictures, they are mostly just sitting there.
Both seats are mounted up and positioned. I will be able to put in the sub-belt anchors next week, and install my harnesses. Hoping to do that on Tuesday, and get the car aligned with the Ground Control camber plates. Doing an autocross on the 22nd. I am going to miss my deadline of a track day on the 18th, but not by much!
Lastly, those 3 long cables you see on the passenger side are the programming cables for the 3 Innovate gauges. I am going to bundle those up and keep them in the glove box. It makes connecting to the gauges much quicker and easier than trying to reach up under the dash each time I want to make a tweak to the output of the gauges.

Leave a comment:
-
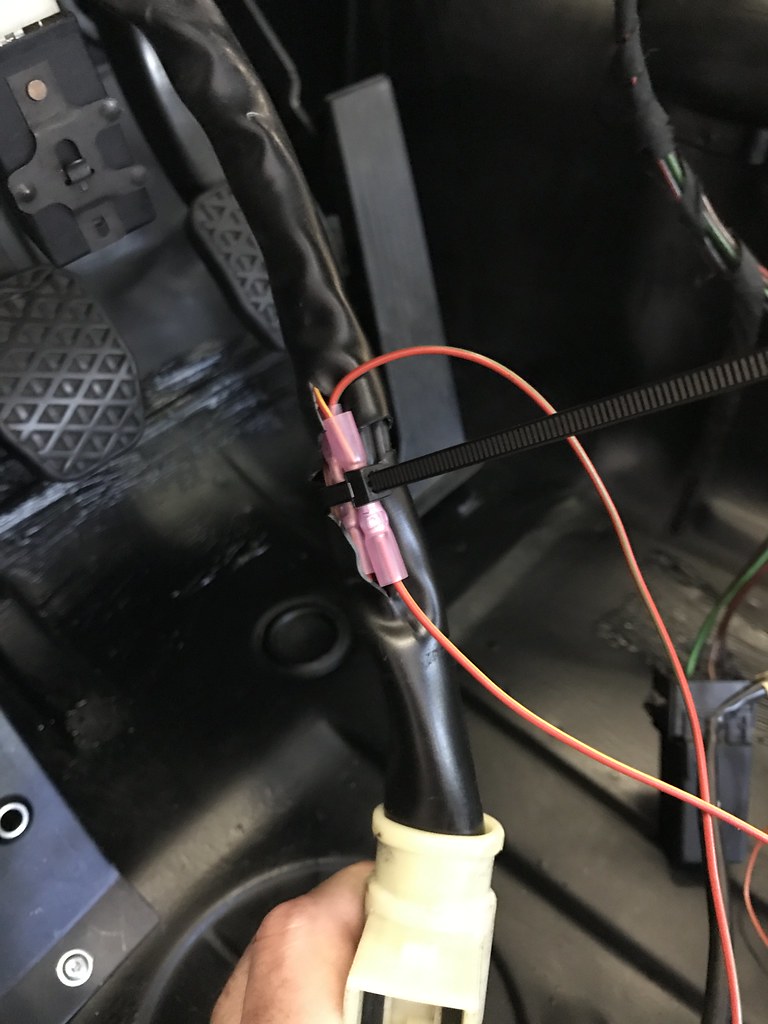
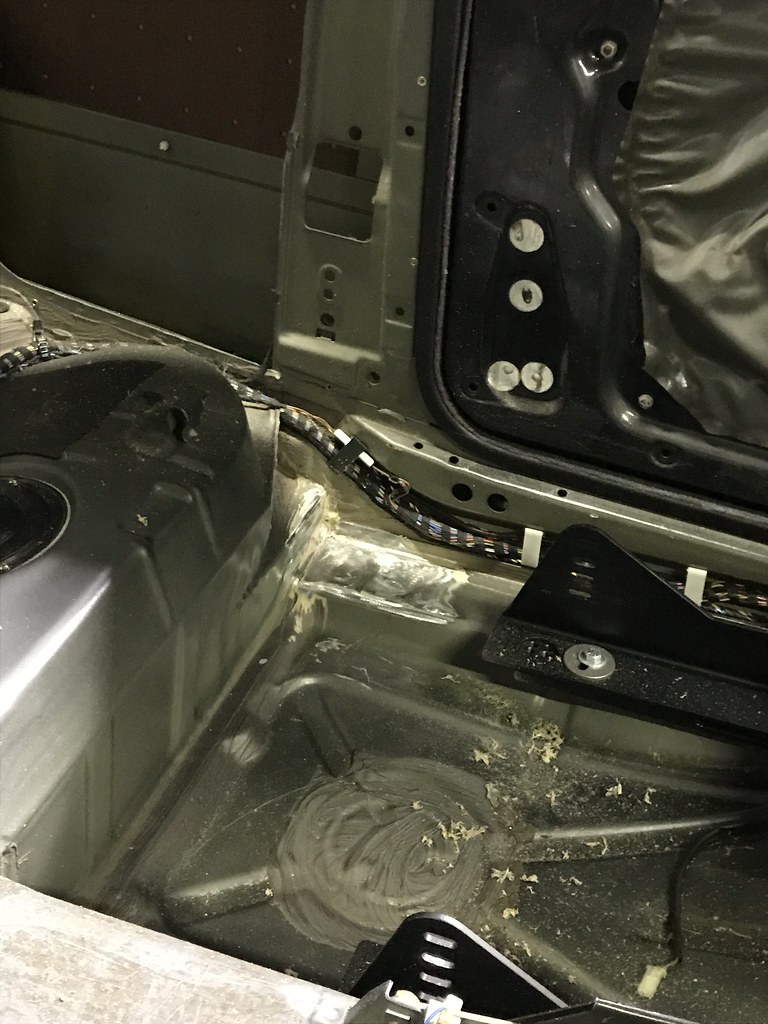
Been working on getting the interior back together. Taking the time to clean up the wiring under the dash some more. I spliced in a kill switch for the ABS system, but it may not be the perfect solution yet. See this thread for more details: https://www.r3vlimited.com/board/sho...d.php?t=409414
(I forgot to shrink the butt end connectors and had to unwrap the wiring after this pic)
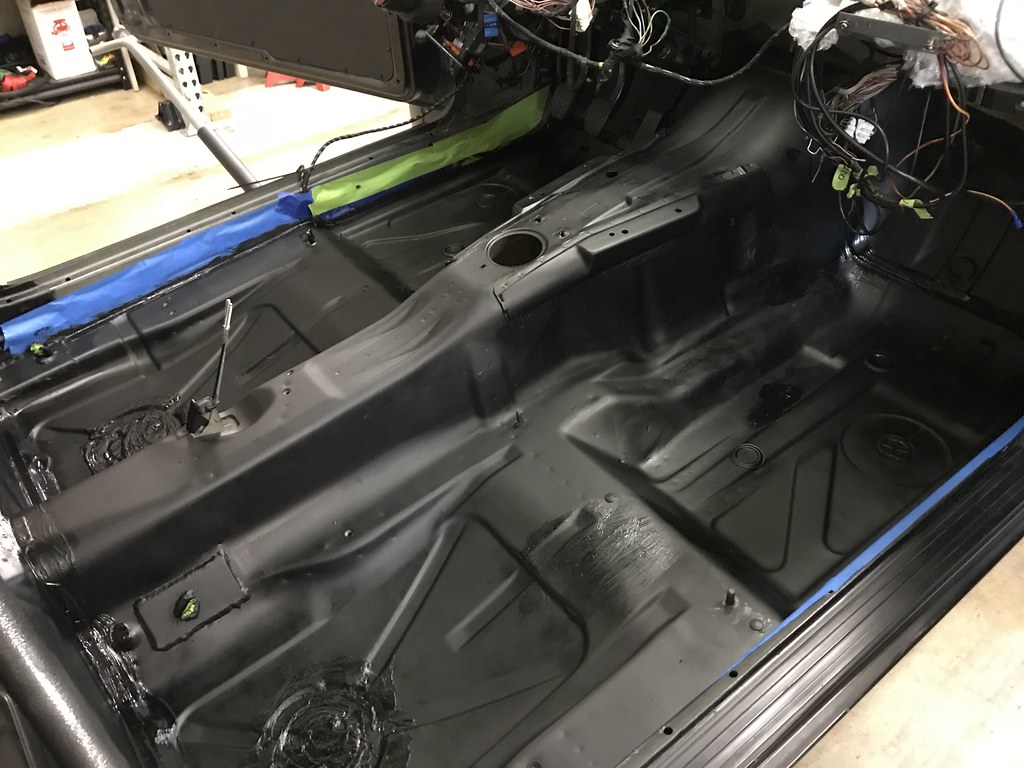
Wet paint on the floor pans. At this point they've had almost 2 weeks to cure and they have hardened up nicely. I think they will hold up well.


Dash back in! Wired up my Ecliptech Shift P2+ shift light as well. That thing is AWESOME! I recommend it to anyone looking for a shift light for their car, any car! It was easy to wire and set up and it's incredibly programmable.
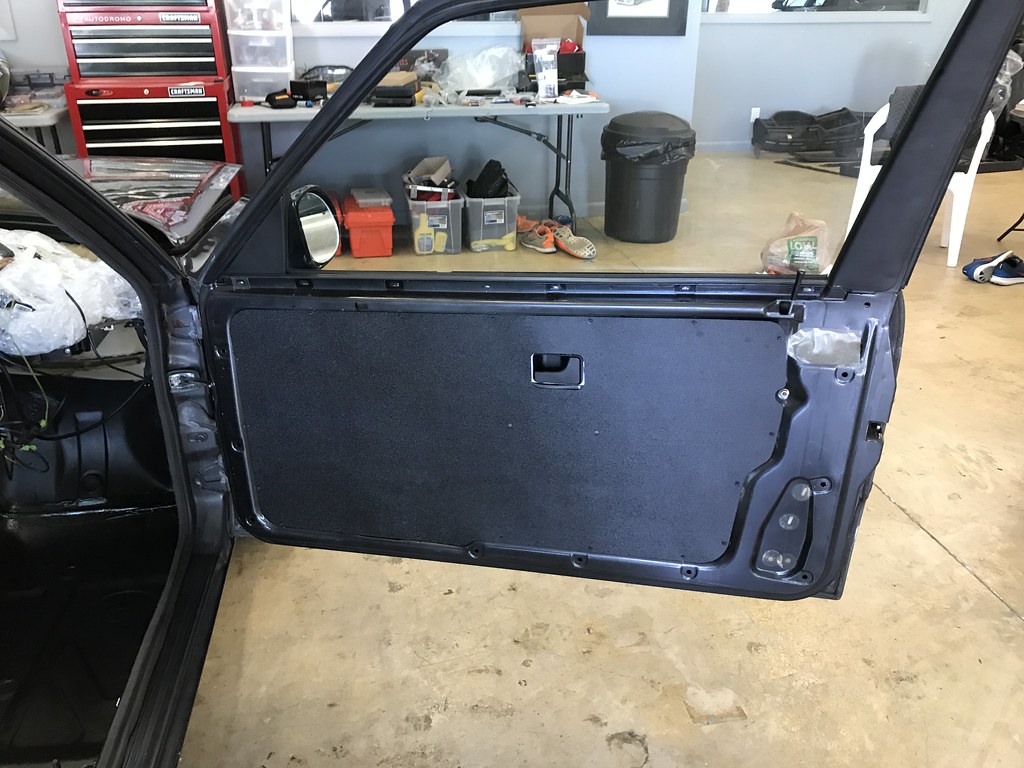
Condor door panels:
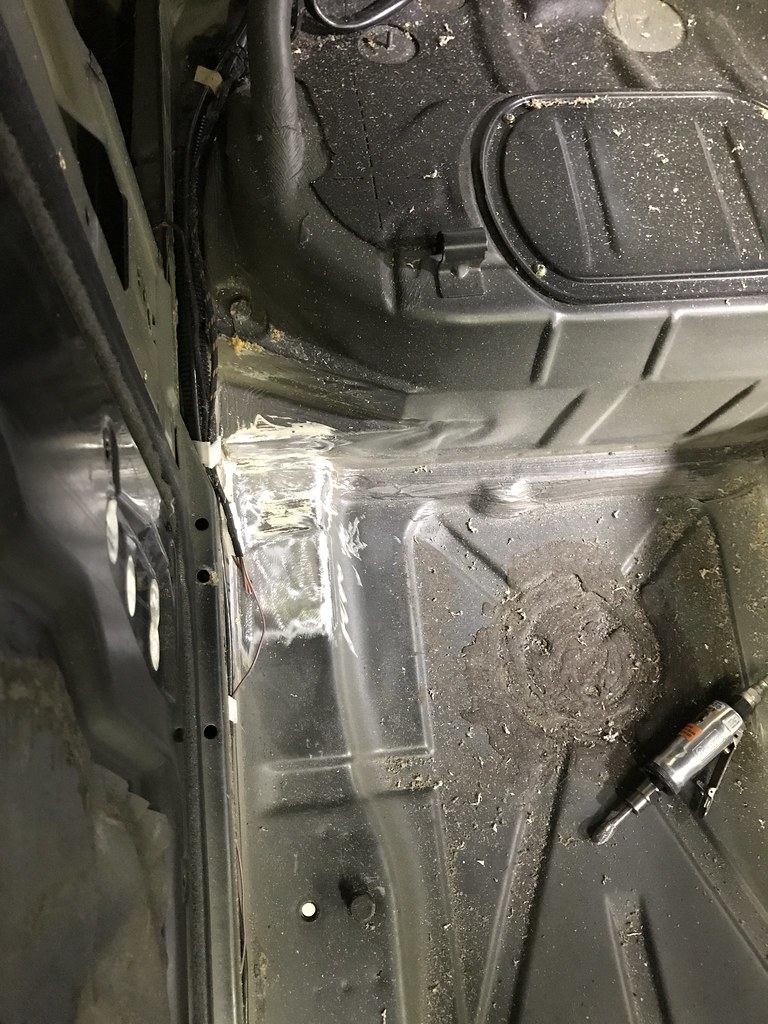
Still have a rat nest of wiring from the gauges that I need to clean up.

Next up is finish up the dash wiring, installing my sub-belt eyebolts, installing the harnesses, installing the GC camber plates and cutting the Bilstein bump stops, and installing the Mishimoto 19 row oil cooler.Leave a comment:
-
Alright, let's get this thread back on track!
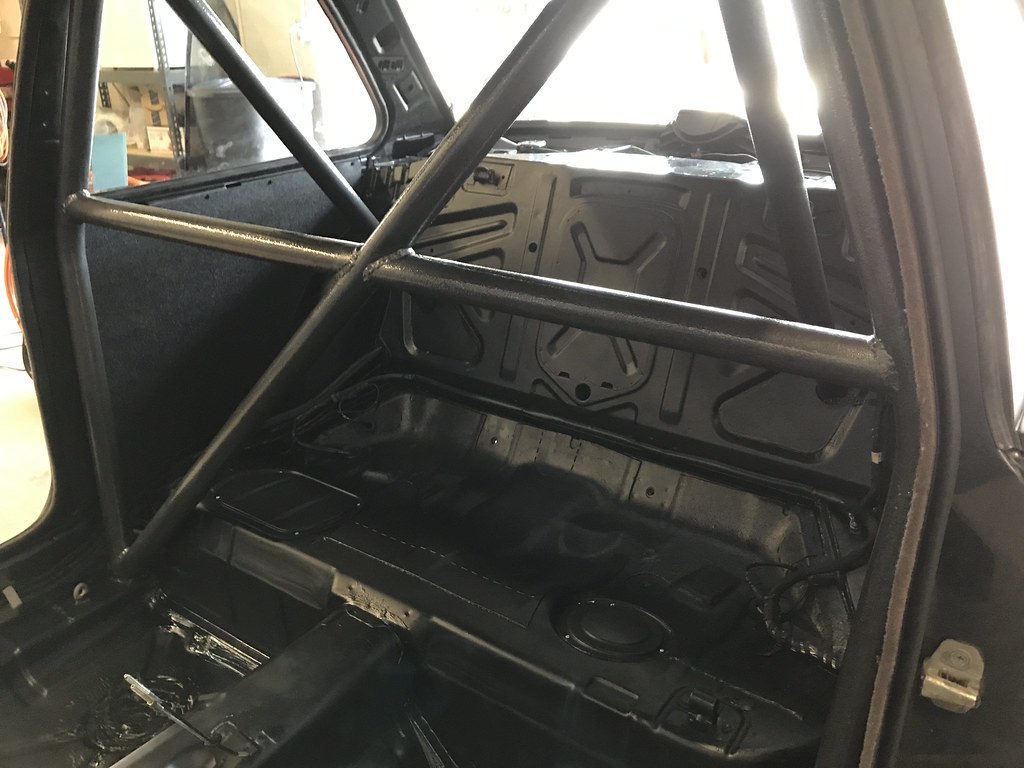
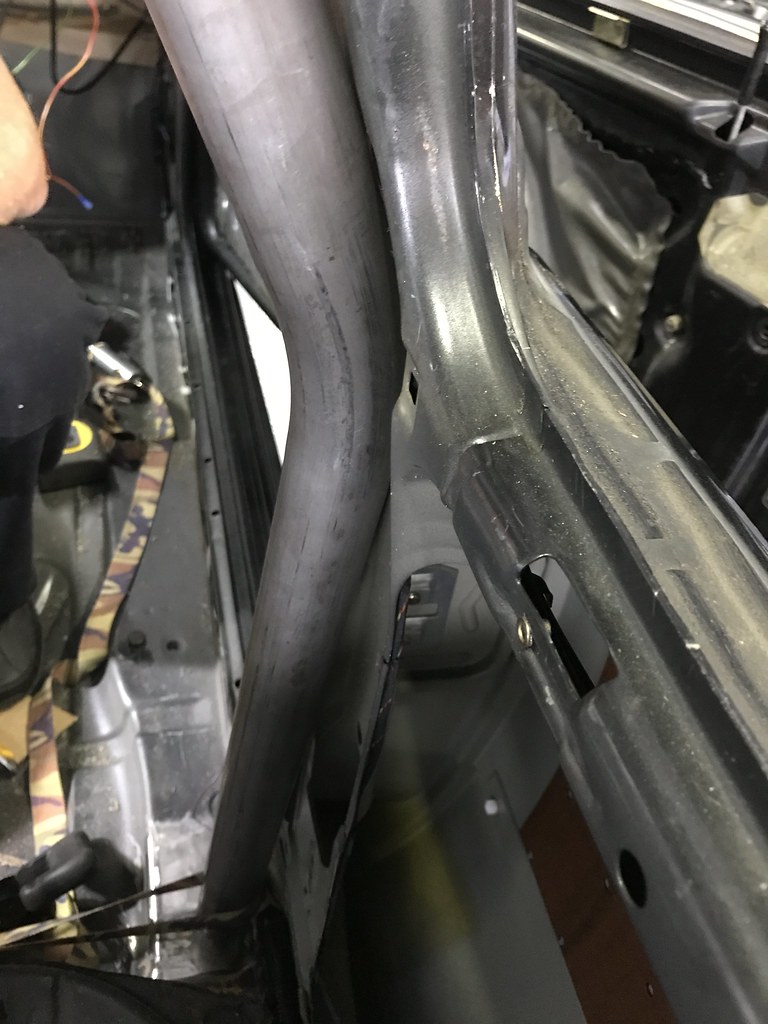
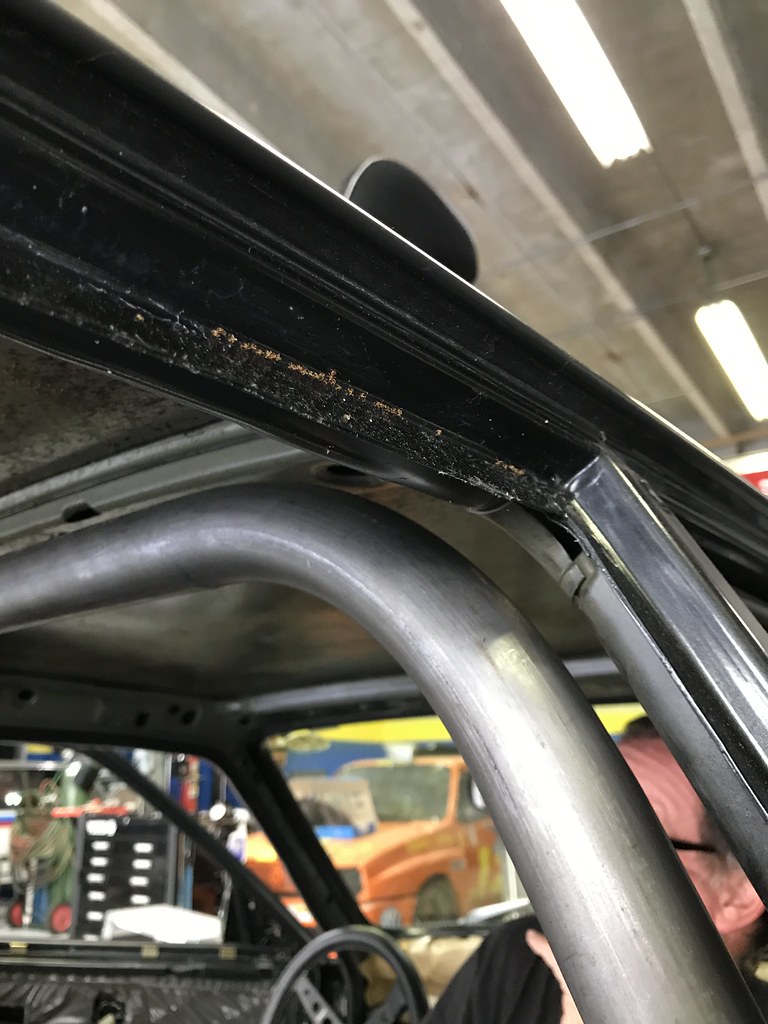
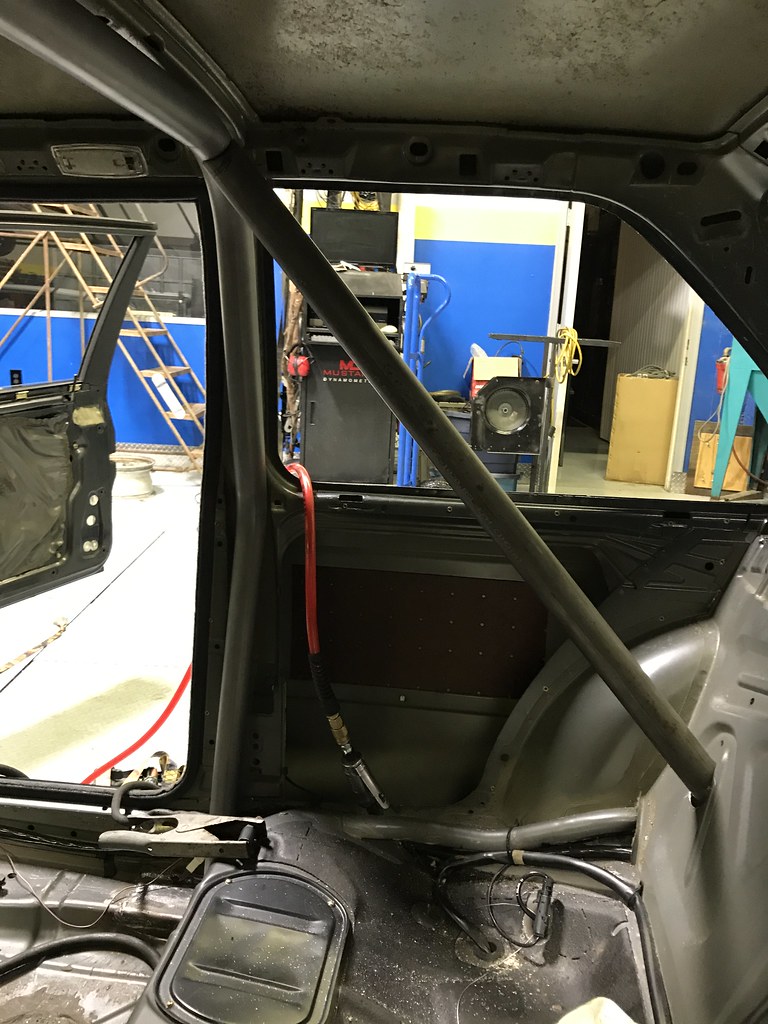
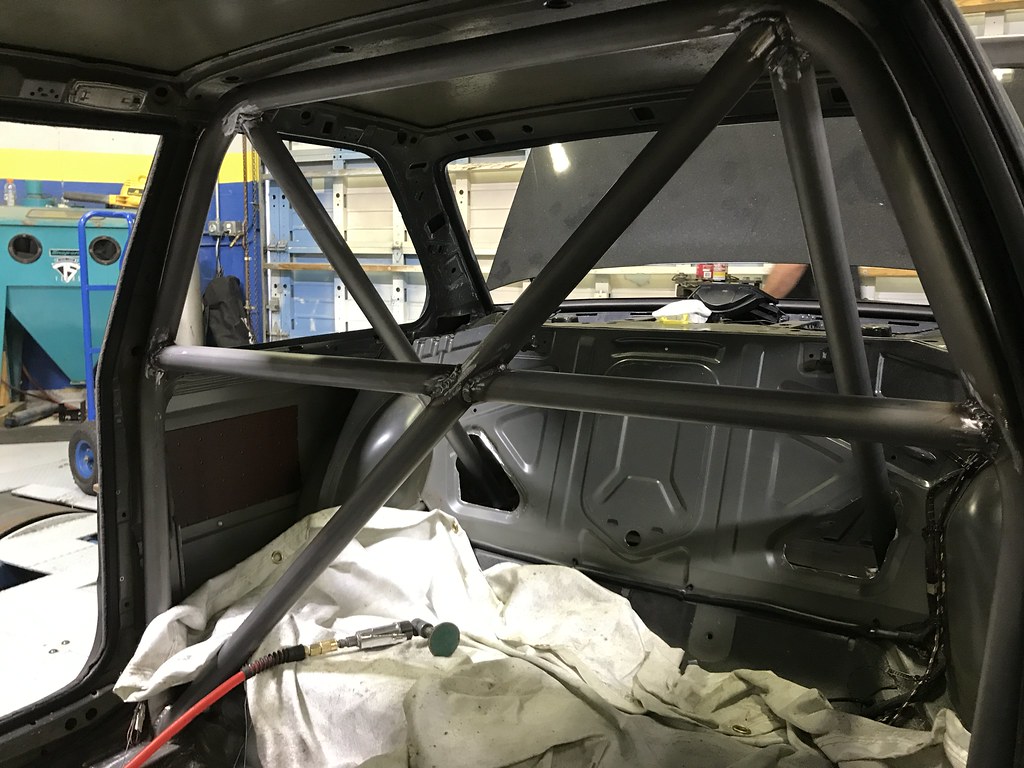
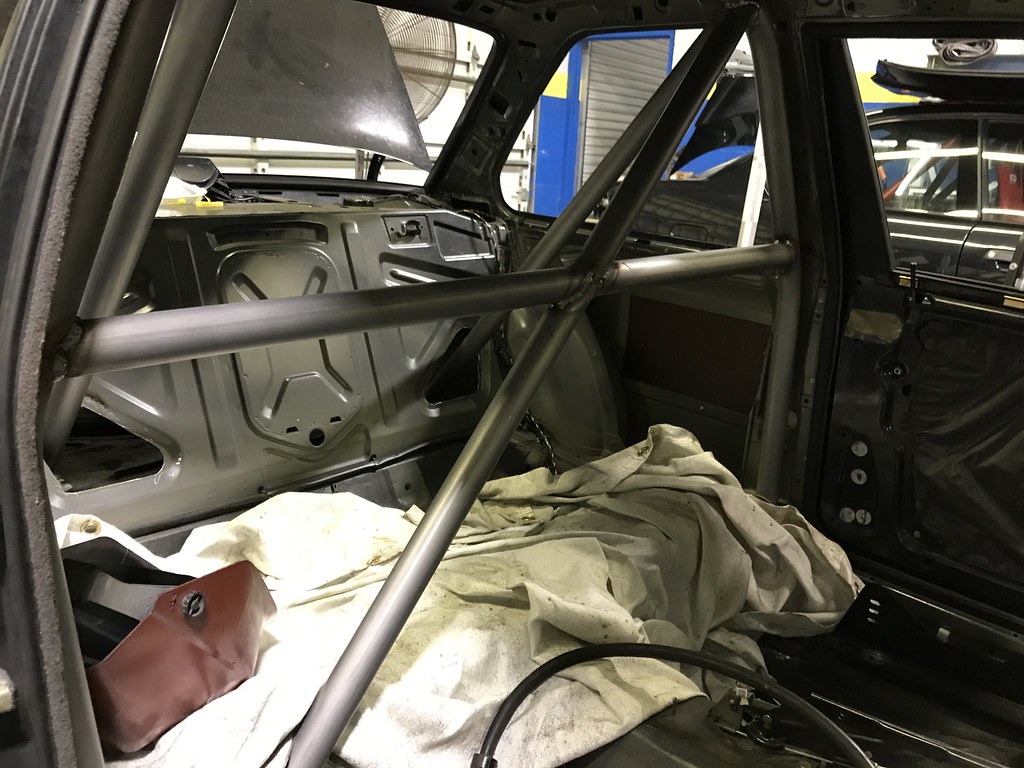
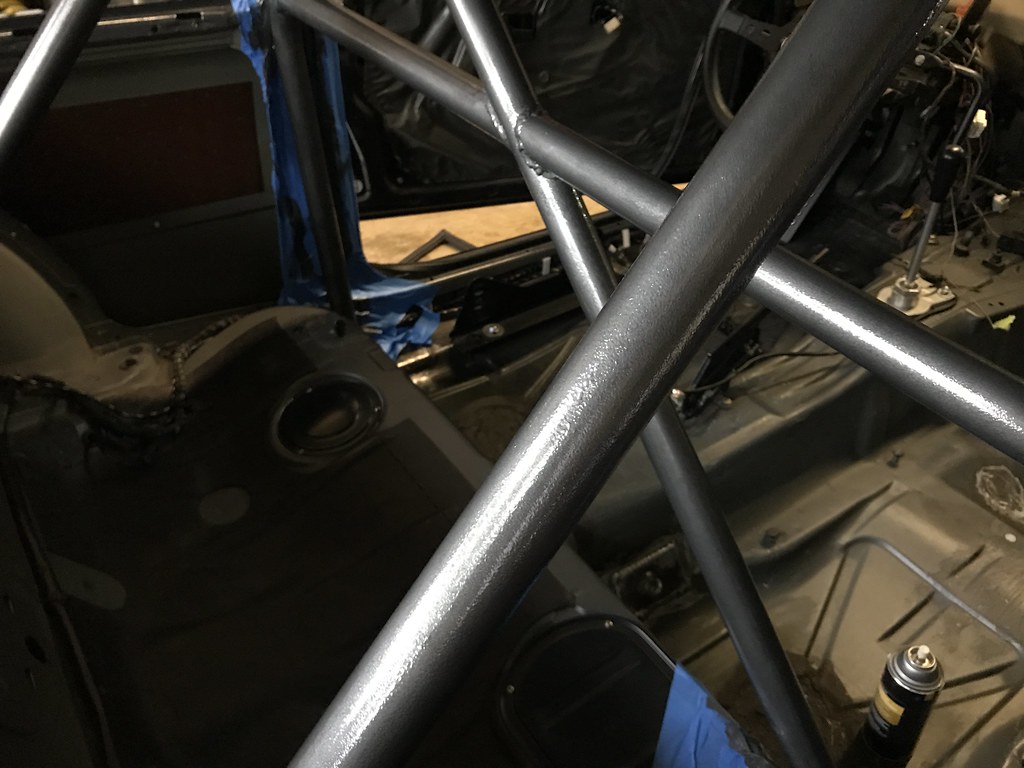
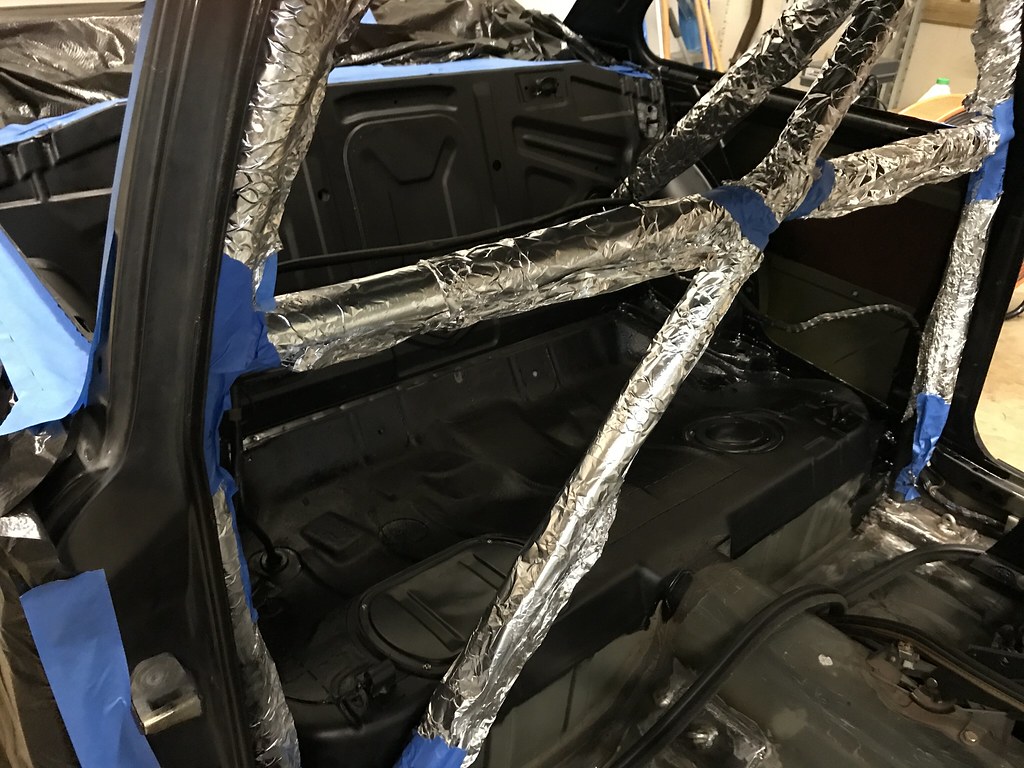
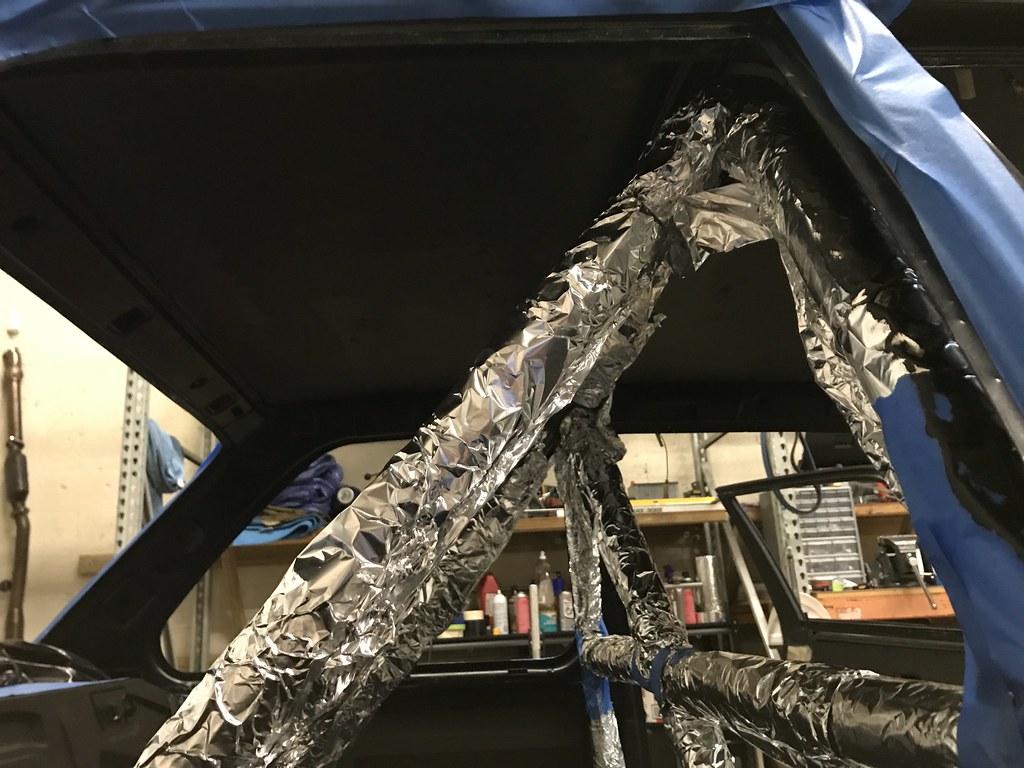
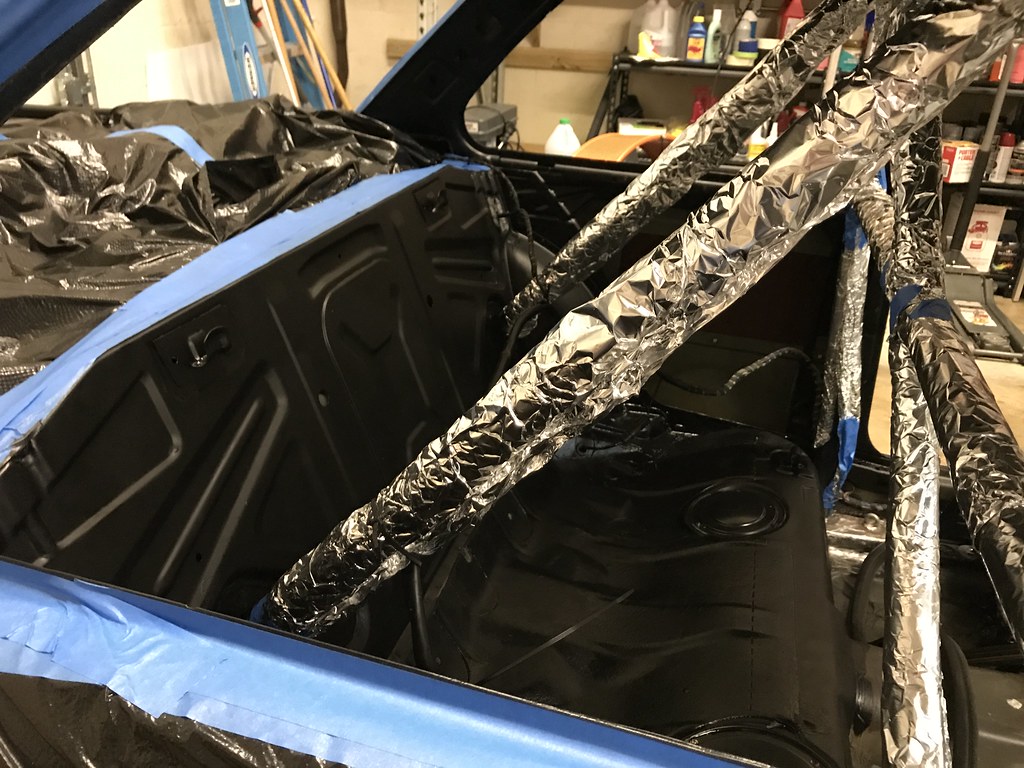
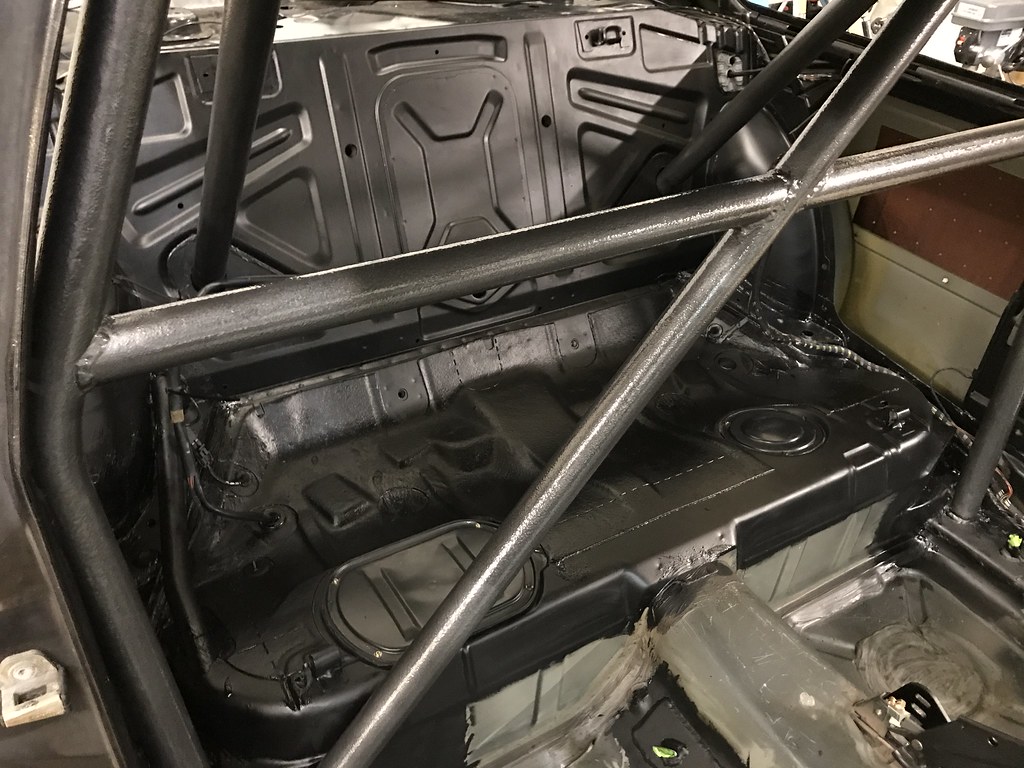
The shop that did my roll bar took longer than expected, but it was worth the wait. I am very happy with the roll bar and they worked with me closely to make something I was happy with, fit my needs, and fit me (literally).
Seeing as though this car still gets driven to the track on the street, and I am not doing any door to door racing, I went with a 4 point "half cage." Without a headliner and having a slick top car, I knew I'd be able to get something that is a much better fit, and stronger than the off-the-shelf bolt in bars.
We elected to use 1.75" 0.095 DOM tubing for the bar. NASA and SCCA would have both allowed 1.50" 0.120 for the weight of the car. We went with the 1.75" as it is lighter, slightly stronger, and easier to bend than 1.50".
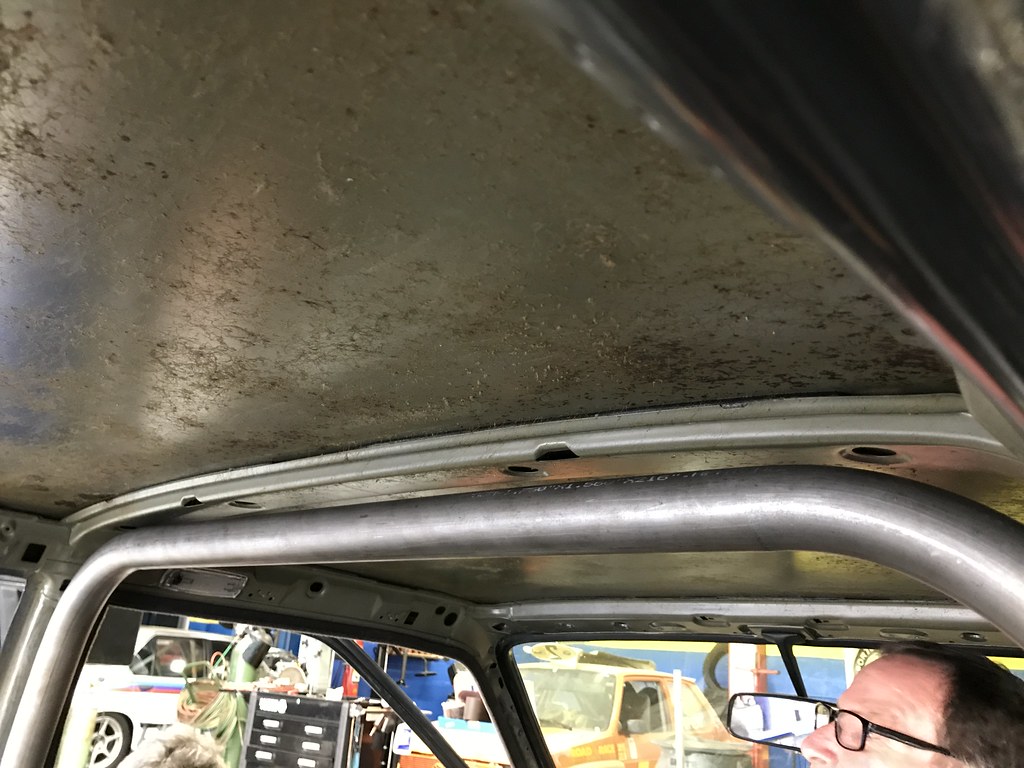
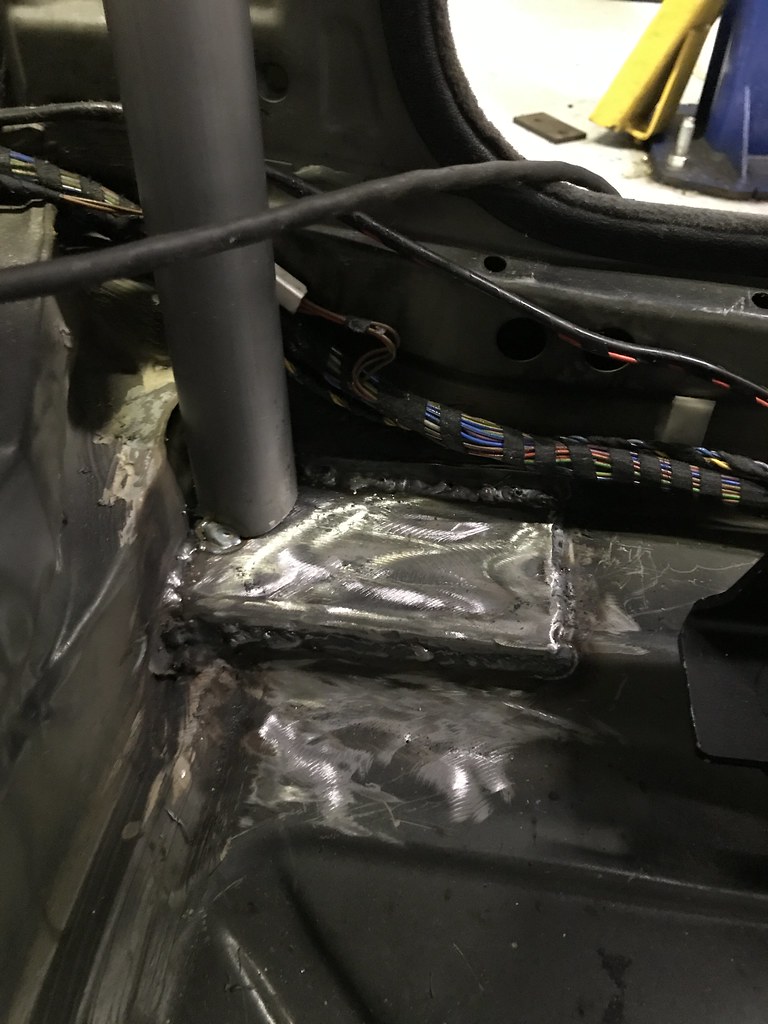
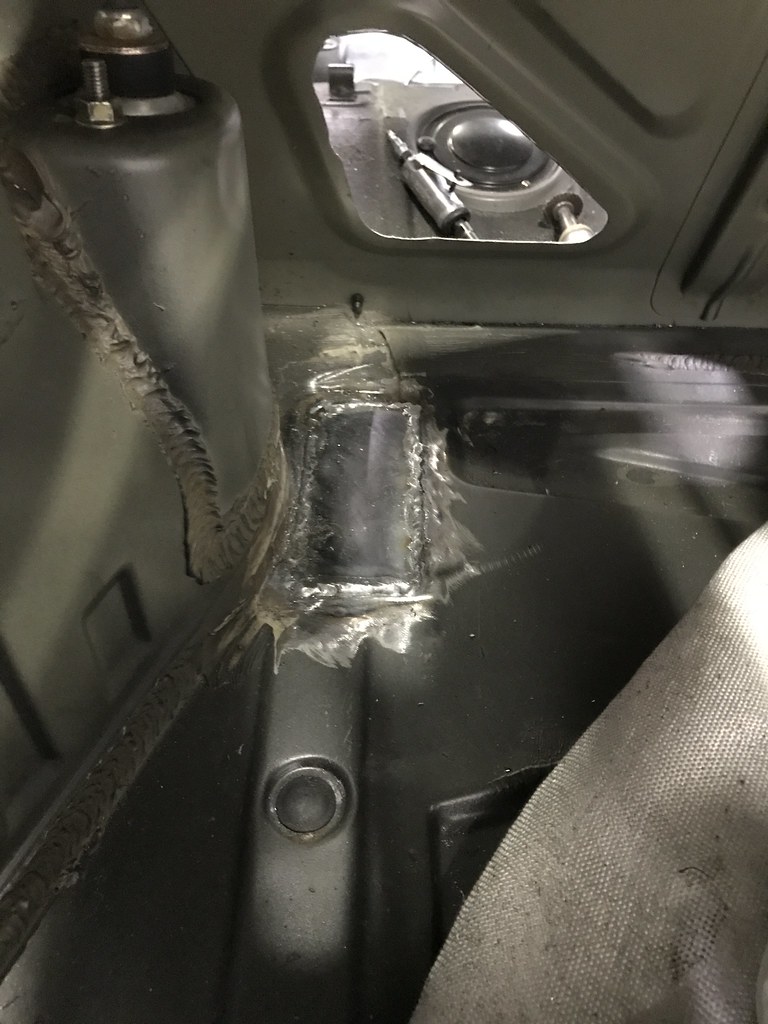
The main hoop and harness bar were fitted with me and my seat in the car to set the proper heights and angles. The pipes come together in nodes for strength. Each pipe is 360* welded. The rear down bars are plated to the frame rails in the trunk. Lastly, welded in 5x3" plates were used to affix the eye bolts for the harness lap belts. I'll be adding the sub belt eye bolts as well soon.
The main hoop is very nice and tight against the roof, and it follows the angle of the B-pillar nicely and is very tight against the body of the car.
Progress photos over the last few weeks as the bar came together.
This was mocking up the main hoop. There are no plates on the floor yet, so it was tighter to the roof line (about 1/8" away) once the plates were added to the sills.

Plates added to the chassis:
Main hoop tacked into place. We ended up kicking the angle back just slightly more before final welding.
Working on the rear down bars:
Harness bar and diagonal being welded:
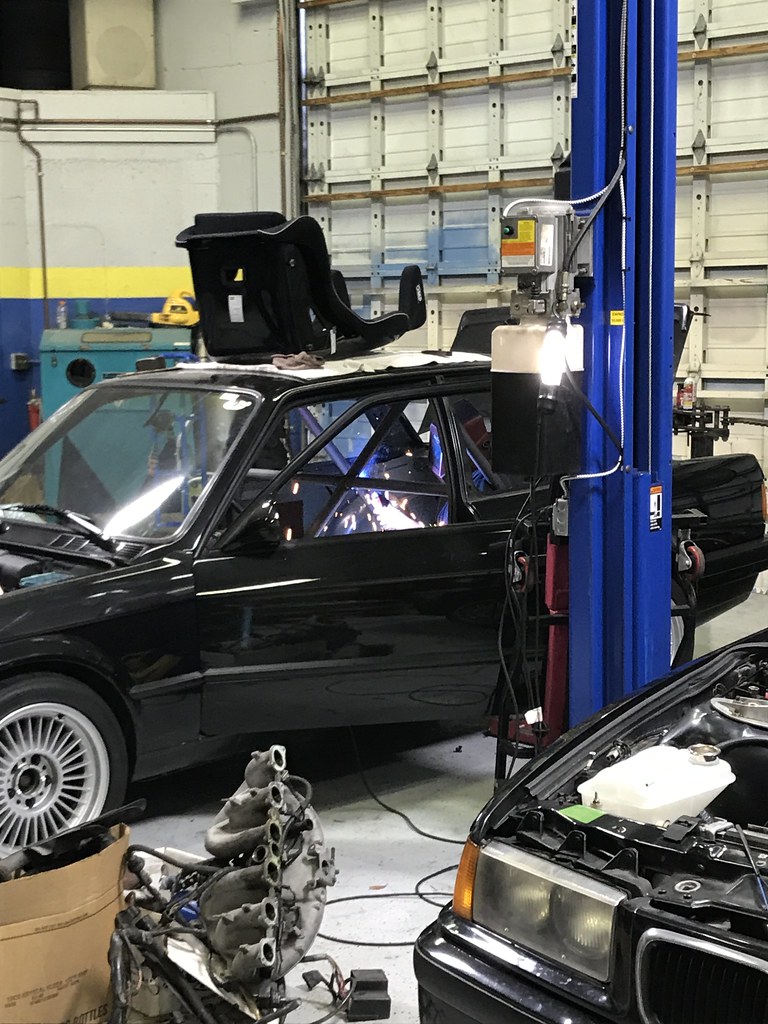
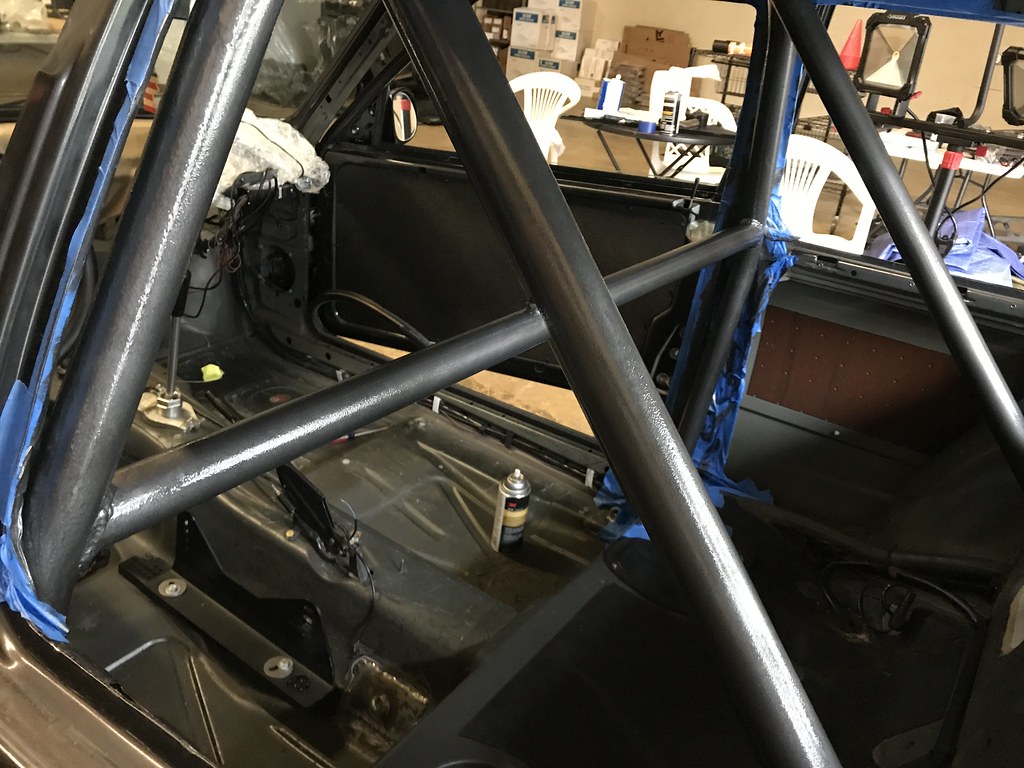
Final product:
With the car finally back in my possession, it was time to start finishing off the interior (paint, reassembly). I set a deadline of a July 18th track day so I can finally drive the car again. It's looking feasible so far.
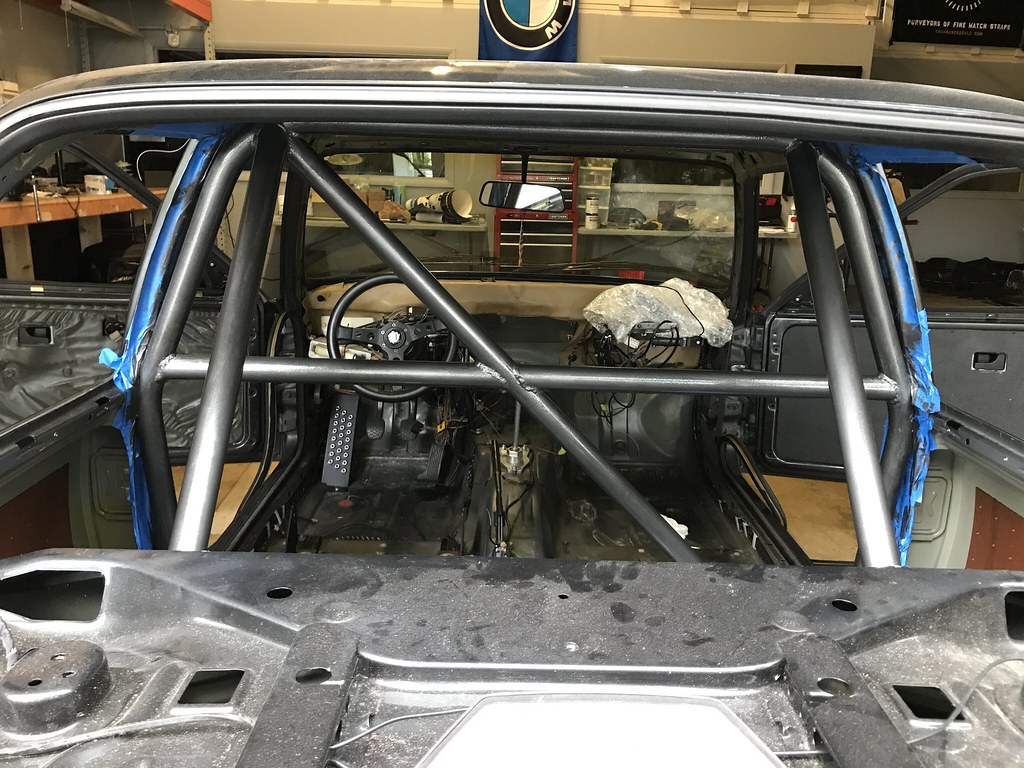
I ended up deciding to use hammered texture paint on the roll bar, and flat black for the rest of the interior. I initially did 2 coats of the hammered, but I wasn't happy with the result. I let it cure for a week, then knocked the texture down a bit with a scotchbrite pad and then did one final coat. It came out pretty good.
I mixed about 20% Rustoleum Hammered Silver with 80% Hammered Black, which is already closer to a dark grey color than black. It came out a nice dark grey tone that stands out just enough, without being loud at all. Here is the end result:
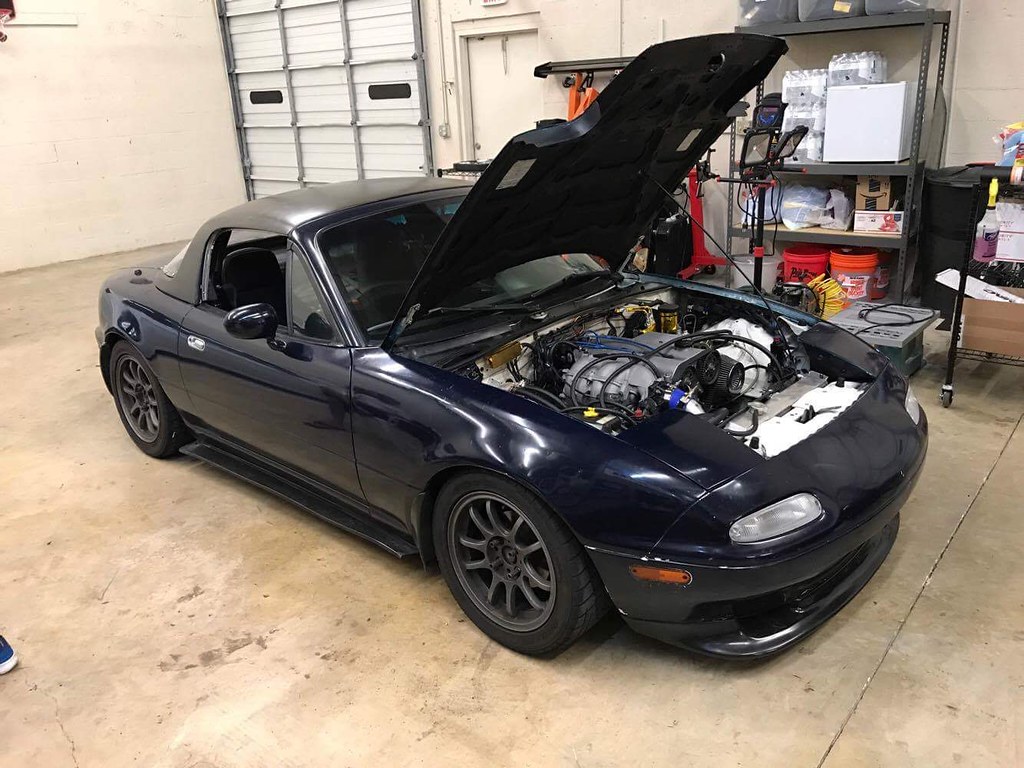
The Miata was tuned with the new 1.8 recently and it made about 250rwhp on a Mustang. Really good numbers! It got a carbon fiber hard top as well.
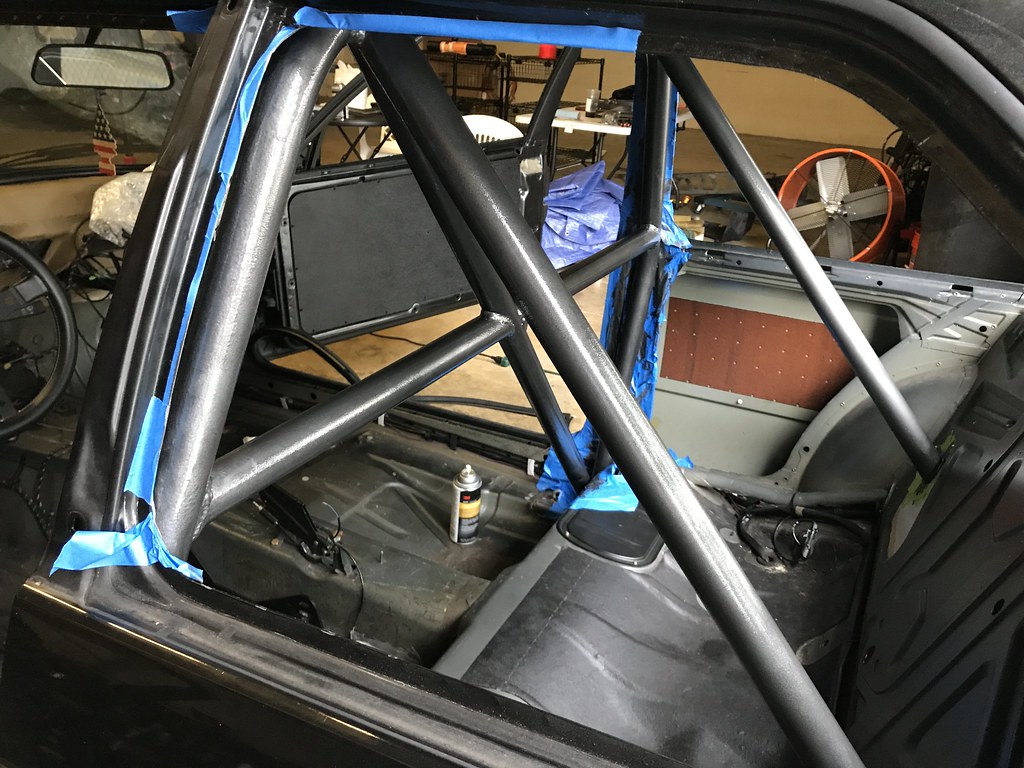
Next was masking off the bar and starting to paint the roof and the rest of the interior. I used Rustoleum flat black out of a jar and rolled/brushed it on. The rolled sections came out awesome! The brushed sections might need a 3rd coat to fix some issues that you can see when the light hits it good. I'm being too anal though, it looks perfect for a track beast.
Here's a better photo of the back half, which is as far as I've gotten so far. The paint is still partially wet here. It dried pretty nice and even.
This week I will be finishing up the interior paint, so I can start reassembly. I need to get the windows back in the car as well. It has been sitting around for about 6 weeks now, and spent a month in a fabrication shop. It's COVERED in dust and debris. I want to give it a good cleansing once the windows are back in!Leave a comment:
-
No problem. My only other advise is carefully drill the hole pretty shallow, as the hose clamp is right underneath the body. You can mangle the hose clamp and possibly the nipple on the tank if you go too far. Don't used a stepped bit for this reason.
Other than that it was an easy job. Don't forget there are 2 sizes of fuel line near the pump. I used a tight fitting barb to join the soft line that goes across the tank to the new line, and then just pulled it across the top of the tank from underneath the car to run the new line.Leave a comment:
-
-
Just went through the whole thread. Pretty sweet build.
Any idea of what the weight is down to? Im guessing mid-2500?Leave a comment:
-
I don't, but I can take a couple for you when I get the car back. You can see it in this picture:
Just north of the black circular access cover for the fuel tank, do you see the metal "loop" used for securing the base of the back seat? The little black cap just to left of that is the access hole.
Basically, there is a hard line on top of the tank that has a rubber hose and hose clamp attached to it. However, the hard line is inset from the edge of the tank a bit, and it's located really close to the body of the car. To add insult to injury, BMW typically installed the hose clamp with the head facing the body. It essentially cannot be accessed from underneath.
What I did was took a really long punch and dimpled the body from underneath the car, as close to the head of the hose clamp as I could. Then I drilled about a 1/2" hole right there and boom, perfect access to the hose clamp. Replaced the hose clamp with a new one, aligned it with the hole, and tightened it down from the top again.
Thank you!Leave a comment:
-
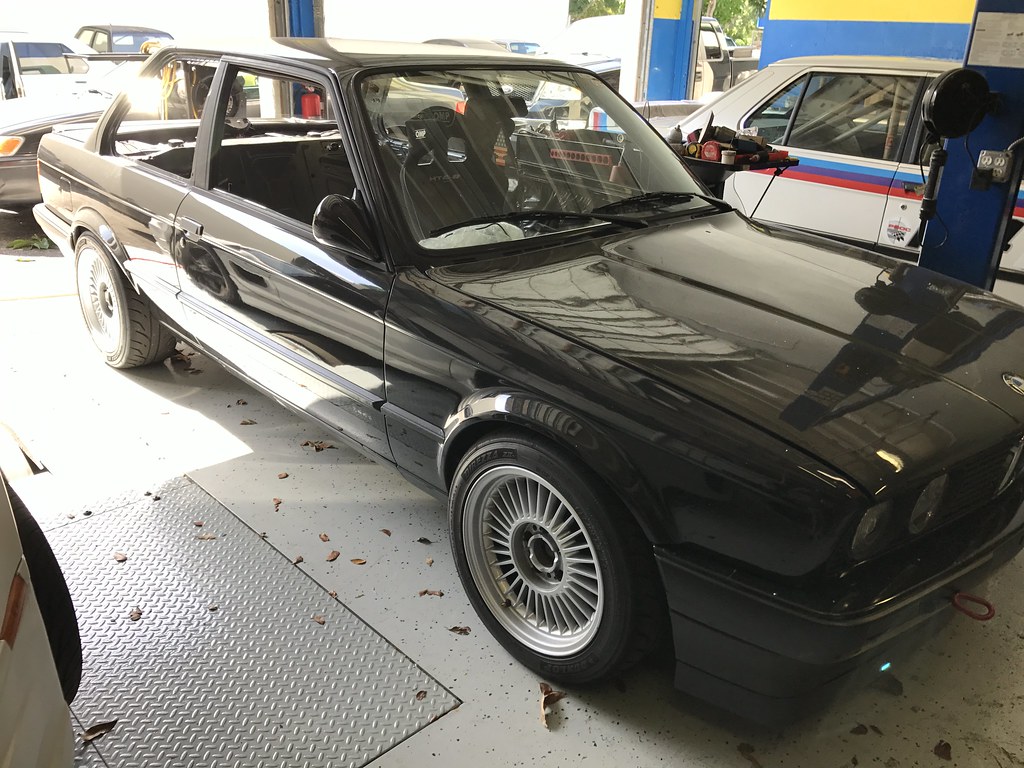
Normally not a fan of black E30s, but this one is just too fresh. Very nice.Leave a comment:
-
I thought you made them yourself. I dont need any haha was just curious.
Sent from my Robin using TapatalkLeave a comment:
-
nice build! do you have any pics of that access hole that you created for replacing the rubber fuel lines @ the top of the tank?Leave a comment:
-
They are black ABS plastic, laser cut. Condor also has them in brushed aluminum, but my interior is going to be black so I wanted to keep it low key.
Leave a comment:


Leave a comment: