Announcement

Collapse
No announcement yet.

1990 - 24v swap

Collapse
X
 
  • Filter
  • Time
  • Show
Clear All
new posts

    Originally posted by mjweimer View Post

    I'm about halfway between Indy and the 'Ville. The interior is the original Cardinal red leather...for some reason it looks really red in those pics.

    Yeah, a snafu with Flickr lost all the pics that were linked in the thread. It will take some time to get that sorted.
    I though all cardinal interior had window crank plugs, 88+ was cherry or Crimson.

    Cool, I'm in southern Indiana, but work in the "Ville"... I'm about start some winter refinements on mine so It'll be out till spring. But it would be cool to try and around up some regional E30's next year for a GTG. It would be great to see this in person.

    I ran into some Indy area E30 guys heading back from brodeo few weeks ago. surprisingly!!


    I was up above it, Now I'm down in it ~ Entropy - A Build thread.
    @Zakspeed_US

    Comment


      Originally posted by moatilliatta View Post

      I though all cardinal interior had window crank plugs, 88+ was cherry or Crimson.

      Cool, I'm in southern Indiana, but work in the "Ville"... I'm about start some winter refinements on mine so It'll be out till spring. But it would be cool to try and around up some regional E30's next year for a GTG. It would be great to see this in person.

      I ran into some Indy area E30 guys heading back from brodeo few weeks ago. surprisingly!!

      Yep, I lazily call all E30 red interiors Cardinal but in reality this is the 0324 Karmesinrot/Crimson red leather. I think the change was with the 9/89 onward production through end of the model run and this car is a 3/90.


      I'd be up for a GTG and there are several folks from the Indy area that would likely be interested as well. Sure would be nice to have some more vintage BMW events in the area.
      Last edited by mjweimer; 12-05-2021, 08:34 AM. Reason: can't spell

      Comment


        Originally posted by mjweimer View Post


        Appreciate the kind words.


        The under hood insulation is the OE pieces from the '90-'91 318i/iS - part number 51 48 1 925 437
        cool. i like it more than the standard cardboard. wonder it it would work on a regular 325i.

        Comment


          That is a good question. BMW shows two different part numbers for the multi-piece foam insulation for the M10, M40 and M20 cars.

          Up to 8/89 = 51 48 1 972 245 and after 8/89 = 51 48 8 103 798

          It is a smooth texture that also has small perforated section in the center panel that can be removed to gain clearance at the top center of the engine. My Euro '86 325i had this panel removed to clear the very top/center of the intake manifold where the small vacuum line connects (opposite the throttle body).

          I don't know if the M42 hood insulation would clear this area or slightly rub.

          Comment


            A GTG is like pulling teeth but nice to see it one come together. Maybe piggyback off a BMWCCA event.

            I looked for a nice set of crimson cards for a bit. Hard to find and most are 4 door... Red is hard to photograph.

            Zach

            I was up above it, Now I'm down in it ~ Entropy - A Build thread.
            @Zakspeed_US

            Comment


              Originally posted by moatilliatta View Post
              A GTG is like pulling teeth but nice to see it one come together. Maybe piggyback off a BMWCCA event.

              I looked for a nice set of crimson cards for a bit. Hard to find and most are 4 door... Red is hard to photograph.

              Zach

              All of our CCA events are always on the NE side of Indy and usually attended by the same folks who live in the area (coincidence?). I know there are folks with older stuff who would like to do something even if it is a simple meet-up.

              Comment


                Originally posted by mjweimer View Post


                All of our CCA events are always on the NE side of Indy and usually attended by the same folks who live in the area (coincidence?). I know there are folks with older stuff who would like to do something even if it is a simple meet-up.
                I'd show up? Is the Purple Touring allowed?

                Comment


                  Originally posted by twright View Post

                  I'd show up? Is the Purple Touring allowed?

                  Absolutely! I'm looking forward to checking out your touring. Hopefully we can get something together in the spring.

                  Comment


                    Back to the updates. Now August of 2020.

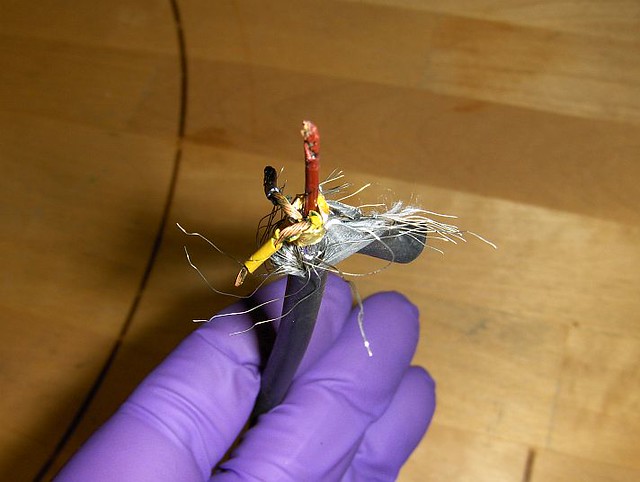
                    As mentioned previously the car was experiencing some strange running symptoms and finally set a code for the cam position sensor. I could repeat the symptoms by pushing on the cam position sensor wiring. Swapped out the cam and crank sensor (for good measure) and this is what the cam sensor wiring looked like when I tugged on the harness...nice.


                    The ICV hose fit but it had a slight kink that was pushing it into the charcoal canister. I don't like things to rub so the decision was made to cut the stock M52 hose and clock it slightly, reassembling with another ICT billet barb fitting.


                    Plenty of clearance.


                    Fit up the Air filter, MAF, etc. for the final time and made a little shield out of silicone scrap to keep the fan wash out of the filter inlet.


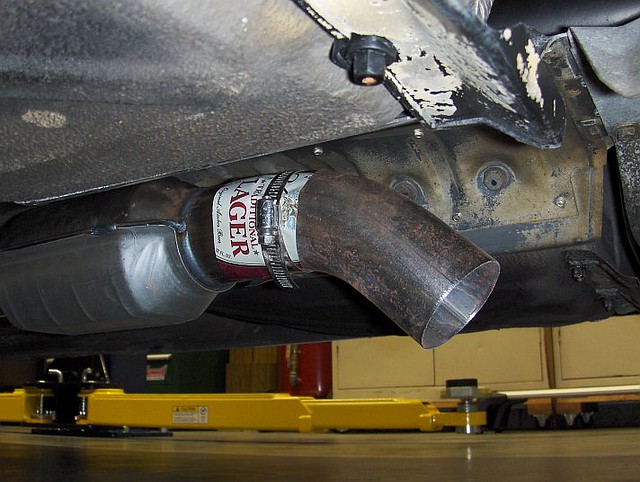
                    To keep the exhaust from blowing back on the fuel tank and try to reduce the noise in the cabin, I added a temporary downturn.


                    Another clearance issue to address, the upper radiator hose (stock E36) was touching the oil filter housing when it was under pressure, a quick trim took care of the problem.


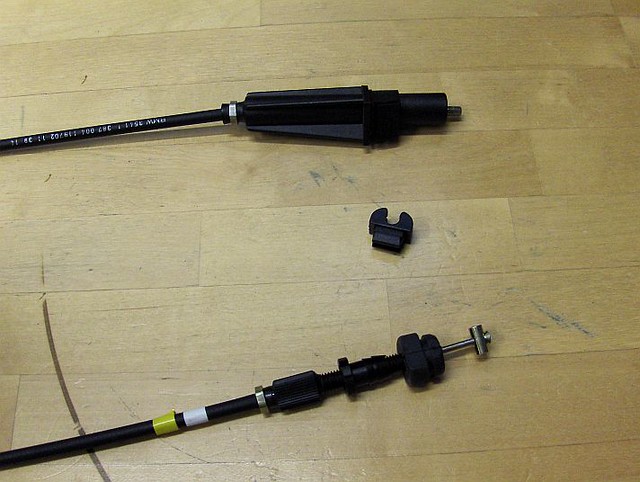
                    Working around the air filter housing reminded me that I still needed to install the cruise control cable. The late M50 cruise control cable (9/94 onward - p/n 65 71 8 380 076) has the right fittings on each end for the E30 cruise module and the OBD1 throttle body.


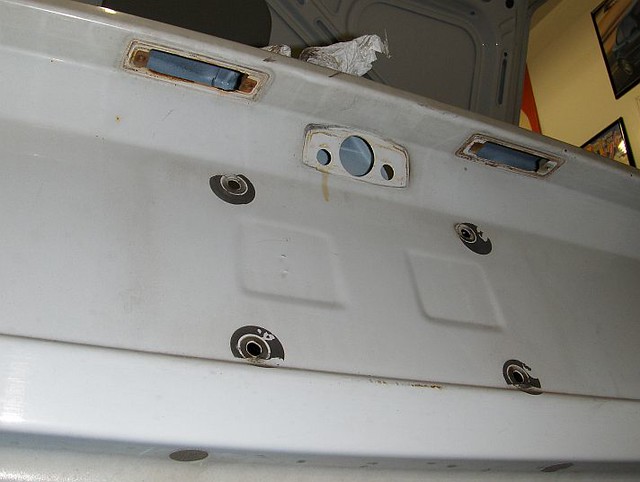
                    And finally, I HAD to take care of the tramp stamp someone painted on the trunk lid way back when...as you can see by the left side a bit of acetone took care of it easily.


                    Last edited by mjweimer; 12-07-2021, 04:31 AM. Reason: spelling

                    Comment


                      Late August into September of 2020.

                      To finish up the wiring and before the front valence could be re-installed, I needed to install the condenser and condenser fan. Updating to the parallel flow condenser makes sense at this point so I sourced the Nissans piece and found (like many others) that the fan mounting brackets were not installed properly. They were not backwards like others have found but the fan would not fit.

                      So I drilled out the rivets, fit the fan in place, marked and drilled new holes and then secured the brackets with bolts/nuts/loctite.


                      When spun by hand, the fan was a bit crunchy with some resistance...so I took it apart to investigate. Worst case, it was junk and needs replaced, best I could service something like the brushes or bearing.

                      A LEFT HAND Threaded nut holds the fan blade to the motor shaft and when removed allows access to the motor bearing. The bearing cover is spot welded on the housing so some careful drilling allowed it to be removed. The bearing was dry and had some rust, interestingly it is not a sealed bearing.


                      The bearing was an SKF part and had a part number on the housing (6001) and thanks to their excellent online catalog, I was able to cross-reference to the same type of bearing in a sealed configuration.


                      Some tack welds and a bit of paint finished up the job.


                      All mounted up.


                      To appease the neighbors and my ears, it was time for a proper exhaust. Thanks to Scott at Stromung, I was able to get their E30 catback muffler modified with a single 2.5" inlet with a slight downturn to clear the subframe. My buds at the local muffler shop took care of the rest.


                      The exhaust turned out great, I had no idea if it droned at this point because the interior was gutted.


                      Last edited by mjweimer; 12-07-2021, 04:32 AM.

                      Comment


                        I did the same thing with my auxiliary fan about a year ago, still going strong, better than any cheap aftermarket fan.
                        IG: https://www.instagram.com/josh.stacey/
                        Flickr: https://www.flickr.com/photos/133952286@N03/

                        Comment


                          Originally posted by jsta1109 View Post
                          I did the same thing with my auxiliary fan about a year ago, still going strong, better than any cheap aftermarket fan.

                          100% - a little time, $12 for the bearing and good as new.

                          Comment


                            We are now up to October of 2020.


                            With the car running well, it was time to focus on some of the body work related projects so I could put the front back together and get the interior back together.

                            I always liked the look of the Touring/M3 roof mounted antenna so I measured my friends E30 M3 and drilled the hole....at this point you are committed.


                            The lower A-pillar on the drivers side had a small rust spot that got a little bigger once the grinder came out. Unfortunately the location of the hole was right where the factory used brazing material to connect the front structure and neither standard Mig or Tig methods would allow for a good weld. A bit of research suggested Silicone-Bronze rod and Tig would be the best choice to make the repair compatible with the factory work and not add too much heat to the area. This will all get smoothed out prior to paint.

                            Thankfully my brother in law is a talented Tig welder.


                            Two options to deal with the hole on the quarter panel; a simple rubber plug or some welding. Since we had everything set up for the A-pillar work, welding a plug at this point was easy. Fit, welded and smoothed:


                            This left the battery tray/rear valence area for me to deal with. A few areas kept trying to blow through - I really could have used thinner wire here - but it turned out well.


                            After seam sealer a bit of paint on the inside and underside.


                            Comment


                              I still needed to paint the patched up areas and get the body reassembled before moving on to the interior. As I was getting the front valence, fender and bumpers cleaned up to re-install I made a big decision. Let's paint the whole car...I wonder how much that will cost? Can I do enough prep to bring the price down to something a bit more reasonable?

                              Only one way to tell...drive the car to a couple of body shops and have the discussion.

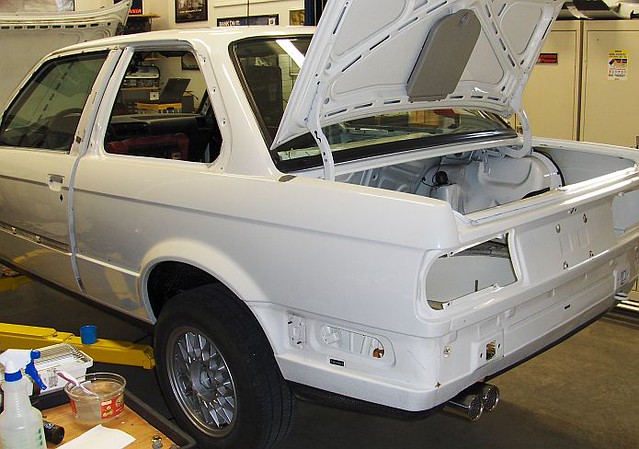
                              I ended up working with a small shop who was not only happy to let me tear the thing down and deliver it in pieces, they encouraged it. The more I could do on disassembly and prep, the more they could focus on the actual body work and paint. Their price was very reasonable and a deal was made.

                              Time to get this thing ready, it is easy to blow things apart, a bit harder to not break stuff.


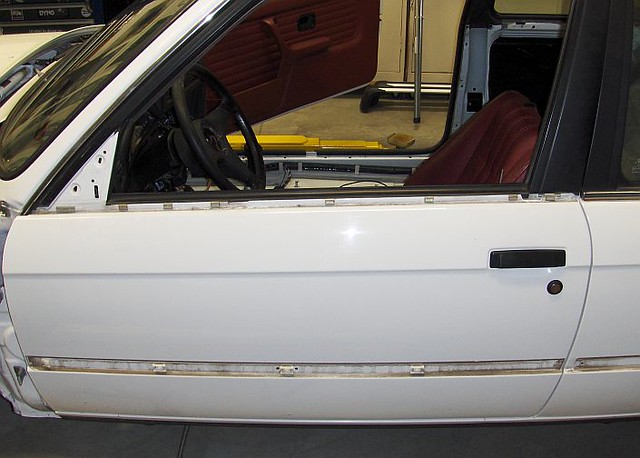
                              Apparently this door was replaced when the car was repaired years ago.


                              Lots of dirt in the nooks and crannies, especially under the seals and behind the trim.


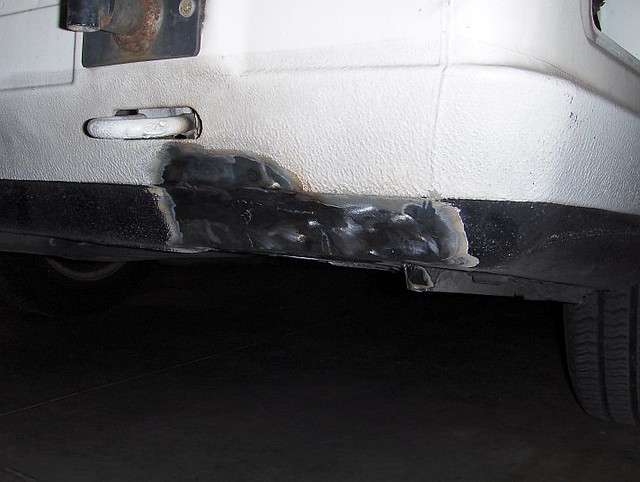
                              I found a bit more rust poking through where the right quarter panel was welded to the B-pillar. Like everything else, poor prep prior to paint was the main issue, the repairs were well done. I had to grind everything back to metal so the body shop could fix properly.


                              With everything apart, the majority of the time was cleaning up all the dirt, rubber, adhesive, etc. so the body shop did not need to spend time messing with it all.


                              Ready to roll. Plan was to drive it 20 miles to the body shop. So I temporarily installed the front and rear lights a seat and seat belt. It was 35F the morning I drove it up there...a bit chilly with no rear windows, sunroof, seals, etc.

                              Comment


                                I dropped off the car and three loads of parts the first week of November 2020.

                                In the meantime I had plenty of other work to ready everything else for re-assembly.

                                The carpet was super nasty and full of dirt but I was surprised how well it cleaned up. It took a lot of vacuuming as well as liberal use of the carpet cleaning machine.


                                Next up was dealing with the front upper headliner panel. It too was nasty dirty, the rear plastic mounts were broken and the vinyl material was pulling away from the edges.


                                These are the rear mounts that always seem to be broken, addisonm95 sells 3D printed replacements on his Ebay store. A bit of Gorilla glue secures them to the panel.


                                Some DAP Weldwood contact cement and some clothespins to secure the material.


                                Thankfully the car was garaged all of its life (but never washed) so the rubber bits like the door window seal/wipers were still soft just really dirty. I'll spare the details but it was a lot of cleaning with Simple Green and a toothbrush.


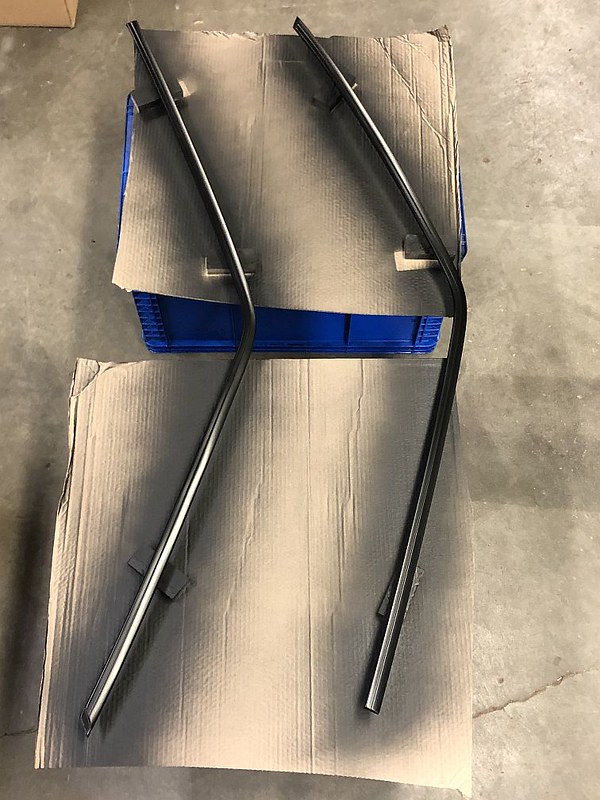
                                Moving on....I figured it would be a great time to clean up and prep the window/door trim to go 100% Shadowline. I scuffed the trim with a palm sander and 120 grit paper and then build some stand-offs to keep the trim elevated so the paint could be applied to all angles. FOr paint I used SEM Trim Black Ultra - Matte 49133.


                                My pseudo paint booth at work was used since it was dust free-ish and nice and warm.


                                The body shop called and said the rear bumper was repaired in the past very poorly and could not be saved, so I decided to place an order for some big items and picked it all up. My bud Matt at BMW of Cincinnati North always comes through with the goods; windshield, bumper, F+R window seals and some other misc. bits.

                                Comment

                                Working...
                                X