-
-
Thanks! I love them bothOriginally posted by e30RS
That CuNi brake line was awesome to work with, easy to bend and made me look like I actually knew what I was doing.Originally posted by LateFan
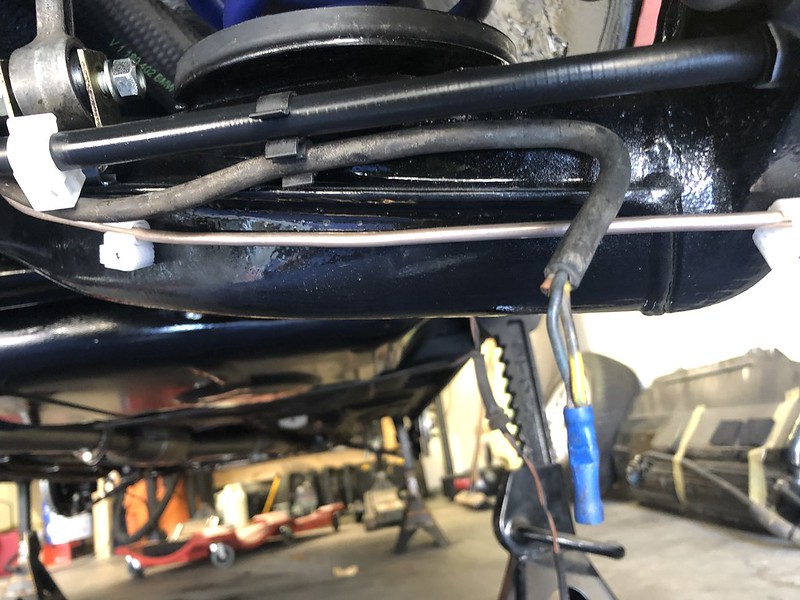
So the NiCad piece to the bottom left (#14 in the diagram) is the in-line fuel pressure regulator, the black piece to the upper right (#20 in the diagram) is indeed the fuel line dampener as efficient said. 14 is widely available, but 20 has been NLA for awhile, mine was in good shape and nice and clean inside so I just repainted it. As for the fuel line, no it isn't routed around the low-side AC line, it T's off from the filter and connects to the cold start valve (on the intake manifold) and to the fuel rail. All the AC lines are pretty much tucked away behind the passenger headlight and run along the inside of the passenger fender into the cabin.Originally posted by Melon

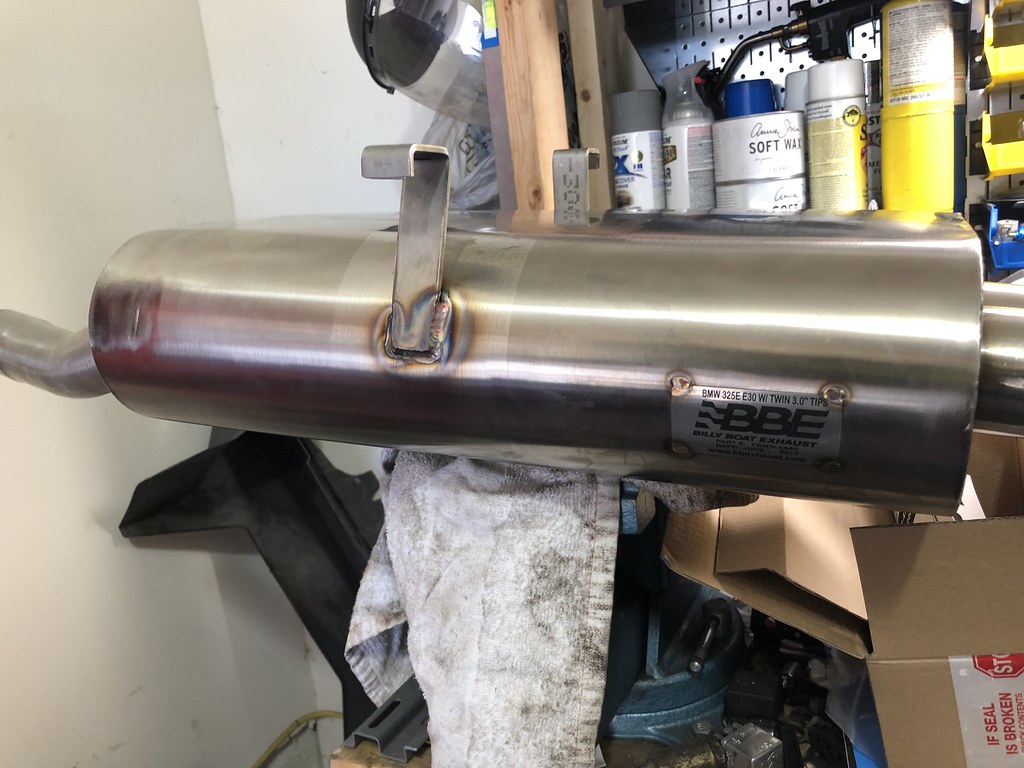
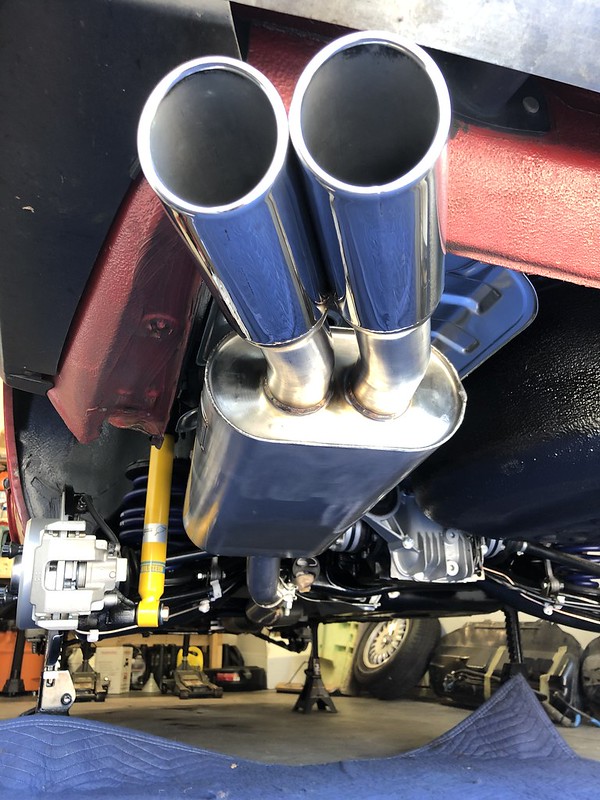
So I ended up cutting the hanger bracket off when I got home from work today. I was super nervous to cut into the muffler but it came out way better than I hoped:
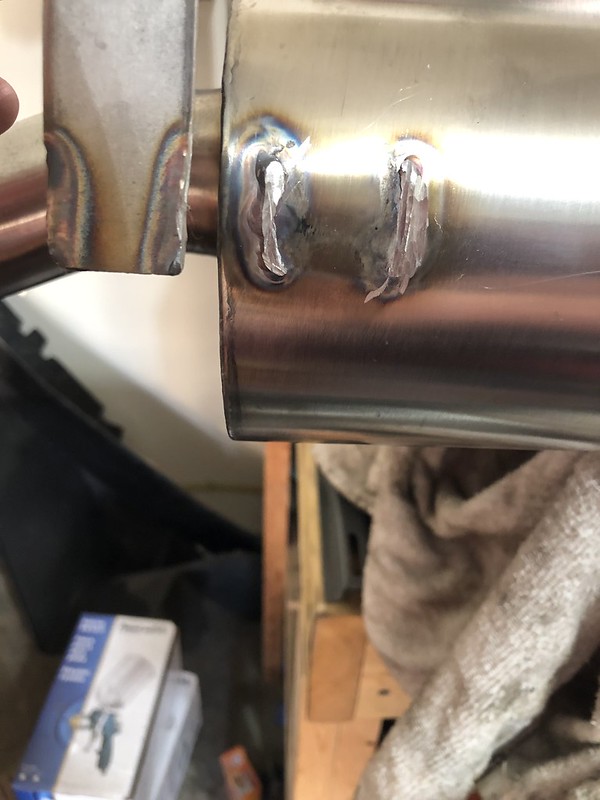
After some filing, grinding, and wire-wheeling:

You can obviously tell where the welds were, but much less noticeable than I was anticipating. And I didn't make any holes in the muffler, the ultimate goal. Once it's mounted I doubt you'll even be able to see that spot behind the rear wheel.
I got in touch with that shop my buddy recommended and am going to swing by tomorrow morning. Should be able to get everything mounted up tomorrow!'86 325e Zinnoberrot /// '02 325ci Schwarz II /// '18 M4 Azurite Black Metallic ///
Albie325 Build Thread | Albie325 COTM Jan 2021Comment
-
Ah ok, my car came from Arizona, maybe that was a hot weather feature.
Also, I have a 2.5 bar fuel pressure regulator.
I bought the 2.5 by mistake, it's yours if you want it.I do things.Comment
-
Sure man, could always use a spare, I'll send you a PMOriginally posted by Melon'86 325e Zinnoberrot /// '02 325ci Schwarz II /// '18 M4 Azurite Black Metallic ///
Albie325 Build Thread | Albie325 COTM Jan 2021Comment
-
Got another project done today that I had been putting off.
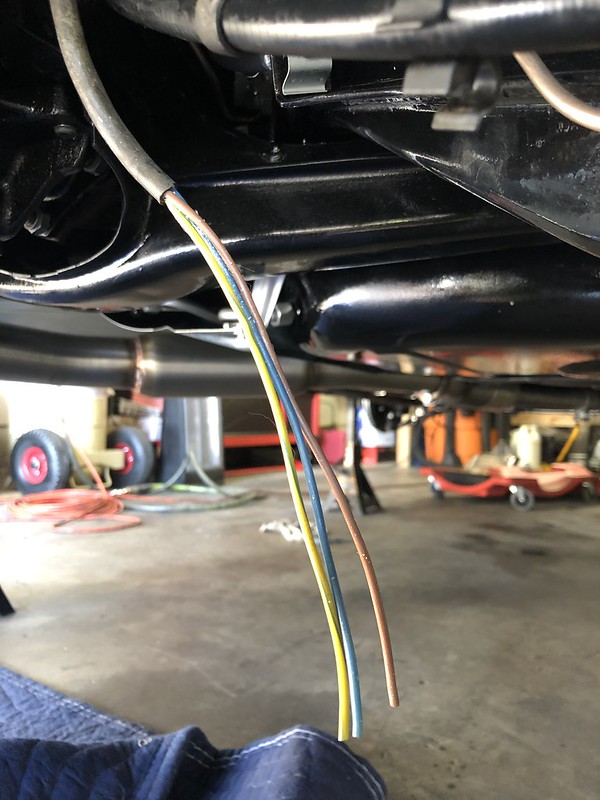
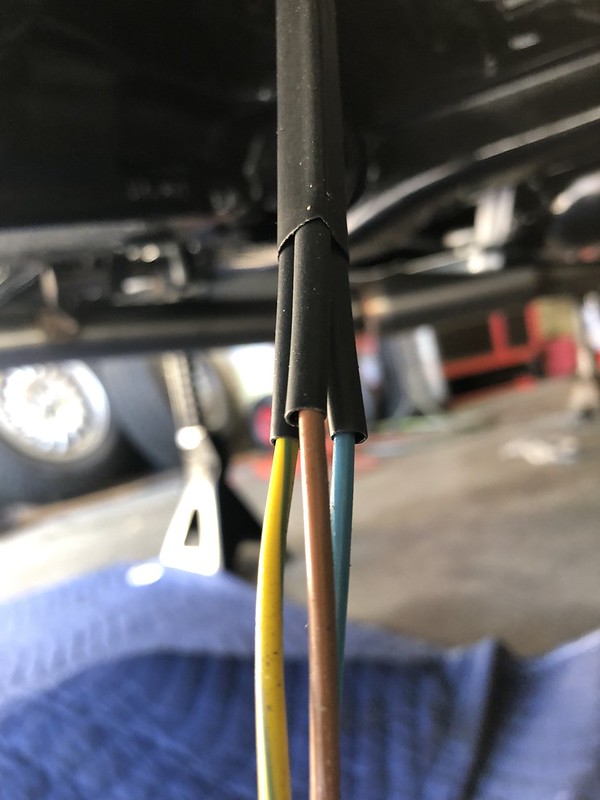
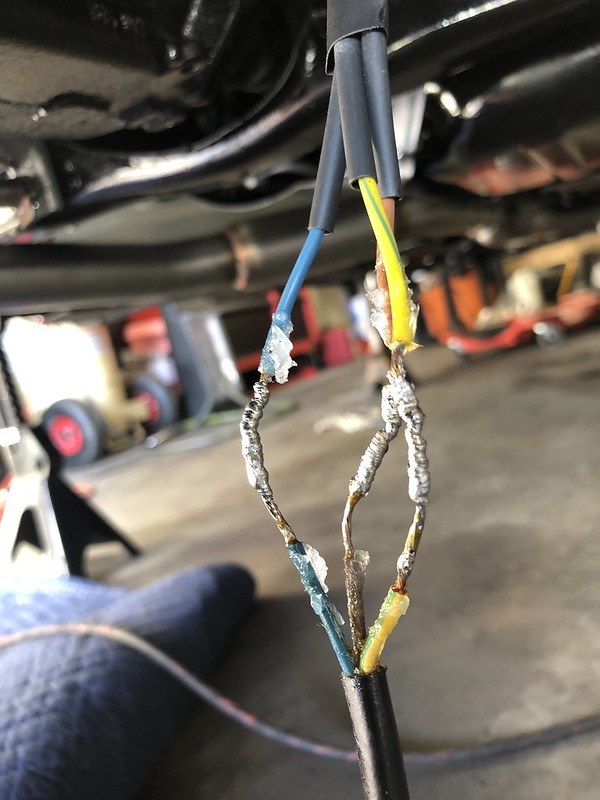
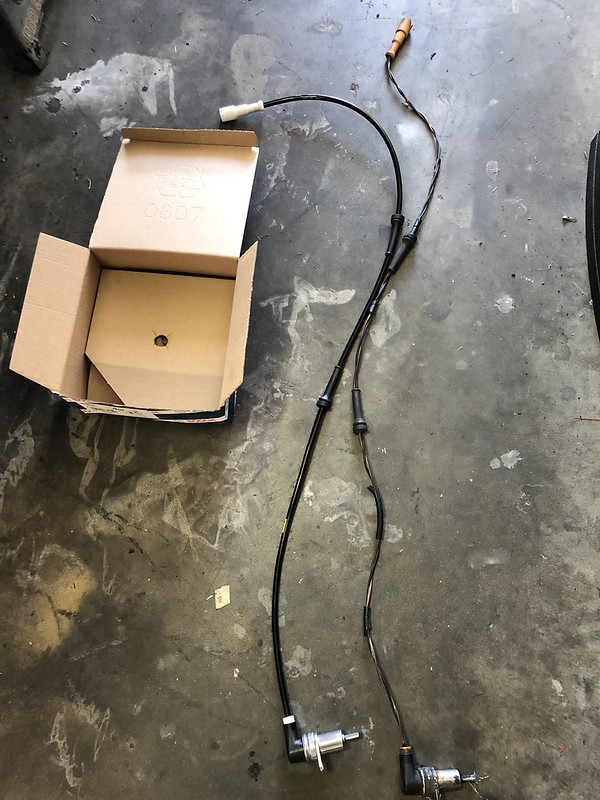
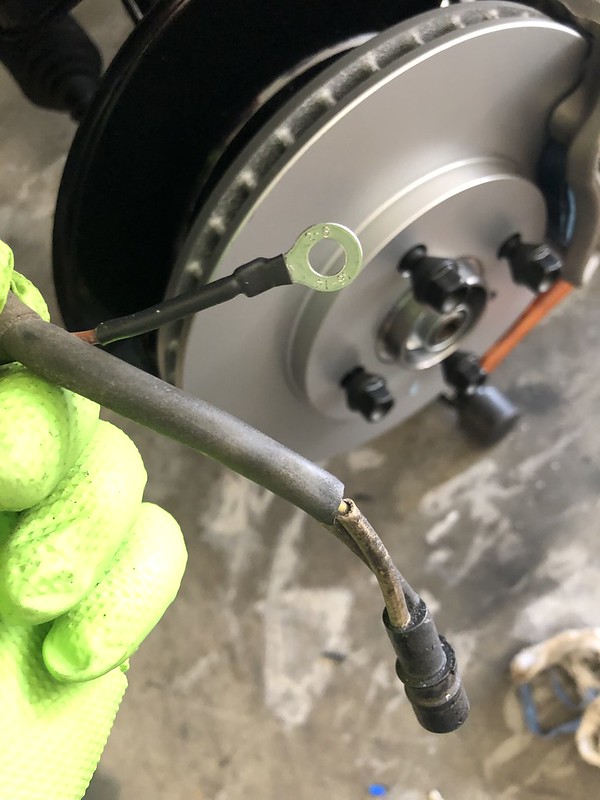
Somewhere along the line, some jamoke cut and capped the rear brake pad sensor harness:
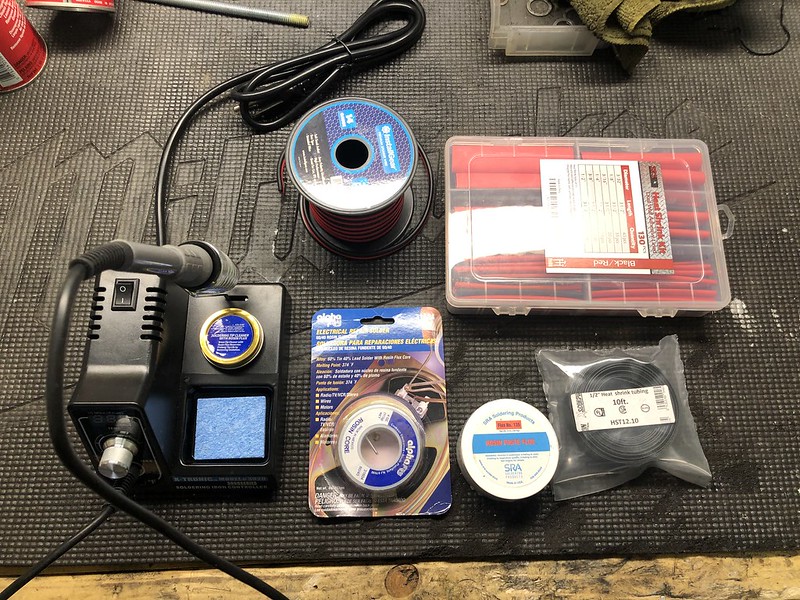
I've never soldered before, so this was going to be a trial by fire soldering under the car rather than on a work bench. I've been reading up on the proper techniques so gathered all the necessary items:
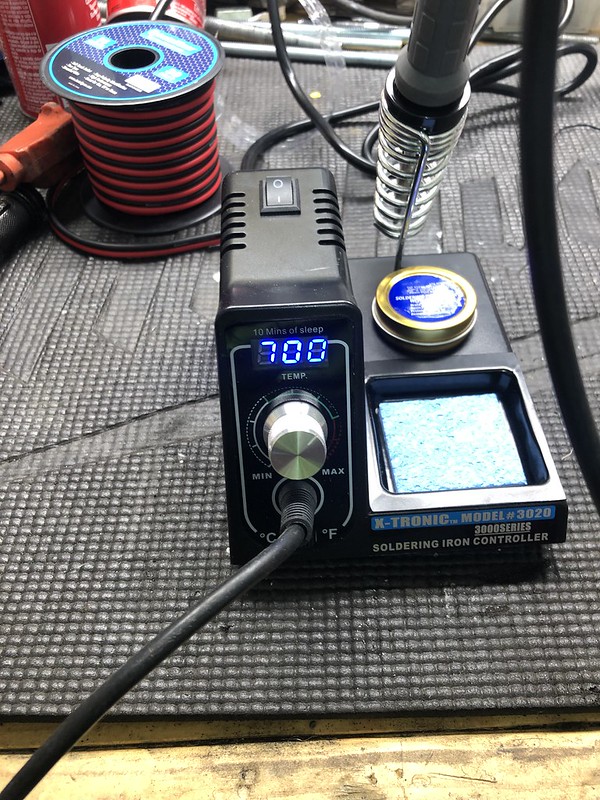
I really liked this soldering iron, it has a dial that allows you to choose the exact iron temp:
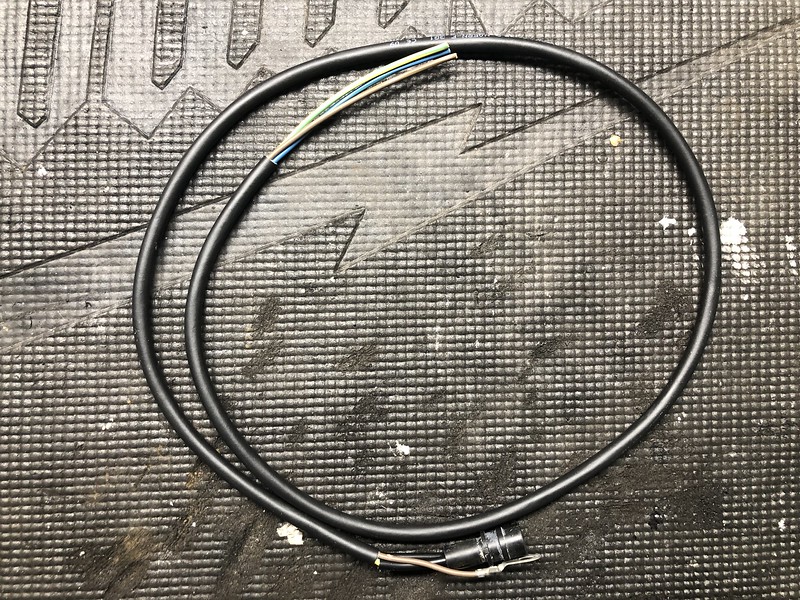
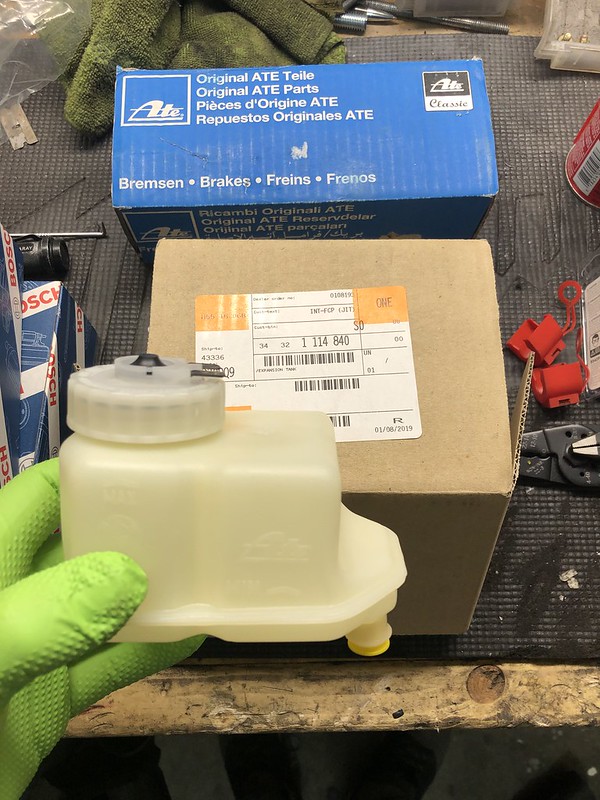
I was surprised to find out the a replacement harness is actually available for purchase:

I did a few practice runs on the bench using the speaker wire until I was happy with how things looked. First couple were pretty ugly, but after I got the hang of it I felt pretty good. Was gonna be a whole nother animal doing it under the car.
Got the old harness cut and stripped leaving enough room for some heat shrink tubing.
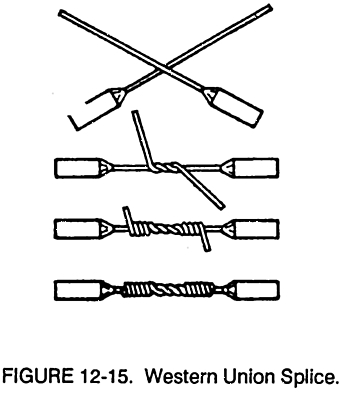
I used a Western Union splice for the connection:
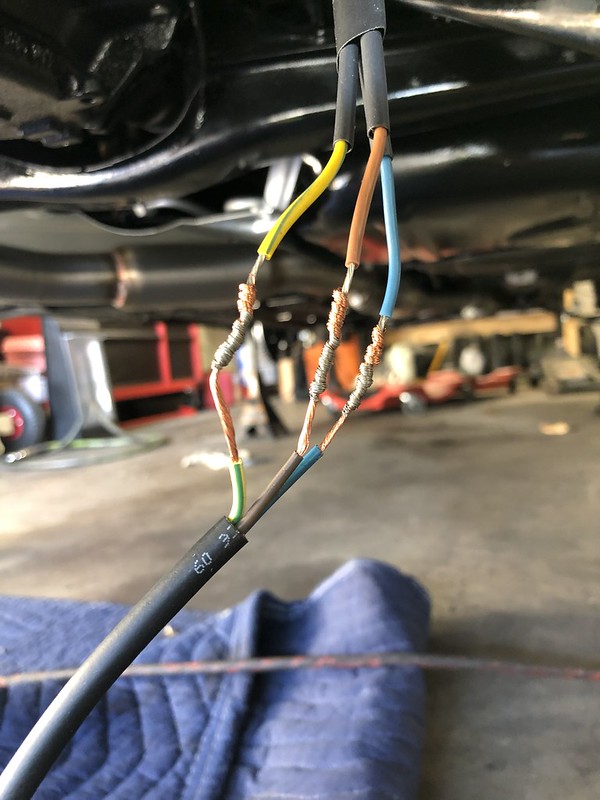
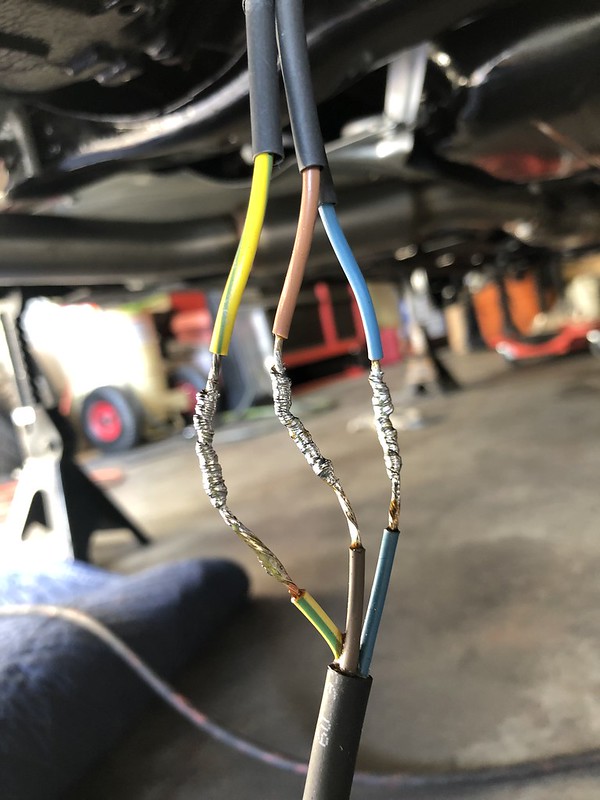
Fluxed the wire, heated the wire from the bottom (with the wire horizontal) and once hot enough, touched the solder to the top of the wire and allowed it to flow down and through the splice. Overall, I was very pleased with how my first solder job came out:
Put some dielectric grease on each end and slid the heat shrink tubing over the top for a nice water proof seal:
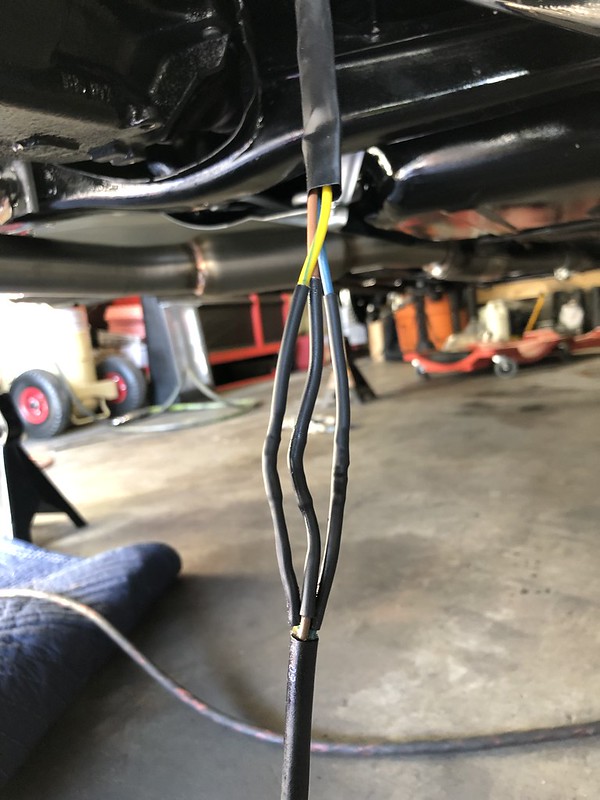
Did the same with the larger tubing, good as new:

Makes me feel a little more confident for when it's time to wire up the euro smileys.
Also got the new hanger welded up this morning. I dropped it off and 20 mins later they had already called me back that they had gotten to it. Paid a little more than I was expecting but they did a nice job. Probably the fastest $50 they ever made.
When I got home I mocked it up to make sure everything looked right, it fit like a glove. Now just waiting on the new heat shield to show up and we can check another thing off the list'86 325e Zinnoberrot /// '02 325ci Schwarz II /// '18 M4 Azurite Black Metallic ///
Albie325 Build Thread | Albie325 COTM Jan 2021Comment
-
Alright, we're in the home stretch for phase one of the project...
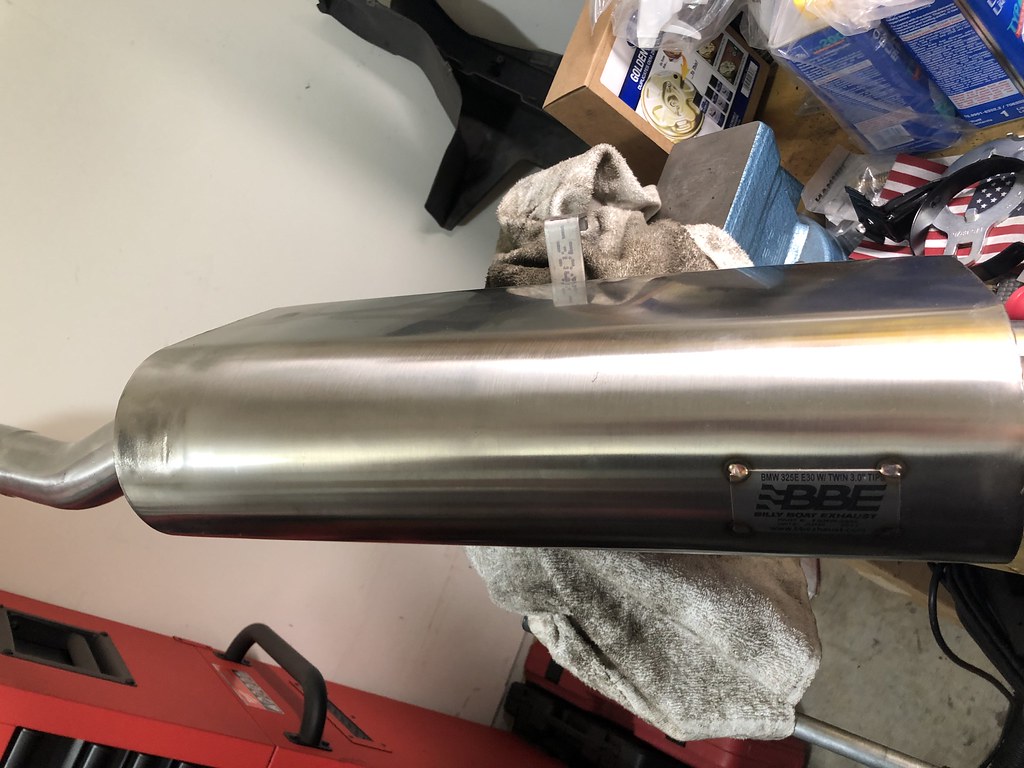
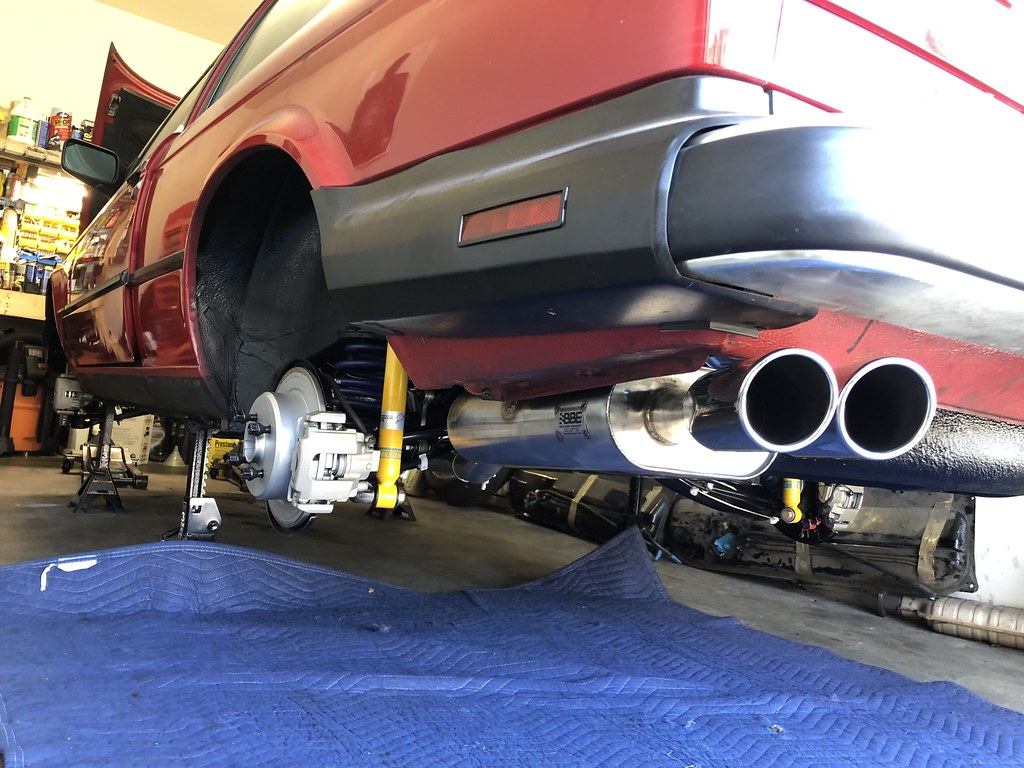
Got the muffler installed, it looks pretty damn good!
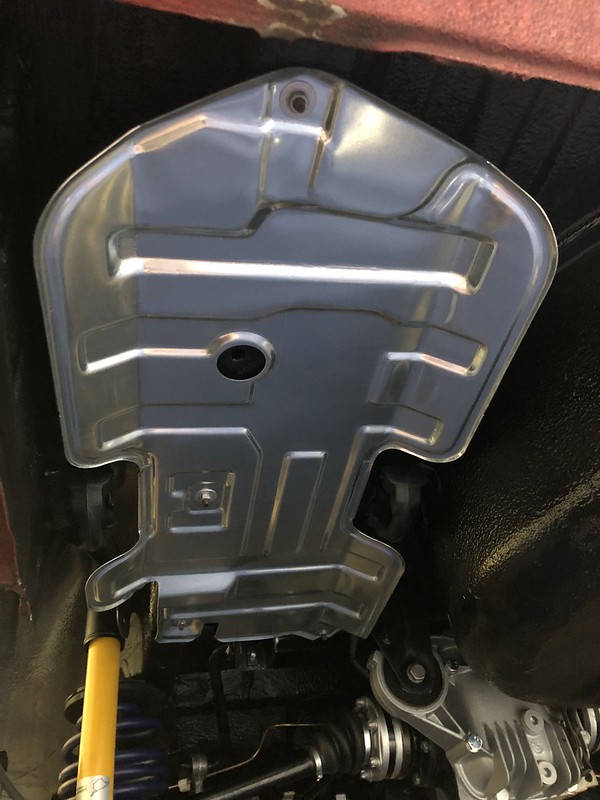
My OCD is much happier with the uncut heat shield:
Can't notice the old hanger position much, and definitely not with the wheels on:


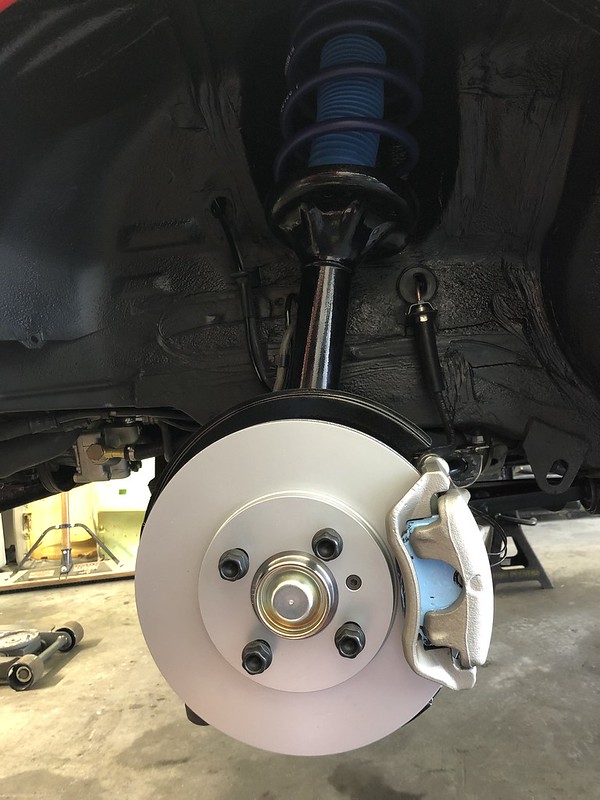
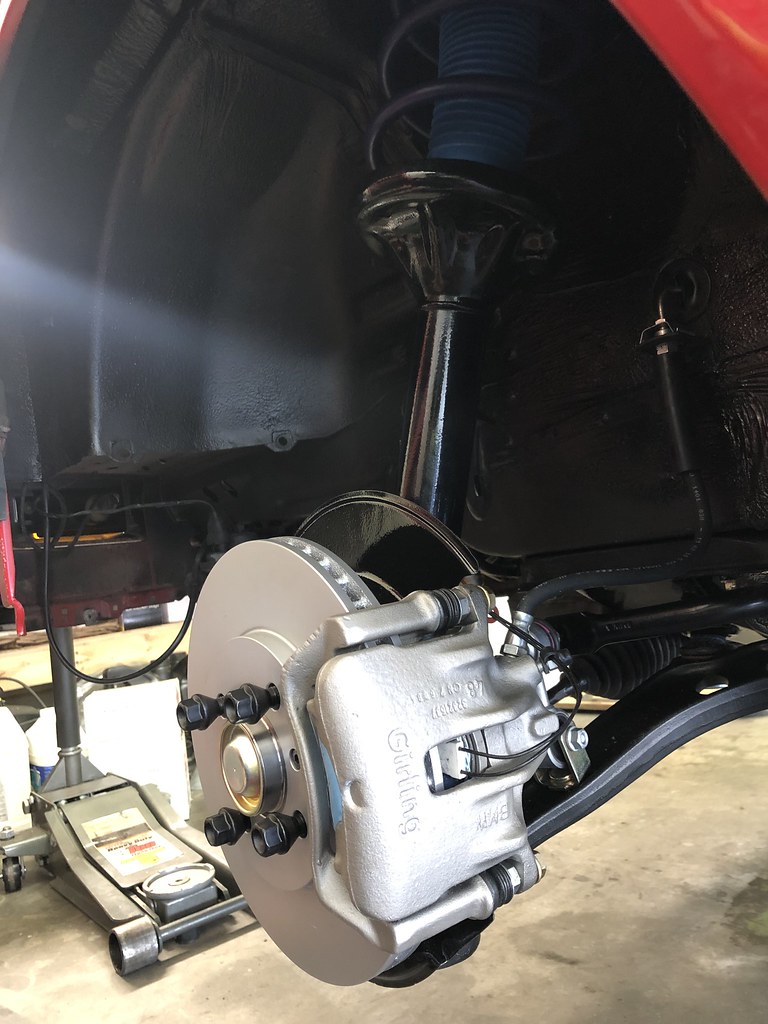
Next I had to finish up the remainder of the brakes, starting with about the most unexciting $300 you can spend on your car:
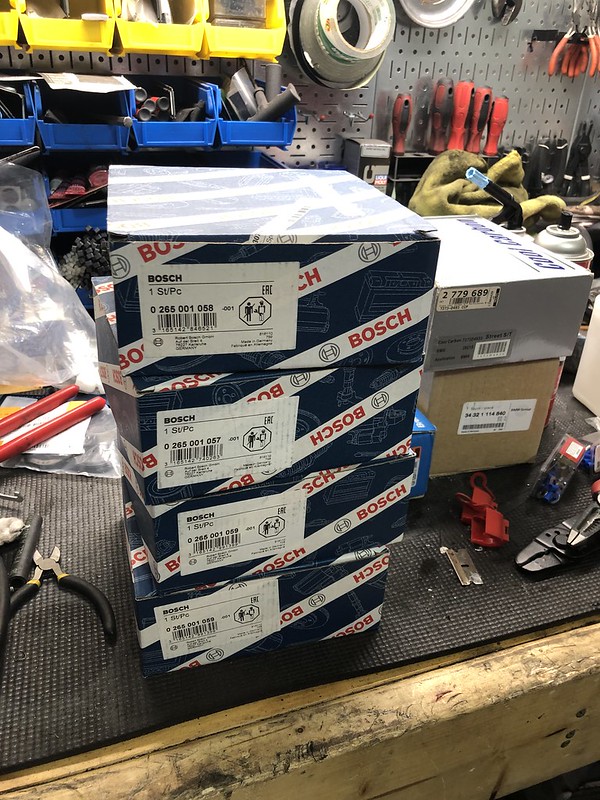
Needed to be done though, the old ABS sensors were crumbling

Also realized my front brake pad sensor harness was missing the ground ring so crimped on a new one:
Not too far behind in the expensive yet yawn-worthy parts:
Bought a brake master cylinder bleed kit only to find out that the MC I bought came with one:
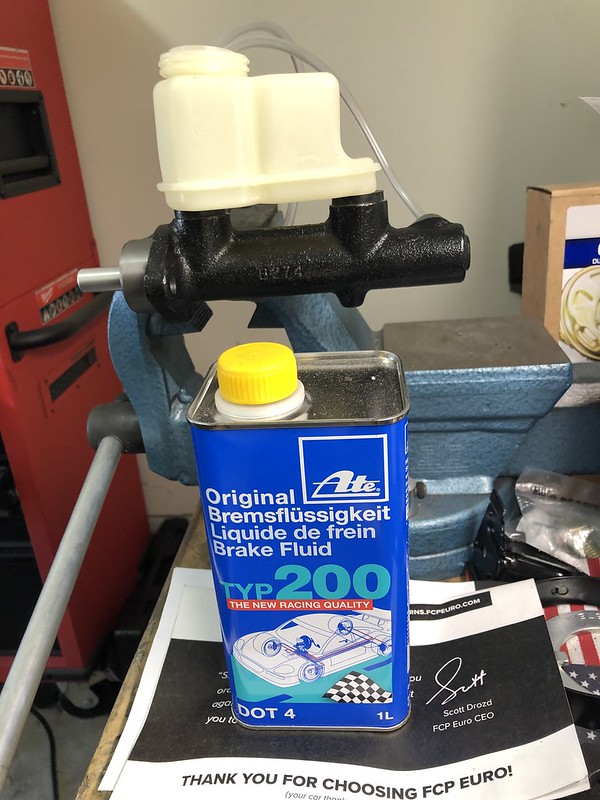
Removing all the bubbles:

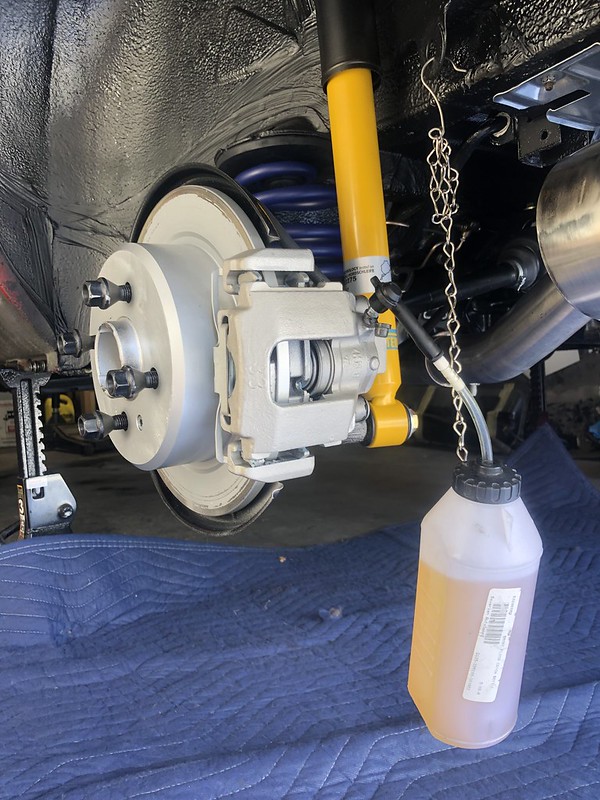
Got the MC installed and all the remaining hard lines hooked up. Now came time to bleed the system, including the ABS pump.
Since I previously removed, cleaned, and pumped the ABS pump full of compressed air I wanted to do a thorough job of flushing the ABS module. I found this thread which was helpful:
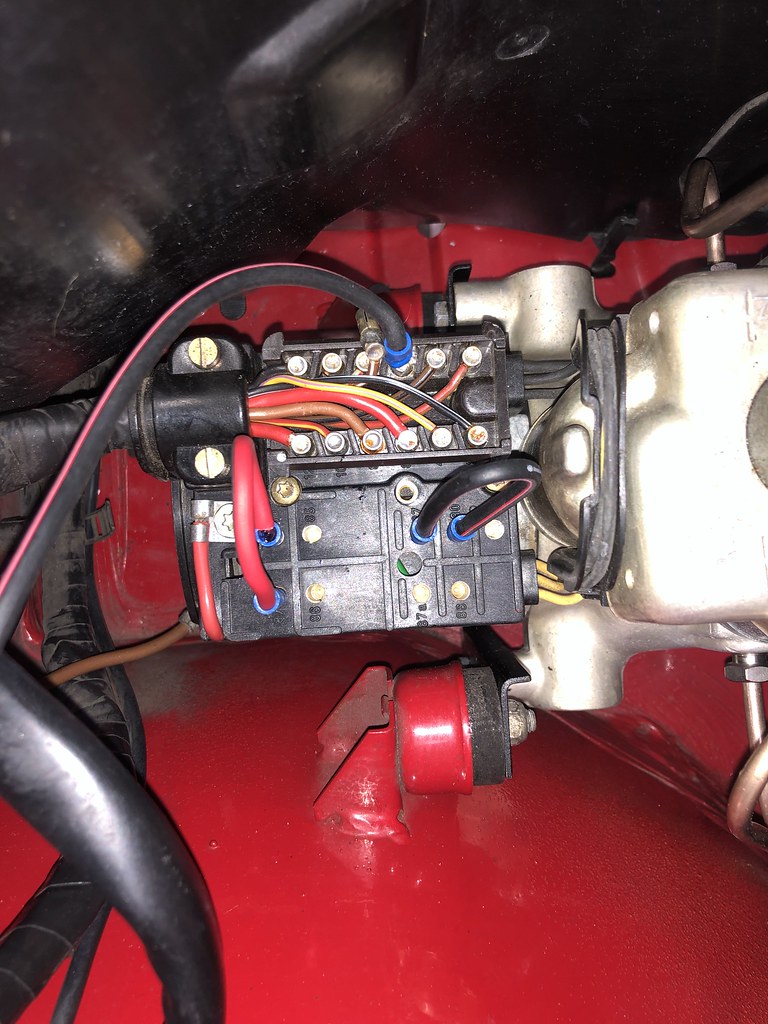
So I removed the cover and the two relays on the ABS module as well as the plastic cover for the harness plug. As you can read in the above mentioned thread, the pin positions you need to worry about are pins 87 and 30 from the relay on the left, 87 and 30 from the relay on the right, and pin positions 1, 3, and 5 from the harness plug.
The harness plug pins are individually removable using some small needle nose pliers as you'll notice here with pin 5:
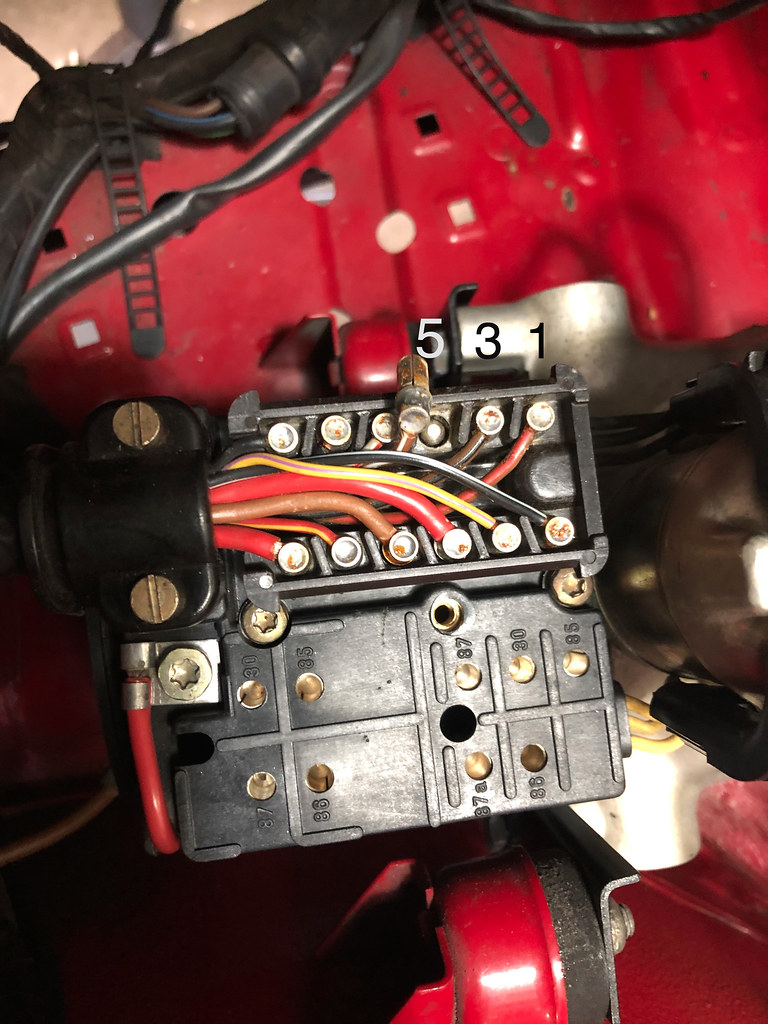
- Pins 87 and 30 from the left relay supply power to the ABS pump itself.
- Pins 87 and 30 from the right relay supply power to the solenoid valves of the ABS module that open and close to selectively provide pressure to the different brake calipers
- Position 5 on the harness plug supplies the rear caliper solenoid, one solenoid for BOTH rear brakes
- Position 3 on the harness plug supplies the passenger front caliper solenoid
- Position 1 on the harness plug supplies the driver front caliper solenoid.
What you'll need to do is jumper pin 87 and 30 on the left to run the ABS pump. Keep only one of the pins plugged in until you are ready to actually bleed to prevent the ABS pump from running too long.
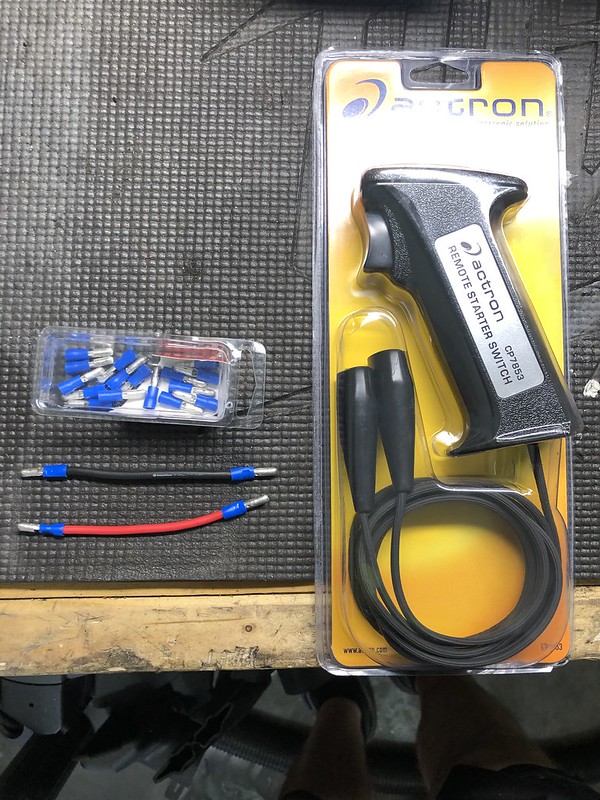
Jumper pins 87 and 30 on the right relay to get power to the solenoids. Using a remote starter switch (purchased for $15 at Advance Auto), you'll need to attach one end of the starter switch to the individual solenoid pins (Positions 5, 3, and 1 on the harness plug) and the other end to ground, I used one of the strut mount bolts.
Here's the setup I used:
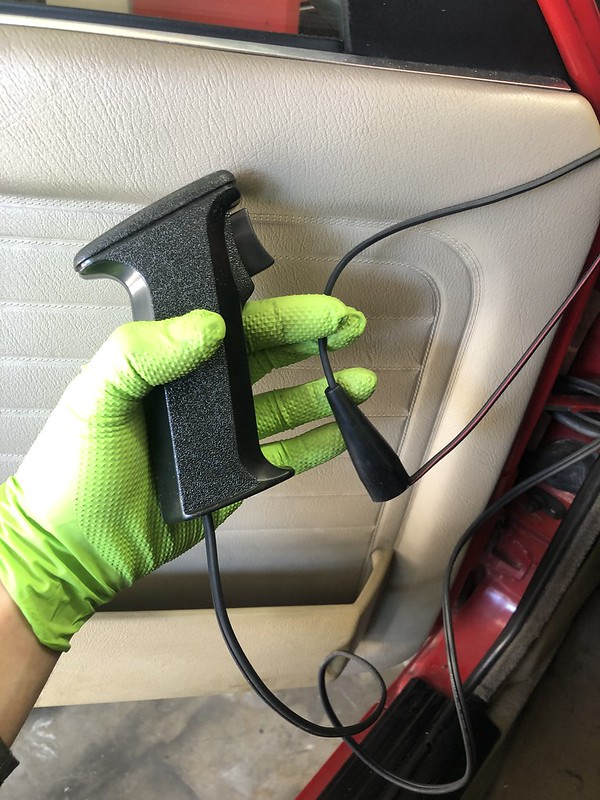
In order to connect the starter switch to the individual solenoid pins, I rigged up a "female" adapter from the male bullet plugs on the other jumpers:

I used a fairly long length of wire for this as you'll need to be sitting in the driver's seat while cycling the solenoid valves.
As I said before keep one of the jumpers for the relay on the left unplugged until ready to start bleeding otherwise your ABS pump will be running the whole time.
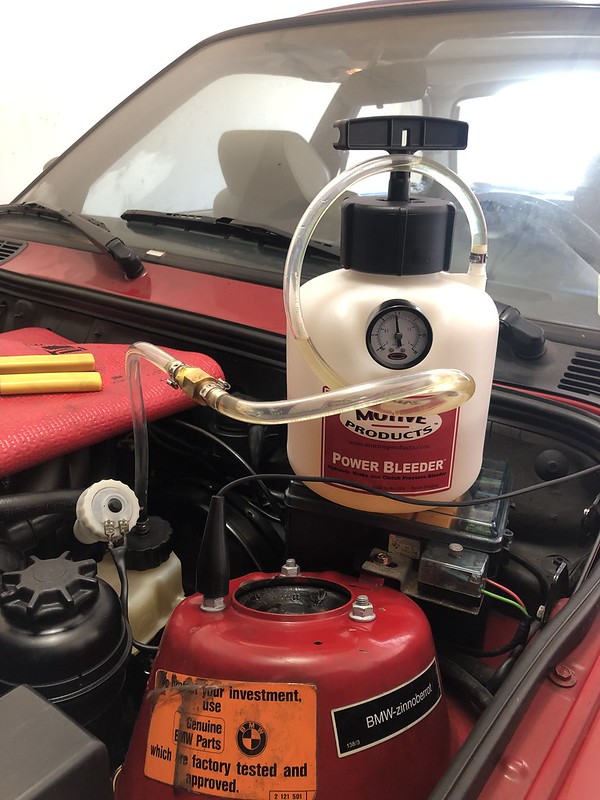
Get your pressure bleeder hooked up, one end of the starter switch grounded on the strut screw:
And the other end attached to the long wire that is plugged into solenoid position 5 (rear wheel solenoid) on the harness plug:
So for the individual solenoids, it will correspond to the proper way of bleeding the brakes: Passenger rear, driver rear (solenoid position 5), Passenger front (solenoid position 3), and finally driver front (solenoid position 1).
At the start, you should have:
Right ABS relay positions 87 and 30 jumpered
Starter switch connected to pin 5 and to ground
Left ABS relay HALF jumpered (remove either the end in pin 87 or 30, it doesn't matter which).
Make sure to fill the pressure bleeder with plenty of fluid as you'll go through a fair amount. I filled it with two liters of brake fluid and was getting pretty low by the end of the whole process.
Start by bleeding the passenger rear caliper until the line is essentially free of air. You want enough fluid to drain into the catch can until the drain hose is submerged to prevent air from re-entering. Once you're happy, put your key in the ignition and turn to position 2 (but don't start the car). Now, plug in the free end of the left relay jumper, you should hear your ABS pump turn on. Now, get in the car, and slowly depress the brake pedal while flipping the starter switch, you can hear the solenoid click on and off as you flip the switch. Flip the switch rapidly as you depress the pedal, you can actually feel it in the pedal as the solenoid opens and closes. As you release the brake pedal, release the trigger on the switch and slowly allow the pedal to return to the starting position. Do this 5 or so times. Now go back and check on you caliper and ensure no further air is coming out. When satisfied, turn the ignition switch off, unjumper the jumper to the ABS pump, and close the bleeder valve on the caliper.
Move on to the driver rear caliper and do the same, keeping the starter switch connected to pin 5 (this solenoid controls both rear calipers).
Then move on to the passenger front, and now connect the starter switch to position 3.
Then move on the driver front, starter switch to position 1, you get the idea.
As the pump turns on, you can actually see some air coming into the system that had previously been absent when just bleeding the caliper. I was happy with the results, we'll see how the brakes feel upon driving.
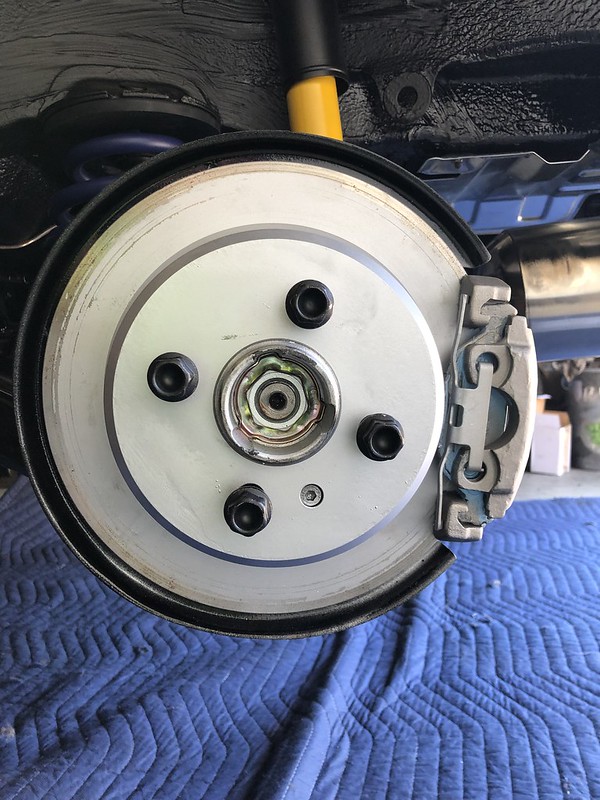
Last project of the day, got all the wheel hub collar nuts torqued with new lock plates and covers:
Got the engine bay cleaned up, amazing what some new plastic parts can do for the look of things. Also awesome to actually be able to see the fluid level in the coolant expansion tank:
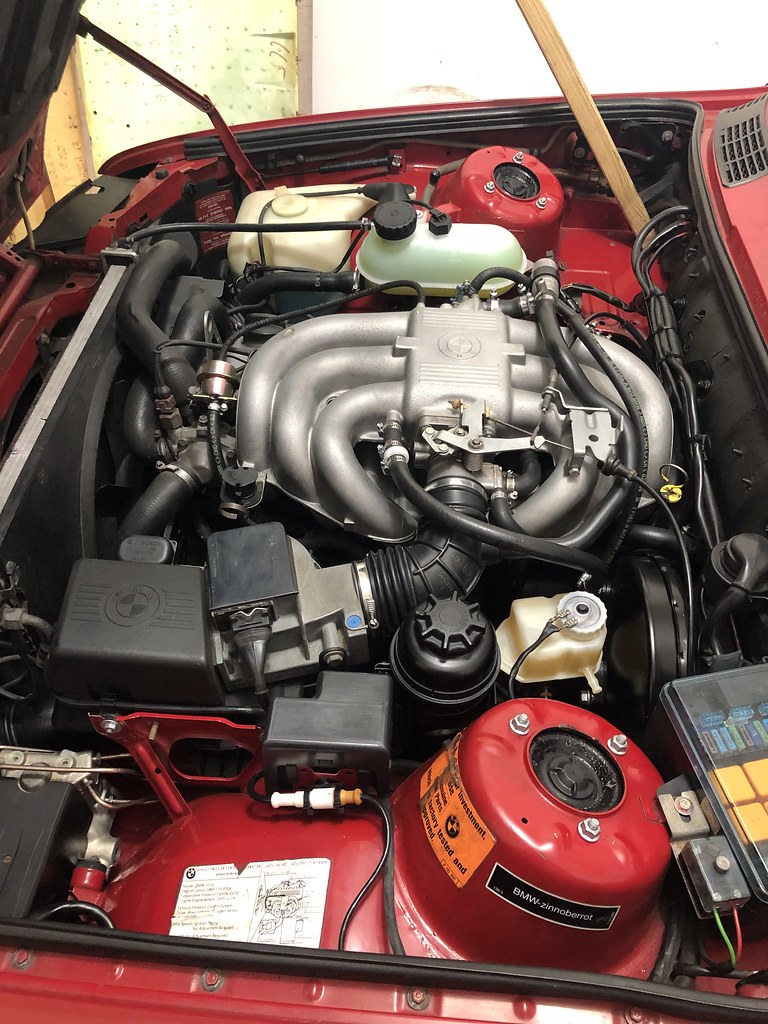
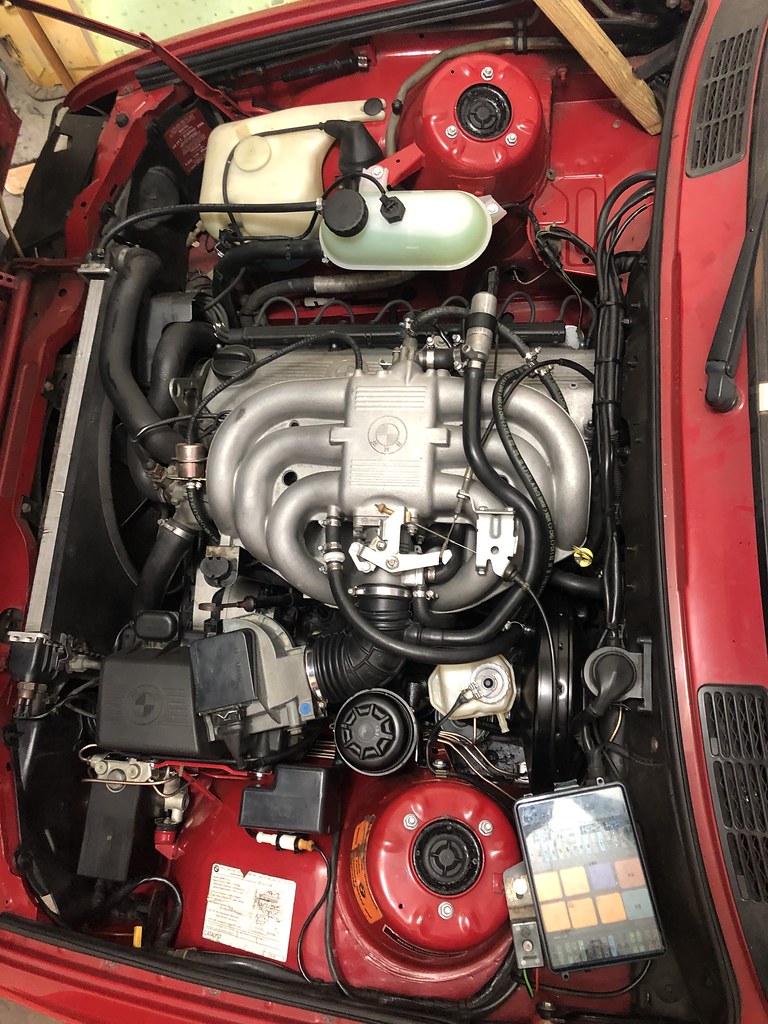
Filled the PS reservoir with new LiqiuMoly ATF fluid. Waiting on some decals from Pukar Designs to complete the engine bay.
Last I ended up mounting and torquing the tires, and torqued all the swaybar connections per the Bentley with the car on the ground. Unfortunately, I misread one of the torque values for the rear swaybar link to trailing arm (Supposed to be 16 ft/lb, ended up torquing to 30ft/lb as the rest of the bolts were all 30) and snapped the bracket bolt off. Those rear trailing arm brackets are currently back ordered everywhere, and I threw my old rusted one away. If anyone has an extra (preferably new) laying around I'd be very interested.
I couldn't help myself but throw a couple gallons of gas in there and start her up. Took about 3-4 turns for the fuel to pump through and... she ran!!! Had some surging idle that I'll now have to track down (again, ugh) but the exhaust sounded good. My battery had died by the time I tried to start it up again today after work to try and sort thing out. It wouldn't hold a charge when I tried to jump it so I'm stuck until I can go get another one on Wednesday. Stay tuned...'86 325e Zinnoberrot /// '02 325ci Schwarz II /// '18 M4 Azurite Black Metallic ///
Albie325 Build Thread | Albie325 COTM Jan 2021Comment
-
I didn't cycle the ABS module and my brakes bled fine.
(Admittedly it has never worked since I got the car, and am working on that.)
I love the Motive power bleeder man, makes super quick work of it.
I appreciate the wiring write-up, I can begin to diagnose my ABS module with that.I do things.Comment
-
Ya the power bleeder was great, the link I posted has another link in it that goes into way more detail than I did for inquiring mindsOriginally posted by Melon
The whole bleeding the ABS thing is probably unnecessary especially if you're only changing calipers or doing a fluid flush since there should still technically be residual fluid in the system. Since every component of my brake system (MC, hard and soft lines, calipers) was replaced and I directly compressed air into the pump, I wanted to be sure as much air was out as possible. It was easy enough to do and didn't require much in the way of disassembly or tools so I figured what the hell. I definitely noticed more air getting pushed through once I got the ABS pump to run.'86 325e Zinnoberrot /// '02 325ci Schwarz II /// '18 M4 Azurite Black Metallic ///
Albie325 Build Thread | Albie325 COTM Jan 2021Comment
-
great work mah guy. the soldering kit you got was one i was looking at for a while, but decided to purchase another one for about the same cost. Temp control is so crucial for soldering.Comment
-
So I got the car running again last weekend and all the undercarriage stuff was buttoned up. I was having some surging idle between 1k-2k. Also once the car was warm, it wanted to idle right at 3K for awhile upon turning the car off and restarting, pretty high for an ETA. After warming up a bit, I had some smoking from the exhaust manifold that I was initially worried was an exhaust leak but ended up just being the VHT paint baking on. That has since stopped.
The surging idle didn't, however. I have been using these links as well as a bunch of R3V threads to try and root out the problem:

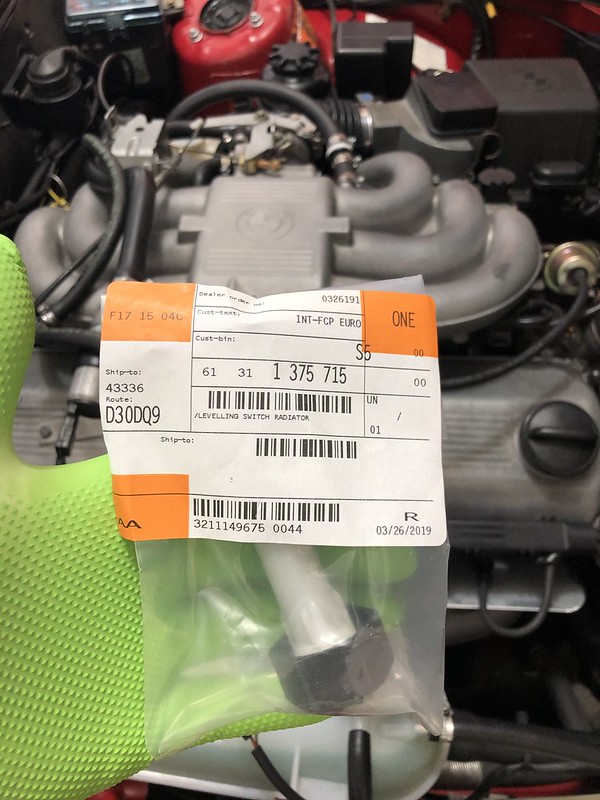
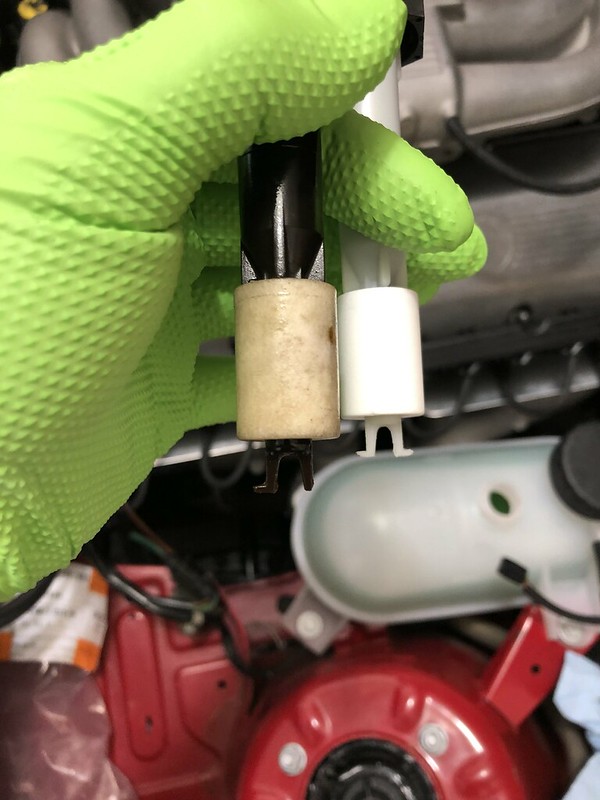
Not related, but I had to replace the coolant level sensor since the old one fell apart when I swapped out the overflow tank:
Moving on to the idle problem, everything on the intake side was replaced within the last year, all hoses and gaskets, the injector O-rings, the whole lot. All fuel hoses, the fuel pump, the fuel filter, both in-line dampeners, all new. I've also cleaned the ICV once before and did it again just for good measure.
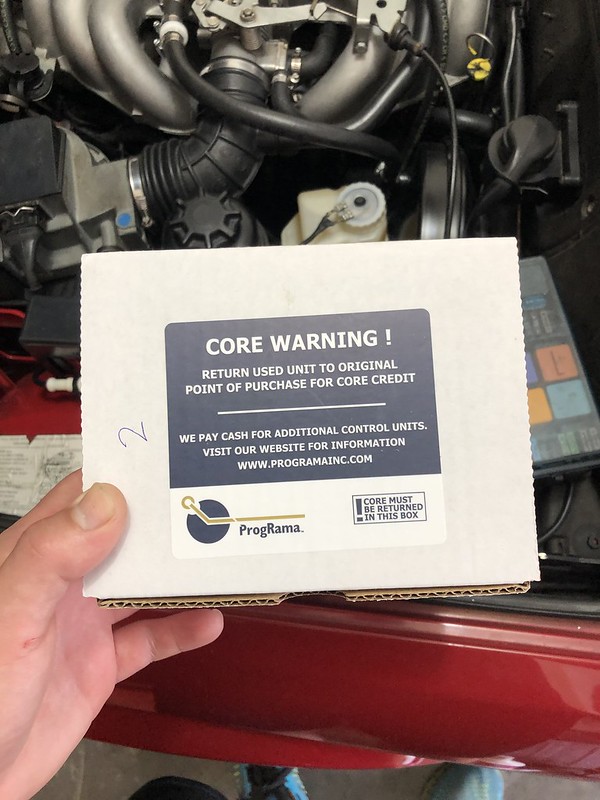
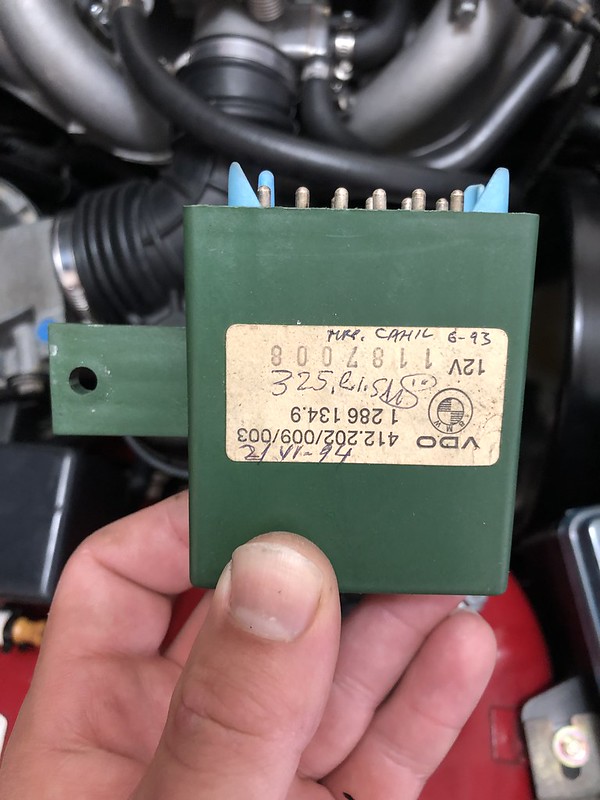
So moving through the usual suspects, I unplugged the ICV with the car running and surging, and it made no difference whatsoever to how the car ran. So I figure maybe the idle control module or idle control valve was the culprit. I bit the bullet and ordered both figuring they're both 30 years old anyway and will probably go NLA just when I need to order.
New (refurbed) ICM:

From my understanding, only the early model cars have this ICM, later models have the idle control integrated with the DME. The solder points are known for going bad, and it actually wasn't too crazy expensive to replace. It's located above the glove box, there's a plastic cover with 2 half-turn plastic lock nuts and two small Phillips head screws to remove, and there it is:
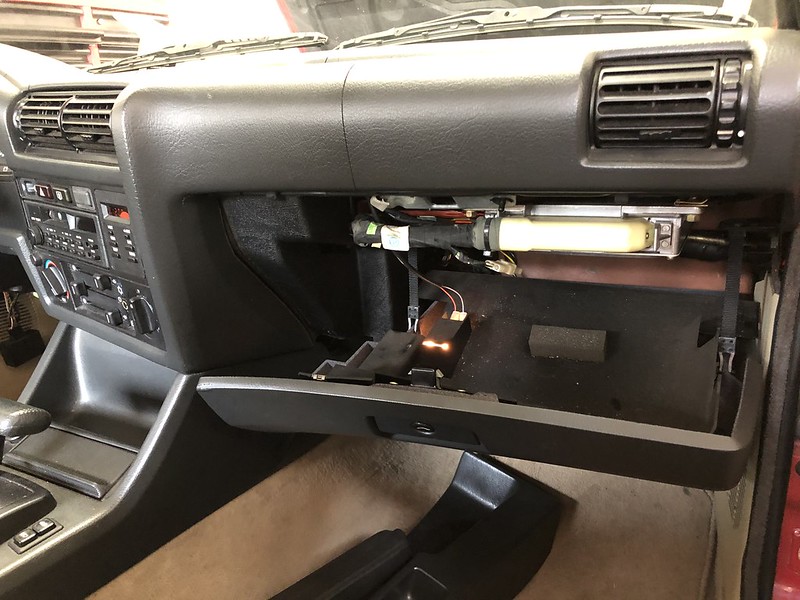
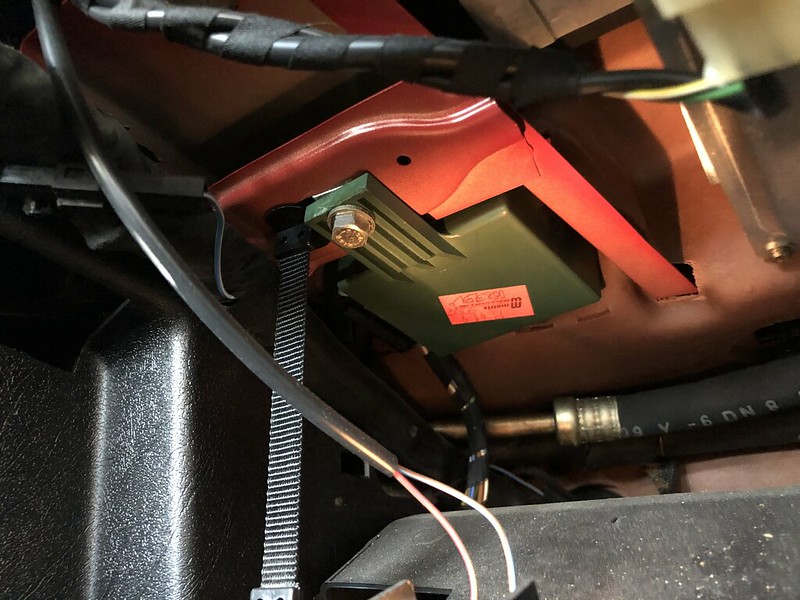

Only one screw holding it in place, really easy to remove.
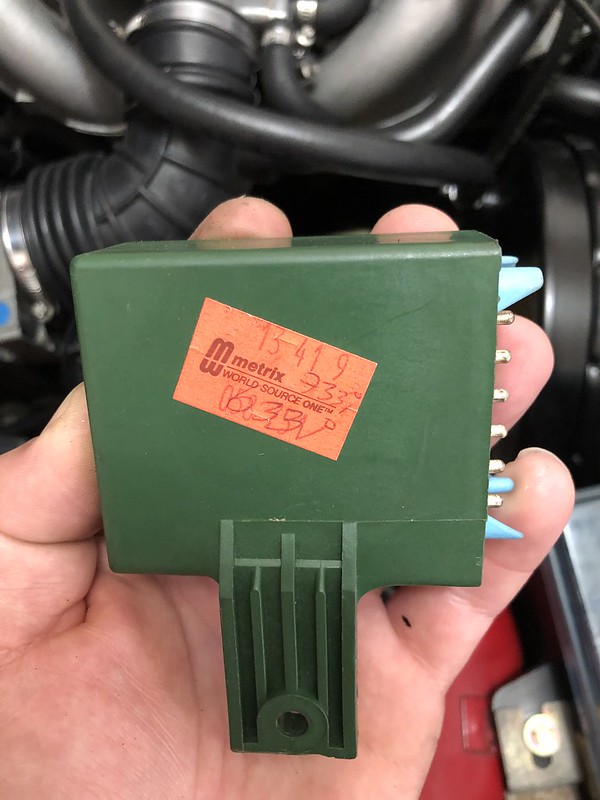
To my surprise, it looks like this was already replaced at some point based on the stickers:
Swapping in the new one seemed to help the idle a little, but not a lot. So then I swapped in the new ICV:

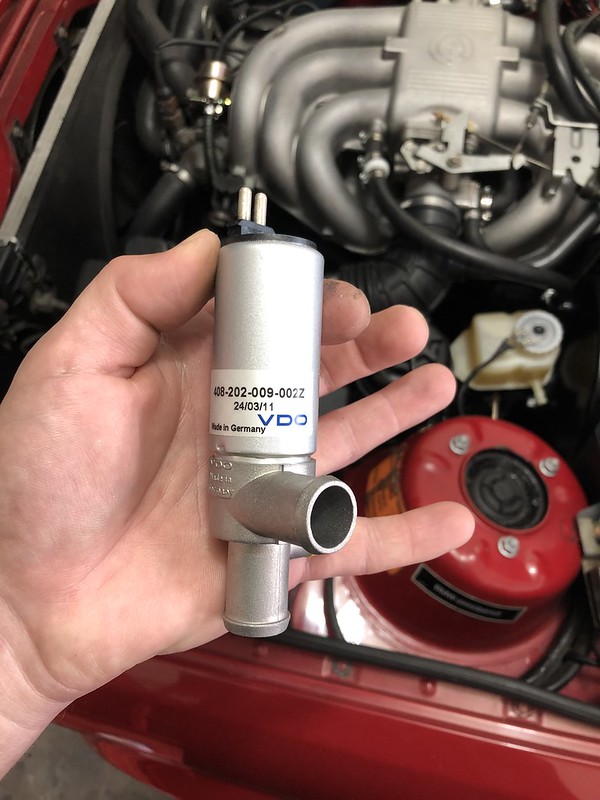
Definitely looks cleaner:
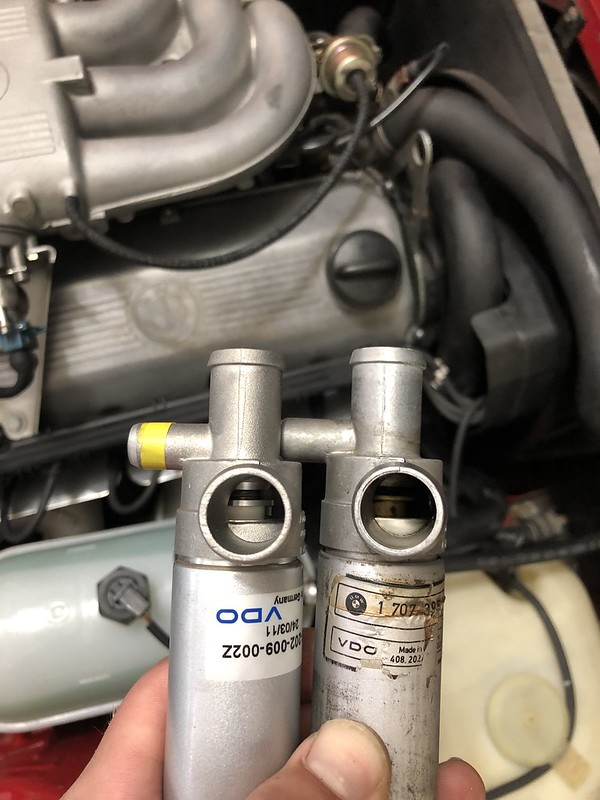
Unfortunately, this didn't help either.
Bummed, I took the car out for a drive just to see if maybe that would clear things out a bit. Aside from the idle, it ran pretty good and the suspension, steering, and brakes (after bedding in) all felt great. They were maybe a little soft and I might bleed them once more. I stopped to fill up the gas tank (and put in some LiquiMoly JecTron in the tank) and a guy came running out to ask me about the car. Ol' girl still got it.
I also felt she was worthy of a well-deserved bath, she was FILTHY:
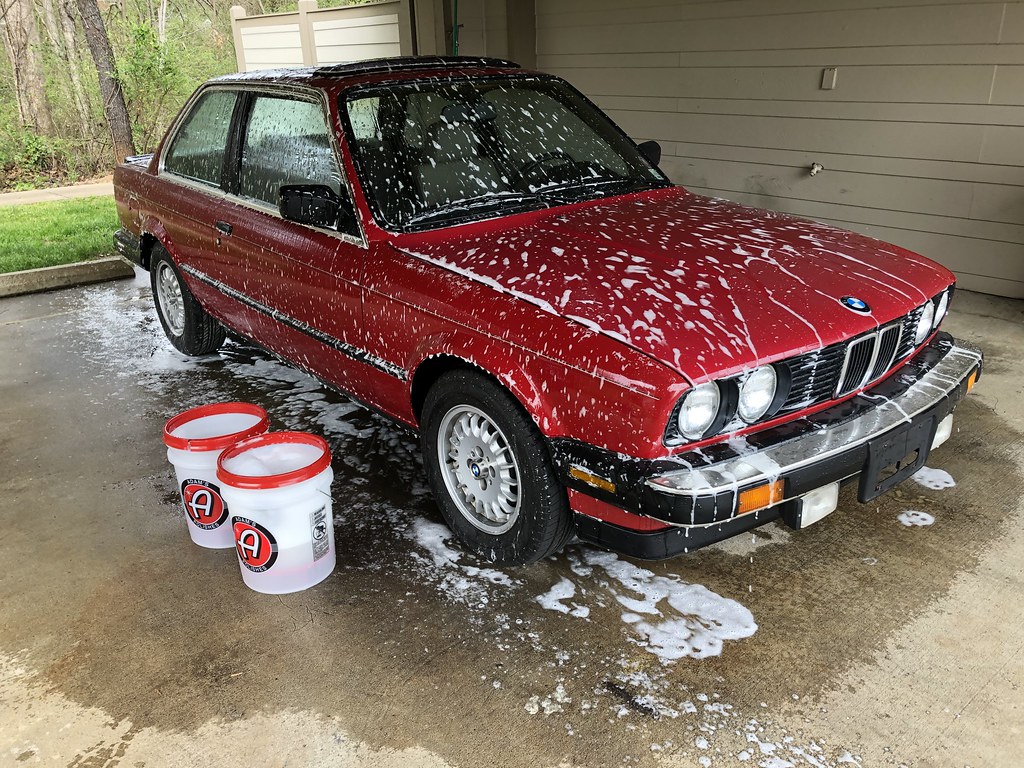
Not the best pic, but here's the new ride height with the Bilstein B8's and H&R sports:
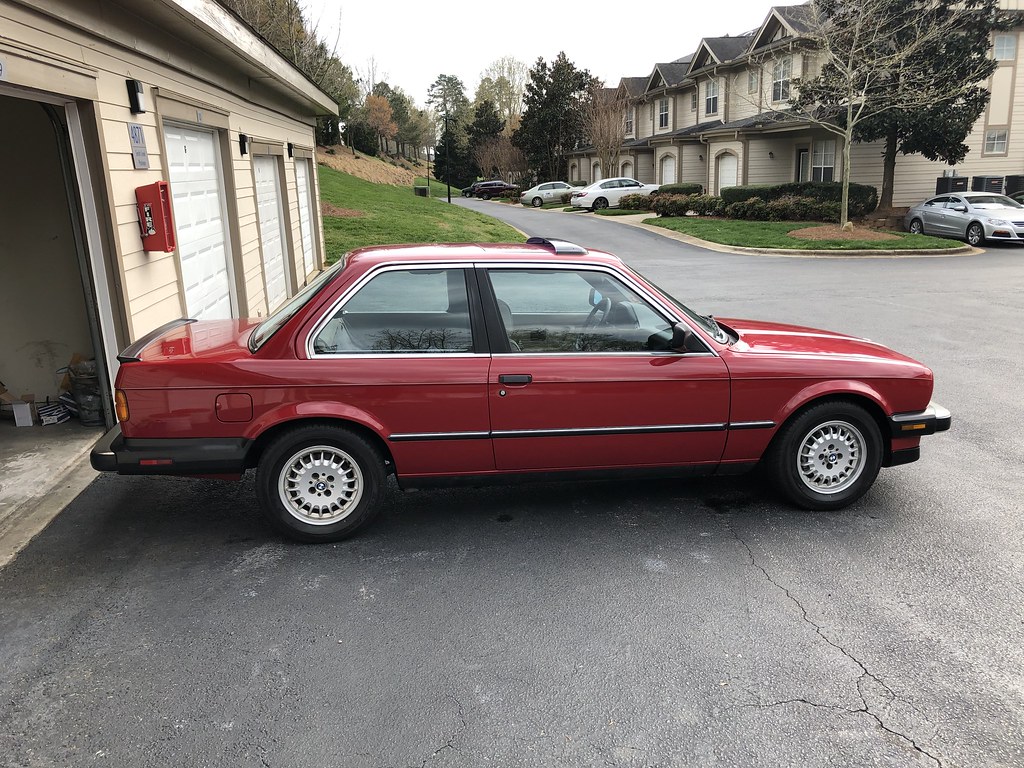
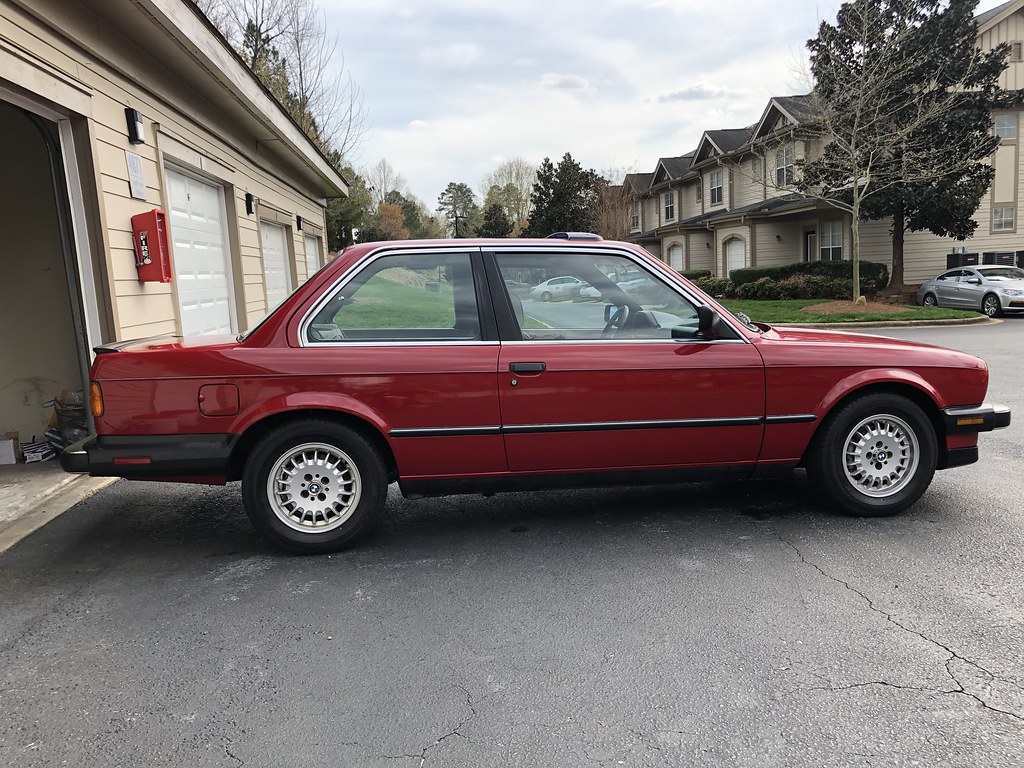
Unfortunately I don't have a great pre- pic for comparison.
Looks great, except it's running like poop.
The car hadn't run in almost a year, but everything had been replaced and was running fine with no idle issues prior to shutting it down. I have triple checked that all the hoses are tightened down. I re-tightened all of the valve cover studs, the gasket was also replaced within the last year. I checked the oil dipstick and the oil filler cap. I have sprayed enough starter fluid around the engine bay to blow the car up several times over. I can't find a leak, but all symptoms seem to point to unmetered air getting in somewhere.
Other symptoms:
- Putting the car in drive steadies the idle and drops it to a steady 1k, however when it's running right it's usually at 700 rpm.
- While in drive (or reverse), the car seems to want to "pull" harder than usual, and I had to apply the brakes harder than expected to keep the car stopped. I thought maybe this had to do with the new 3.25 diff gearing but I think if the idle was normal this wouldn't happen.
- With the car in park, revving the engine elicits a "hyperdynamic" response. The engine rev's way higher and stays up longer than what I would expect for the amount of throttle supplied
Could it be the TPS or crank position sensors? Would an exhaust leak cause this? Or a new O2 sensor? Any other suggestions???? I'm at my wit's end. Would really appreciate some input.Last edited by Albie325; 03-31-2019, 06:30 PM.'86 325e Zinnoberrot /// '02 325ci Schwarz II /// '18 M4 Azurite Black Metallic ///
Albie325 Build Thread | Albie325 COTM Jan 2021Comment
-
I had a car come in that was pushing the car when he did not have his foot on the gas. And it wound up being his coolant temp sensor. It was causing it to become rich enough that it was like lightly stepping on the accelerator pedal.
You have two of them on the M20. One for the gauge and one for the computer. If your gauge is reading correct temperature maybe your computer's sensor is bad and reading high. Or the wiring to the sensor is bad.How to remove, install or convert to pop out windows
http://www.r3vlimited.com/board/showthread.php?t=297611
Could be better, could be worse.Comment
-
1. You need to smoke test instead of do the starter fluid method.
2. There is a test you can do on the TPS while on the bench to see if it's operating correctly. I'm unsure if the M1.0 TPS is the same PN as the M1.3 TPS. Additionally, you might have to verify your CPS is at the right distance from the flywheel. You will have slightly different symptoms than 80% of the other users because you have a M20b27, and everyone else has the later model M20b25.
3. When are you putting on those bumpers, I would love a detailed write up to help guide me during my euro bumper installation process.Comment
-
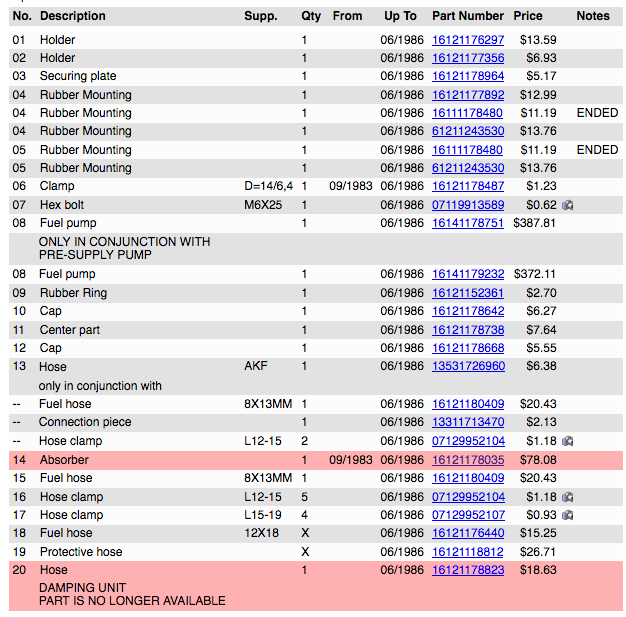
Hmm interesting. I've previously replaced sensors 12, 13, and 15 in the below pic as they were pretty reasonably priced and looked to be crumbling. Sensor 15 is actually NLA and is a 20Celsius (white top) temperature switch, I replaced it with part #12-63-1-279-719 which is a 0Ceslsius (purple top) switch. As a result, the car typically runs just to the colder side of midline on the temp guage and was running fine before this most recent project. I didn't replace sensor #16 as I had no indication it was bad (and it's expensive, ~$200):Originally posted by rzerob


Are these what you're talking about? Also, I did disconnect the coolant overflow tank and hose connected to the top of the radiator, but didn't re-bleed the coolant system, you think that would matter? Might be next on my list.
Yes a smoke test is in my near future, once I can get a free day off work to do it. I'll look into the TPS as well, as for the CPS, I haven't messed with them at all so not sure why the distance would be off.Originally posted by paynemw
I probably won't be fitting the euros on until I'm getting ready to paint the car and MTech 1, not sure when that will be. I will definitely do a write up when I do it, until then here's a few links that I'll be referencing:
There's a few threads within a thread as well.'86 325e Zinnoberrot /// '02 325ci Schwarz II /// '18 M4 Azurite Black Metallic ///
Albie325 Build Thread | Albie325 COTM Jan 2021Comment
-
Impressive seriously.Comment


Comment