

Great thread full of mint DIYs, thank you so much for posting it all. I'll definitely be referring to them for my build
-
-
Subscribed.How to remove, install or convert to pop out windows
http://www.r3vlimited.com/board/showthread.php?t=297611
Could be better, could be worse.Comment
-
No problem! Not sure my ABS was working as my brakes were one of the biggest issues I had (pedal was hard as a rock). Hopefully this, new booster/master cylinder, and some new sensors all around will fix it.Originally posted by Melon
Hope they help! Figured I'd try and save people a few hours worth of reading. I'm already doing all this, might as well take a few pics along the way.Originally posted by econti'86 325e Zinnoberrot /// '02 325ci Schwarz II /// '18 M4 Azurite Black Metallic ///
Albie325 Build Thread | Albie325 COTM Jan 2021Comment
-
So it's been pissing rain here in NC for basically two weeks straight. Has been a pretty miserable view from the garage:
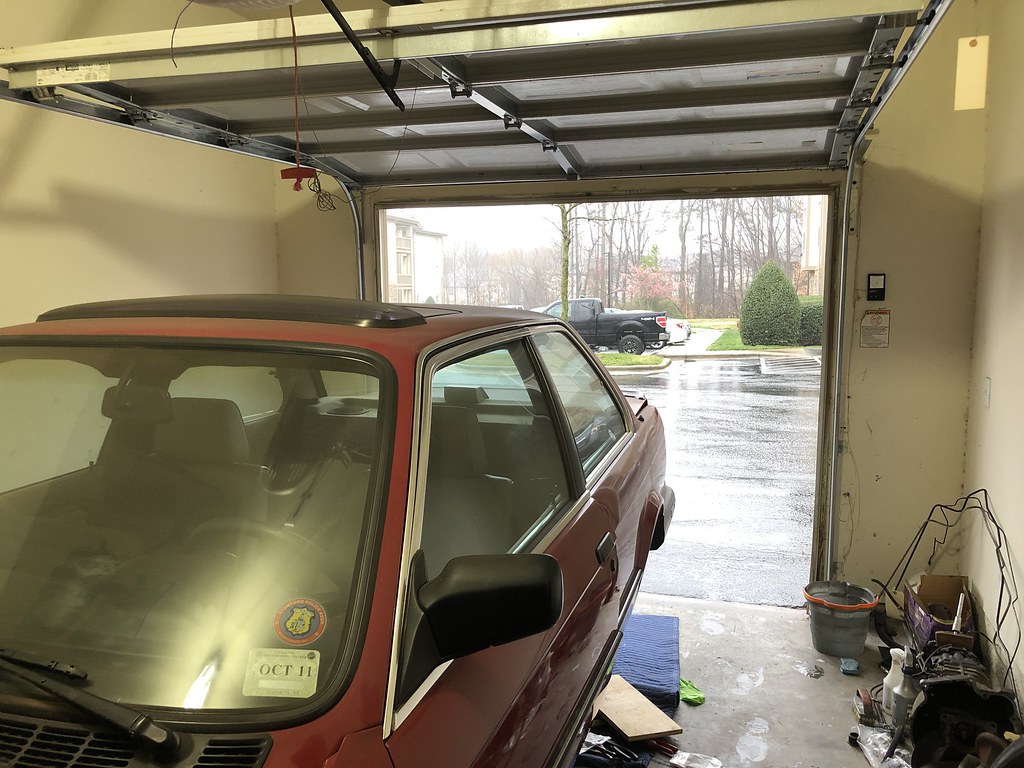
Luckily my fiancée was busy studying (she's in the midst of grad school) so I was free to have as much garage time as I wanted.
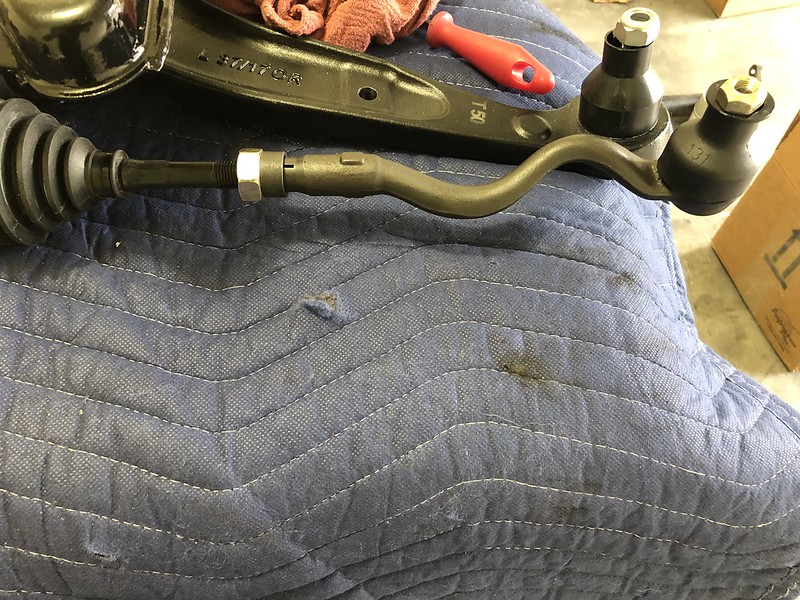
I started by finishing up the steering rack with the correct tie rod securing ring/nut:
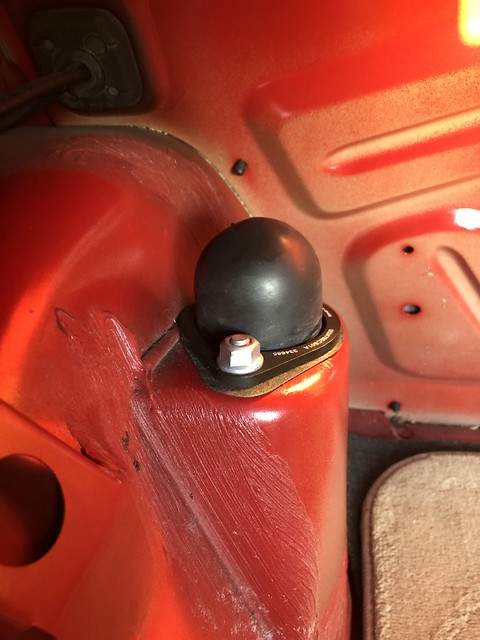
I also realized I had mounted my lollipops on backwards. Was quite fun removing and reinstalling them...
Finally ready to rock:

All mounted and torqued
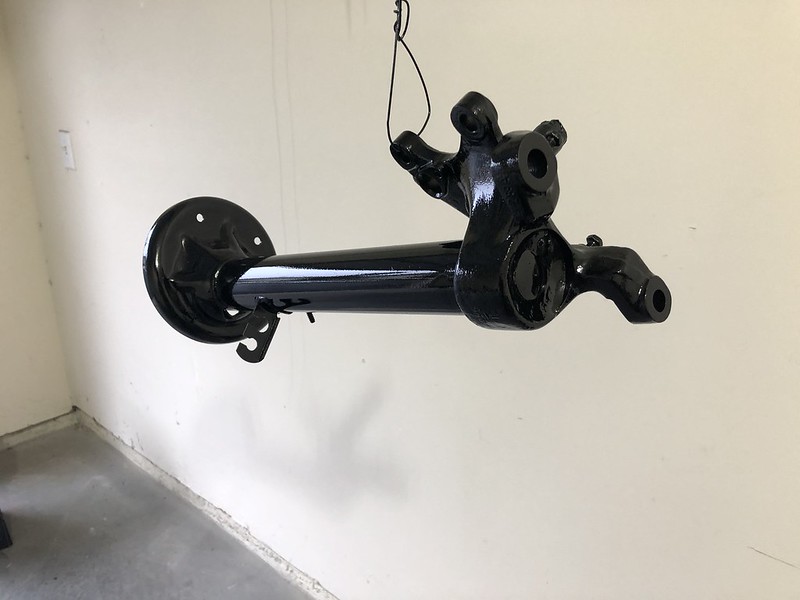
I know I showed a pic in an earlier post of the steering knuckle I filed down that showed the lower knuckle only. It's actually the top knuckle that will bind, I filed it down prior to install after doing some more reading.
I also recommend getting the knuckle seated on the steering column shaft before lifting the subframe up. I had the subframe all bolted in before I realized I didn't have enough play to get the knuckle hooked up. Just more practice at dropping the subframe for when I can finally replace my oil pan gasket I guess...
After install everything turned smoothly and felt great, no binding or anything. Very pleased with this mod and I'm not even close to driving the car yet.
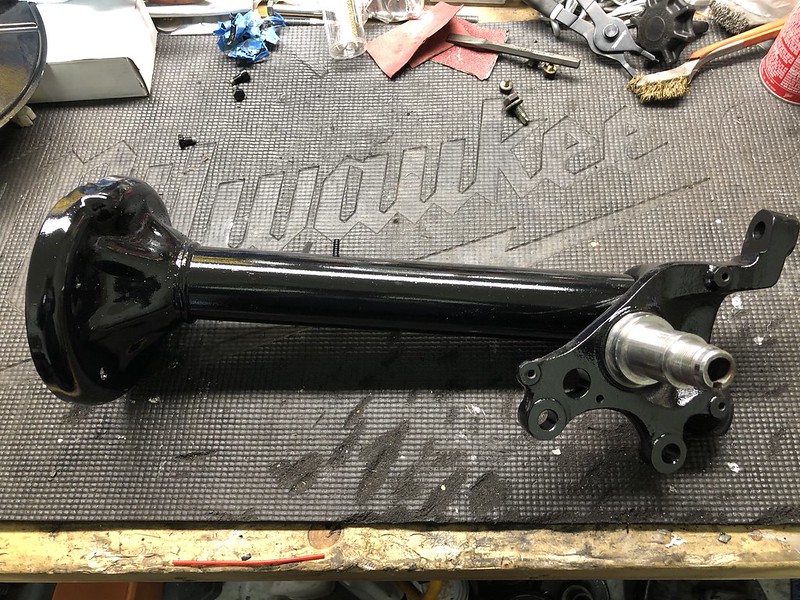
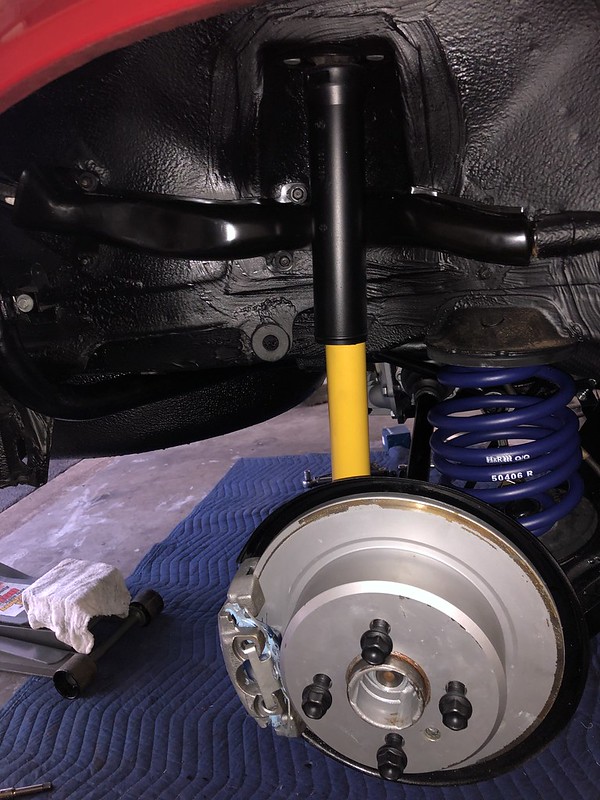
Next, I ended up buying another strut tube to replace the bent one. Never heard back from the original ebayer... Oddly enough, I bought the new strut from the same guy I bought the rear subframe and trailing arms from over a year ago. First thing I did was check to make sure the strut went in (it did thankfully).
It was in almost mint enough shape to skip painting, but the finish was more matte than the rest of the undercarriage so I scuffed it and just did the top black coat:
Came out the best of all paint jobs I've done so far:
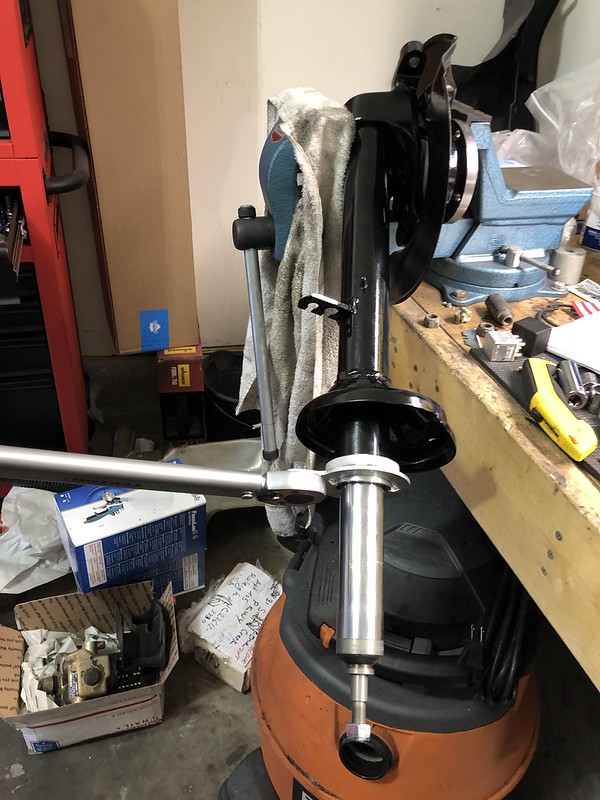
I had to get creative when torquing down the gland nuts, just under 100 ft/lbs to torque down without much to hold onto:
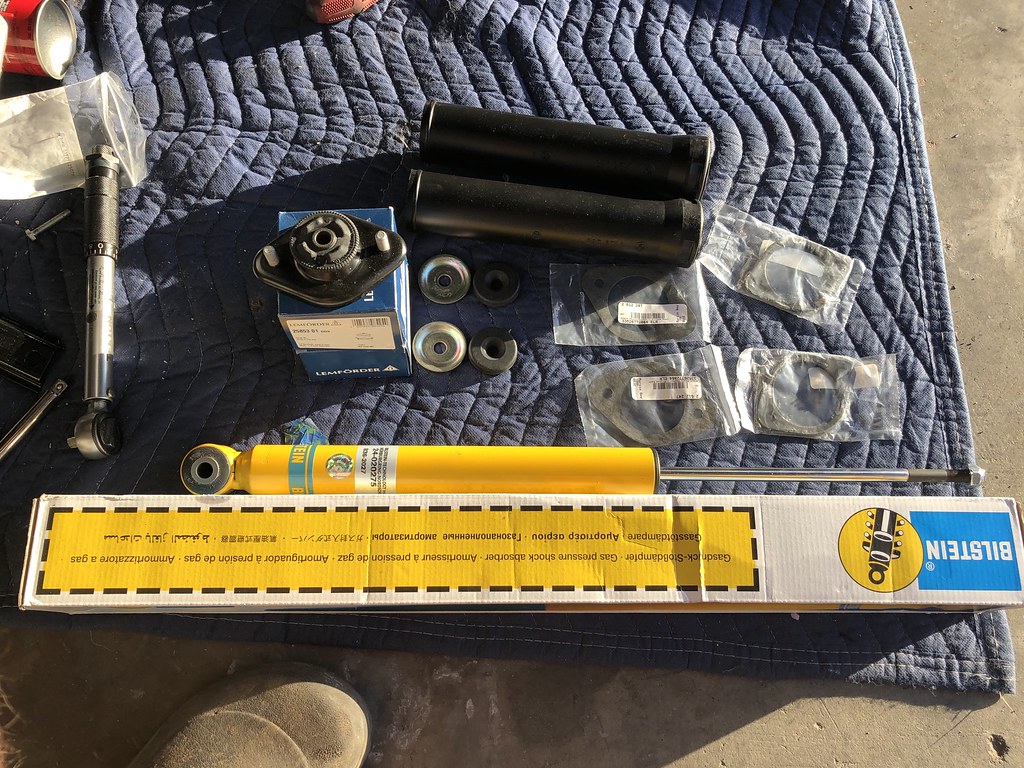
Been patiently waiting to open up this box. 'Murica, fuck ya...
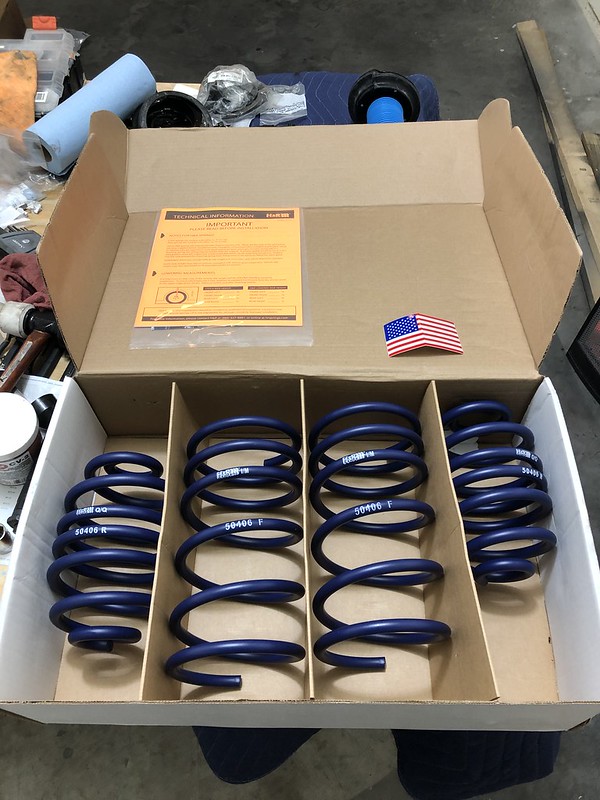
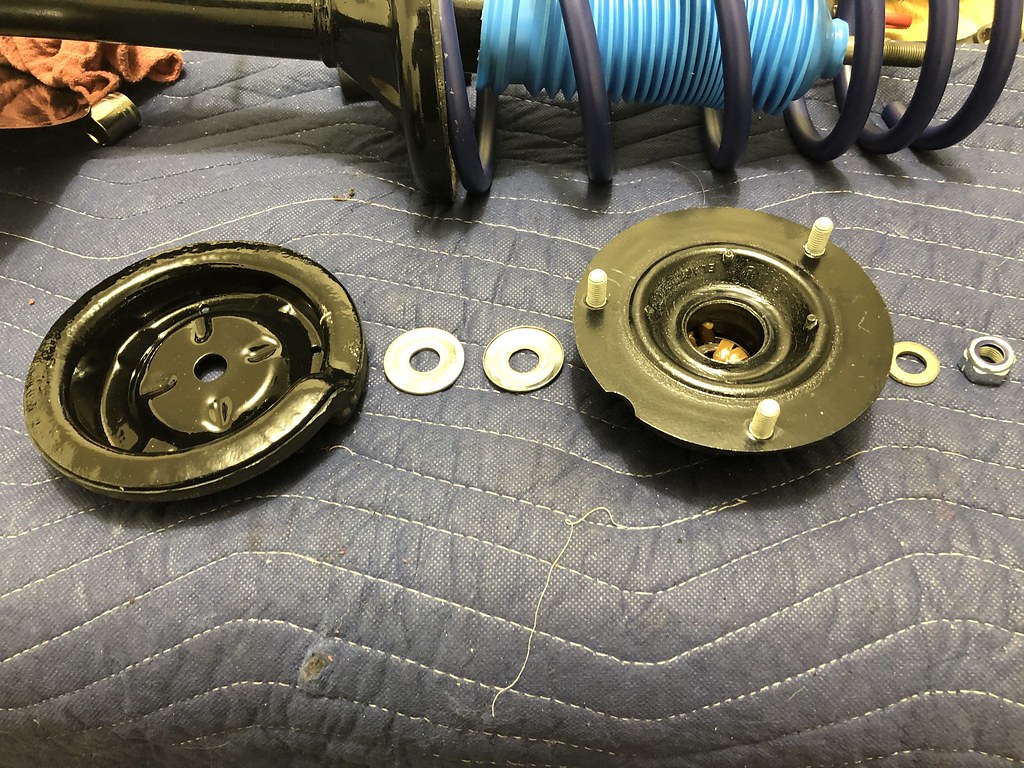
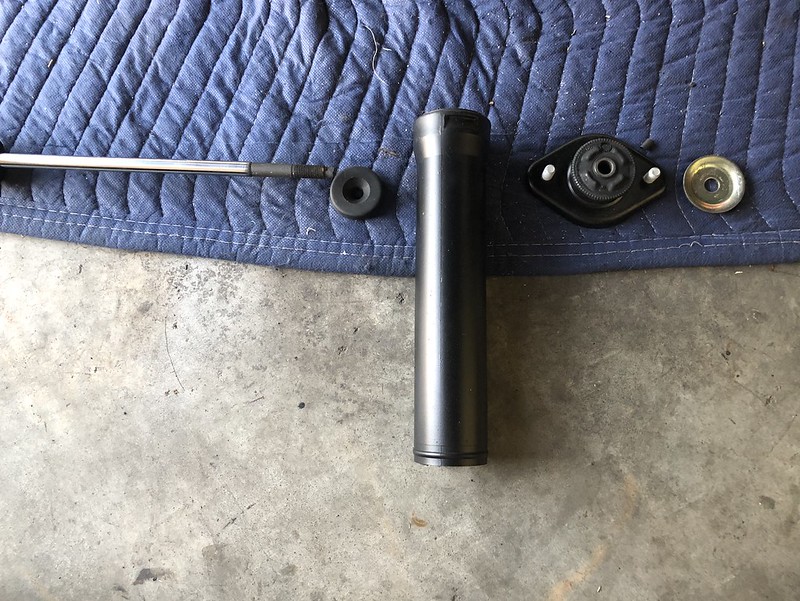
Order of operations for the drophats/mounts and associated hardware (the spring pad is already on the drophat):
So when I went to go tighten the top nut for the strut tube, I realized I needed to insert an allen key into the middle of the strut rod to keep it from spinning, and I didn't have any pass through sockets. None of the local stores had the correct size (19mm) in stock. There's a specific tool for this job (Scwaben makes it for about $17). In any case, I wanted to get it done without having to wait for shipping. I took a look at my impact sockets and they all have a sizeable hole in the side:
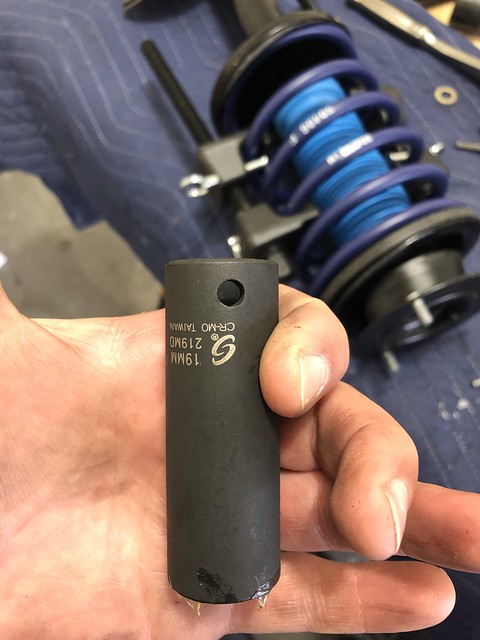
I used a punch through the hole as well as the allen key to tighten down. I wasn't able to torque it to spec, but at 30 ft/lbs I just tightened it nice and snug.

All good:
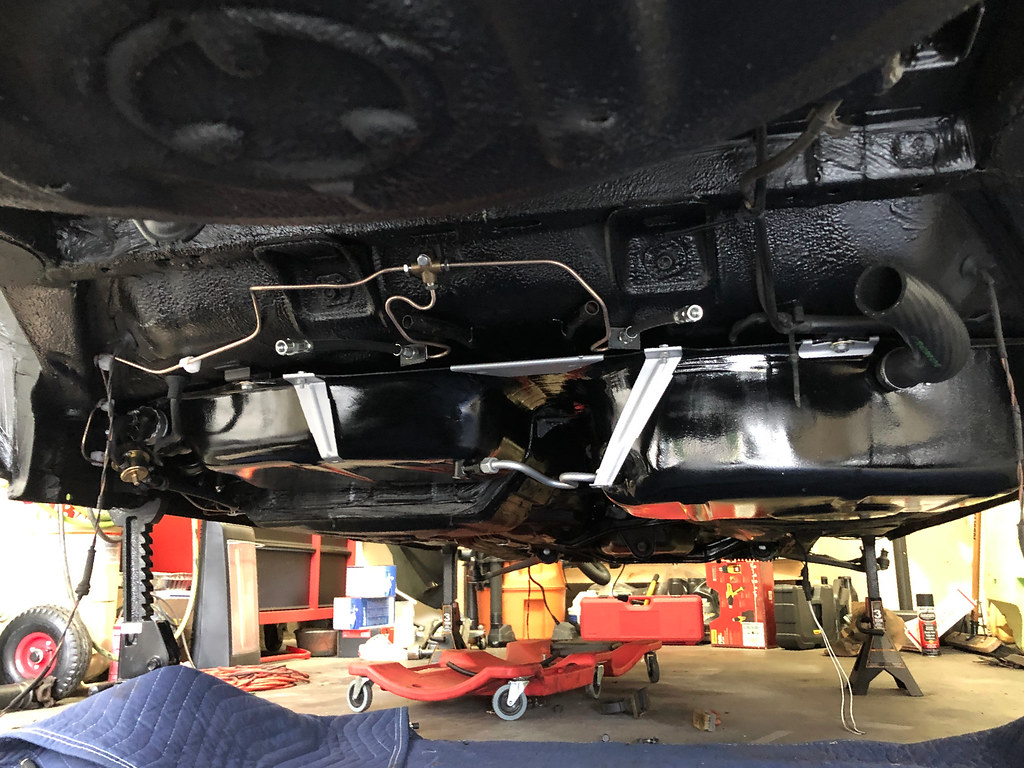
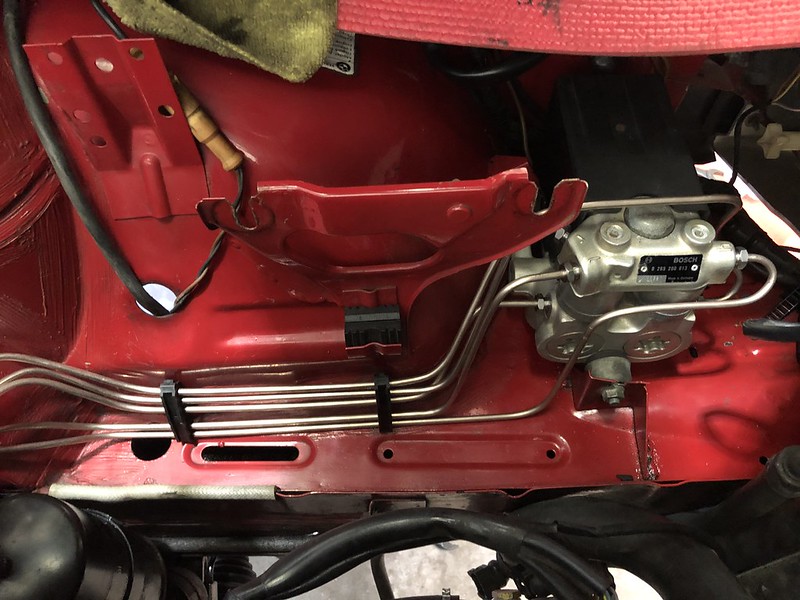
Got all the new brake lines, high-speed fuel pump and bracket with new rubber bushings, and all new hard fuel lines mounted up. Also repainted the trans mount bracket and installed the new mounts:
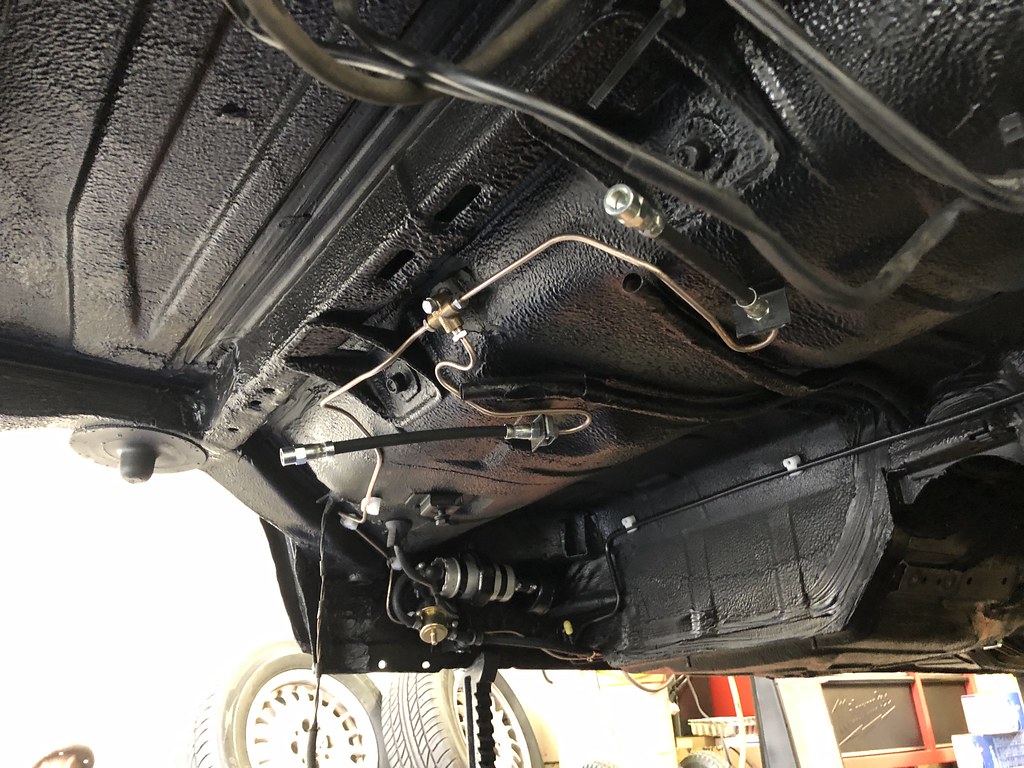
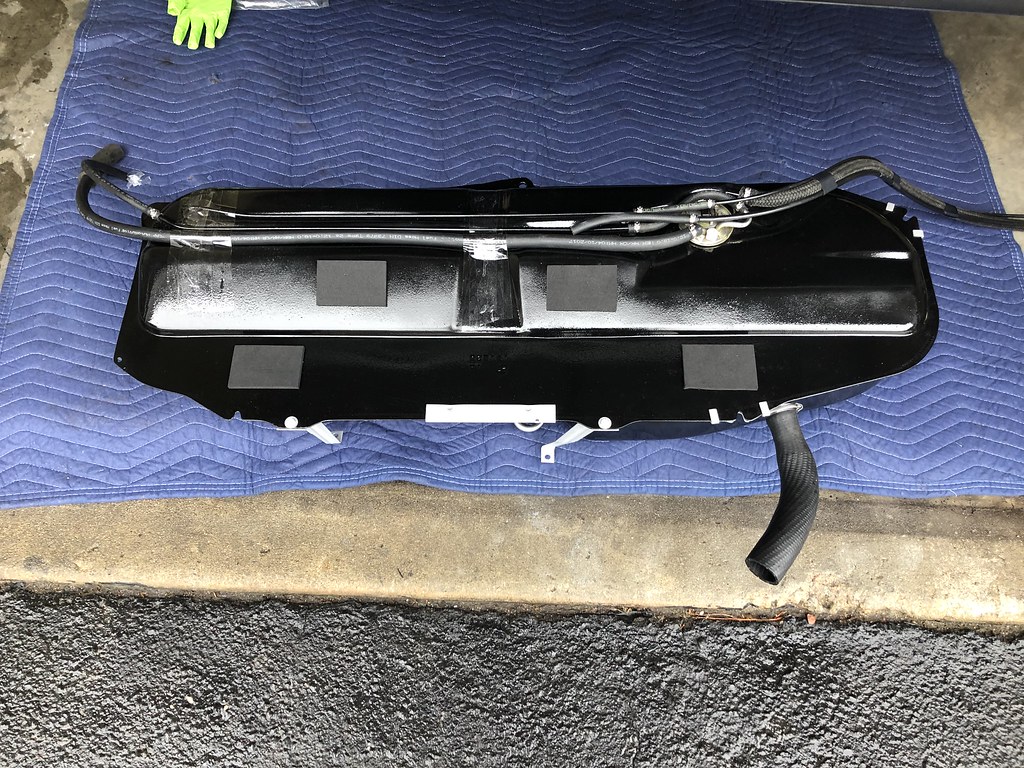
Found acetate cloth adhesive tape on Amazon that was pretty much identical to the original tape for securing the gas expansion tank breather hoses:
Compared to the old breather hose:
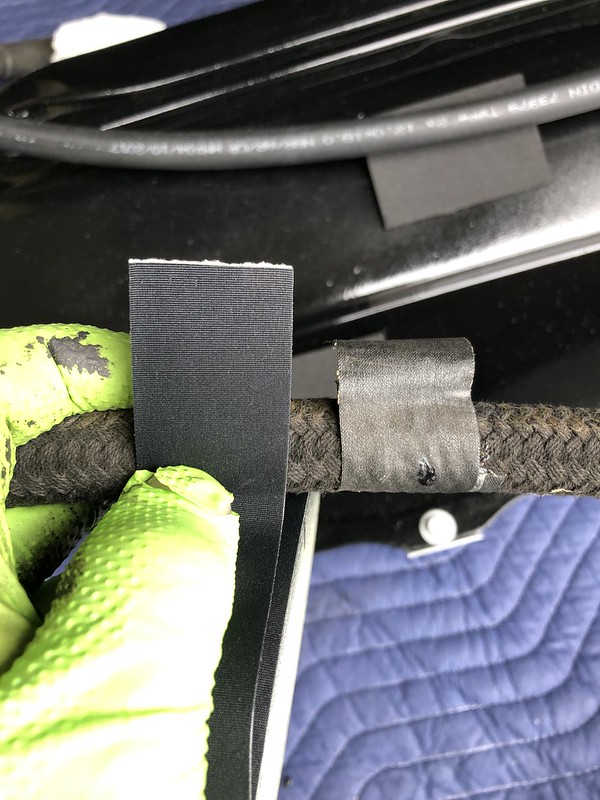
New breather hose:
Now it was time to tackle this beast, I had been excited but dreading it for some time:
I propped it up on a jack and got it lined up. Contrary to some other reviews I've read, the Spectra Premium aligned pretty well with the original bolt holes. The hardest part was connecting the two fuel lines on the driver's side of the tank to the high speed pump and hard fuel line with the tank balanced on the jack. Also, you'll need to thread the expansion tank breather hoses through the pipe leading into the rear passenger wheel well before mounting up.
Looking good... of course this is after I realized I forget to thread the in-tank pump wiring up under the tank from the harness. Had to drop the tank, thread the wires through, and do it all again. Do-overs, noticing a trend here?
I figured it'd be easier to get the rear swaybar in place prior to the subframe. For those that asked earlier on, here are the differences between the stock ETA swaybars and the 325ic front/M3 rear bars:
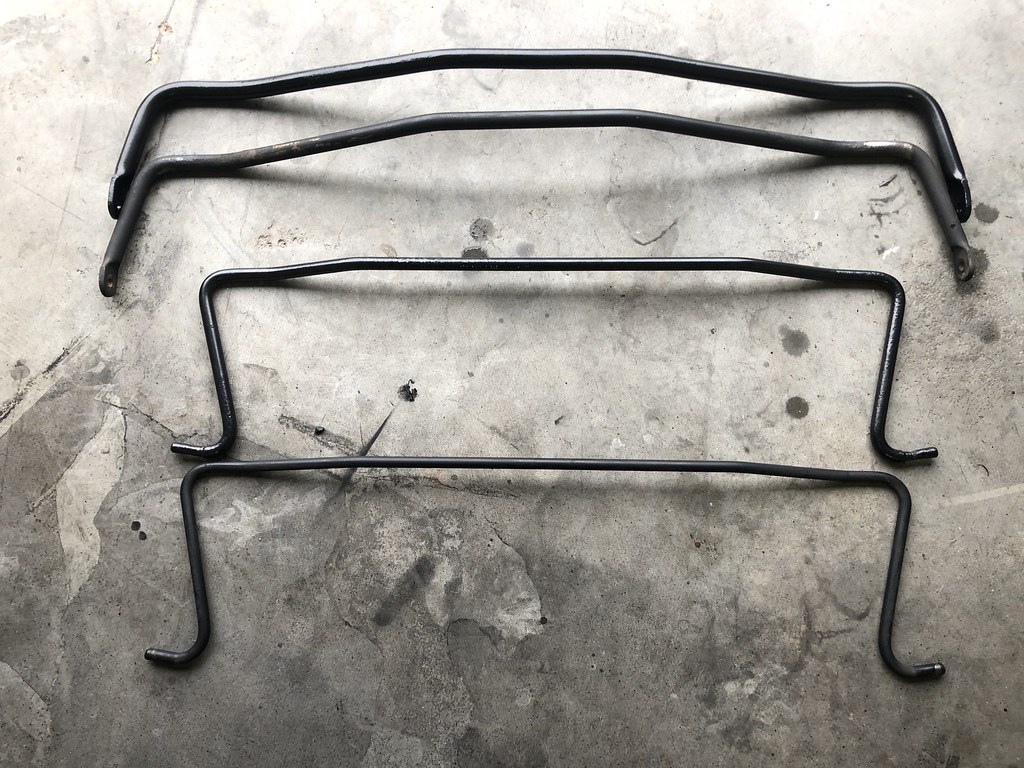
Front:
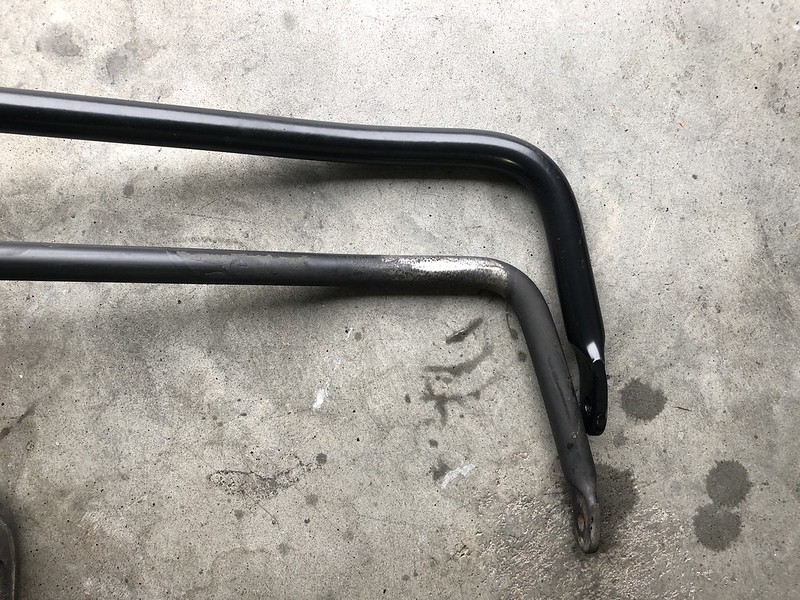
Rear:
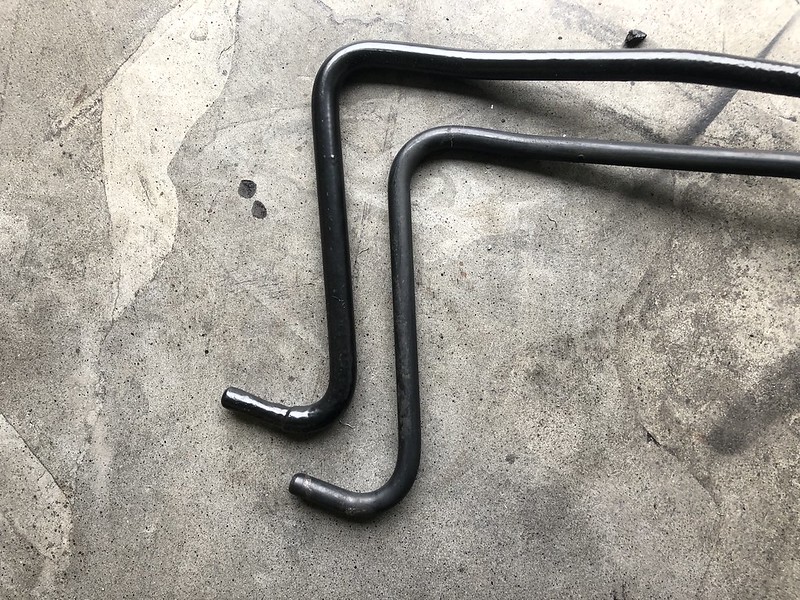
Subtle, but definitely noticeable. Got the rear mounted up. The bushing was super tight in the bracket and I had to use a vice grips to lock the bolt side down enough to get the bolt through. Then I remembered I didn't use any lithium grease on the inside of the bushing... redo time. Goddammit.
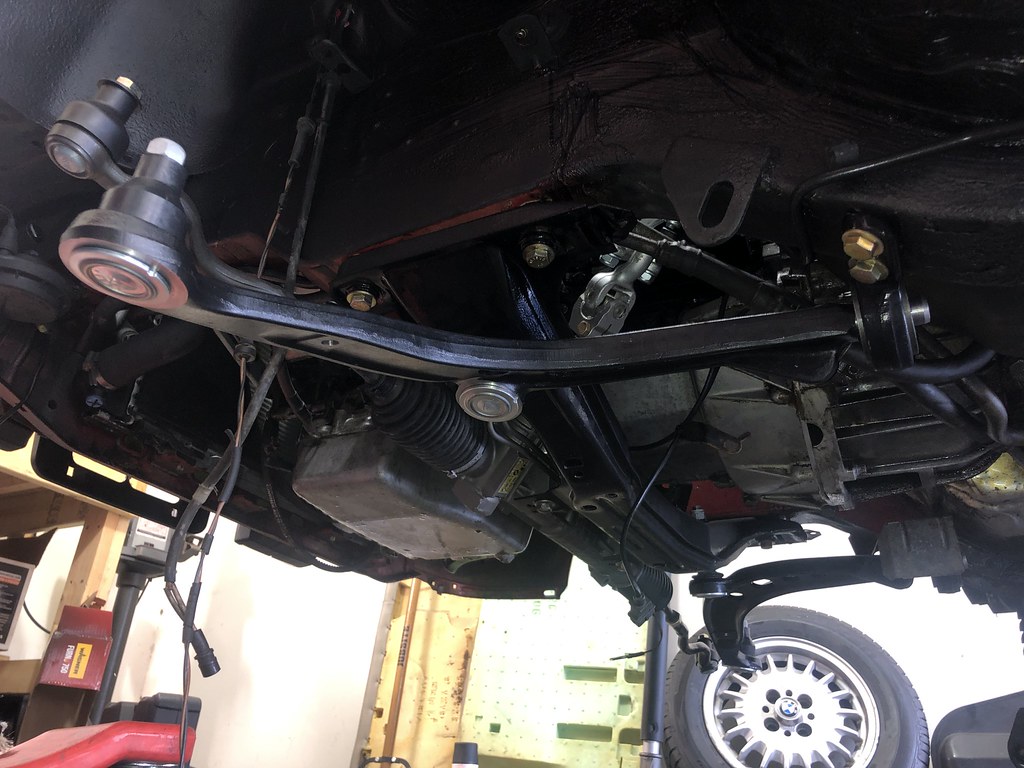
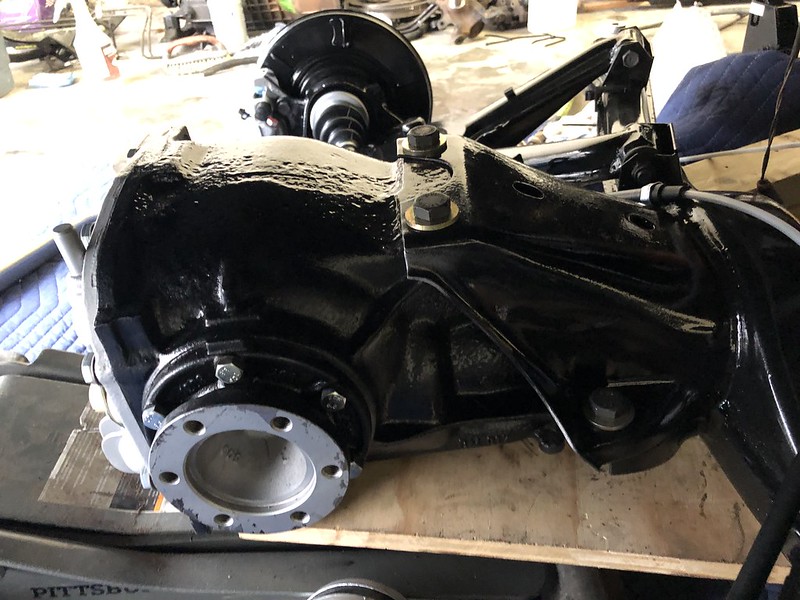
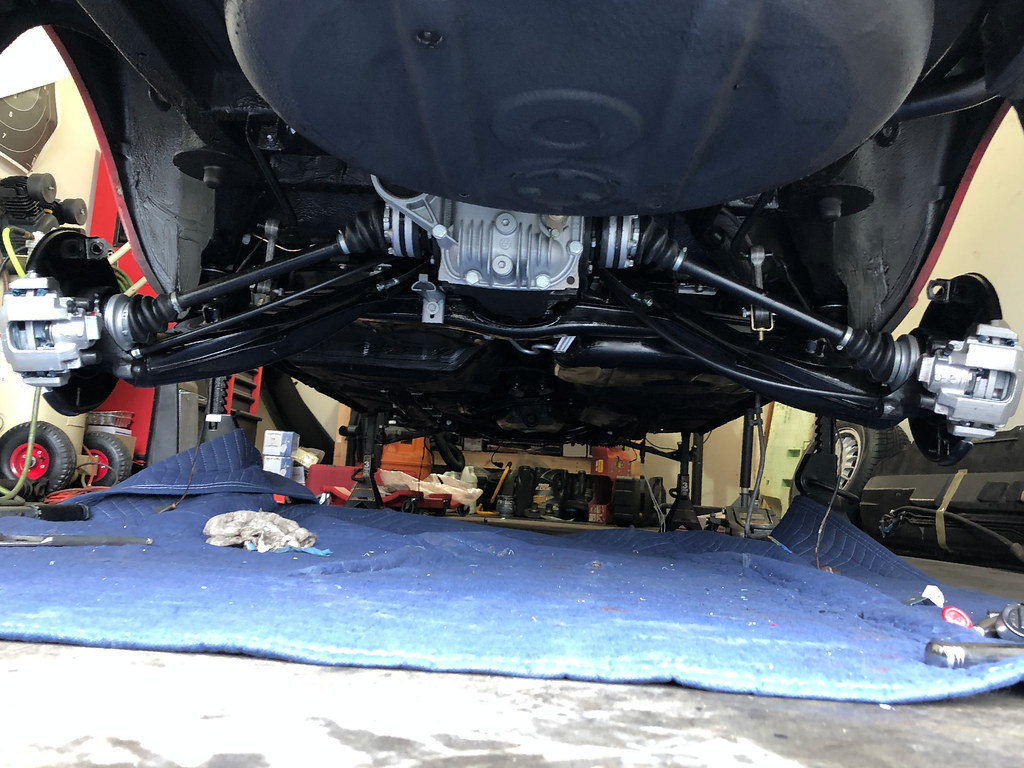
Time for the diff and subframe:
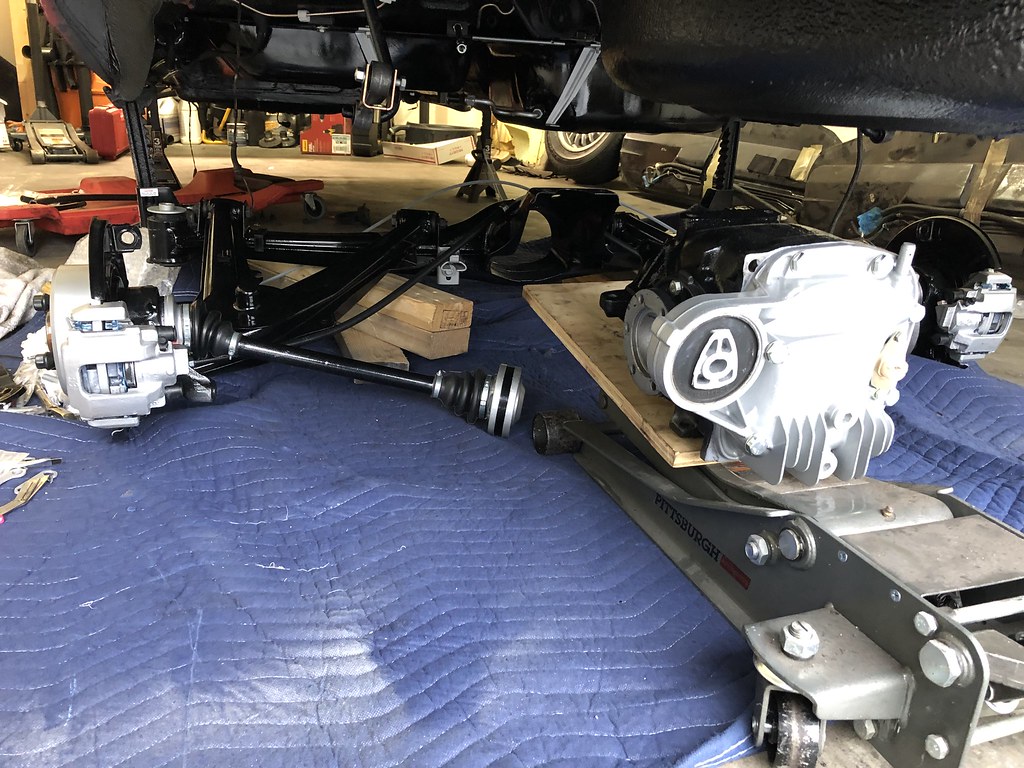
Finally mated to it's new home, can't wait to see how much of a difference the S3.25 gearing makes:
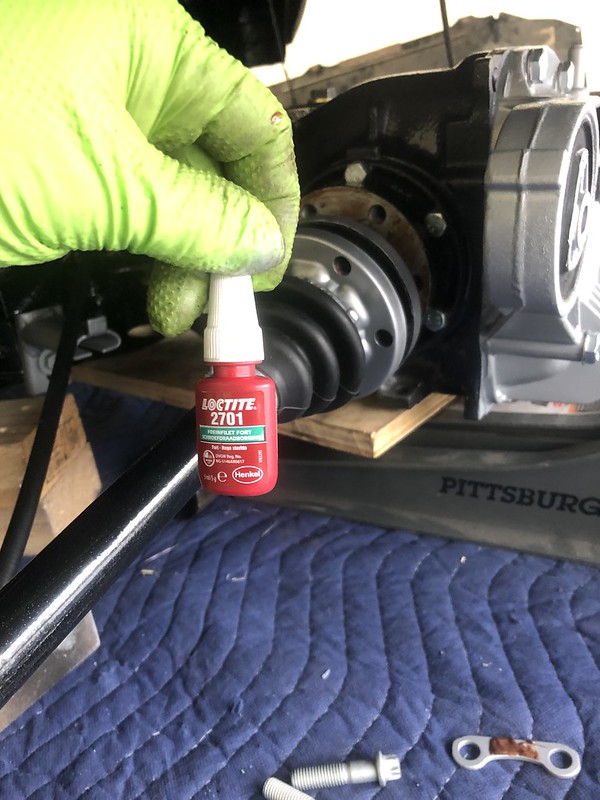
Got the half shafts mounted and torqued, DON'T FORGET TO USE LOCTITE ON THE BOLTS.
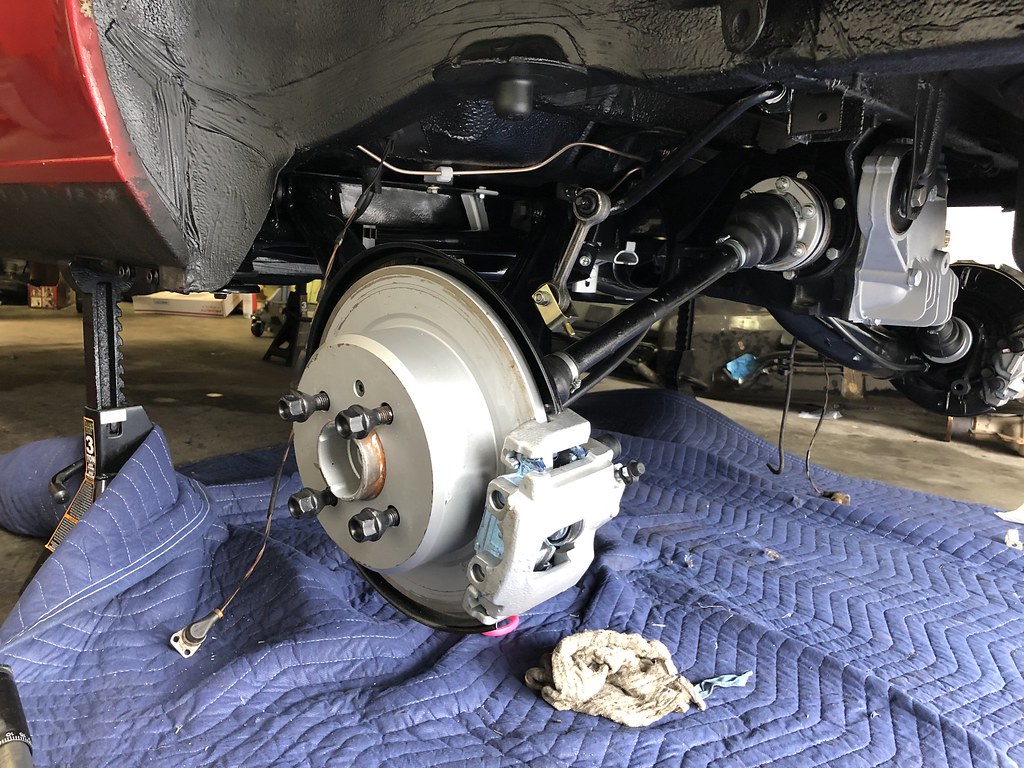
It was quite the balancing act but it actually ended up lining up well. I left all the old ABS sensors in place just so I'd remember where to put the new ones later on:
All bolted up:
I'll have to do something about the black rocker panel paint, now that the freshly painted brackets are on there it stands out like crazy.
And just like that, the skies parted and the sun shone down upon me...
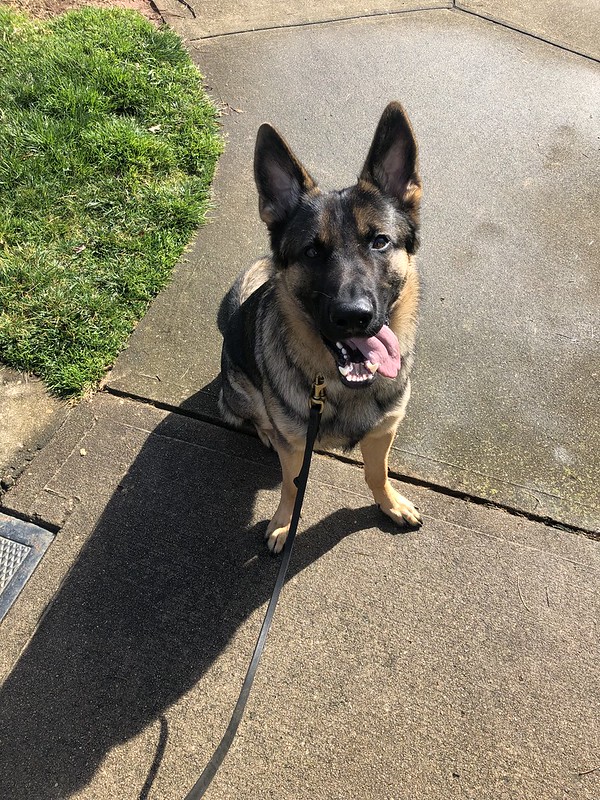
The pup wasn't too upset about it, he's been going crazy inside:
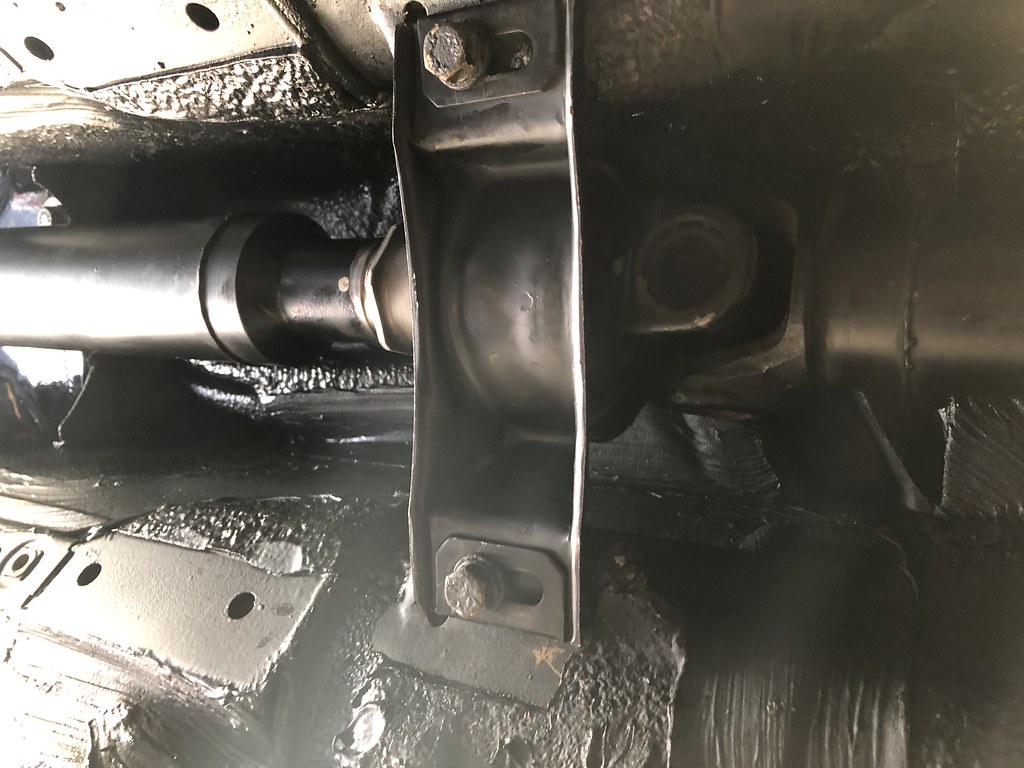
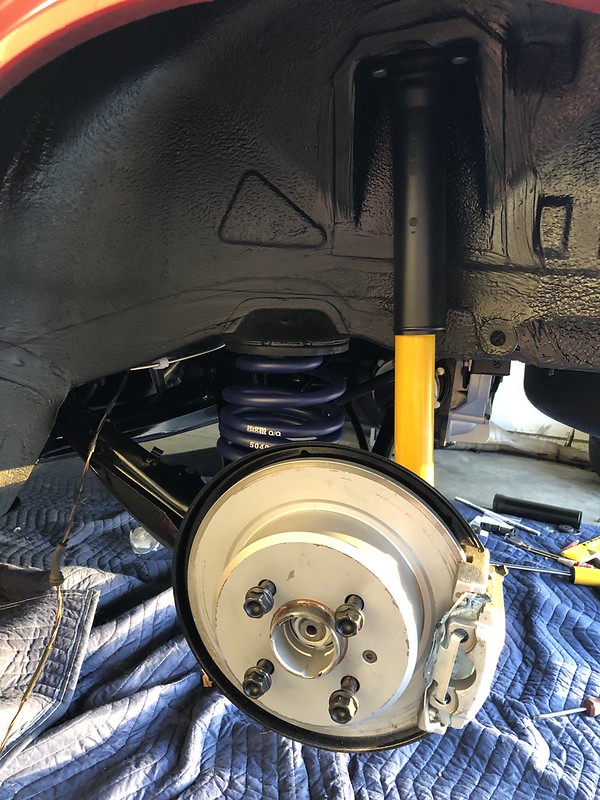
Now I was on a roll, still had a few hours of sunlight left so I decided to get the dirveshaft back in and the rear suspension bolted up.
It was at this point I realized that when I took the driveshaft apart, the diff was out of the car. Now, I didn't have enough room to put it back together. Should have connected it before I put the subframe up (d'oh). I had to disconnect it from the trans to have enough play. A half hour (and a dozen times flipping back and forth to neutral) later:
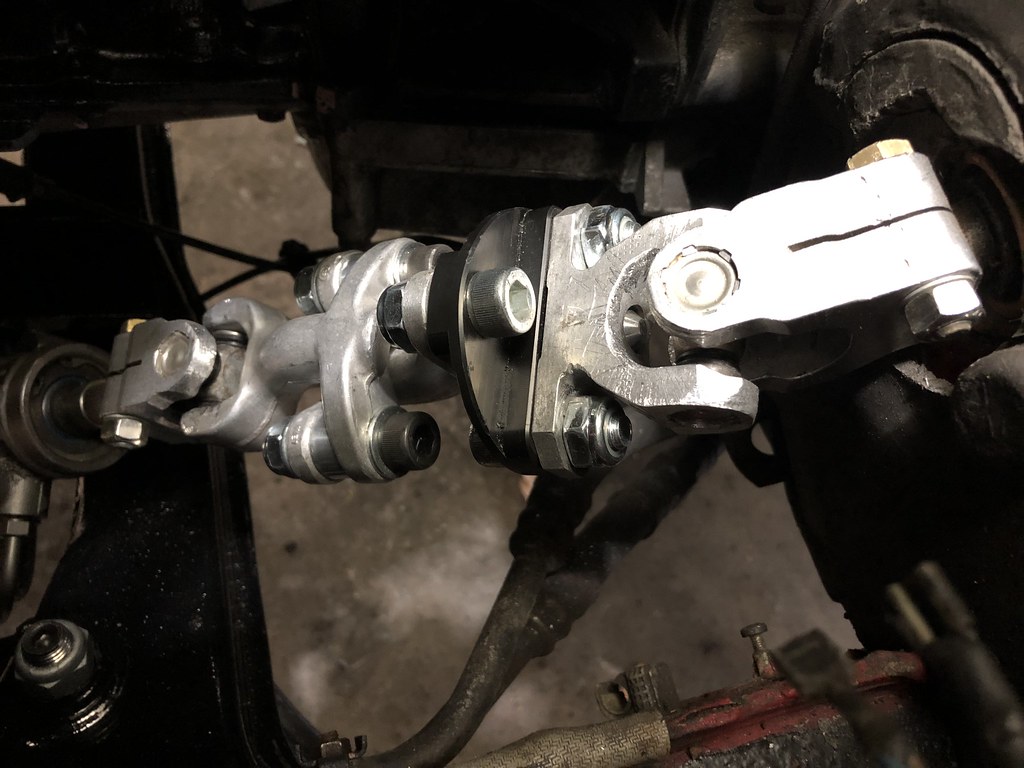
New CSB (just loosely in place to hold it up):
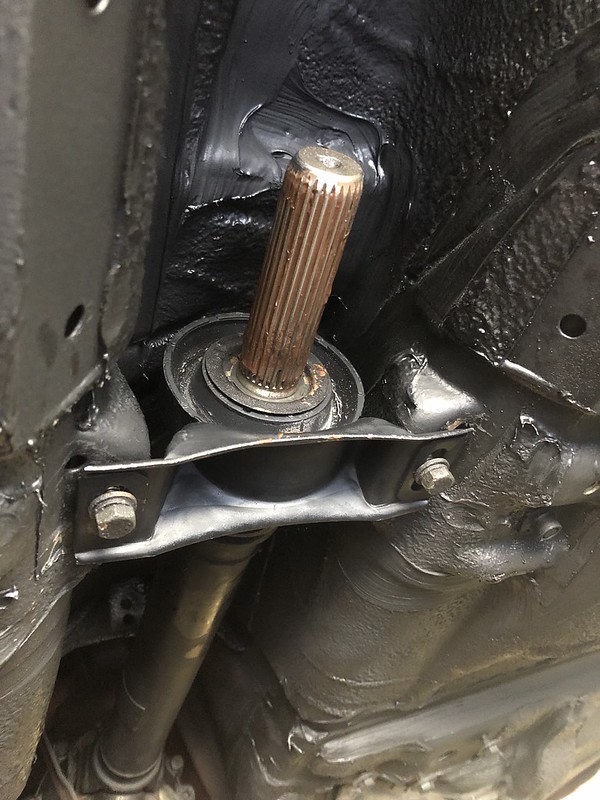
Got my white dots aligned as best I could and preloaded the CSB before tightening. It wouldn't align dead on, was always one spline off to either side. Doubt it will matter much and it won't be in the car for long anyway:
More pretty stuff:
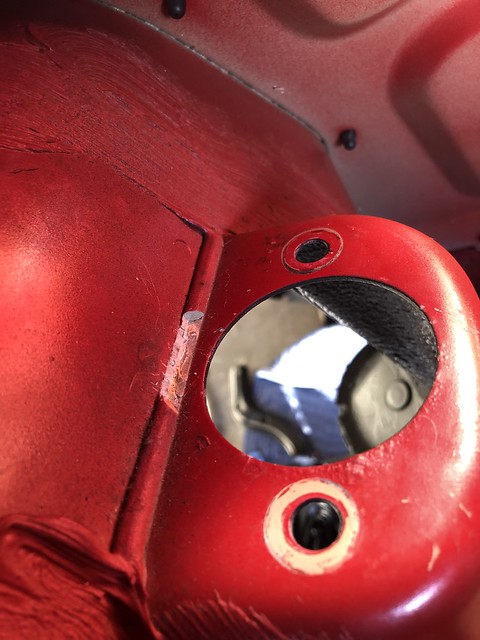
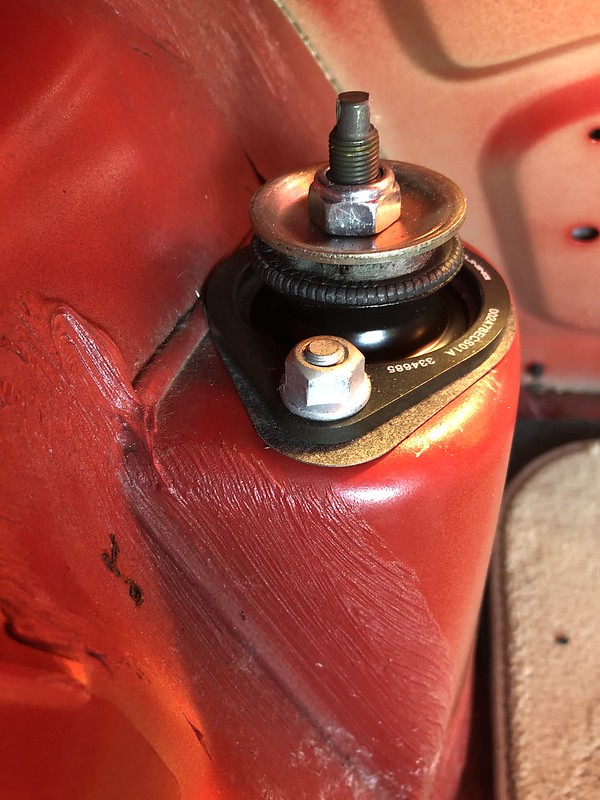
I refinished the rear shock tube covers with Eastwood plastic resurfacer, highly recommend.
Order of operation for the shock mounts:
I bought the ECS mount reinforcements, however they wouldn't align correctly as there was some sort of sealant strip in the way:

I cut a notch out of it with a scalpel and it fit no problem:
Remember guys, always use protection...
Awww yeahhhh:
Ran out of daylight, but pumped with how much I got done. Getting really close to driving this thing...
Hoping to have the front struts, the rest of the brake lines, the power steering lines/pump, and maybe the brake booster in place by the end of next weekend. Stay tuned...Last edited by Albie325; 02-25-2019, 05:45 AM.'86 325e Zinnoberrot /// '02 325ci Schwarz II /// '18 M4 Azurite Black Metallic ///
Albie325 Build Thread | Albie325 COTM Jan 2021Comment
-
Getting close! That's a ton of great work.
Regarding torquing the top nut on the front struts I've done this a couple of ways on various cars:
1. Do the final torque with the weight of the car on the suspension. The weight of the car will usually prevent the strut from spinning.
2. Use a "pass through" ratchet/socket set. I bought a GearWrench set for about $30 a number of years ago that has proved useful. This will allow you to ratchet while using the allen key to prevent the strut from spinning.Comment
-
Great write up about the zhp rack and front subframe. I'm about to tackle that soon and your level of detail will help immensely.Comment
-
Nice work, I did the same with the Sways, Vert front, and M3 rear. Its a nice upgrade without going really big with aftermarket.Comment
-
For the struts I used an offset wrench from Harbor Freight, mike.bmw's suggestion of doing it on the car works too.
Great progress man! I put mine in there without the diff, using a Harbor Freight ATV jack. Worked really well.
Also, 5/7 pupper, would toss ball to.I do things.Comment
-
Melon Yah a set of pass through sockets are next on my list, I’ve had a few situations now when they would have been useful. My issue was that no one had a set with a 19mm in stock and I wanted to get the struts assembled without having to wait on shipping.
mike.bmw I’ll definitely torque down once mounted, should have a pass through ratchet set by then!
ATL_E30 The swap wasn’t bad at all, hardest part was getting the knuckle disassembled. Glad to help
Staszek I’m glad to hear you like the “stock” upgrade, wasn’t sure if it’d even be noticeable. My whole reasoning for it was because I didn’t want to have to weld up any reinforcements for big aftermarket sways or risk tearing the mounts.'86 325e Zinnoberrot /// '02 325ci Schwarz II /// '18 M4 Azurite Black Metallic ///
Albie325 Build Thread | Albie325 COTM Jan 2021Comment
-
I did find (please don't crucify me) that my impact driver would dugga the nut on nicely, then an offset box spanner and allen key took care of the final nip upComment
-
Quick update, not a ton of pics as the working spaces were a bit tight and the projects were a bit tedious.
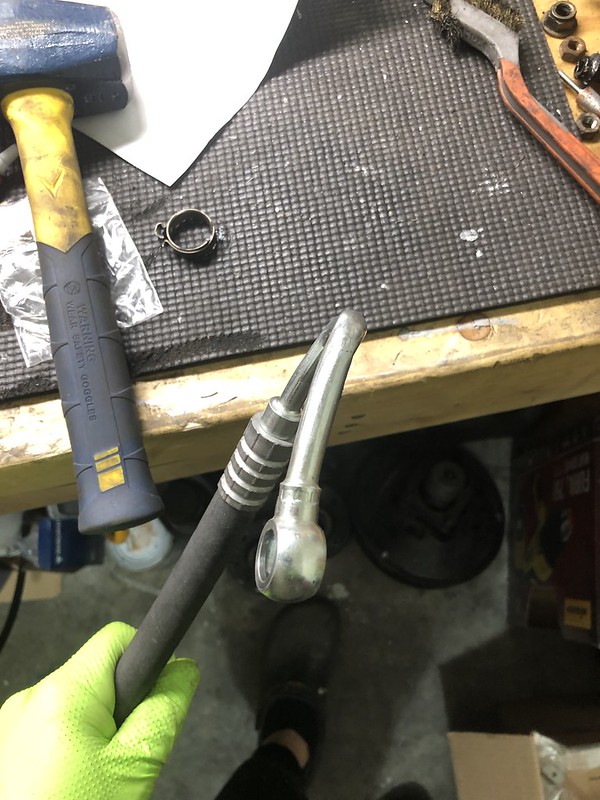
To put a bow on the whole rack swap since a few of you guys seemed interested, the only change regarding the power steering hoses is to bend to hose connecting the PS pump to the rack. Here's the stock angle of the connector end for the rack:
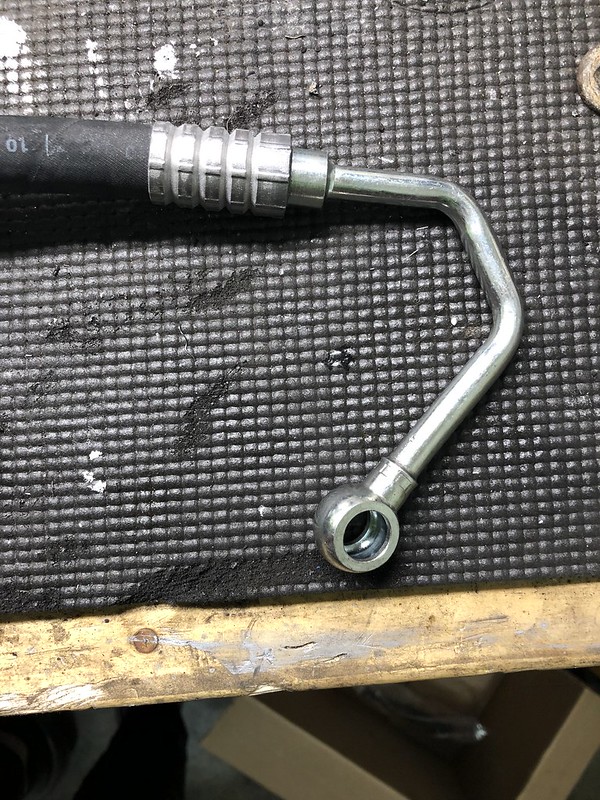
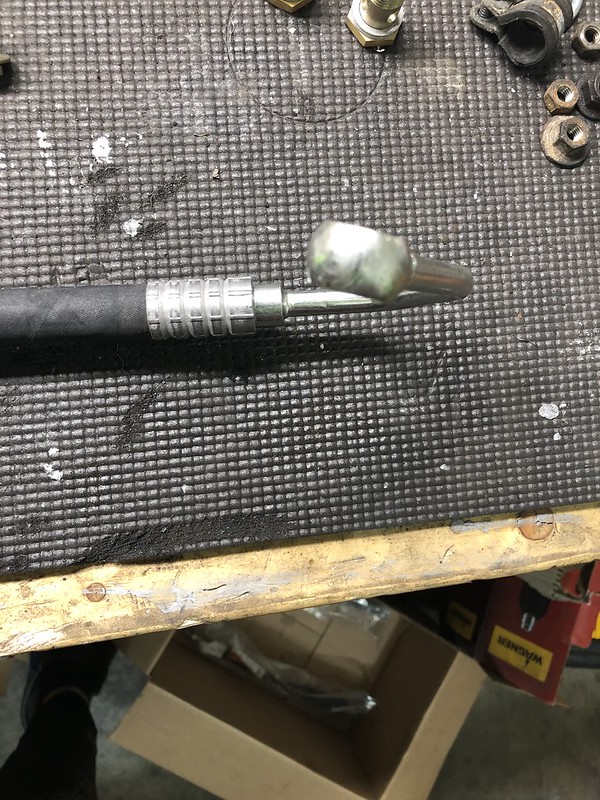
In order for it to fit, you have to bend it backwards and also rotate the connection end:
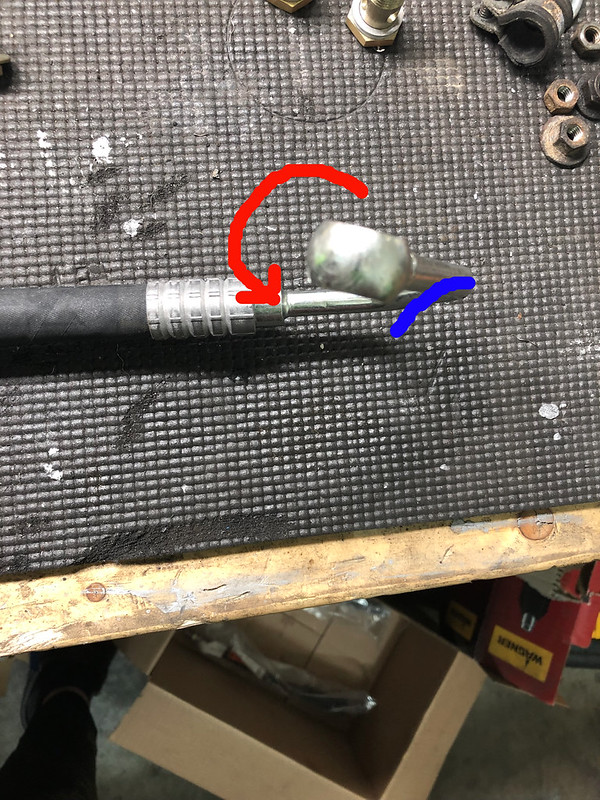
Doesn't have to be a ton, ends up like this:
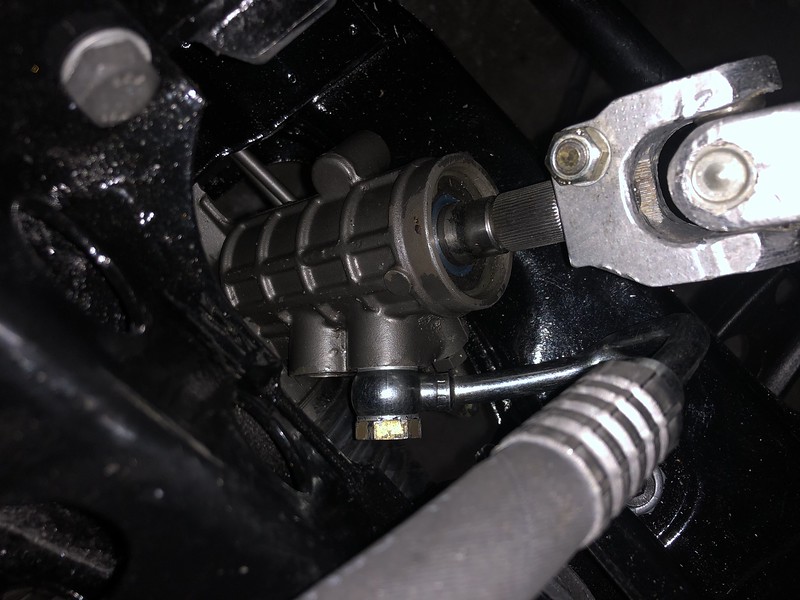
Plenty of clearance for the steering knuckle. Route the line over the motor mount support rather than under otherwise the hose will be too kinked and will protrude into the wheel well.
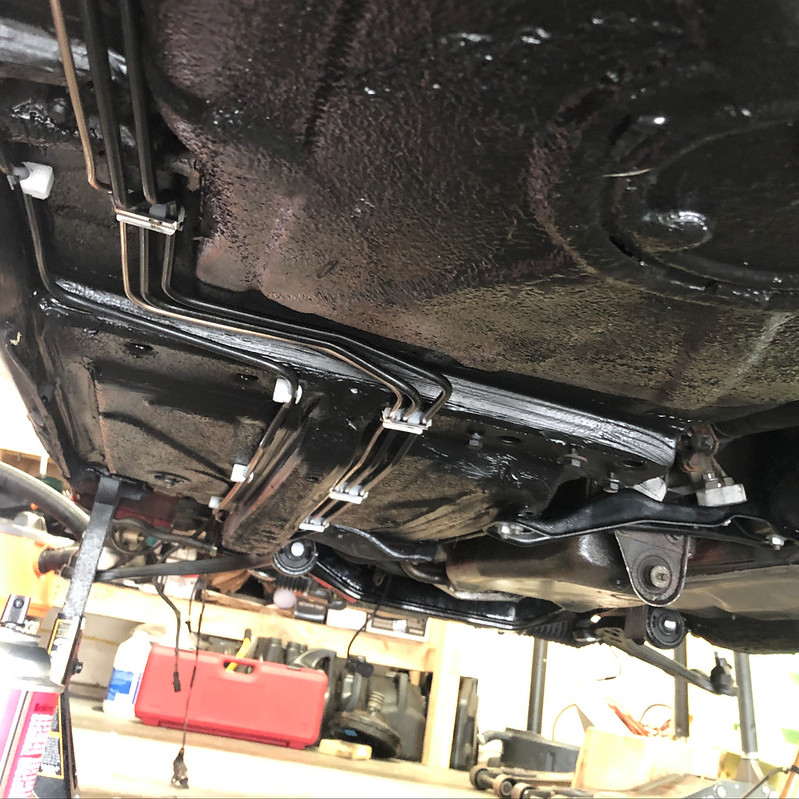
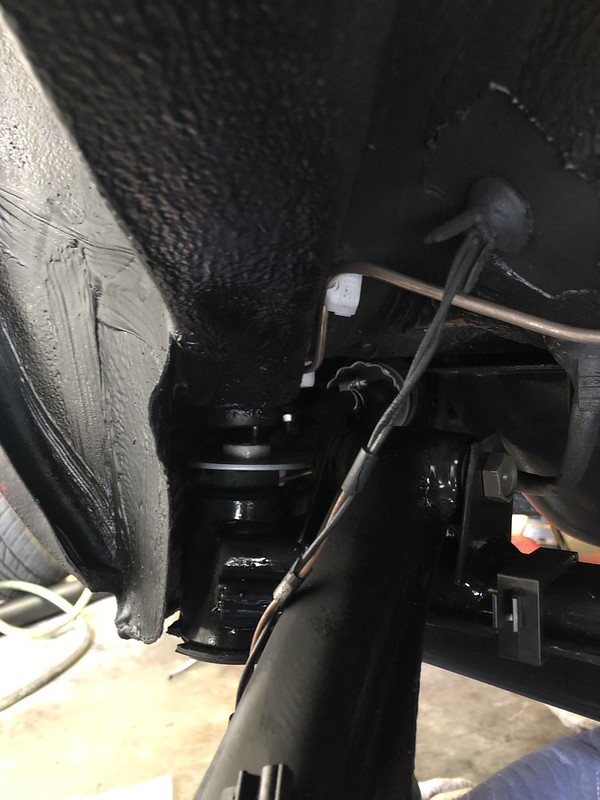
Got the rear pressure regulator hooked up and realized I didn't like the way the new lines looked next to the old ones. Also figured with all the gunk i cleaned out of the ABS module that the old lines were full of the same stuff so decided to just bend all new front lines as well.
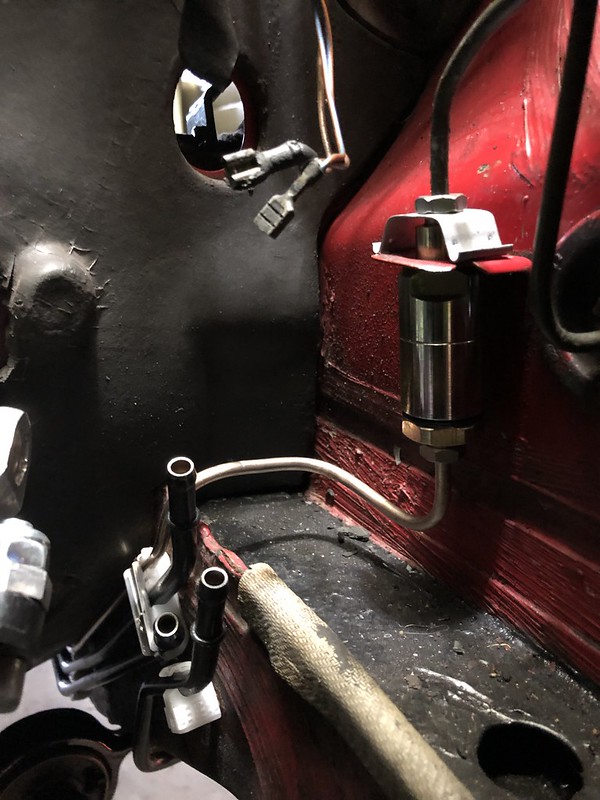
The most difficult one was the line running from the ABS module around the back of the motor and to the passenger front wheel well. Had to pull the harness up and weave the line in there, thankfully I didn't break any of the clips as I'm pretty sure they're NLA. Now that all the lines were done I decided to get the new booster and gasket put in as well as a new brake light switch installed:
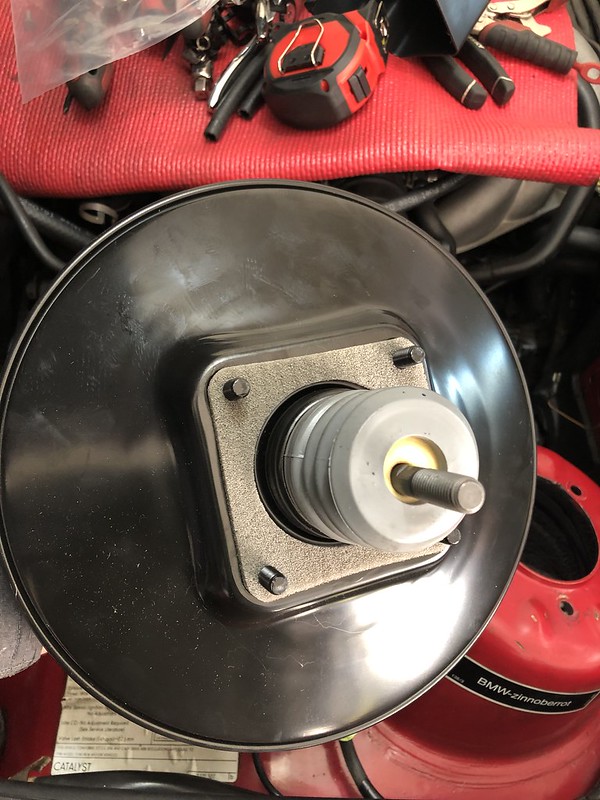
My fiancee must have thought I seemed a little perplexed when trying to figure out the brake pedal and brake light switch adjustment...
No real pics of the brake pedal stuff, it was pretty tight in there (and it was also kindof a bitch).
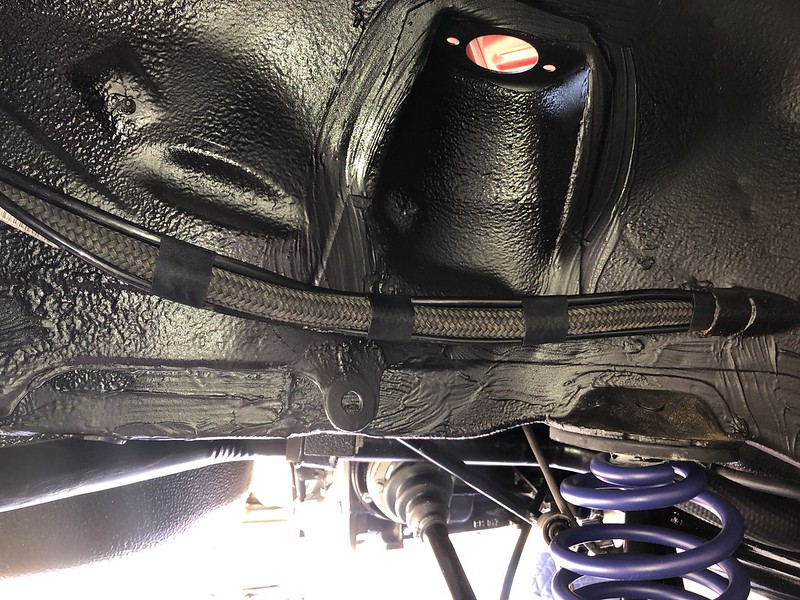
Last, I got the expansion tank connected with all new lines:
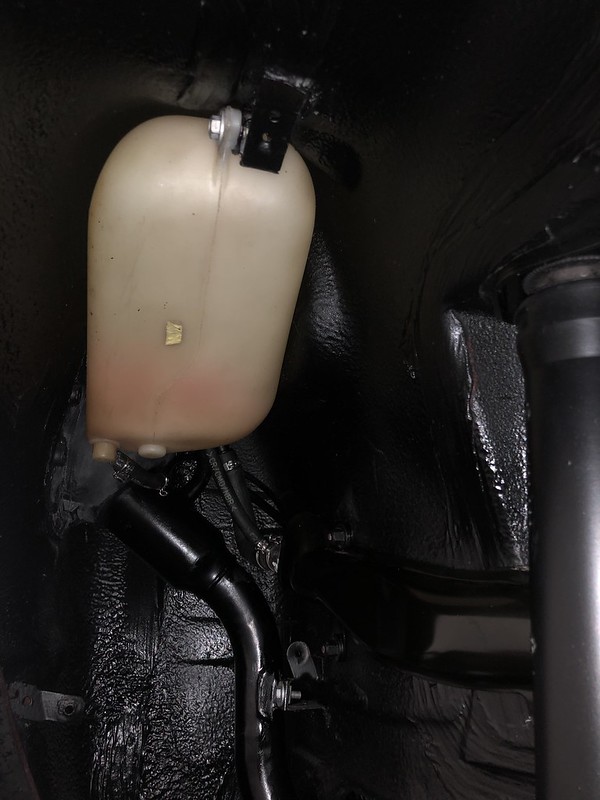
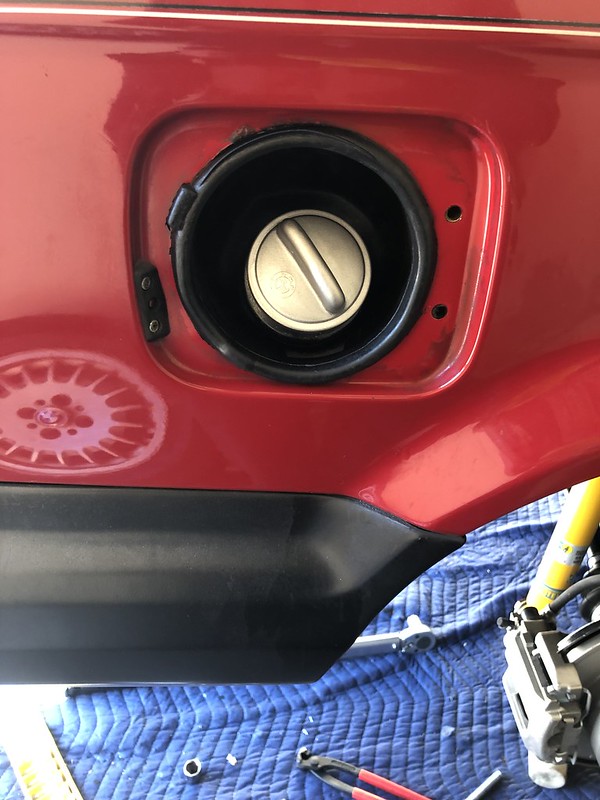
New gas tank grommet, and we're on to some more projects for another day...
 Last edited by Albie325; 08-25-2019, 04:48 PM.'86 325e Zinnoberrot /// '02 325ci Schwarz II /// '18 M4 Azurite Black Metallic ///
Albie325 Build Thread | Albie325 COTM Jan 2021Comment
-
Got a few more things knocked out over the last two weeks. Been putting in a ton of OT at work so garage time has been a little scarce.
Ended up getting the new exhaust manifold studs, headers, and new Magnaflow 23553 catalytic converter bolted up with a new Bosch O2 sensor.
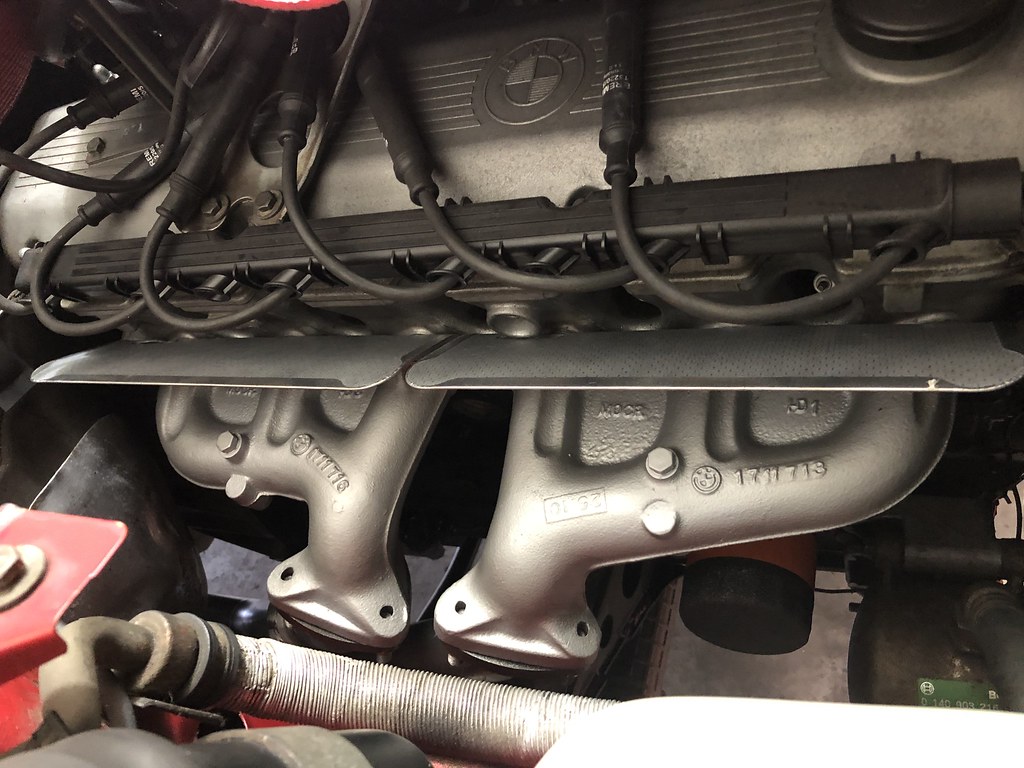
I ended up mounting the catalytic converter to the headers first, then bolted the headers to the block as I remembered it being difficult to get to the cat-header bolts during removal. It worked well and the overall fit of the catalytic converter was pretty good, however did require some tweaking to get all the header studs to line up correctly.
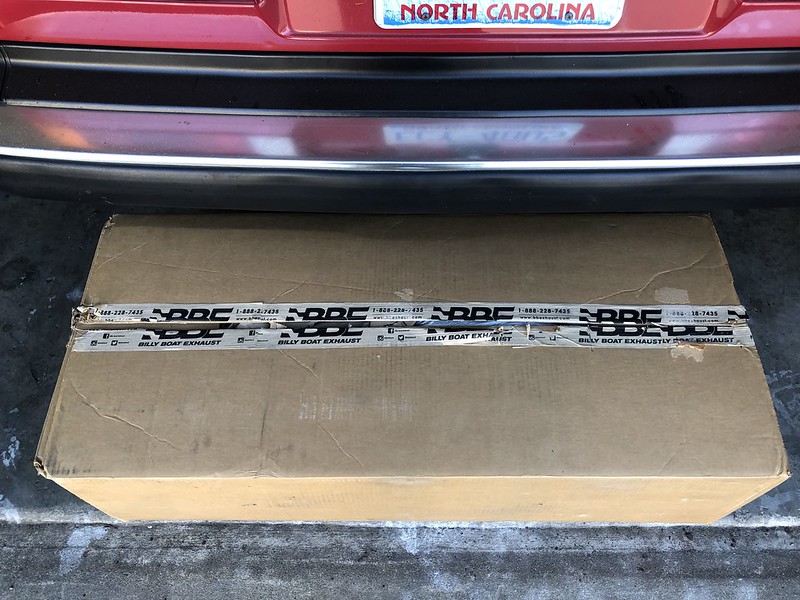
Then I finally got to tear into this box, something I had been waiting some time for. I had peaked inside just to see whether the tips were slanted or straight to decide which MTech 1 rear apron I would need, but hadn't yet seen it in all its glory:
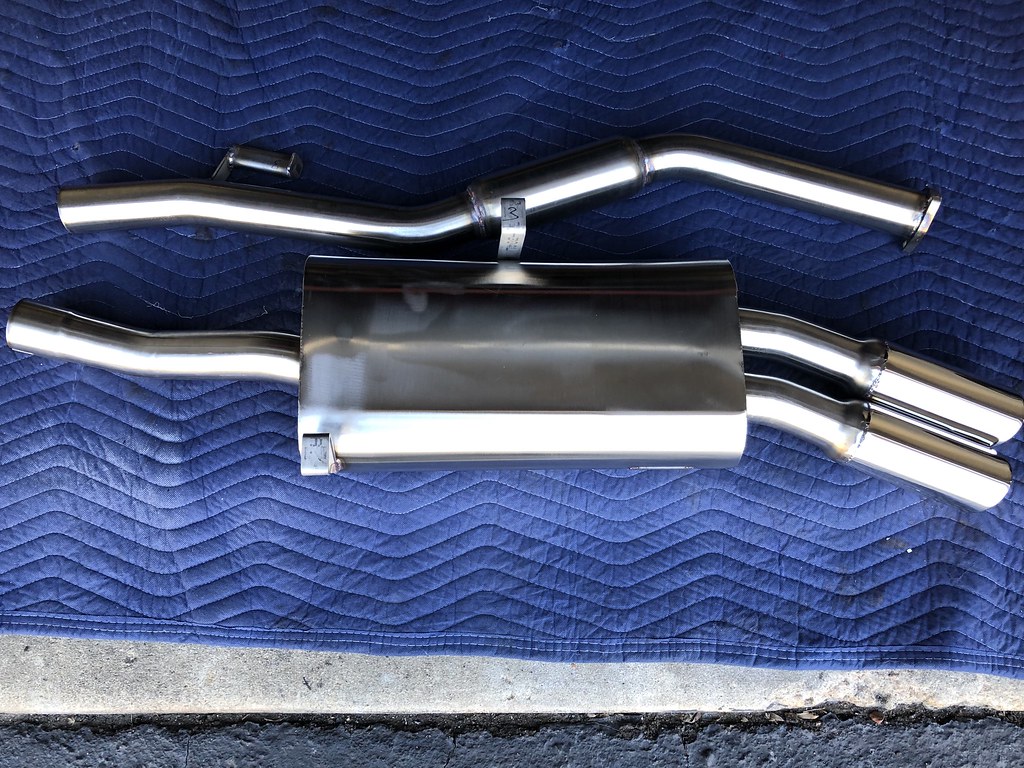
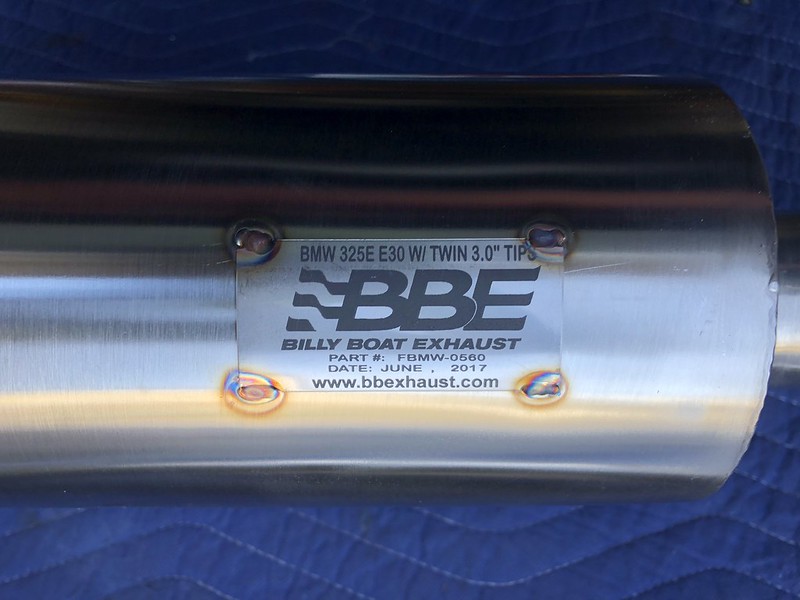
The build quality appears exceptional, the welds are really nice and the muffler has a nice heft to it.
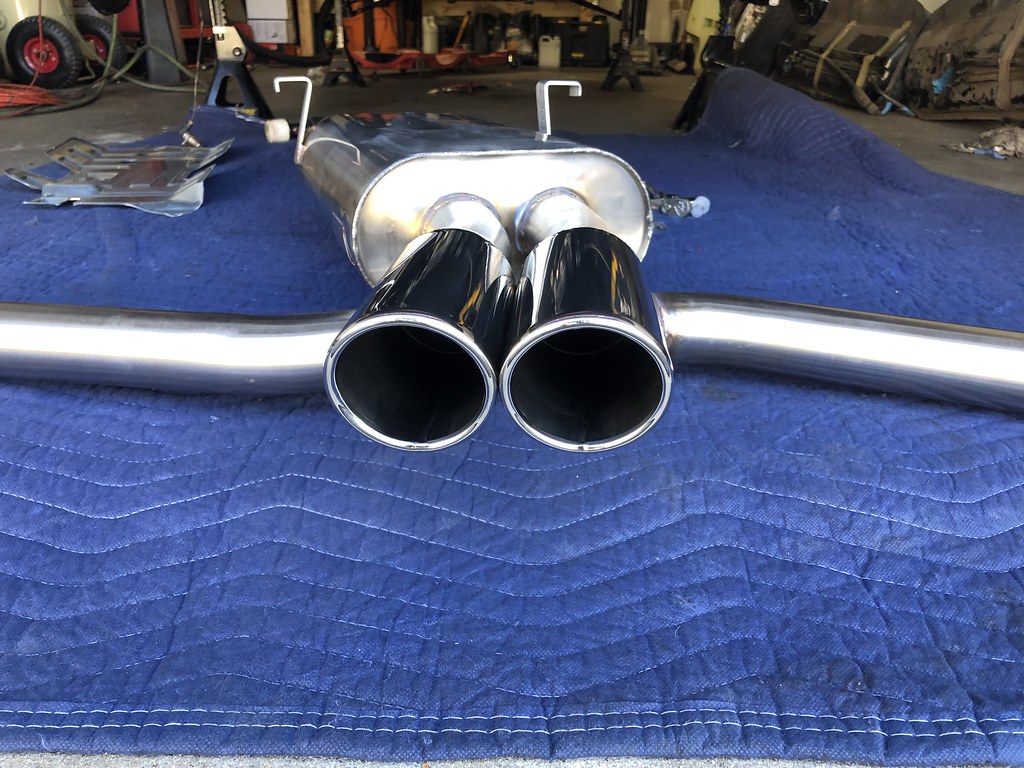
I got the midpipe mounted, had to bend the hanger a bit to fit but ended up bolting up no problem without any rattles or contact points:
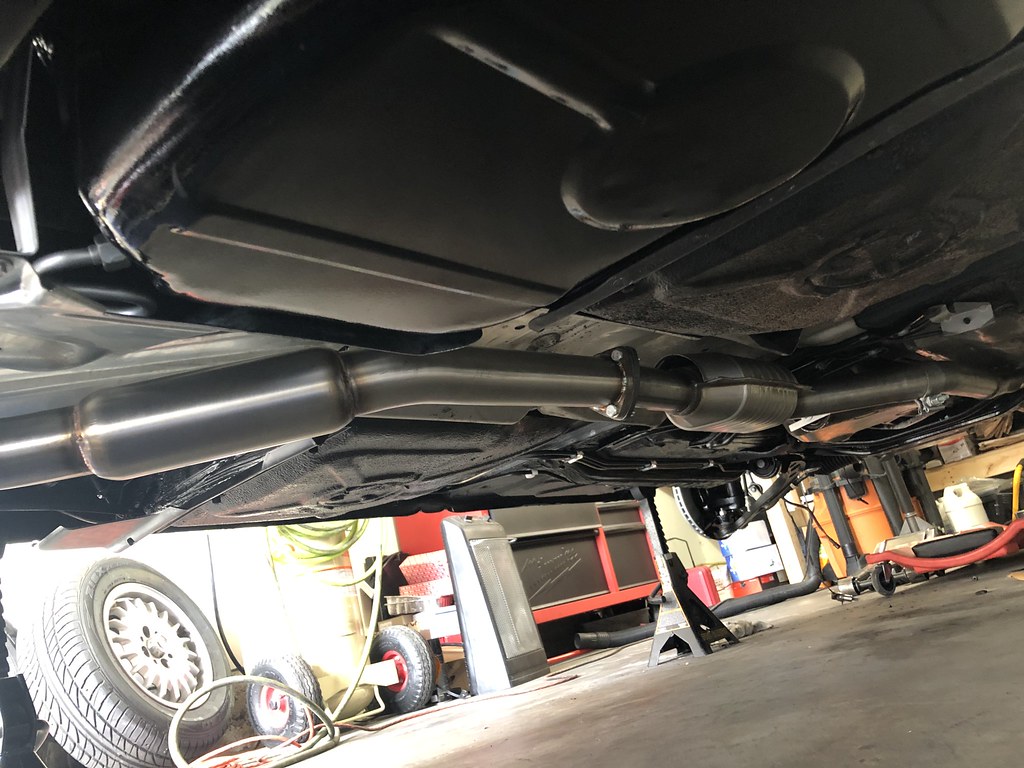
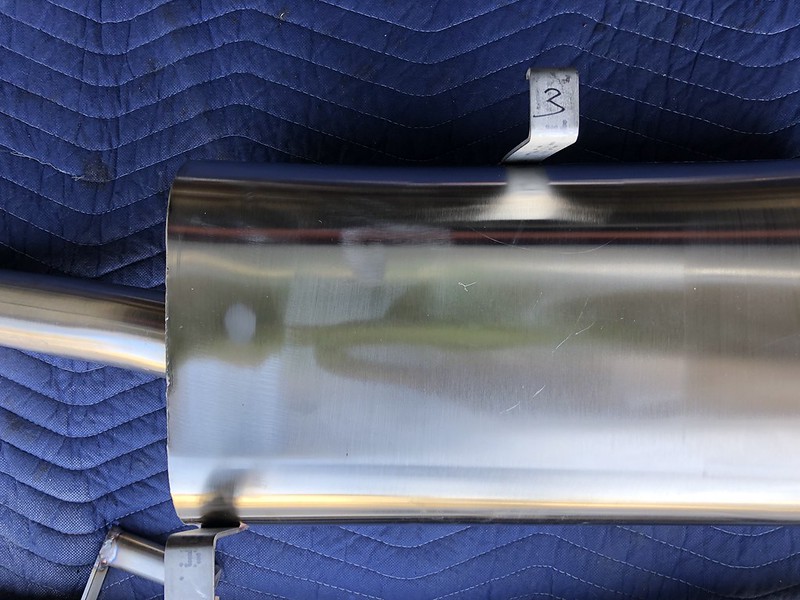
I started to line up the muffler and noticed that the hangers were staggered. Upon looking under the car, there were three sets of hanger mount points:
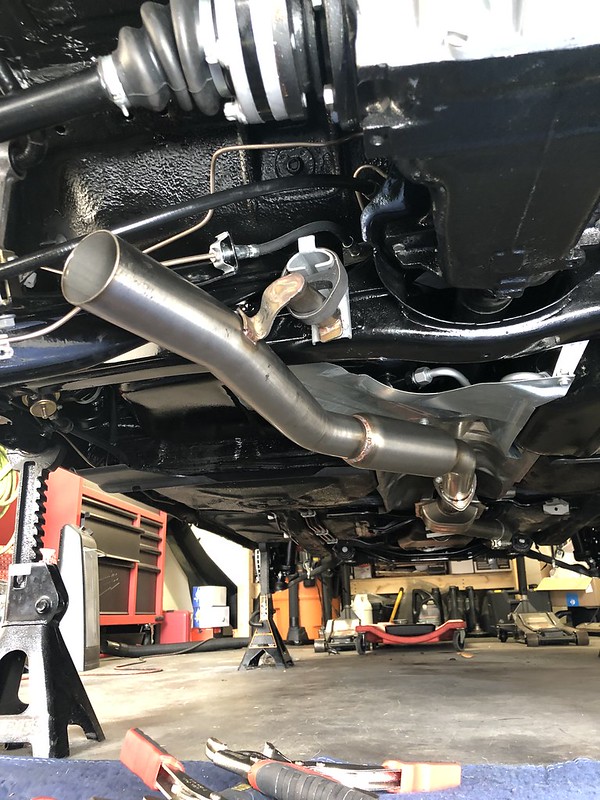
It initially looked like the muffler was going to align with the far left and middle hanger support, and so I thought I needed to cut the heat shield to allow the hanger bushing to fit through:
It came out great, I cut it out and filed down the edges so they were nice and smooth. Only one problem: once I had the midpipe installed, there was about 8 inches of gap between it and the muffler if it had mounted to the above hanger points. Turns out, the driver's side hanger on the muffler needed to move back to be parallel with the passenger side mount. These would then align with the outermost hanger brackets on the car. Otherwise, the driver's side hanger was flapping in the breeze in the rear wheel well:
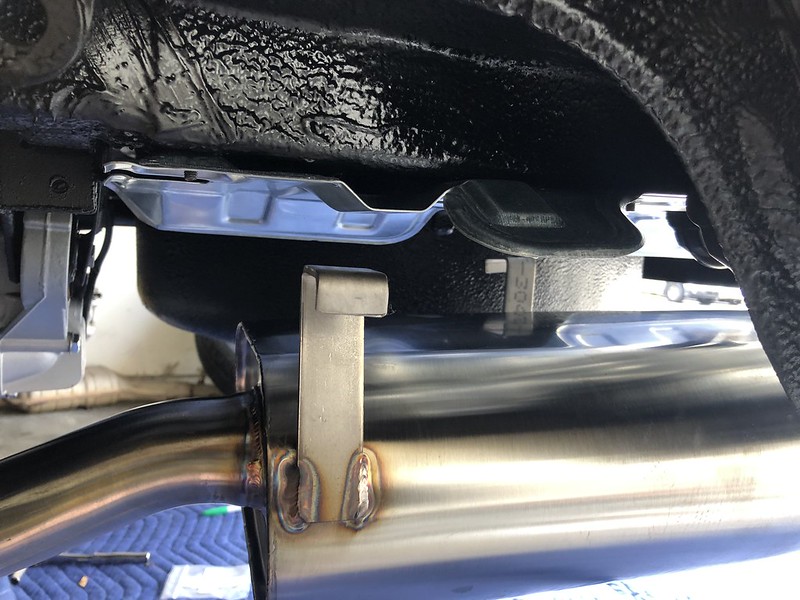

Ugh. I could probably still use the heat shield, but that's gonna bother me knowing I cut it needlessly. I ended up ordering a(nother) new one. I guess I'll list this one for sale, it's otherwise brand new. I'm sure someone will have an exhaust with different mount points, if you need/want it let me know.
As for the muffler, I spoke with Billy (of Billy Boat fame) and he said he's only ever mounted the hangers staggered and never had an issue. He offered to ship the muffler back and re-weld the hanger, but I figured that was too much work and turnover time, although I appreciated the offer. I'll just cut the hanger off myself and plan to call a local shop a buddy of mine recommended tomorrow to weld it in the proper place. Shouldn't take them more than about 5 mins.
Recently on the R3V Facebook page, someone posted about their CRP fuel line cracking after only a short time. All the smaller 6x11 fuel hose I had already replaced with OEM BMW line, however the 8x13mm hose I replaced with CRP as no one had any of the OEM BMW line in stock at the time (about a year ago). All of the CRP fuel line I had been running looked to be in good shape, however seeing that post kindof freaked me out. I figured I'd rather swap out all the fuel line now while there's no fuel in it to leak all over me while I'm under the car. I (re)replaced all the 8x13mm fuel line with new OEM BMW hose. The only fuel hoses I wasn't able to get to were the 12x18mm line running along the top of the fuel tank and a really short section of 8x13 connecting the driver's side of the fuel tank breather hose to one of the hard fuel lines running along the driver's side of the car. I'll get to those when I do the 5 speed swap as I'm in no mood to remove the driveshaft again.

Now that BavAuto is out of business, I'll have to get their fender mats in as many pics as possible to pay homage :(.
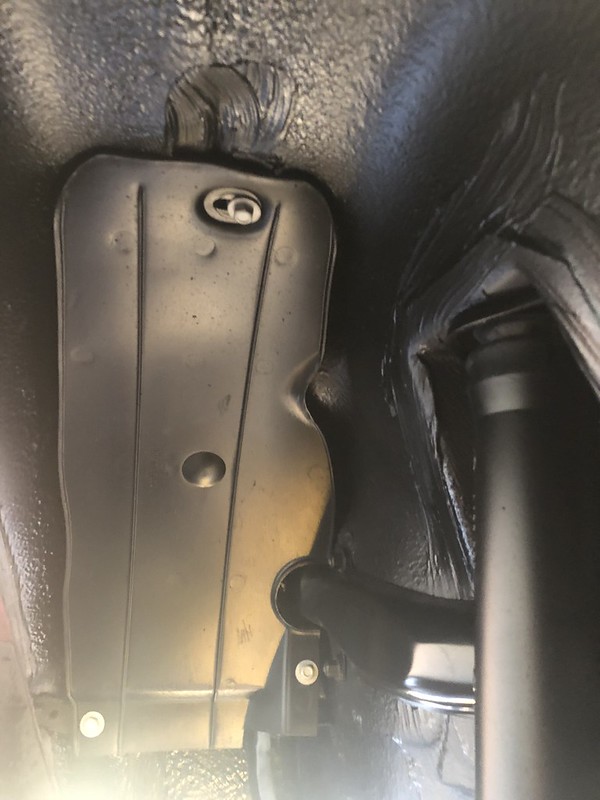
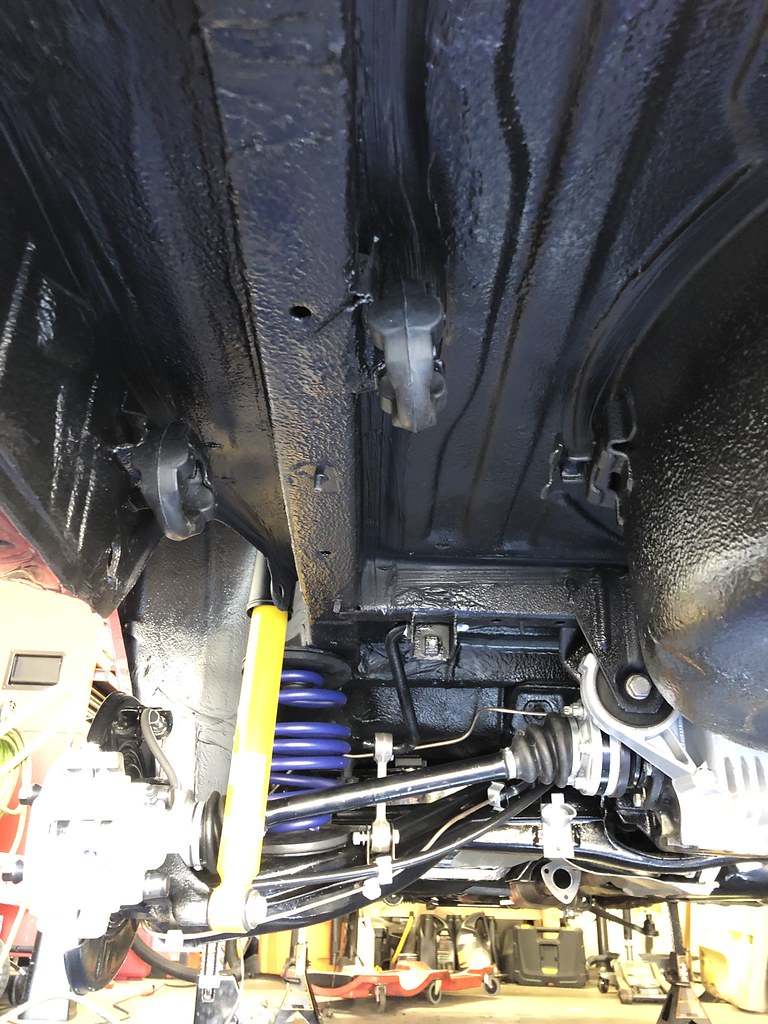
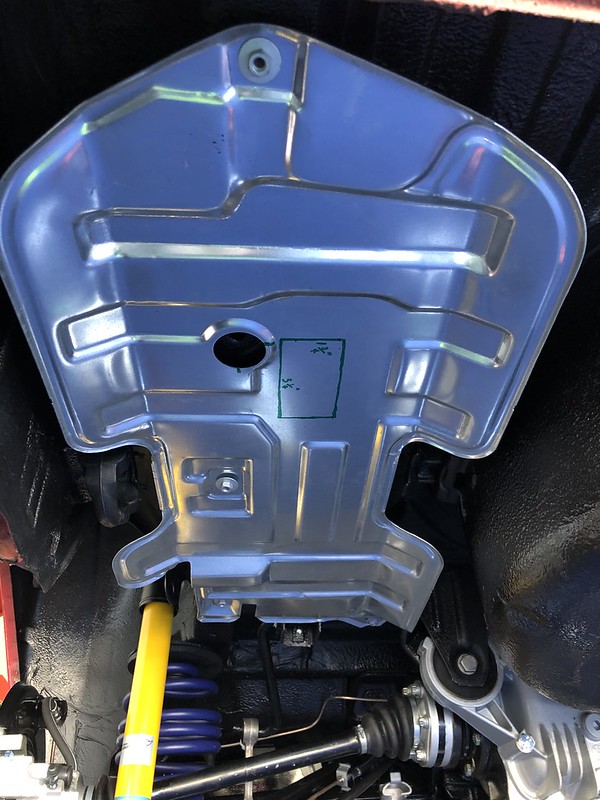
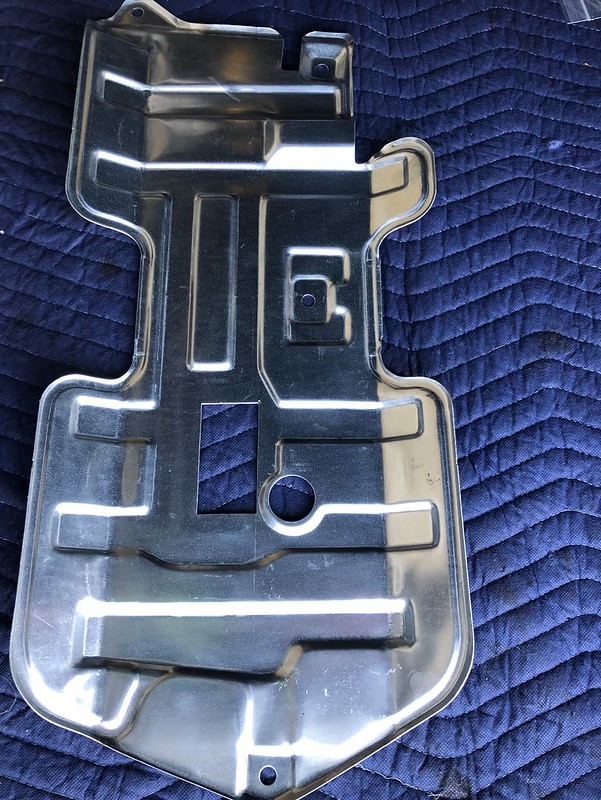
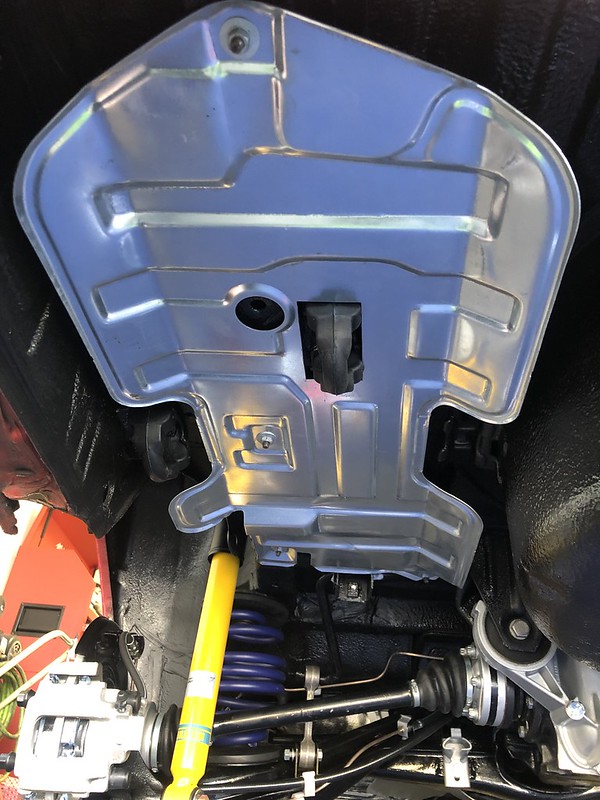
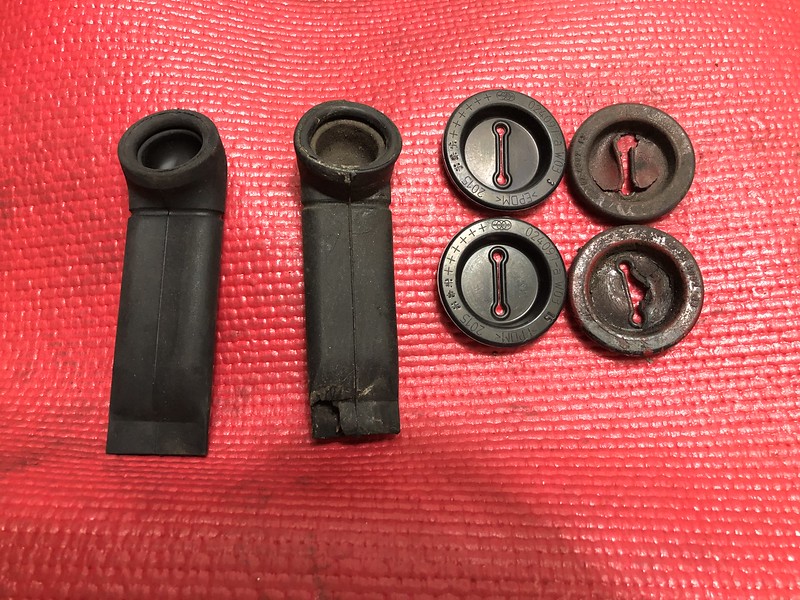
Replaced a few rubber bits that had turned to stone while I was poking around the engine bay:
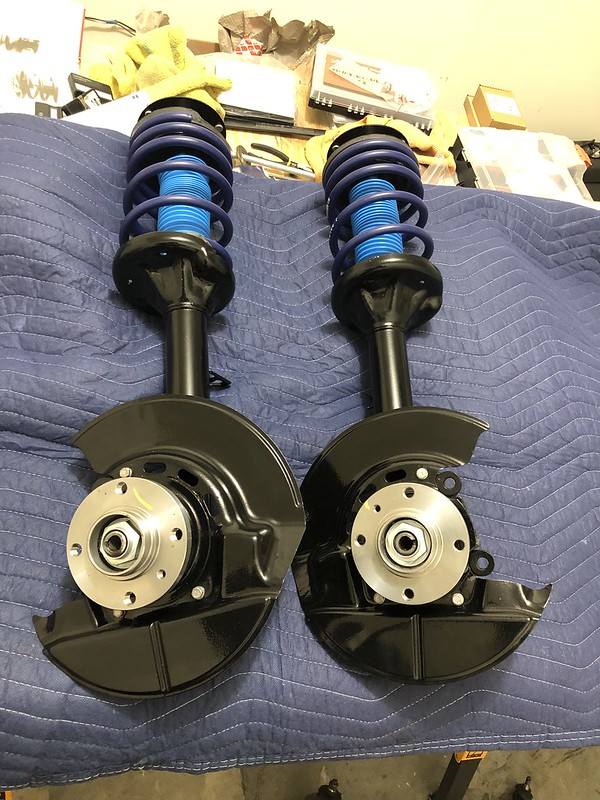
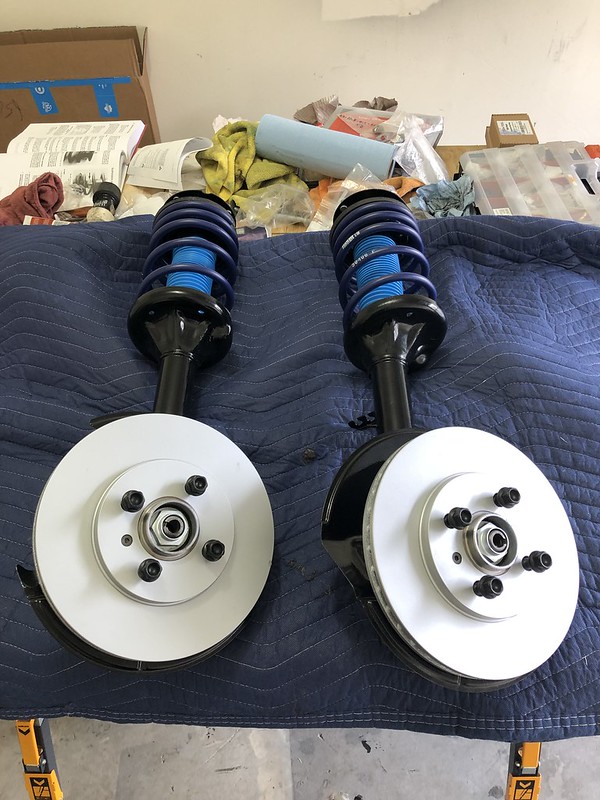
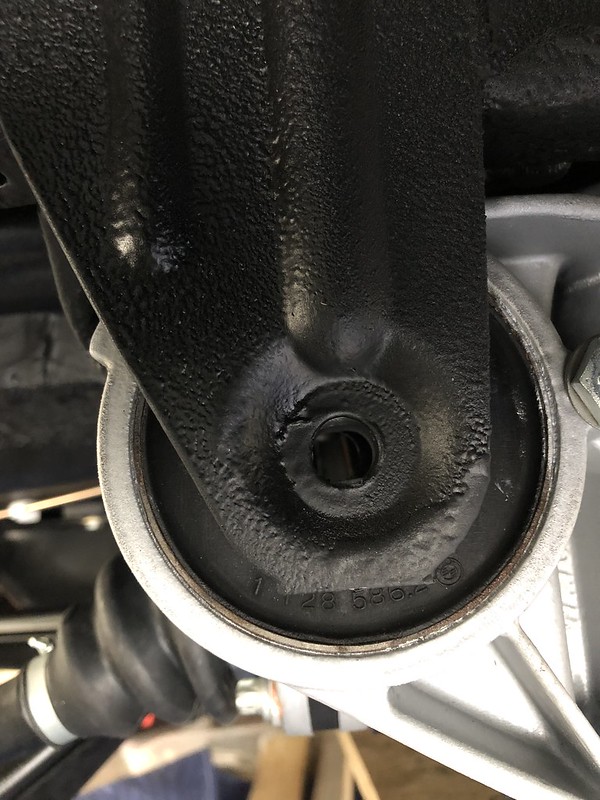
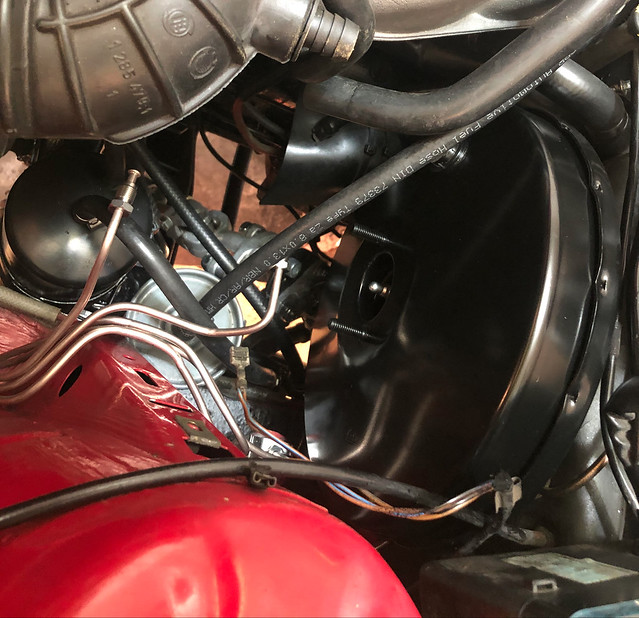
Last, I got the front struts mounted (and torqued!).
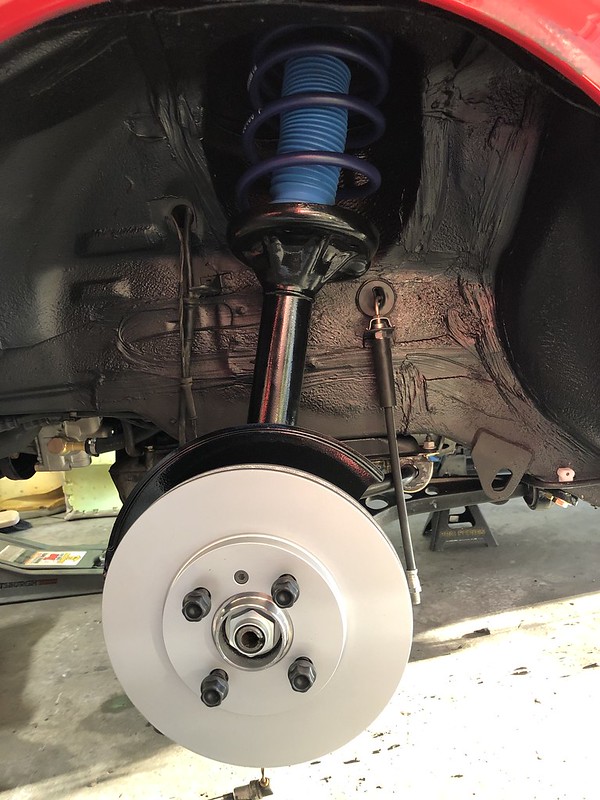
Went to mount the front brakes and realized I hadn't ordered new mounting bolts for the calipers so I'll have to wait on those to come in. Once I get those mounted up and the last of the brake lines connected, I can bench bleed the master cylinder and bleed the brake system. Then it's just fill and bleed the power steering system, connect all the new ABS and brake wear sensors, and we're golden! (I hope).Last edited by Albie325; 03-18-2019, 02:00 AM.'86 325e Zinnoberrot /// '02 325ci Schwarz II /// '18 M4 Azurite Black Metallic ///
Albie325 Build Thread | Albie325 COTM Jan 2021Comment
-
Great work! Awesome dog and car!Comment
-
Looking awesome man!
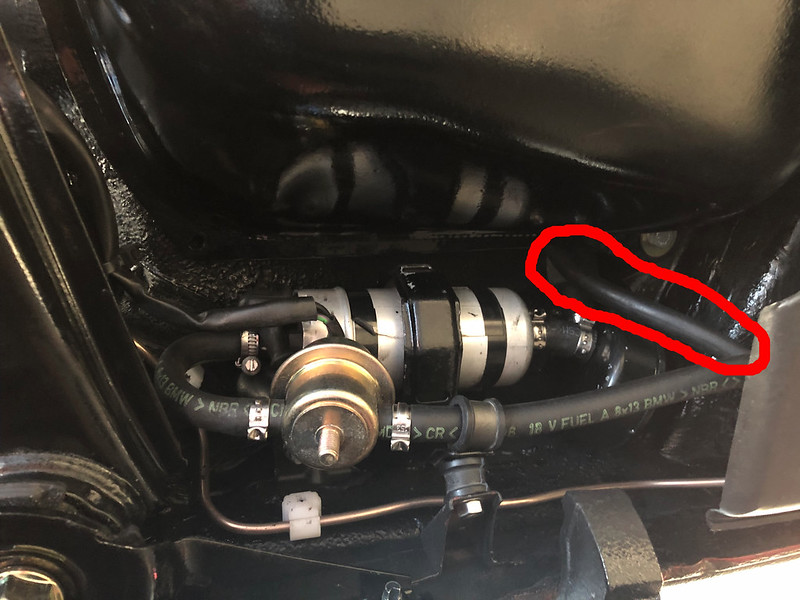
Is that a pressure regulator by the external fuel pump?
Also, does your car route the fuel line around the low side A/C line?
Mine had that routing stock, but was deleted when the fuel tank and pump was swapped to a late model system.I do things.Comment
-
Thanks for all the good documentation.
Your brake line bending is tidy!Comment


Comment