
Nice. Now to wait for the next update.
-
@IRON-E30 aka Edwin:D -
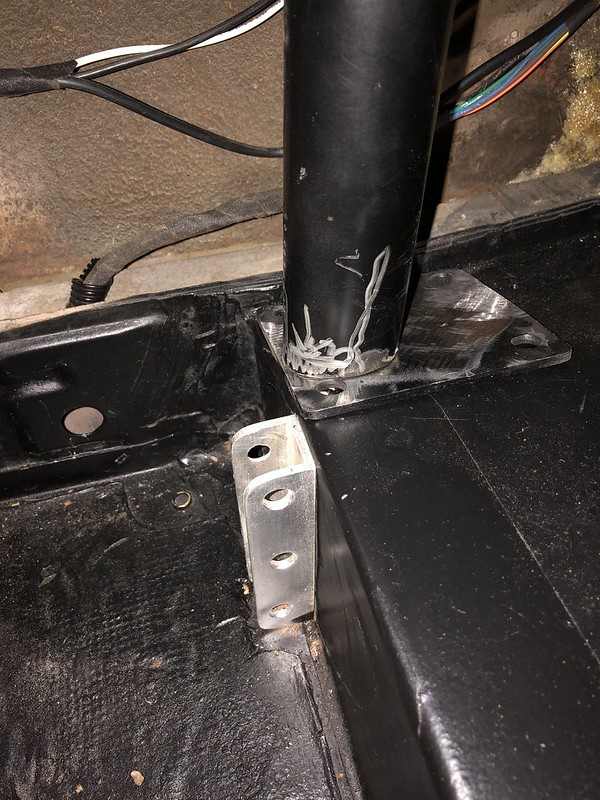
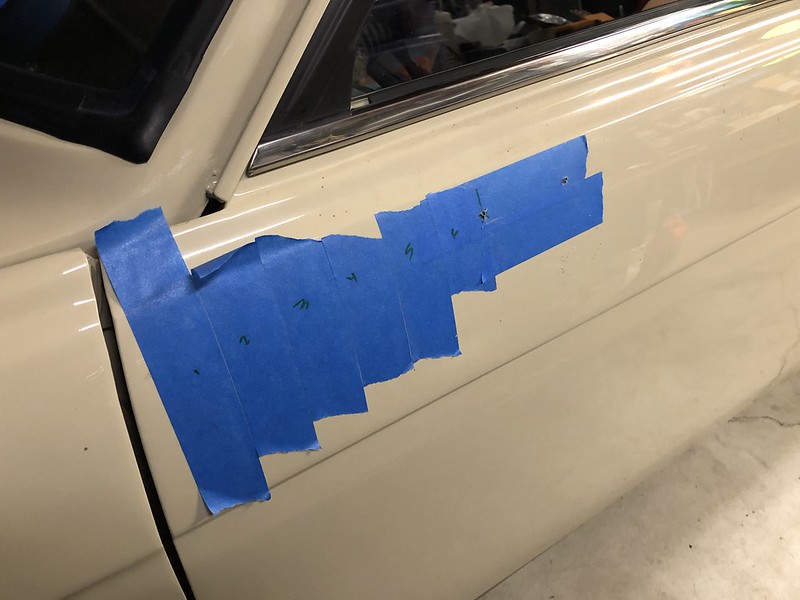
I have a question regarding the aluminum covers your dad made in the fender well. So they were tacked in and you used seam sealer to make sure no water would get in. I'm curious what the limitations of seam sealer is. I have a project that I'm doing where I'm patching metal pieces and once in a while I will get a pin hole that is hard to fill. That being said, I have not worried too much about it because I figured that the epoxy primer and seam sealer would be more than enough to keep it together and avoid rust. I'm curious of you can drop some knowledge regarding the seam sealer itself and what it's limitations are? I've see auto manufactures use it to basically hold a panel onto the car with a few spot welds, similar to what your dad did with the aluminum piece. Really I'm just trying to find assurance that I will be fine doing it the way I'm doing it.
Thanks! Love the build!Comment
-
Thank you! You should be able to use seam sealer for what you are describing. I wouldn't worry about any issues with water as many panels are water tight with seam sealer on tons of cars.
Time for an update!
Dad has been working extremely hard to finish up the wiring and we are beginning to inch closer and closer to that first drive! This part of the project was extremely daunting, but with patience and the well labeled/designed Painless wiring kit, the overall process was…. relatively painless. We wanted the dash panel to be 100% removable and serviceable so the wiring harness attached to all the gauges and switches had to be on a separate loom.
Below was a relatively early mock-up of some of the wiring.

Once the location of the fuse box and relays were roughly determined, the dash harness was slowly put together.


And ended up looking like this!
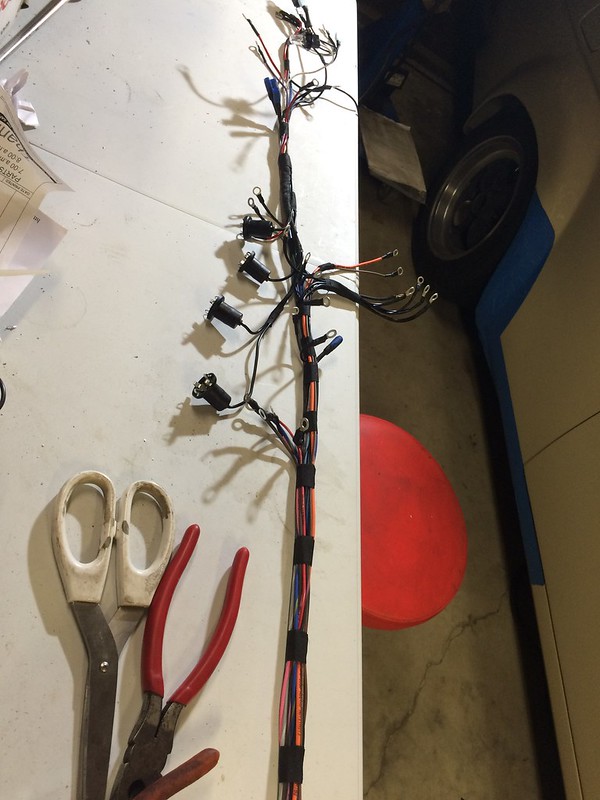


Looking great! All connections were crimped/soldered and shrink wrapped.
A couple power and ground distribution blocks were then mounted to the dash support.

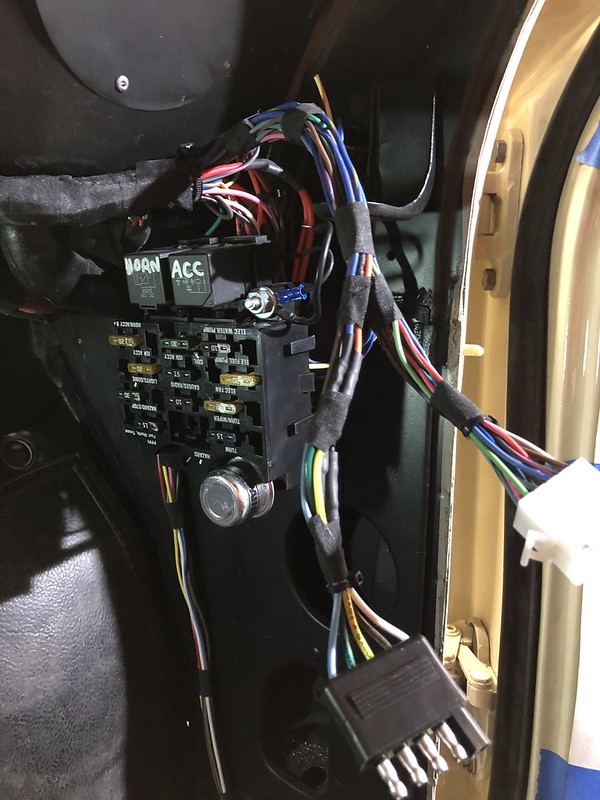
Once the dash harness was created the body harness was formed. Dad made a connector to separate the dash harness from the main harness and fuse box for serviceability.

You can see where that harness spits out of the firewall here next to the fusebox.
And then the remainder of the inside body harness.


[url=https://flic.kr/p/2hGcdQ1]
And here you can see the engine bay harness where it comes through the firewall. A power junction block included in the Painless kit was mounted to the passenger side firewall.


Here you can see all of the starter wiring.

The front lights, ignition, and alternator wiring come out of the inner fender well and into the engine bay on the passenger side.


Looking awesome! This was a ton of work and I really think the wiring came out fantastic and exceeded expectations. Many hours went into this harness and it really shows.Last edited by Balleristic31; 11-07-2019, 04:06 PM.
-NICKComment
-
wiring is no joke! There are twice as many wires as an elevator with many floors. it's great work youre doing here.Comment
-
Looking good, Ive considered getting a painless wiring harness for mineSimon
Current Cars:
-1966 Lotus Elan
-1986 German Car
-2006 Volkswagen Jetta TDI

Make R3V Great Again -2020Comment
-
Once the wiring was all set, we could finally do a finished assembly on the dash panel. Before that could take place, the dash and rear seat delete panels need to be coated with the previously chosen wrinkle black finish. Initially we were going to use VHT spray and work the wrinkles in manually with a heat gun, but after a bit of deliberation we determined powder coating would be a much better and more durable option. The end result was very satisfying and looks fantastic!
First the rear panels were mocked up in their final position. Looking good!


Then came the upper dash panel.

And finally, the front face of the dash. Fantastic!


Installed!


And here are a few pictures of the backside of the dash panel all tidied up.


All in all, we are thrilled with how the dash came together. It’s starting to look like a car again!
-NICKComment
-
Dang, just found this thread. Was hoping to suggest vantablack for the dash ala Gesaffelstein.
Also did you shoot some of those opening pics on 135? Color rendering reminds me of it Kodak Gold.Comment
-
Every detail of this car is just incredible. I love the interior work and all the textured black. It looks fantastic.
I'm jealous of the father son project as well. My dad has moved away from car projects as I've gotten more passionate about them. A project like this together would be amazing.Comment
-
Big update for everyone! As of a couple weeks ago, the car runs and drives under its own power! The car basically fired right up after plumbing the remainder of the fuel system and buttoning up a few small items. No video of the first start right now, but we have something better; a flyby! Listen to that induction noise!
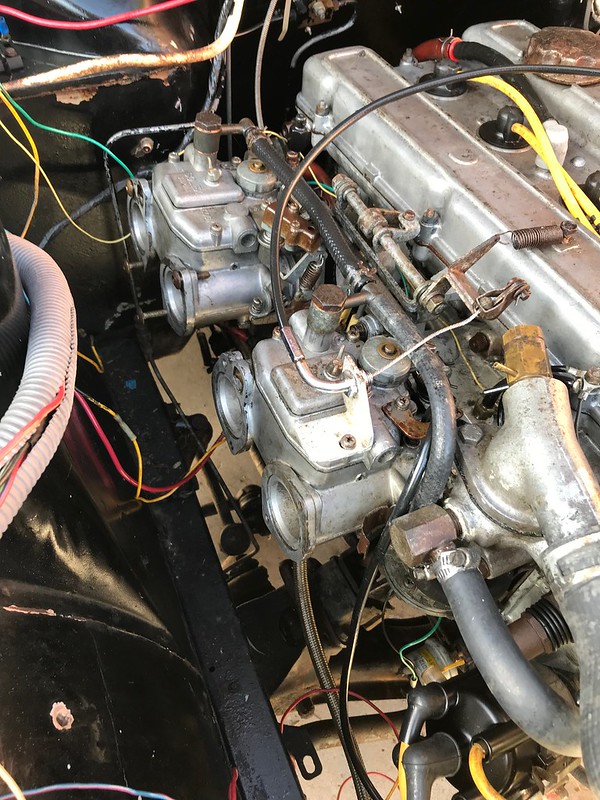
The 18RG runs very strong even with a slight lean condition at the moment. There is a bit of oil burning, and the transmission is a bit noisier than we were hoping it would be, but its quick! The torque of the 2.0L is lovely. Keep in mind this car hasn’t moved under its own power in over 20 years!
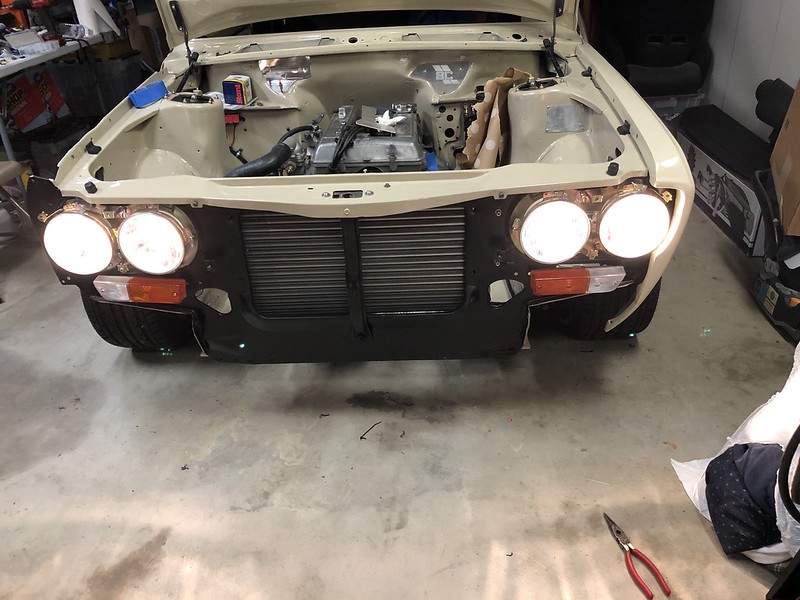
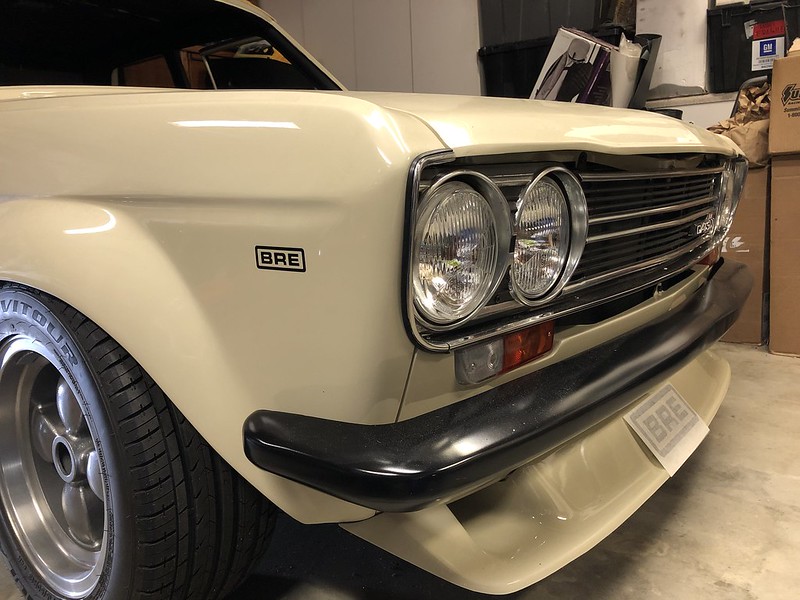
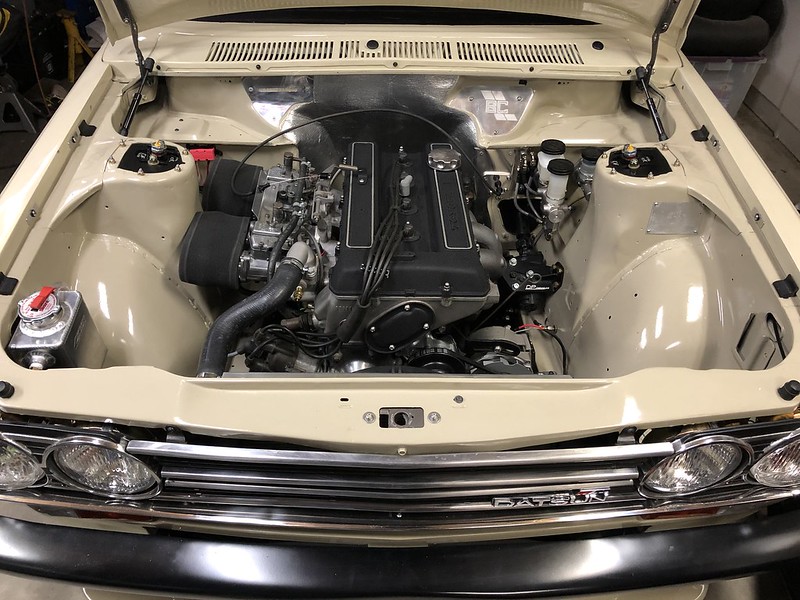
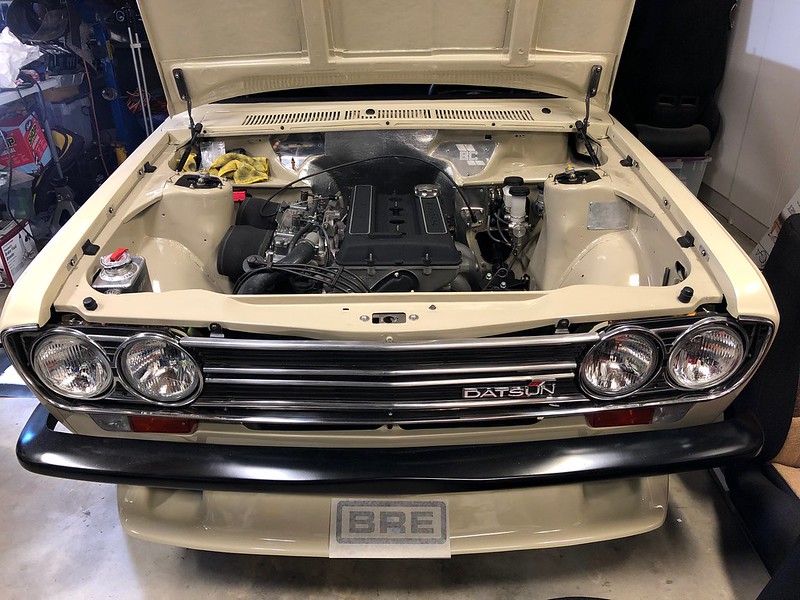
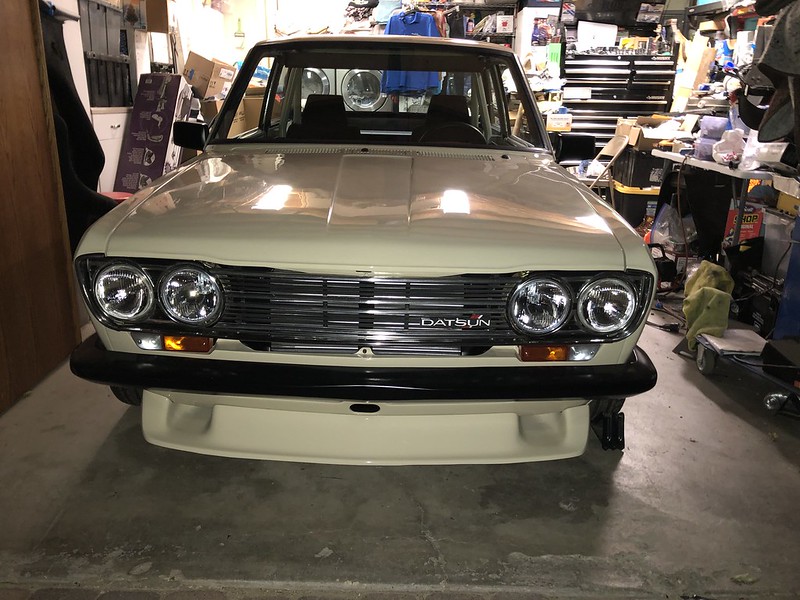
Beyond getting it running, additional miscellaneous progress has been made across the entire car. The front end was assembled including the front valence, airdam/lip, bumper and the grill assembly.
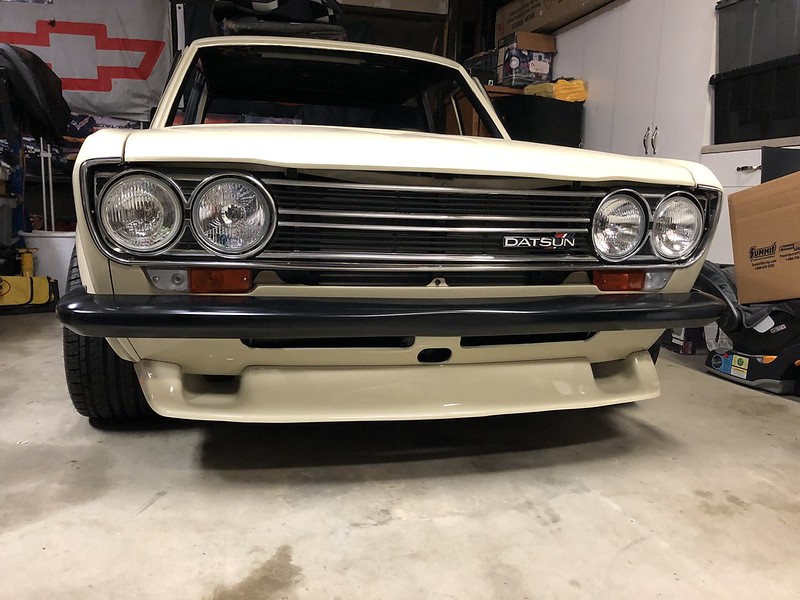
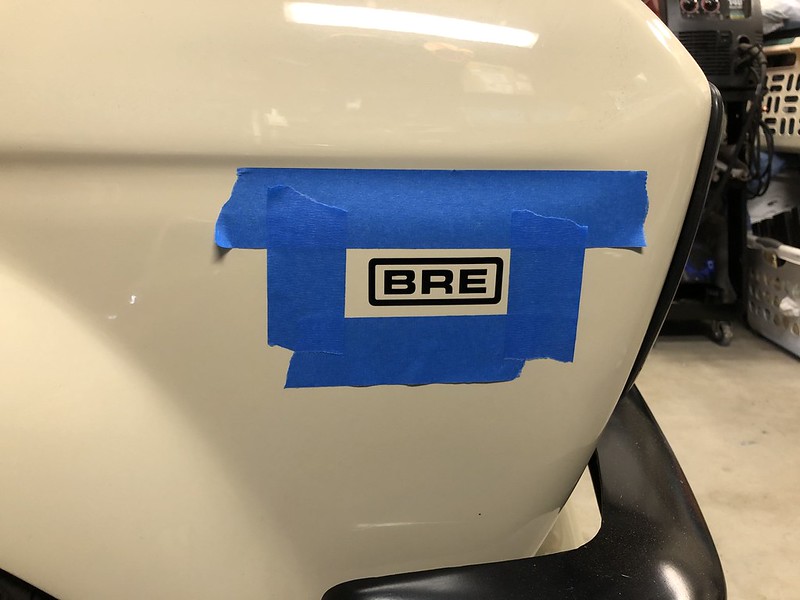
A few BRE touches/decals were added. Definitely fits the character of the car in my opinion!
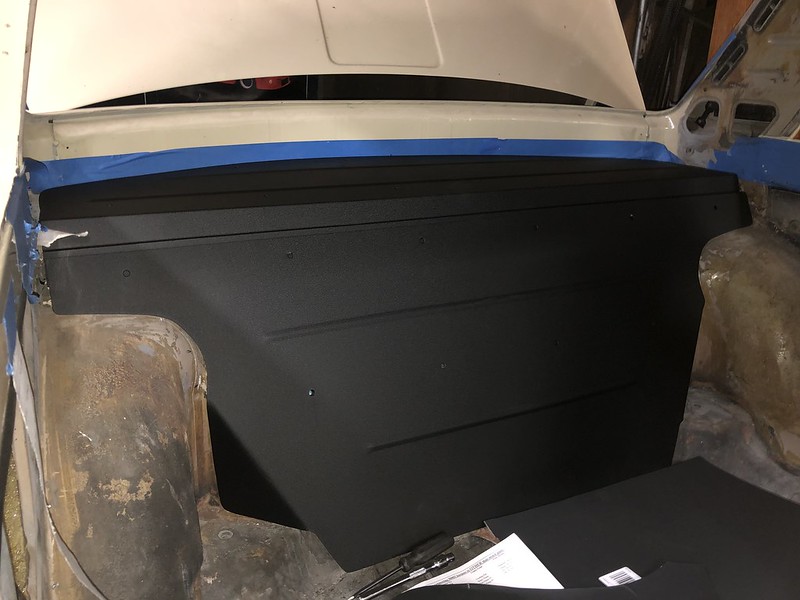
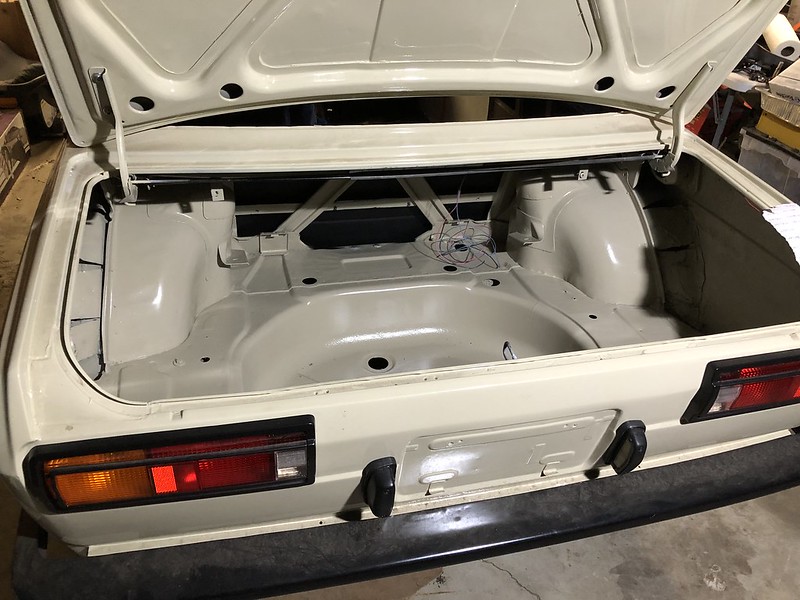
At some point before the gas tank went back in, the trunk was also painted body color to match the rest of car.
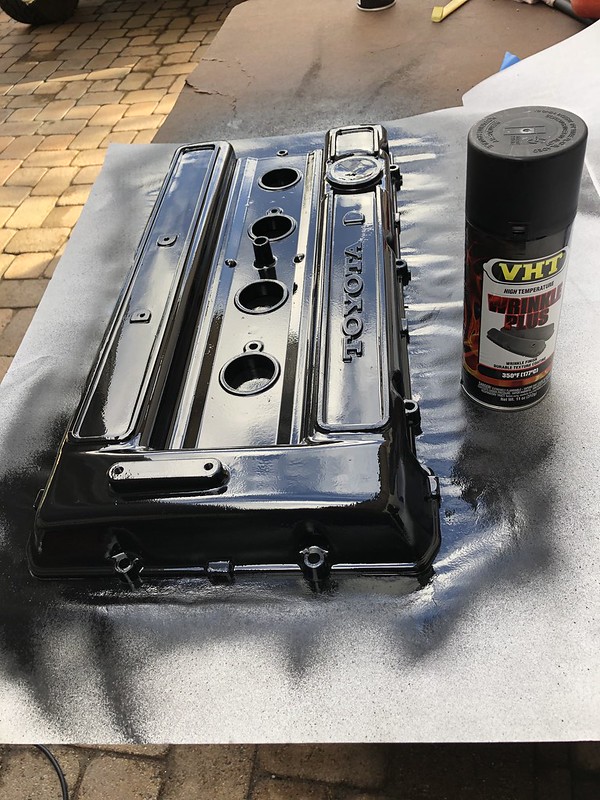
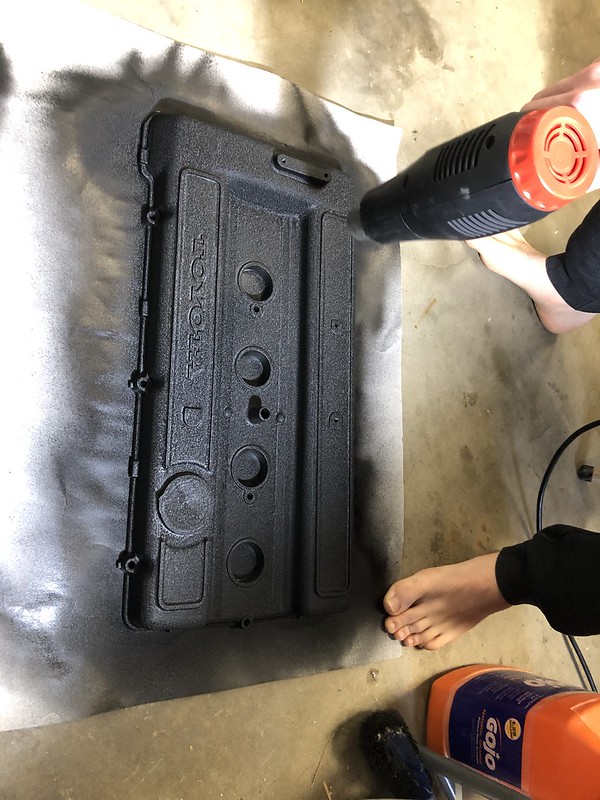
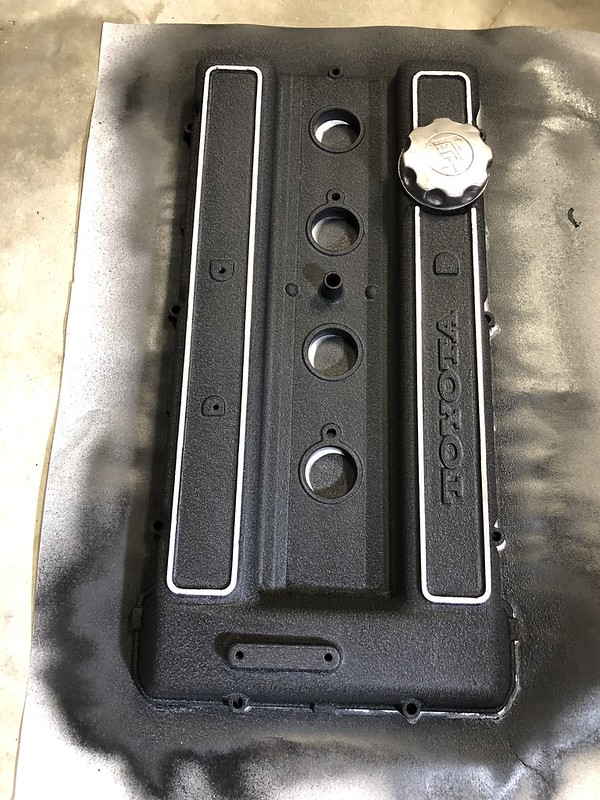
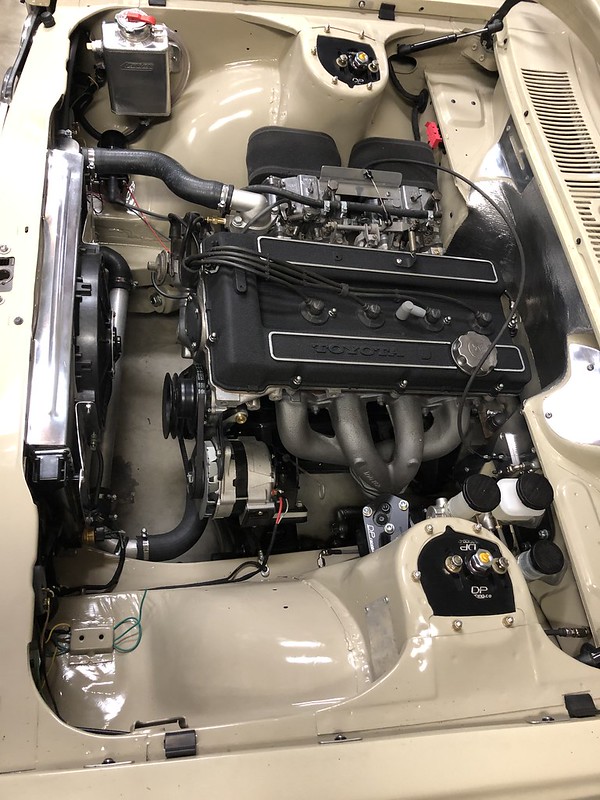
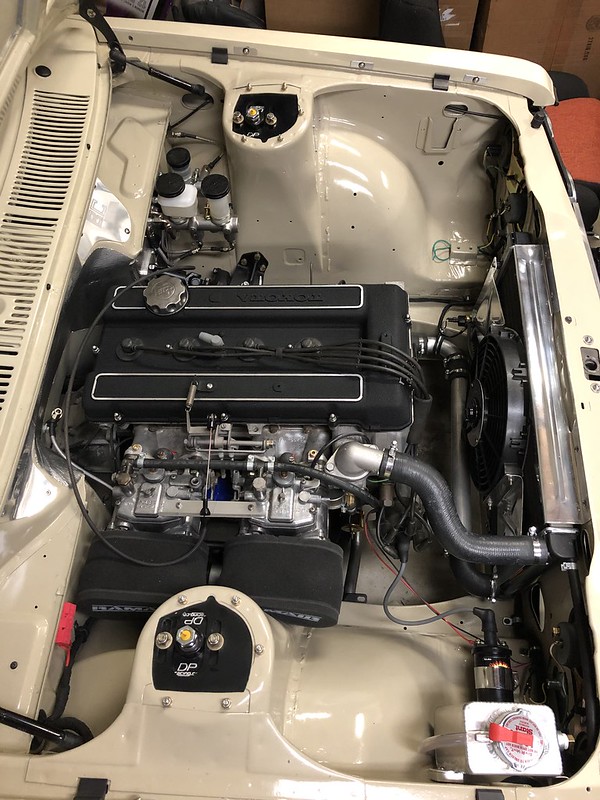
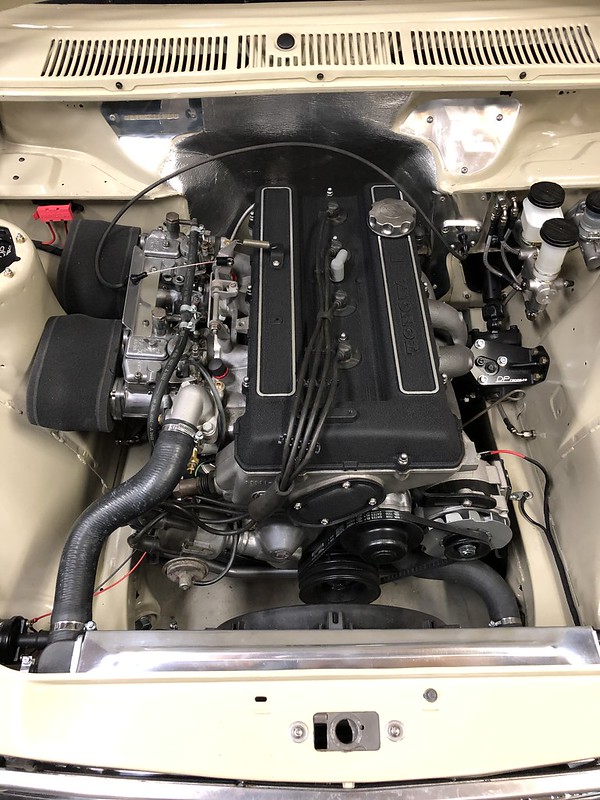
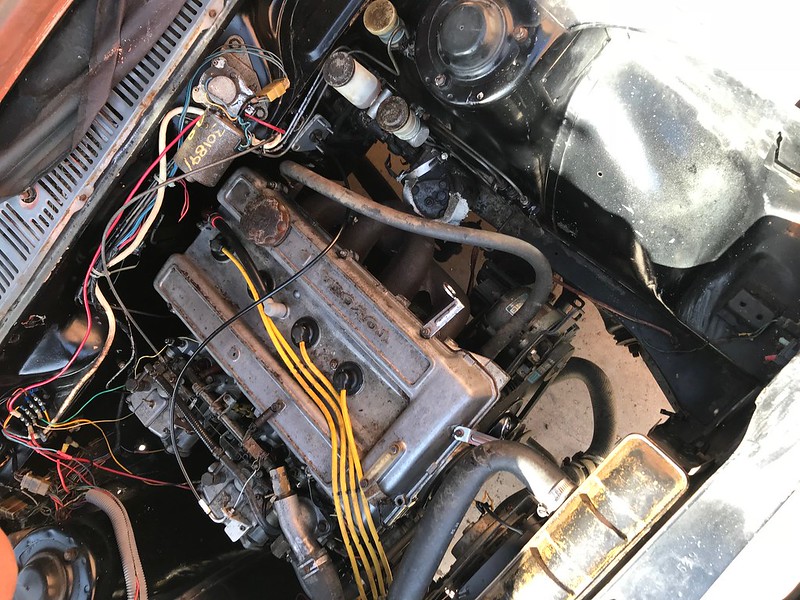
The valve cover was pulled for its coating in VHT wrinkle black. Some strategic masking/sanding afterwards led to a stealthy look that aids in hiding the true identity of the powerplant.
And installed. These photos really illustrate how far this engine bay has come. Below I posted some of the engine bay shots when the car was first purchased for comparison. Dad did an absolutely fantastic job on this build and it really shows.
I’ll leave it here for now. Roll bar/interior updates to come shortly!
-NICKComment
-
Really satisfying build and attention to detail. Link for flyby video didnt work :( I really want to hear the noise! Sent from my SM-G960U using TapatalkComment
-
Ah, it appears the youtube embed is not very mobile friendly.
Here is the full link for those interested! https://www.youtube.com/watch?v=dSdF2JNKqh0
-NICKComment
-
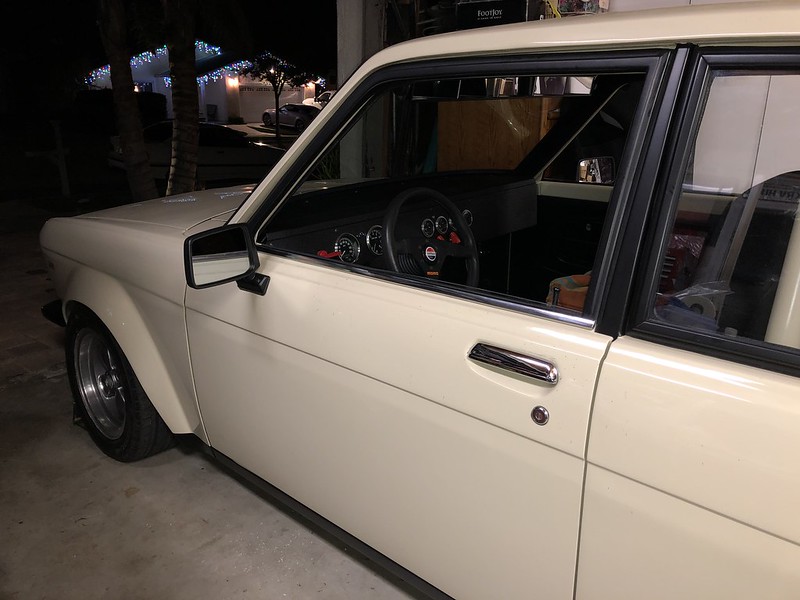
Another big update today! First, we picked up a roll bar a few months back from a gentleman who builds them out here in LA. It still needs a harness/cross bar welded in, but Dad fitted/painted/installed it for now. Below you can see a few pictures of the mock up/test fit.
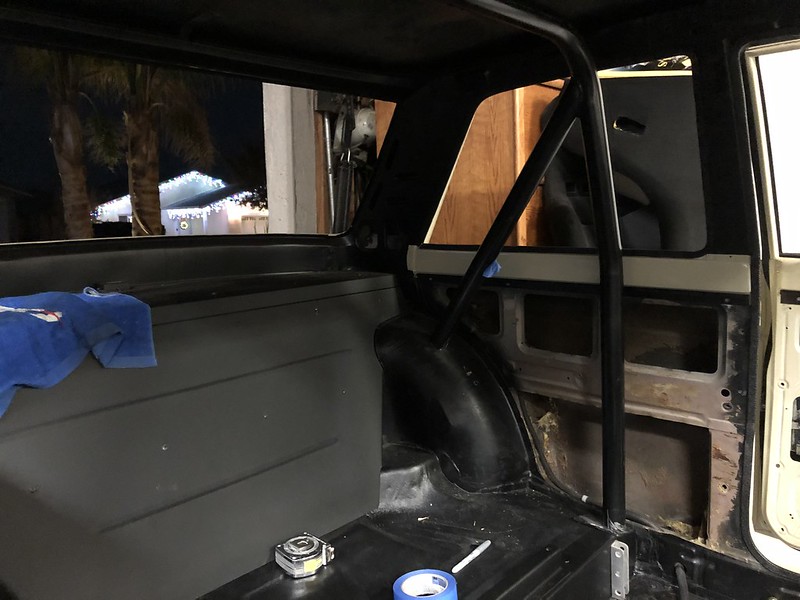
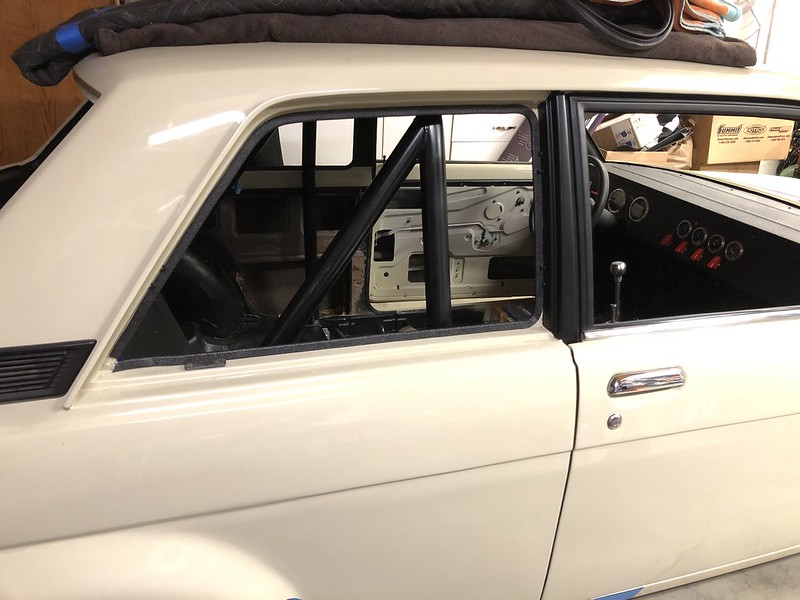
Then the bar was painted body color and installed! Also here you can see the rear side windows installed and the b-pillars all painted up with SEM trim paint to match the window frames.
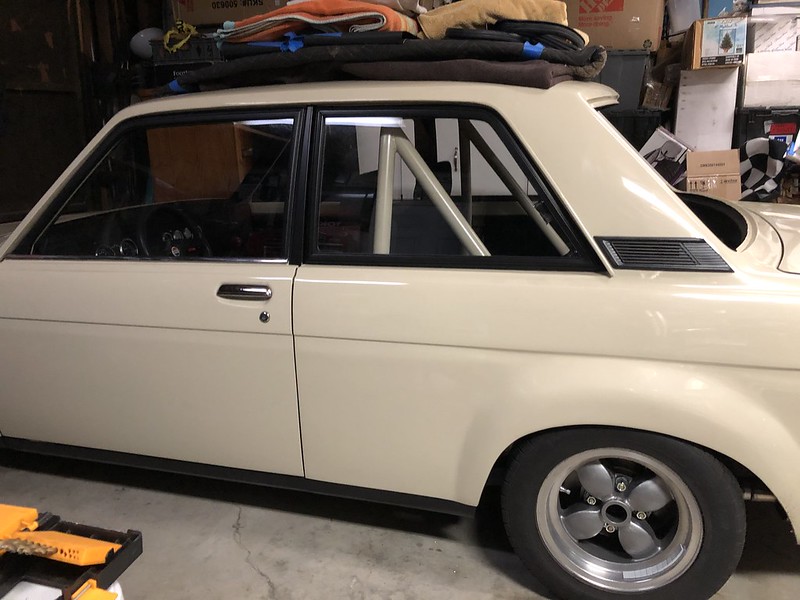
This is one of my favorite photos of the car thus far. Here you can also see the rockers painted black as well.
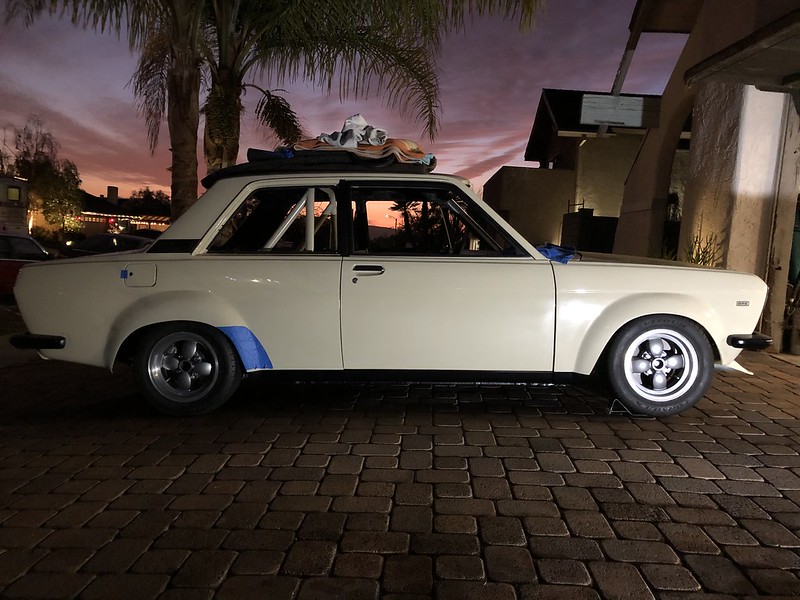
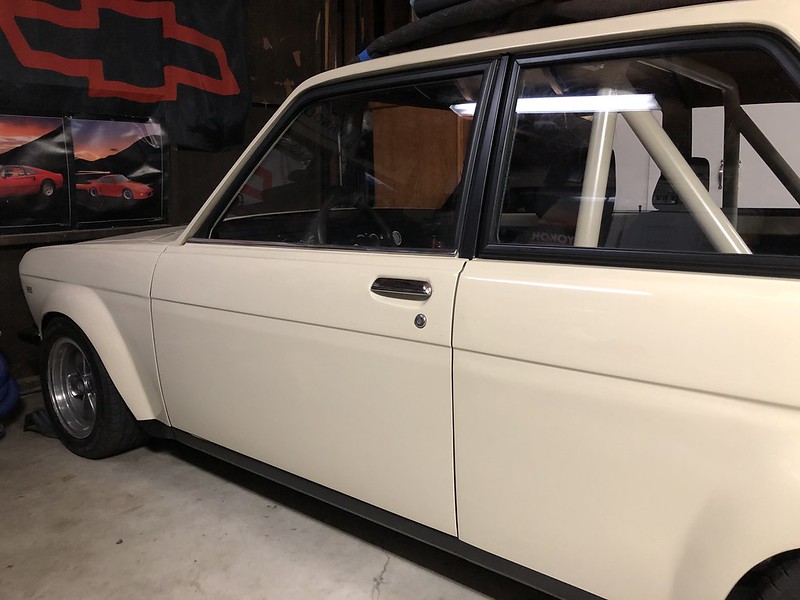
Door panels were installed. Interior is really coming together now!

Mirrors holes were carefully mocked up and drilled. Sorry everyone, no JDM mirrors on this 510!
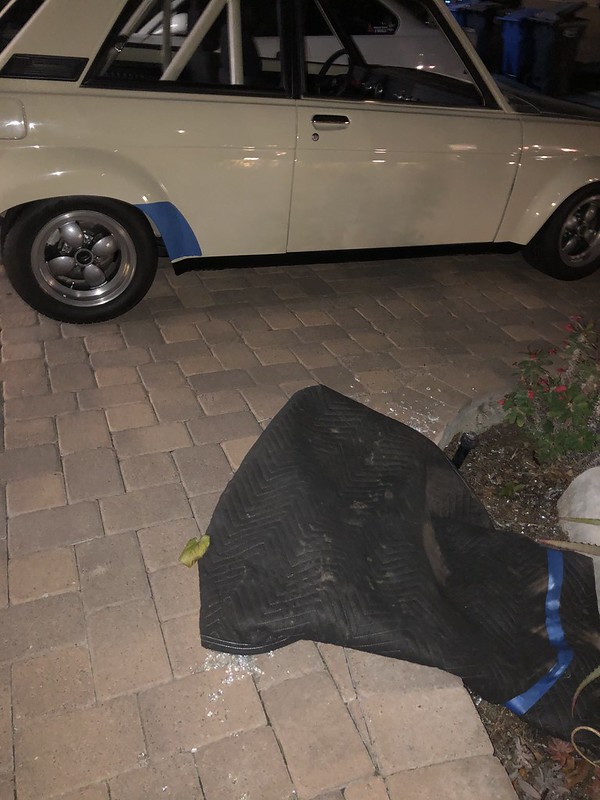
Unfortunately, when the car was pulled out of the garage the wind picked up and tossed the rear window off the roof completely destroying it.
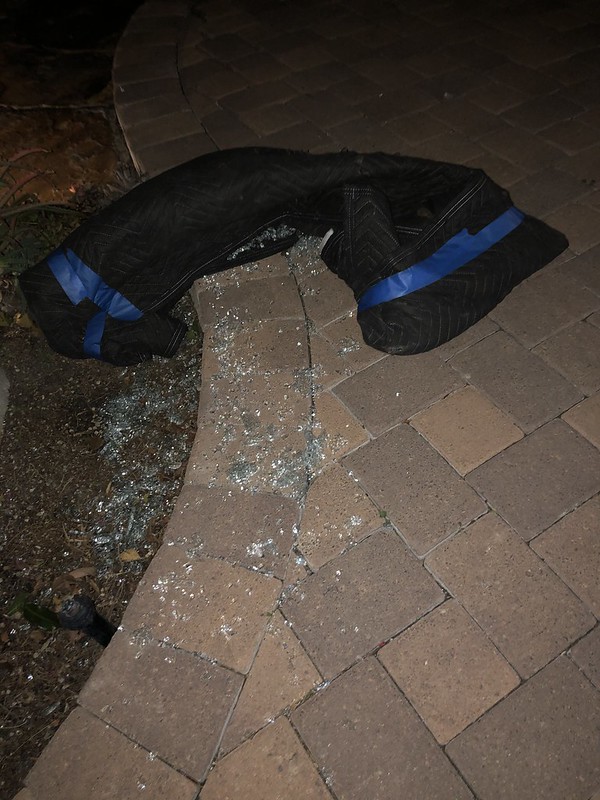
Luckily, the 510 community is awesome and we had a new window (thanks Seth!) within a day or so!
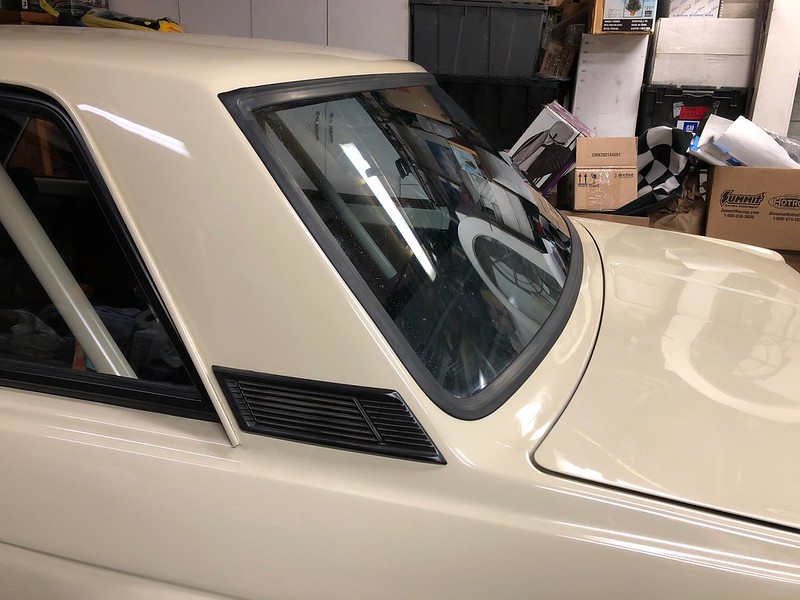
And the brand new windshield installed!
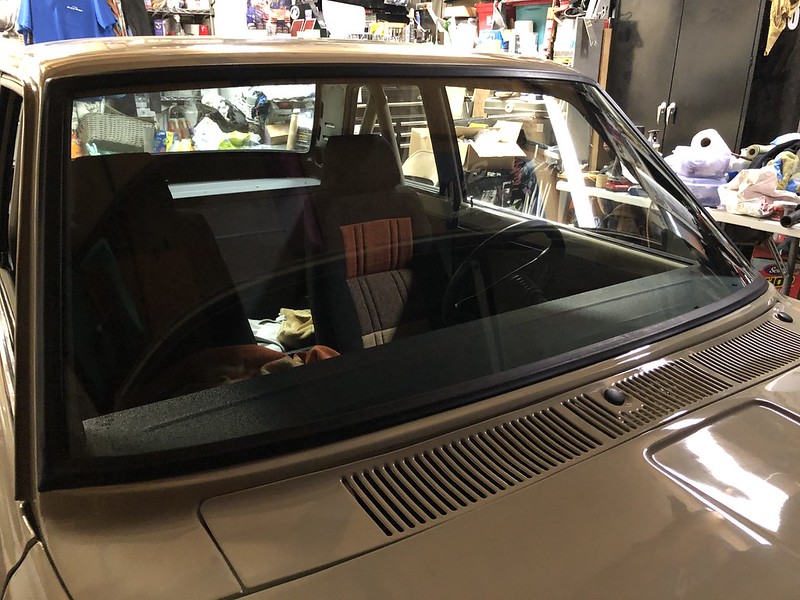
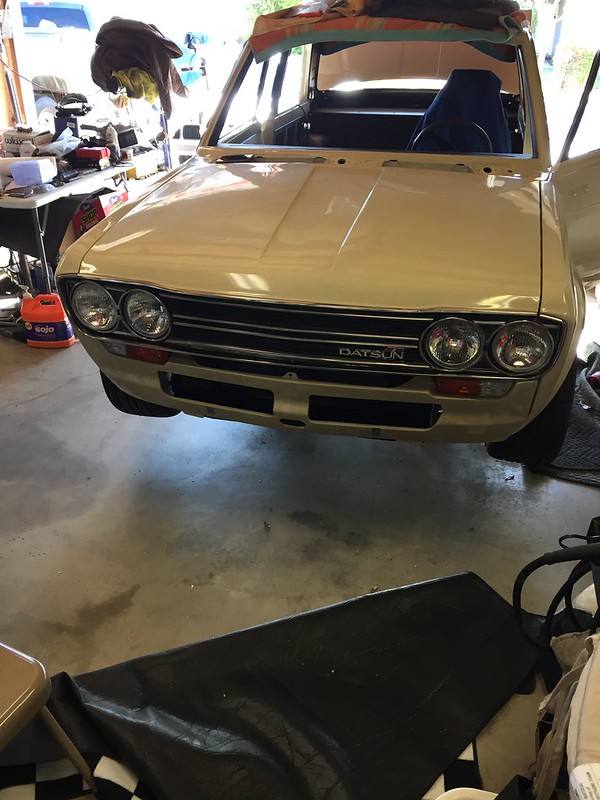
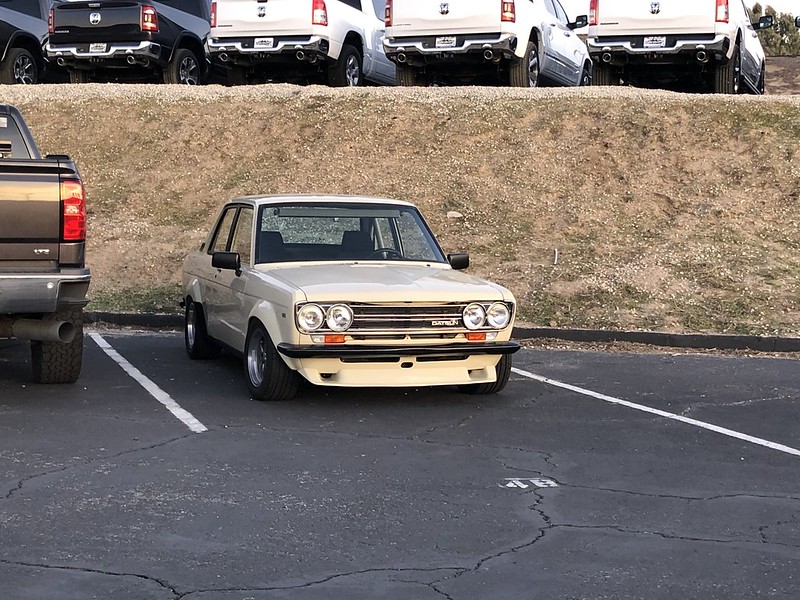
With all the glass installed, it was time to finally take the car on its first real trip to the gas station. Please enjoy the photos below, as they are a culmination of over a year’s hard work by Dad!
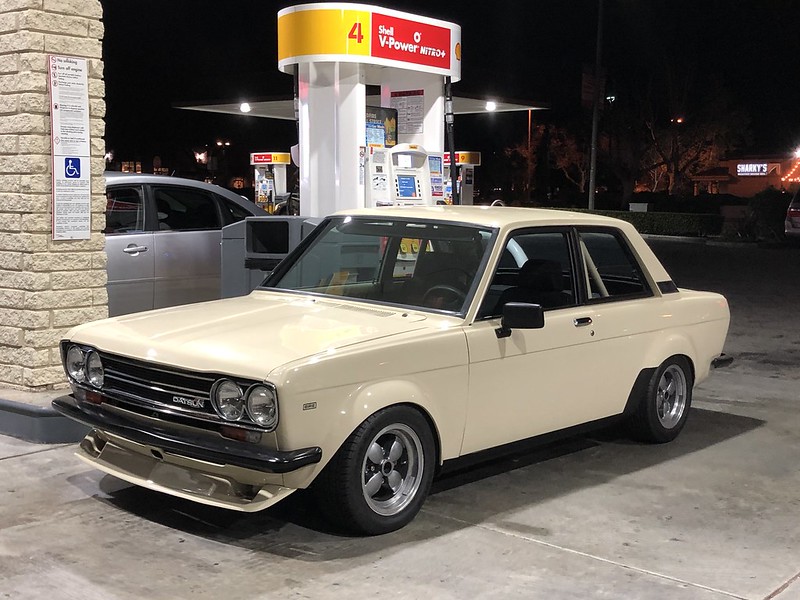
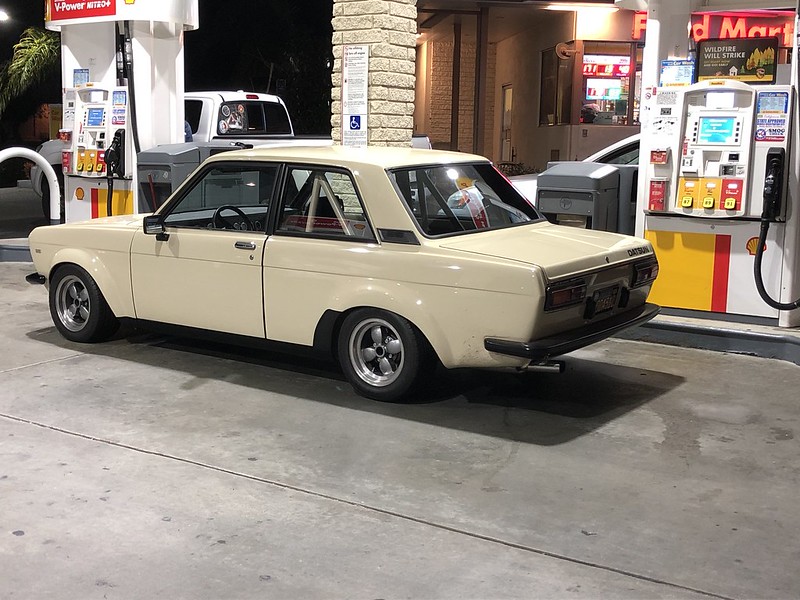
And one final shot this morning. Looks fantastic in the sun!
-NICKComment
-
It turned out great. You guys did a good job. What are the plans for the carpet?How to remove, install or convert to pop out windows
http://www.r3vlimited.com/board/showthread.php?t=297611
Could be better, could be worse.Comment
-
Fantastic job to all of you guys.
Cherish all those special bonding moments with your Dad.@IRON-E30 aka Edwin:DComment


Comment