Announcement

Collapse
No announcement yet.

The Humble Lachssilber 4 Door - Austin's Daily 325i

Collapse
X
 
  • Filter
  • Time
  • Show
Clear All
new posts

    #46
    Nice work on this car man! I love the positivity and dedication you have. I'm actually really surprised the insurance fixed it the first time around.

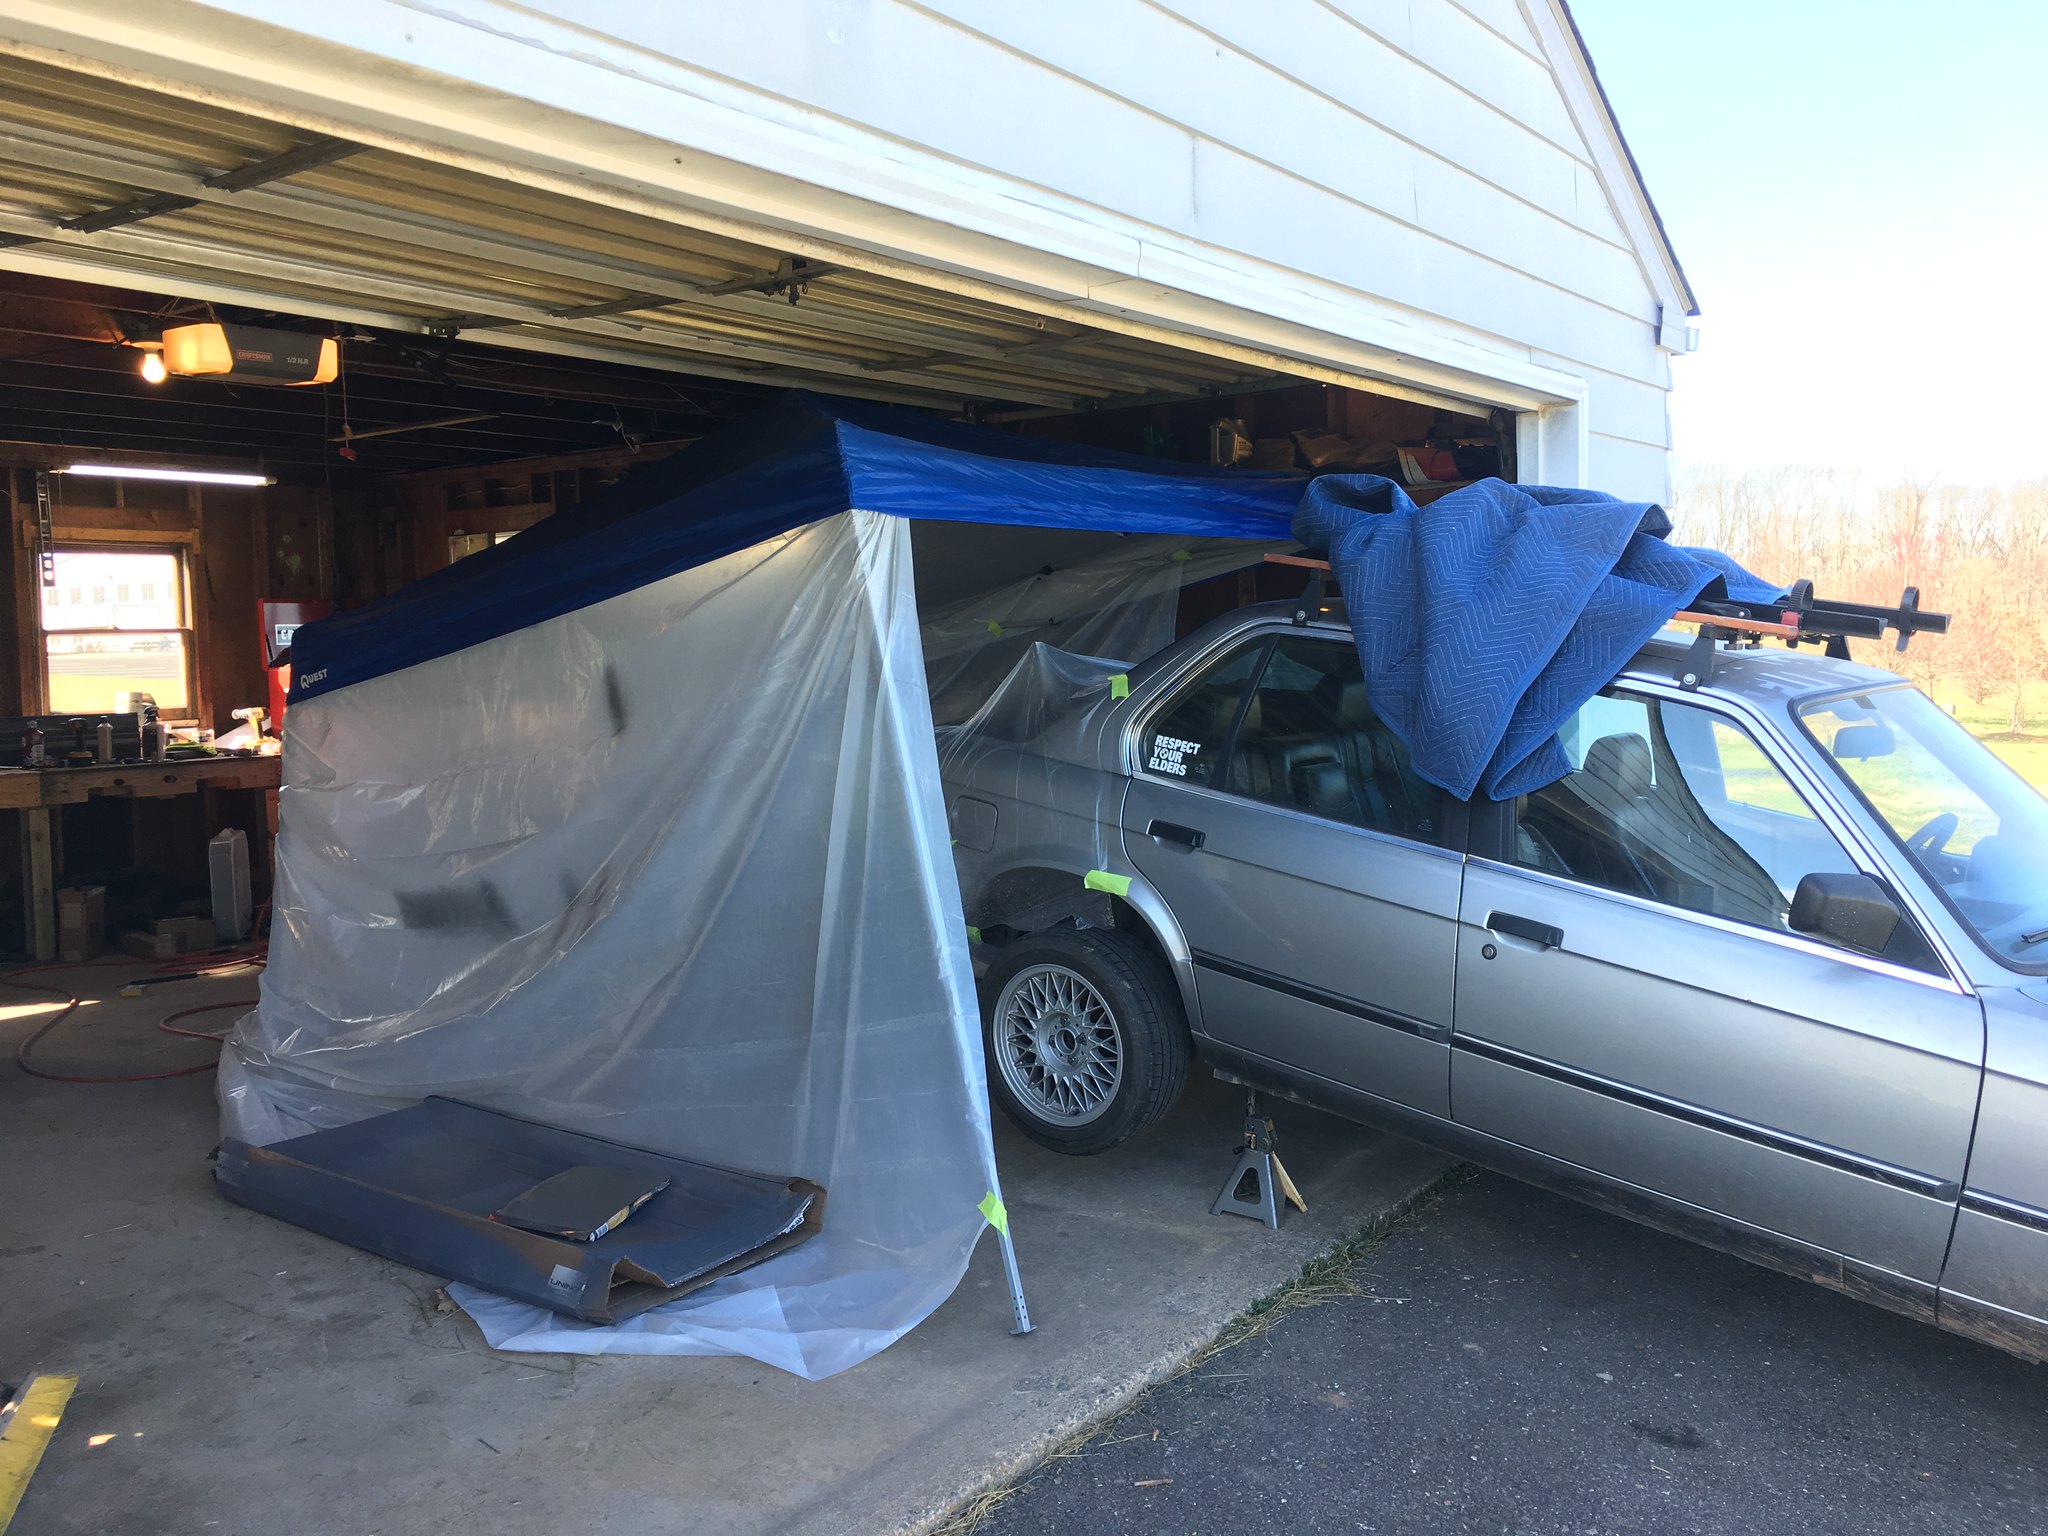
    Looking forward to seeing how the paint turns out.
    '90 325i - 5 speed coupe
    '05 330ci 6MT ZHP

    Comment


      #47
      The tribulations of this build! Just caught up with your work, subbed for sure.

      Comment


        #48
        Okay update time
        so like many of you I’m sure, I found myself with much more time not being in work so I finally got to wrap up the bodywork! Bear with me as this was my first time painting a car so, it was a learning process! Alright, first things first, the trunk lid I got had a little bit of bubbling forming on the one edge, so I stripped back the seam sealer and resealed it.

        Untitled by Austin Kratz, on Flickr

        The trunk was otherwise good & straight! Sanded down to 320 grit

        Untitled by Austin Kratz, on Flickr

        First coat of primer went on! I think I did 1 coat of primer, Sanded with fine grit, then a second coat.

        Untitled by Austin Kratz, on Flickr

        Got the "Paint Booth" set up. Also side note, I did not know urethane base coat paint is so hard to get?? I felt like I was trying to buy dope, I had to talk to the bodyshop guy I know who told me to go to this guy behind a run-down diner about 25 minutes from me and talk to "Jacob, He should be able to help you out." well... Jacob got me what I needed and that was that.

        Untitled by Austin Kratz, on Flickr

        2 coats of base color

        Untitled by Austin Kratz, on Flickr

        Untitled by Austin Kratz, on Flickr

        aaaaand this is where things really went downhill for me, "try painting a test panel first" they said but nooooo my impatience said to just go for the clear, I got a good gun, it should be easy! Plus I'll just wet sand after. Well... I sprayed 5 coats of clear but later realized I had the flow rate turned way too low on the gun and the clear didn't flow at all. It looked HORRIBLE I was so frustrated with myself.

        by Austin Kratz, on Flickr

        I went to bed in frustration and so worn out from giving it my absolute best and failing. I woke up the next day determined to make that the last day I spent painting the car. I spent probably 3 hours sanding down the paint, trying to level the clear in hopes I could get away with just respraying the base coat and clear coat. At a few spots, I went through to base and some through to primer. I powered through, masked everything off, sprayed a sealant on some of the spots that went through, and went for it round 2 after doing a little more testing with the clear coat. My results were much better, although the spots that my sanding messed up were magnified by the clear coat and the new layer of base coat I sprayed unfortunately had some significant imperfections. I didn't even care, the clear coat turned out great and I was so happy and proud of that. I'm still not sure what I was doing wrong but I was spraying the clear coat as thick as I possibly could and it was still not leveling quite like I wanted, but it did the job. Maybe I needed to use a larger spray nozzle who knows.. Anyways, the next day I was able to wet sand and compound/polish the paint and well... Check it out!!!

        Untitled by Austin Kratz, on Flickr

        ALOT of wetsanding. It's crazy how hard urethane clear gets in 24 hours. Just the trunk lid probably took me 3 hours to do 600 to 1500 to compound to polish. Anyways, I'm glad it's a tough coating!

        Untitled by Austin Kratz, on Flickr

        And here is the final finish!

        Untitled by Austin Kratz, on Flickr

        Untitled by Austin Kratz, on Flickr

        This picture shows some of the base coat imperfections/scratching but to be honest, the rest of the car isn't perfect either and its a reminder of the process I went through. I still breathe a deep sigh of relief when I see the finished car.

        Untitled by Austin Kratz, on Flickr

        For the first time in 6 months, it was a complete car again. I sat there staring at that booty for so long drinking a beer and smiling from ear to ear

        Untitled by Austin Kratz, on Flickr

        Took her out for a spin to get some fresh air and man did it feel good. I was reminded why I put so much work into this thing. So tight and direct, what a car!

        Untitled by Austin Kratz, on Flickr

        And I'm a happy man again, this e30 lives on. I am super proud to have undertaken a project like this, I didn't ask for it, but I definitely learned a ton along the way from Mig welding bodywork with argon hookup, to spraying clear coat sort of... Unfortunately I can't finish the paperwork and get the rebuilt title until notaries open up again which could be a little while, we will see. But paperwork isn't so bad and I am so happy to have the painting behind me. Honestly, I don't know if I will ever try it again, I would MUCH rather replace and rebuild an engine than do that again. Bodywork is an art for sure and not an easy one to master. Until then, shes lookin pretty in the driveway and I take it around the block once in a while to keep everything healthy. And that's the end of that project! Time to enjoy it again.

        Untitled by Austin Kratz, on Flickr


        Comment


          #49
          I think you did a fantastic job!

          Do you mind sharing some pictures of the sealer where the tailpanel meets the quarters? In the "corners" beneath the tailgate
          I'm getting my tailpanel replaced, due to rust, at a bodyshop and I'm unsure how the sealer should look. Also, what type of sealer did you use?

          Thanks!

          Best regards,
          Søren, Denmark

          Comment


            #50
            You should be proud. Quite an accomplishment!

            Comment


              #51
              Dude nice work!!
              1990 Brilliantrot 325iS Build Thread
              1989 Zinnoberrot M3 Build Thread

              Comment


                #52
                Now you just need a giant rear window sticker that says, DONT REAR END ME
                Simon
                Current Cars:
                -1999 996.1 911 4/98 3.8L 6-Speed, 21st Century Beetle

                Make R3V Great Again -2020

                Comment


                  #53
                  Alright, I’m back with updates that aren’t about getting rear ended... yet

                  I’ve been driving the car a bit recently here and there while I work out the paperwork to get the r title to keep everything good & healthy. On the last drive, I was getting a really strong smell of gas, and then my check engine light came on, which has never happened in my ownership of the car. I drove it straight home and open the hood and the fuel feed hose had multiple pinholes in it and was spraying gas straight in the air in my engine bay! The thing that’s weird is I replaced all those hoses 2 years ago when I had the engine out but I must not have used the right stuff.. don’t skimp on fuel hose quality I guess! So I’ll be replacing those hoses and doing general cleanup in the meantime. I’m hoping the CEL was caused by a drop in fuel pressure bc nothing else seems off with the engine


                  Also, I’ve had this fire extinguisher around for a little while bc of the gas smell I was getting so I decided it was time to mount it for real. I didn’t really want the racecar look of it being in the passenger footwell or anything so I hid it in the trunk, I like it. Nice and discreet. Tbh after seeing other people’s cars light on fire, this is probably a good idea for all e30 owners.

                  Comment

                  Working...
                  X