Announcement

Collapse
No announcement yet.

'91 325i Alpine Sedan (2.7 Stroker ground-up rebuild)

Collapse
X
 
  • Filter
  • Time
  • Show
Clear All
new posts

    #91
    Got the rear wheel bearings installed. Bearings went in the freezer overnight, sat the heat gun in front of the trailing arm bore while I set up the hydraulic press which made light work of installation.


    You'll note that the rubber bungs in the trailing arms were lost in the powdercoating oven. Doh…. I tried to source some blank grommets but found these Christmas tree plugs were the perfect size. The original bungs have a breather hole in them, so the slot in the plug will offer similar ventilation.


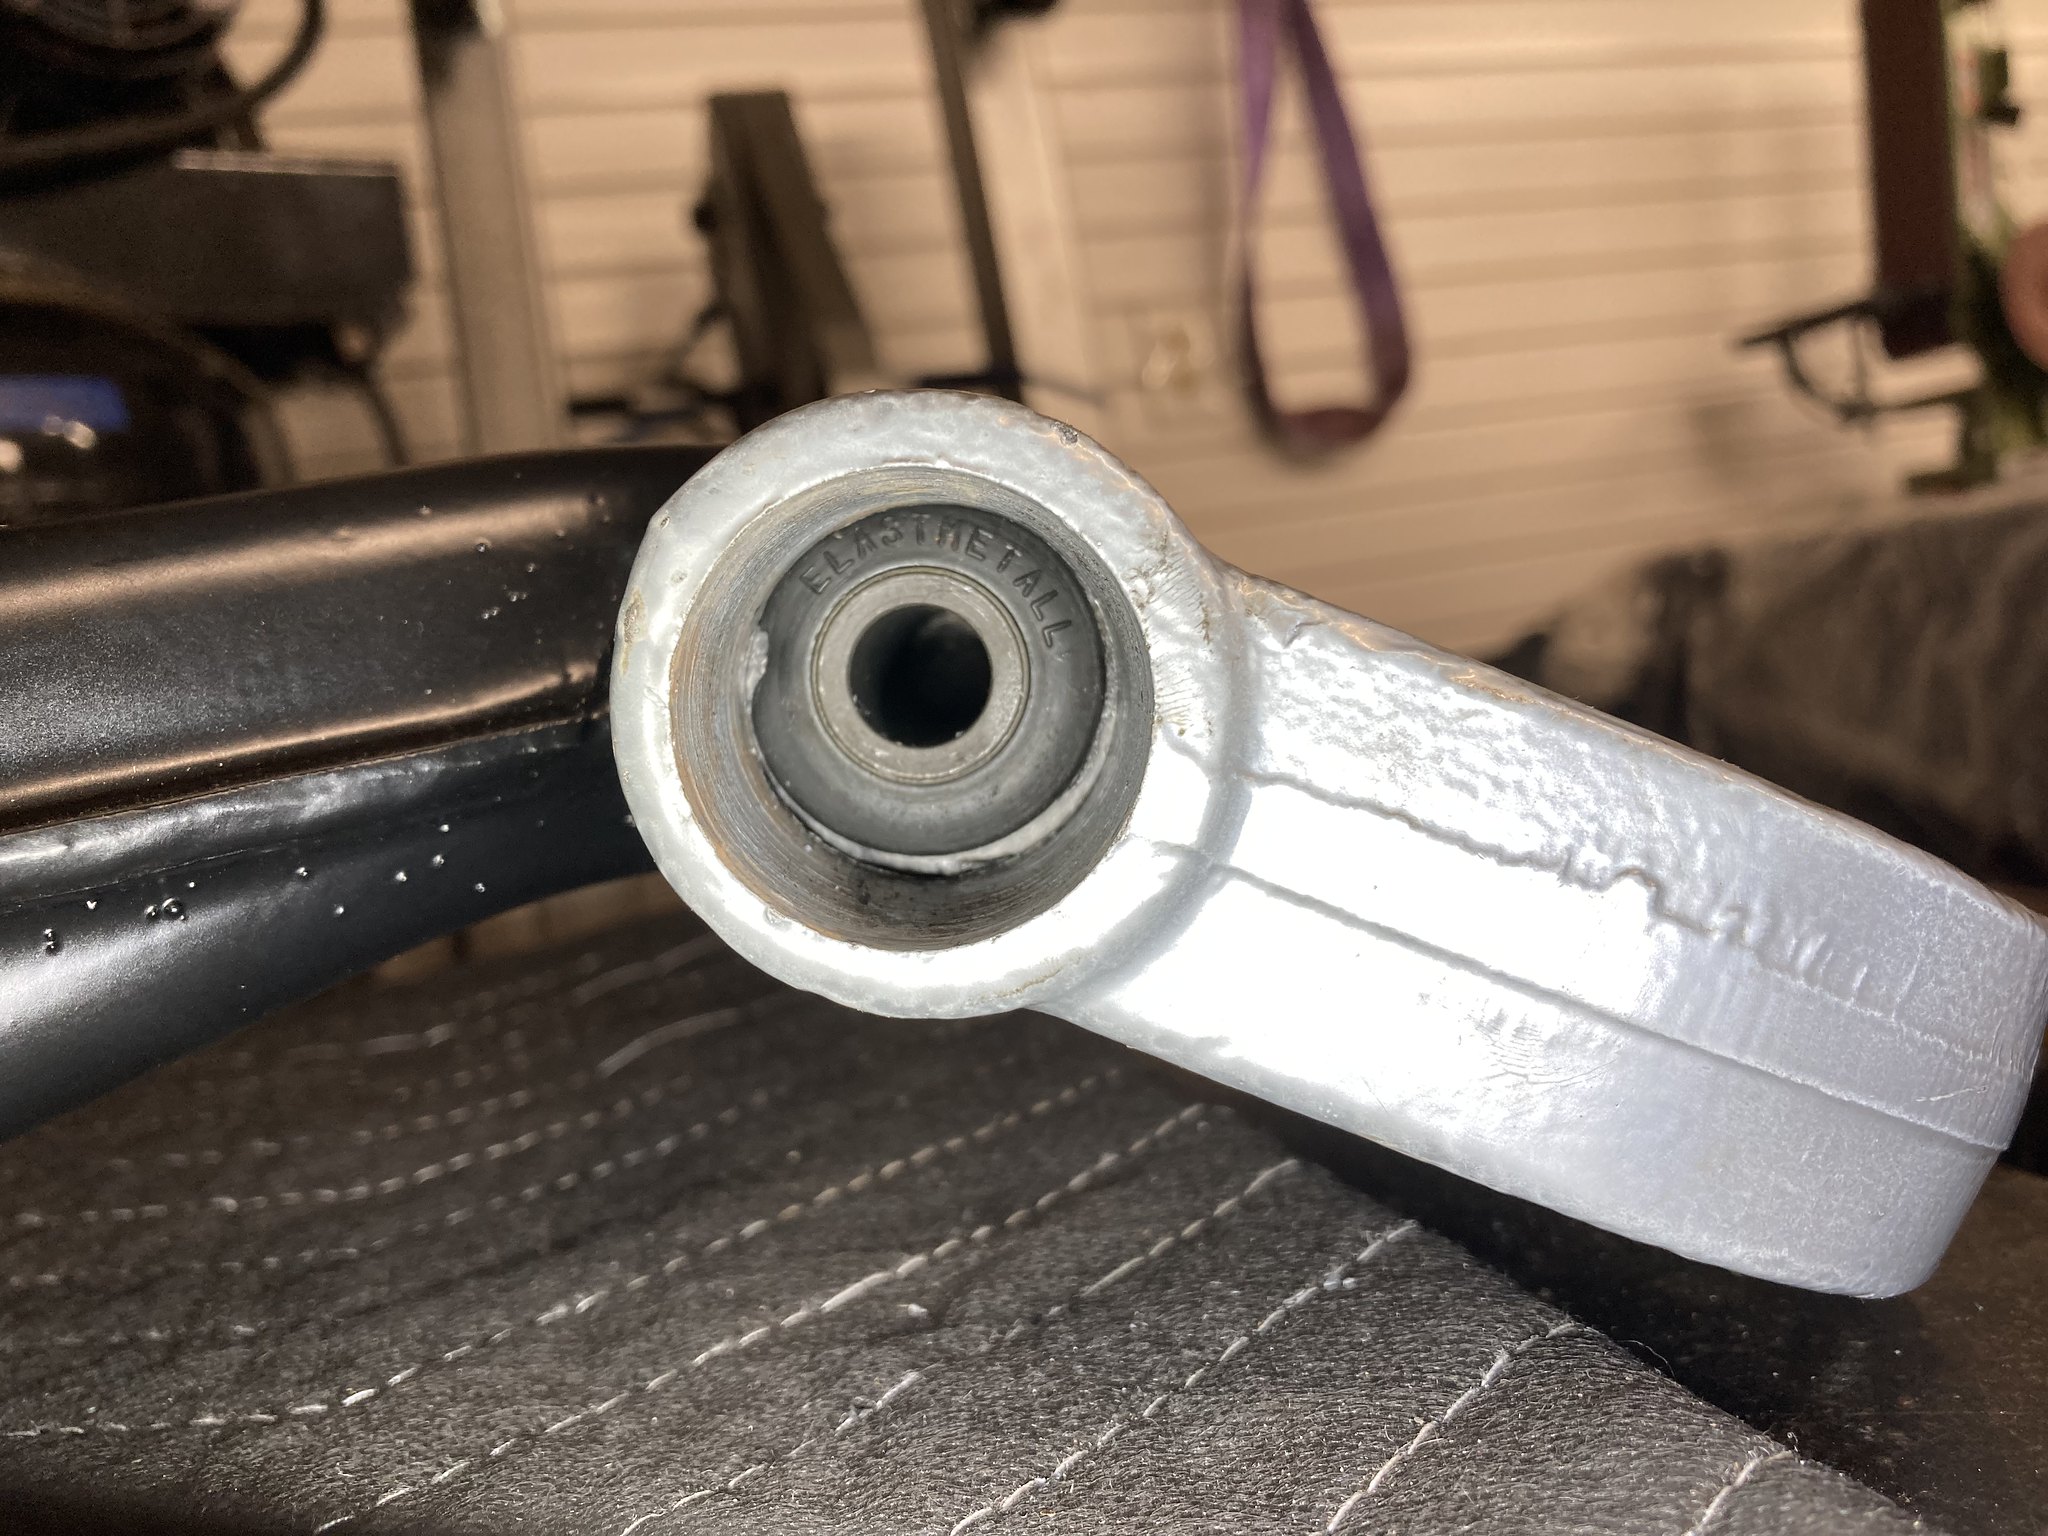
    I used this Maddox ball joint press tool to remove the trailing arm bushes and it was equally perfect for installing the new Lemforder units.


    Finished the other axle (inner boot clamps in hand, to be installed) so ready for assembly of the rear end to commence.

    Comment


      #92
      Got the hubs & axles installed last night.

      Powdercoated brake shields went in first. The little parking brake brackets were cleaned up on the wire wheel, well oiled and installed with a little grease as they were pretty crusty and tight upon removal.

      Hubs went in the freezer for 24hrs, put the heat gun to the bearing inner races and they went in easy. Used a spring compressor and assortment of press tools to pull the first one in. Second one slid in by hand with little resistance, probably as I spent less time handling it after it came out the freezer.


      Axles, I heated the hubs with heat gun for a couple minutes, greased the splines and carefully knocked them through until I got a turn of thread on with an old axle nut. Oil the flange of the nut and then get cranking on that to pull the axle through.


      Just waiting on a couple more parts before I can hang the whole rear end in the shell and get this thing on its wheels!

      Comment


        #93
        Well, I just found another use for my spring compressors.
        Originally posted by priapism
        My girl don't know shit, but she bakes a mean cupcake.
        Originally posted by shameson
        Usually it's best not to know how much money you have into your e30

        Comment


          #94
          Originally posted by Northern View Post
          Well, I just found another use for my spring compressors.
          Happy to help! Haha. It’s important to press against the inner race and this was much simpler than trying to manhandle everything under the hydraulic press. That ball joint clamp and the spring compressors have come in handy for all sorts of unassociated jobs.

          Heating the hole and chilling the pole always helps assembly a great deal too. Just go gentle on the heat where rubber parts (bushings, bearings seals, etc.) are present.

          Comment


            #95
            While I was (still) waiting on parts, I figured it was safe to put the subframe together. I married up a pair of dollies with a slab of oak so the Jack would slide between and lift the diff (on the oak slab) such that the whole subframe assembly was balanced.

            Not sure if I’ve mentioned the diff yet? Picked up a 3.64 Torsen, which is currently letting the side down, but is just there for lifting purposes and to give the axles something to hang on to! It’ll come out for a service and freshen up later.


            The subframe bushing brackets and reinforcement plates were powdercoated with the rest of the suspension parts, and I shot the bolt heads with some satin black to match.


            Lined up the shot…


            …and sent her home.


            Parts turned up the next day so I can now get the shocks hung. I’ll assemble the parking brake and put the rotors & wheels on, and then I’ll have a rolling E30 at last!
            Last edited by Matt@EDC; 09-22-2021, 06:08 AM.

            Comment


              #96
              With parts in hand, I got to work hanging the rear shocks tonight.

              First things first, the shock tower reinforcement plates were a ways off fitting. I test fitted with some bolts to align the holes and marked up where to bend.


              Took them over to the bench vice and used a bit of plate as a brake edge such that the visible side of the plate didn’t get chewed up by the knurled jaws.


              Spot on


              Same on the other side


              Laid everything out to ensure I had everything and in the correct order.


              Then assembled the shocks on the bench.


              All looking lovely up here. The rubber caps appear to be NLA and/or very expensive. Assume they are just to stop the damper rods poking a hole in the carpets when the trunk is fully loaded. I’ll shop around and see what readily available options I can find.


              H&R Sports went in with the old rubber top hats for now. I’m going to wait until everything has settled before buying new perches incase I want to tune the ride height at all.


              Next job is parking brake and rotors and then set her down on all 4 wheels

              Comment


                #97
                I like the idea of bending the reinforcement plates. On the two cars I installed them, I ended up filing a radius into that spot you bent.
                It still hits the seam sealer, but there seems to be a lot of variation in how they did the seam sealer beside the RSMs - both of my cars had that seam sealer brushed like the other seams.
                Originally posted by priapism
                My girl don't know shit, but she bakes a mean cupcake.
                Originally posted by shameson
                Usually it's best not to know how much money you have into your e30

                Comment


                  #98
                  Originally posted by Northern View Post
                  I like the idea of bending the reinforcement plates. On the two cars I installed them, I ended up filing a radius into that spot you bent.
                  It still hits the seam sealer, but there seems to be a lot of variation in how they did the seam sealer beside the RSMs - both of my cars had that seam sealer brushed like the other seams.
                  Yeah, seemed like the neatest solution. Wouldn’t have really mattered to cut that chunk off, but looks more like it was ‘meant to be’ this way. Hence I was careful not to inflict any tooling marks.

                  And agree, you can see in the pics they brushed the seam sealer down the side of the shock tower, but not the tops 🤷‍♂️ I wonder if the gap between the inner arch tub and the shock mount hole reduced over the years as the press tooling for the panels wore (common on old GM trucks) so they stopped brushing that seam and splooging it out the hole. Sounds very un-German though.

                  Comment


                    #99
                    Keen to set this thing on its wheels at long last, I got on with the last couple of jobs.

                    Before brake rotors can go on, I wanted to get the parking brake sorted out so I could stop the car rolling off down the driveway. I cleaned up the old linkage and adjuster parts, which were reassembled with plenty of brake lube. Ate parking brake springs and Vaico shoes were ordered.


                    As it’s been 12 months since I pulled the old shoes apart, I followed the guide on the E30 Wiki which said to put the large groove in the shoes at the bottom, but after getting everything together, it was evident the narrow groove doesn’t accept the adjuster and better fits the slots in the actuator below. So apart it all came, back together again, and then I realized one of the springs that links the shoes together has a bit of a kink in it. Didn’t notice until the straight one didn’t fit under the adjuster so had to pull them off and swap them over. Second side was a piece of cake, once I knew what I was doing!


                    And with that, the rotors can go on. I’m using the PowerStop Z23 rotor and pad kit, which includes their Euro-Stop coated rotors, ceramic pads and wear sensors. Good price for the whole lot together from RockAuto and I’ve had great results with these PowerStop on lots of different vehicles (personal and maintenance for friends).


                    Fronts (vented) and rear rotors are retained with new OEM bolts, with a bit of anti-seize to help the next guy!


                    Almost there…


                    One last job was the rear swaybar. All new hardware purchased including some parking brake cable hangers and brake line clips, and I cleaned up the original bar.


                    Getting it over the diff was a bit of a hassle, possibly due to my jackstands being in the way. Also notice one of my diff cover fins is broken 😞 Musta been when the junkyard dropped it out of the Z3. Oh well, I’ll tidy it up when the diff comes out for attention. End links gave me a real hard time until I read up about using channelocks, which made short work of them with a little silicon spray for assistance.


                    And with that, I gave the wheels a wash and bolted them up the next day.


                    She actually looks pretty good on the 14” weaves, though I may eventually go up a size to make the most of the suspension, steering and engine upgrades. I rolled it out of the shop briefly so I could sweep up the floor. Feels like a pretty good project milestone as with all the suspension and wheels on, I’ve made a sizable dent in the parts pile.

                    Next steps are to get the interior finished up and a windshield in. Then I need to have a big shop tidy up so I can squeeze in a blast cabinet and small powdercoating setup to aid the engine build over winter. I also have a friends C3 Corvette being dropped off for some TLC shortly, so will have plenty to play with when car season is over!
                    Last edited by Matt@EDC; 10-02-2021, 09:25 AM.

                    Comment


                      Underneath looks nice and fresh now! Hopefully it drives as good as it looks
                      Originally posted by priapism
                      My girl don't know shit, but she bakes a mean cupcake.
                      Originally posted by shameson
                      Usually it's best not to know how much money you have into your e30

                      Comment


                        Originally posted by Northern View Post
                        Underneath looks nice and fresh now! Hopefully it drives as good as it looks
                        I hope so too!

                        Spent some time this evening making a start on the cruise control and 13 button loom repairs and install. Seems like everyone round these parts would sooner cut a connector off than… disconnect it 🙄

                        Comment


                          Originally posted by Matt@EDC View Post

                          I hope so too!

                          Spent some time this evening making a start on the cruise control and 13 button loom repairs and install. Seems like everyone round these parts would sooner cut a connector off than… disconnect it 🙄

                          Guilty.


                          Making excellent progress and it seems to be going together really well. All that prep really pays off during reassembly - it's got to feel great to get it on the ground.

                          Comment


                            Originally posted by mjweimer View Post


                            Guilty.


                            Making excellent progress and it seems to be going together really well. All that prep really pays off during reassembly - it's got to feel great to get it on the ground.
                            Absolutely! Tho first time I went to roll it out the door it nearly understeered into the wall…. Tracking needed quite a tweak!

                            I do wonder whether it all started with one guy cutting a connector off, and then the next guy did it to repair that one, and the cycle has just continued forever more? Haha. I pulled a whole OBC assembly but was missing the yellow plug as someone had cut all the connectors to take the cluster. The next car I went to scavenge parts from, someone had done the same, but didn’t take the cluster. Just left it in the car with all the cut off connectors attached 🙄 So I got a good spare cluster and all the repair pigtails included

                            Comment


                              Originally posted by mjweimer View Post


                              Guilty.


                              Making excellent progress and it seems to be going together really well. All that prep really pays off during reassembly - it's got to feel great to get it on the ground.
                              Absolutely! Tho first time I went to roll it out the door it nearly understeered into the wall…. Tracking needed quite a tweak!

                              I do wonder whether it all started with one guy cutting a connector off, and then the next guy did it to repair that one, and the cycle has just continued forever more? Haha. I pulled a whole OBC assembly but was missing the yellow plug as someone had cut all the connectors to take the cluster. The next car I went to scavenge parts from, someone had done the same, but didn’t take the cluster. Just left it in the car with all the cut off connectors attached 🙄 So I got a good spare cluster and all the repair pigtails included.

                              Comment


                                I’m REALLY trying to push on and get all the wiring DONE!!! I’m a big believer in delayed satisfaction (insert ‘your Mum’ joke here), so happy to grind through these crappy jobs before playing with shiny bits. Would rather get this out of the way so I can start on the engine build knowing it’ll be about ready to drop straight in and fire.

                                So, the aforementioned OBC. Some helpful sausage cut the plug off the loom I pulled, while they extracted the cluster from the junkyard car. But an extra helpful sausage did the same in the next car I checked out and left the perfectly good cluster in the car, with the pigtail attached! So I took the lot.

                                The loom is from an early car (spots) and the pigtail from a late car (stripes), but colors are all the same so just matched spots to stripes. I staggered the cuts in 3 bunches, twisted, soldered, added color matching heat shrink and then wrapped in loom tape.


                                Like all the other dash looms, the OBC & cruise harness were routed the harder, but proper way, over the far left AC ducts and down the side of the dash.


                                The acquired cruise stalk was a little weathered…


                                …but after some masking and satin black, cleaning & dressing, it looks pukka.


                                Harnesses have been run through the firewall grommet (nightmare with the brake booster in situ) and pretty much all connected up under the dash. Just a couple of odds & ends to finish up then tie everything up neatly & securely.

                                As it’s somewhat wiring related, I figured I’d tie up the loose ends out back by finishing up the parcel shelf area. All the belts were cleaned up earlier in the project, as was the parcel shelf. All the shelf vents and the speaker grills were washed and finished with 303 Aerospace.


                                May have been posted earlier, but this is the audio equipment going in the car. Amp is in, now for the 2-way coaxials in the rear.


                                Pioneer supply some lovely little pigtails with silicone booted connectors, so I was keen to use those. I prepped them and color coded to match the wiring at the amp and headunit.


                                Connected these to the wiring run from the front using heat shrink coated crimp connectors and hooked them up to the speakers.


                                Nylon washers were used to provide a flat clamping surface for the grilles, otherwise they teeter on the pressed steel frame of the speaker.


                                Standard grills fit perfect and give an OEM finish to the audio upgrade.


                                I’ve started cleaning up the rear bench to drop in, and I’ll start plugging some bits into the dash next, I guess! Enjoying every little step as this thing starts coming together!
                                Last edited by Matt@EDC; 10-19-2021, 06:11 AM.

                                Comment

                                Working...
                                X