
OK, as promised, here's the final photo dump of my finished successful project. It took me more than a year thanks to lots of other distractions and priorities, but I am super stoked that this is now done and working perfectly.
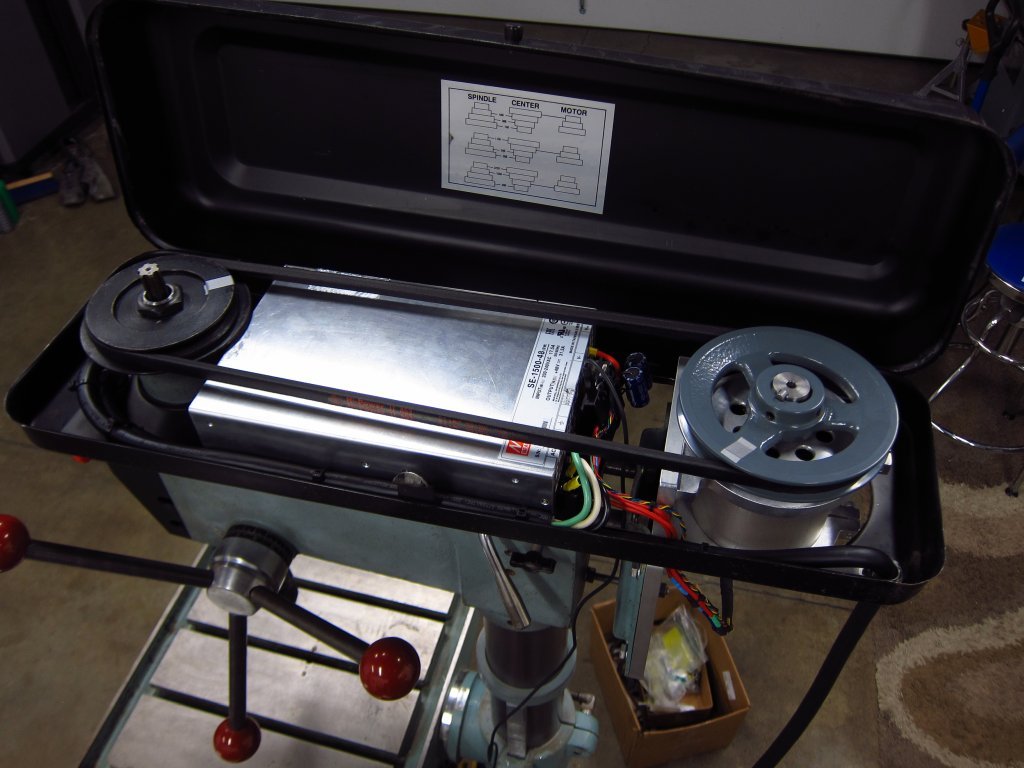
Here is how the 1500W PSU is nested into the belt/pulley housing. It is a tight fit, and the machining work that I did on the head casting was absolutely necessary. The PSU is screwed into the bottom of the housing in all 4 corners, so it isn't going to move around at all. I also ditched the cheap cast zinc motor pulley and went with a cast iron one...there was just way too much warp and runout in the zinc one. As it is, this relatively long V-belt develops a little whipping at specific RPMs as it hits resonance frequencies, and while those are easy enough to avoid, I think that I might design a bolt-on intermediate pulley to tension the middle of the span. Or maybe I will just leave well-enough alone.
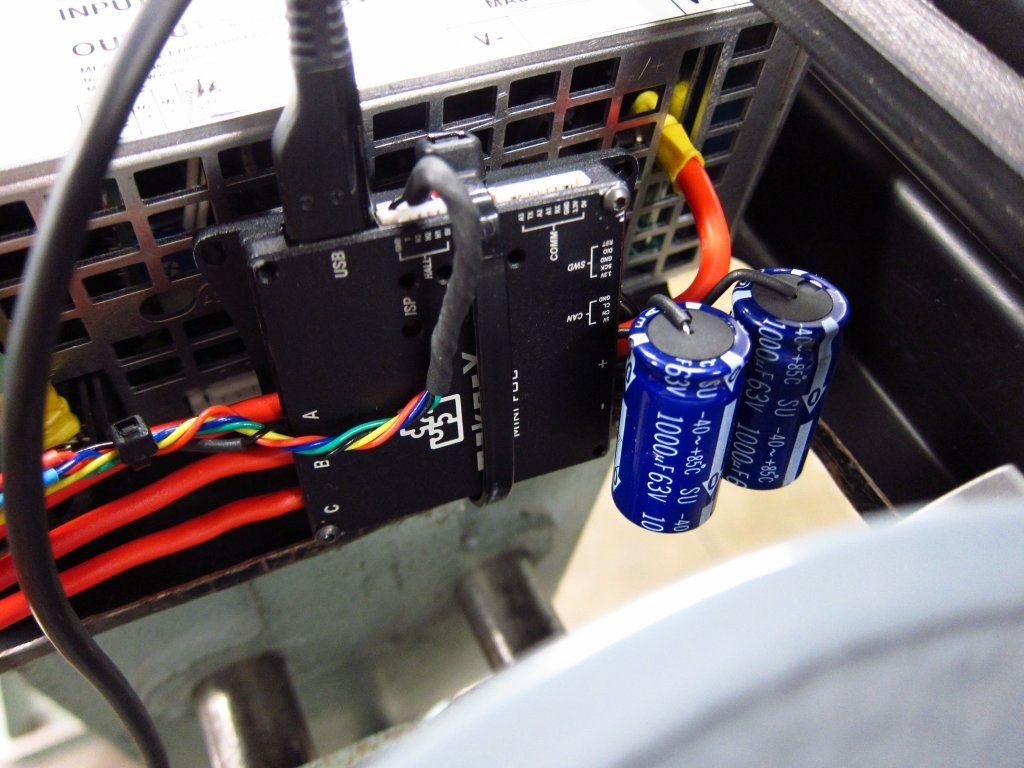
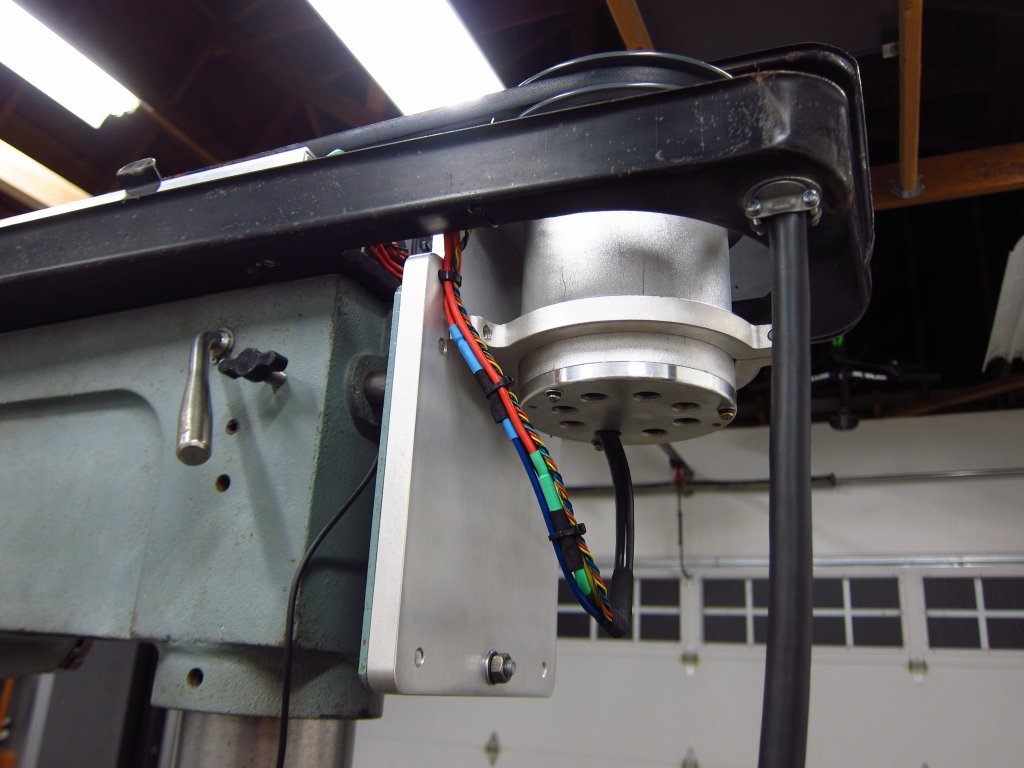
Here is the ESC (MakerX Mini-FOC Plus - a VESC clone) mounted directly to the PSU with minimum power lead length. This thing can draw significant current with high frequency spikes, so it is critical to keep the input leads short, and I had to add a couple thousand microFarads of capacitance to really clean up the power rails in the thing. I hacked up the ESC quite a bit to directly connect the caps to the input pads, and to replace the output leads with 4mm^2 power wire from an old M42 engine harness lol. Around this time was when I was also rebuilding the engine & front chassis harnesses on my E30, so I was all about clean wiring and using Tesa harness tape when possible lol. The motor mounting came out super clean I think.
The ESC uses the VESC Tool tuning interface, and it took a few hours of messing around with the settings to get things to run properly. Lots of PID gain tuning and current injection settings to fart around with. Speed control in the final setup is done via the UART (a digital communication interface) rather than an analog sensor like an e-bike throttle or potentiometer. I originally wanted to use a potentiometer, but there is just way too much electrical noise in the ESC, and honestly I'd need a pot with at least 5 turns to retain good speed control resolution at both low and high RPM (you want fine control at low RPM, and more coarse control as RPM increases so you don't have to spin it forever to get to high RPM). Anyway, this was all before I decided on the control interface, and getting the motor tuned with the belt and spindle attached was priority #1.
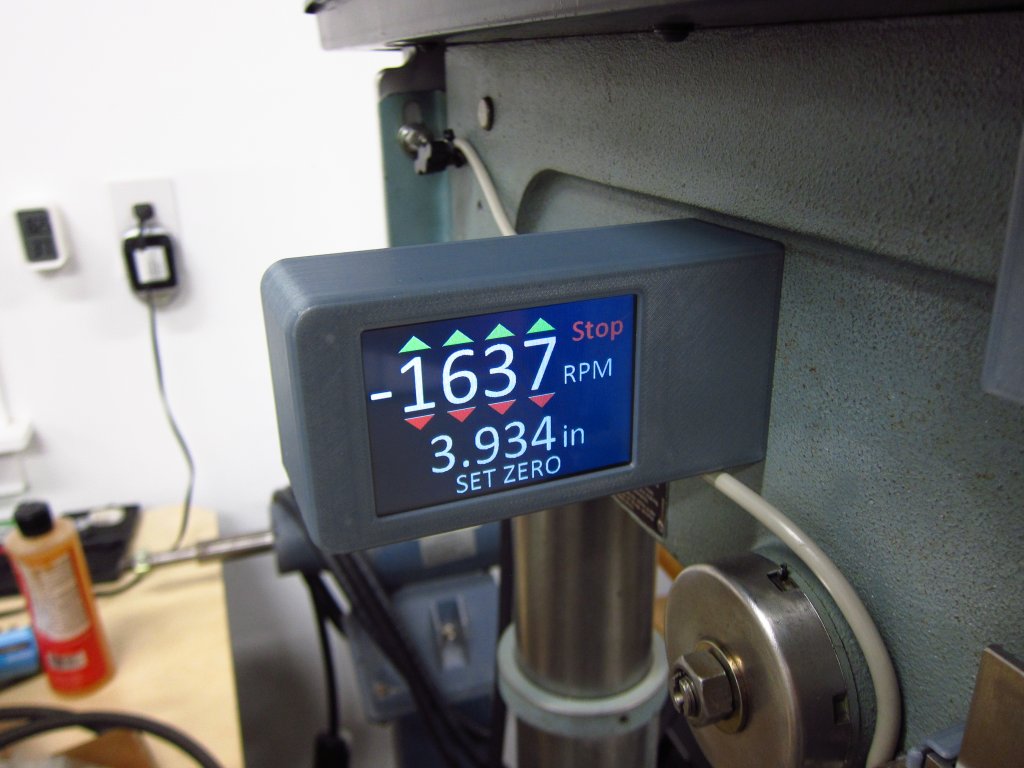
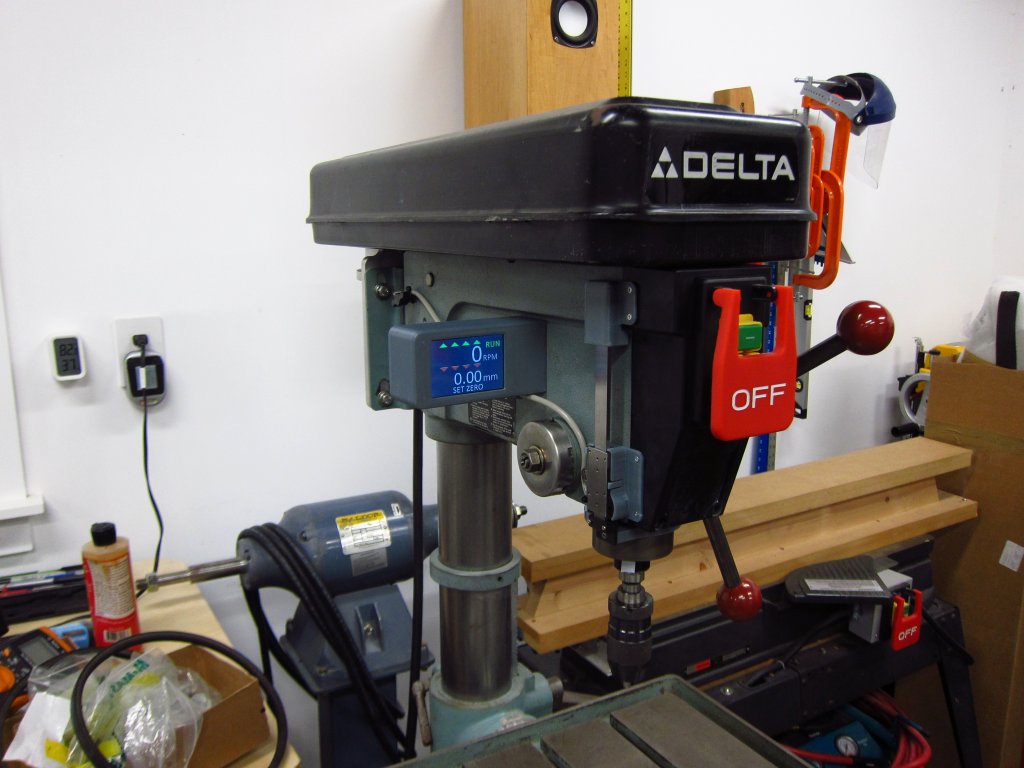
After much thinking and planning, here's how the controls and stuff settled. I ended up using a touch interface rather than any sort of knob, and I added a depth readout on the quill lol. This is a pretty fancy old drill press now!
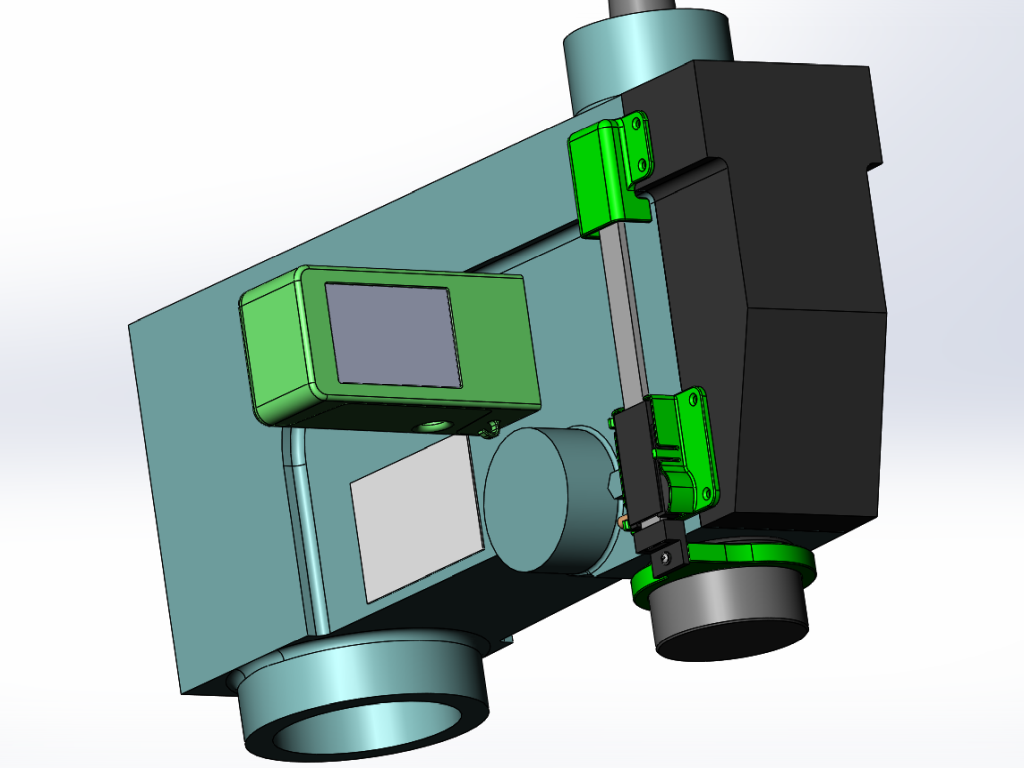
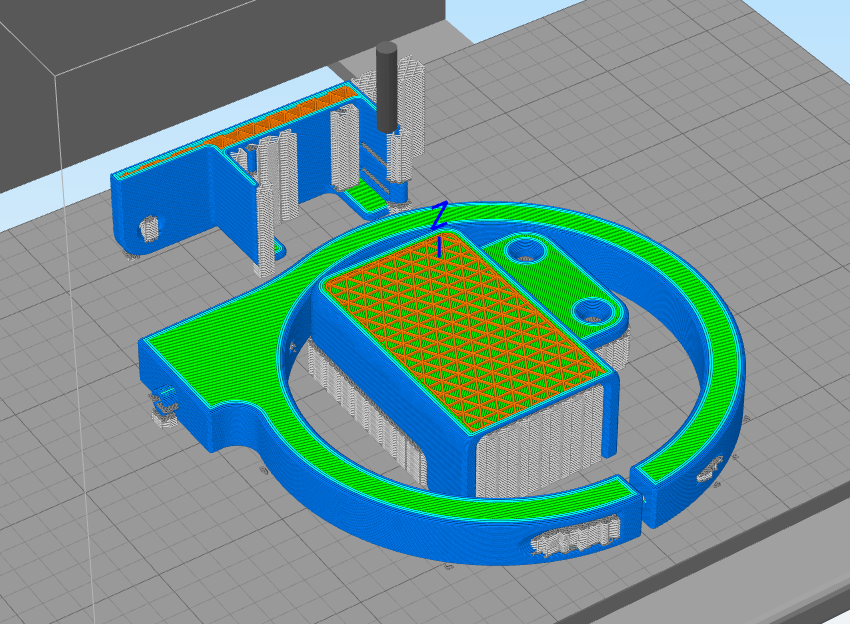
Lots of 3D printed stuff in there.
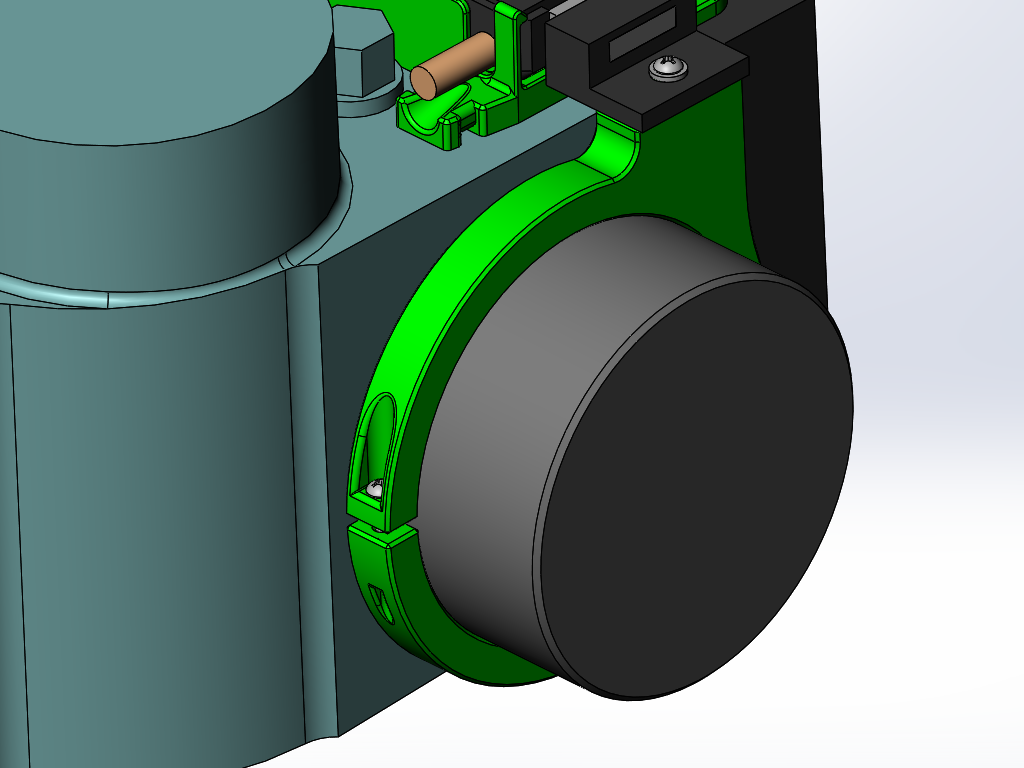
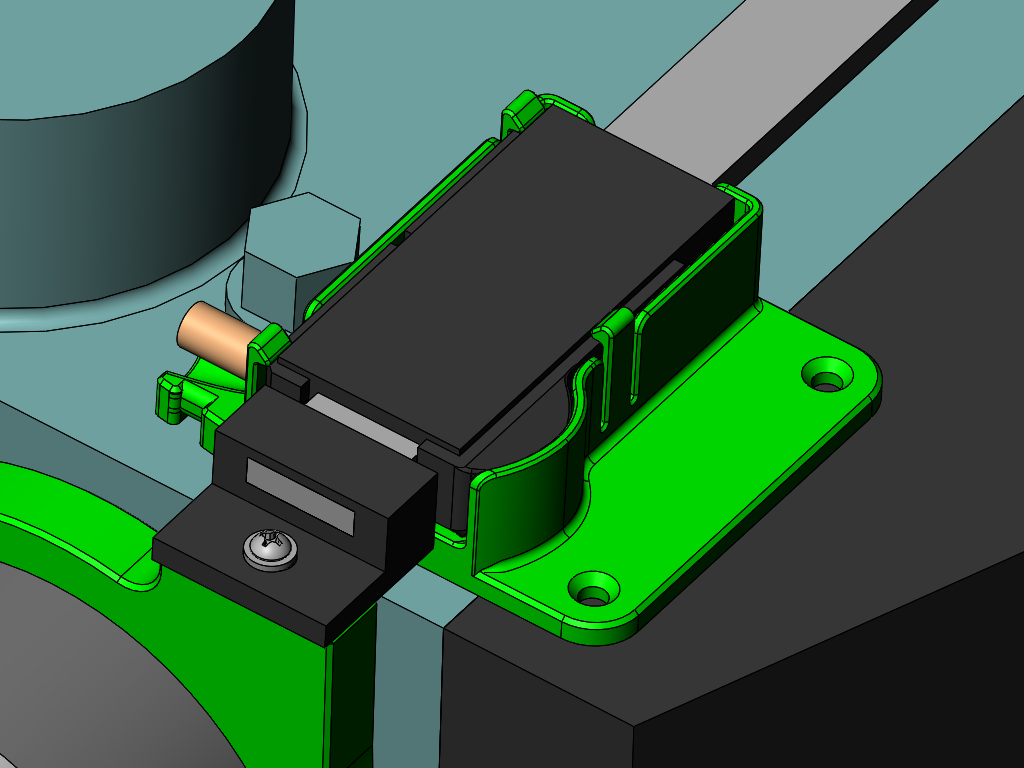
The depth readout used a cheap Amazon 6" / 150mm scale, and I just 3D printed the various parts I needed to adapt it. The collar on the quill just uses a tapping screw to draw it tight, the scale body clips into place with some spring fingers and other (not visible) features to keep it from moving up/down, and I added a little protector thing at the top to help keep stuff from getting caught on the top of the sliding rail.

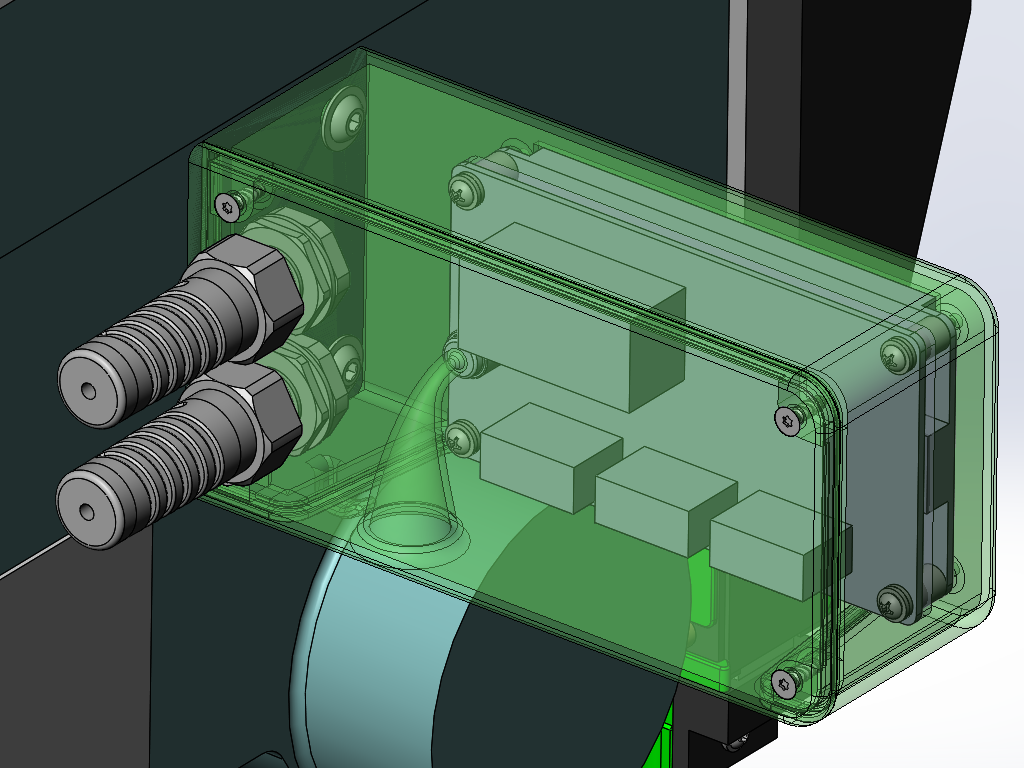
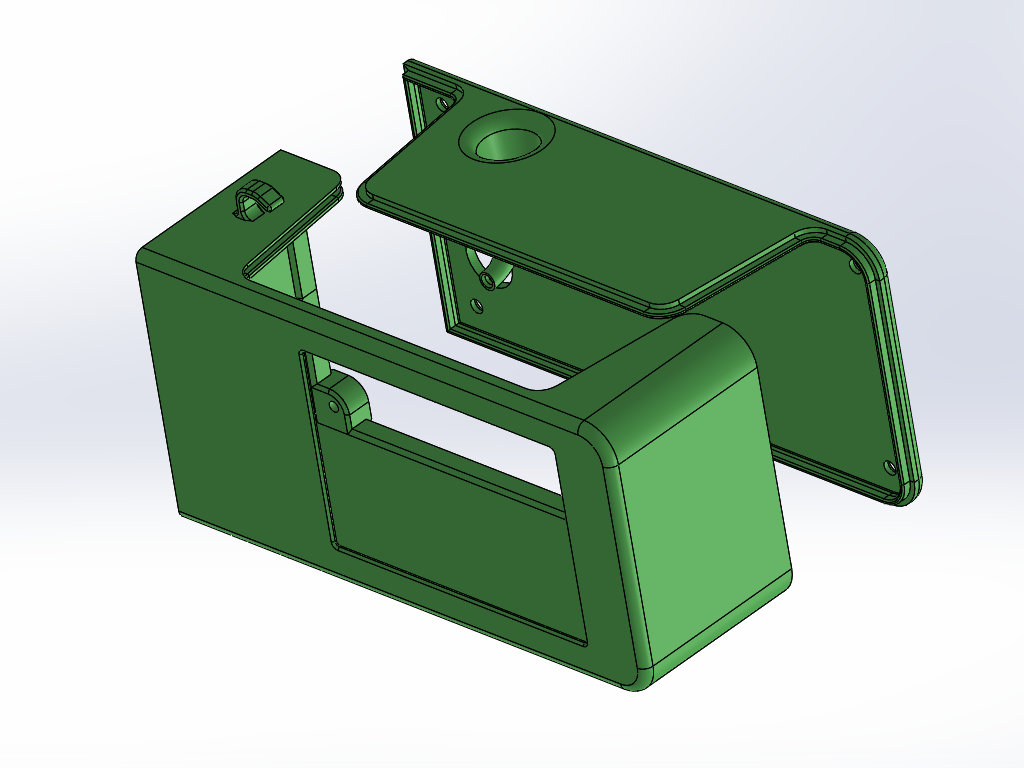
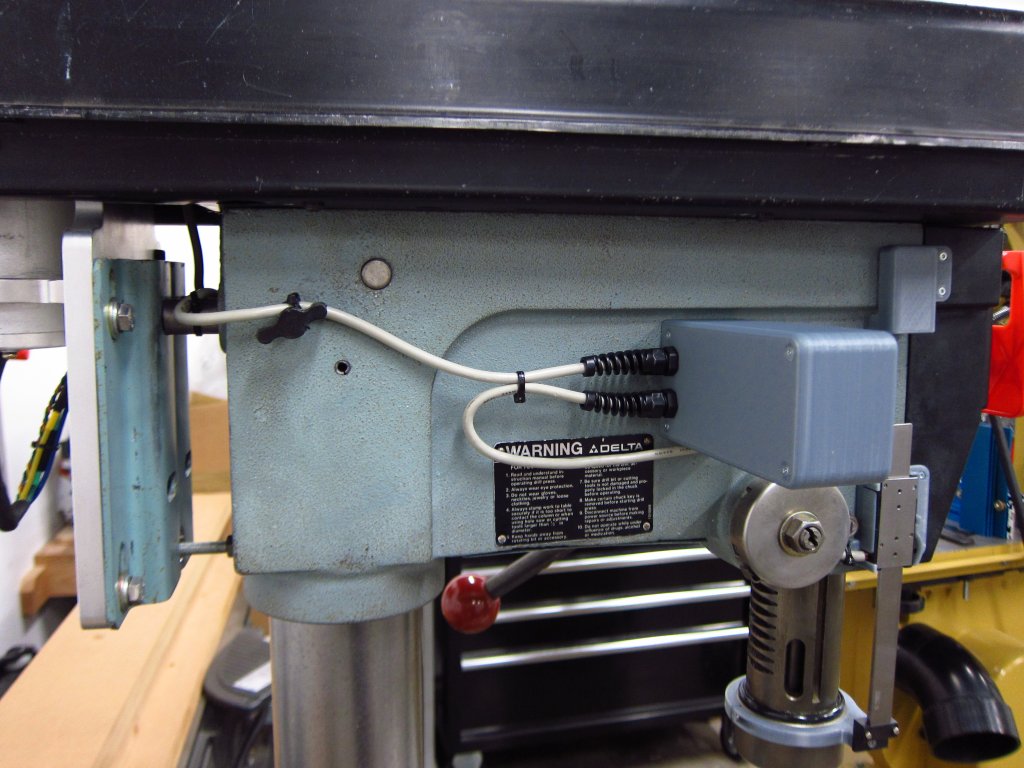
Similarly, the housing for the controls was 3D printed too. It is an interlocking clam shell with the big lower lip thing being there to allow me to get at the wire terminals and micro-SD card slot in the touch screen if I ever need to load a new interface onto it. The control board has a little piezo speaker on it to provide beeps as the touchscreen is used, and I designed in a little "horn" for it to help amplify the sound and get it out of the enclosure.
For the controls, I used a Teensy 3.2 as the MCU, and a Nextion 3.5" touchscreen to handle user input. Since PCBs are so cheap to have made these days, I designed a nice simple one to get everything in one place. The digital scale runs on 1.5V, and the Teensy uses 3.3V, so I needed some logic level shifting and a 1.5V power supply to power it (no batteries!). So the ESC provides 5V, the Teensy has its own 3.3V regulator which powers the 1.5V regulator on my board, which powers the scale (~16mA when on). The ground planes/pours are hidden so you can see the rest of the layout.
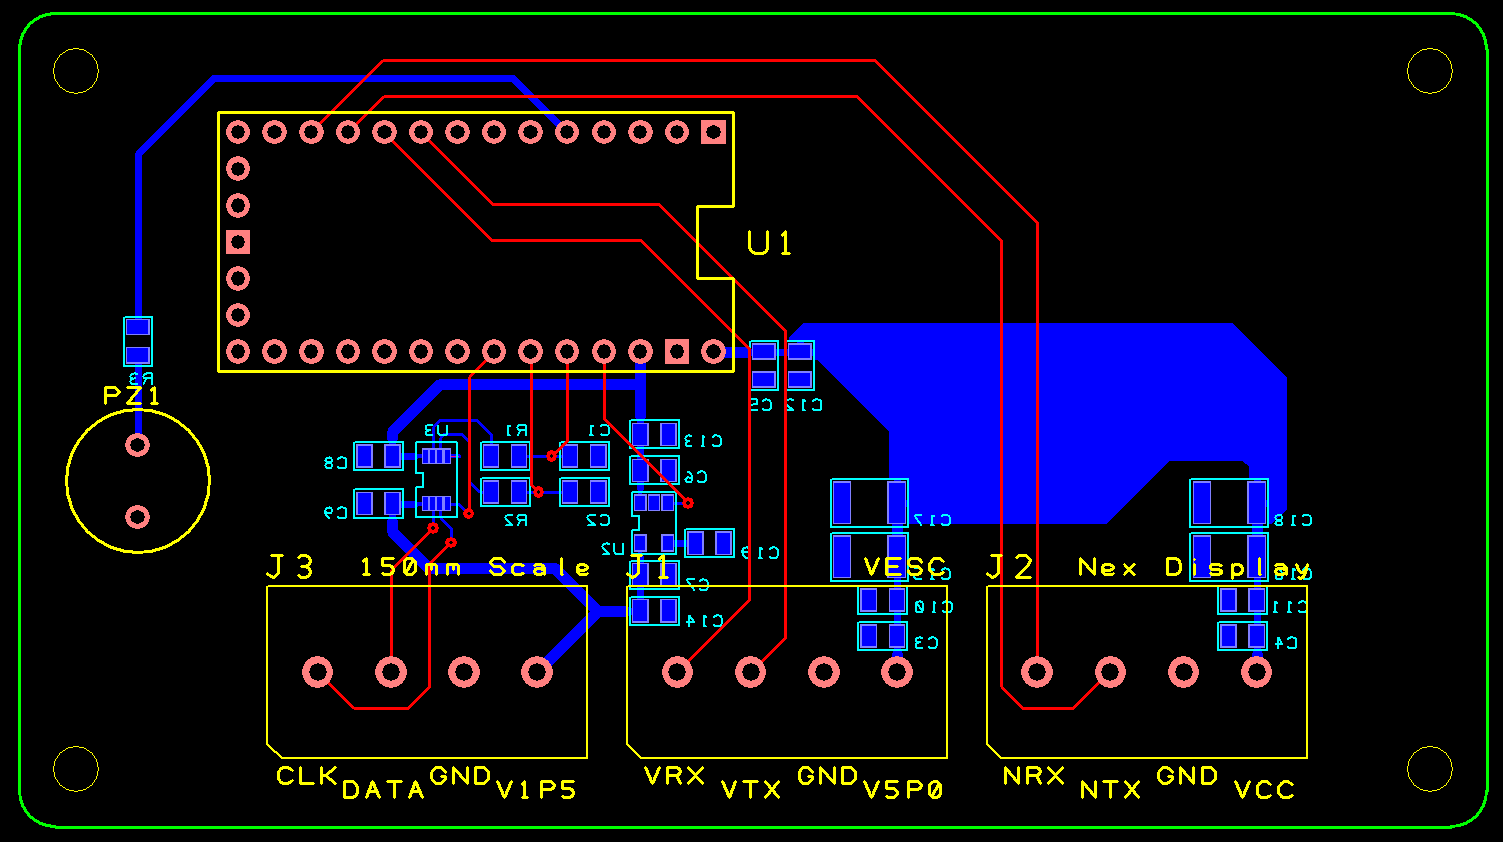
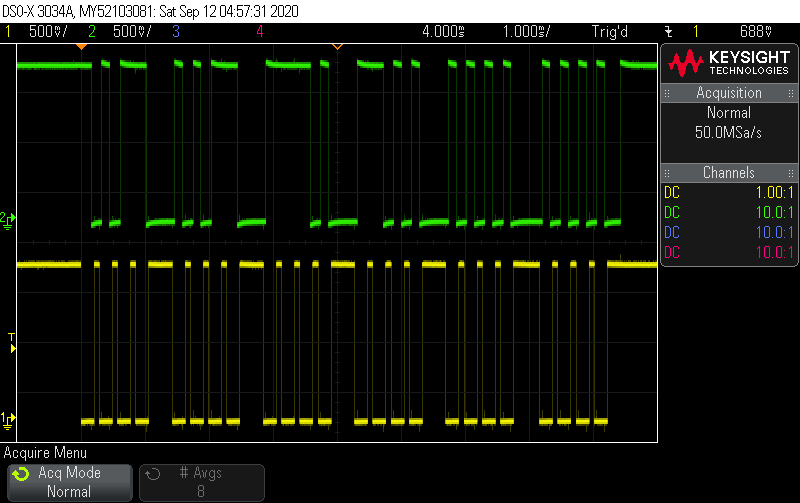
Basically every cheap Chinese digital scale / caliper has a 4 terminal interface which can be used to get position readouts. If looking at the caliper face normally, the pins are usually (left to right) GND, Data, CLK, Vin (1.5V). A number of places on the web have info on the protocol, but it is in most cases packets of 24 bits with the first 16-20 of them being the actual position, and then a few further up for the inch/mm setting and positive/negative reading. I verified what was what on a scope.
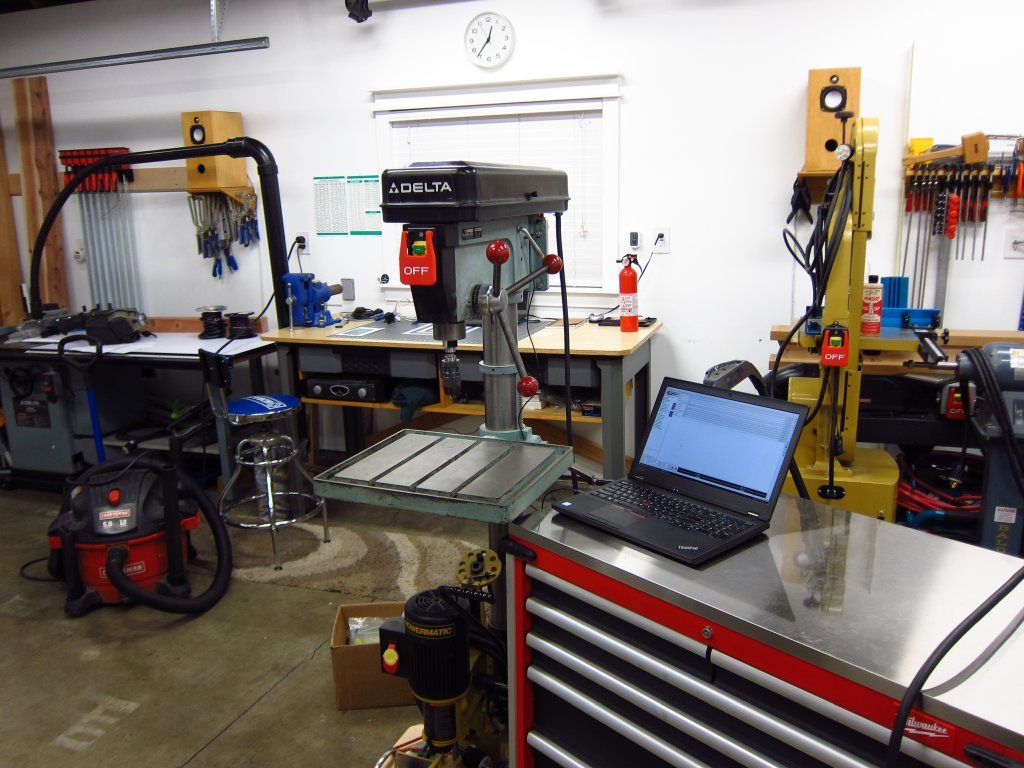
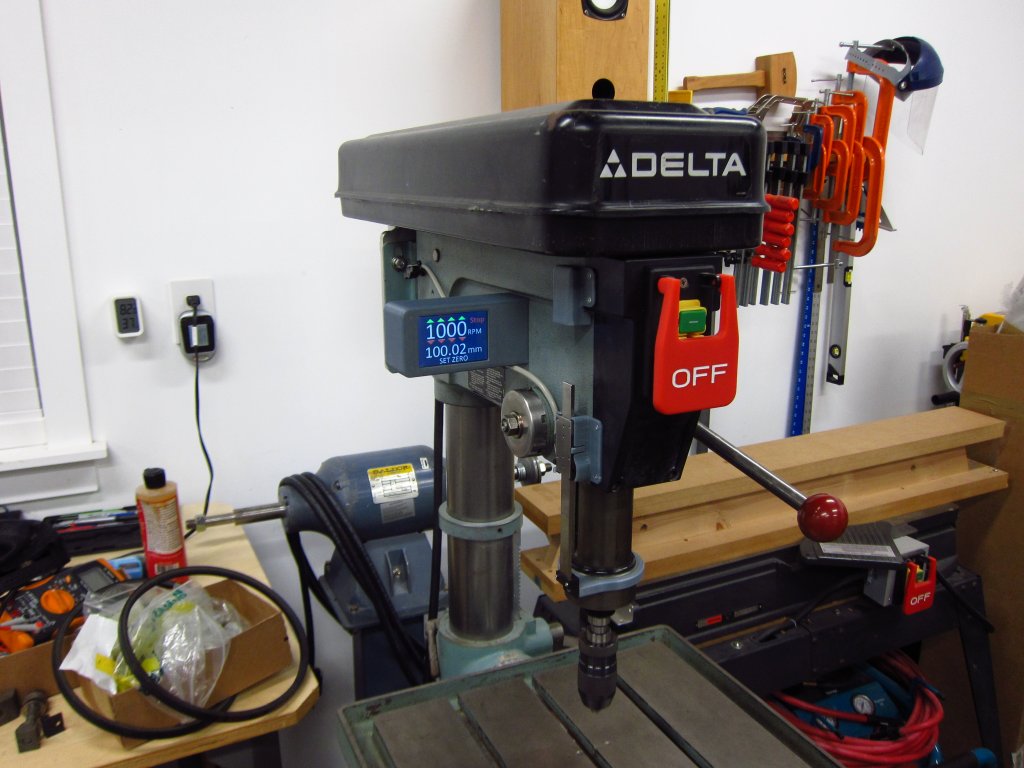
OK, so that's all well and good...pretty CAD pictures and whatnot, but what about actually doing it? Here it is!
Features:
- Forward and reverse running
- Depth readout with zero-offset function
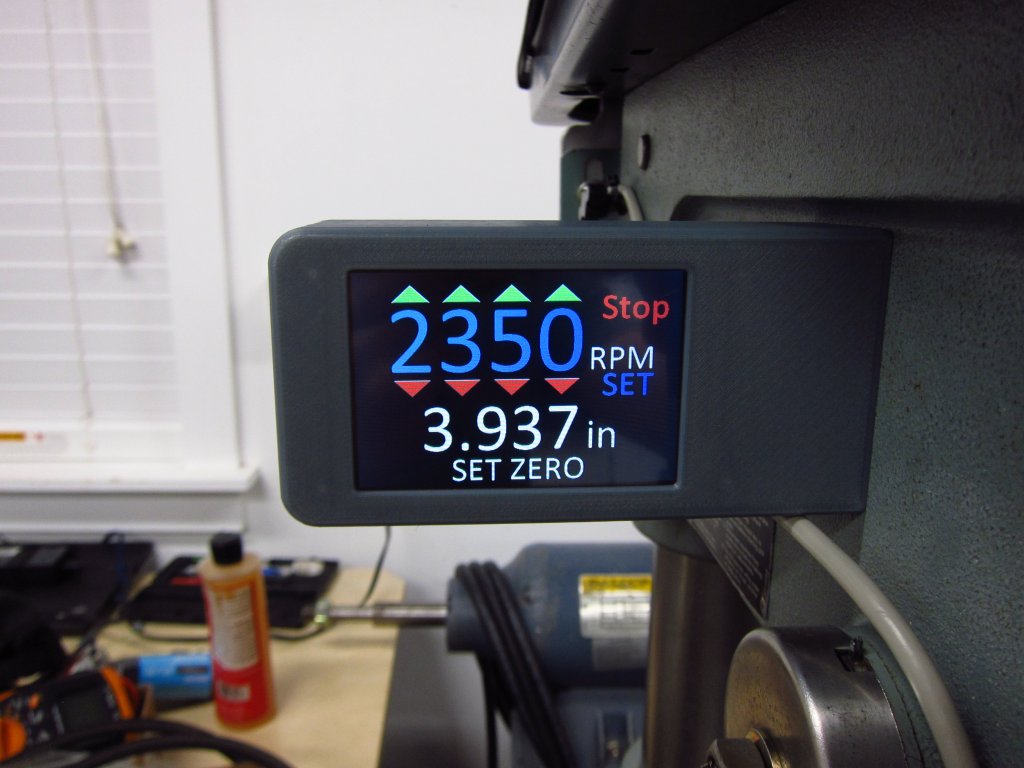
- Selectable inch / mm depth reading
- 150-5000RPM range, in 1 RPM increments
- PID speed control, so the ESC increases motor torque as the spindle gets loaded
I want to add a couple of things eventually:
- Optical pickup on the spindle pulley: right now the ESC reports the motor RPM via UART, and I programmed the controller to calculate spindle RPM based on pulley ratios. Reading the "real" spindle RPM would enable me to implement stall detection, which could save the V-belt if the spindle got stuck but the motor kept spinning.
- Belt tensioning pulley to reduce belt whip at certain RPMs
There it is folks. Overkill? Yeah. Awesome? Definitely.
Here is how the 1500W PSU is nested into the belt/pulley housing. It is a tight fit, and the machining work that I did on the head casting was absolutely necessary. The PSU is screwed into the bottom of the housing in all 4 corners, so it isn't going to move around at all. I also ditched the cheap cast zinc motor pulley and went with a cast iron one...there was just way too much warp and runout in the zinc one. As it is, this relatively long V-belt develops a little whipping at specific RPMs as it hits resonance frequencies, and while those are easy enough to avoid, I think that I might design a bolt-on intermediate pulley to tension the middle of the span. Or maybe I will just leave well-enough alone.
Here is the ESC (MakerX Mini-FOC Plus - a VESC clone) mounted directly to the PSU with minimum power lead length. This thing can draw significant current with high frequency spikes, so it is critical to keep the input leads short, and I had to add a couple thousand microFarads of capacitance to really clean up the power rails in the thing. I hacked up the ESC quite a bit to directly connect the caps to the input pads, and to replace the output leads with 4mm^2 power wire from an old M42 engine harness lol. Around this time was when I was also rebuilding the engine & front chassis harnesses on my E30, so I was all about clean wiring and using Tesa harness tape when possible lol. The motor mounting came out super clean I think.
The ESC uses the VESC Tool tuning interface, and it took a few hours of messing around with the settings to get things to run properly. Lots of PID gain tuning and current injection settings to fart around with. Speed control in the final setup is done via the UART (a digital communication interface) rather than an analog sensor like an e-bike throttle or potentiometer. I originally wanted to use a potentiometer, but there is just way too much electrical noise in the ESC, and honestly I'd need a pot with at least 5 turns to retain good speed control resolution at both low and high RPM (you want fine control at low RPM, and more coarse control as RPM increases so you don't have to spin it forever to get to high RPM). Anyway, this was all before I decided on the control interface, and getting the motor tuned with the belt and spindle attached was priority #1.
After much thinking and planning, here's how the controls and stuff settled. I ended up using a touch interface rather than any sort of knob, and I added a depth readout on the quill lol. This is a pretty fancy old drill press now!
Lots of 3D printed stuff in there.
The depth readout used a cheap Amazon 6" / 150mm scale, and I just 3D printed the various parts I needed to adapt it. The collar on the quill just uses a tapping screw to draw it tight, the scale body clips into place with some spring fingers and other (not visible) features to keep it from moving up/down, and I added a little protector thing at the top to help keep stuff from getting caught on the top of the sliding rail.
Similarly, the housing for the controls was 3D printed too. It is an interlocking clam shell with the big lower lip thing being there to allow me to get at the wire terminals and micro-SD card slot in the touch screen if I ever need to load a new interface onto it. The control board has a little piezo speaker on it to provide beeps as the touchscreen is used, and I designed in a little "horn" for it to help amplify the sound and get it out of the enclosure.
For the controls, I used a Teensy 3.2 as the MCU, and a Nextion 3.5" touchscreen to handle user input. Since PCBs are so cheap to have made these days, I designed a nice simple one to get everything in one place. The digital scale runs on 1.5V, and the Teensy uses 3.3V, so I needed some logic level shifting and a 1.5V power supply to power it (no batteries!). So the ESC provides 5V, the Teensy has its own 3.3V regulator which powers the 1.5V regulator on my board, which powers the scale (~16mA when on). The ground planes/pours are hidden so you can see the rest of the layout.
Basically every cheap Chinese digital scale / caliper has a 4 terminal interface which can be used to get position readouts. If looking at the caliper face normally, the pins are usually (left to right) GND, Data, CLK, Vin (1.5V). A number of places on the web have info on the protocol, but it is in most cases packets of 24 bits with the first 16-20 of them being the actual position, and then a few further up for the inch/mm setting and positive/negative reading. I verified what was what on a scope.
OK, so that's all well and good...pretty CAD pictures and whatnot, but what about actually doing it? Here it is!
Features:
- Forward and reverse running
- Depth readout with zero-offset function
- Selectable inch / mm depth reading
- 150-5000RPM range, in 1 RPM increments
- PID speed control, so the ESC increases motor torque as the spindle gets loaded
I want to add a couple of things eventually:
- Optical pickup on the spindle pulley: right now the ESC reports the motor RPM via UART, and I programmed the controller to calculate spindle RPM based on pulley ratios. Reading the "real" spindle RPM would enable me to implement stall detection, which could save the V-belt if the spindle got stuck but the motor kept spinning.
- Belt tensioning pulley to reduce belt whip at certain RPMs
There it is folks. Overkill? Yeah. Awesome? Definitely.

Comment