
This car was my high school senior (Turbo) project that never really ended, the idea was budget but with the right parts, meaning standalone management, headstuds and orings etc. This mostly meant buying used. You can skip to the end for a summary and the current project, but here is how it started:
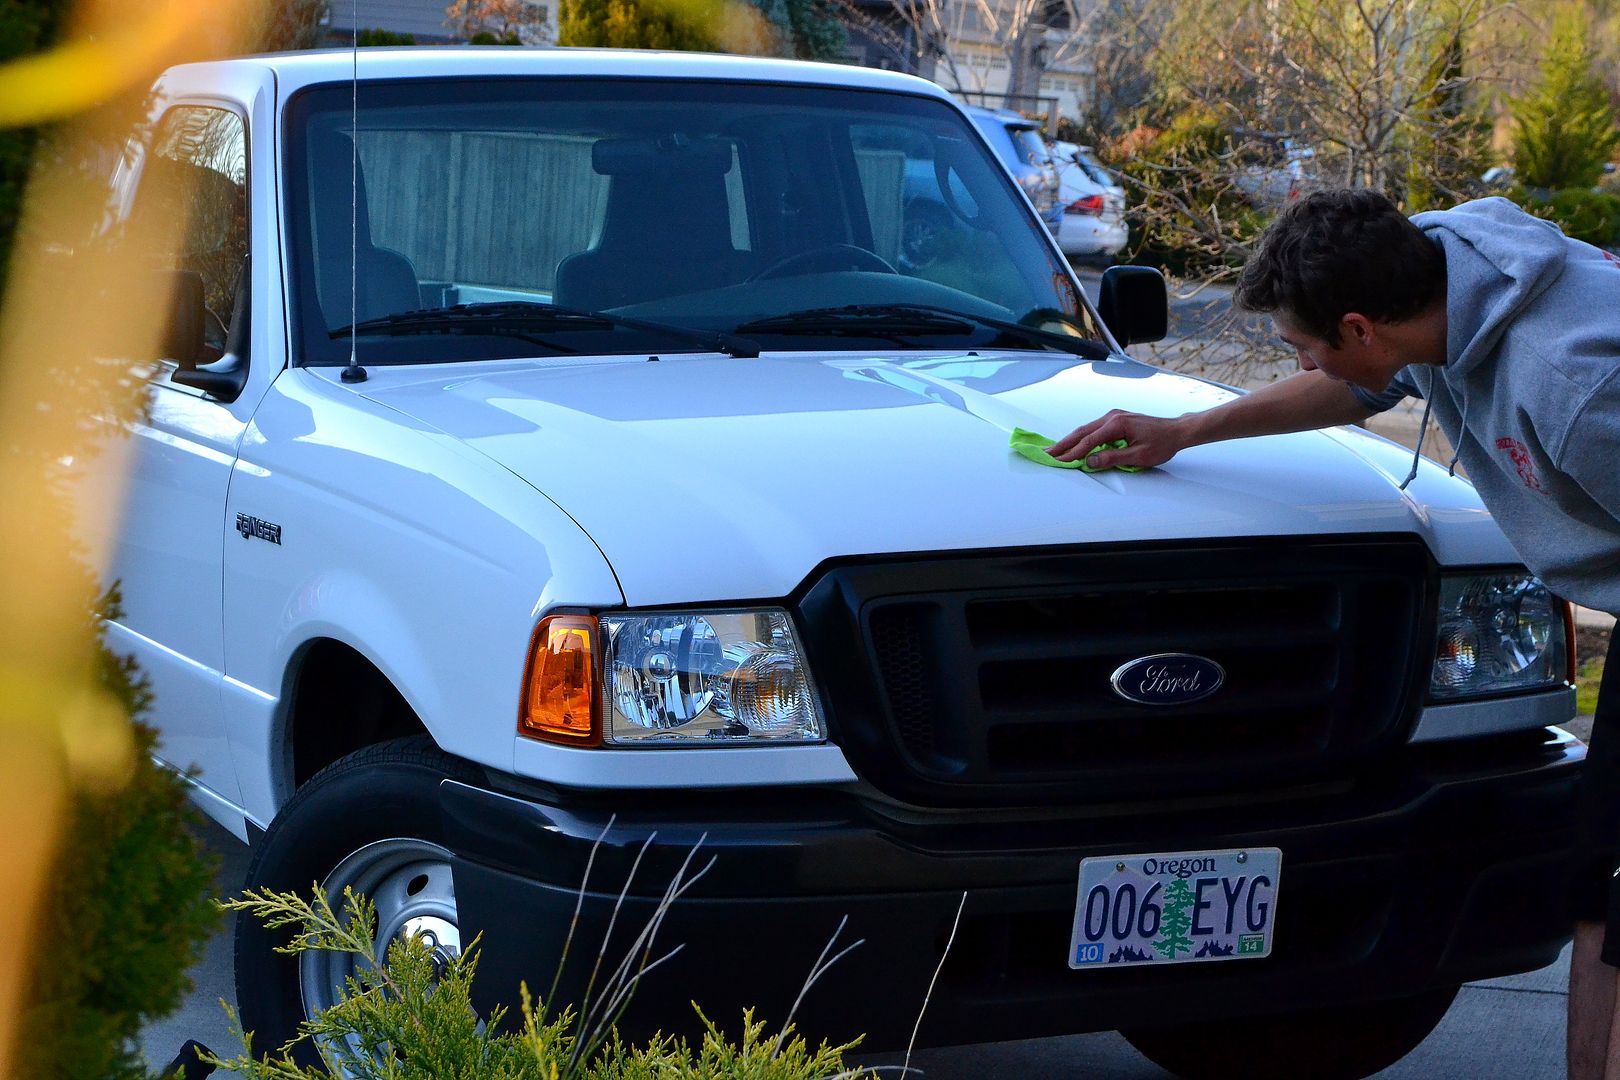
Sold my first car, '04 Ranger, 70k miles, bought from my grandpa, much too reliable, not enough project
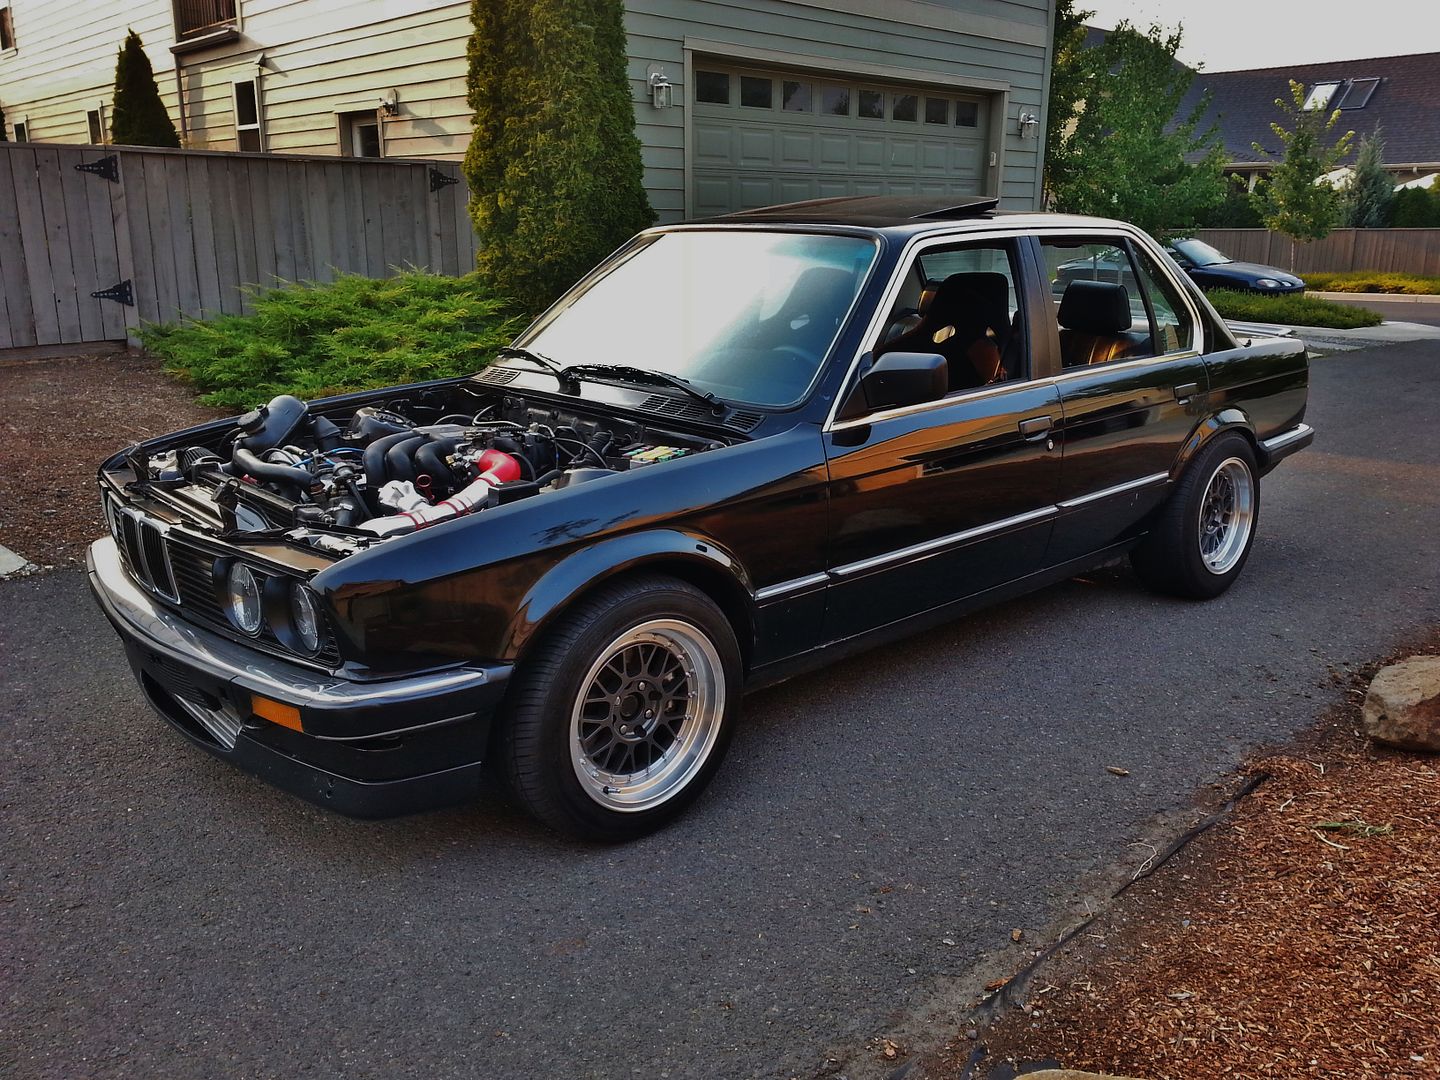
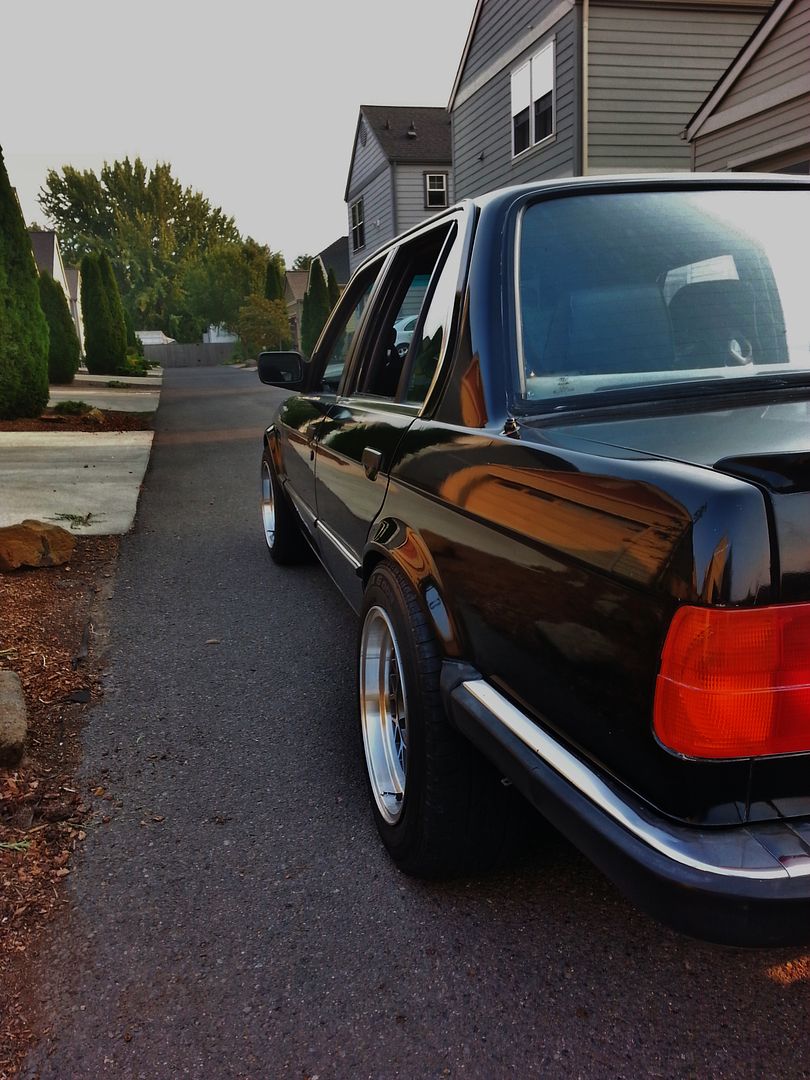
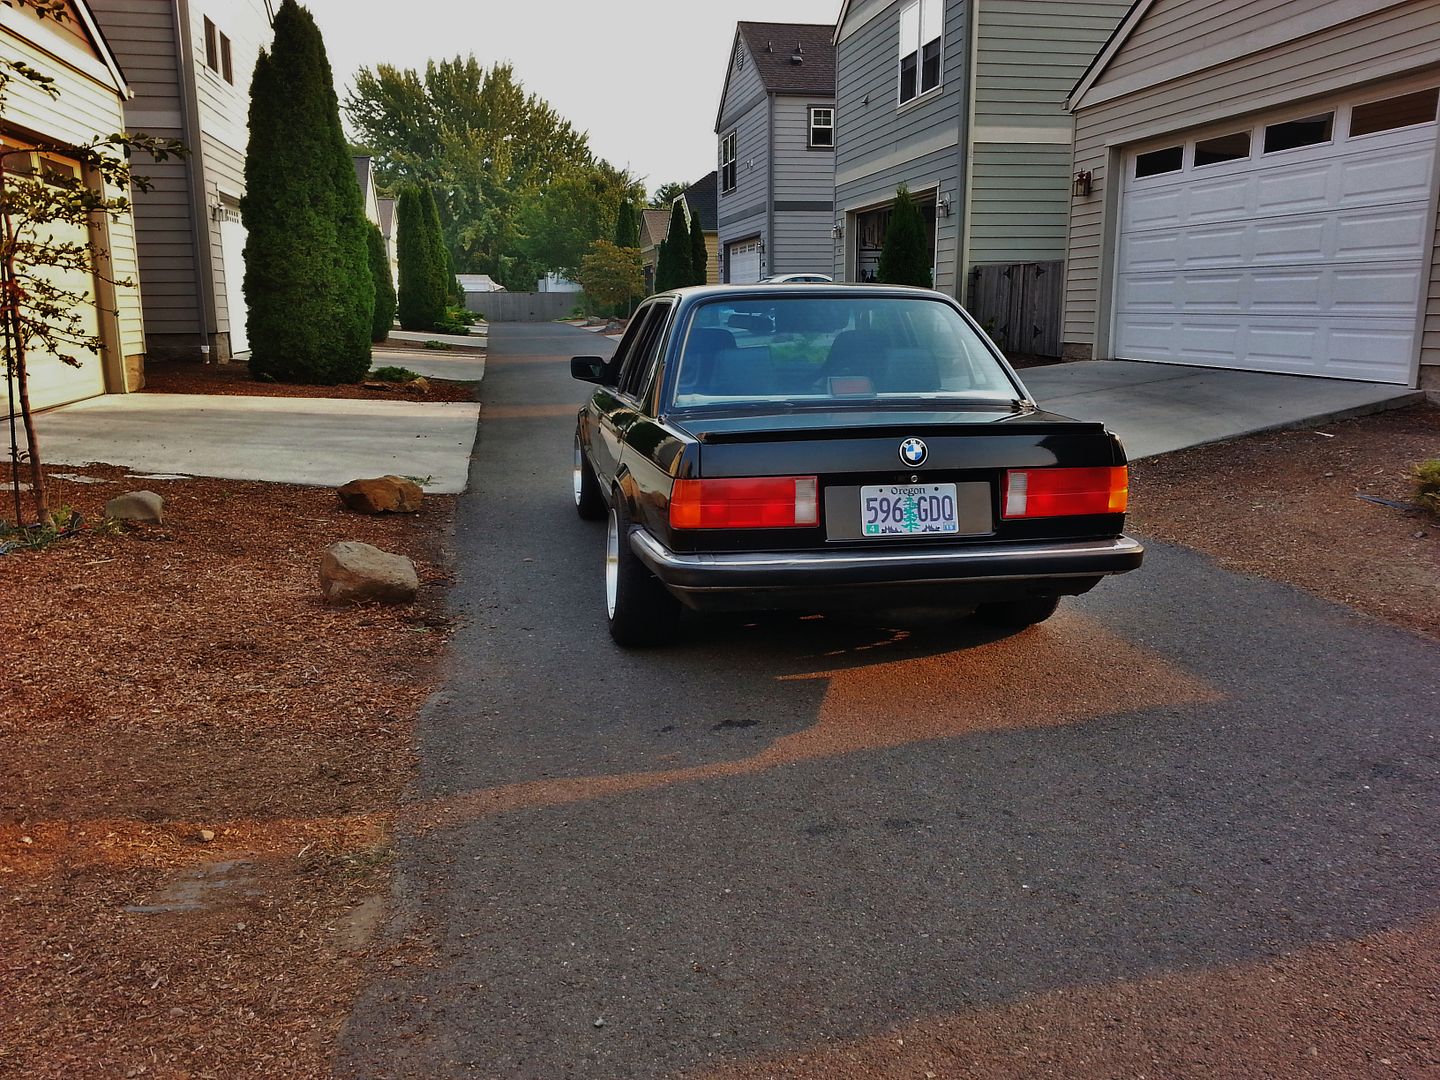
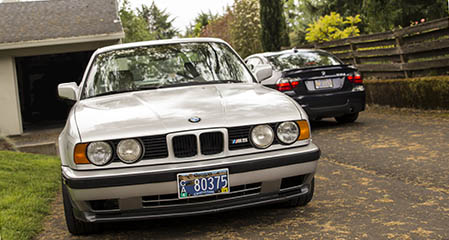
Bought this 1986 325e last summer from a local enthusiast/r3v member who had taken care of a lot of maintenance and suspension with Bilsteins and H&R Race springs. At 225k it was still a solid runner with good compression numbers and maintenance history.
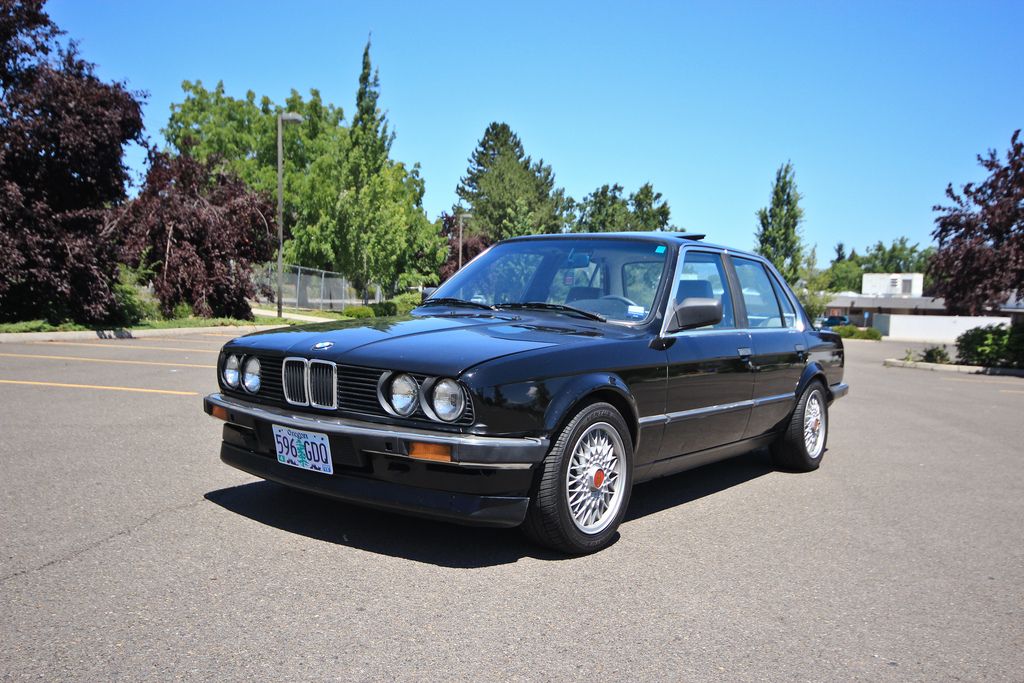
And Euro Bumpers, those sold me :)
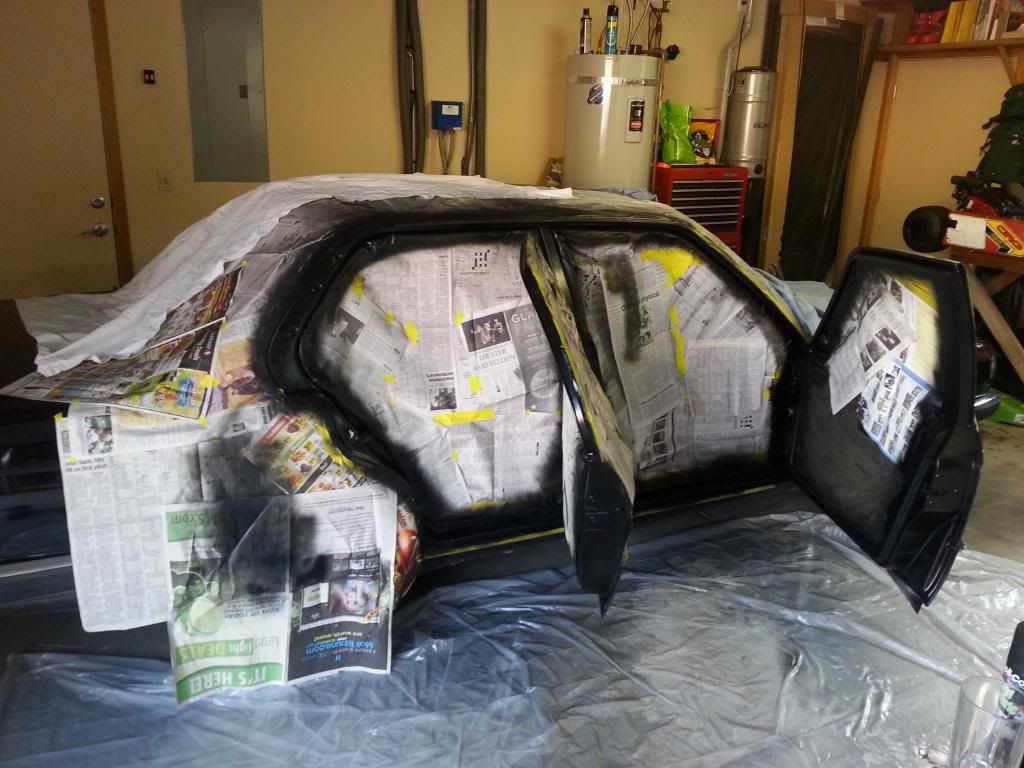
But I had plans. First up was painting. The car had a decent respray from a few years back but the door jambs and engine bay were left bronzit, and the passenger doors sills red :-/
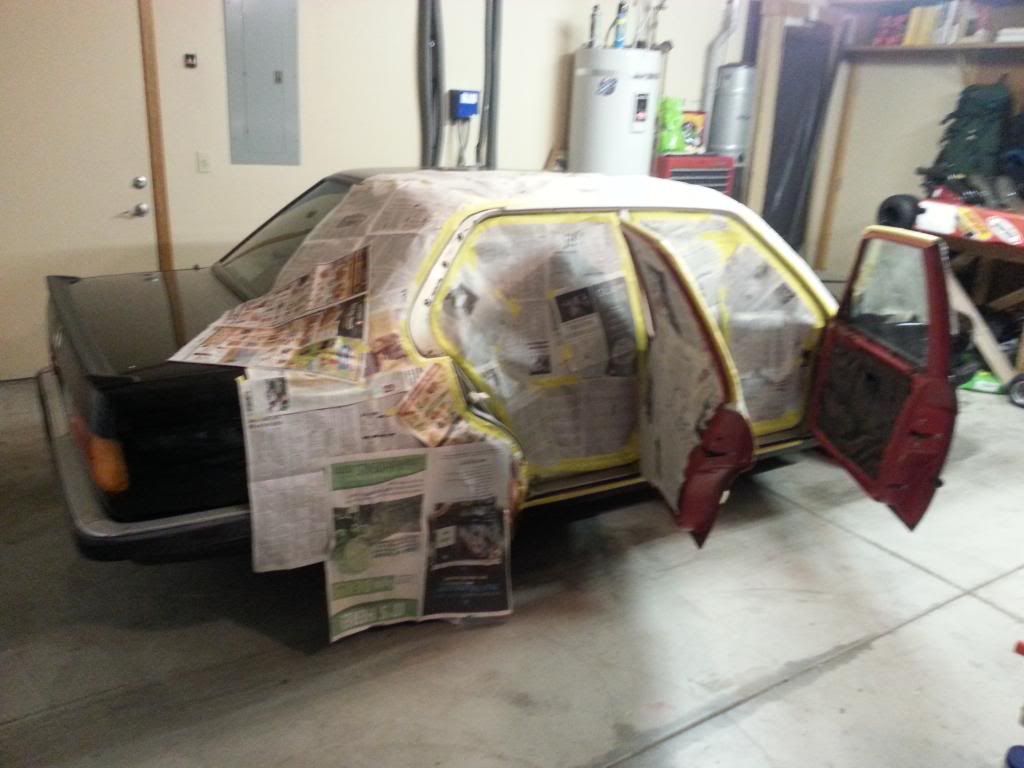

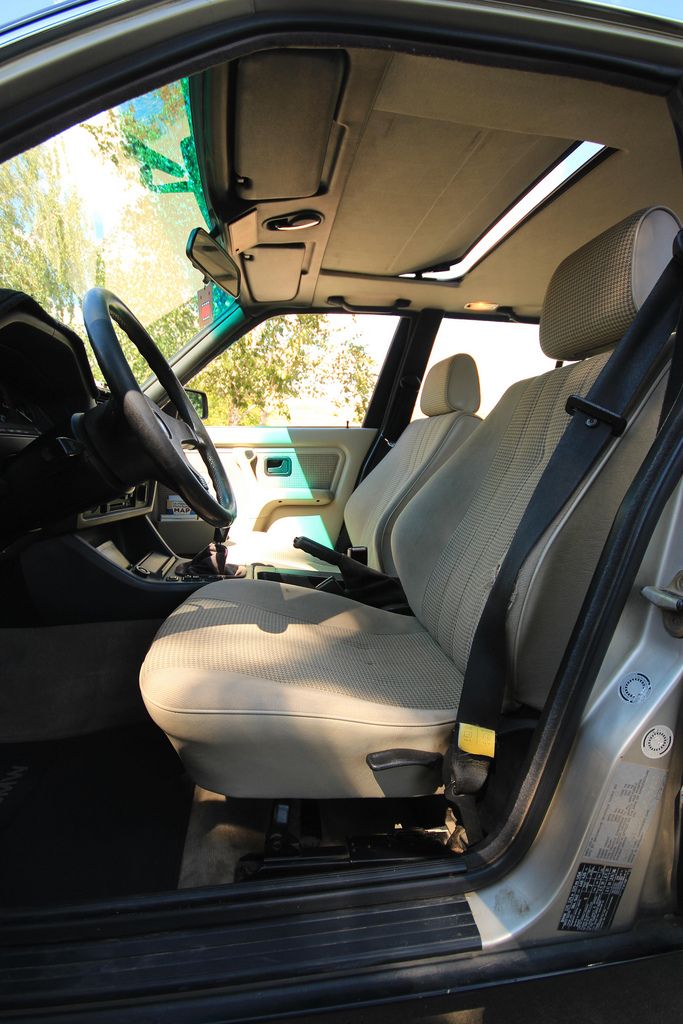
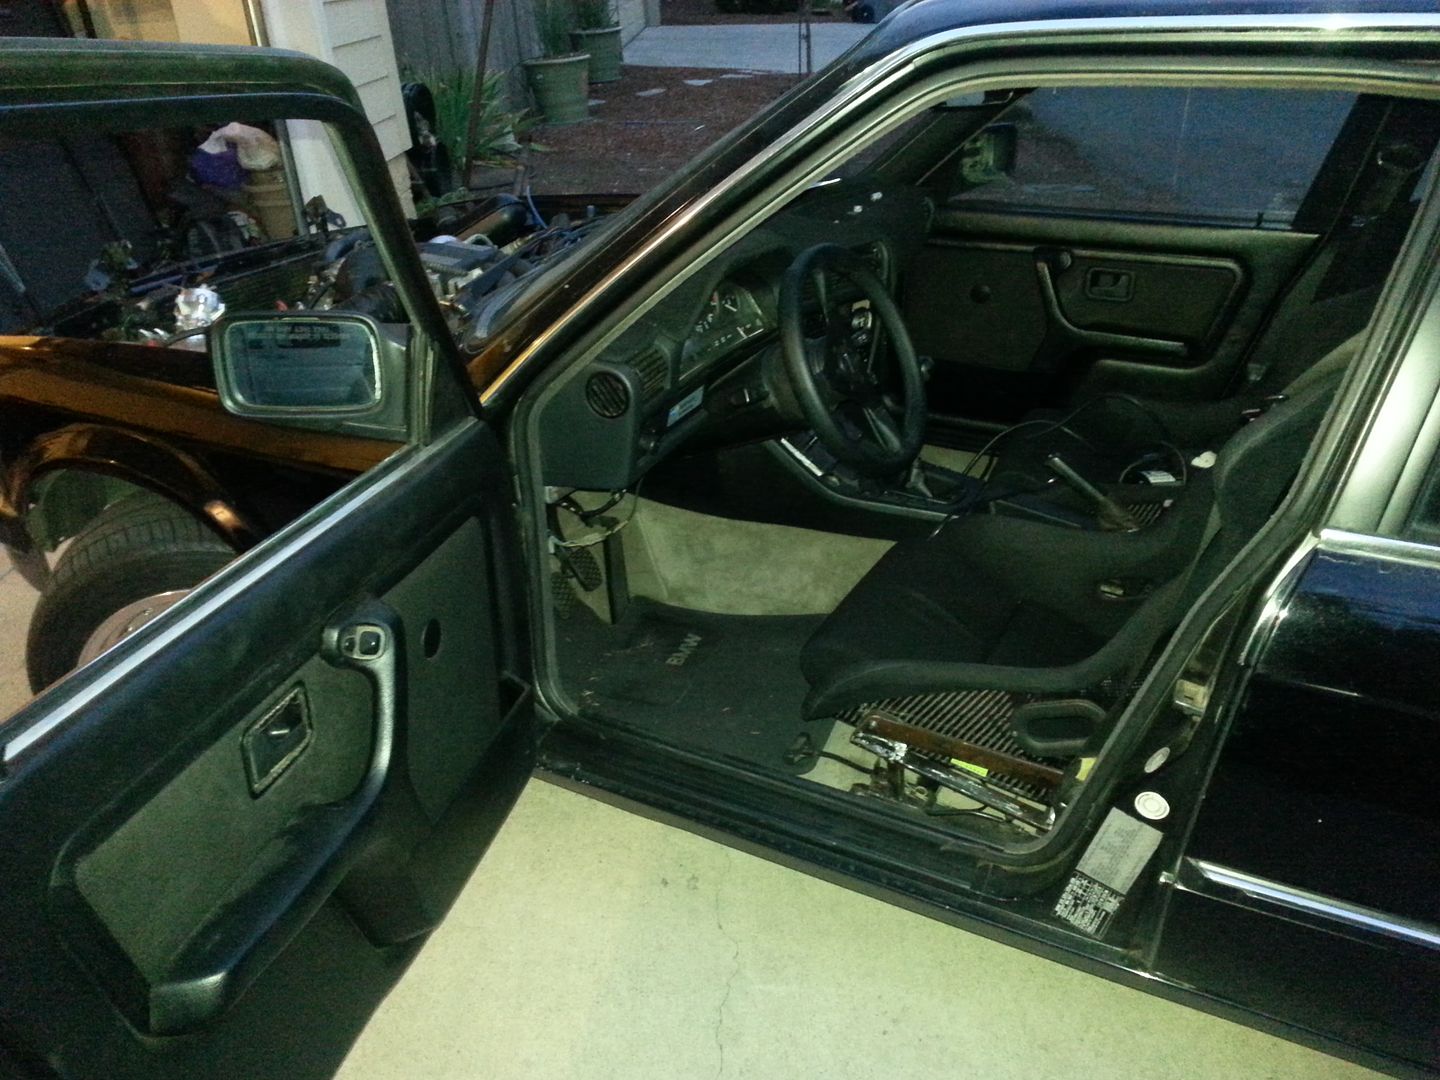
I also died the door cards black and picked up some fixed bucket seats from a member. Had to weld up custom mounts to the stock sliders.
I got a lot of help from a local body shop for prepping and spraying knowledge. Came out decent. I used high temp on the engine bay, clear coated it later with VHT engine paint. Also painted some BBS LM reps I picked up. Self etching primer and duplicolor wheel paint
Then the real project started. I had the intention of doing a turbo project before I got the car though I neglected to tell the seller as I didn’t want to be another one of those kids who can’t stop talking about turbocharging their ‘beamer’, and I also feared that if the PO did believe that I would succeed in strapping a turbo to his project, he would surely know it would end up shiny side down or with a blown motor and no tuning.
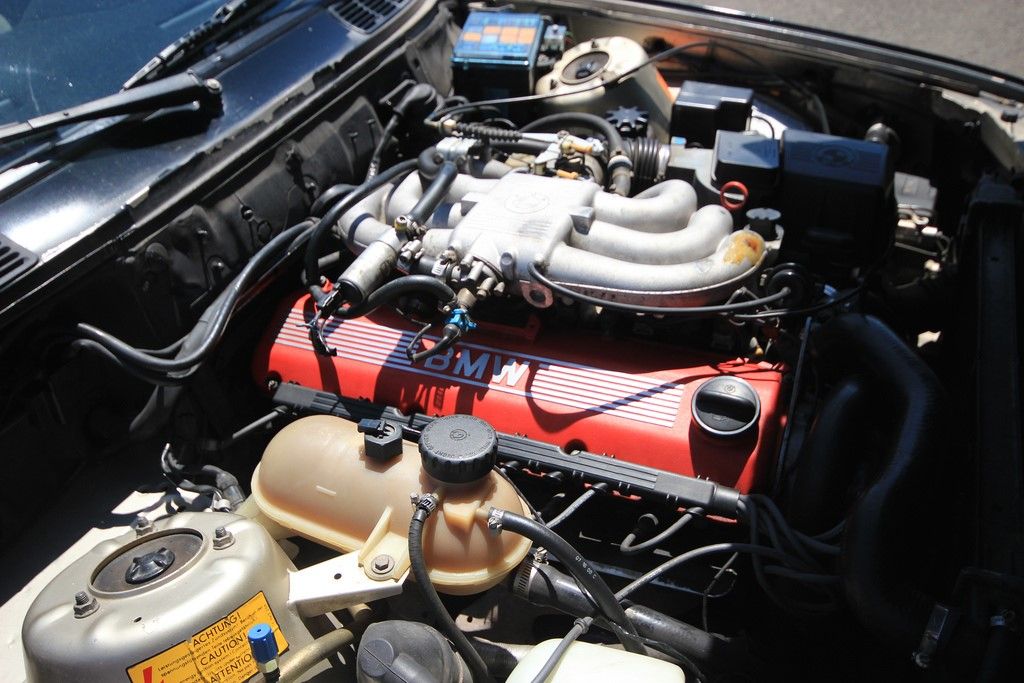
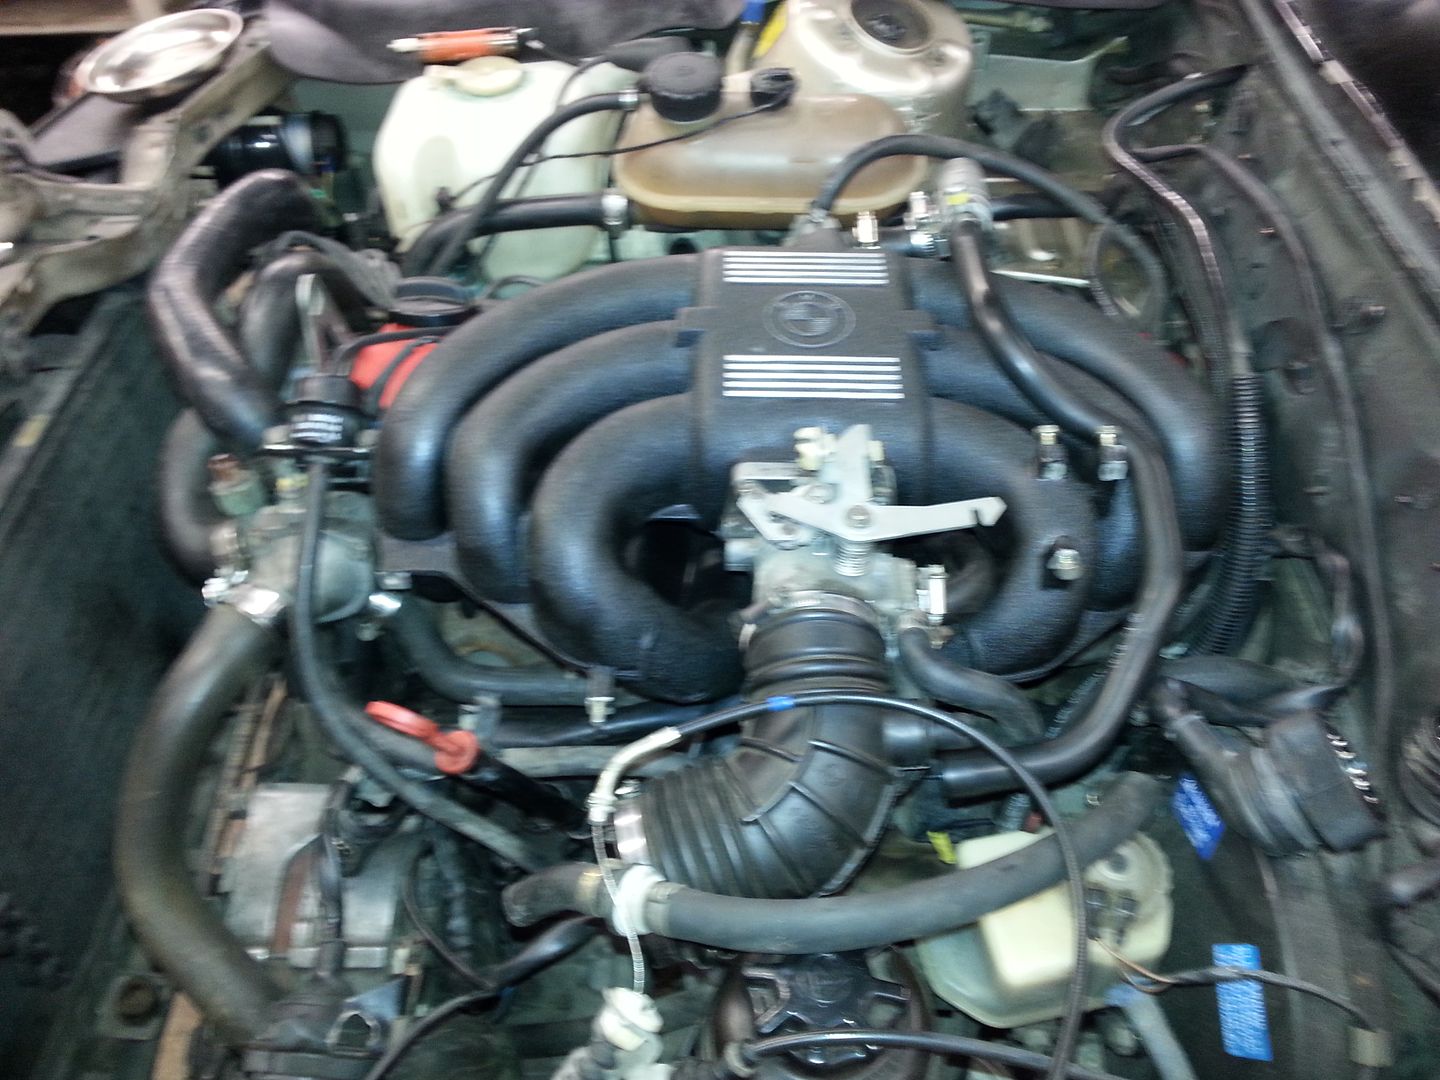
First up was dealing with the motronic 1.0 and remaining m20b27 parts.
This took me the better part of 6 months. It was my first car project, and I had to google EVERYTHING.
Swapped the wiring harness to the 55 pin motronic and bought a used ms1 pnp. This was supposed to be an msII unit, which is part of why the electronics took so long. The msIIextra code doesn’t load too well to the ms1 unit. Took me awhile to figure out the board and realize what I was working with.

Also installed a lc1 wideband, burnt a sensor, couldn’t figure out why, and also thought tuning FI meant setting your AFR target and letting the ecu figure out the pulse width directly off the 02 sensor. (VE table what??)
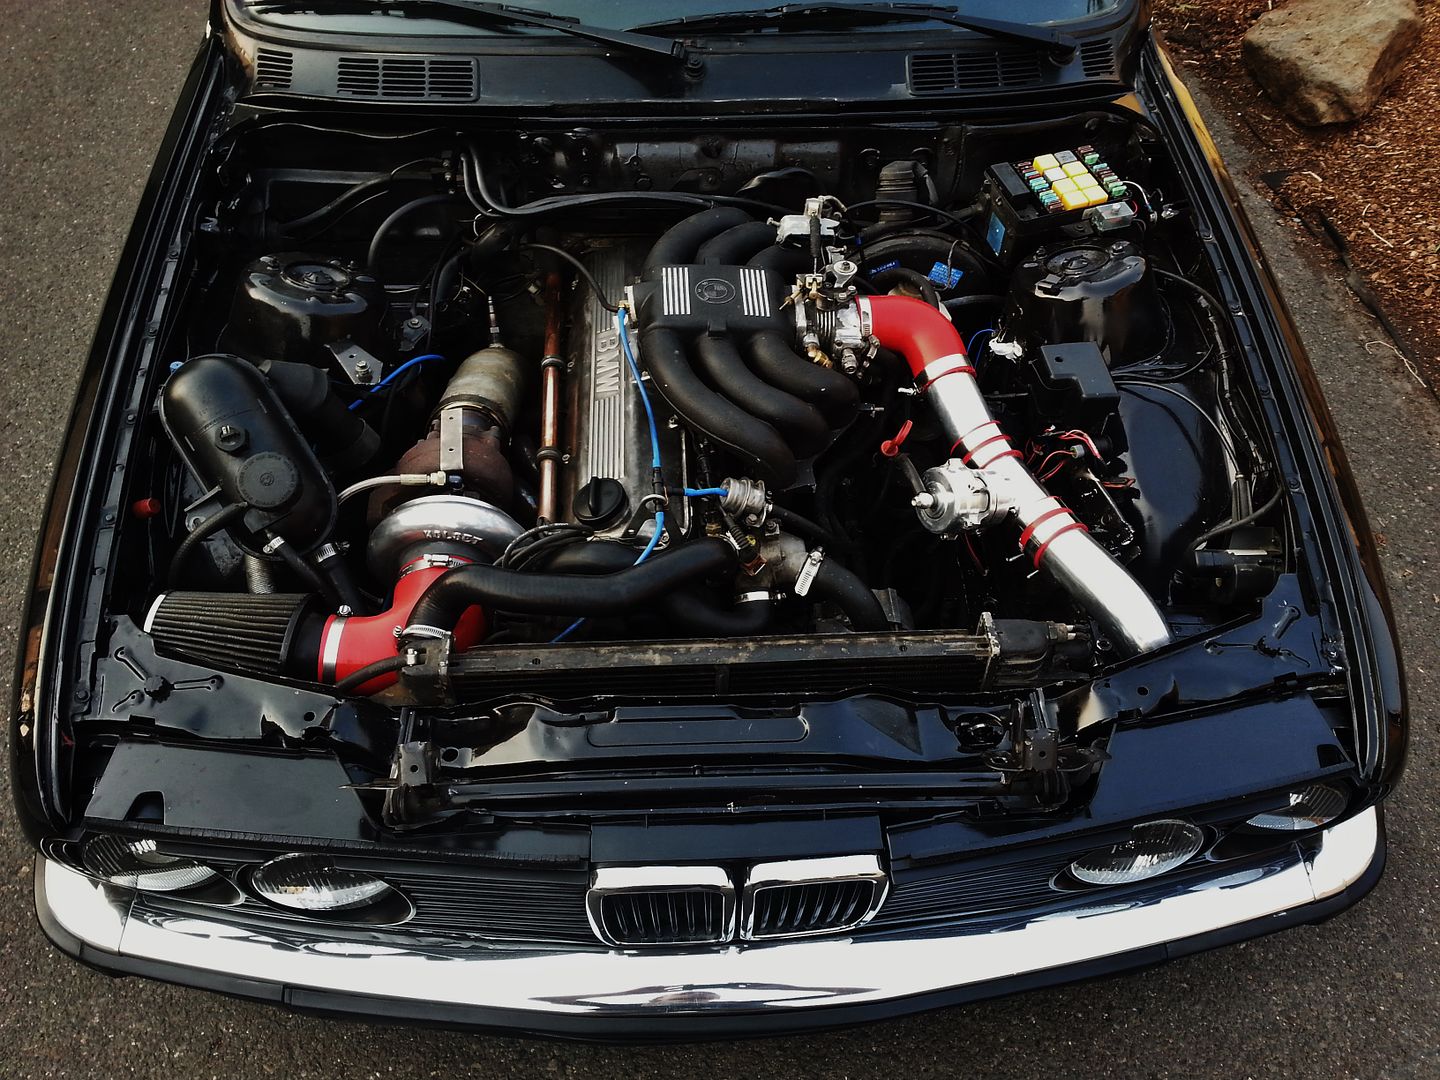
So in June 2014 I finally had the electronics mostly figured out, and was driving a stock 325e with 42 lb fuel injectors and megasquirt (Woot!) So it was time finally move forward with the turbo hardware.
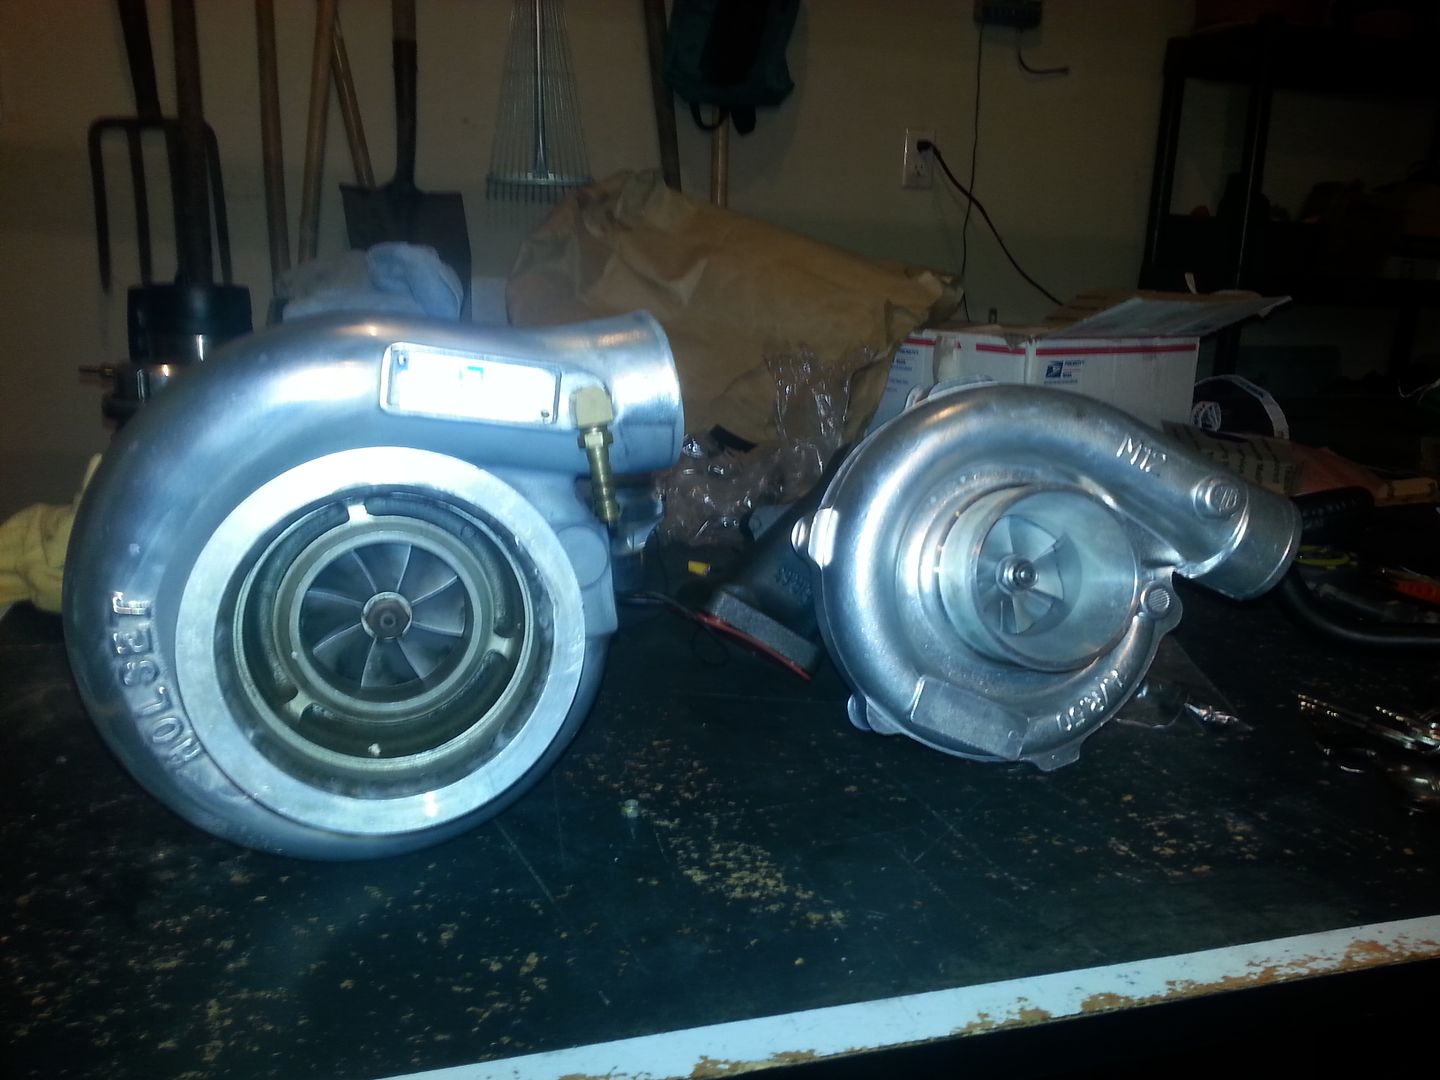
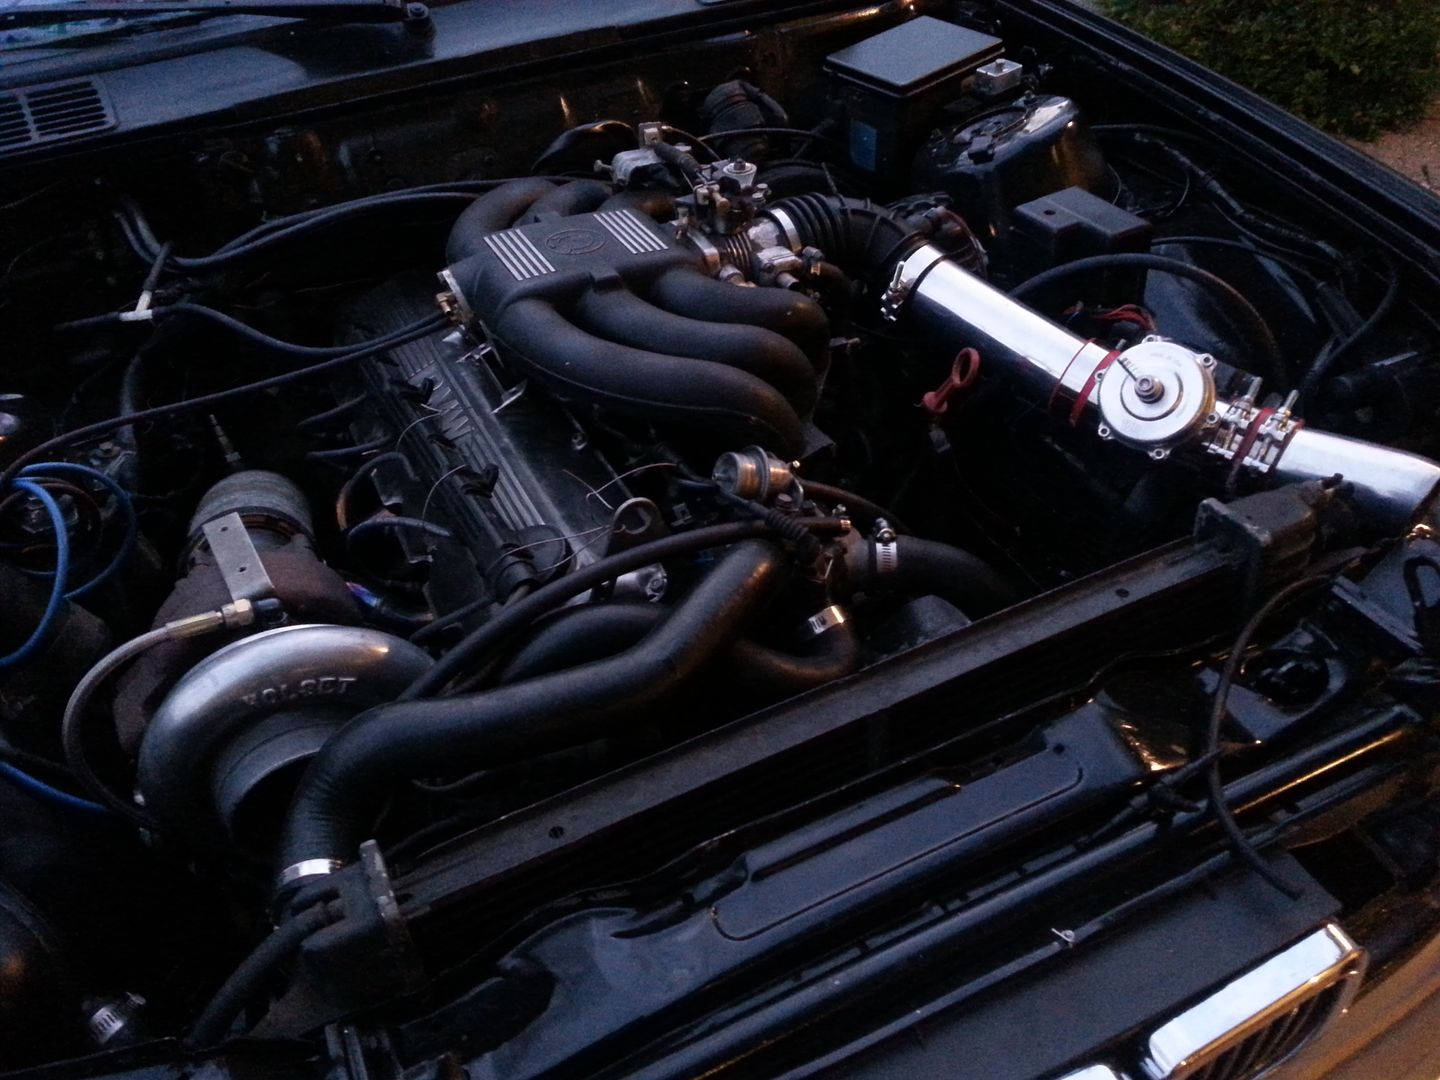
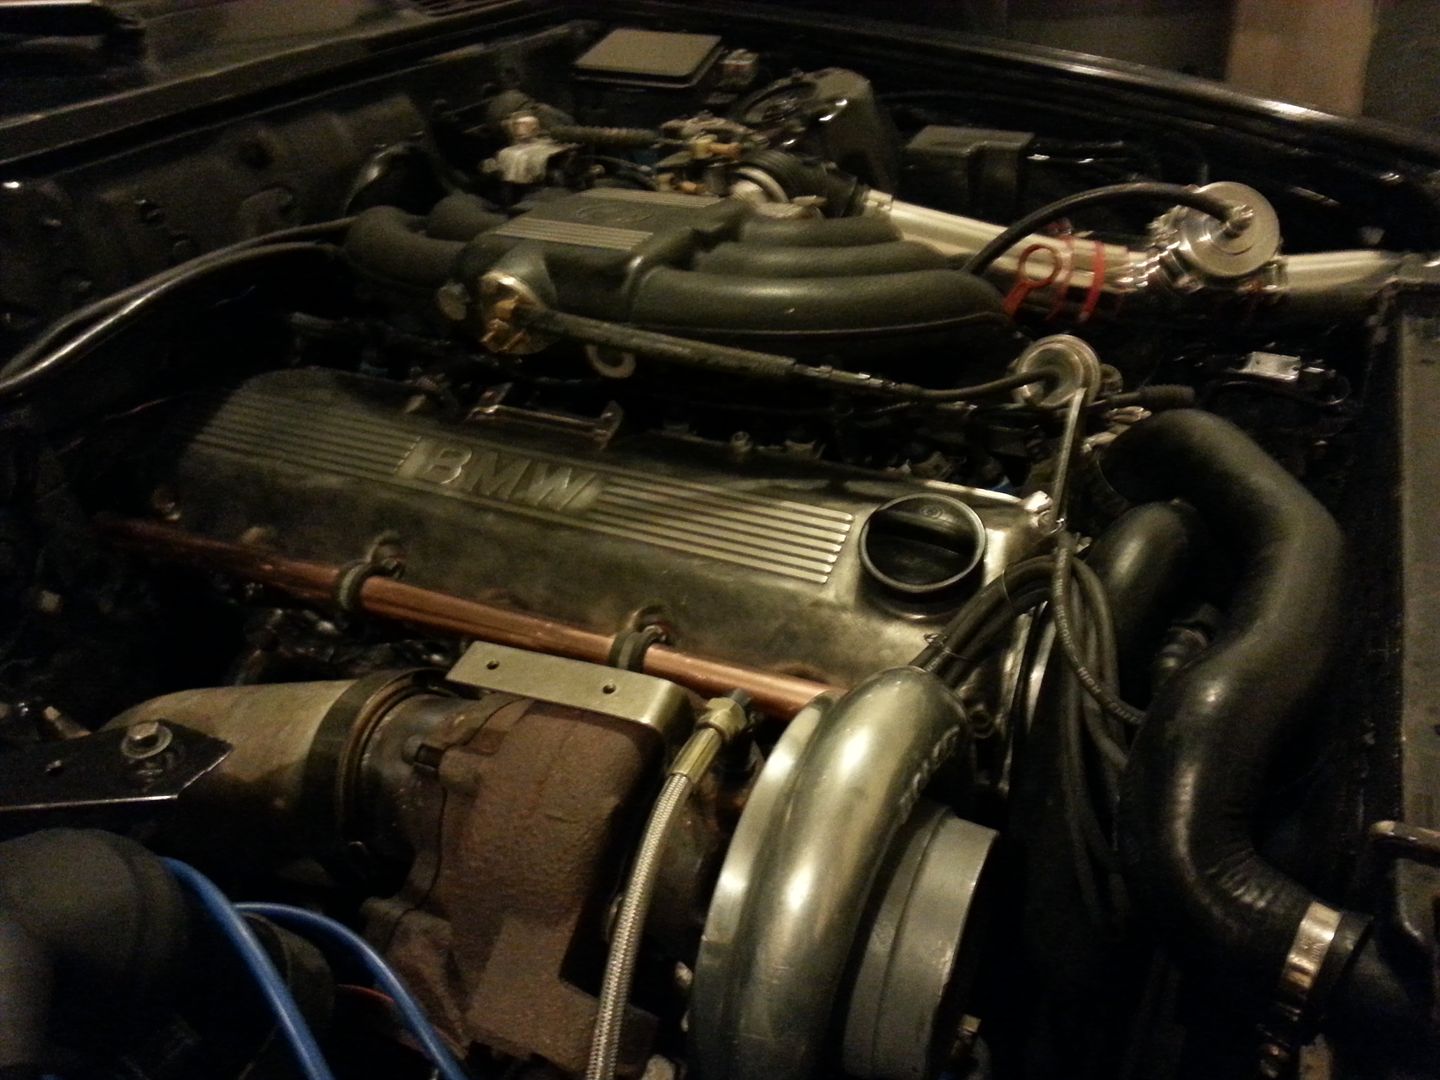
Had to decide which turbo, on the right was an ebay 50trim t3/t4. Ended up going with the 12cm hx35. Picked it up on craigslist for 150 bones. I didn’t want the setup to be tooo laggy though, so I modified my ebay manifold for divided entry. Also added a divided wastegate provision.
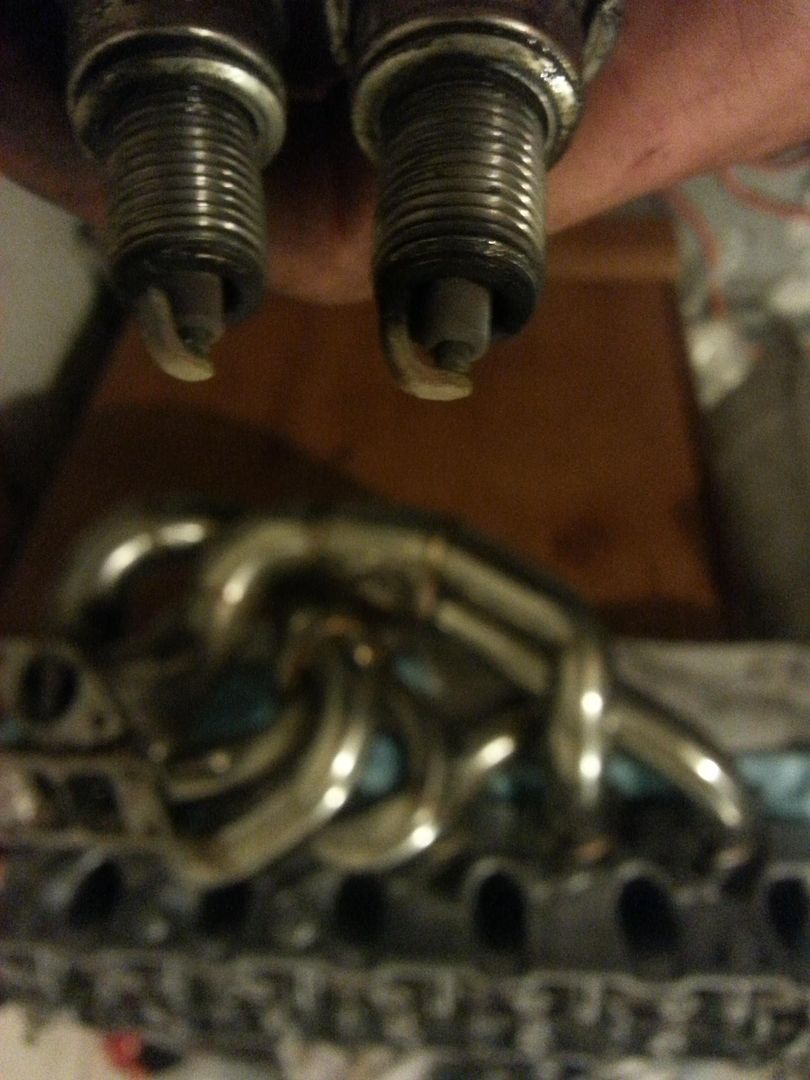
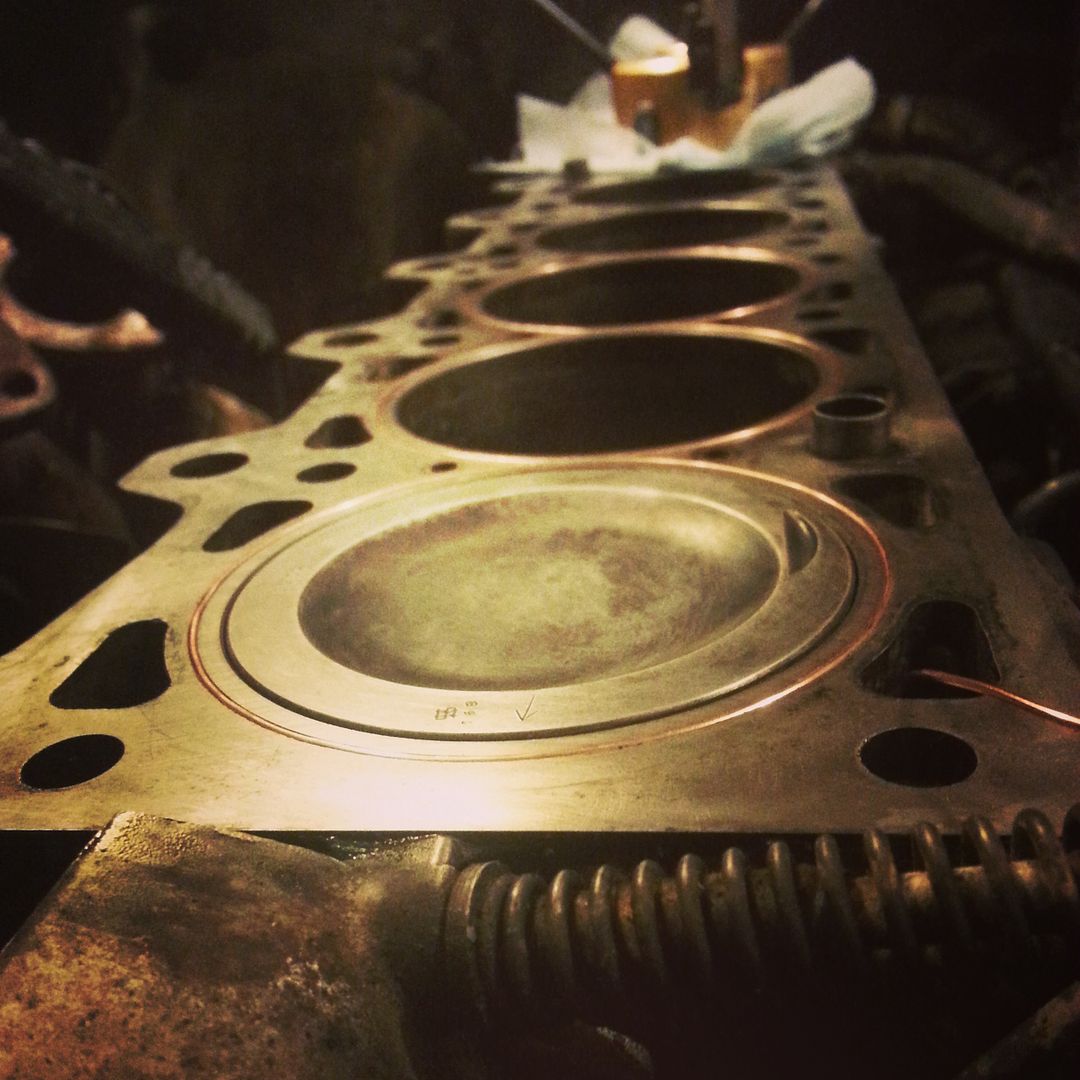
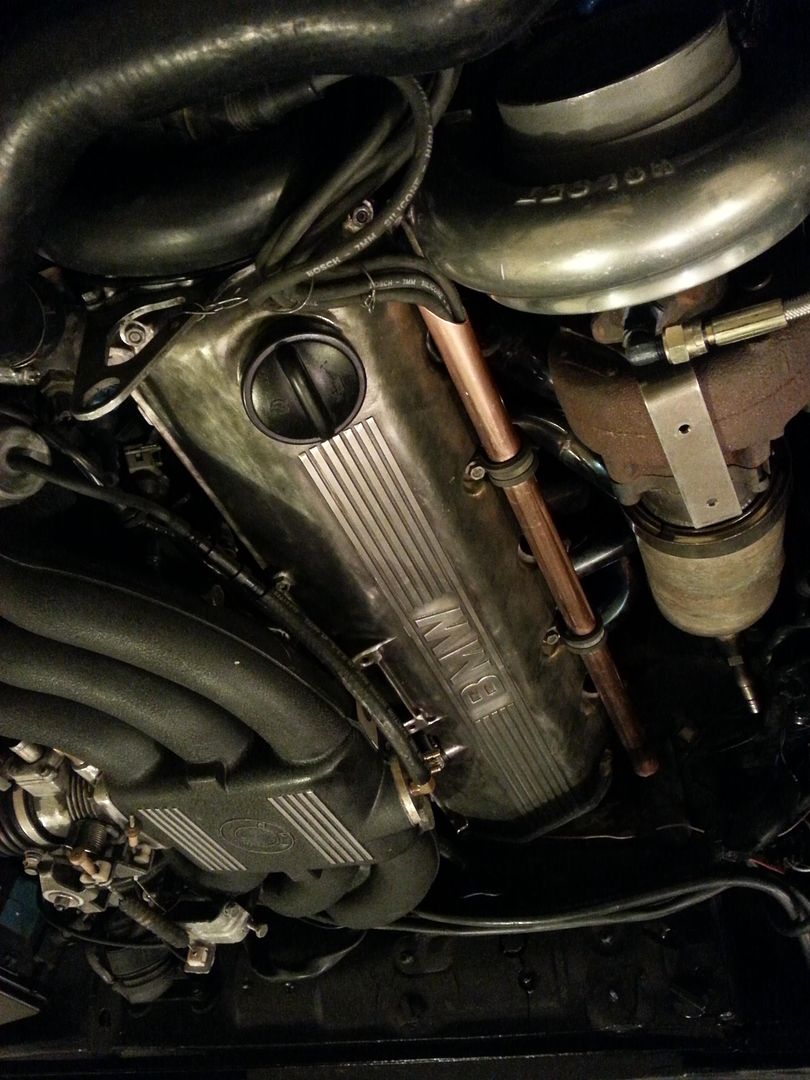
I originally took the picture for spark plug color on my megasquirt tune, but you can see the manifold in the back divider and wastegate provision. Got to learn how to TIG weld, it was fun getting the electrode and filler rod 4” into the collector to weld..not..
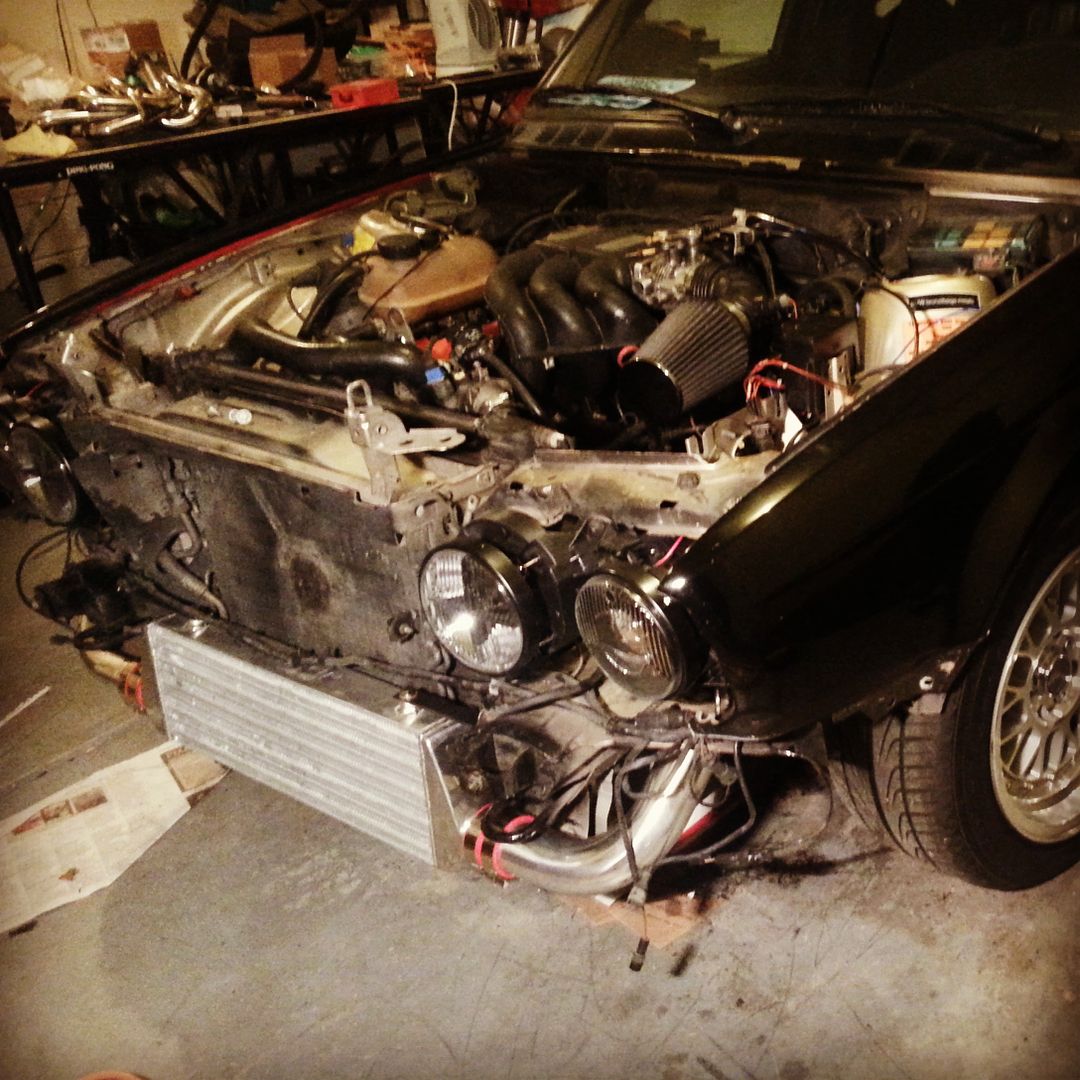
Test fitting the intercooler (old pic)
My shifter was super sloppy and for some reason I thought it would be better to machine one in shop class instead of buy one???
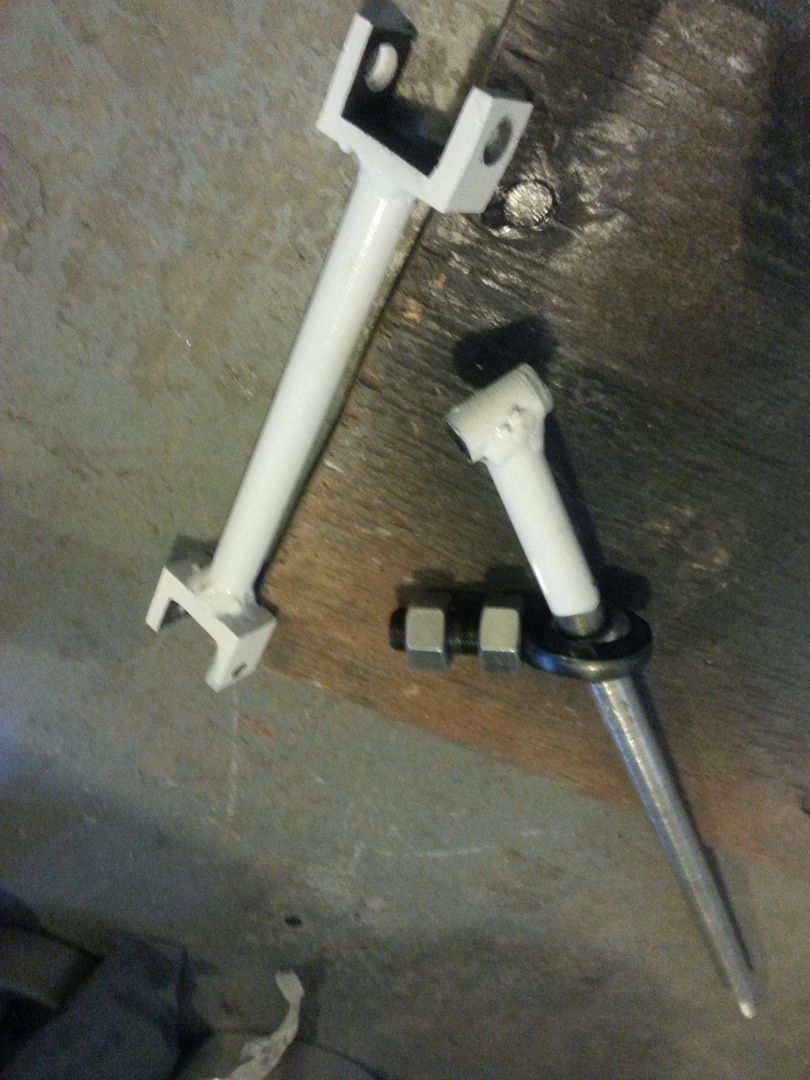
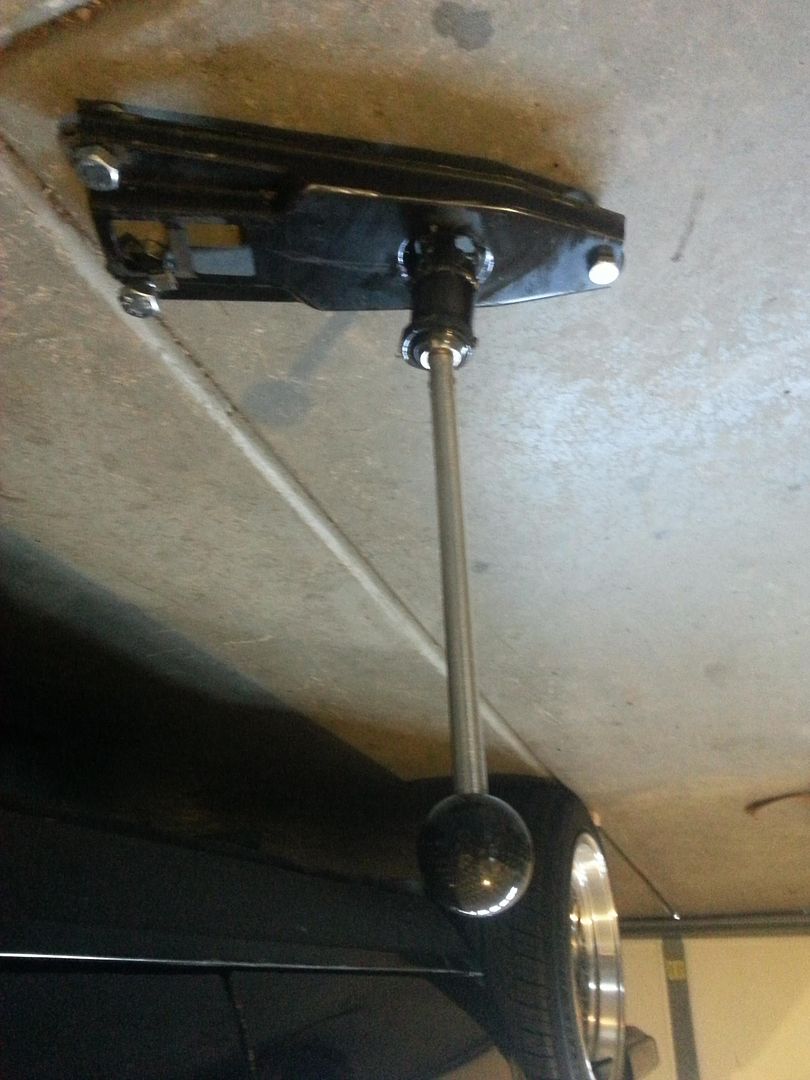
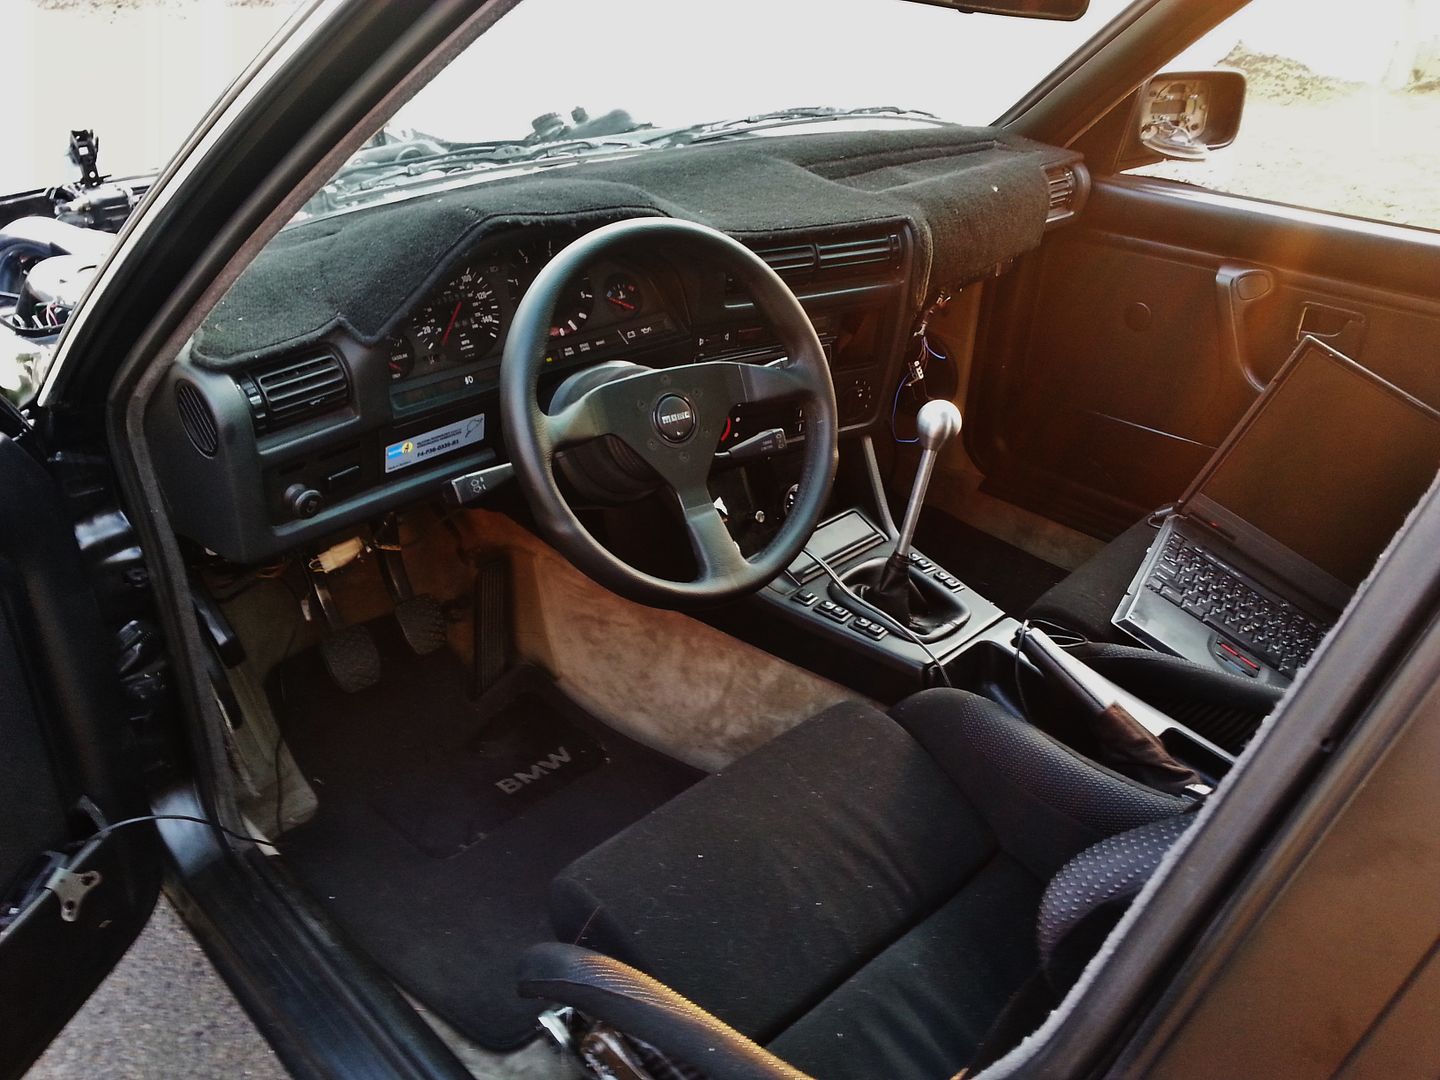
40 or 50 hours and later I had my DTM style shifter and DSSR. This was an old version that had a heim joint welded to the early model shift carrier. Now it is bracketed to the trans tunnel.
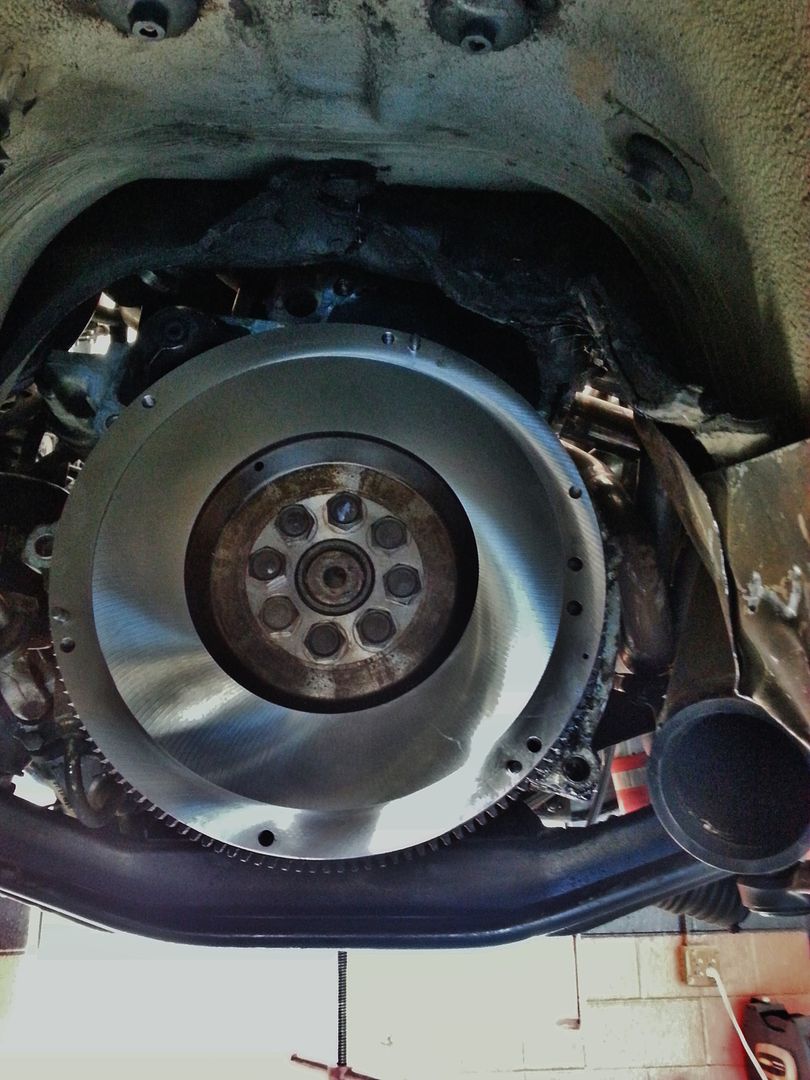
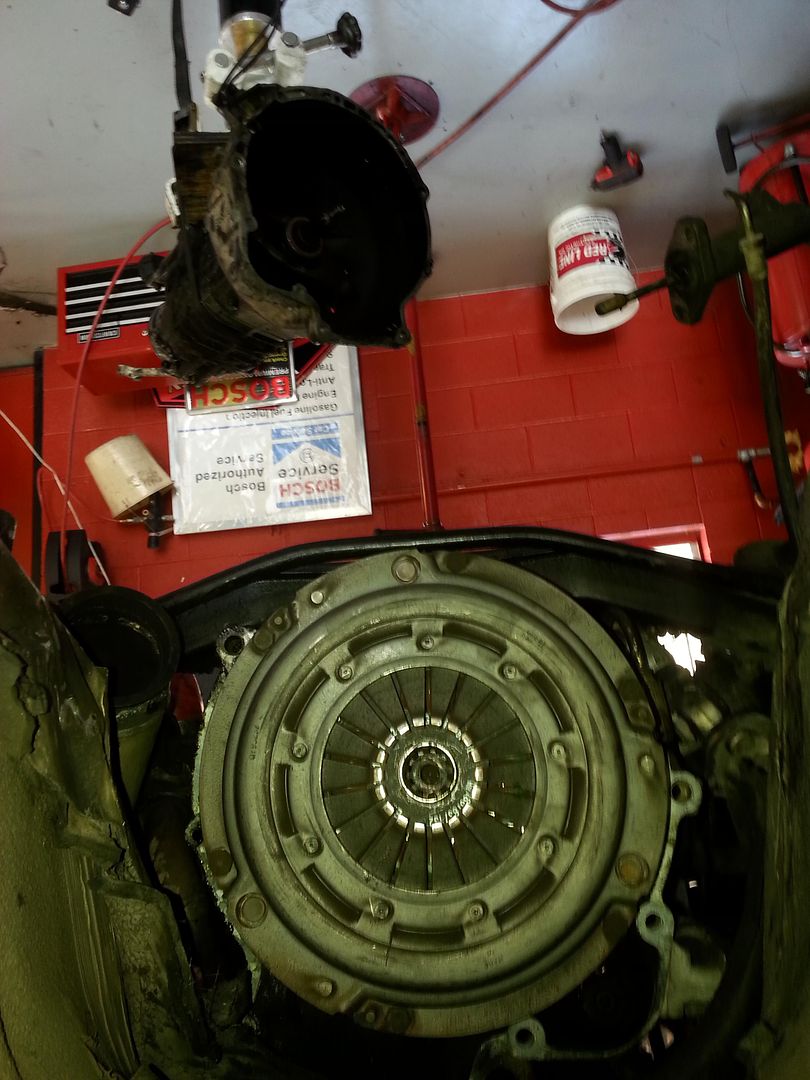
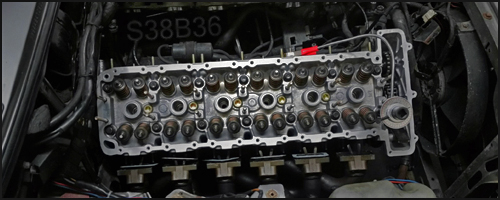
Then the 885 head I picked up for $40, obviously had to be rebuilt.
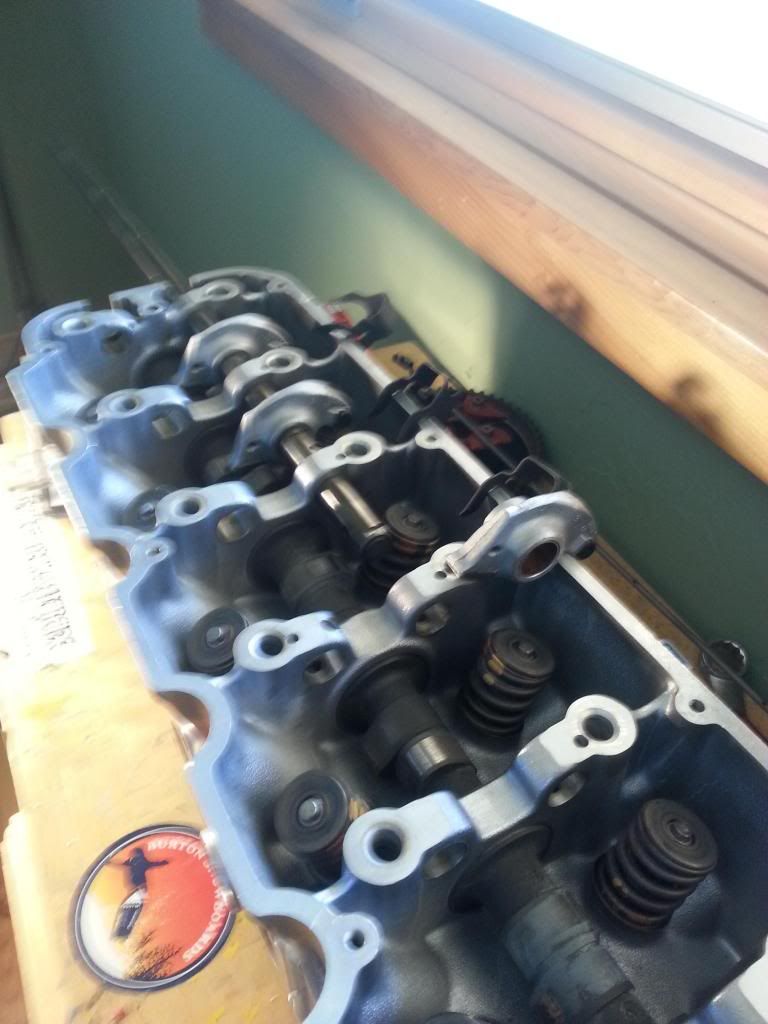
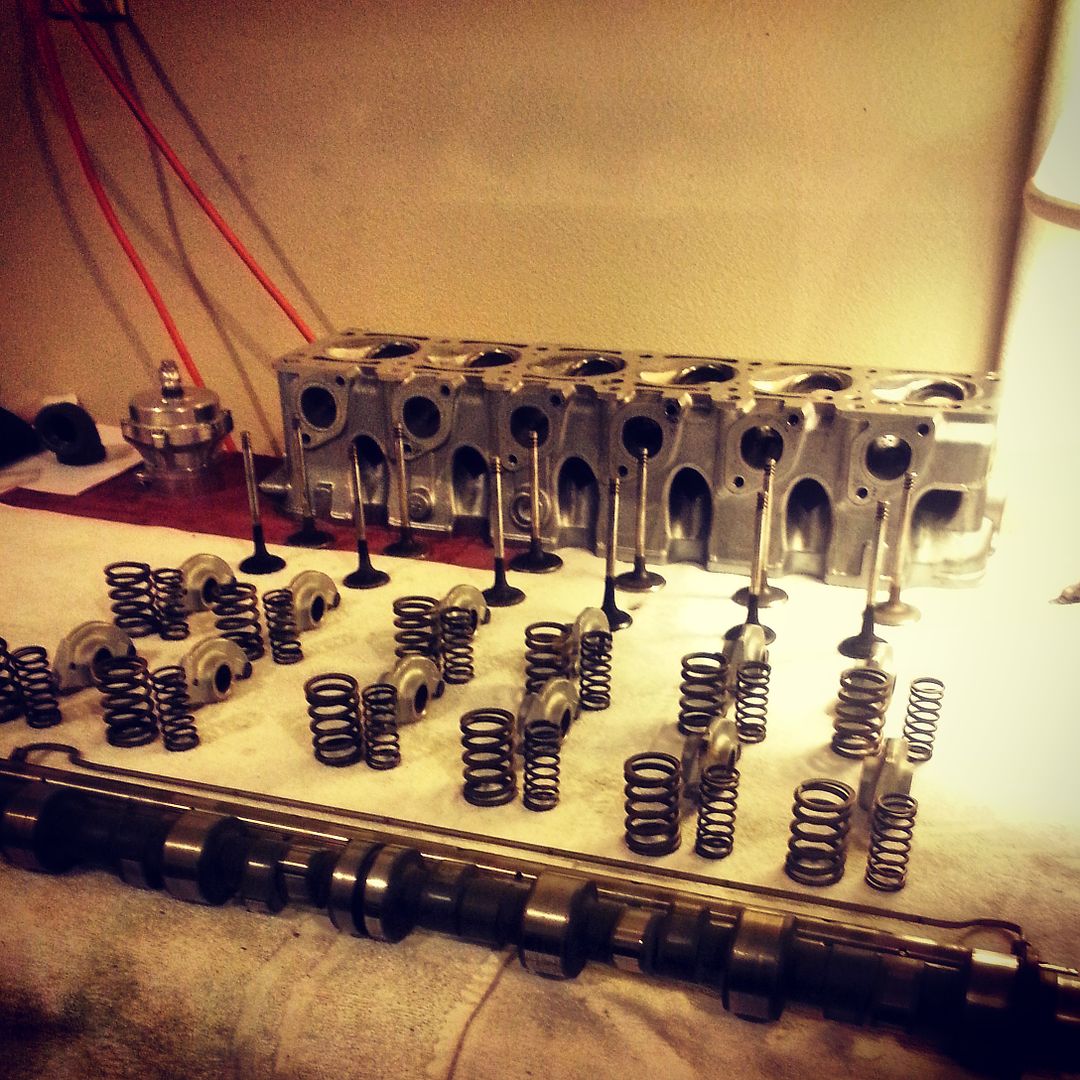
Had severe pitting in the combustion chambers so I ported them with my dremel, smoothed the factory edges and CCed them.
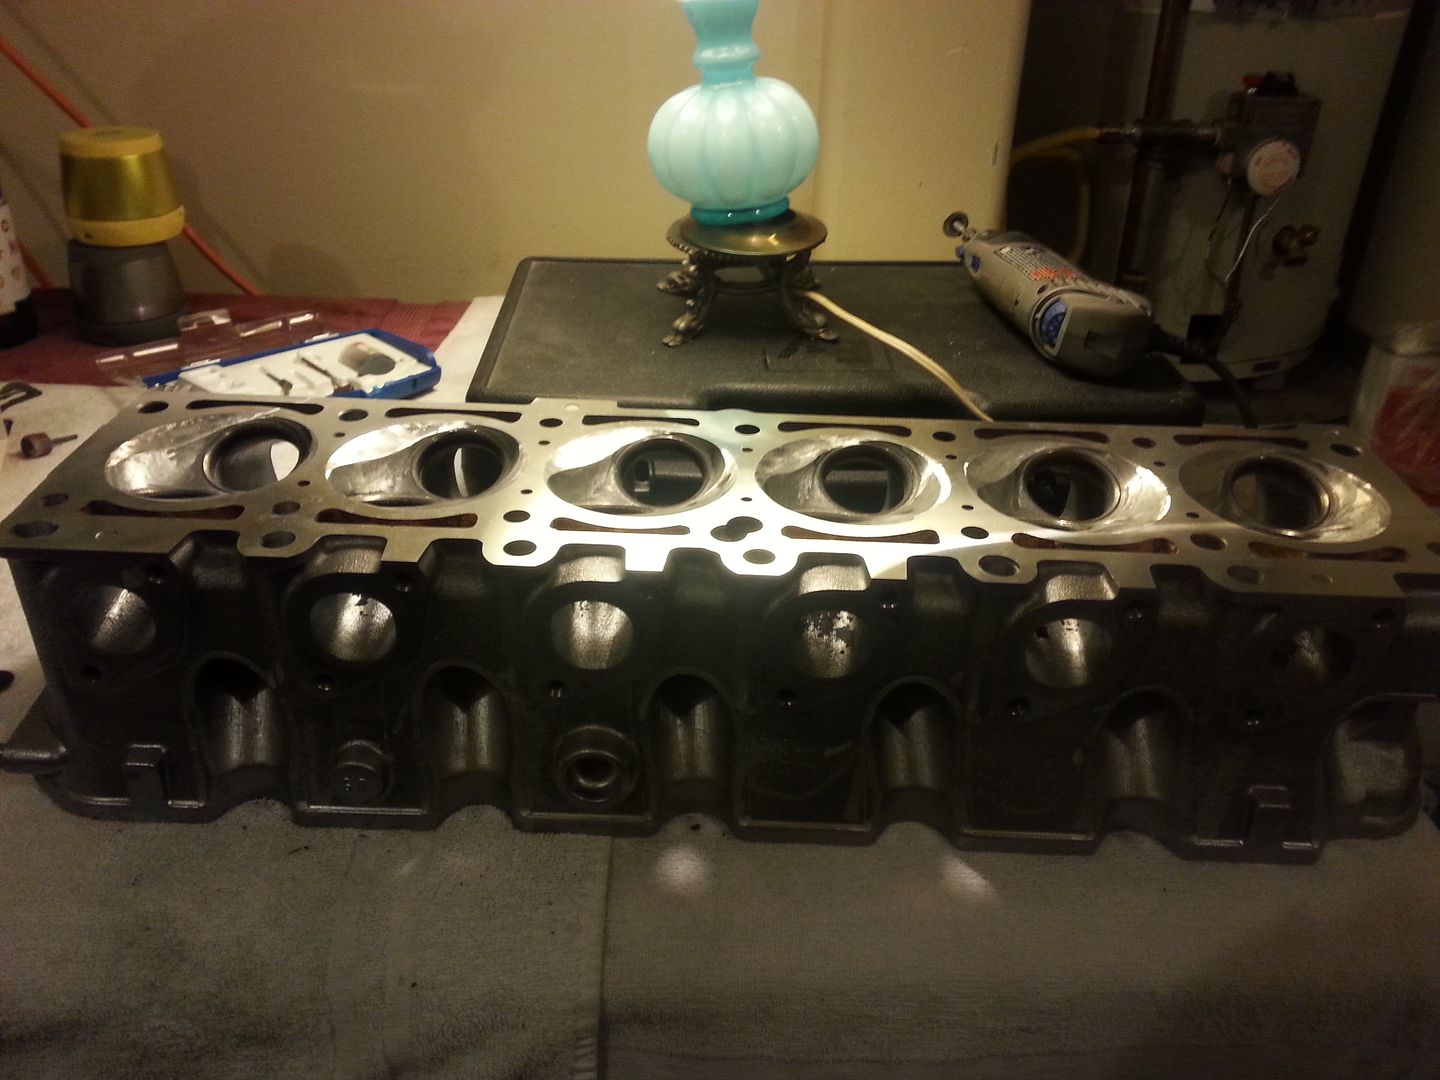
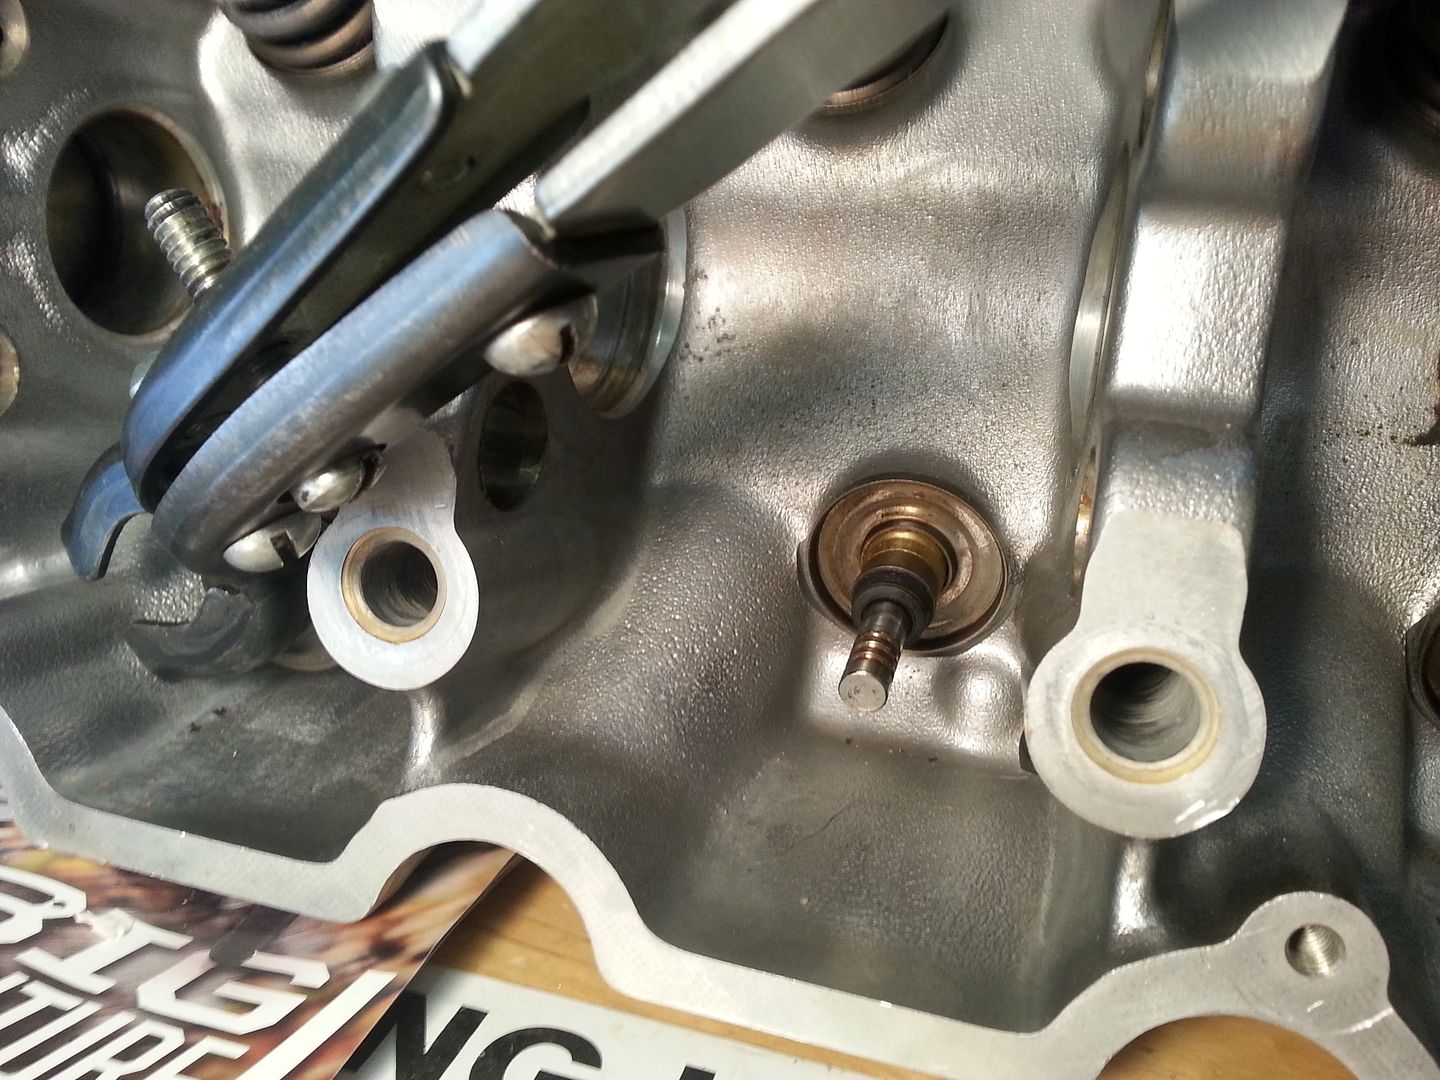
While the head was off I Oringed the block with the Isky Groove-O-Matic tool. Used copper rings and Goetze head gasket.
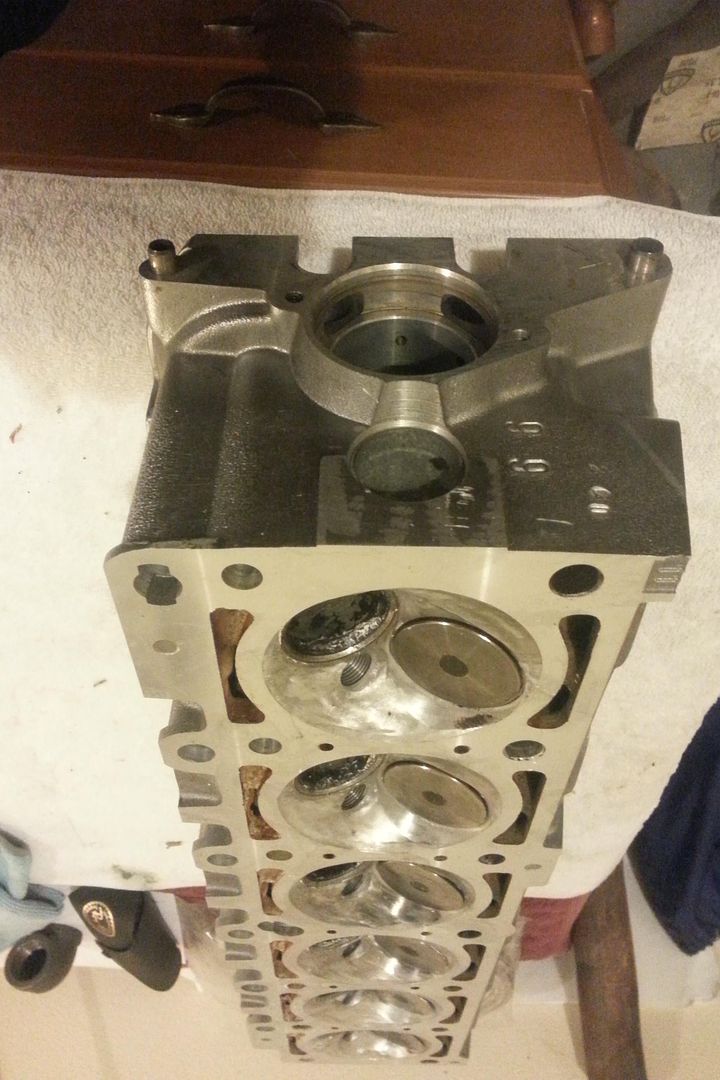
Going back together with ARP studs, torqued to ARP’s recommendation.
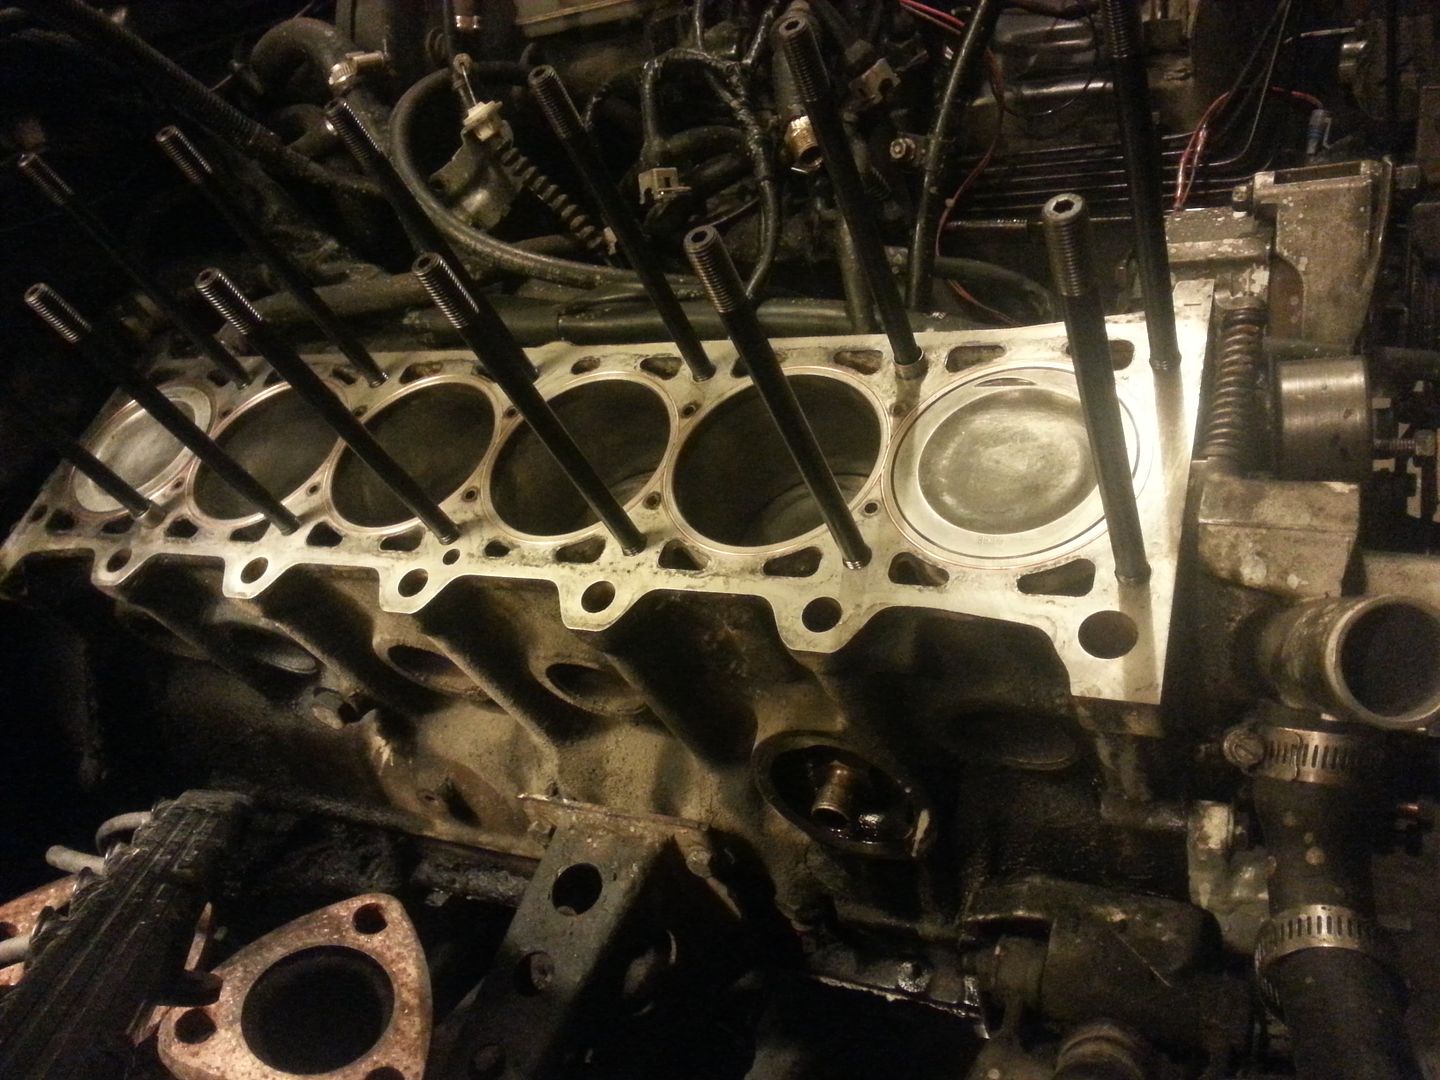
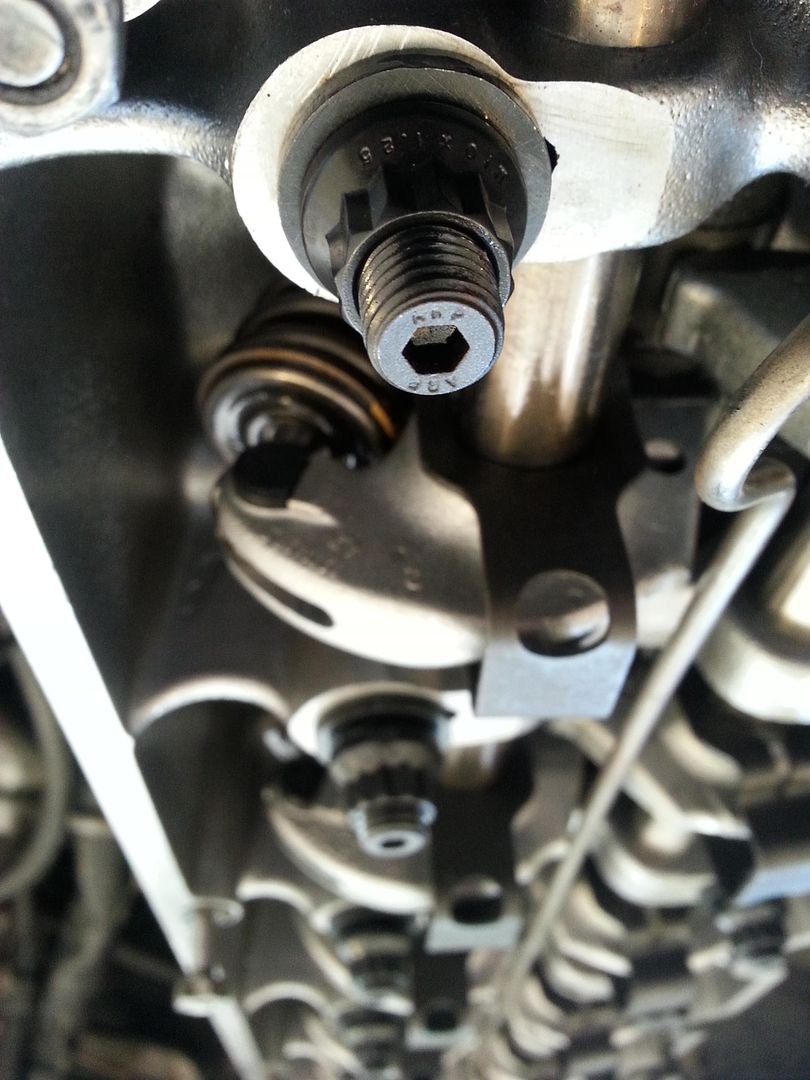
I bought them off a member here, I guess they were sitting around his shop for awhile, I received 13 studs.. L still rocking one factory headbolt, need to call arp about a single stud .
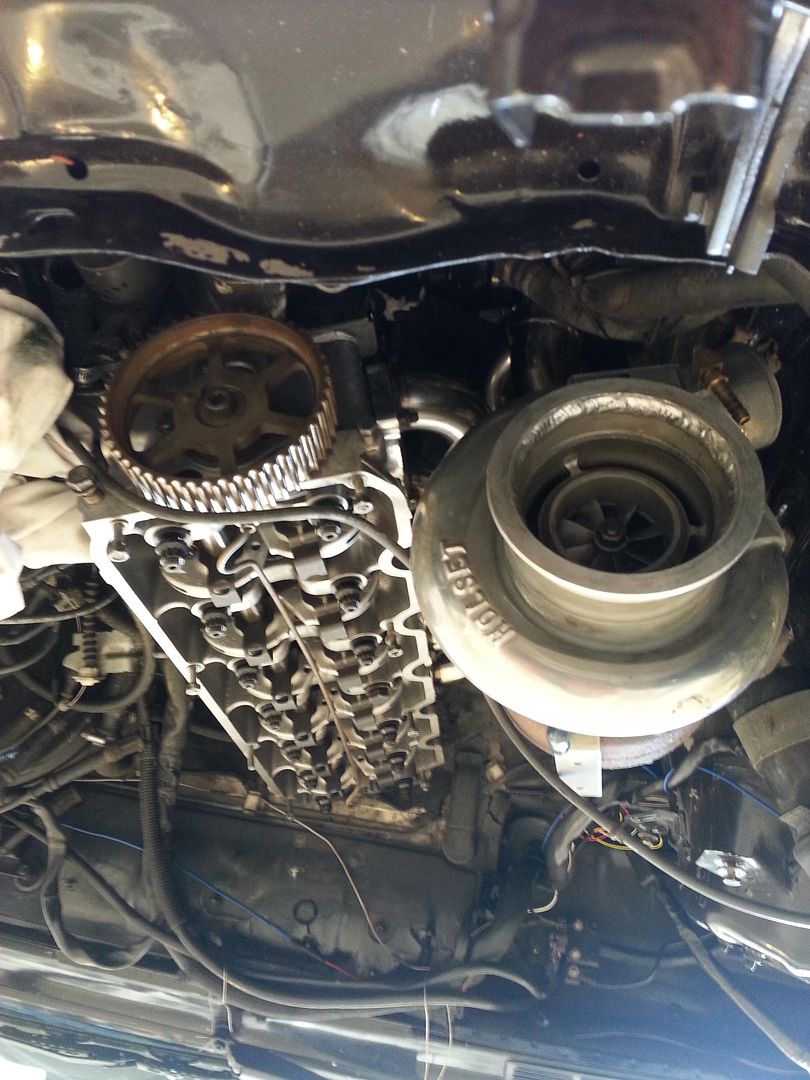
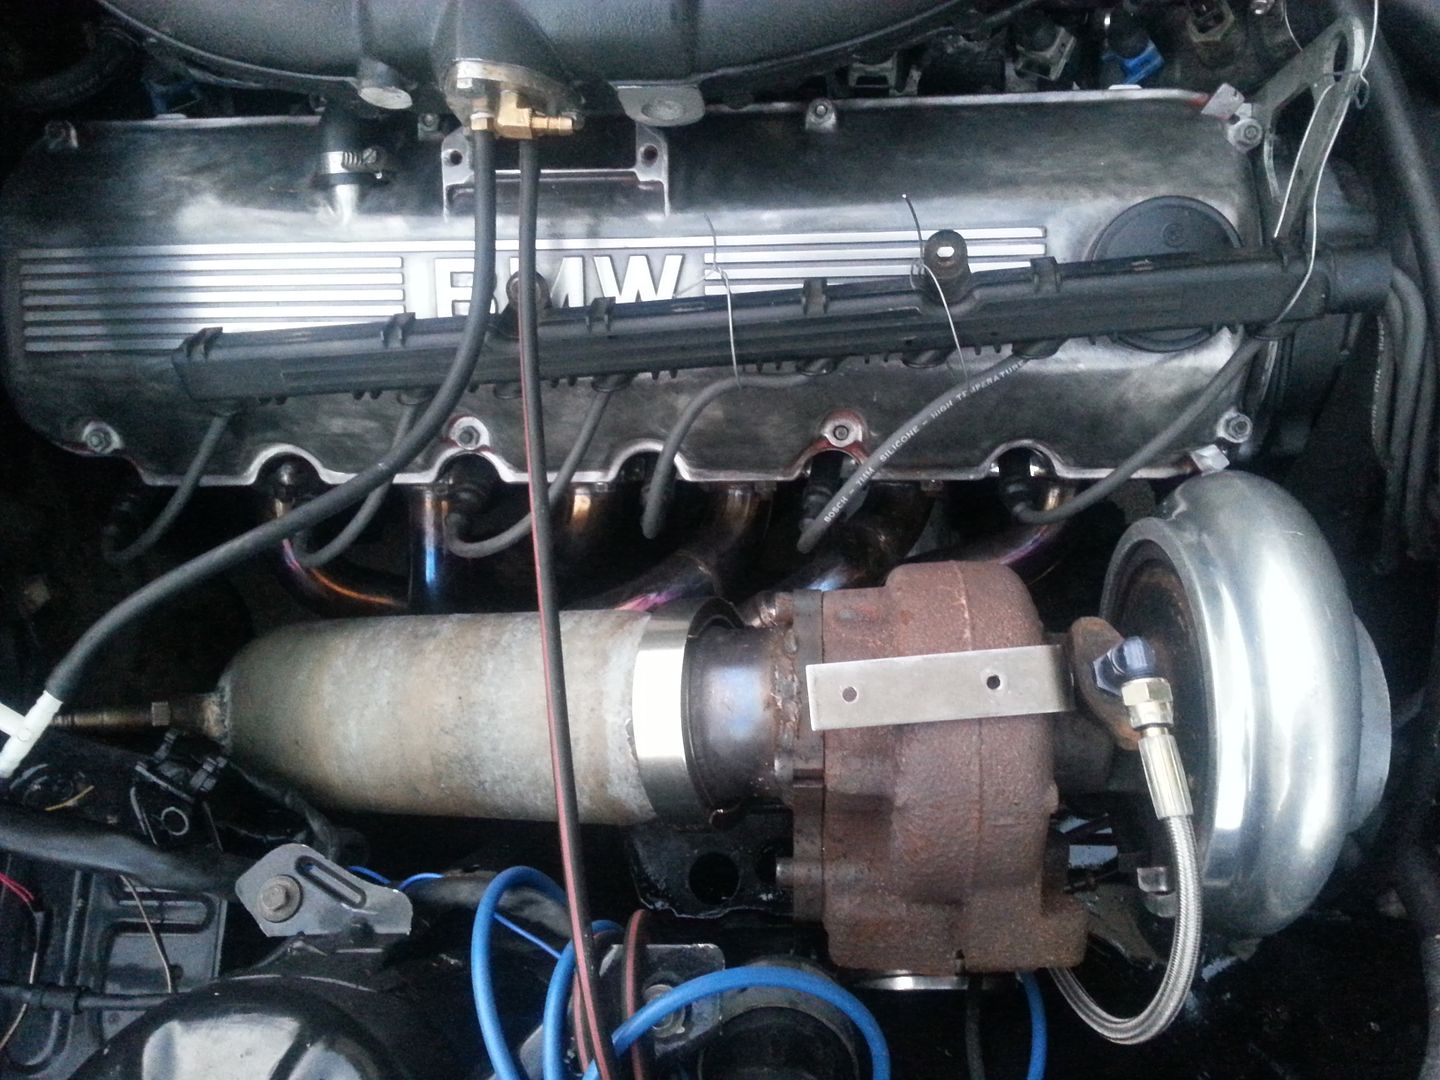
Turbo installed. The ebay manifolds fitment was terrible. I’m not sure how much of it was from me welding on it and how much is just bad design, but it seriously took over 5 hours to get it on the studs by myself. Ended taking out all but the two outermost studs, up enlarging the manifold holes, heating up the joints and prying it onto the studs with a jack handle.
It was a pain in the ass but for $150 +man hours I had an equal length split pulse manifold that cleared a stock (shortie) oil filter and kept the AC.
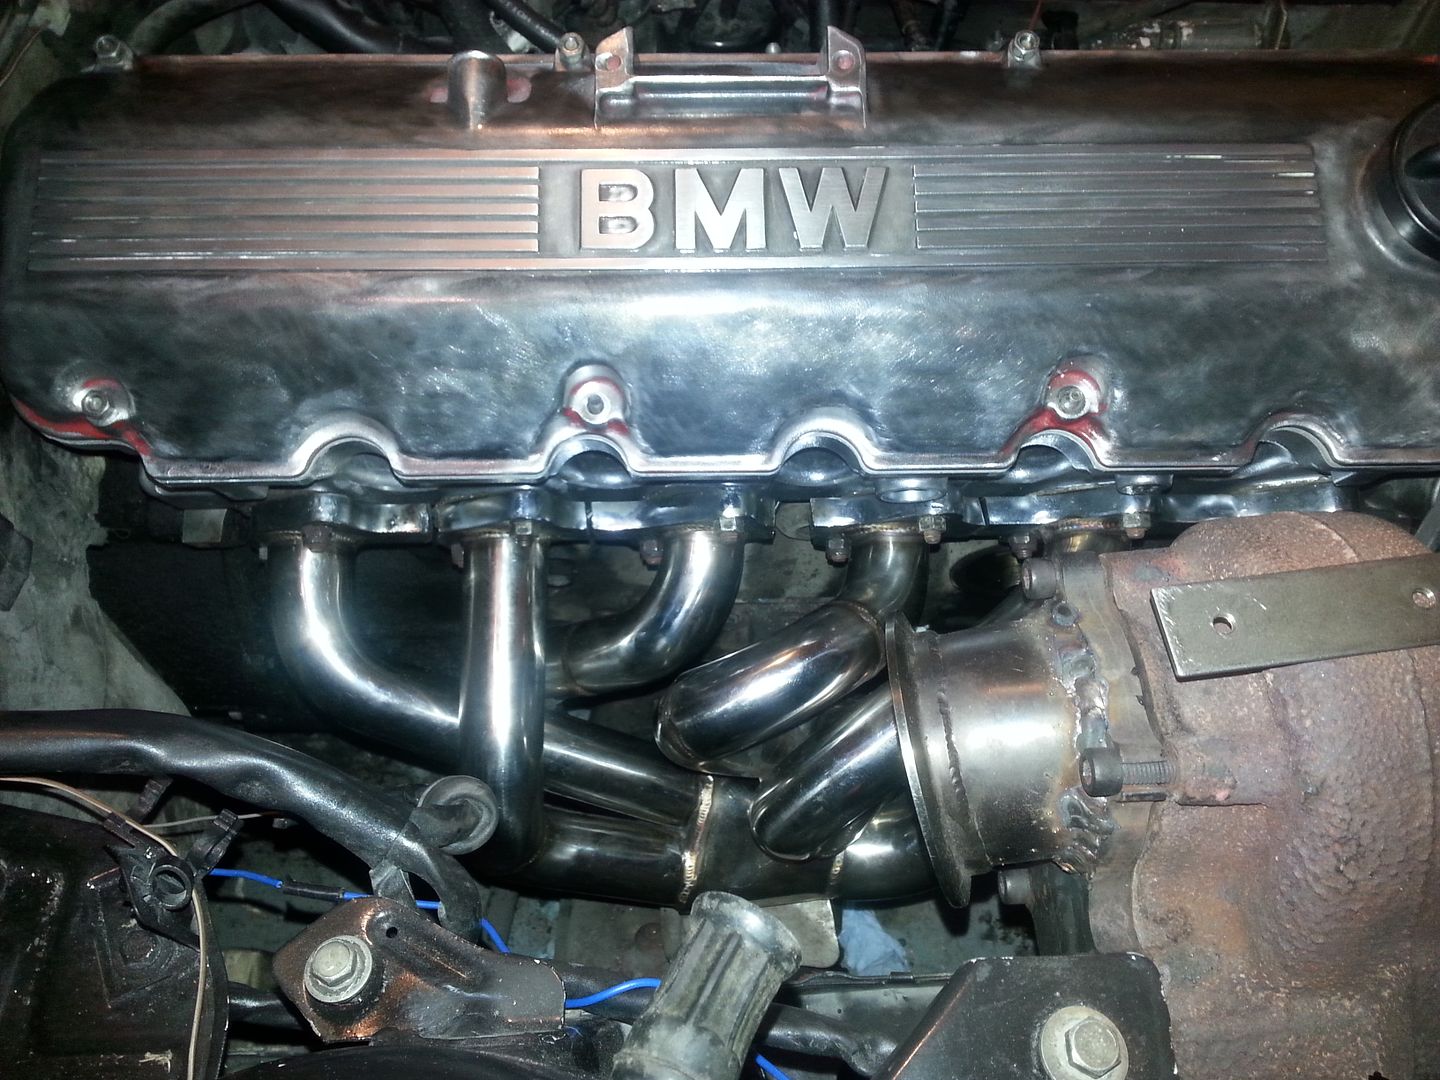
Fabbed a 4” downpipe out of some scrap aluminized steel. Tucks just barely. Still surprised I got away with an equal length split pulse manifold stock oil filter, AC, and a 4” downpipe.
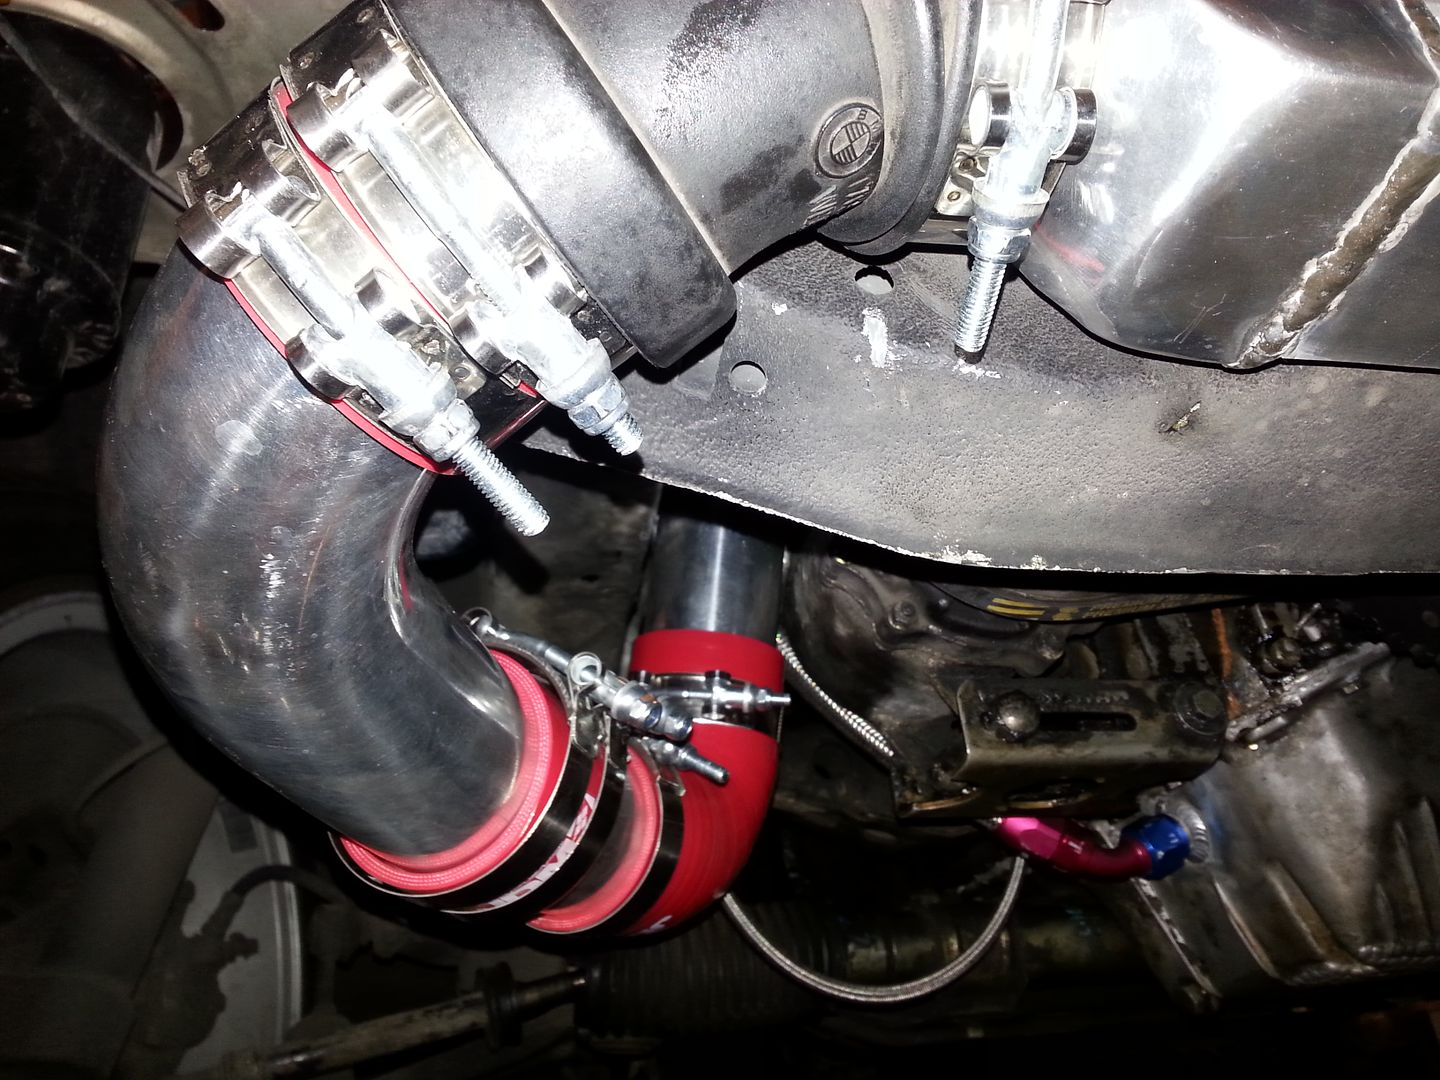
2.5” intercooler piping just slips by AC compressor.
The stock plastic ignition wire loom didnt really fit between the compressor housing and the valve cover so I made this in about 15 minutes:
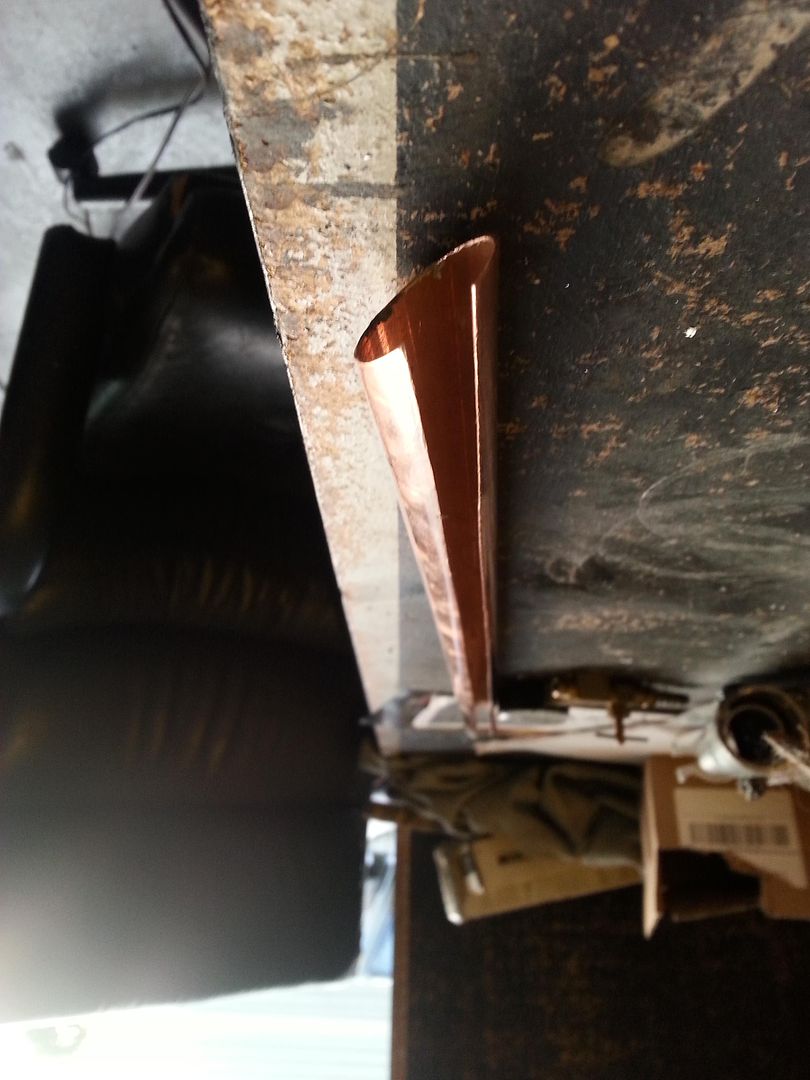
Sharpied the parallel lines with a stick and cut it out free hand with an angle grinder.
I still had the stock 325e radiator and things were getting hot so I picked up two 10’ electic spal fans and a generic Ford radiator on ebay with the largest width and depth I could run. It ran me $120 shipped, and its big
Little tip: the Fords have the inlet outlet on the same side as the b27 engines. Chevy knockoffs are on the side as the b25 engines.
I had to reweld the outlet so it cleared the power steering pump (still doesn’t quite) and weld some mounts to bolt it to the frame.
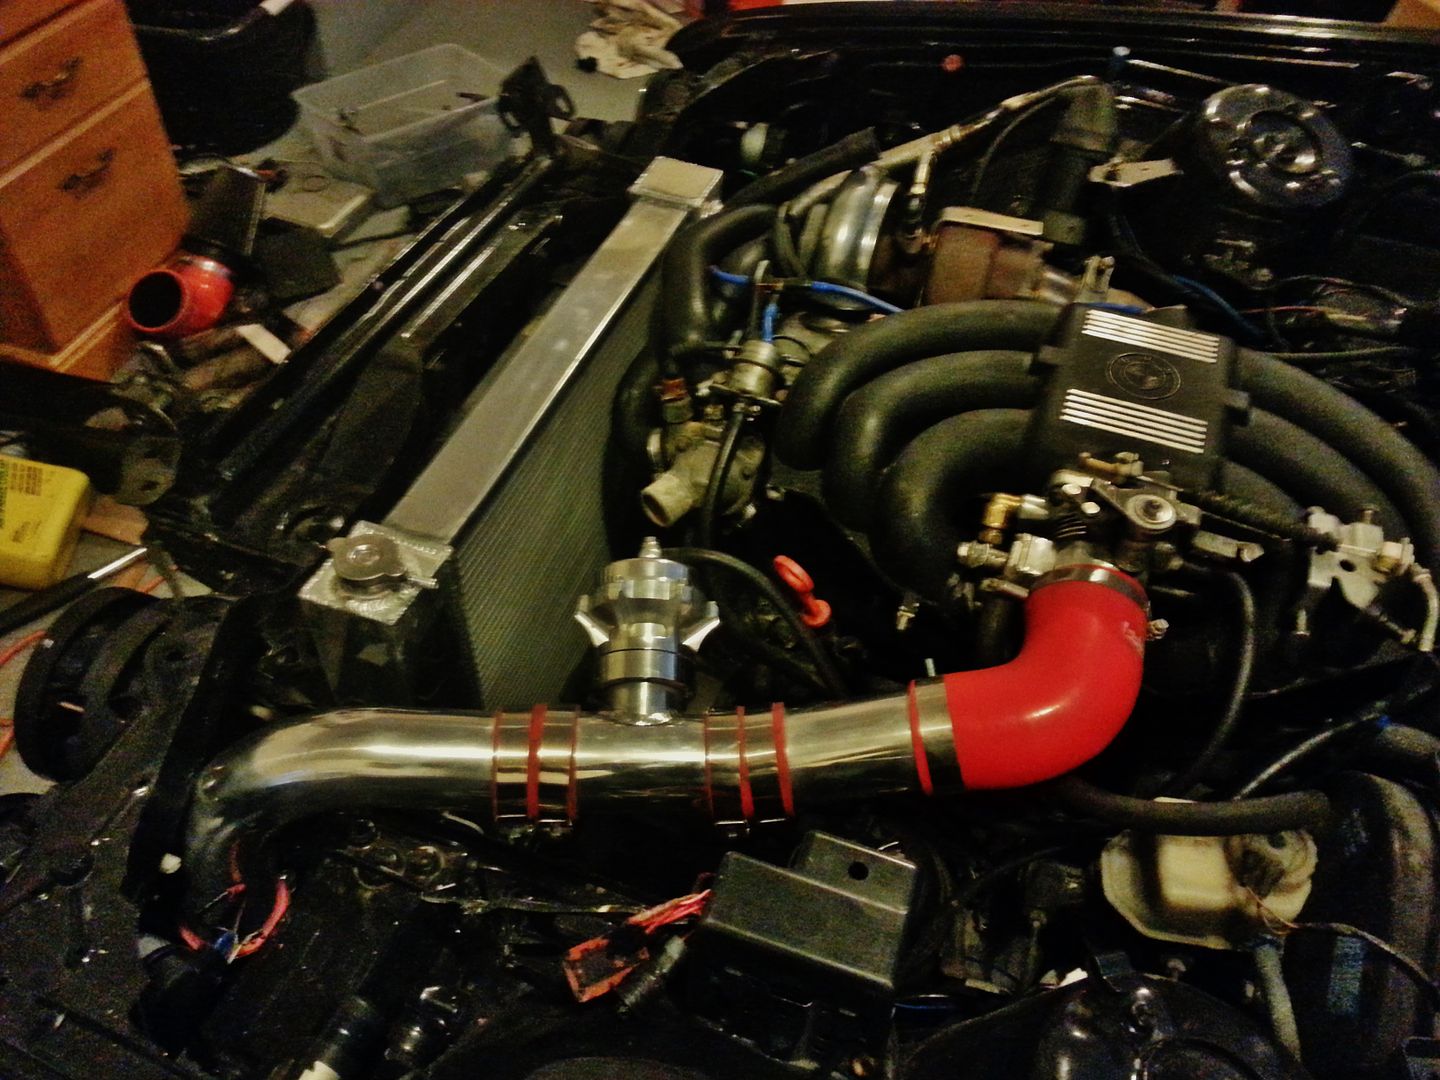
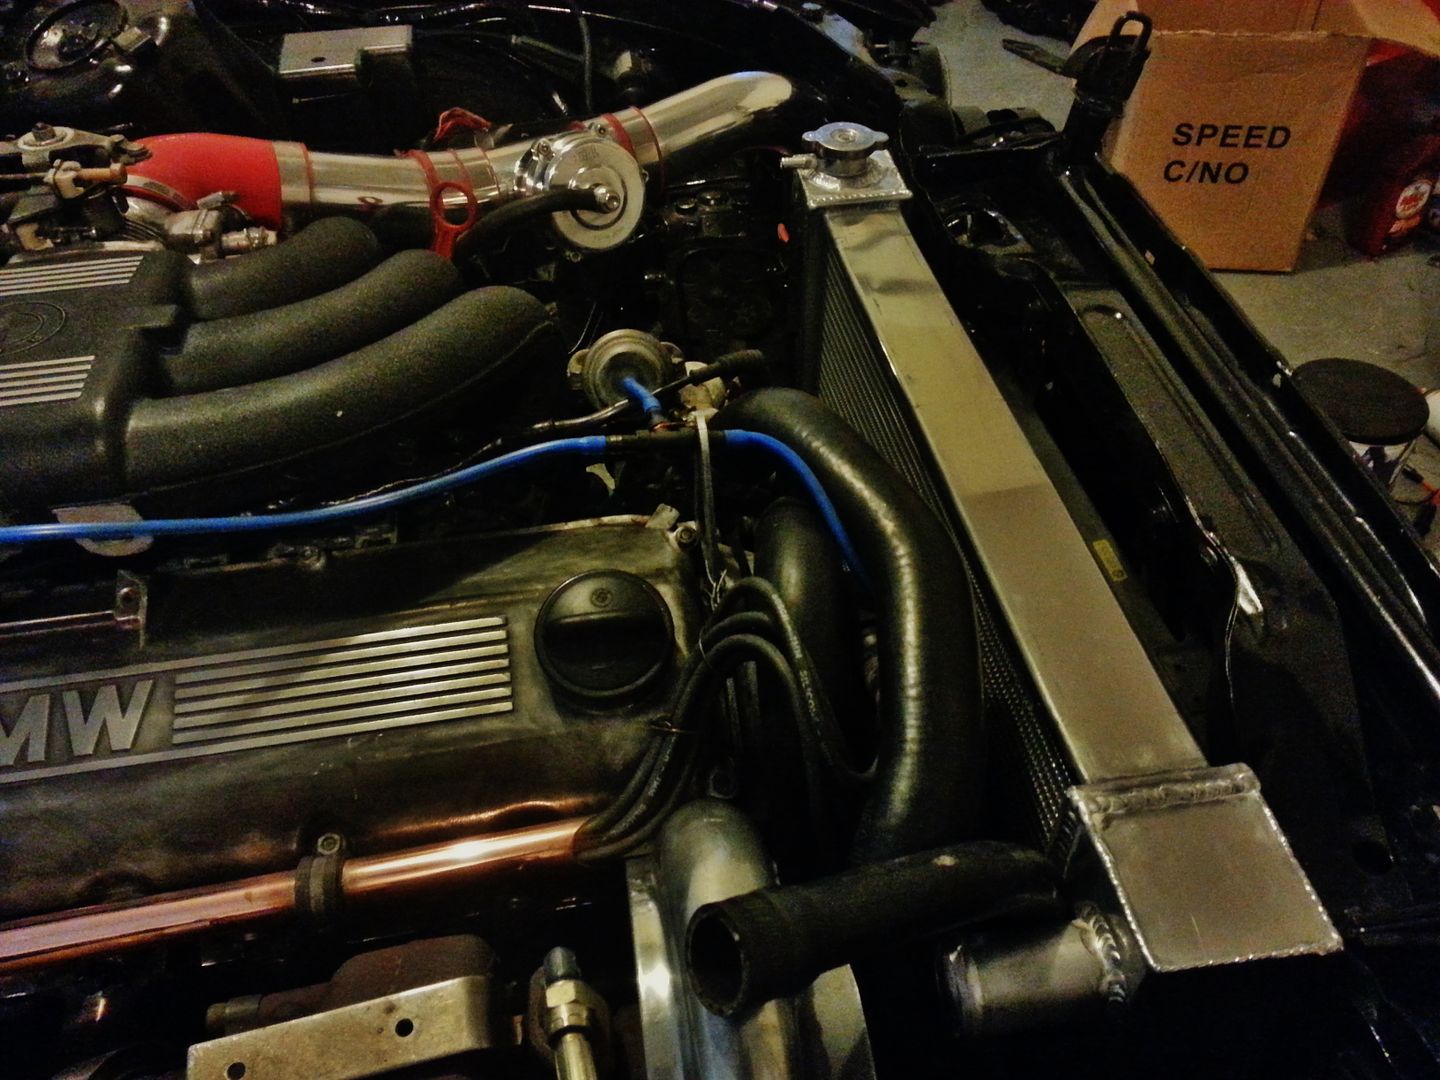
Finished routing the intercooler piping aswell. Picked up a 50mm Tial Bov for $140 on ebay, vband/charge pipe adapter was $25 on ebay as well.
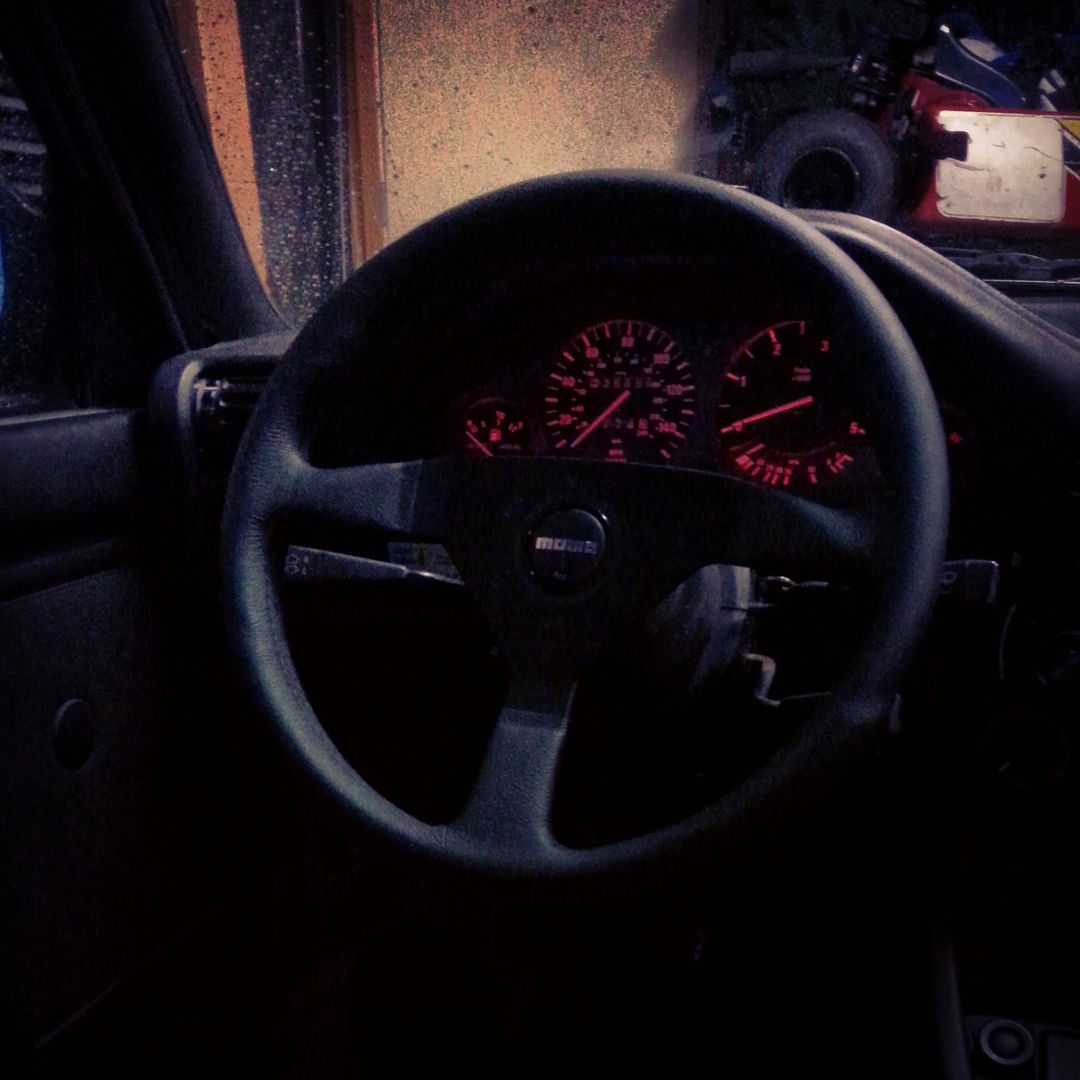
Finished all this up late August and drove it through September getting the tune dialed. The stock clutch started slipping at 8 psi but I took it up to 16 psi several times to get the tune dialed. Thoughts on the build? WAAY faster than the car was stock. When it spools, holy shit, I couldn’t wait for a clutch that held the power.
End of September, last few days before I went off to Oregon State University:
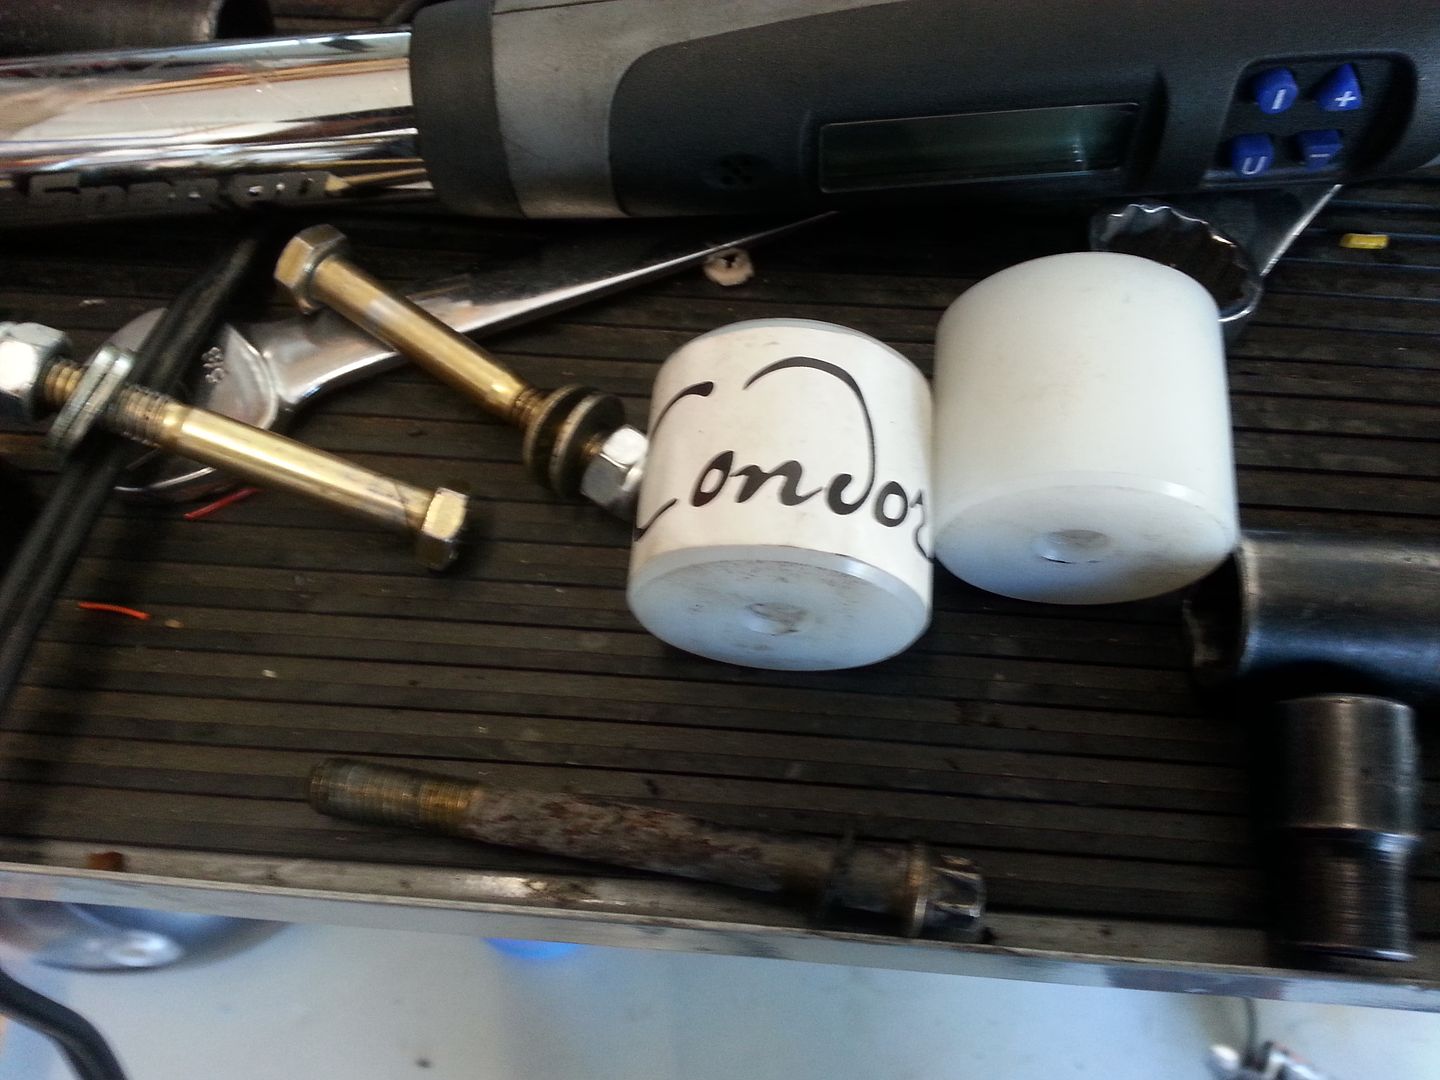
TCD stage 2, bought from a r3v member that never used it, and Conder UHMV transmission mounts so the solid shifter doesn’t move around as much. Will need to get motor mounts soon.
Well that’s where it sits right now! Took me the better part of a year, spending way too much time in the garage, but I learned sooo much about cars and mechanics, electrical systems…everything above, I honestly had no idea what I was getting into, but I’m glad I stuck with it and ‘finished’ the project. Ha. Haha.hahahaha says friends and family.
I’m not quiiiite done with the project which is why I chose to finally make a build thread.
Currently I’m working on wasted spark, Boost control, PWM idle air control, methanol injection,
And twincharging. Yeah this things going on there somehow:
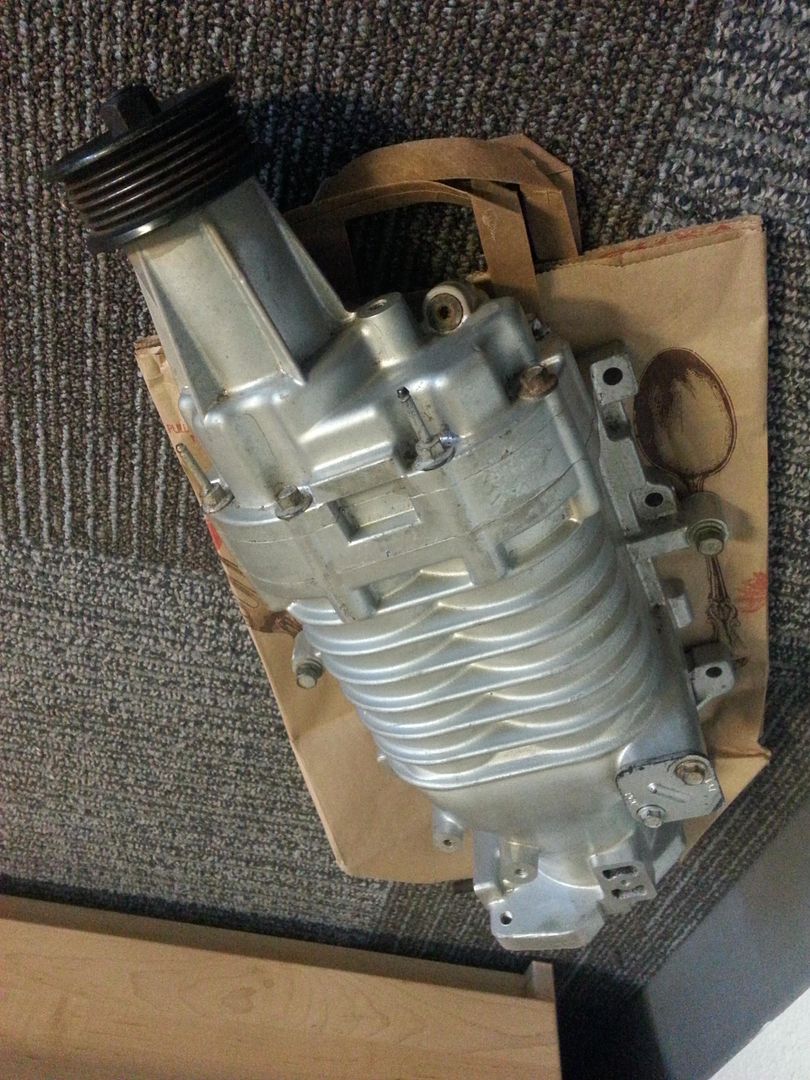
After driving the car the top end power is great. At 17 psi I’d estimate its about 350whp, but the response isn’t quite there for me. After reading Denny’s twincharged build I got excited, ended up on craigslist and had one of these for 120 bucks.
Hope you guys enjoyed reading, Ill try and keep this updated as I make progress.
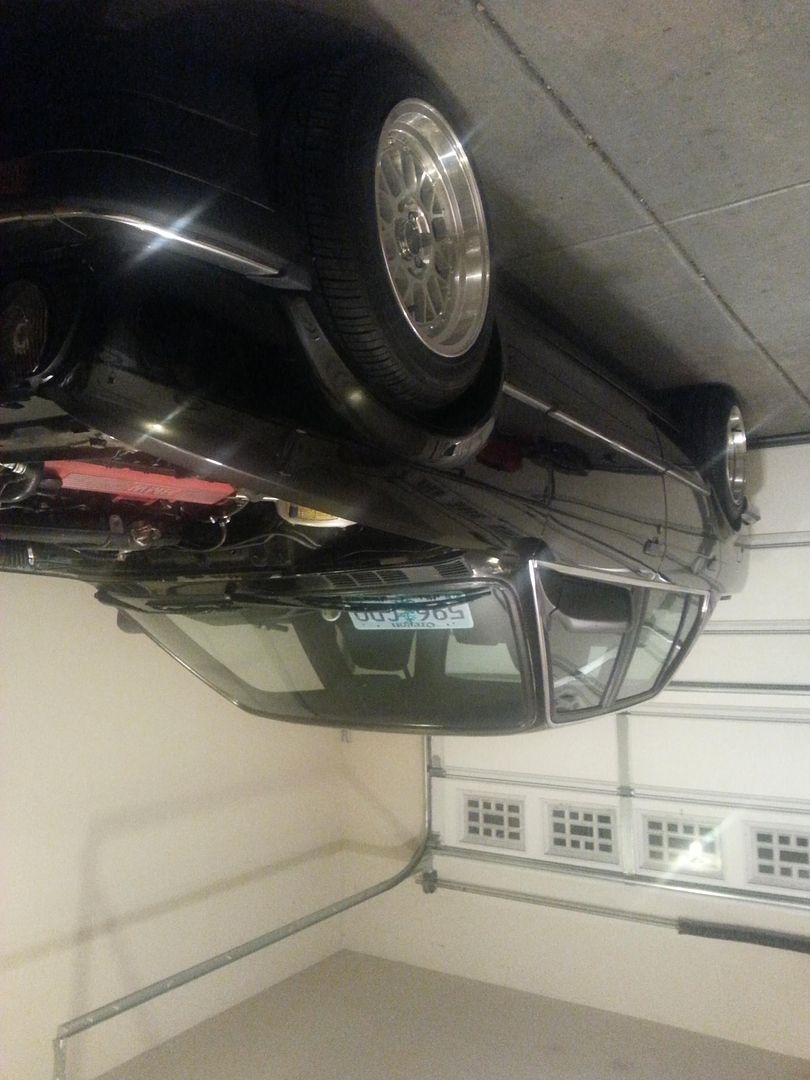
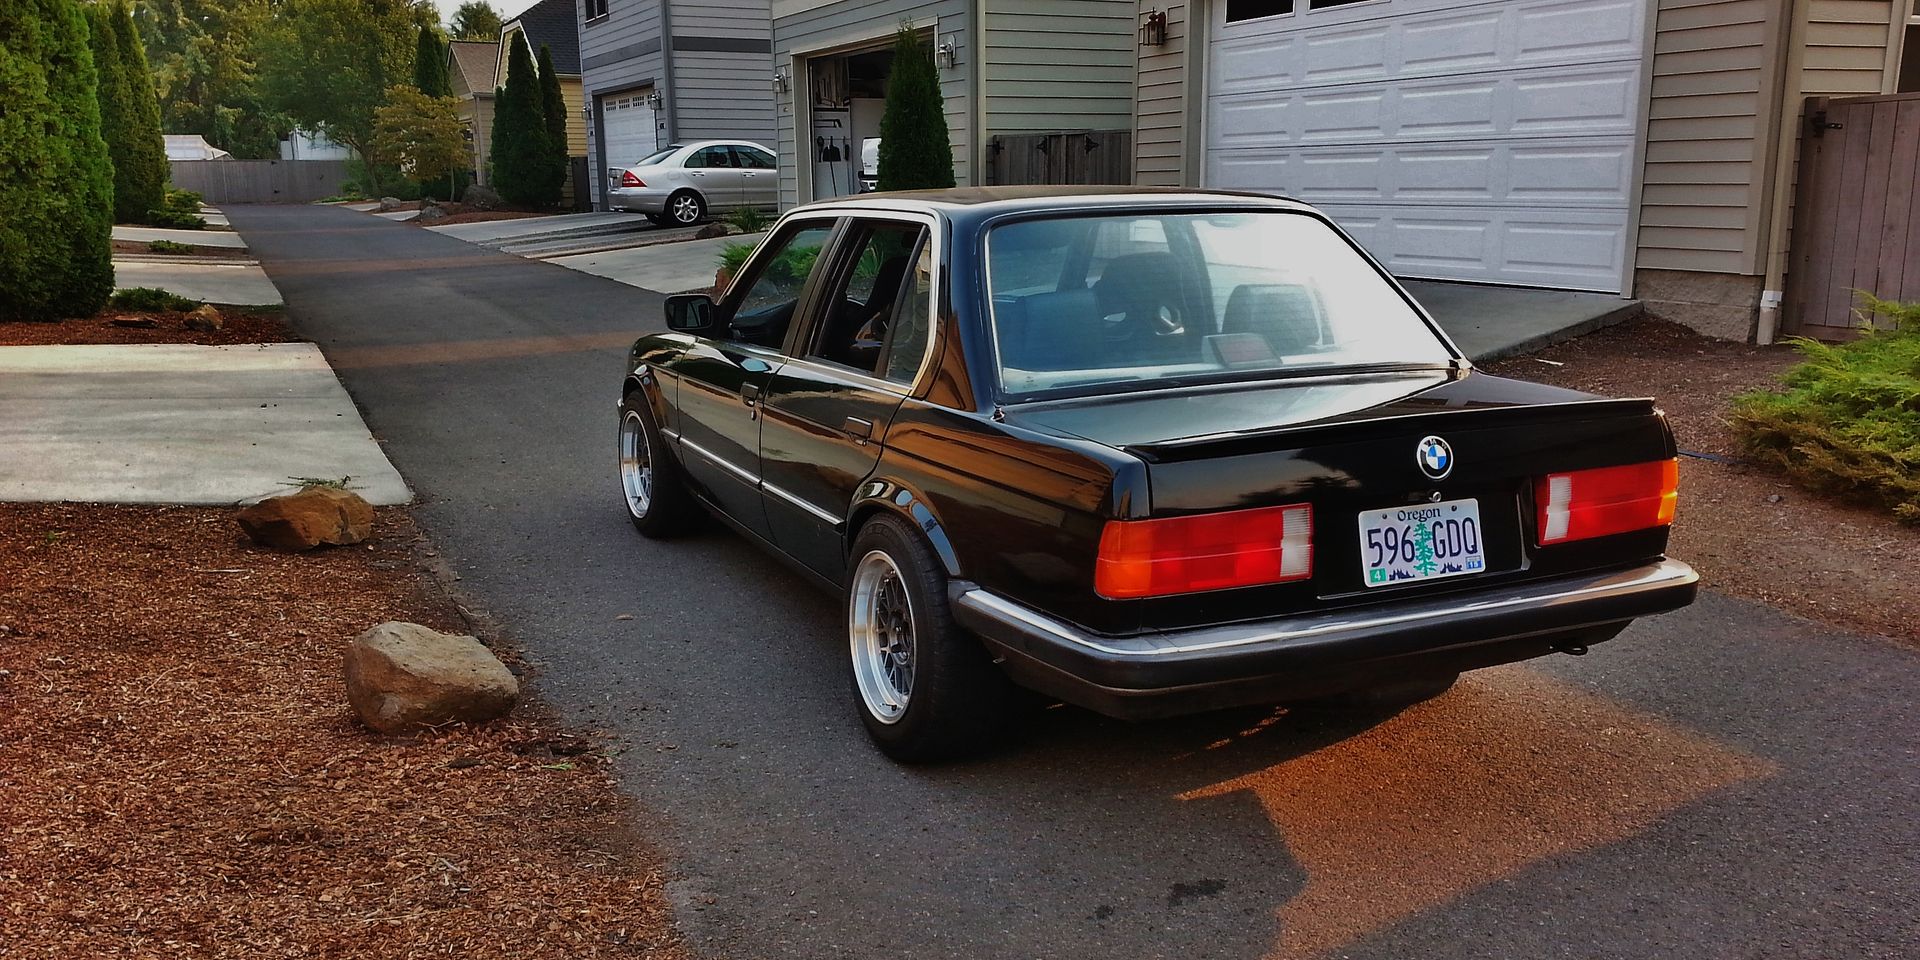
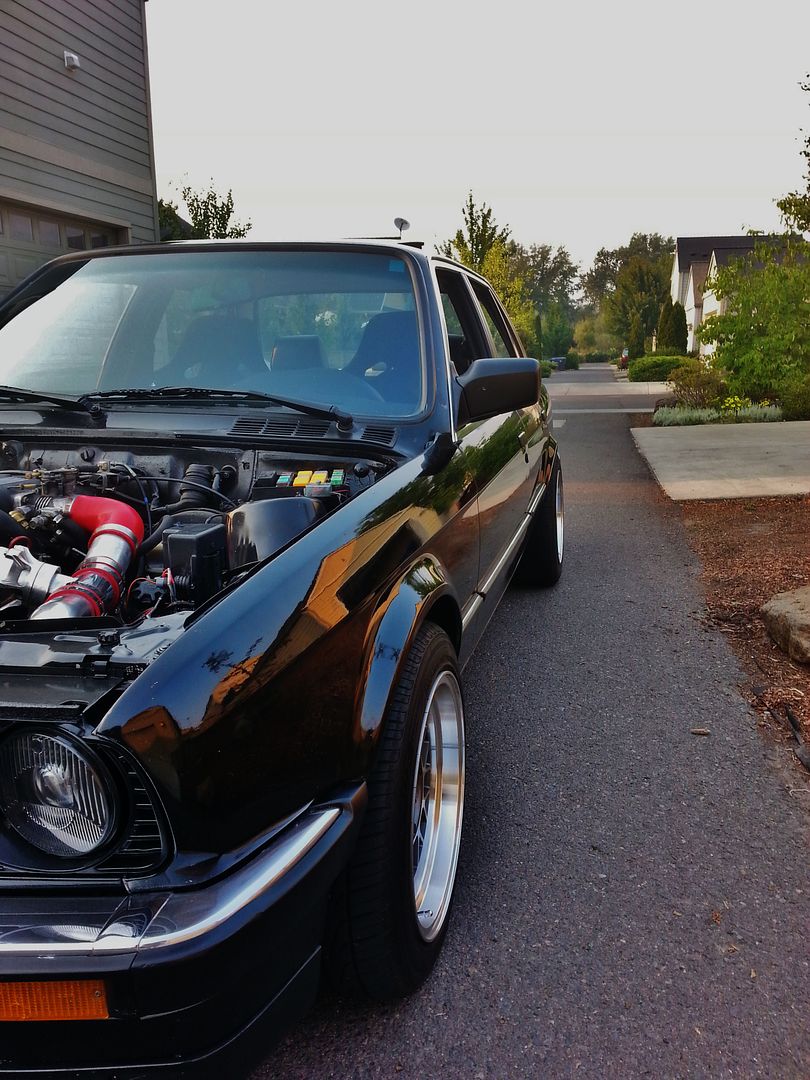
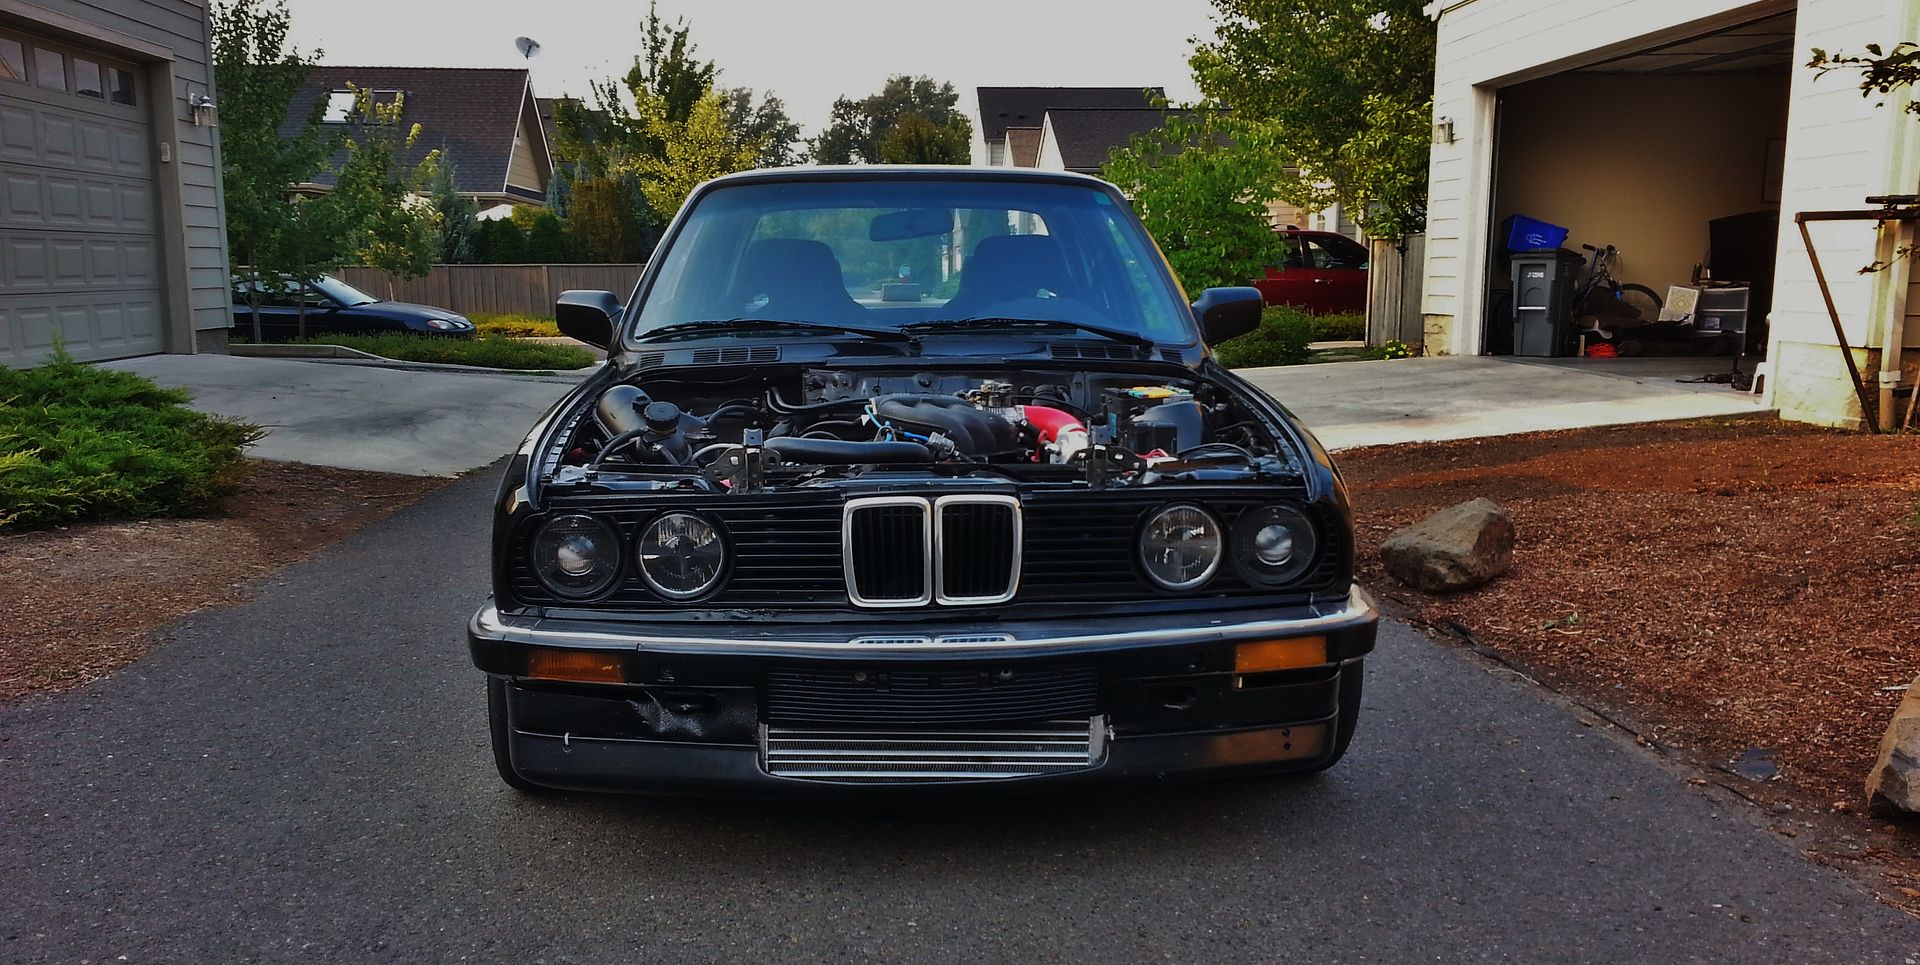
Some parting shots:
Sold my first car, '04 Ranger, 70k miles, bought from my grandpa, much too reliable, not enough project

Bought this 1986 325e last summer from a local enthusiast/r3v member who had taken care of a lot of maintenance and suspension with Bilsteins and H&R Race springs. At 225k it was still a solid runner with good compression numbers and maintenance history.

And Euro Bumpers, those sold me :)


But I had plans. First up was painting. The car had a decent respray from a few years back but the door jambs and engine bay were left bronzit, and the passenger doors sills red :-/


I also died the door cards black and picked up some fixed bucket seats from a member. Had to weld up custom mounts to the stock sliders.


I got a lot of help from a local body shop for prepping and spraying knowledge. Came out decent. I used high temp on the engine bay, clear coated it later with VHT engine paint. Also painted some BBS LM reps I picked up. Self etching primer and duplicolor wheel paint


Then the real project started. I had the intention of doing a turbo project before I got the car though I neglected to tell the seller as I didn’t want to be another one of those kids who can’t stop talking about turbocharging their ‘beamer’, and I also feared that if the PO did believe that I would succeed in strapping a turbo to his project, he would surely know it would end up shiny side down or with a blown motor and no tuning.
First up was dealing with the motronic 1.0 and remaining m20b27 parts.

This took me the better part of 6 months. It was my first car project, and I had to google EVERYTHING.
Swapped the wiring harness to the 55 pin motronic and bought a used ms1 pnp. This was supposed to be an msII unit, which is part of why the electronics took so long. The msIIextra code doesn’t load too well to the ms1 unit. Took me awhile to figure out the board and realize what I was working with.

Also installed a lc1 wideband, burnt a sensor, couldn’t figure out why, and also thought tuning FI meant setting your AFR target and letting the ecu figure out the pulse width directly off the 02 sensor. (VE table what??)
So in June 2014 I finally had the electronics mostly figured out, and was driving a stock 325e with 42 lb fuel injectors and megasquirt (Woot!) So it was time finally move forward with the turbo hardware.

Had to decide which turbo, on the right was an ebay 50trim t3/t4. Ended up going with the 12cm hx35. Picked it up on craigslist for 150 bones. I didn’t want the setup to be tooo laggy though, so I modified my ebay manifold for divided entry. Also added a divided wastegate provision.

I originally took the picture for spark plug color on my megasquirt tune, but you can see the manifold in the back divider and wastegate provision. Got to learn how to TIG weld, it was fun getting the electrode and filler rod 4” into the collector to weld..not..

Test fitting the intercooler (old pic)
My shifter was super sloppy and for some reason I thought it would be better to machine one in shop class instead of buy one???


40 or 50 hours and later I had my DTM style shifter and DSSR. This was an old version that had a heim joint welded to the early model shift carrier. Now it is bracketed to the trans tunnel.
Then the 885 head I picked up for $40, obviously had to be rebuilt.


Had severe pitting in the combustion chambers so I ported them with my dremel, smoothed the factory edges and CCed them.


While the head was off I Oringed the block with the Isky Groove-O-Matic tool. Used copper rings and Goetze head gasket.

Going back together with ARP studs, torqued to ARP’s recommendation.


I bought them off a member here, I guess they were sitting around his shop for awhile, I received 13 studs.. L still rocking one factory headbolt, need to call arp about a single stud .

Turbo installed. The ebay manifolds fitment was terrible. I’m not sure how much of it was from me welding on it and how much is just bad design, but it seriously took over 5 hours to get it on the studs by myself. Ended taking out all but the two outermost studs, up enlarging the manifold holes, heating up the joints and prying it onto the studs with a jack handle.
It was a pain in the ass but for $150 +man hours I had an equal length split pulse manifold that cleared a stock (shortie) oil filter and kept the AC.

Fabbed a 4” downpipe out of some scrap aluminized steel. Tucks just barely. Still surprised I got away with an equal length split pulse manifold stock oil filter, AC, and a 4” downpipe.


2.5” intercooler piping just slips by AC compressor.

The stock plastic ignition wire loom didnt really fit between the compressor housing and the valve cover so I made this in about 15 minutes:


Sharpied the parallel lines with a stick and cut it out free hand with an angle grinder.
I still had the stock 325e radiator and things were getting hot so I picked up two 10’ electic spal fans and a generic Ford radiator on ebay with the largest width and depth I could run. It ran me $120 shipped, and its big
Little tip: the Fords have the inlet outlet on the same side as the b27 engines. Chevy knockoffs are on the side as the b25 engines.
I had to reweld the outlet so it cleared the power steering pump (still doesn’t quite) and weld some mounts to bolt it to the frame.


Finished routing the intercooler piping aswell. Picked up a 50mm Tial Bov for $140 on ebay, vband/charge pipe adapter was $25 on ebay as well.
Finished all this up late August and drove it through September getting the tune dialed. The stock clutch started slipping at 8 psi but I took it up to 16 psi several times to get the tune dialed. Thoughts on the build? WAAY faster than the car was stock. When it spools, holy shit, I couldn’t wait for a clutch that held the power.
End of September, last few days before I went off to Oregon State University:


TCD stage 2, bought from a r3v member that never used it, and Conder UHMV transmission mounts so the solid shifter doesn’t move around as much. Will need to get motor mounts soon.
Well that’s where it sits right now! Took me the better part of a year, spending way too much time in the garage, but I learned sooo much about cars and mechanics, electrical systems…everything above, I honestly had no idea what I was getting into, but I’m glad I stuck with it and ‘finished’ the project. Ha. Haha.hahahaha says friends and family.
I’m not quiiiite done with the project which is why I chose to finally make a build thread.
Currently I’m working on wasted spark, Boost control, PWM idle air control, methanol injection,
And twincharging. Yeah this things going on there somehow:

After driving the car the top end power is great. At 17 psi I’d estimate its about 350whp, but the response isn’t quite there for me. After reading Denny’s twincharged build I got excited, ended up on craigslist and had one of these for 120 bucks.
Hope you guys enjoyed reading, Ill try and keep this updated as I make progress.
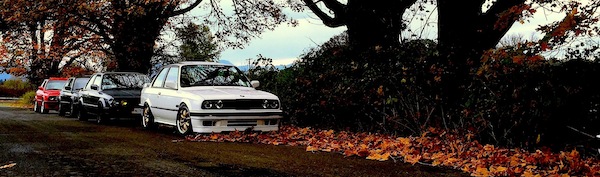
Some parting shots:


Comment