
Hey guys, this is a writeup for anyone wanting to install a newer style rear view mirror on there E30. I am doing this on a 87' 325is. The Mirror if from a 96' i think 530. I've searched everywhere and seems as if no one has done it before so i thought id share. I had some doubts but after reading up, going to the junk yard and just trying it I've had success. I know a lot of 95+ year BMW car owners hate there clown nose mirrors but i actually like the innovative design and its pretty unique to BMW. I really wanted a map light mirror but after reading its actually not all that i just settled for this. The main reason for me doing this is that i just installed a Viper 3350 alarm (very cool system for $100) I wanted to ditch the lame blue LED that it shipped with and install a red but why drill a mounting hole for the LED in some random location when you can have an oem look for $10 via junkyard and have the LED more visible to thieves and maybe even cheeper if you disconnect the rain sensor. This mirror also auto dims at night which is pretty cool too.
BE SURE to ether rip it off the car if its at the junk yard or purchase one with the mount included because you will need this to attach to your window instead of the old location. (Please do not RIP this off a friends car or your own because you will most likely crack/ruin the windshield to some degree.) These can properly be taken off by twisting the mirror arm: check out this video for further instructions: https://www.youtube.com/watch?v=u7U67OCkmUQ If the mirror has a rain sensor included, its a big module that is attached to the inside of the mirror, ditch it unless you want to try and wire it up to your wipers, (i may try this some time)
After you do that its a pretty simple setup. Below i will specify the wires.
Pinout - Color - Description
1. Blue/Yellow ---- + Reverse Signal
3. Green/Yellow ---- +12 Ignition Wire (Power for Auto Dimming)
8. Red/Black ---- +12v Alarm LED (Clown Nose)
9. Gray/Black ---- Ground Alarm LED (Clown Nose)
10. Brown/Black ---- Ground (Auto Dimming)
This is an extremely simple hack, no extra modules needed from the newer car or anything it just works.
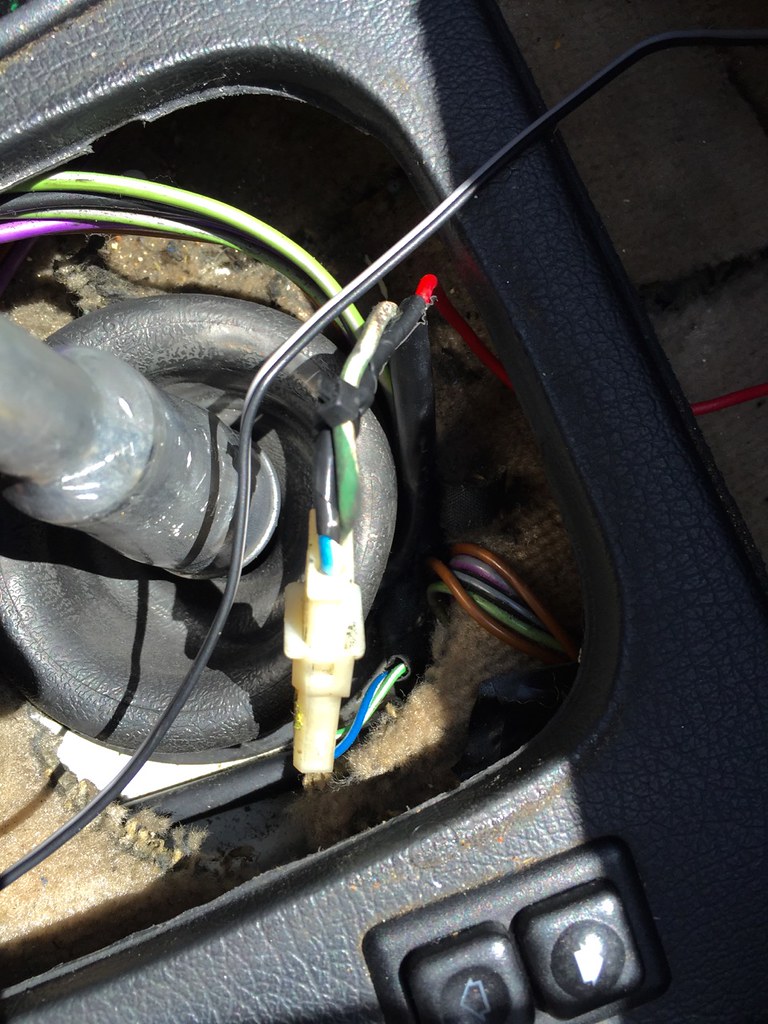
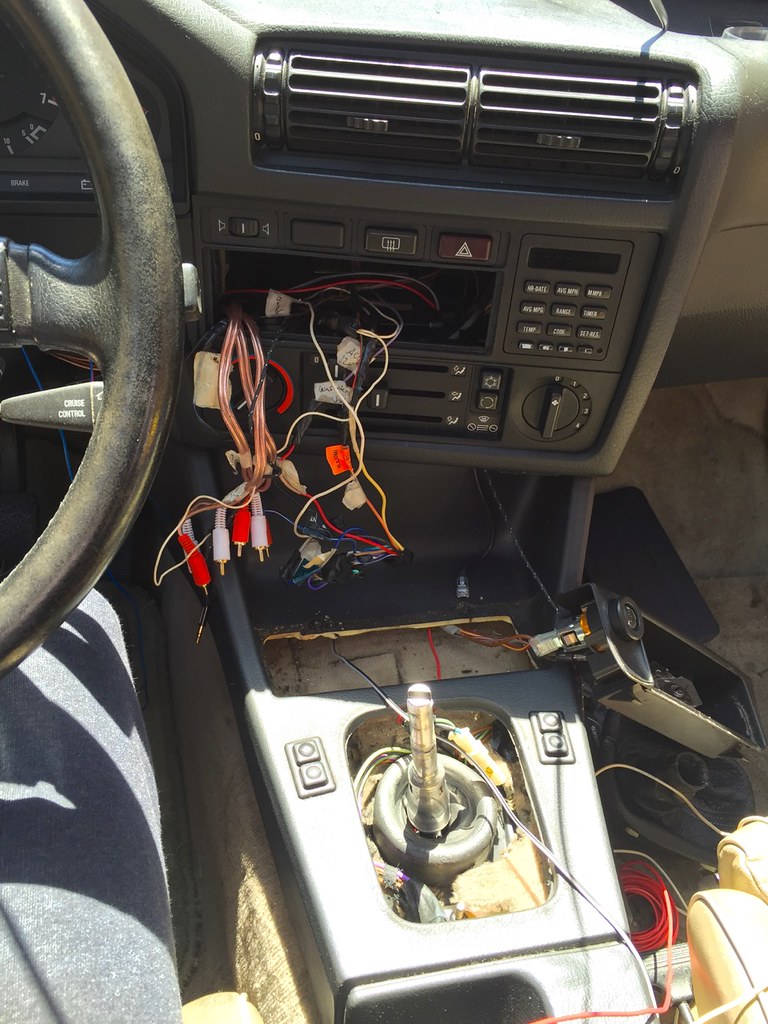
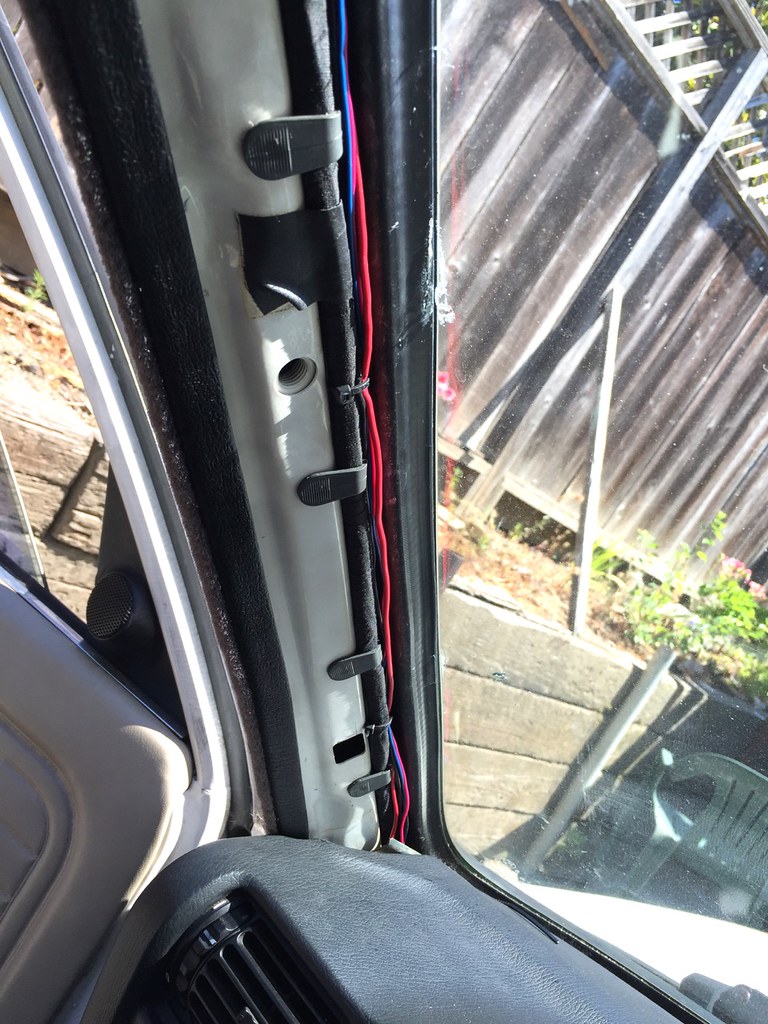
pinout 1: The Reverse signal is for the auto dimming to turn off being you want to be able to see through your mirror while reversing. Remove your shifter knob and the boot surrounding it. Find the blue/white and green/white cable in that area, your blue/white cable is your reverse signal wire, connect blue/yellow to it. This is probably the most difficult one to route a wire too and will take some extra wire to do so but sure to have a good amount on hand.
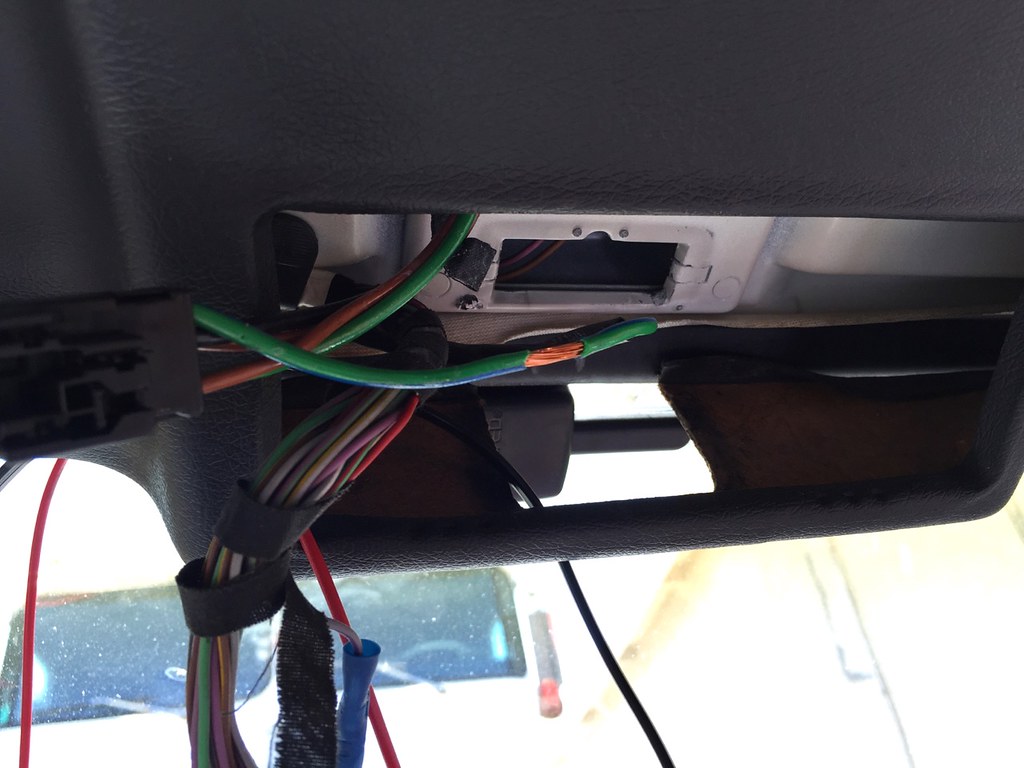
Pinout 3: +12 Ignition Wire you can get your power from your sunroof switch (wire green/blue) , if you don't have an electric sun roof you best bet is to run a cable down to your ignition wire directly, Its the green wire coming from under the ignition itself. (Please be sure to connect Pinout 3 to a ignition controlled wire and not a constant or accessory because this will bring an unwanted drain on your battery, you only want this to be active while driving not while chilling in the car).
Pintout 8/9: If you have a security system cut off the led from it and simply go power to to red/black and ground to gray/black.
Pinout 10: You can probably ground to many different locations, i went with the visor bracket. There are 2 screws, pick one, sand down the area around the hole and ground there. I soldered all my connections together and covered them with electrical tape.

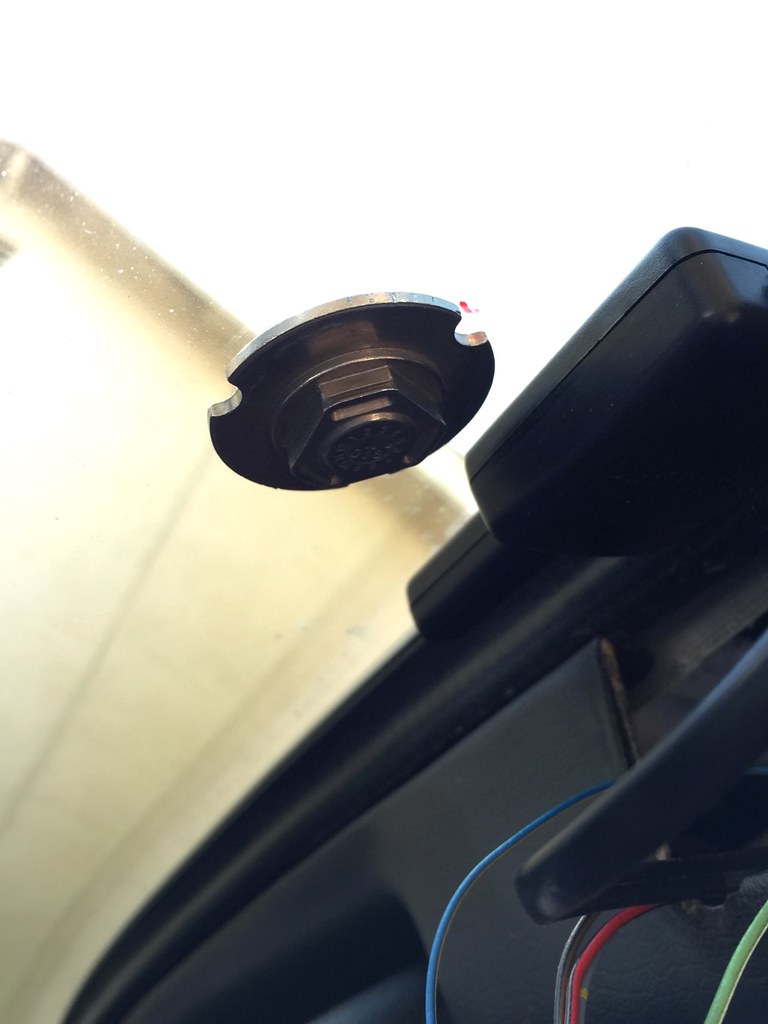
Next you will have to get some windshield mirror adhesive from your local auto store and mount your mirror mount to the windshield. If you already have the mount attached to the mirror to get it off use vise grips and turn, learn how it works it will be useful for reattaching being you don't wan to be learning while your mounting it for real. You want to mount it with one of the 3 notches pointing directly upward (this is very important, if you mount it any other way it will be off and if the glue dried you will be basically screwed). Please make sure you mark the center of your windshield and have it up high enough but not too high because you need to be able to attach your mirror, if its too high your mirror will hit the check panel while attaching making it impossible to do so. It is very important that you read and follow the adhesive instructions but i recommend letting it sit far longer then recommended. Mine said 15mins and it fell off as i was trying to mount, I let mine sit for 12hrs and had much better results so if you have the time wait it out some.
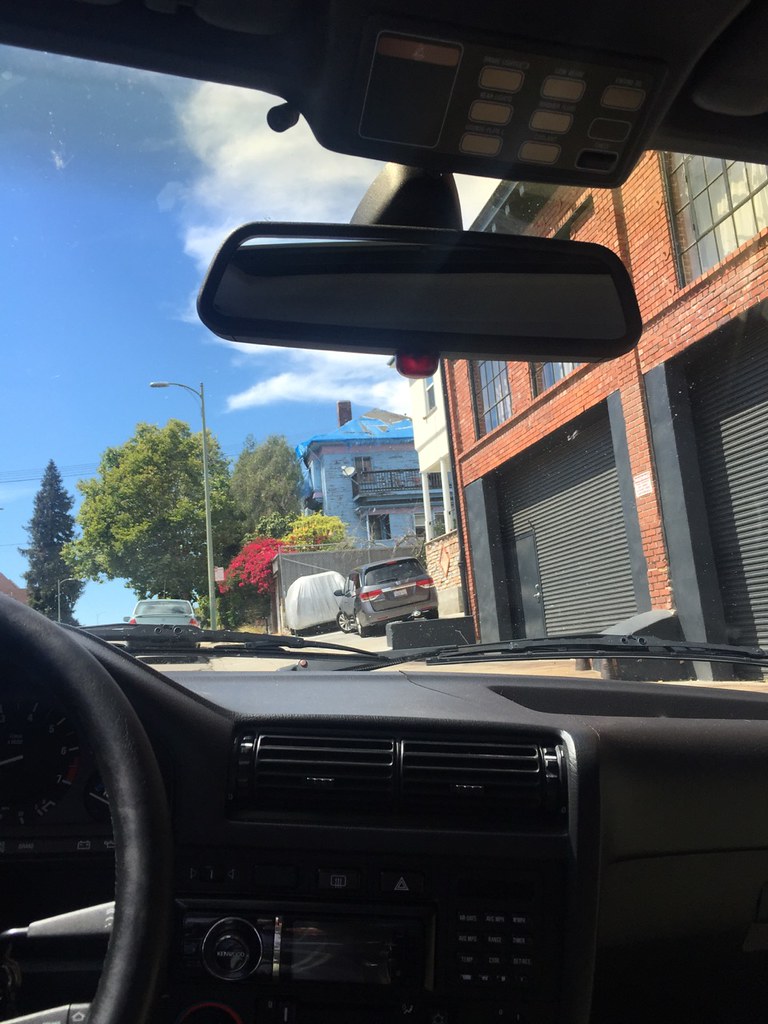
Ive tested the setup completely and it works perfectly. Im very happy with my instillation and everything with the mirror works just like it does in my dads 2001 X5 which has a similar. Im very pleased with this mod it looks very oem even in the 25+ year old car, I'm really big on aesthetics, Im a licensed technician with an electrical ASE but my full time is film/photo/graphic production so matching everything to the style of this vehicle. I hope you guys like it as well!
UPDATE
-------------------
The last matter to deal with is if your looking at the mirror from the outside there is most likely a hole from the mirror cover that comes with these new style mirrors, they don't come with a back they are just exposed. It not a huge issue but it does throw the job off a bit. I plan on tinting the area like the newer cars or just covering it up some how with a plastic cover.
BE SURE to ether rip it off the car if its at the junk yard or purchase one with the mount included because you will need this to attach to your window instead of the old location. (Please do not RIP this off a friends car or your own because you will most likely crack/ruin the windshield to some degree.) These can properly be taken off by twisting the mirror arm: check out this video for further instructions: https://www.youtube.com/watch?v=u7U67OCkmUQ If the mirror has a rain sensor included, its a big module that is attached to the inside of the mirror, ditch it unless you want to try and wire it up to your wipers, (i may try this some time)
After you do that its a pretty simple setup. Below i will specify the wires.
Pinout - Color - Description
1. Blue/Yellow ---- + Reverse Signal
3. Green/Yellow ---- +12 Ignition Wire (Power for Auto Dimming)
8. Red/Black ---- +12v Alarm LED (Clown Nose)
9. Gray/Black ---- Ground Alarm LED (Clown Nose)
10. Brown/Black ---- Ground (Auto Dimming)
This is an extremely simple hack, no extra modules needed from the newer car or anything it just works.
pinout 1: The Reverse signal is for the auto dimming to turn off being you want to be able to see through your mirror while reversing. Remove your shifter knob and the boot surrounding it. Find the blue/white and green/white cable in that area, your blue/white cable is your reverse signal wire, connect blue/yellow to it. This is probably the most difficult one to route a wire too and will take some extra wire to do so but sure to have a good amount on hand.
Pinout 3: +12 Ignition Wire you can get your power from your sunroof switch (wire green/blue) , if you don't have an electric sun roof you best bet is to run a cable down to your ignition wire directly, Its the green wire coming from under the ignition itself. (Please be sure to connect Pinout 3 to a ignition controlled wire and not a constant or accessory because this will bring an unwanted drain on your battery, you only want this to be active while driving not while chilling in the car).
Pintout 8/9: If you have a security system cut off the led from it and simply go power to to red/black and ground to gray/black.
Pinout 10: You can probably ground to many different locations, i went with the visor bracket. There are 2 screws, pick one, sand down the area around the hole and ground there. I soldered all my connections together and covered them with electrical tape.
Next you will have to get some windshield mirror adhesive from your local auto store and mount your mirror mount to the windshield. If you already have the mount attached to the mirror to get it off use vise grips and turn, learn how it works it will be useful for reattaching being you don't wan to be learning while your mounting it for real. You want to mount it with one of the 3 notches pointing directly upward (this is very important, if you mount it any other way it will be off and if the glue dried you will be basically screwed). Please make sure you mark the center of your windshield and have it up high enough but not too high because you need to be able to attach your mirror, if its too high your mirror will hit the check panel while attaching making it impossible to do so. It is very important that you read and follow the adhesive instructions but i recommend letting it sit far longer then recommended. Mine said 15mins and it fell off as i was trying to mount, I let mine sit for 12hrs and had much better results so if you have the time wait it out some.
Ive tested the setup completely and it works perfectly. Im very happy with my instillation and everything with the mirror works just like it does in my dads 2001 X5 which has a similar. Im very pleased with this mod it looks very oem even in the 25+ year old car, I'm really big on aesthetics, Im a licensed technician with an electrical ASE but my full time is film/photo/graphic production so matching everything to the style of this vehicle. I hope you guys like it as well!
UPDATE
-------------------
The last matter to deal with is if your looking at the mirror from the outside there is most likely a hole from the mirror cover that comes with these new style mirrors, they don't come with a back they are just exposed. It not a huge issue but it does throw the job off a bit. I plan on tinting the area like the newer cars or just covering it up some how with a plastic cover.


Comment