

I was dissapointed to not find a rear TAB DIY on here so I decided to take some pics and do one myself. This is basically as described from the Bently. I would suggest reading all the way through this before attempting the job, just because you might want to do the steps a bit differently.
1. Jack up rear of car on jack stands, remove wheels

2. Remove brake calipers and caliper brackets, rotor, and emergency brake parts, essentially gutting the brakes.

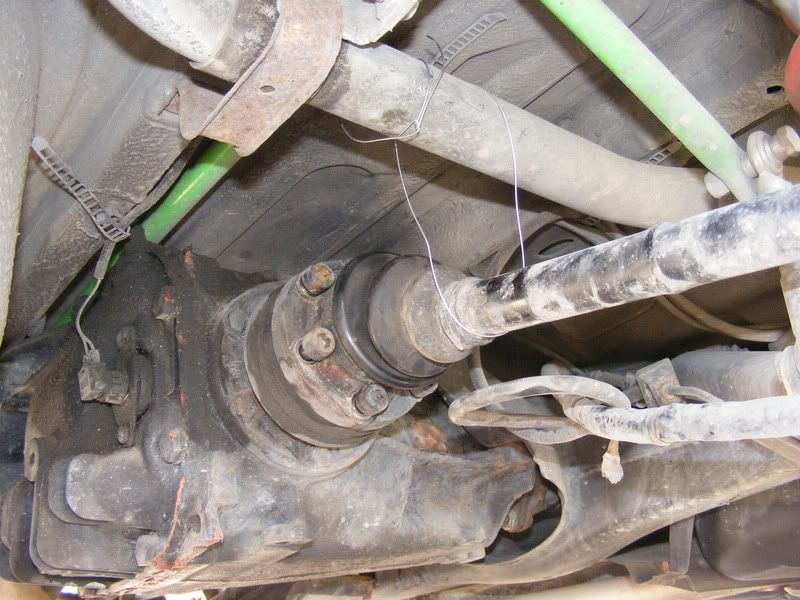
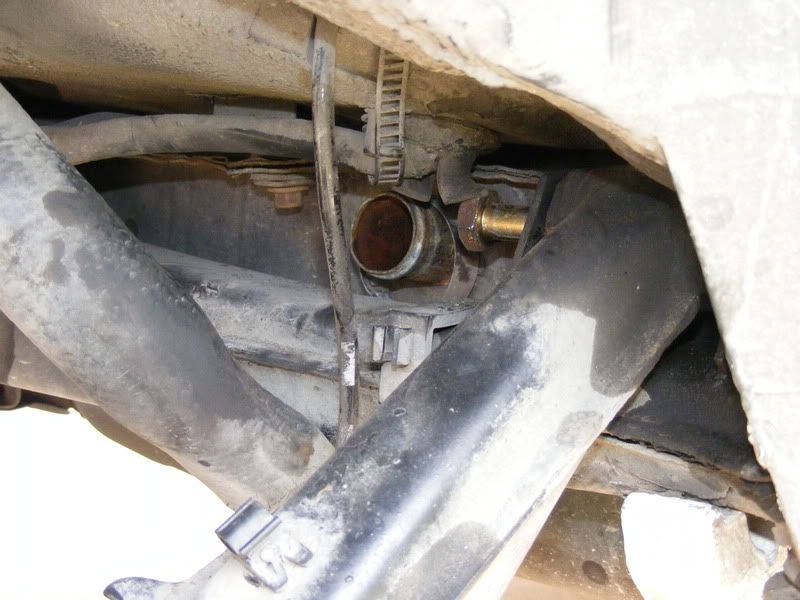
3. Next its time to remove the half shaft. Undo the 6 socket cap screws that mount the inner CV joint to the diff. Lower it a bit and then wire it up so you dont put the CV's at a funny angle. DONT leave it in line with the diff, it needs to hang lower so it can move towards the middle of the car without hitting anything when you go to press the outside off (ask me how I know). Using a screwdriver and a hammer knock and pry the axle nut lockplate off. Mine was pretty rust and took some time but stick with it and it'll come off. I then used an impact with a 30MM socket to loosen the axlenut. If you dont have an impact you'll want to bust this nut loose before you raise the car since it's on there pretty tight. Press out the splined half shaft from the hub. I used a 2 jaw puller and it came out pretty easy. Now the half shaft is free to remove.

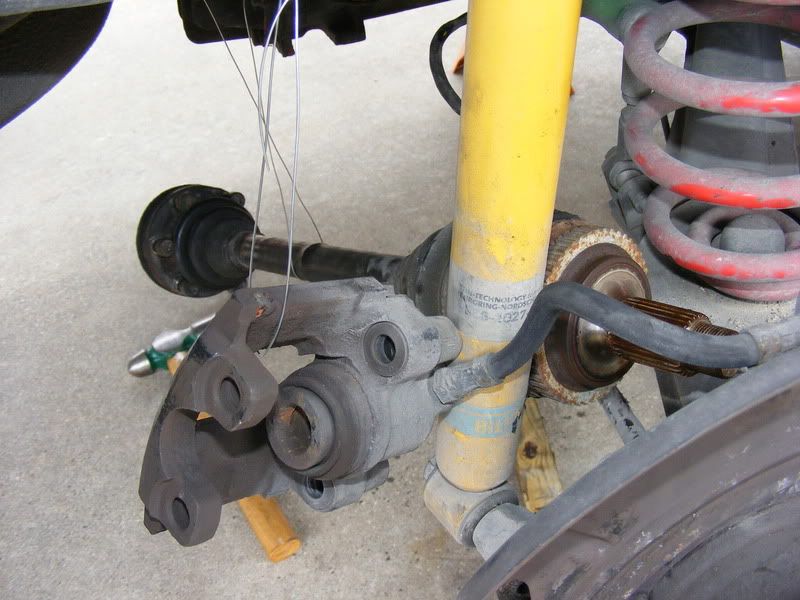
4. Disconnect ABS sensor, shock, swaybar, brake lines between the body/TA and TA/caliper, and parking brake cable. My parking brake cable was sized pretty bad and took some work to break loose, but it just pulls out. Remove the spring.
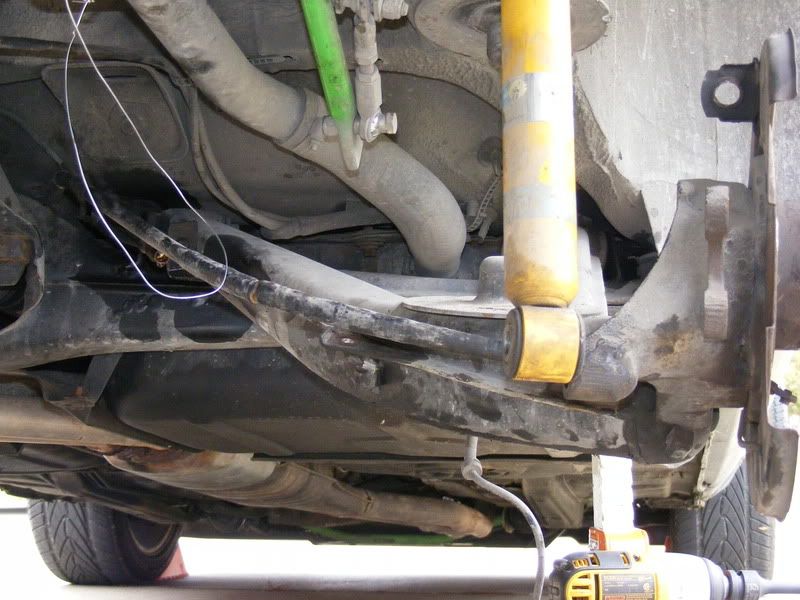
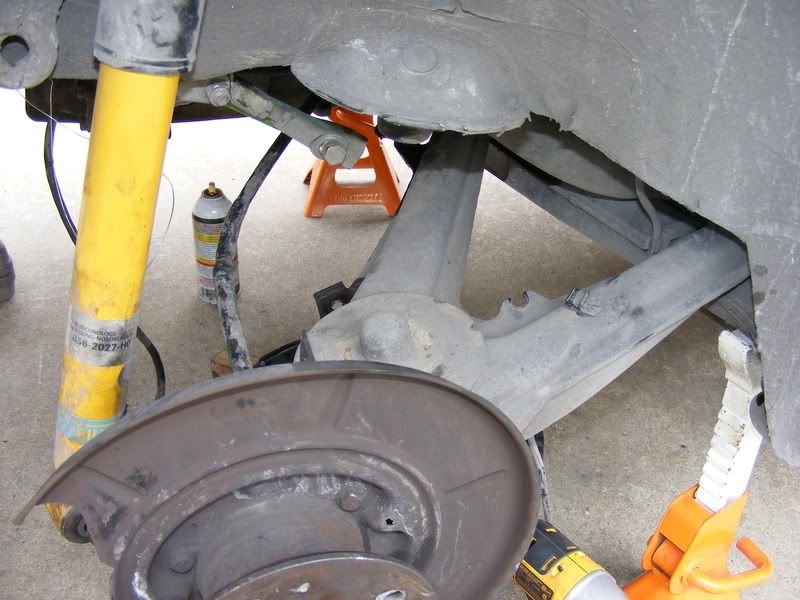
5. At this point basically everything should be removed from the trailing arm, and the only thing holding it should be the mounting bolts. To get the passenger side outer bolt off you'll need to disconnect the fuel filler hose at the gas tank. Remove the other bolt and the arm should come loose.
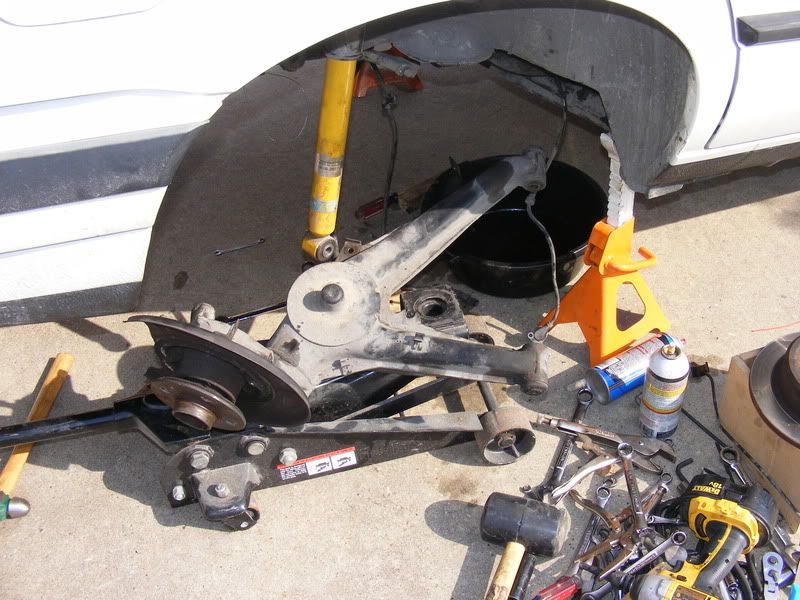
6. When you get the TA on a bench there are a multitude of ways to remove the bushings. There are tools you can buy, you can make a home made one with hardware store parts, etc... I was doing this late so I found an easy way to do it using a 6" HF C-clamp and a 36mm socket. Just tighten good and tight, wait a minute, come back and it'll be loose, retighten, and keep doing this until it comes out, only takes a few minutes this way.

Once you have new bushings in (I bought Powerflex and they fit great) installation is the reverse of removal. If you have any other stuff you wanted to do on the rear end this is a great chance to do it. I did alot; rebuilt and painted both calipers, new inner CV boots, new spring pads (the old were missing), new emergency brakes (were completely missing on the passenger side:-x), and new SS brake lines. Some things I also considered but didn't need done, but you might want to think about are rear wheel bearings, shocks, swaybar, end links, etc... I used lock-tite 242 and nickel anti-sieze as required on fasteners and parts. I also used disk brake lube on the caliper slide bolts.

Here is a list of torques and tools
Torques (ft-lbs):
- caliper bracket to TA: 44-49
- caliper to caliper bracket (slide bolts): 22-25
- lug nuts: 74
- shock to TA: 52-63
- swaybar to TA: 16-17
- inner CV socket head cap screws to diff: 42-46
- axle nut: 144-155
Tools
- 2 or 3 jaw puller
- 36mm socket and 6" c-clamp (for bushing removal)
- 6, 7, and 8 mm allen wrenches
- 7, 10, 14, 15, 17, 19 mm wrenches (racheting wrenches will help alot)
- 11mm flare nut wrench
- 10, 14, 15, 17, 19, 30 mm sockets and ratchet, impact, deep and shallow
- wire, PB blaster or eq, brake parts cleaner, grease for calipers
- various pliers and visegrips
- cordless and air impact helps alot
- various screw drivers
- rubber mallet and hammer(s)
- as a side note I ended up needing a 14mm crows' foot to access the brake lines between the TA and the hardlines that go above the diff, these were a total bitch to access with the subframe in place.
This is what I can remember from the top of my head, might be a few other things. Took me a good 12 to 14 hours total wrench time for both sides. I spent some more time cleaning and rebuilding things, sandblasting parts and painting so it took me a bit more.
1. Jack up rear of car on jack stands, remove wheels
2. Remove brake calipers and caliper brackets, rotor, and emergency brake parts, essentially gutting the brakes.
3. Next its time to remove the half shaft. Undo the 6 socket cap screws that mount the inner CV joint to the diff. Lower it a bit and then wire it up so you dont put the CV's at a funny angle. DONT leave it in line with the diff, it needs to hang lower so it can move towards the middle of the car without hitting anything when you go to press the outside off (ask me how I know). Using a screwdriver and a hammer knock and pry the axle nut lockplate off. Mine was pretty rust and took some time but stick with it and it'll come off. I then used an impact with a 30MM socket to loosen the axlenut. If you dont have an impact you'll want to bust this nut loose before you raise the car since it's on there pretty tight. Press out the splined half shaft from the hub. I used a 2 jaw puller and it came out pretty easy. Now the half shaft is free to remove.
4. Disconnect ABS sensor, shock, swaybar, brake lines between the body/TA and TA/caliper, and parking brake cable. My parking brake cable was sized pretty bad and took some work to break loose, but it just pulls out. Remove the spring.
5. At this point basically everything should be removed from the trailing arm, and the only thing holding it should be the mounting bolts. To get the passenger side outer bolt off you'll need to disconnect the fuel filler hose at the gas tank. Remove the other bolt and the arm should come loose.
6. When you get the TA on a bench there are a multitude of ways to remove the bushings. There are tools you can buy, you can make a home made one with hardware store parts, etc... I was doing this late so I found an easy way to do it using a 6" HF C-clamp and a 36mm socket. Just tighten good and tight, wait a minute, come back and it'll be loose, retighten, and keep doing this until it comes out, only takes a few minutes this way.
Once you have new bushings in (I bought Powerflex and they fit great) installation is the reverse of removal. If you have any other stuff you wanted to do on the rear end this is a great chance to do it. I did alot; rebuilt and painted both calipers, new inner CV boots, new spring pads (the old were missing), new emergency brakes (were completely missing on the passenger side:-x), and new SS brake lines. Some things I also considered but didn't need done, but you might want to think about are rear wheel bearings, shocks, swaybar, end links, etc... I used lock-tite 242 and nickel anti-sieze as required on fasteners and parts. I also used disk brake lube on the caliper slide bolts.
Here is a list of torques and tools
Torques (ft-lbs):
- caliper bracket to TA: 44-49
- caliper to caliper bracket (slide bolts): 22-25
- lug nuts: 74
- shock to TA: 52-63
- swaybar to TA: 16-17
- inner CV socket head cap screws to diff: 42-46
- axle nut: 144-155
Tools
- 2 or 3 jaw puller
- 36mm socket and 6" c-clamp (for bushing removal)
- 6, 7, and 8 mm allen wrenches
- 7, 10, 14, 15, 17, 19 mm wrenches (racheting wrenches will help alot)
- 11mm flare nut wrench
- 10, 14, 15, 17, 19, 30 mm sockets and ratchet, impact, deep and shallow
- wire, PB blaster or eq, brake parts cleaner, grease for calipers
- various pliers and visegrips
- cordless and air impact helps alot
- various screw drivers
- rubber mallet and hammer(s)
- as a side note I ended up needing a 14mm crows' foot to access the brake lines between the TA and the hardlines that go above the diff, these were a total bitch to access with the subframe in place.
This is what I can remember from the top of my head, might be a few other things. Took me a good 12 to 14 hours total wrench time for both sides. I spent some more time cleaning and rebuilding things, sandblasting parts and painting so it took me a bit more.


Comment