

Lookin good!
-
'87 325i -
A quick update.
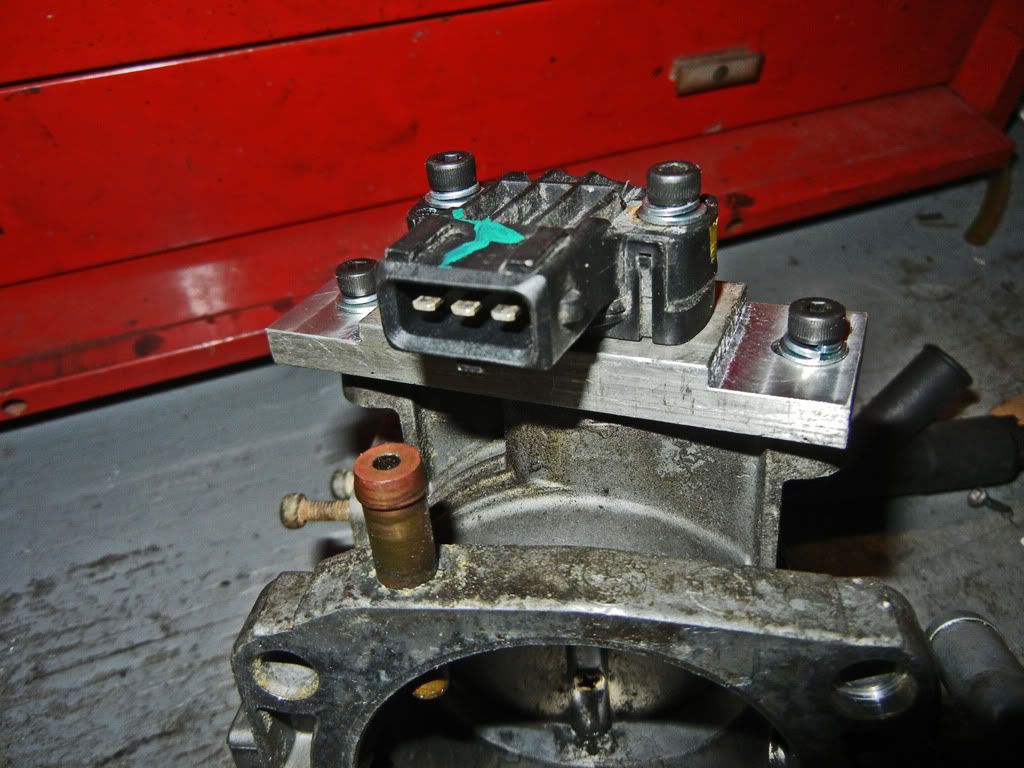
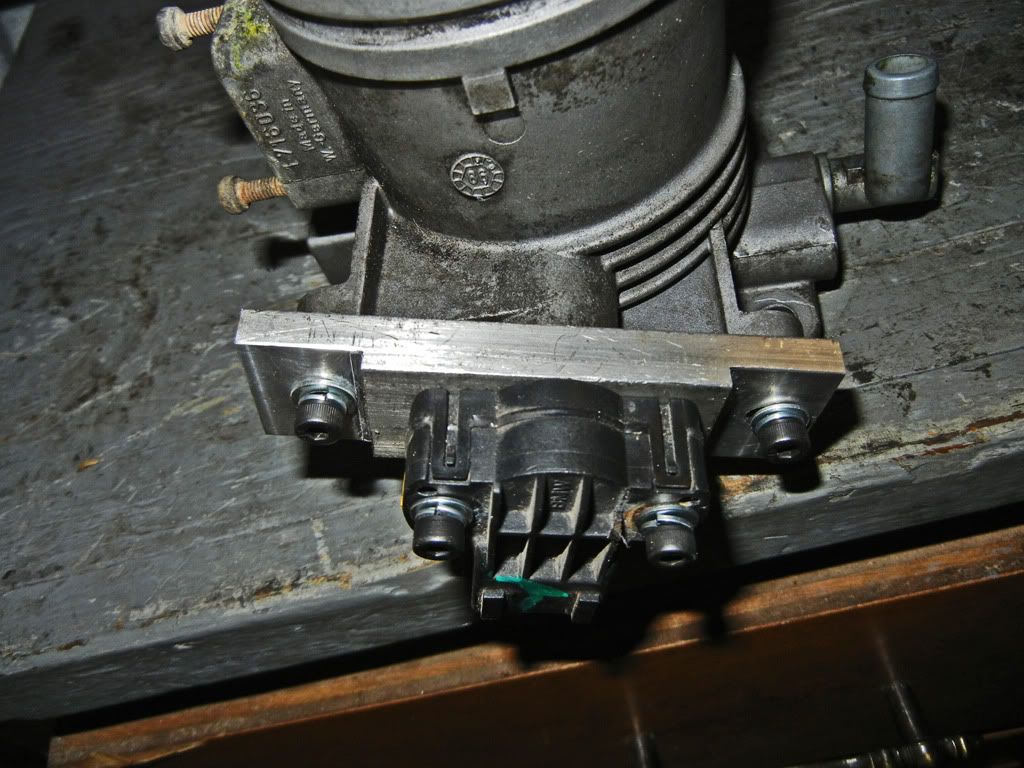
Yesterday I machined a simple adapter plate so that I can mount a variable TPS from an M52 to my M20 throttle body
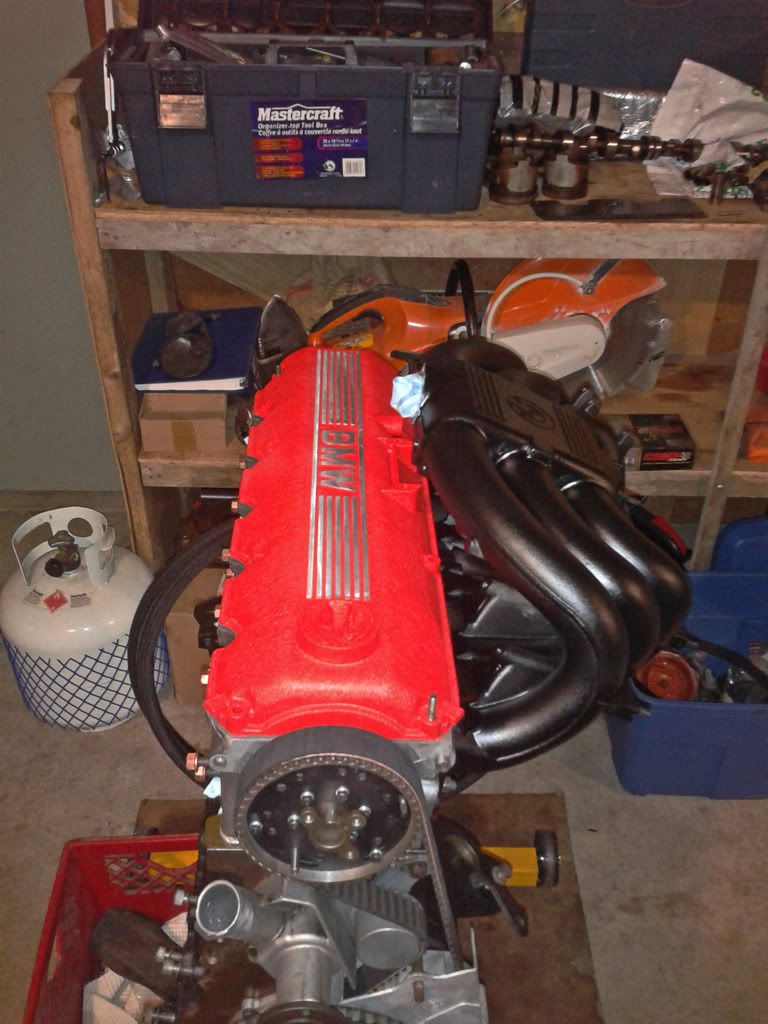
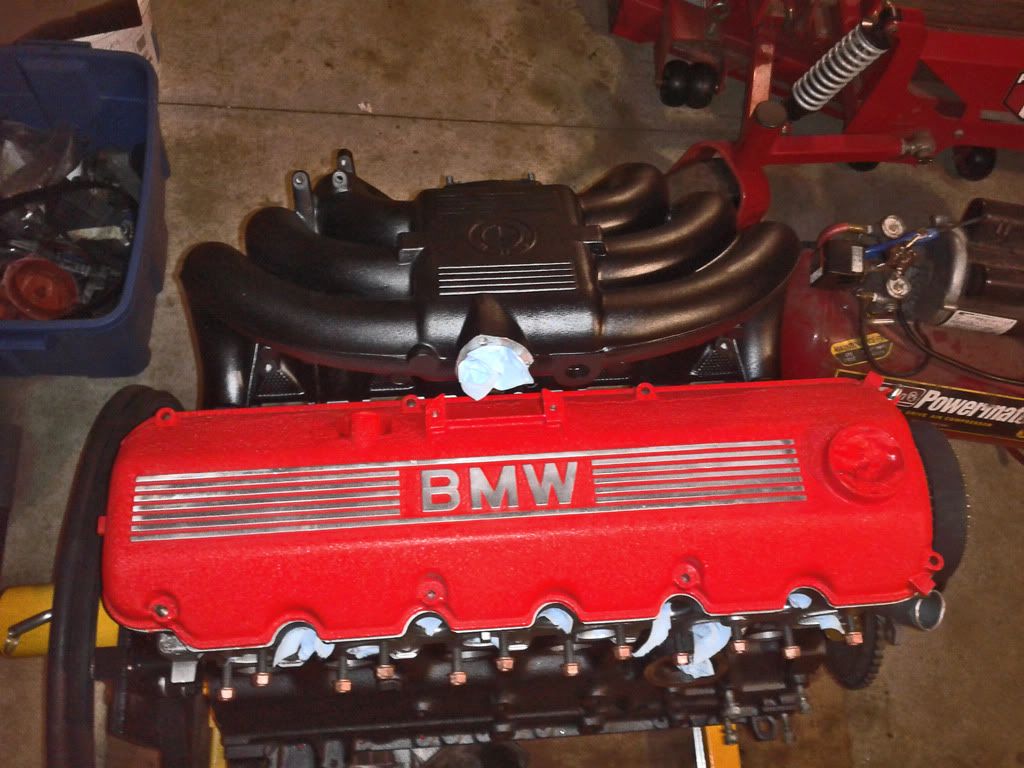
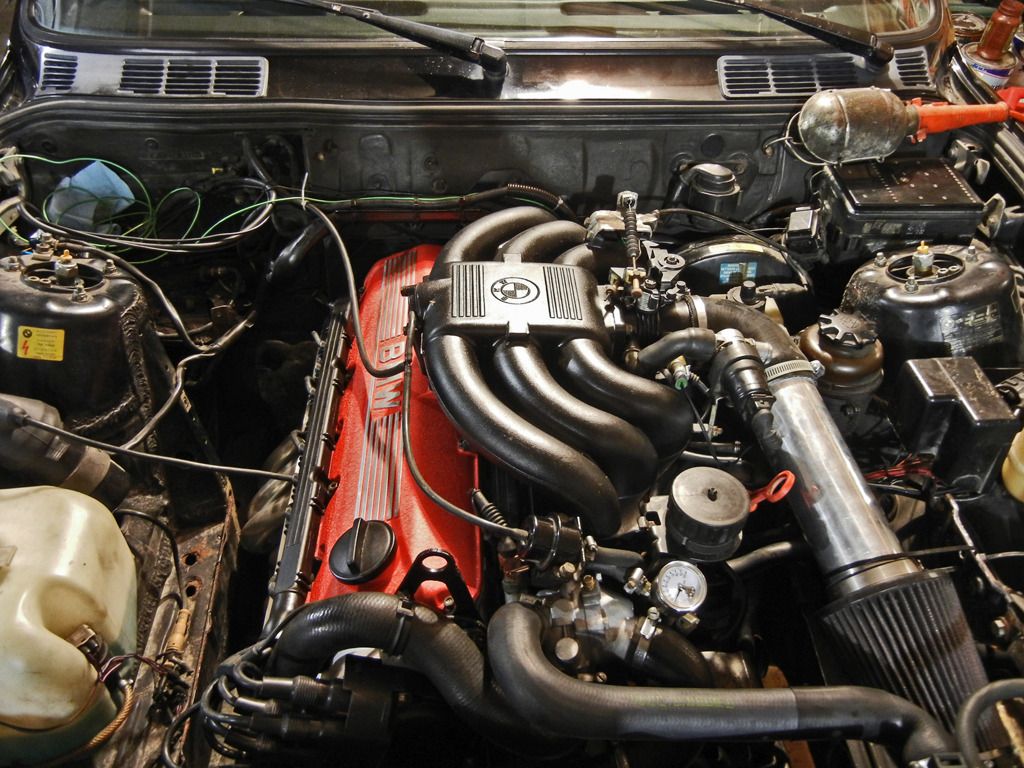
I also cleaned up my intake manifold yesterday, and today I gave it a satin black rattle can paint job. I like how it turned out...
Now all I need is some shiny headers... which apparently I won't be getting until early July...
Comment
-
Cant wait to hear it in some vids ;)
Comment
-
Comment
-
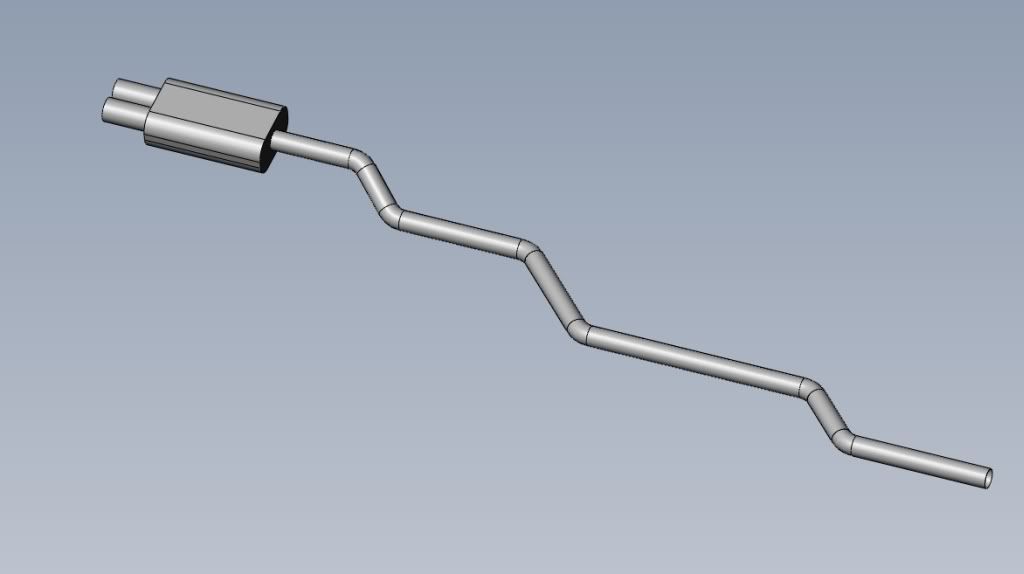
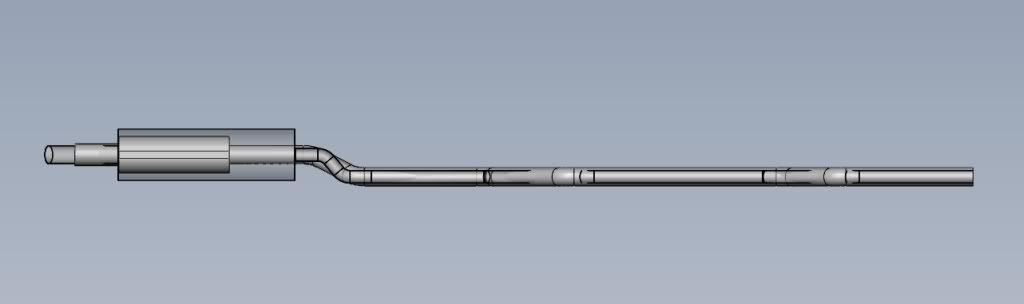
Unfortunately there hasn't been much happening with the build in the past couple weeks. I've been working out a couple issues with my other car so that I can drive that one while I do the swap. The past few days I've been looking into exhaust since I'm going to want a custom set-up to go with my RD headers. Right now I'm thinking I'd like to try and mock up the exhaust, tac it together, then get a friend to weld it up nice. So last night I took some measurements off the car and came up with a rough model of the stock exhaust (leaving out the x-pipe cat and resonator)...
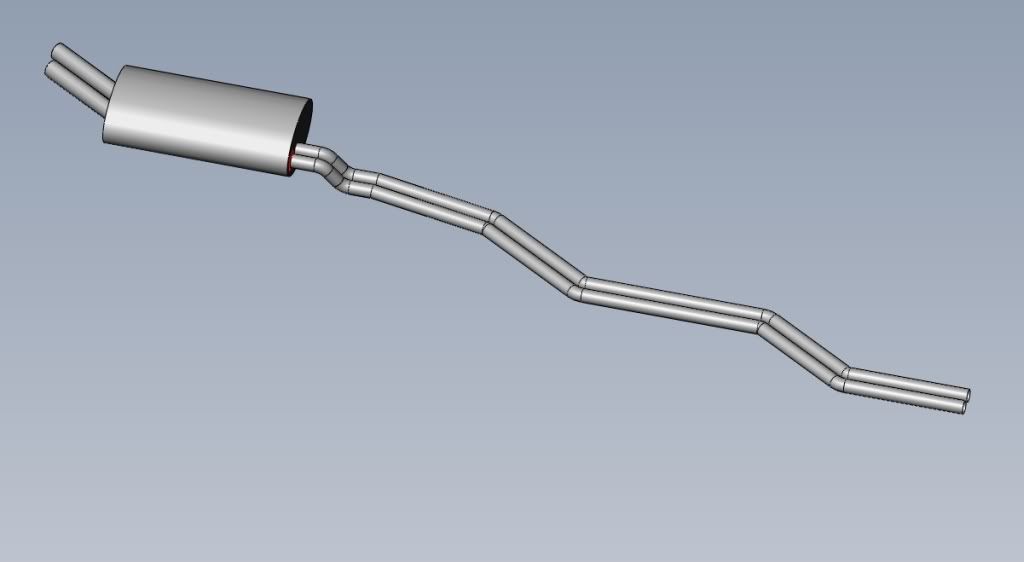
After doing some reading I've decided to go with a single 2.5" exhaust because it's light weight, simple, and because going any diameter larger than 2.5" would require a custom made merge collector. For the power the motor should be making 2.5" will be sufficient.
I drew up an exhaust using only 45" bends because those are readily available from any place that sells misc. exhaust tubing.
I'm probably going to end up buying components from Vibrant since they are local and I've heard good things about their stuff. In the place of the stock mid section I'm going to put a 13" catalytic converter and a 12" resonator, and the muffler I'm thinking is a streetpower flat black 2.5" in dual 3" out (dimensions in the model reflect the dimensions of the muffler). It looks like I should be able to offset it just enough to have the dual tips centred in the valance cut out. If not then I'll just skew it on a slight angle to centre the tips. This is how the two look overlaid...
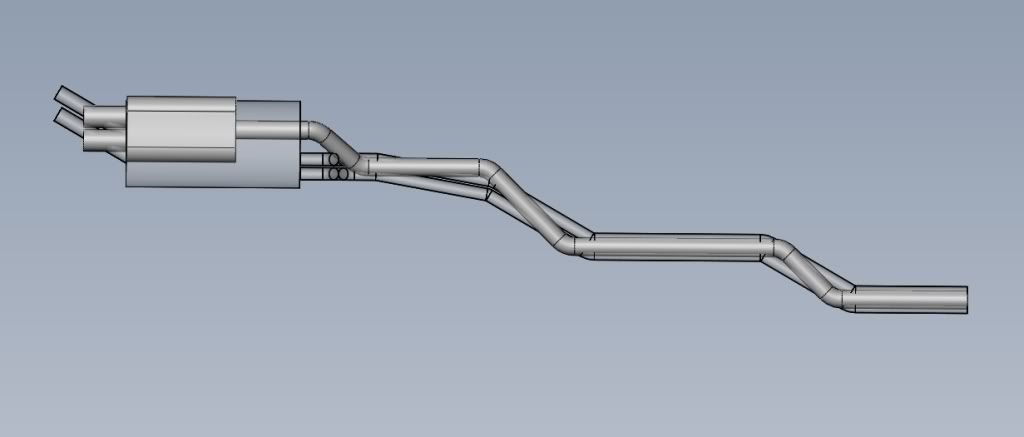
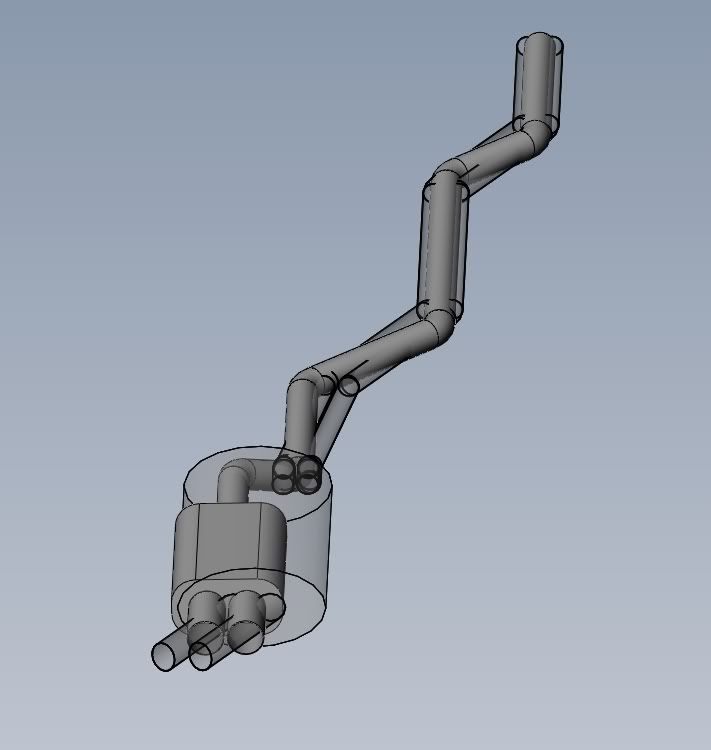
I'm also planning on having the mid section connected by v-band clamps so it will be simple to remove it and install a test pipe for the track if I want to down the road.
I'm currently looking into pricing of the components and parts.
Cheers.Comment
-
Excellent work! Awesome models too and I think it is great you are doing the machine work yourself. I'm jealous
1991 LS1 Swapped 318is
Instagram:
https://instagram.com/saltybeast/
LS Build Thread:
https://www.r3vlimited.com/board/for...s-e30-ls1-swapComment
-
Quick update:
Over the weekend I got my car converted over to the DIYPNP kit and did a little bit of tuning to get my fuel table half decent. Before I pull the motor I'll figure out what idle settings I'll need to get the car to idle at 2000rpm for the cam break in, that way when I go to start the new motor for the first time I won't have to sit there and hold the gas when I'll want to be looking at every inch of the motor for any leaks or other issues.
Last night I finally got around to fitting the crank scraper...
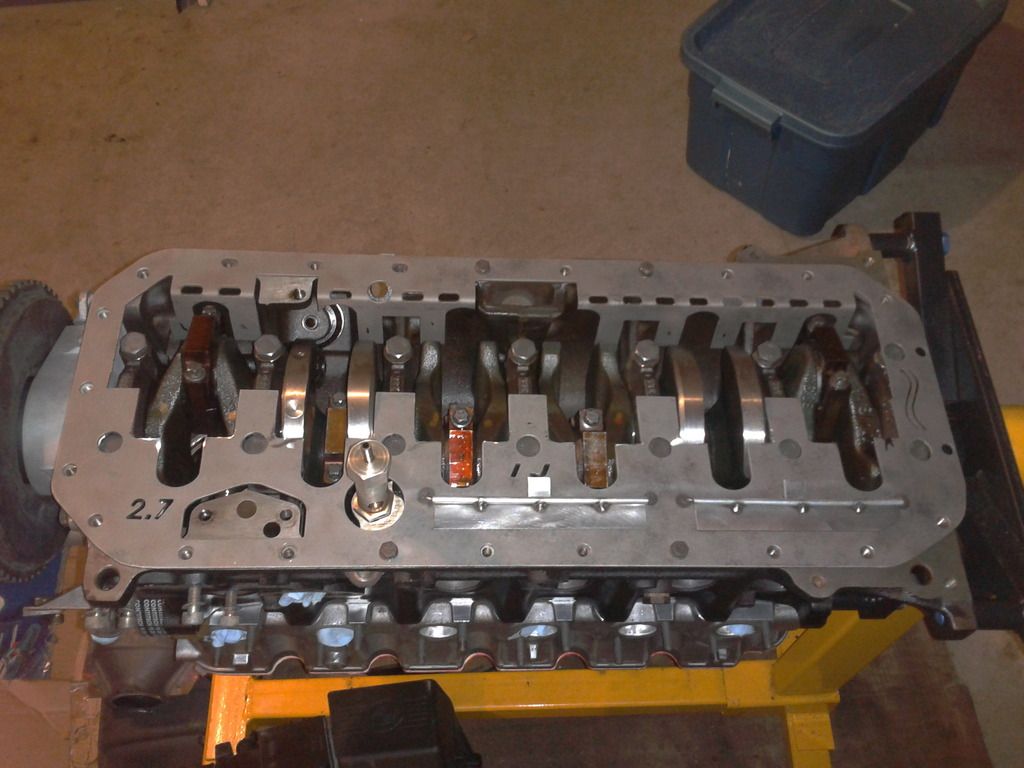
It took a decent amount of grinding to get the scraper to clear the counter weights.
I also started making this yesterday at work...
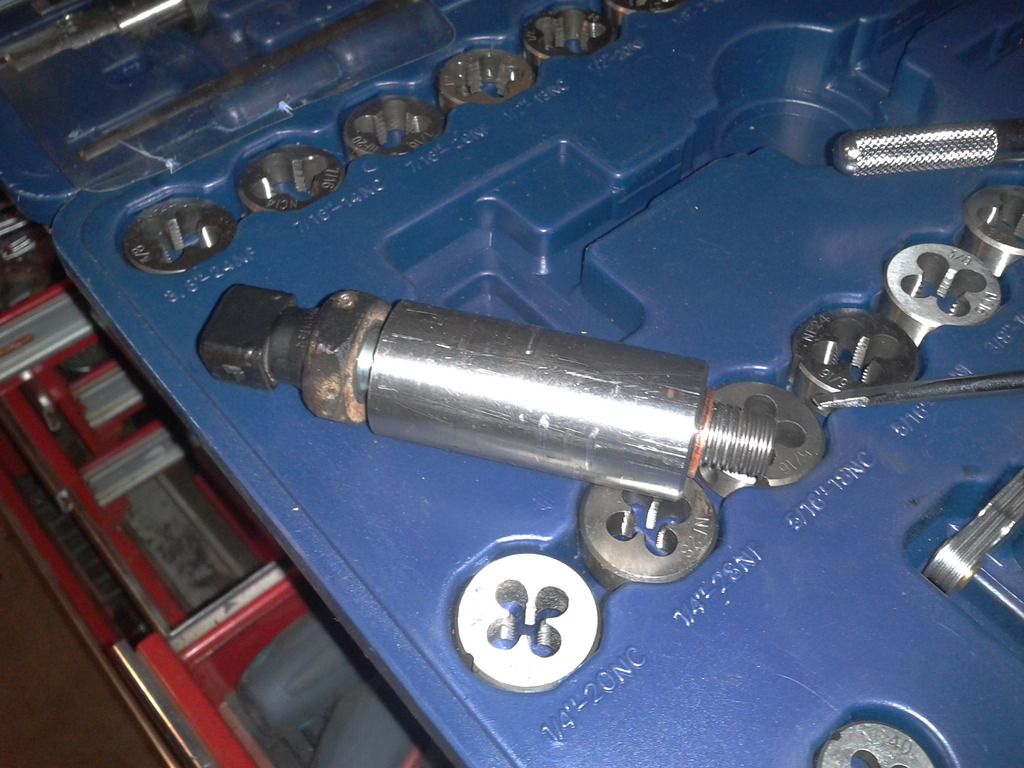
It's going to be an adapter for an oil pressure gauge sender that keeps the stock dummy light, I just need to drill and tap into the side for the fitting, and machine some flats for a wrench on the end.
I'm planning to start the engine swap this weekend.Comment
-
sub'd great work so far!17 Range Rover Sport SVR
14 Q5 TDI S-Line
...on the hunt for another E30.Comment
-
Update:
I asked this guy for an update and his response was "Update? What Update?...."
Stay tuned.Comment
-
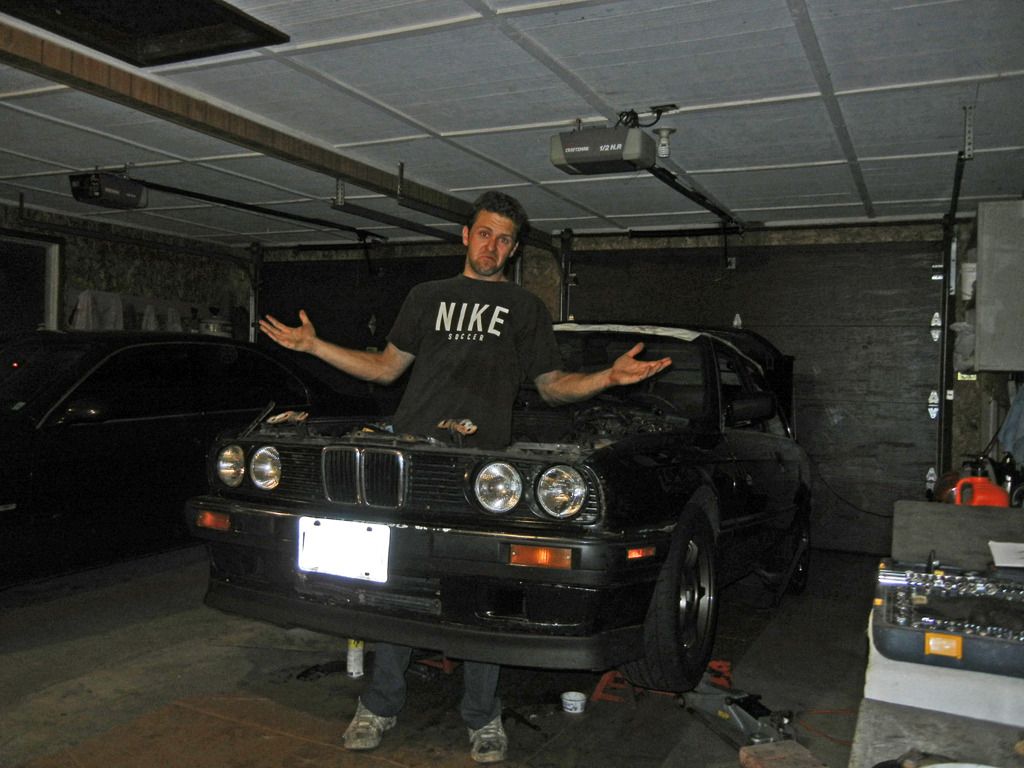
Update: Many hours later....
:up:
A couple other pictures...
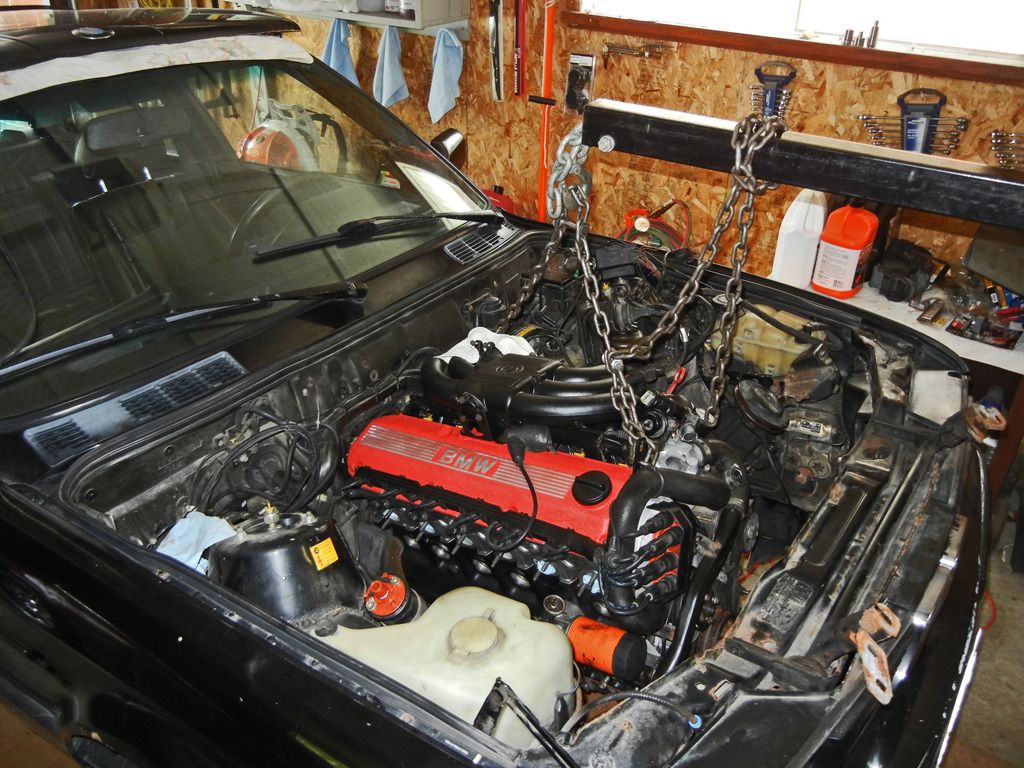
A shot of the motor when it was ready to go in...
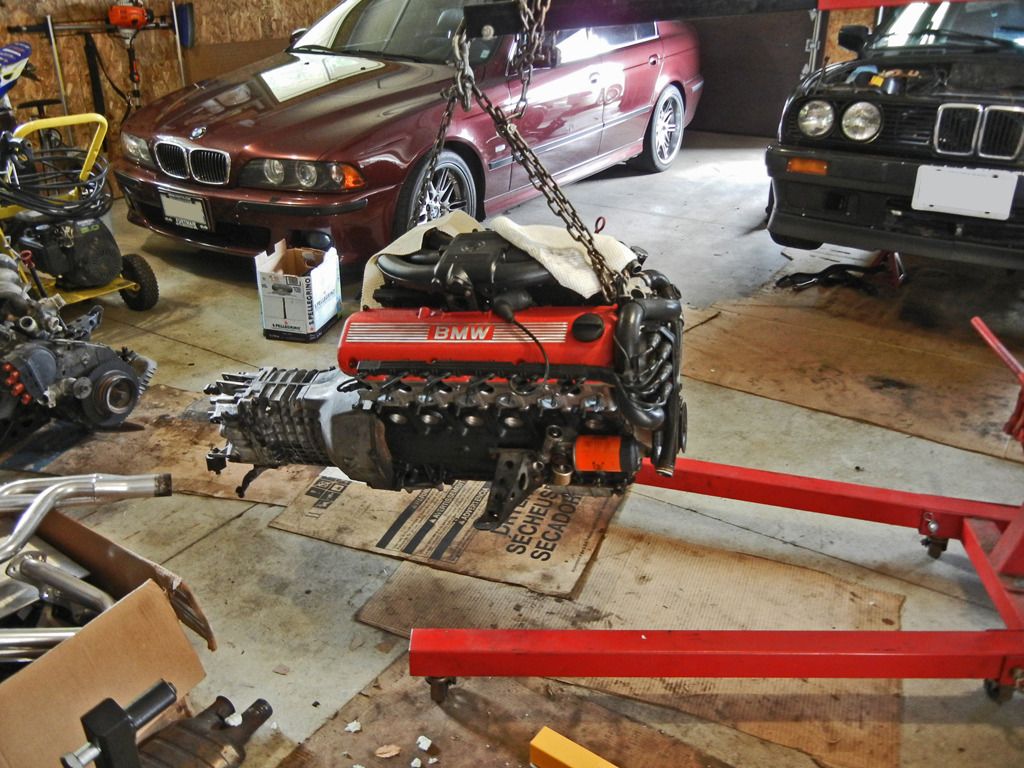
A shot of when it first landed in its new home...
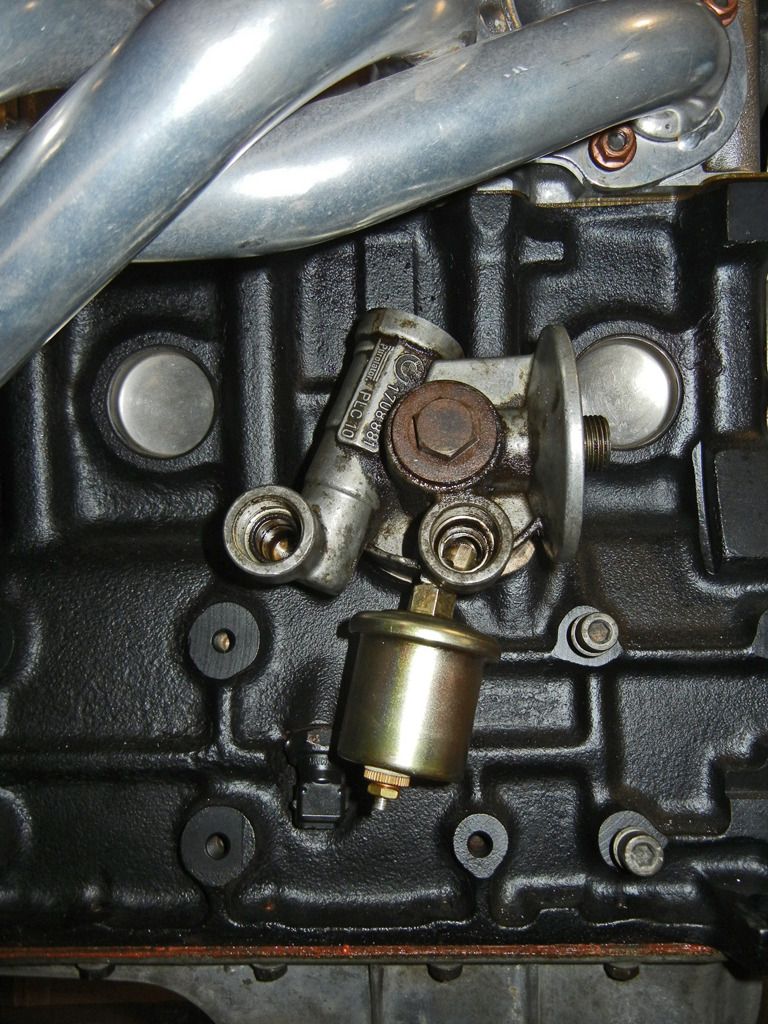
Where I ended up installing the sender for the oil pressure gauge...
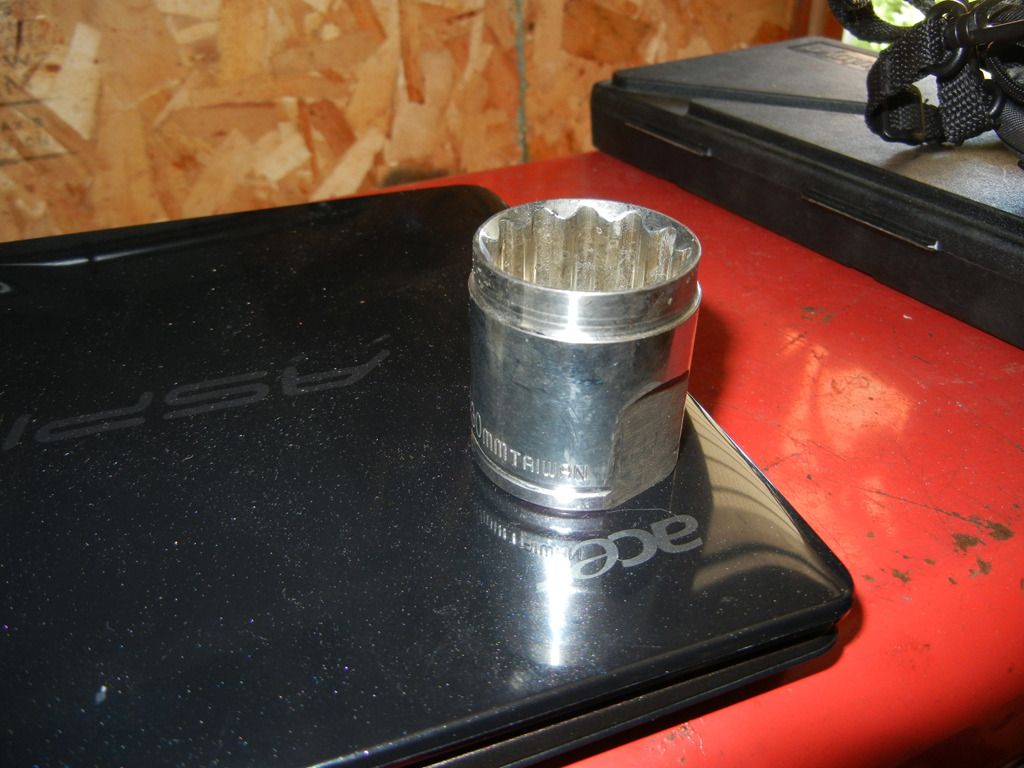
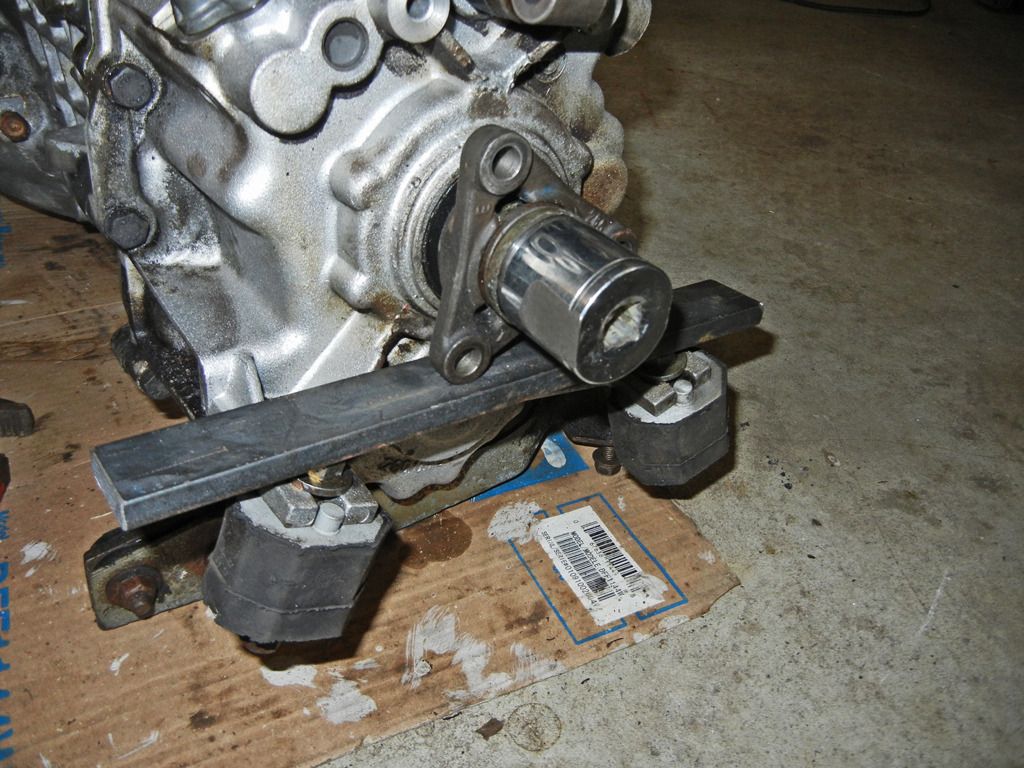
And now a Macgyver tool story... I remember reading in the Bentley manual that I'd need a 30mm socket to remove the nut on the drive flange so that I could replace the seal. So I went out and bought one at lunch on Friday and machined it down a bit because I knew it needed to be thin walled. What I didn't realize was that it needed to be a deep socket. When I came home I went to see if it'd fit and it wasn't even close to being long enough. However I would be SOL this weekend if I couldn't make it work. I noticed that the part of the shaft that goes into the pilot bearing almost fit through the opening for the 1/2" drive on the socket so I used my rotary tool to grind the opening to allow the shaft to fit through. Then I ripped a couple flats on the bench grinder so I could get some grip with a big pipe wrench....
A trick to hold the output flange is a piece of flat bar between the transmission mounts....
All that's left is to put the exhaust back on, wire the oil pressure gauge, modify the wiring for the O2 (since it's now located in the mid-section of the exhaust), add fluids, and double check that everything is good and tight. I'm hoping to fire it up tomorrow night!
I also have to make a heat shield for the air filter, but that's not an immediate issue.Comment
-
The M20 stroker breaths! I did a 50km (~30 mile) hard break in and changed the oil. Although the cam seal seems to be leaking I'm pretty pumped that other than that the motor seems to be running well. I'll diagnose the leak further in the next couple days. I was going to drive it some more after the oil change but it started to rain and I haven't put my hood back on yet.
The tune is still rough but it's good enough to drive the car and it will progressively get better the more I drive. Initial impressions... more low end torque and although I haven't spooled it out yet it feels strong on the top end.
Videos will be coming soon.Comment
-
Hmm very interesting build...wonder if i could use a 2.8 crank with my euro Eta pistons.Comment
-
-
I'm pumped for the video. Congrats on finishing this project.Comment


Comment