
Hey guys,
I don't post on this forum but I have a street strip drag car that I have been building with a solid rear axle and a 4 link rear suspension that I built. Anyway I have wanted to lower the front of my car for some time now but I didn't like the options available so I decided to come up with something myself to fit my needs. Since this is a street strip car I do not want a high rate spring in the front of the car since it is not conducive to weight transfer. Here are my goals,
Lower the front end of the car by 1 - 1.5 inches
Retain the original bump and extension travel of the shocks
Retain my factory sport spring rates
Utilize the bilstien HD sport shocks that were installed by the previous owner
The big issue here is maintaining full shock travel. I could just cut the springs or find some low rate lowering springs but that would cause the car to ride on the bumpstops and drive terrible. I know that bilstien will on special request shorten shocks for a fairly high price so I looked for some info to see what is actually inside these shocks. I found this video of a mini cooper shock which gave some clues.
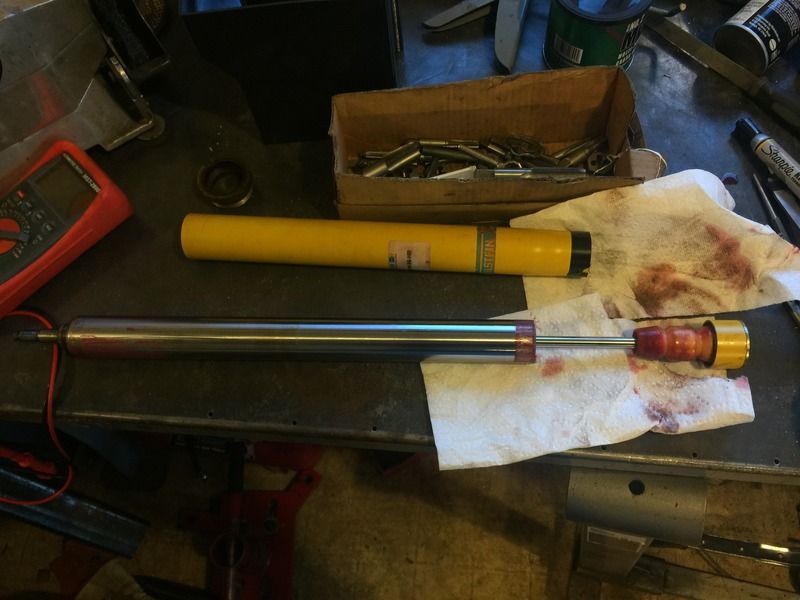
I decided to cut open one of my shock to see whats in there.
Here is a section view of whats inside the struts and how the pieces fit together. For the purpose of discussion I have labeled all the components. I don't know if these are the correct names, and don't care.
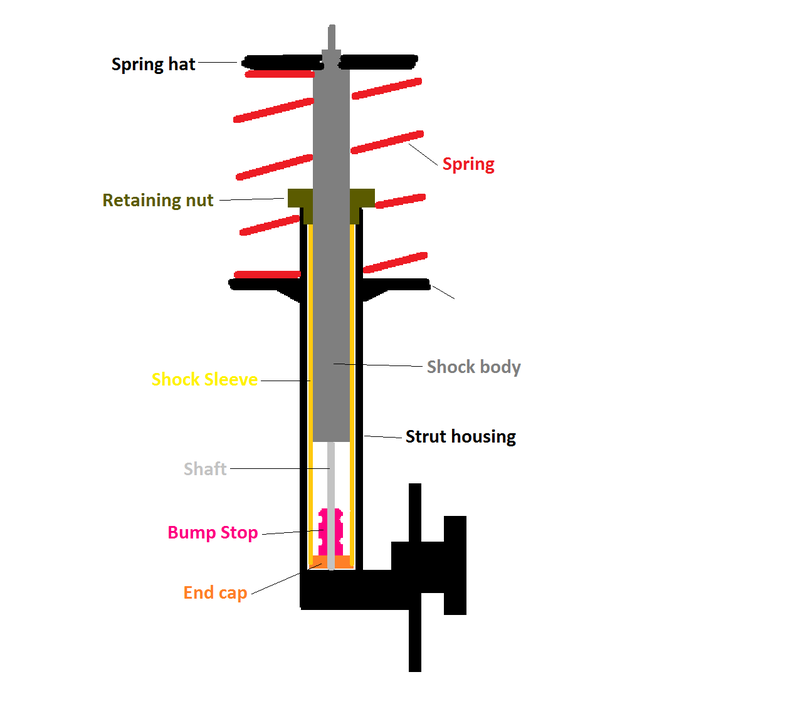
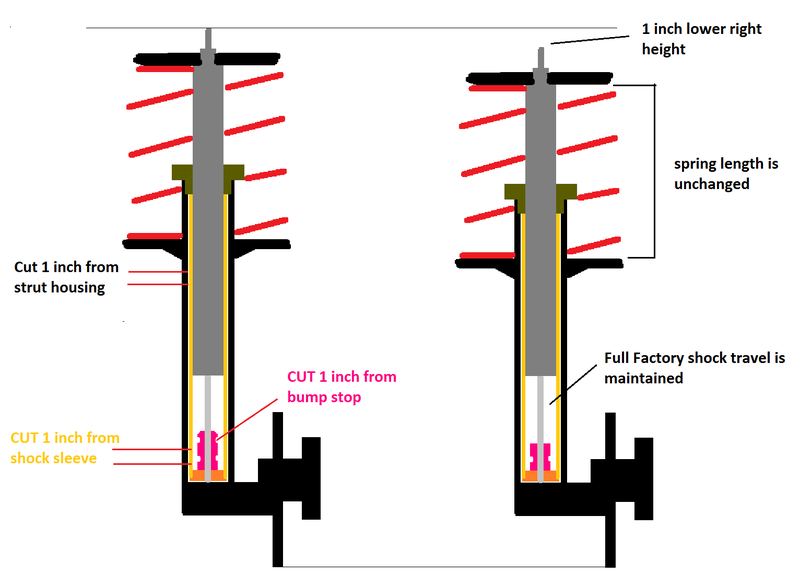
Now what we want to do here is to shorten the strut housing by an inch, but in order for the shock to fit down inside the housing and still be able to get the retaining nut on, we also need to shorten the shock sleeve by an inch. Finally in order to gain back the full suspension travel, we also need to cut an inch off the bump stops to restore the original bump travel of the shock.
Here is how I went about it. Please not this is a mixture of pictures from both shocks I did so the parts may look different in some pictures.
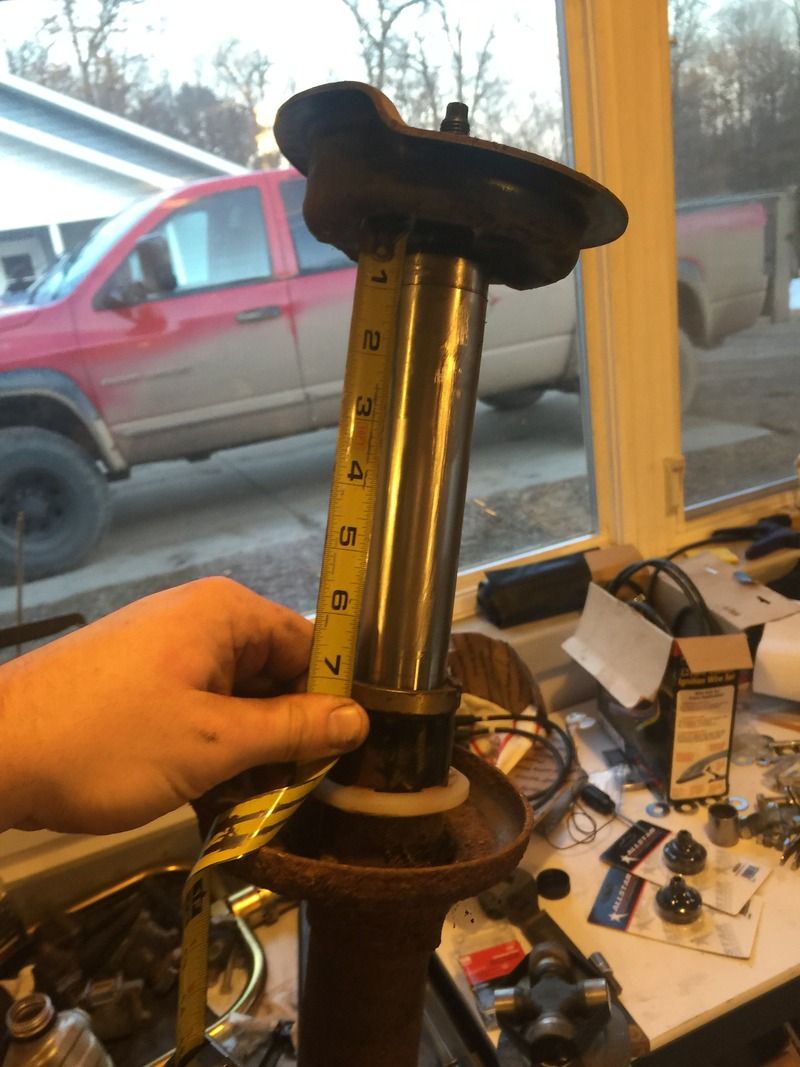
First before I pulled it apart I measured the max distance the shock could compress before bottoming out on the spring hat just for reference. 7 inches
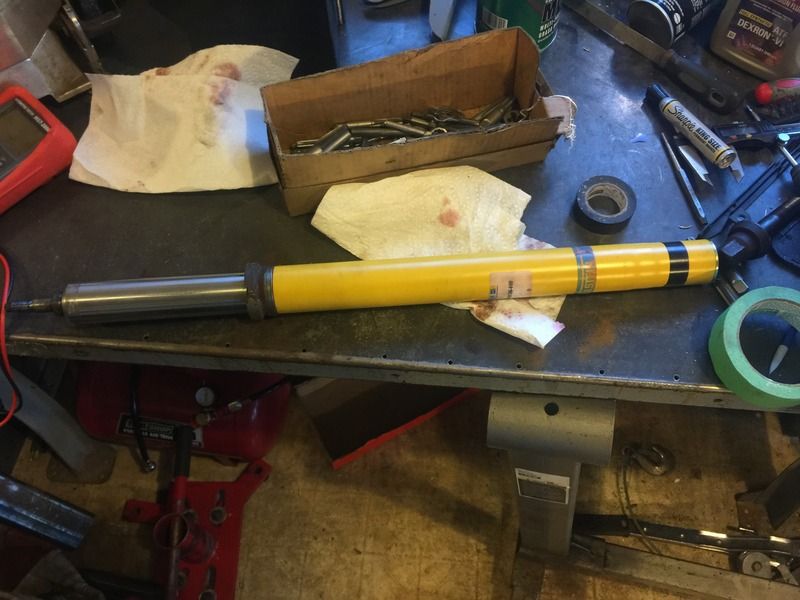
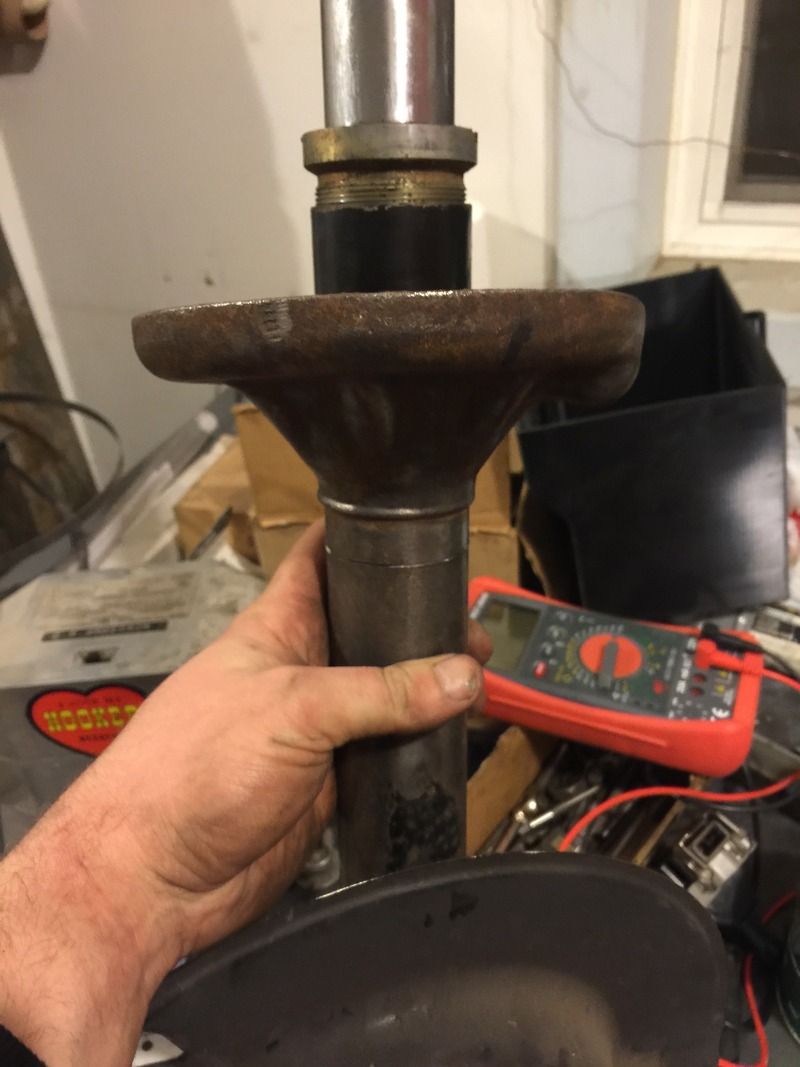
Here is the shock after removing from the strut housing. There is a metal cap which apears to either be threaded or somehow bonded to the bottom of the yellow shock sleeve. The shaft of the shock threads into the center of this cap. I tried several ways to try to get this cap off but it would not move. I was worried about damaging the sleeve so I decided to just cut it.
I marked a line 1 inch from the bottom cap and cut the tube with a bandsaw. You don't want to cut the bump stop, so be careful to only let the blade go in an 1/8 or so.
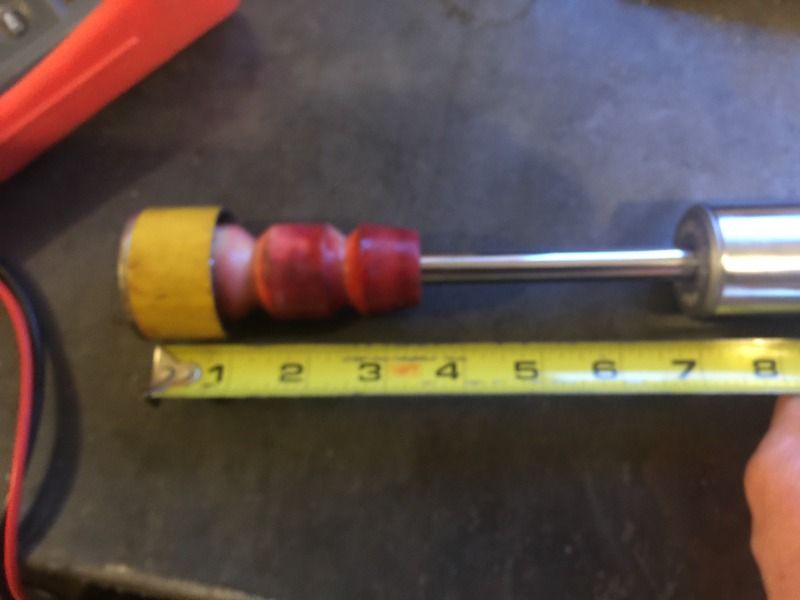
The bump stop is a 3.5 inches long and made of urethane foam. It is cone shaped on one end. The total available shaft travel inside the shock is 6 3/4 inches, however the bump stop takes up a significant amount of that space and can't be completely compressed, so effective shock travel stock is probably about 5.5" or so with the bump stop in place.
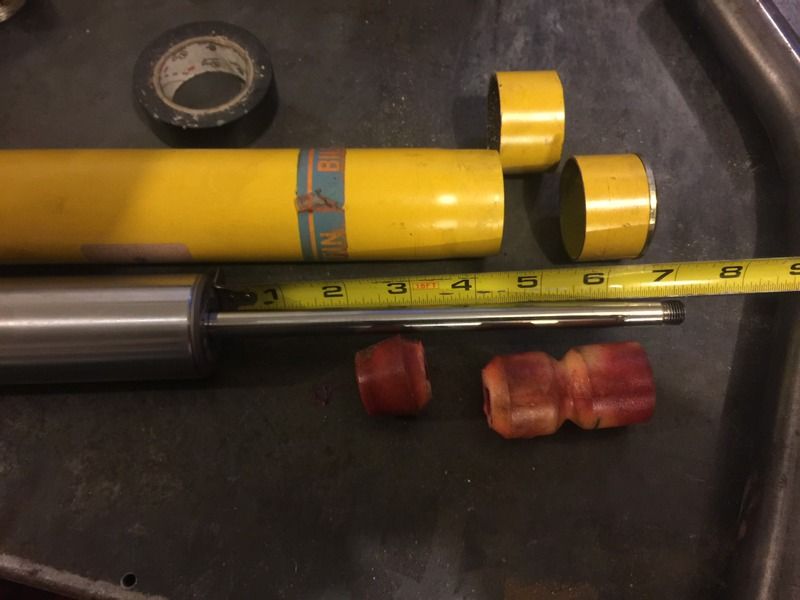
Next I removed the end cap by sliding up the bump stop and grabbing the very end of the shaft with a vice grip and turning the end cap off. This mars the shaft slightly but the seal on the shock will never travel this far due to the bump stop. Next I cut another 1 inch section from the sleeve, and cut the end 1 inch off the bump stop.
At this point you could also if you desire shorten the shaft of the shock. The only thing this would do is limit the extension travel of the shock.
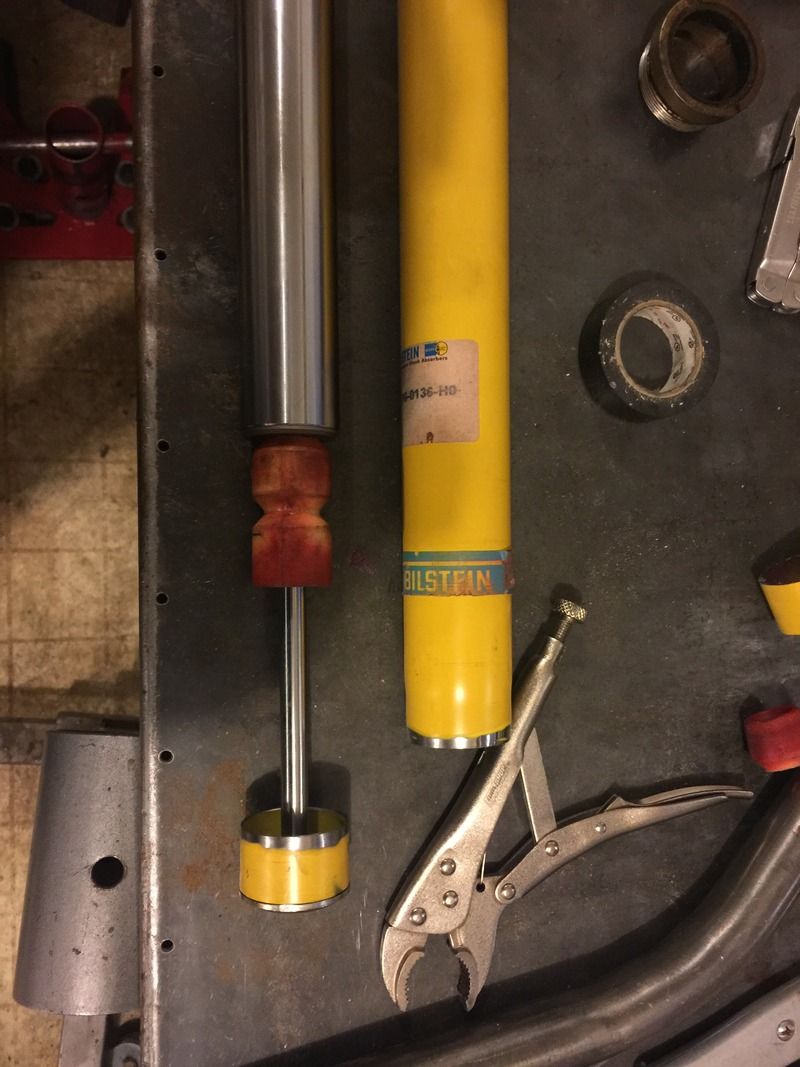
Now we are ready to weld the sleeve back together. Grind the paint off from the weld joint about 3/8". Put the bump stop back on the shaft and thread the end cap back on and tighten it. Before sliding the sleeve back on, slide the bump stop all the way up against the shock. This will keep it away from the heat of welding.
align the two pieces together and tack wend them in several places.
fully weld the two halves back together. The sleeve is very thin. I tig welded it with stainless filler using 35 amps. If you have a mig welder you will need to stitch weld it to avoid burning through. This is not a place for brazing or stick welding.
Quick shot of paint and your done with that.
Next you will need to shorten the strut housing.
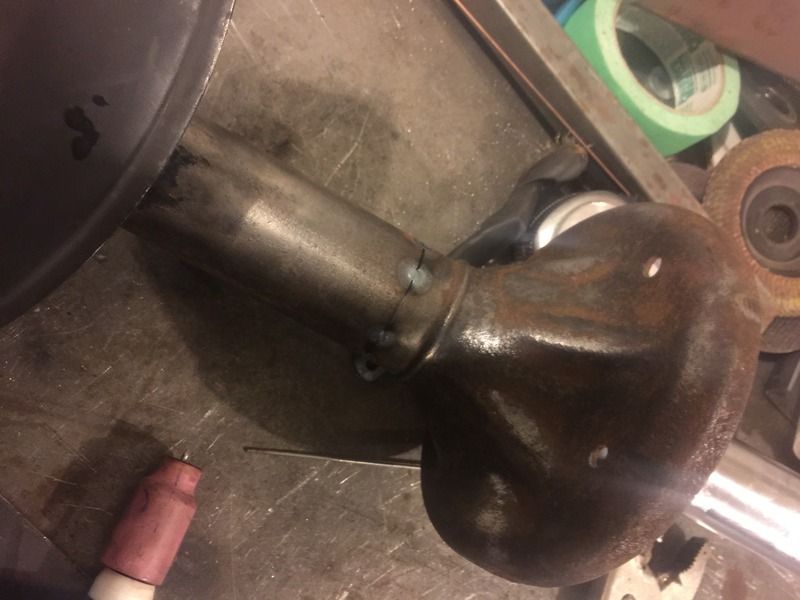
Here is the strut housing after marking and cutting out a 1 inch section. I cut this with a cutoff wheel in an angle grinder. These cuts need to be accurate in order to get the housing back together straight.
Next thing is to install the shock back in the housing and partially thread the retaining nut in place. This will hold the strut in alighnment while you tack weld it.
Make plenty of tack welds which will help to keep it from warping when it is finish welded. Now remove the retaining nut and shock to avoid over heating them.
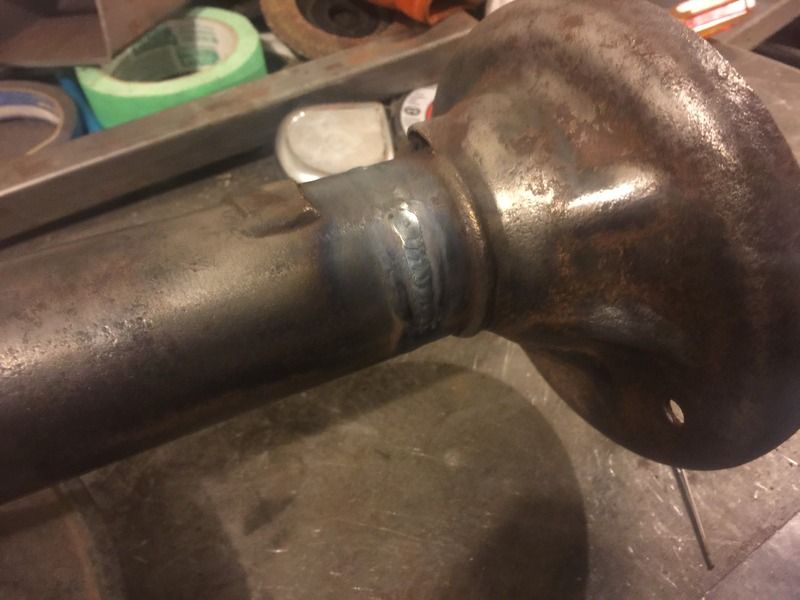
Weld the rest of the joint. Weld this in short sections alternating around the tube to avoid warping it. I tig welded the tube at 75 amps with steel filler. Mig is fine to.
Once it has cooled install the shock in the housing to make sure it still fits. You may need to use a die grider to clean up the joint on the inside of the tube if you had a bit to much penetration.
If you found that the tube warped when you welded it the shock may not fit all the way down, or you may find you can't get the retainer nut back on. You can straighten the tube by adding another partial weld bead above the previous. This will shrink the steel and cause the top of the tube to bend toward the side with the weld bead.
To check clearance in the car I assembled the strut without a spring and installed in the car. I jacked the strut up until the weight for the car was sitting on the bump stop in order to fully compress it. I have run a 25 inch tire in the front on account of the 28 inch tires in the back of my car, so clearance is tighter for me than if you were using a normal size e30 tire. I had plenty of clearance lock to lock.
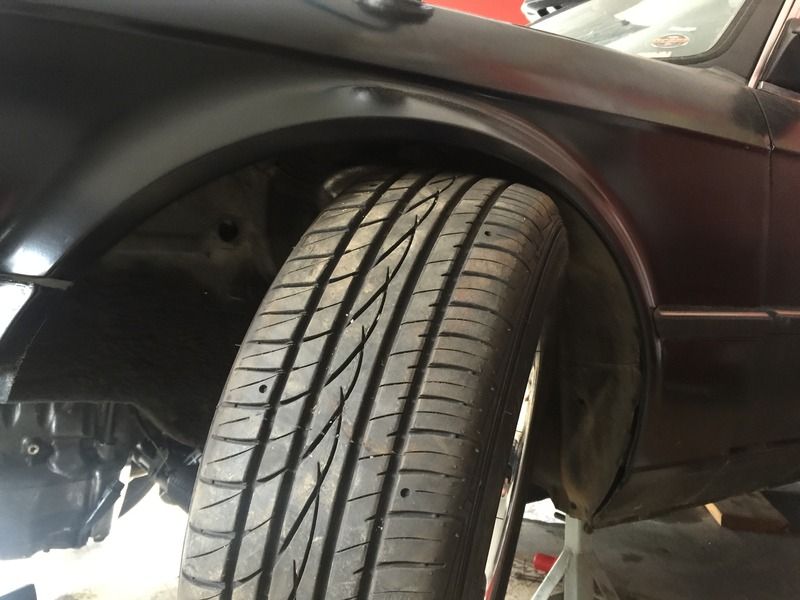
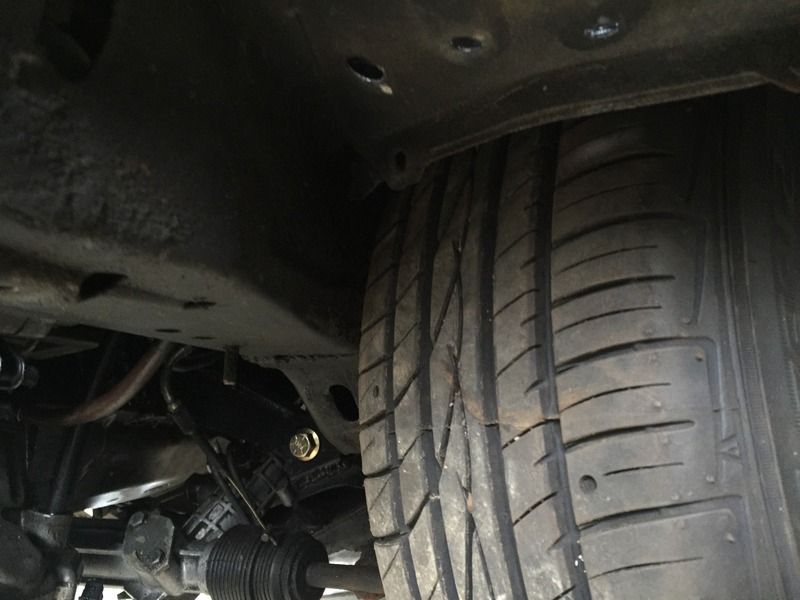
Here you can see why I chose to shorten the strut only 1 inch. If the strut were shortened any more my tires would hit the spring perches. With a shorter tire you may be able to get by shortening everything by 1.5" or so.
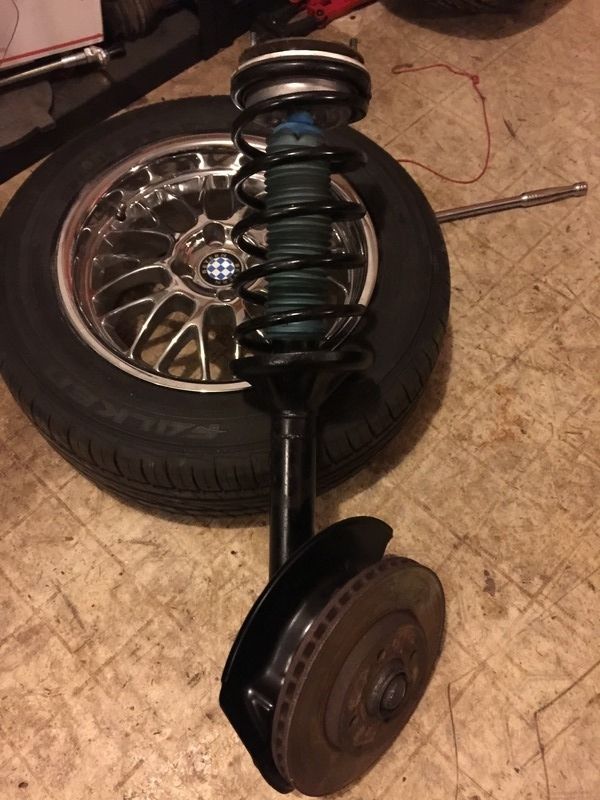
Here it is painted up and assembled. I chose to also add an E90 .5" drop hat to lower it a tiny bit more.
Here is what the car looked like at stock height

Here is after. Please note the tire is sitting on a 2x6 because the other side had not yet been done when this picture was taken. I also lowered the rear 1 inch and removed my wheel spacers from the back.

Cost = mabey $3 worth of argon? This method will retain the full stock bump travel and spring length so it should ride just like it did before, just an inch lower. Time involved was probably 2 hours for the first side and an hour for the second, not counting time measuring and testing. I no longer have the factory rear suspension so someone else will have to figure out a diy for that end of the car.
I'm not at all interested in debating if this is better or worse than option a or b or c. This is how I did it, take it or leave it.
thanks and enjoy
I don't post on this forum but I have a street strip drag car that I have been building with a solid rear axle and a 4 link rear suspension that I built. Anyway I have wanted to lower the front of my car for some time now but I didn't like the options available so I decided to come up with something myself to fit my needs. Since this is a street strip car I do not want a high rate spring in the front of the car since it is not conducive to weight transfer. Here are my goals,
Lower the front end of the car by 1 - 1.5 inches
Retain the original bump and extension travel of the shocks
Retain my factory sport spring rates
Utilize the bilstien HD sport shocks that were installed by the previous owner
The big issue here is maintaining full shock travel. I could just cut the springs or find some low rate lowering springs but that would cause the car to ride on the bumpstops and drive terrible. I know that bilstien will on special request shorten shocks for a fairly high price so I looked for some info to see what is actually inside these shocks. I found this video of a mini cooper shock which gave some clues.

I decided to cut open one of my shock to see whats in there.
Here is a section view of whats inside the struts and how the pieces fit together. For the purpose of discussion I have labeled all the components. I don't know if these are the correct names, and don't care.

Now what we want to do here is to shorten the strut housing by an inch, but in order for the shock to fit down inside the housing and still be able to get the retaining nut on, we also need to shorten the shock sleeve by an inch. Finally in order to gain back the full suspension travel, we also need to cut an inch off the bump stops to restore the original bump travel of the shock.

Here is how I went about it. Please not this is a mixture of pictures from both shocks I did so the parts may look different in some pictures.
First before I pulled it apart I measured the max distance the shock could compress before bottoming out on the spring hat just for reference. 7 inches

Here is the shock after removing from the strut housing. There is a metal cap which apears to either be threaded or somehow bonded to the bottom of the yellow shock sleeve. The shaft of the shock threads into the center of this cap. I tried several ways to try to get this cap off but it would not move. I was worried about damaging the sleeve so I decided to just cut it.

I marked a line 1 inch from the bottom cap and cut the tube with a bandsaw. You don't want to cut the bump stop, so be careful to only let the blade go in an 1/8 or so.

The bump stop is a 3.5 inches long and made of urethane foam. It is cone shaped on one end. The total available shaft travel inside the shock is 6 3/4 inches, however the bump stop takes up a significant amount of that space and can't be completely compressed, so effective shock travel stock is probably about 5.5" or so with the bump stop in place.

Next I removed the end cap by sliding up the bump stop and grabbing the very end of the shaft with a vice grip and turning the end cap off. This mars the shaft slightly but the seal on the shock will never travel this far due to the bump stop. Next I cut another 1 inch section from the sleeve, and cut the end 1 inch off the bump stop.
At this point you could also if you desire shorten the shaft of the shock. The only thing this would do is limit the extension travel of the shock.

Now we are ready to weld the sleeve back together. Grind the paint off from the weld joint about 3/8". Put the bump stop back on the shaft and thread the end cap back on and tighten it. Before sliding the sleeve back on, slide the bump stop all the way up against the shock. This will keep it away from the heat of welding.

align the two pieces together and tack wend them in several places.

fully weld the two halves back together. The sleeve is very thin. I tig welded it with stainless filler using 35 amps. If you have a mig welder you will need to stitch weld it to avoid burning through. This is not a place for brazing or stick welding.

Quick shot of paint and your done with that.

Next you will need to shorten the strut housing.
Here is the strut housing after marking and cutting out a 1 inch section. I cut this with a cutoff wheel in an angle grinder. These cuts need to be accurate in order to get the housing back together straight.

Next thing is to install the shock back in the housing and partially thread the retaining nut in place. This will hold the strut in alighnment while you tack weld it.

Make plenty of tack welds which will help to keep it from warping when it is finish welded. Now remove the retaining nut and shock to avoid over heating them.

Weld the rest of the joint. Weld this in short sections alternating around the tube to avoid warping it. I tig welded the tube at 75 amps with steel filler. Mig is fine to.

Once it has cooled install the shock in the housing to make sure it still fits. You may need to use a die grider to clean up the joint on the inside of the tube if you had a bit to much penetration.
If you found that the tube warped when you welded it the shock may not fit all the way down, or you may find you can't get the retainer nut back on. You can straighten the tube by adding another partial weld bead above the previous. This will shrink the steel and cause the top of the tube to bend toward the side with the weld bead.
To check clearance in the car I assembled the strut without a spring and installed in the car. I jacked the strut up until the weight for the car was sitting on the bump stop in order to fully compress it. I have run a 25 inch tire in the front on account of the 28 inch tires in the back of my car, so clearance is tighter for me than if you were using a normal size e30 tire. I had plenty of clearance lock to lock.


Here you can see why I chose to shorten the strut only 1 inch. If the strut were shortened any more my tires would hit the spring perches. With a shorter tire you may be able to get by shortening everything by 1.5" or so.
Here it is painted up and assembled. I chose to also add an E90 .5" drop hat to lower it a tiny bit more.

Here is what the car looked like at stock height

Here is after. Please note the tire is sitting on a 2x6 because the other side had not yet been done when this picture was taken. I also lowered the rear 1 inch and removed my wheel spacers from the back.

Cost = mabey $3 worth of argon? This method will retain the full stock bump travel and spring length so it should ride just like it did before, just an inch lower. Time involved was probably 2 hours for the first side and an hour for the second, not counting time measuring and testing. I no longer have the factory rear suspension so someone else will have to figure out a diy for that end of the car.
I'm not at all interested in debating if this is better or worse than option a or b or c. This is how I did it, take it or leave it.
thanks and enjoy


Comment