
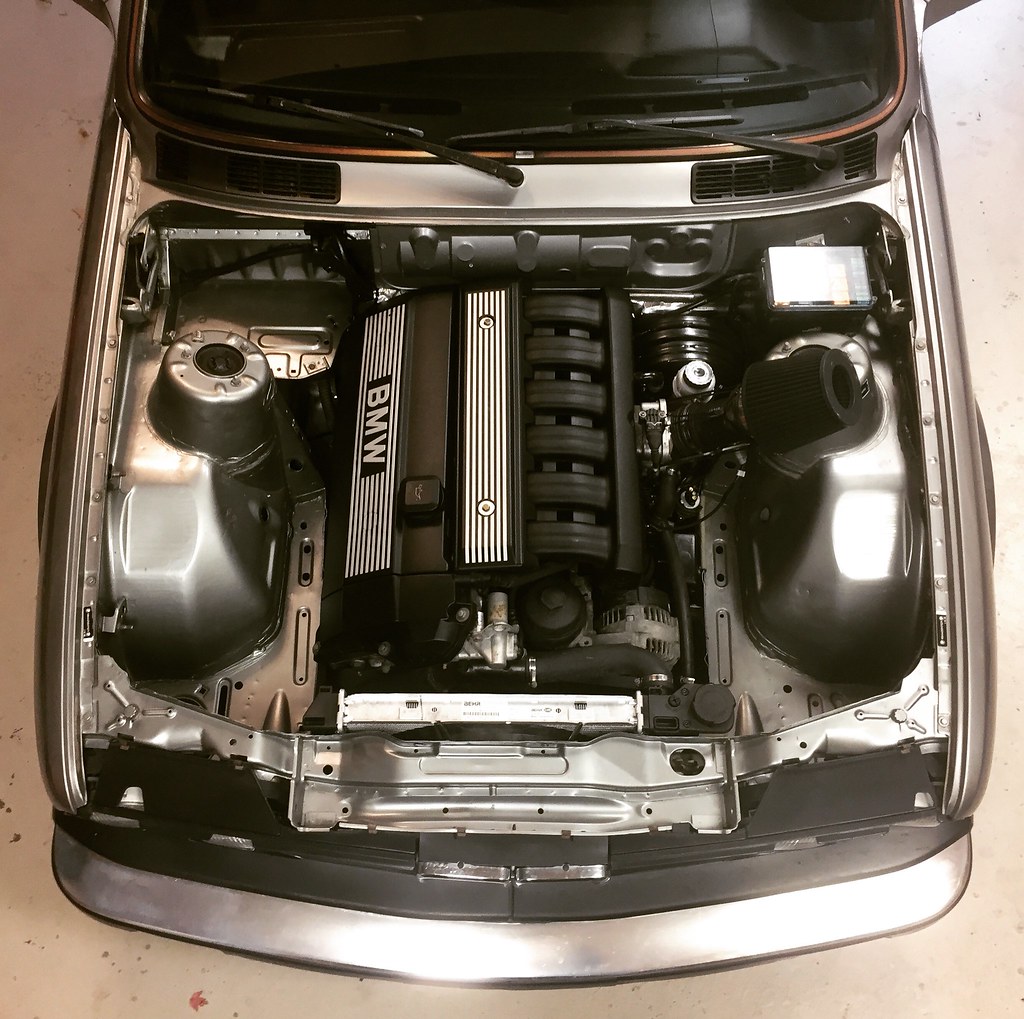
As i see you didn't install back any of these brackets you removed because you have M54 engine ? Mine will have the M20 engine with all the original brackets. I probably don't remove all of them but only these where i can see some surface rust and is not possible to clean without removing them. I try to keep it as original as possible. In the engine bay most of the brackets are in okay/good condition but underneath there are lots of bad looking brackets and i have no idea are they reusable after sandblasting or do i have to find a donor where i can get better ones. We will see after they are removed and blasted.
I think and i hope the next project will be something different. Replacing engines and stuff. I mean first im gonna drag this one over the finish line and then start looking for the next project. I haven't decided what would be the next victim. I want to do a E28 because i had two of them back in the day or then E30 wagon which would be more practical car sort of. I know myself that as the time goes on the more i start appreciate the originality of the car. This one i also wanted to restore to a historical vehicle which means black licence plates but it needs to be at least 95% original. Previous owners has replaced the engine and a gearbox so its out of the question. And i have to be straight with you, i don't like the way it sits with original suspension. Its like a offroader.
-
FWIW, I didn't use a spot welder drill bit when I removed my engine bay brackets.
Just carefully used a grinder with a cutoff wheel to trim down the brackets to the sheetmetal.
Didn't even use any filler before painting on version 1 and it looked pretty good (but not perfect).

Leave a comment:
-
I had a chat with the guy whos gonna do the welding on my car and decided i will remove most of the brackets from the body. It will be much easier to clean and also less time spent by the welder. And i want to educate myself so i went to the shop and bought special drill bits for the spot welding. I hope i don't f*ck it up! :D
Leave a comment:
-
Also cleaned most of the engine bay. There were places that i knew of and few new surprises as well. I'm already mentally ready for every new rusty spot. :D
Left side.
Right side.
Engine bay.
Leave a comment:
-
Same crap, different day. Yesterday i continued with the underseal removal like last 10 posts. But i can feel the finsihline. :)
Cleaned the side member covering so i could see all of the welding points. Making easier for the welder so he doesn't have to look for them. I knew that the left side had a small hole and little fit of rust, but after wirebrush it became a much larger problem. Soon we will find out whats underneath and how bad it really is.
Leave a comment:
-
When underseal removed i noticed that one of the previous owners tried to repair the rust holes with silicone. What a moron! After that crap removed a new opening came to visible. Of course my friend (he is gonna do the whole welding) is clapping his hands, because more money and work for him and bigger disaster to my bank account. :D
That whole lower part will be replaced. There isa Lithuanian company called Valcas Garage and they produce all kinds of metal parts for different BMW models.
I need this: https://www.valcasgarage.com/product...ide-1982-1987/
As you can see, rear left part of the wheel arch has been repired but what a poor job. Also the inner and outer arch is rust damaged and needs to be fixed by a proffessional.
I bet that many bodyshops would love to do the bodywork on my car cause i have made them welding and fixing so much easier by removing everything from underneath. All together i spent around a week by removing that s*it. Of course it would have been much easier to dip it in to a acid bath or take it to a sand or a soda blasting and call it done, but i just needed to do it myself. And i saved probably many hundreds of euros doing it myself. Only thing was spent was time, but this one i have and why not use it wisely. :)
To be continued......Leave a comment:
-
Thank you everybody for the good words! It gives me so much motivation to continue even if sometimes i feel exhausted and willing to give up! :)
It's morning in my country, so good morning!
I probably mentioned few posts ago that front panel of my project is little bit damaged and been repaired the way i don't like. So the whole panel will be replaced. I brought home used one, but its from the facelift model. Cooling radiator brackets and towing eye needs to be taken from the old one. But first i will take it to the sandblasting and see whats underneath the paint. I hope it's usable, but if it isn't i need to take my wallet to a dealership and buy brand new one. Unfortunately the brand new one costs 4 times more than used one. 100 euros versus 400 something euros. We will see that. My brain tells me to buy new but my wallet screams:" You are an idiot if you do that!"
By the way, that used front panel is from my old car. Looks like its time measuring kilometers has come to an end.
But the story doesn't end there. I still had to continue to remove the underseal. Luckily i see the light in the end of the tunnel. Actually i wanted to finish it yesterday, but i couldn't feel my fingers anymore (s*hit load of manual labor), anglegrinder batteries died and i ran out of wirebrush. So i had to call it a day and continue today.
Front right wheelarch.
Last edited by MarkoEST; 04-29-2023, 10:53 PM.Leave a comment:
-
Great post and pictures! Looking forward to following the rest of your journey on this.
Leave a comment:
-
Thanks! We have a long weekend coming and i try to finish all the underseal in three days. It would be a race against the clock, but i have to get it done asap. Bodyshop guy is already waiting for me. Probably few pics coming. :)Leave a comment:
-
Im trying to remove as much as possible by myself. It should be much easier for the bodyshop and probably the price will drop significantly when you dont need to remove that crap. I would love to do the welding, but im not qualified and E30 shouldnt be the first project to test my welding skills on. So unfortunately i have to take it to a friend who will restore it completely. Of course i have a budget limit for the bodywork but definately it will go over the budget when it comes to restoring. I hope that i can get the welding and painting done by the end of this summer. I so want to drive this thing next season, but we will see. Luckily i have almost all the parts i need for assembly excluding headers and few bodyparts.
Thank you! :)Leave a comment:
-
Great thread! Good job on tackling the rust completely by removing the underseal!
I've done it a couple of times and it sucks lol.
Are you going to weld it yourself?Leave a comment:
-
Long time no see. Last weekend i continued to scrape off the underseal. Every time i do that, more holes will be visible and its sad. Rolled the car on its roof basically.
Before i started i already noticed some bad rusty places. After cleaning the real result came visible. I probably need to stack my shelves with cheap macaroni because work volume for the bodyshop will be quite remarkable. I build it for myself so i want to make as good as my wallet can let me. :)
Leave a comment:
-
Havent posted a while. The reason is that i dont have enough time. I have so much else to do that i cant get to the garage these days very often. But its not totally left aside. But im still keeping eye on the market to find parts what i need. Few days ago i found one OEM BBS wheel and three hubcaps. You dont see them very often for a sale.
Now im missing one wheel and one hubcap. Then i have two full sets which at least one will be painted to its former glory. I dont know what im gonna do with the other one when its complete. Well see it then. :)
Leave a comment:

Leave a comment: