

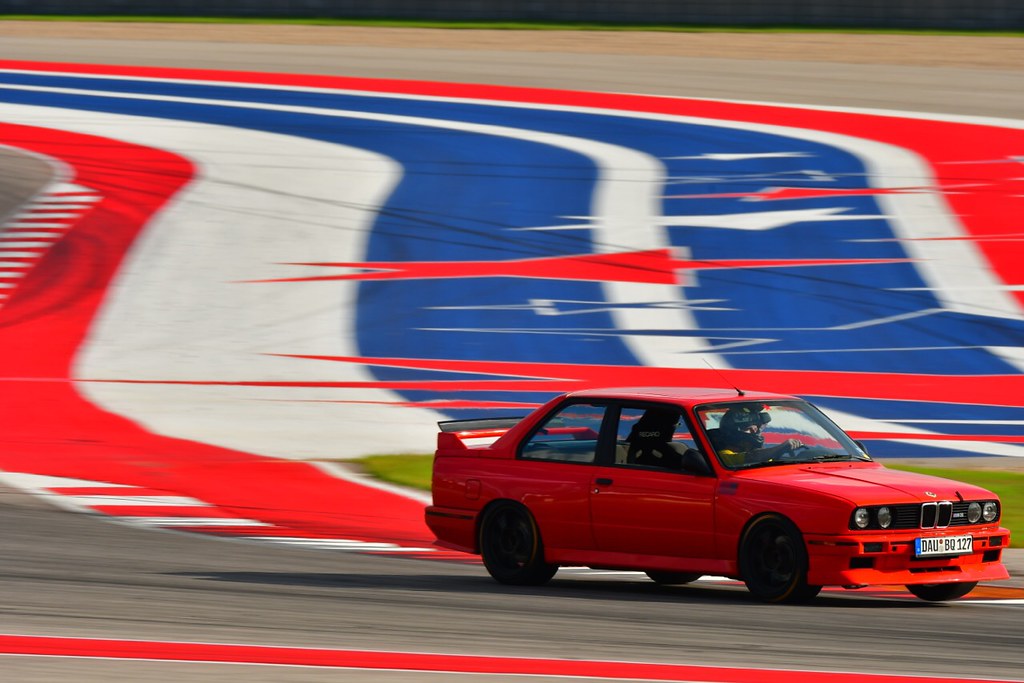
 Untitled by ericandshovin, on Flickr
-
-
Looking great! What is the offset on those SSR's? I'm running 17x9 ET30 with Conti's on my late model and it fits perfectly (e30 m3 5 lug), I'll be interested to see where you end up.
Also, regarding the Conti's, put a short scuff cycle on them before doing any long runs and they'll be a lot more consistent over their life span. I would throw them on one weekend and just do one session on them when track temps aren't super high, then take them off the car, put them away and run them hard next eventLeave a comment:
-
You truly are one talented MOFO. Wish I had some of your skills. Awesome thread!!!Leave a comment:
-
-
Funny that one shot of rubbing has a wheel marking of 4x100 and it's obvious it's 5x120. Were they blanks? The SSR's?Leave a comment:
-
Thanks! I wouldn't say it's good work ethic... just a deadline that I'm cramming for! My E28 M5 is getting some goodies, then it's sadly going on the chopping block.
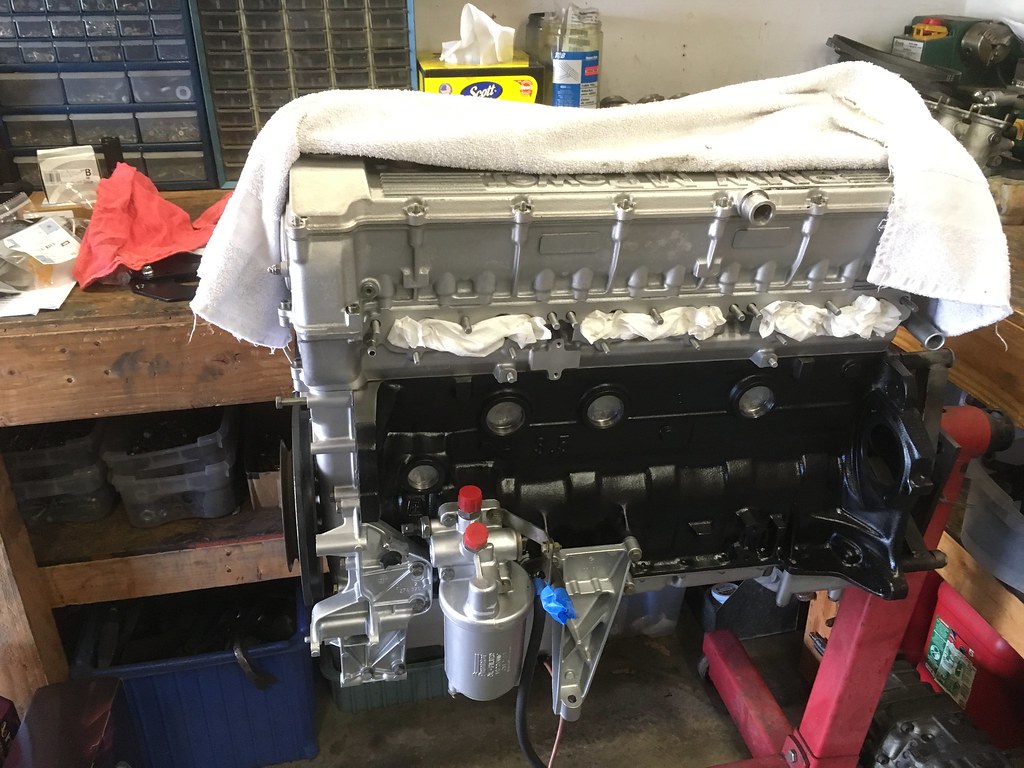 Untitled by ericandshovin, on Flickr
 Untitled by ericandshovin, on Flickr
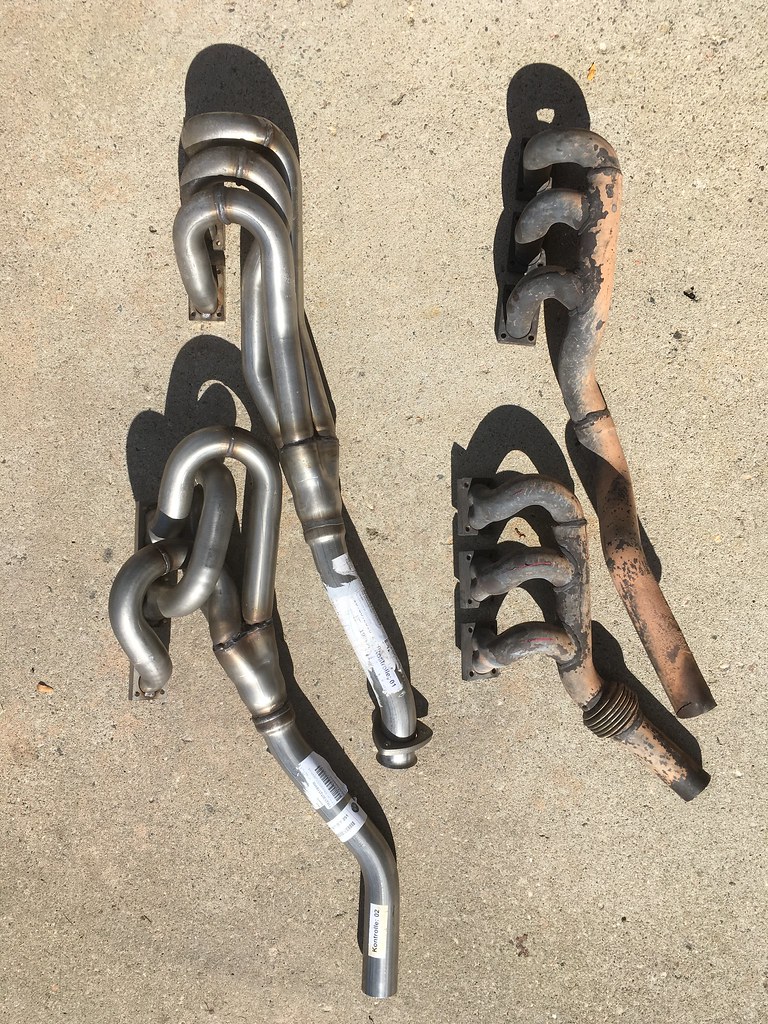 Untitled by ericandshovin, on Flickr
Back to the E30... I had about 10 minutes last to check out what is going on with the rear wheels. I'm running 17x9 255/40/17 Star Spec 2's squared and I got some rubber melting rubbing at that event on sunday.
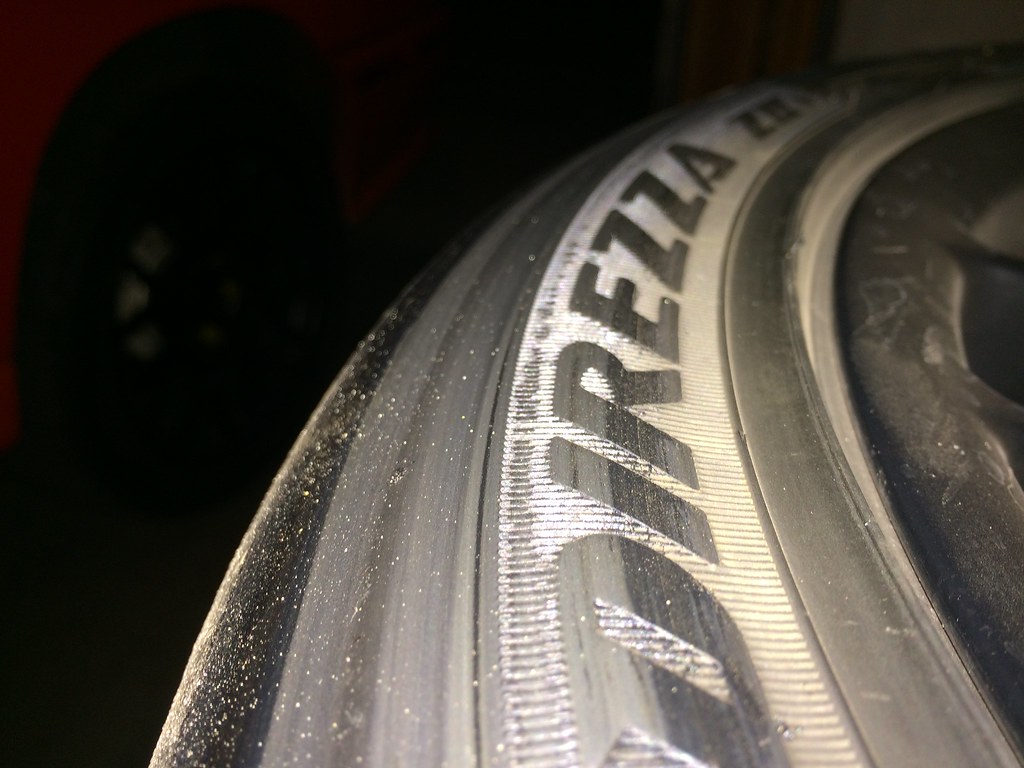 Untitled by ericandshovin, on Flickr
I realized at the event that I should be running 15mm spacers in the rear instead of 20mm! Noted for next time I drive on street wheels. Since I'll be using the continentals and SSR's at COTA, I need to test fit them as they are a hair wider and the SSR's are 3mm lower offset.
Room in the rear looks OK. Has anyone shaved down the seam that sticks out to get a little more clearance?
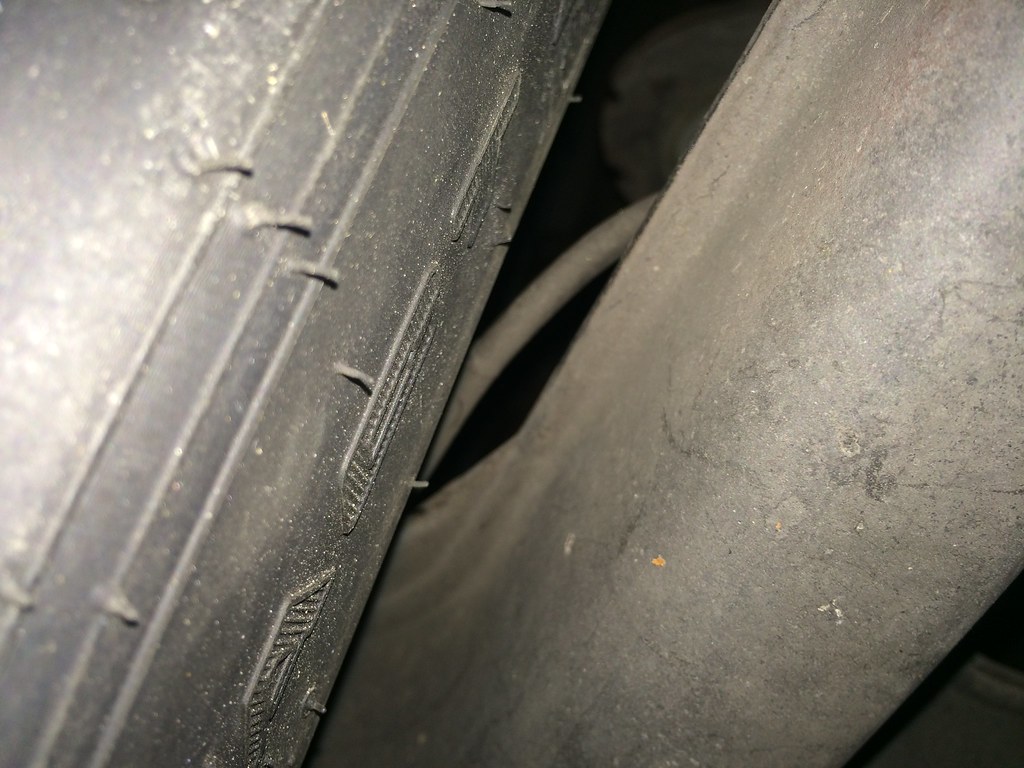 Untitled by ericandshovin, on Flickr
Outside looks suspect, but OK at it's static ride height
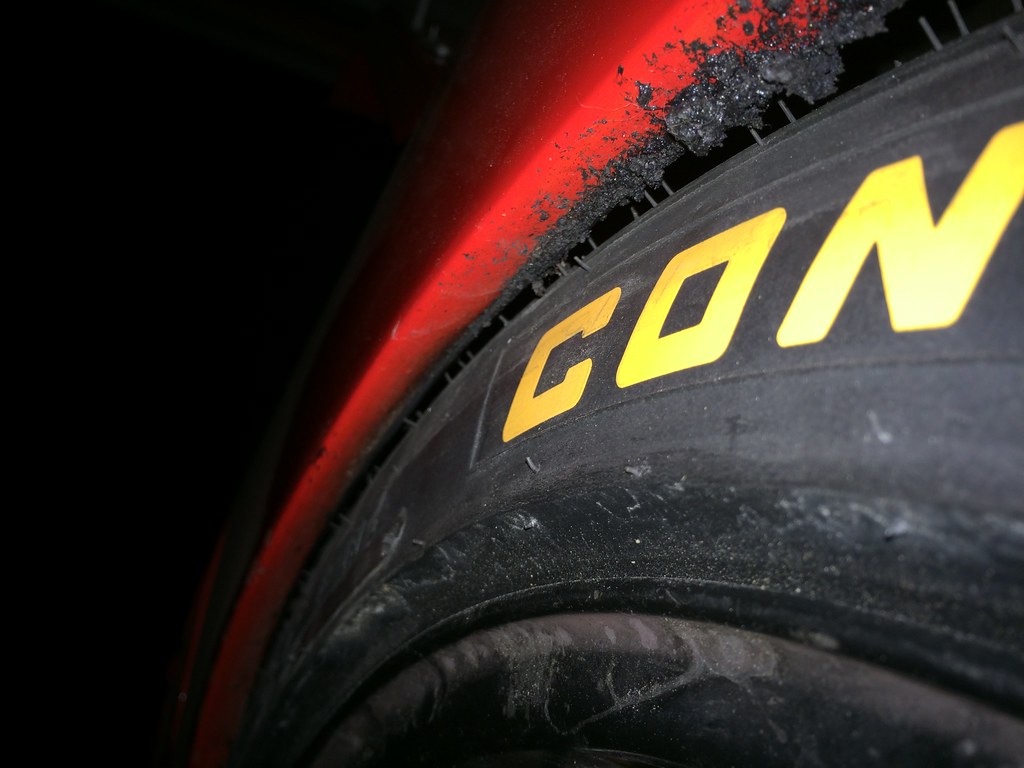 Untitled by ericandshovin, on Flickr
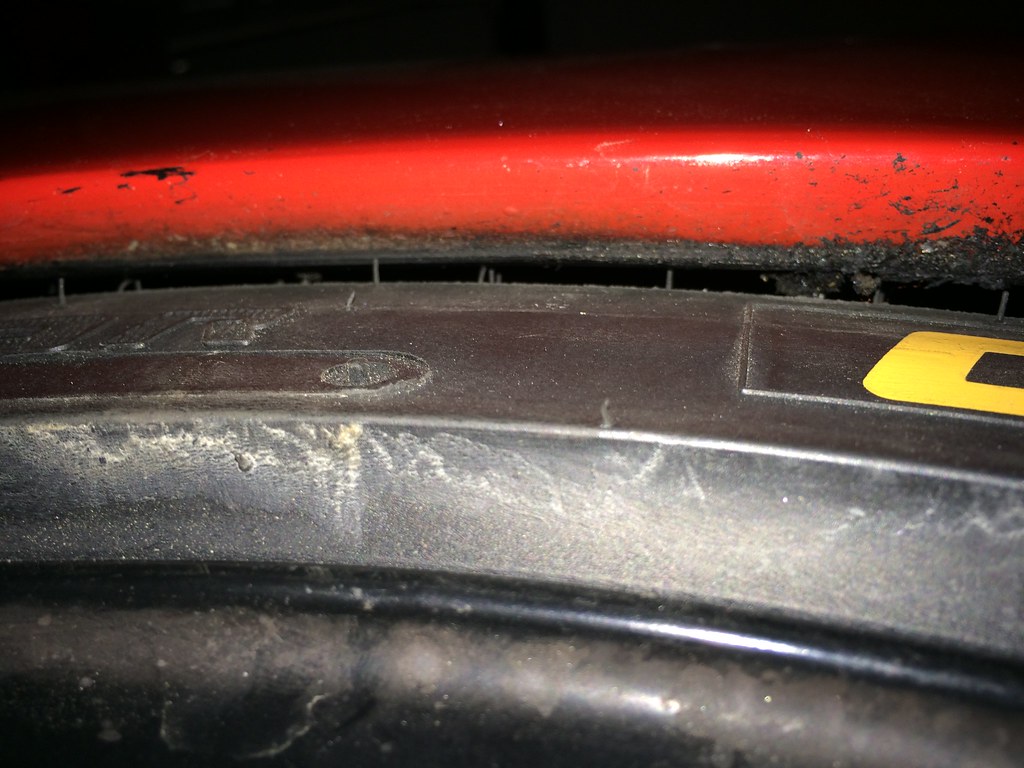 Untitled by ericandshovin, on Flickr
Then I removed the shock and jacked it up until it made contact.
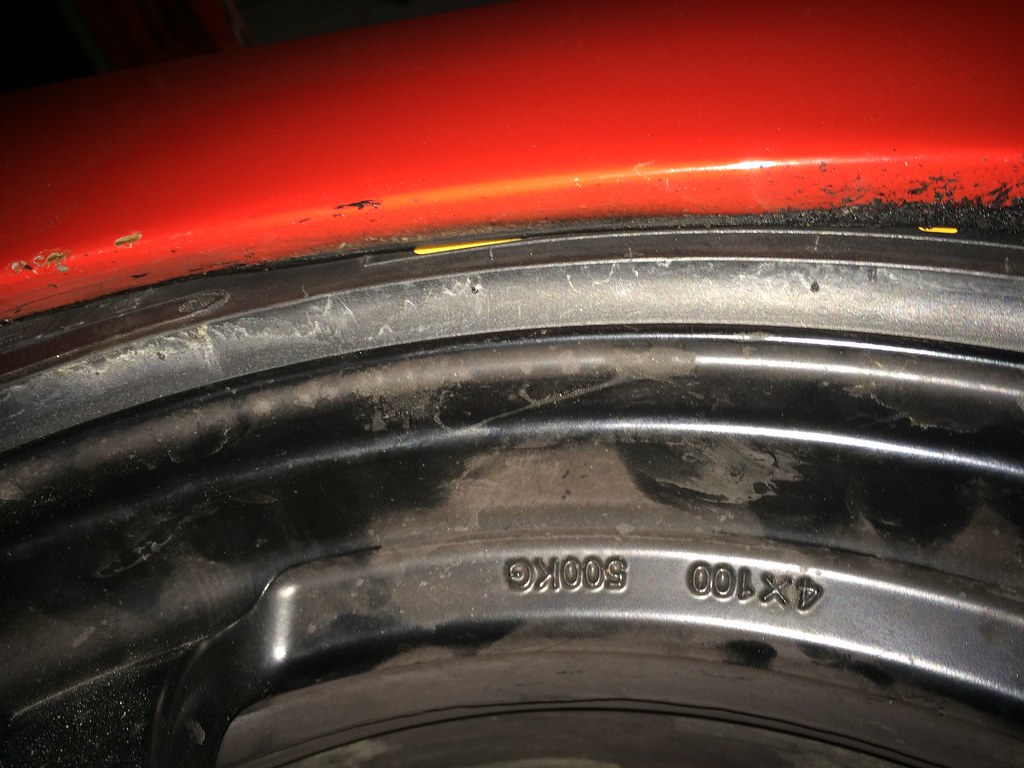 Untitled by ericandshovin, on Flickr
I've put an order in with VAC for some other spacer sizes. I seam to have lost my ancient H&R 15mm, my 10mm found their way onto the front of the E28 M5, and I need an 18mm for the front. I'm planning on stacking the 10mm and 18mm up front and use the 15mm in the back. This should work without needing to roll the fender. I have a fender roller, but I'm in no ways a pro, and I don't want to test my luck on this car!
Snapped a few photo's just now in the sunlight (sorry, dirty lens). Looks pretty cool I think!
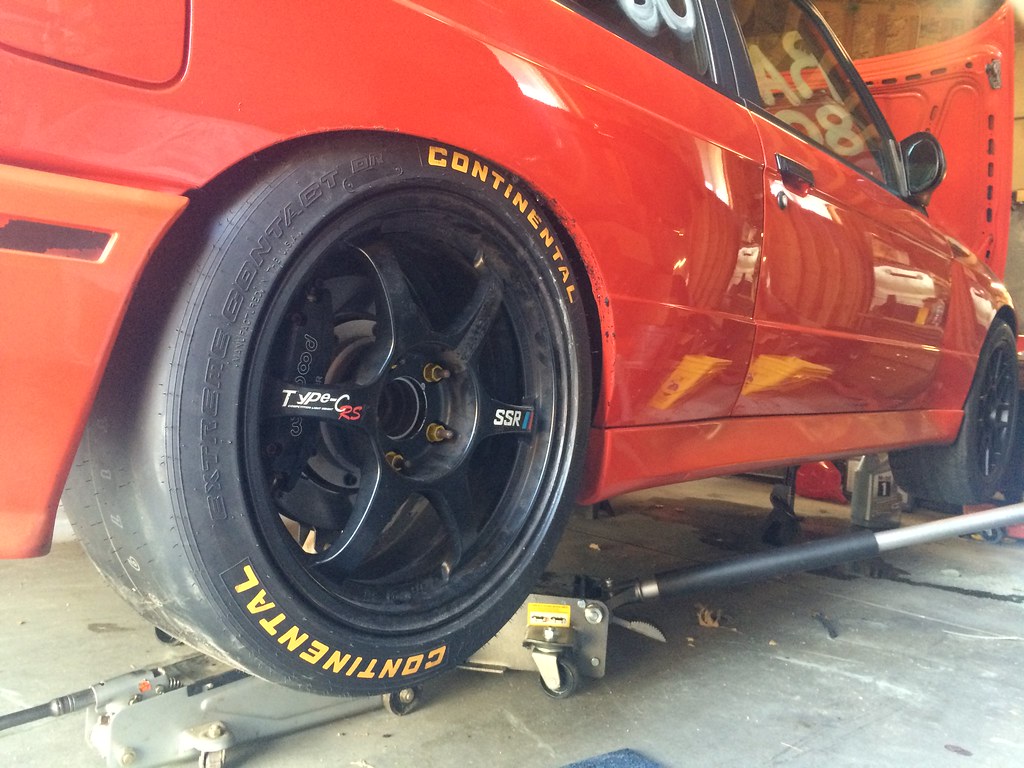 Untitled by ericandshovin, on Flickr
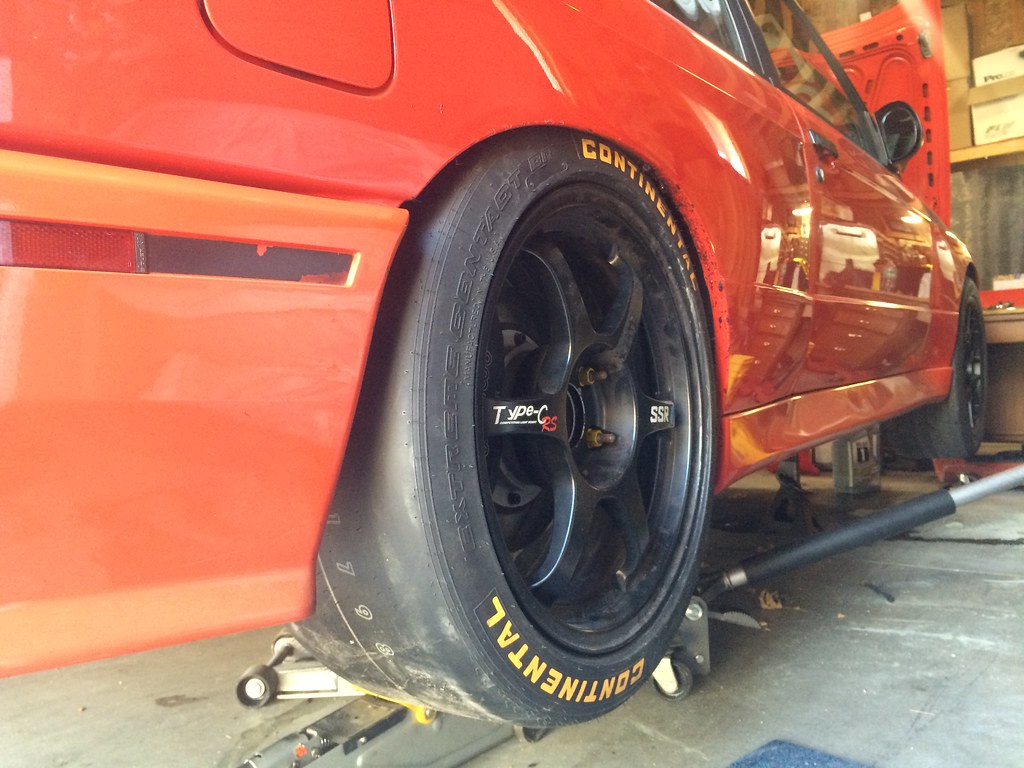 Untitled by ericandshovin, on Flickr
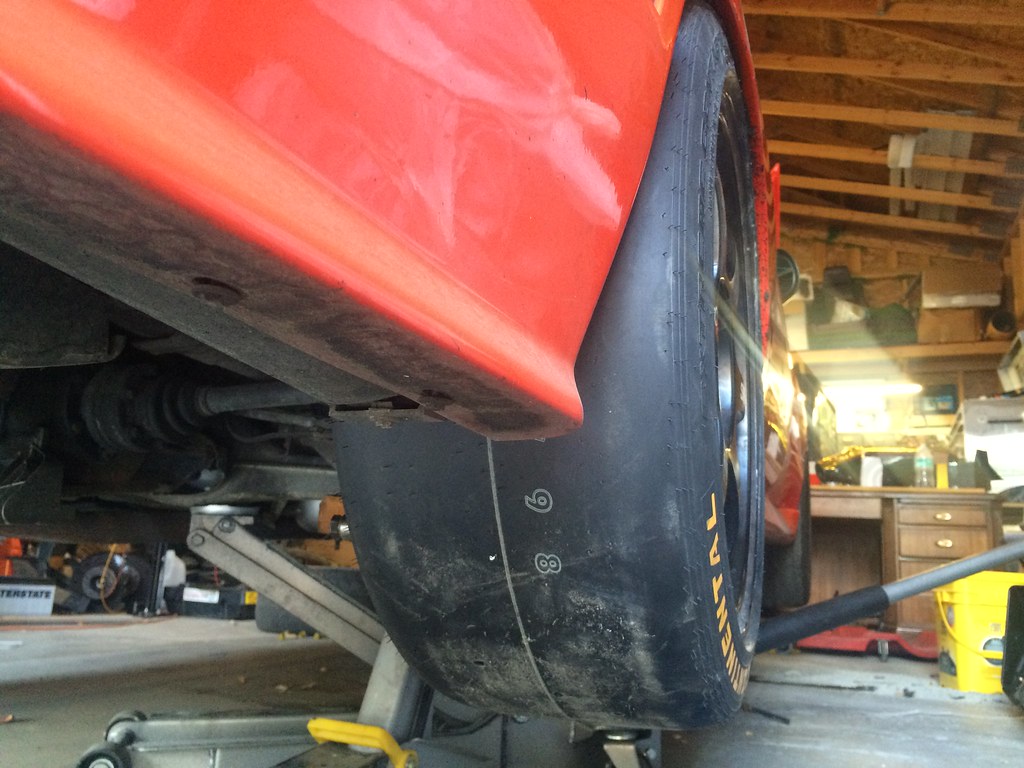 Untitled by ericandshovin, on Flickr
Last edited by Eric; 11-02-2016, 12:55 PM.
Untitled by ericandshovin, on Flickr
Last edited by Eric; 11-02-2016, 12:55 PM.Leave a comment:
-
You, sir, have fantastic taste and an even better work ethic. Kudos to owning each of my dream cars with emphasis on the e28 and e34 m5s.Leave a comment:
-
Damnnnnn Eric you've been busy. I figured you would have just S54/S62 swapped and called it a day.Leave a comment:
-
Busy busy couple of days.
So a few 2am nights and the car made it to it's first event in nearly 2 years!
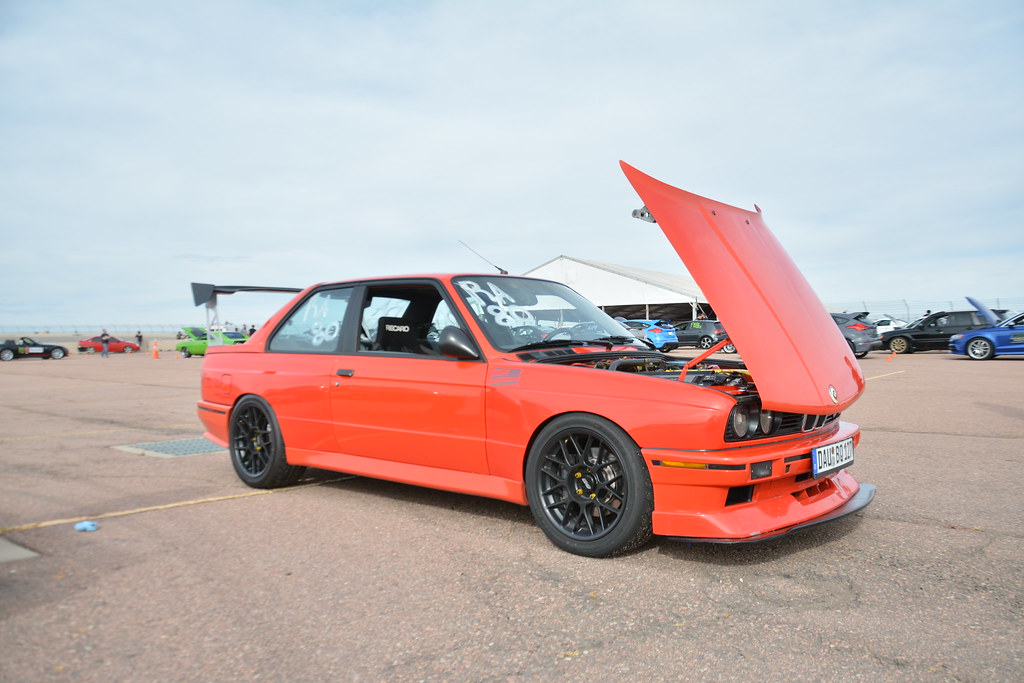 DSC_8208 by ericandshovin, on Flickr
The event was fun, but the way they organized the runs wasn't my favorite. All classes/cars ran through the course then you started all over again. This lead to 1.5 hours or more of down time between your 45 second run. Tires were cold, motors were cold, etc. I like the auto-x format better where you can get everything up to temp. Here is a little vid of me on course.
The good news:
- The wing didn't fly off!
- The splitter didn't fly off at 90mph!
- The motor didn't blow up!
But now back to those 2am nights.
A quick little project was securing the dipstick. I tore the O-ring in it a while ago, and didn't want to weld a tab on it. so a new o-ring, this little aluminum, an adel clamp and a bolt did the job just fine.
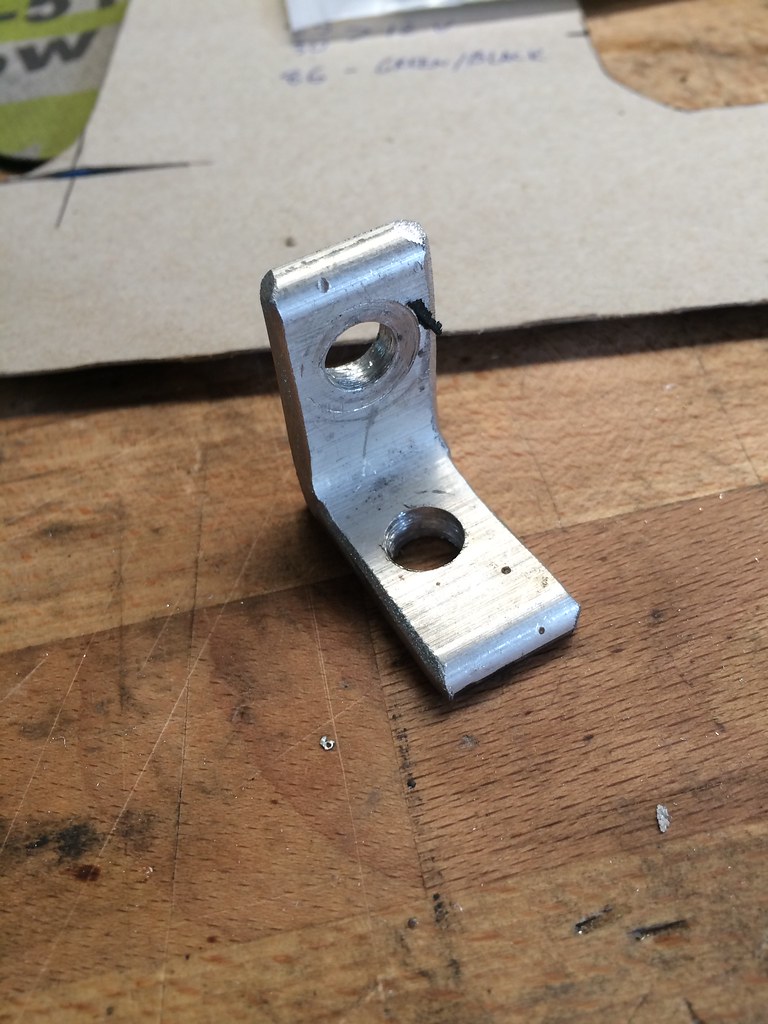 Untitled by ericandshovin, on Flickr
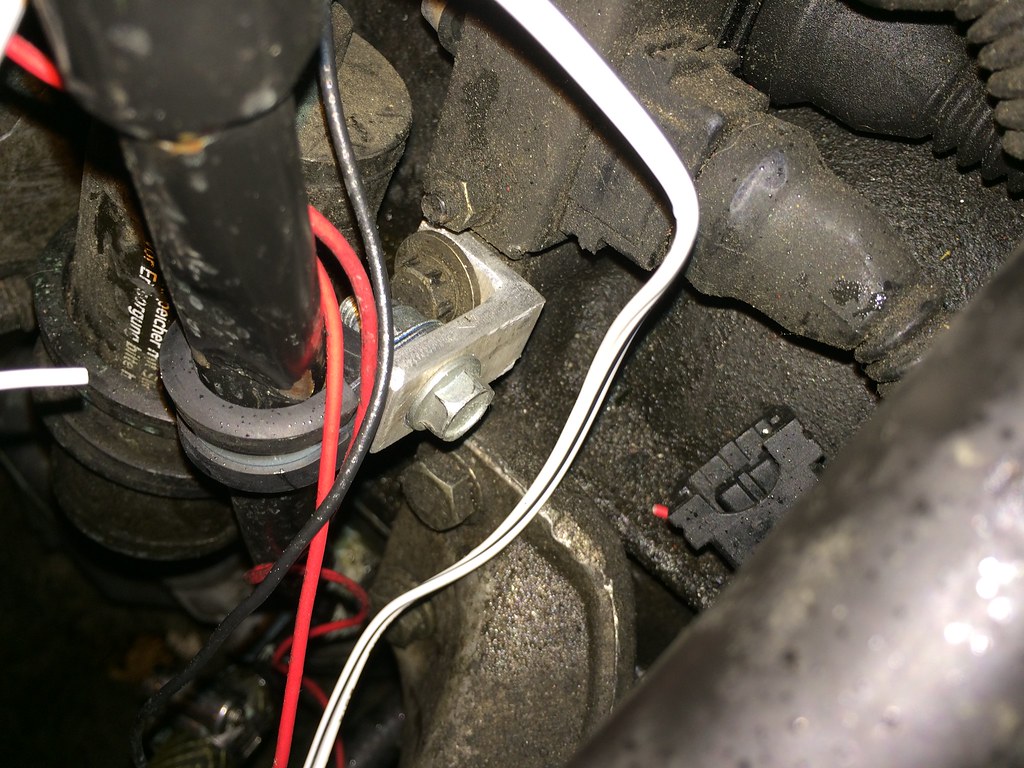 Untitled by ericandshovin, on Flickr
While reassembling the coolant system I thought I'd compare the VDO gauge probe in the old 3.0L motor with the one in the 3.2L motor. As you can see, the 3.0L was much longer and able to stick further into the flow a lot better than Mr. Stubby.
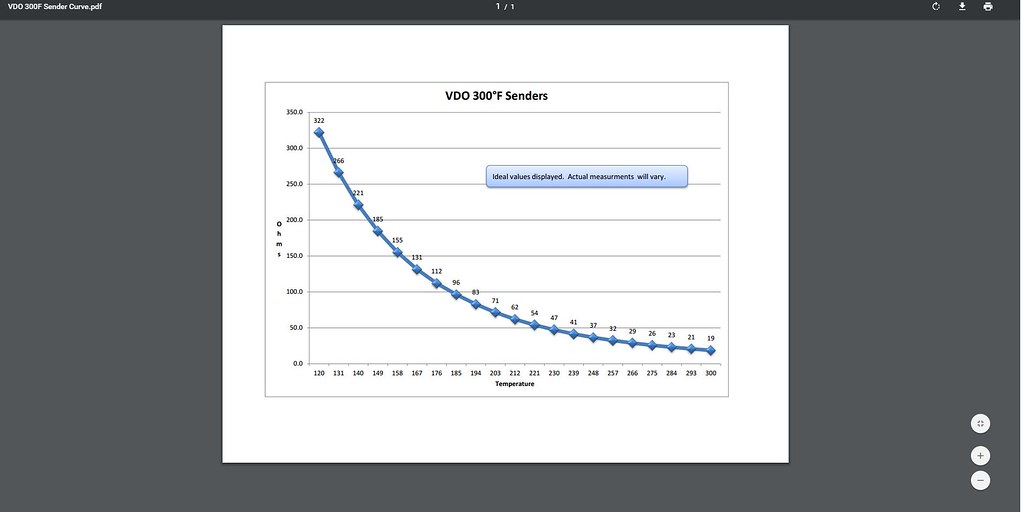
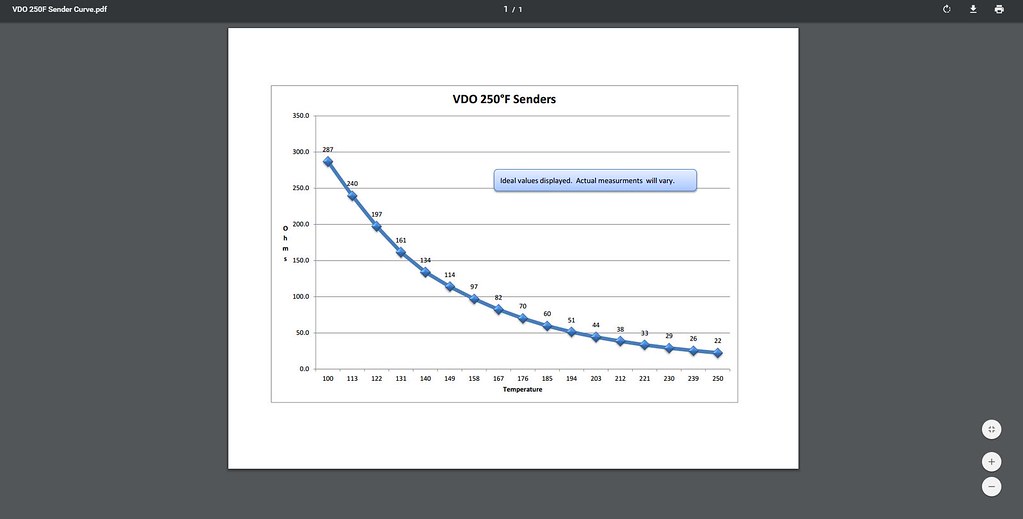
Before sticking the long one in and calling it good, I looked up the part number to see if it's the right probe. Turns out it is... But the stubby one is not! My gauge reads 100-250°F the stubby probe is 120-300°F. At first I didn't think anything of it, but then I starting pondering the relationship between what the probe was reading and how the gauge was interpreting it.
Below is the 300° chart:
 300F by ericandshovin, on Flickr
And the 250°F chart:
 250F by ericandshovin, on Flickr
If you look at the ohm reading for a given temp, you can see that hooking a 120-300° probe to a 100-250° gauge will give some scewed readings.
ex 1:
-300° sender reads 140° and sends the gauge a resistance of 220ish ohms.
-250° sender reads 128°ish and sends the gauge a resistance of 220ish ohms.
Ex 2:
-300° sender reads 221° and sends the gauge a resistance of 54 ohms.
-250° sender reads 194° and sends the gauge a resistance of 51 ohms.
EX 3:
-300° sender reads 266° and sends the gauge a resistance of 29 ohms.
-250° sender reads 230° and sends the gauge a resistance of 29 ohms.
With this new knowledge, I thought all would be well in EWP land. Turns out, not so. A few miles down the road and the water temp would climb to 220° then shoot up to 250°!!! This is when I shut off the car and coasted to a stop. I got out to check on everything and it was clear that the coolant system was pumping air into itself, pumping it right out of the bleeder cap. I also noticed an odd thunking from the pump, still not sure what this is. If you watch the video closely you can see the pump have very small pulses which it normally doesn't do.
Yesterday I took off a day to just relax a bit and let my mind sink in to all the things that need to be done.
Last night after all the trick r' treating was finished up, I tore into the cooling system, removing the radiator, upper hose, lower hose with the pump and the thermostat housing. My goal was to remove the silicone tubing as I was having a problem with the upper radiator hose beginning to slip off the radiator. I had to push that thing back on at least 3 times yesterday!
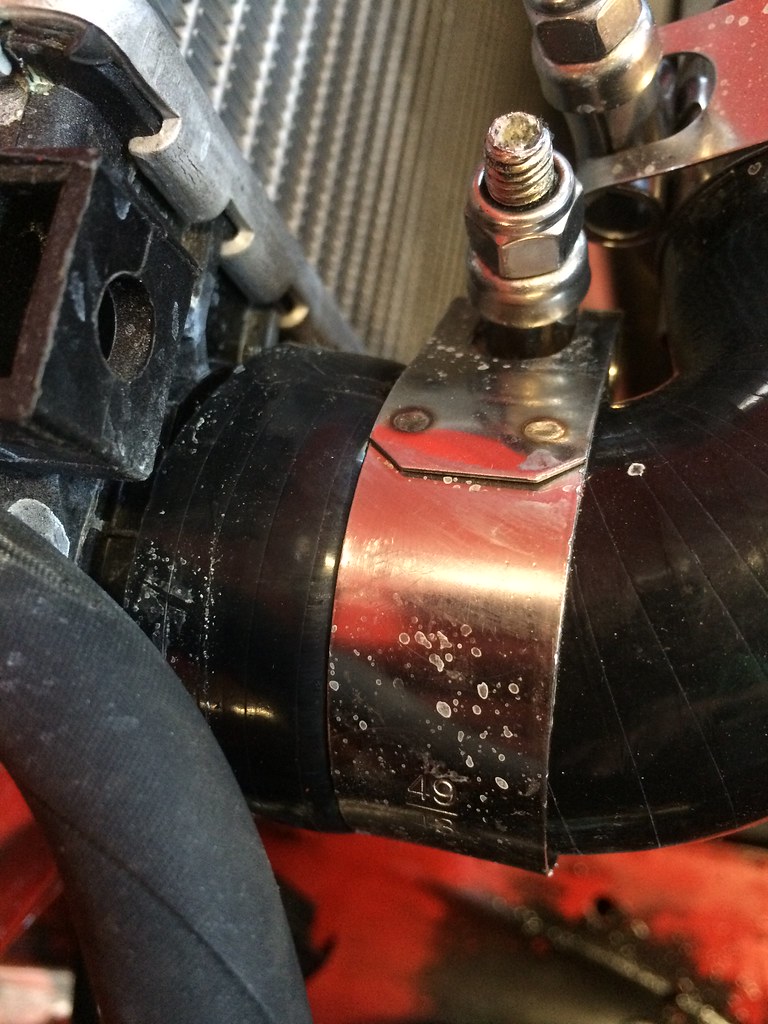 Untitled by ericandshovin, on Flickr
Some time after midnight I realized that I was wrong a few posts up about the flow of water in the system. Well, maybe not wrong, but not 100% correct. The thermostat housing pictured below is the view from the engine, coolant leaves the head, goes straight into the hole your looking into and then heads out to the upper radiator hose to be cooled off.... except... there is a giant fucking hole there!
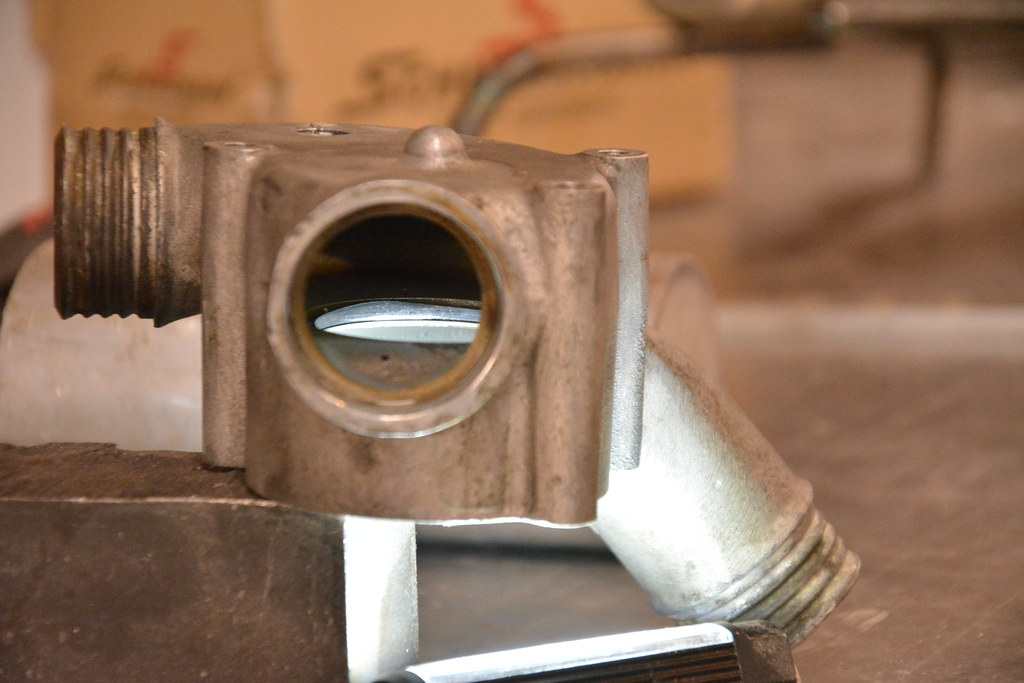 DSC_8218 by ericandshovin, on Flickr
The Davis Craig instructions say to remove the thermostat as the digital controller will act as the thermostat, so that's what I did. Little did I realize it would put a 2.5" hole that allows the cool water from the radiator to mix with the hot water from the head. A bit of rummaging in drawers revealed two old t-stats, and here is one of them sitting in the orientation it would sit in the car. The silver bit goes into the thermostat housing, the brass parts go down into the water pump. Google S54 t-stat for more pics, it's the same geometry.
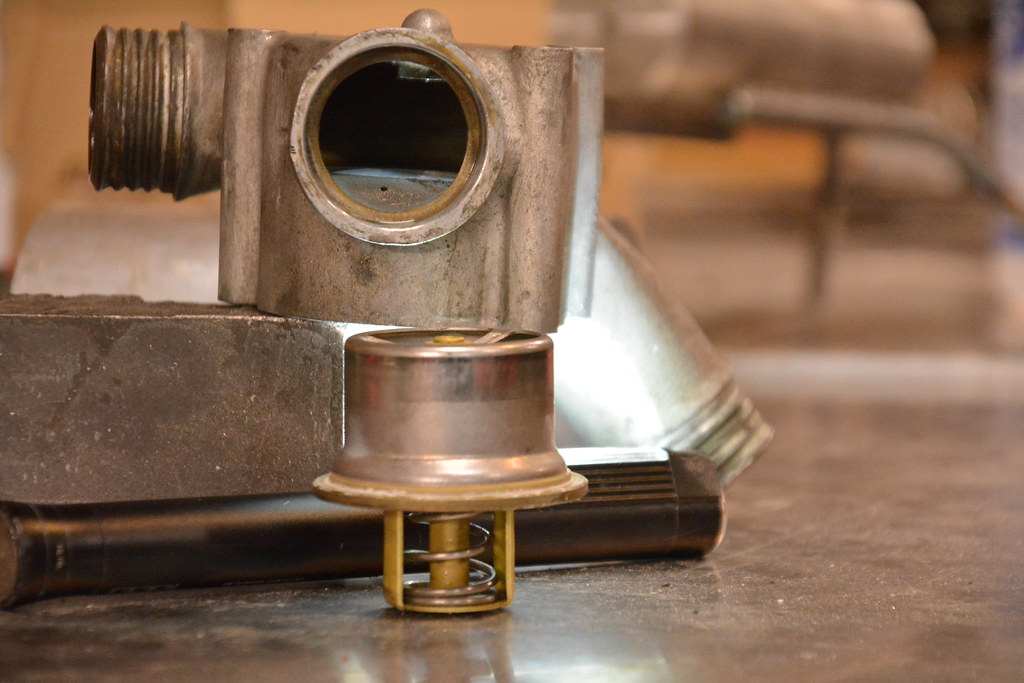 DSC_8219 by ericandshovin, on Flickr
Now hang on, the t-stat is hollow in the center, so there is still a giant hole that connects the upper and lower chambers!
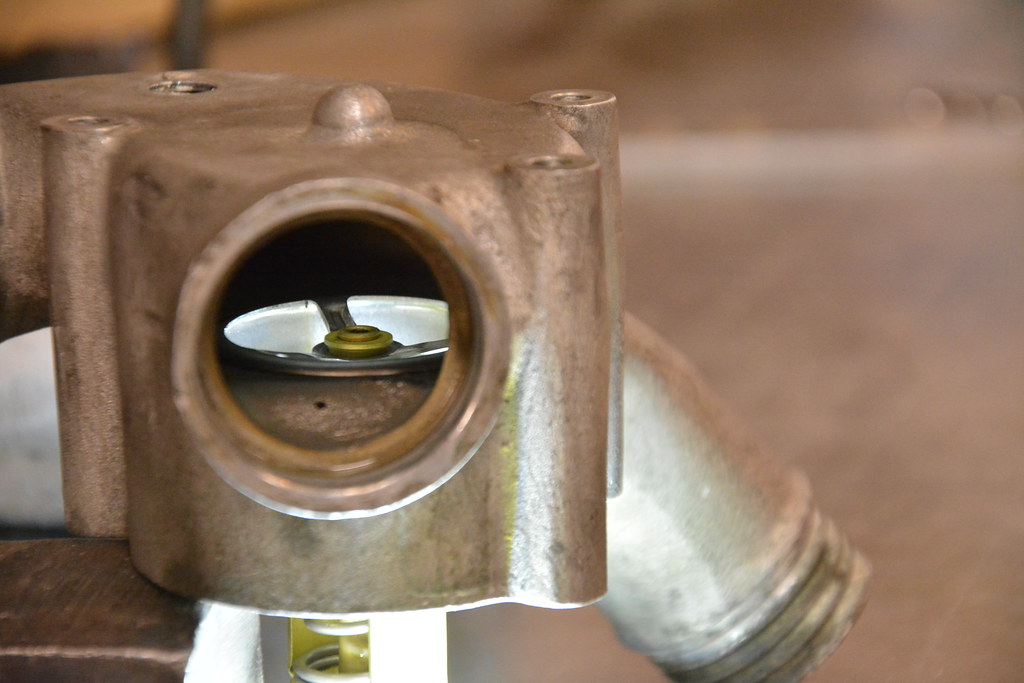 DSC_8220 by ericandshovin, on Flickr
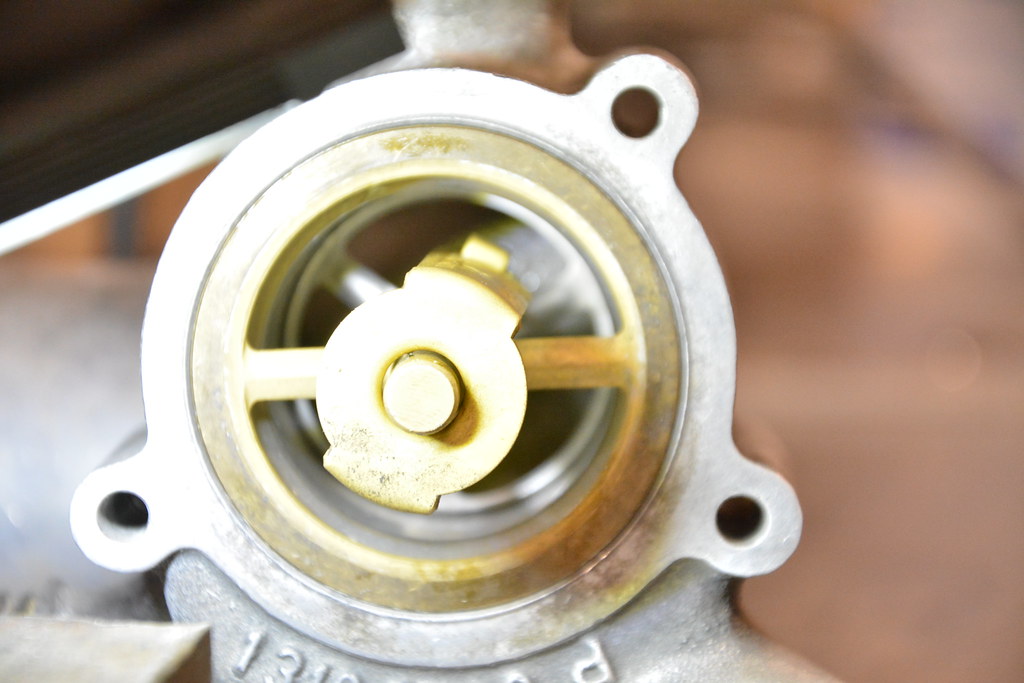 DSC_8221 by ericandshovin, on Flickr
I was seriously perplexed here, so much so, I called a buddy and used that facetime thing to show him what I was looking at. He too didn't get it. Then when messing with it, I pushed on the spring hard enough to move the silver tube up. I then realized that the silver tube slides up into the upper chamber allowing water from the lower chamber to flow into the water pump. When the t-stat is cold, water just falls from the upper chamber down into the pump via the pathway the silver tube provides. simple and ingenious (of course BMW, of course).
I tested this theory with a big C-clamp. Yup.
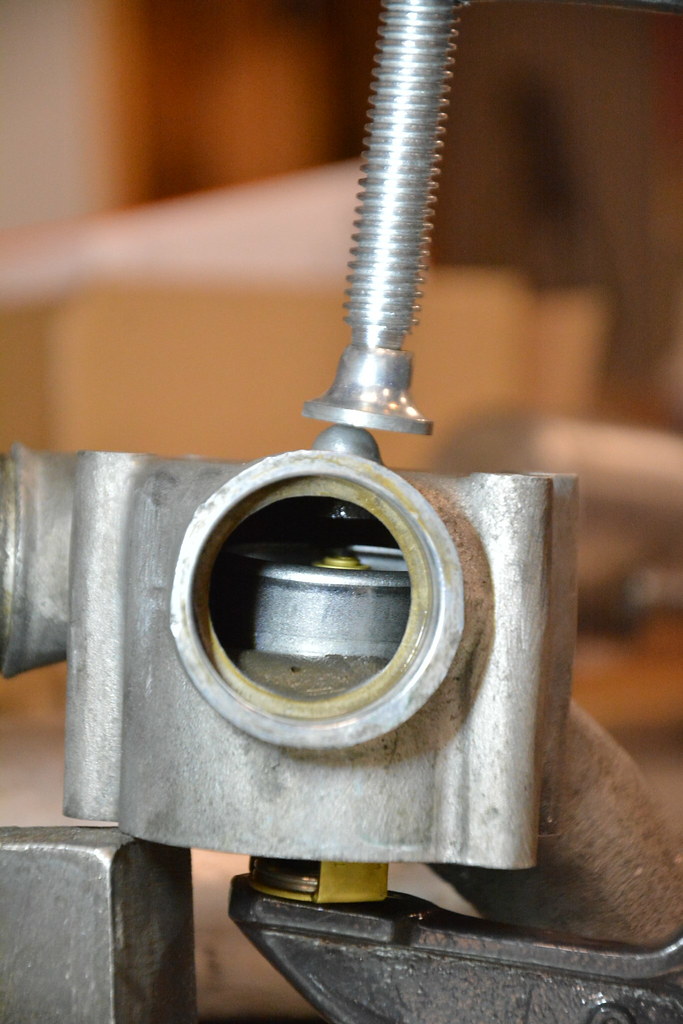 DSC_8228 by ericandshovin, on Flickr
At this point my buddy strongly suggested I pull the mechanical pump blank off and go back to the old pump and just not worry about it any longer. This would probably have been the smarter option.
Instead I decided to figure out how to prop the t-stat open to allow the EWP to function as it should and provide the proper seperation between upper/lower chambers that BMW designed.
Remove the spring by compressing the spring and releasing the tabs on either side of the inner framework
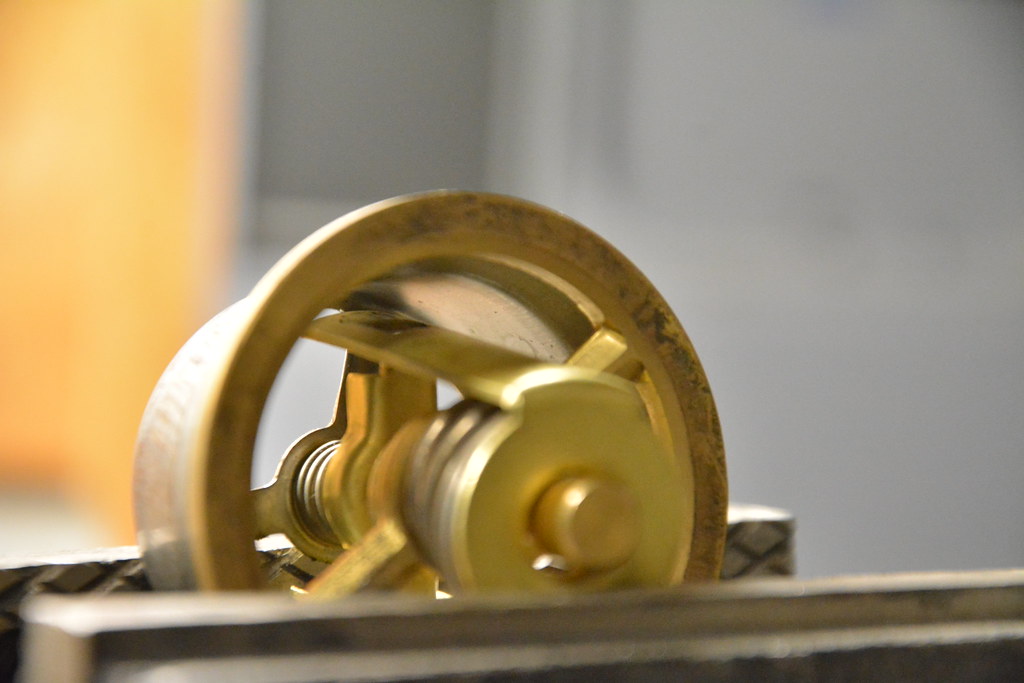 DSC_8236 by ericandshovin, on Flickr
Without the spring, the t-stat was a mess to keep together. but with enough clamps, I was able to get it assembled, open the t-stat and JB-weld the thing in the open position. Does cured JB weld hold up to 100% submersion in BMW Blue juice?
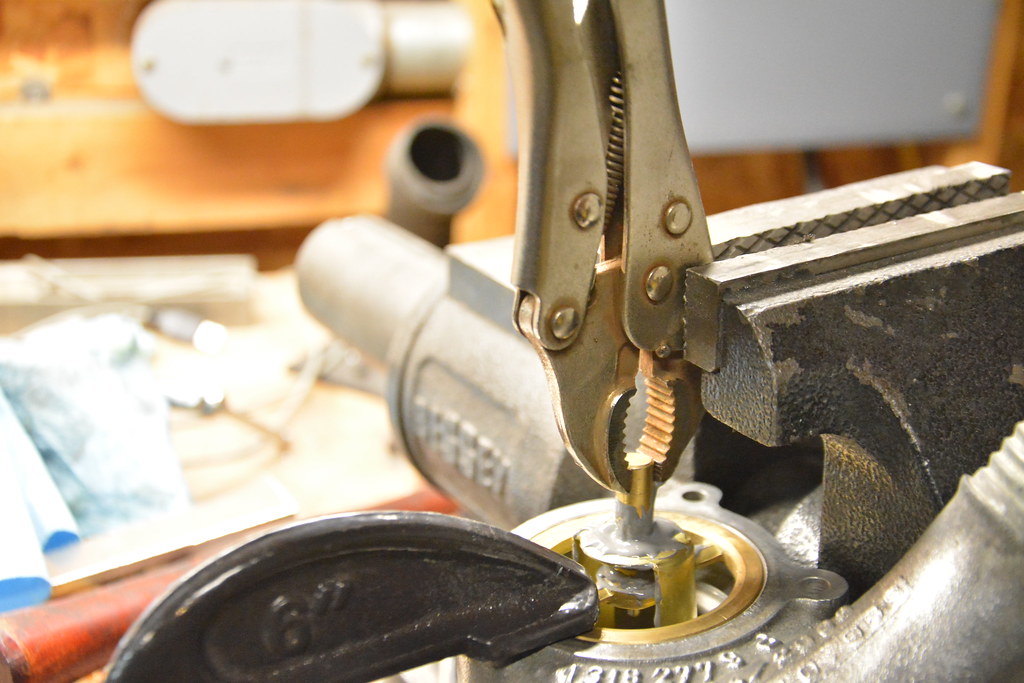 DSC_8238 by ericandshovin, on Flickr
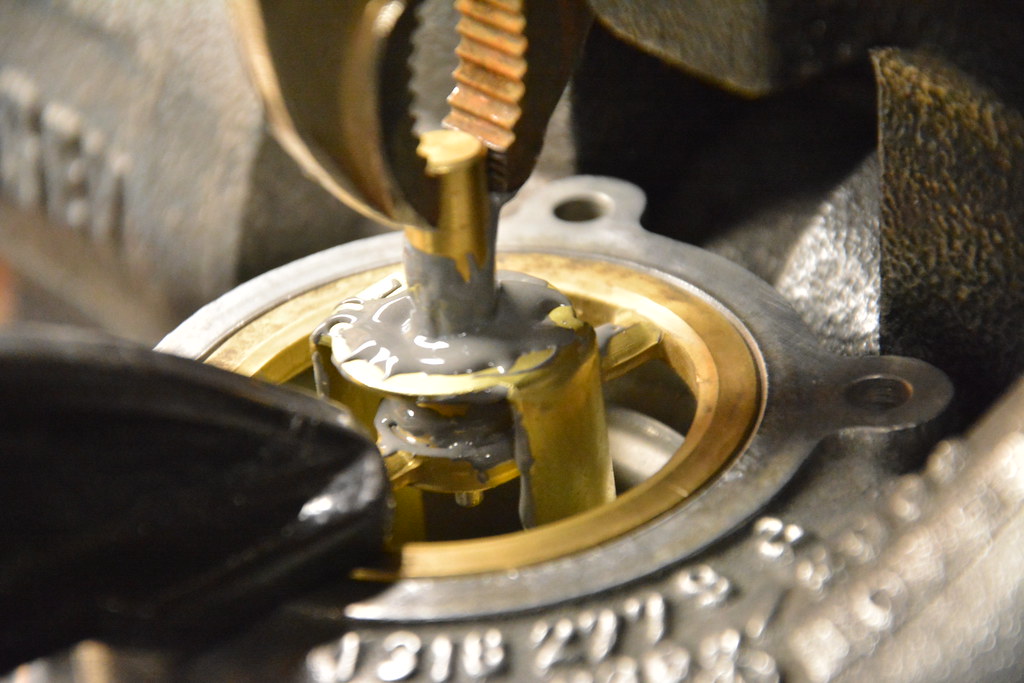 DSC_8237 by ericandshovin, on Flickr
My next project for the evening was to remove all variables that could cause air to enter the system. One suspected area was the thermister the EWP uses to know the water temp. It's a 1/4" NPT thread, and while I did my best to tap the thermostat housing properly, it never felt really good. Part of it is probably my tapping skills, and part of it was the thin material of the housing.
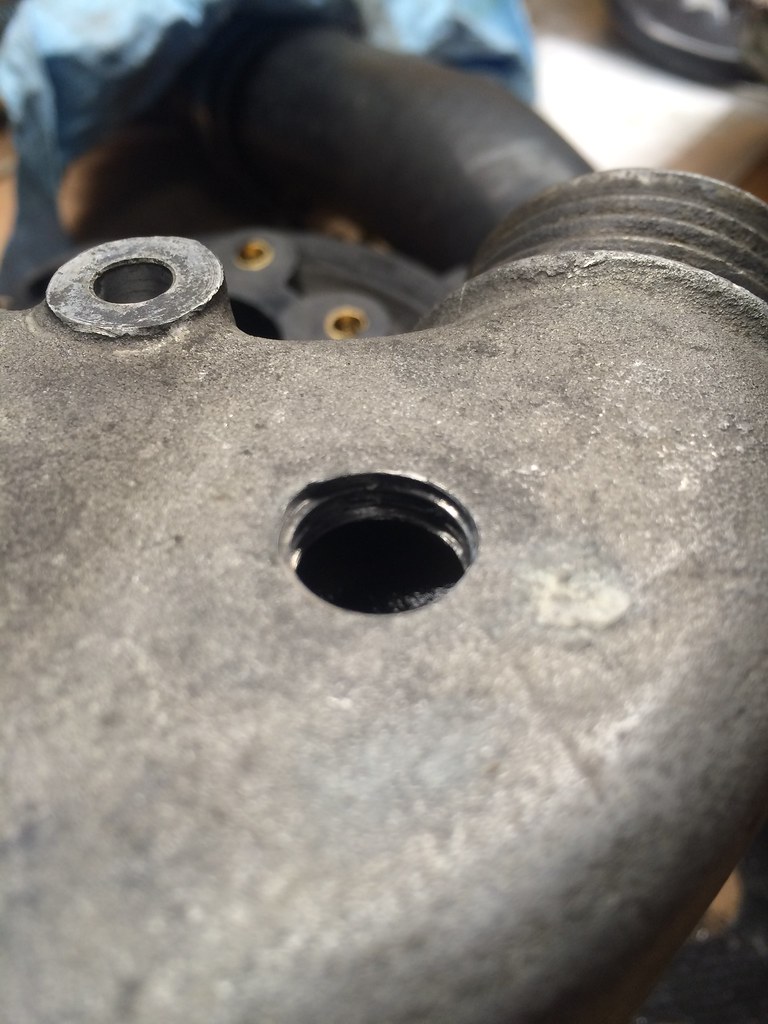 Untitled by ericandshovin, on Flickr
I made up for this with a liberal use of teflon paste.
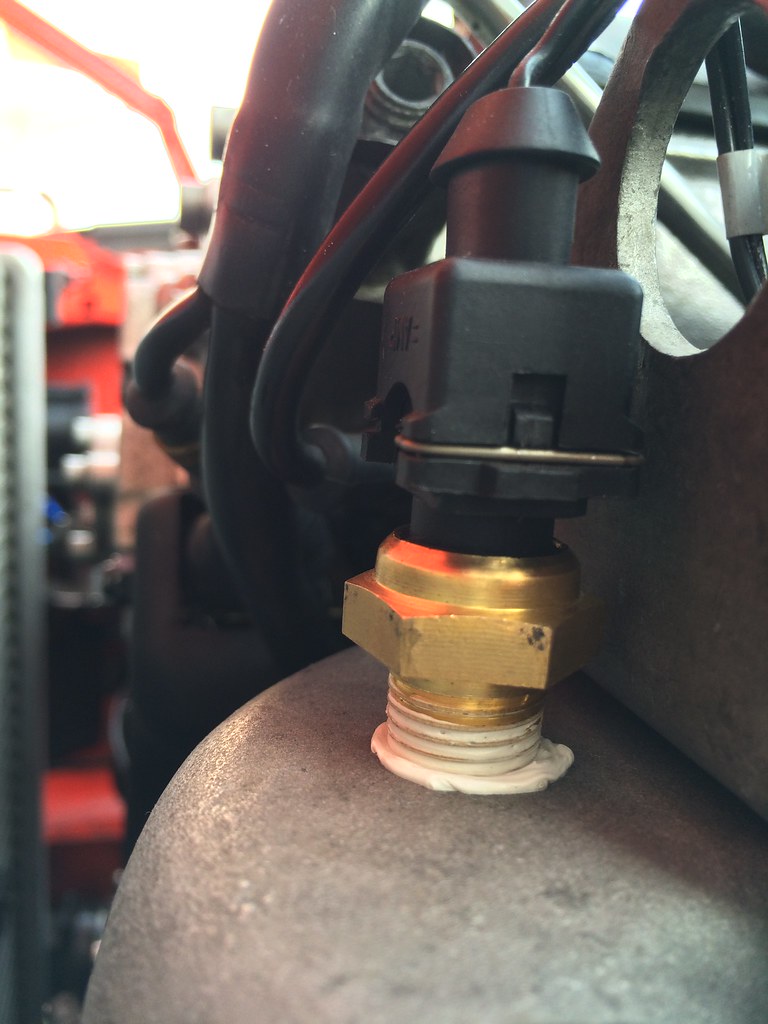 Untitled by ericandshovin, on Flickr
I spent a few hours looking for a local version of this: https://www.summitracing.com/parts/e...2erl/overview/
No hose shop, speed shop, import shop, subaru bro shop had it. Then I found this at Pep Boys of all places!
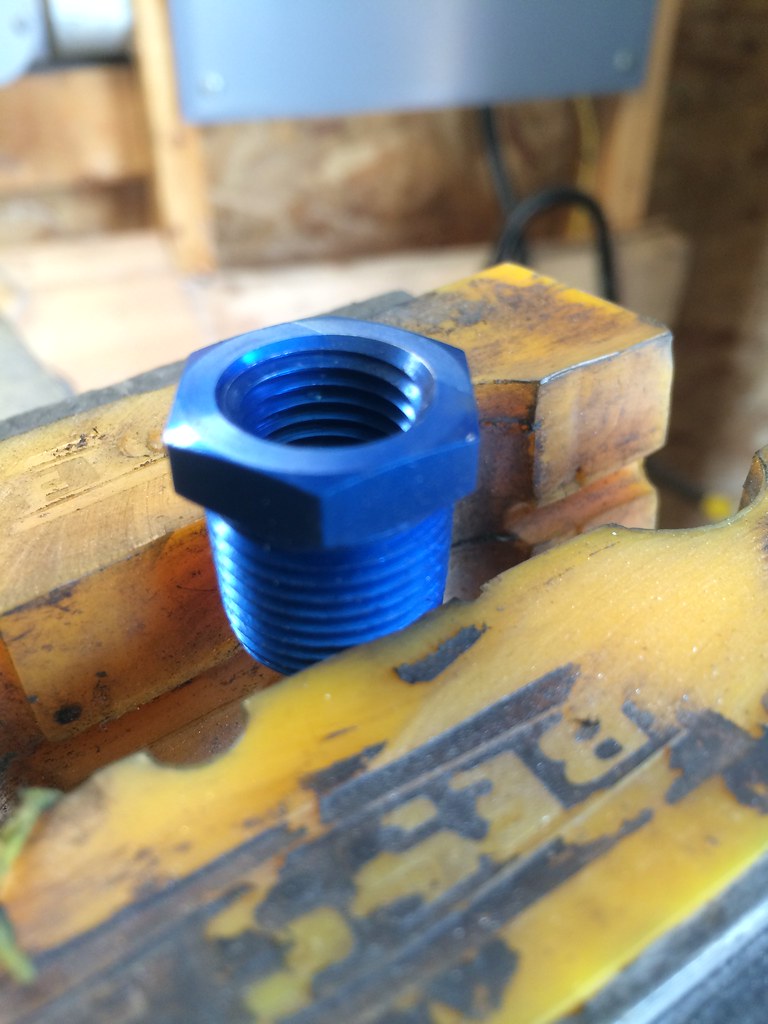 Untitled by ericandshovin, on Flickr
Prep is key in welding, and welding over anodized material is a no-go. So a bit of wire wheel and it's getting close to ready!
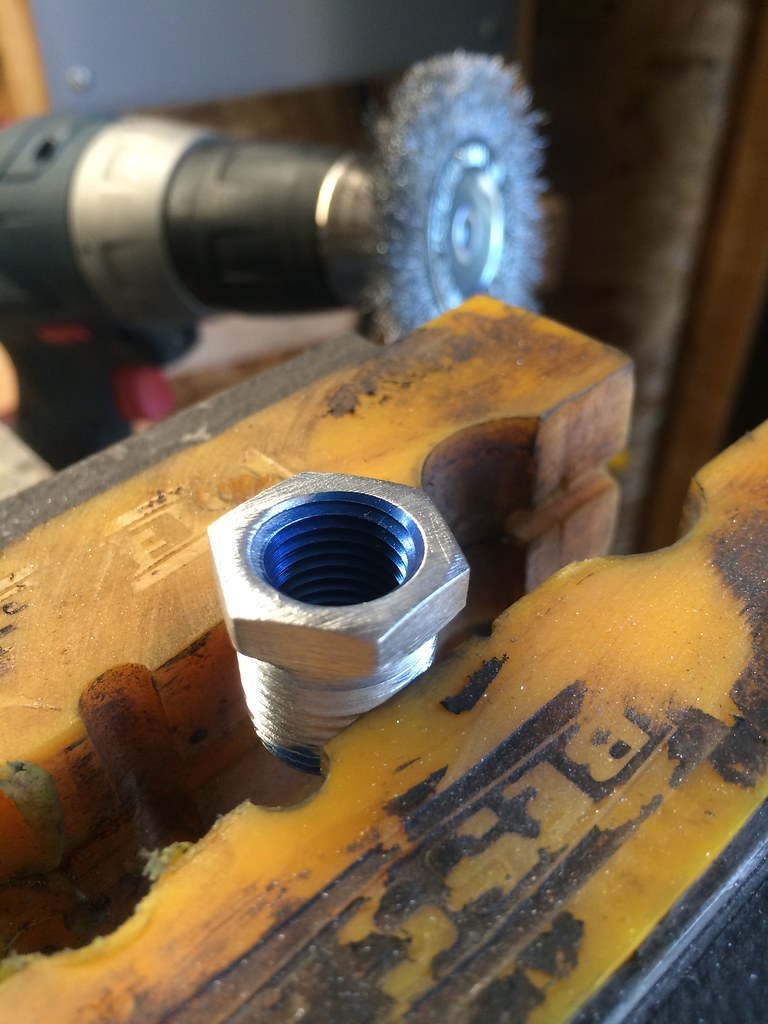 Untitled by ericandshovin, on Flickr
A test fit showed that the bung reached as far as the probe. That's not good! I need the probe to be in the flow of coolant, luckily I own a lathe!
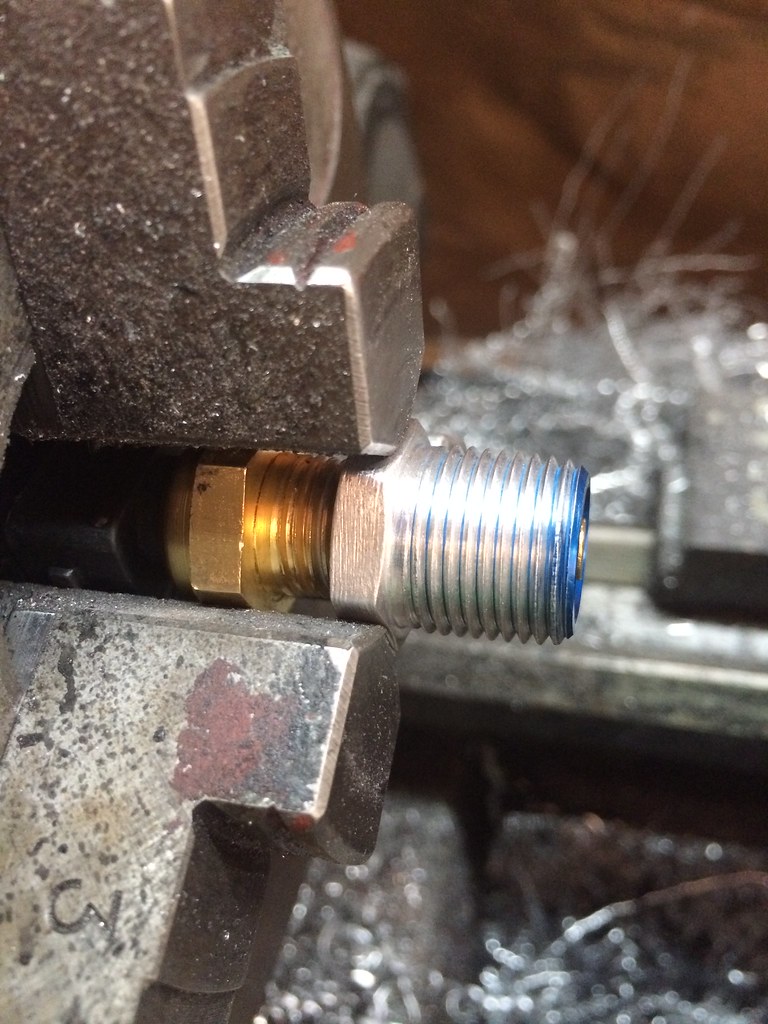 Untitled by ericandshovin, on Flickr
That's better!
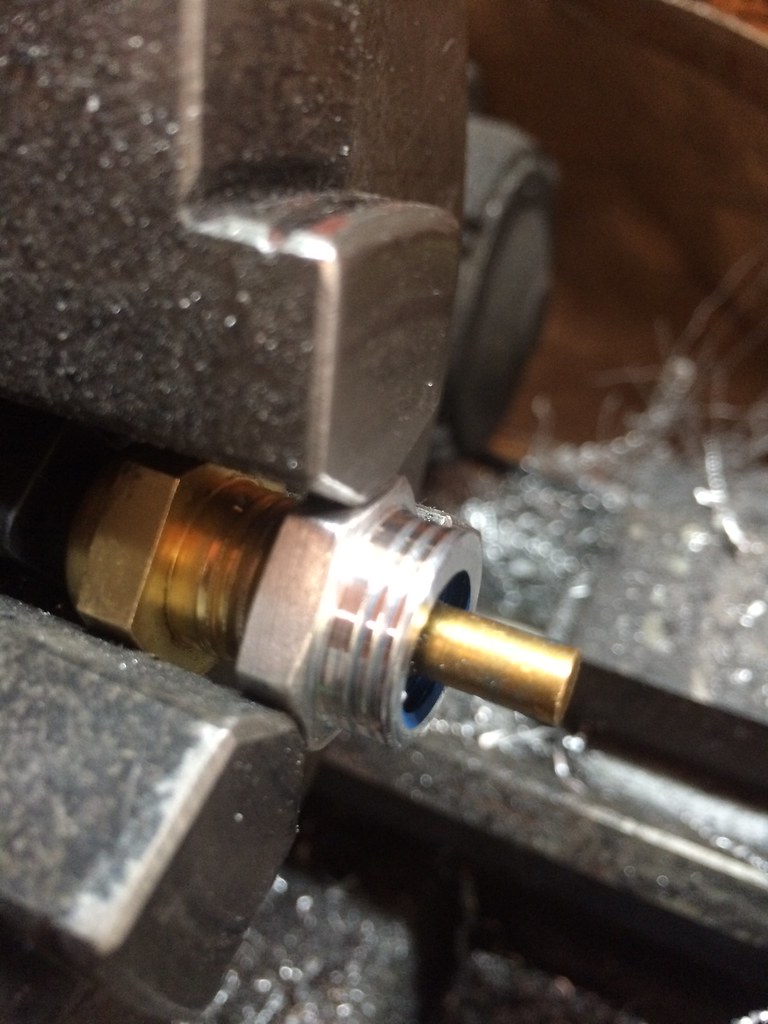 Untitled by ericandshovin, on Flickr
This guy did a pretty good job of enlarging the hole, but the bung did need a few taps from the hammer to sit flush
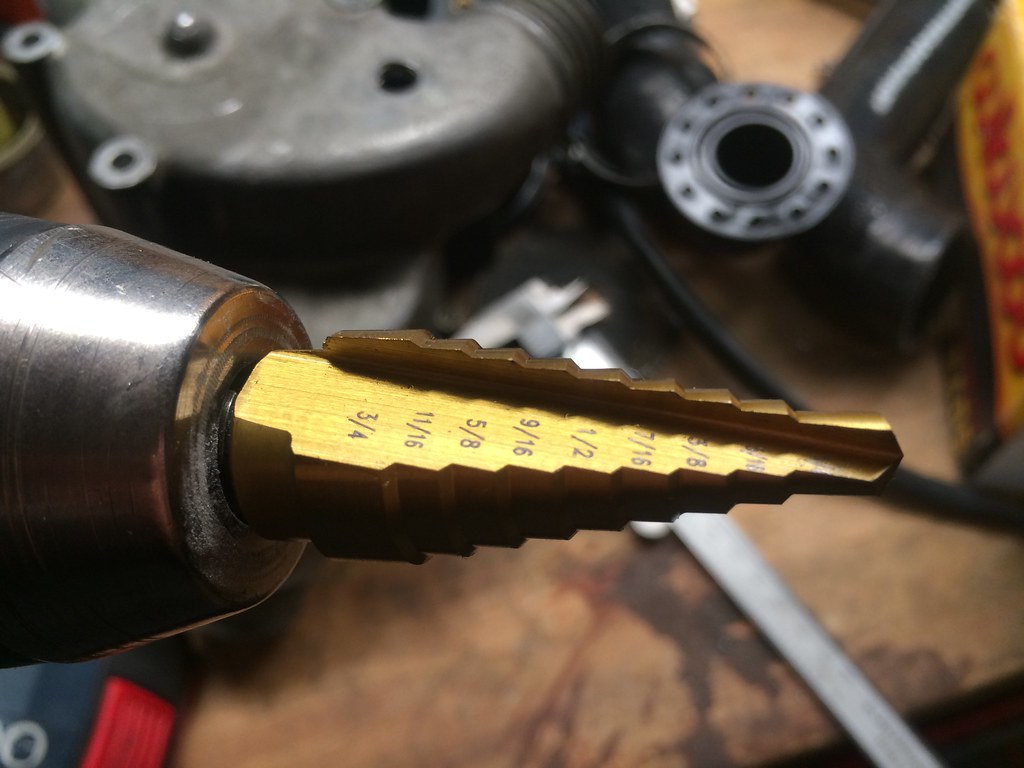 Untitled by ericandshovin, on Flickr
I added the cap to try and keep down distortion/warping. It seams to have worked.
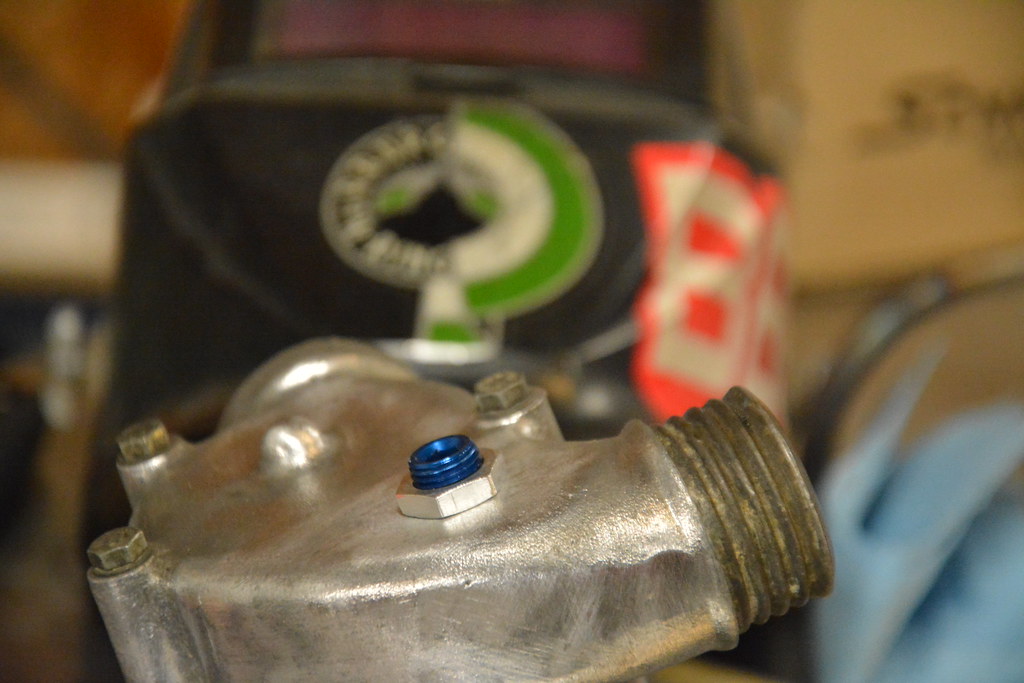 DSC_8231 by ericandshovin, on Flickr
Pre-heat is necessary!
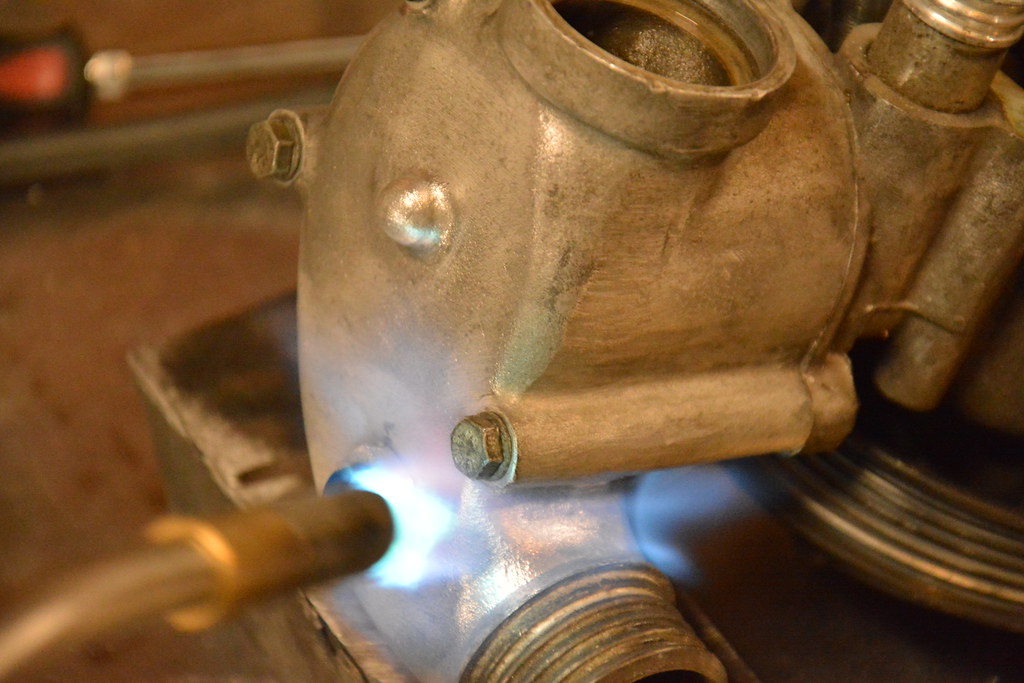 DSC_8233 by ericandshovin, on Flickr
Done!
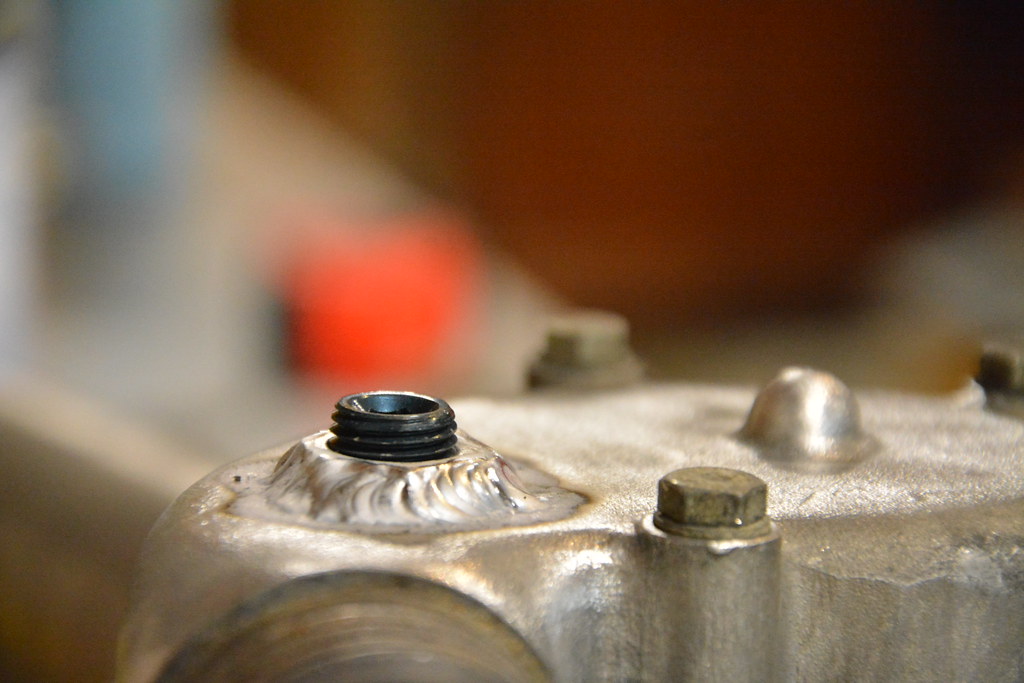 DSC_8234 by ericandshovin, on Flickr
The welds came out OK. sticking two different spec/shape/thickness together isn't nearly as easy as just cutting a piece in two and putting them back together again.
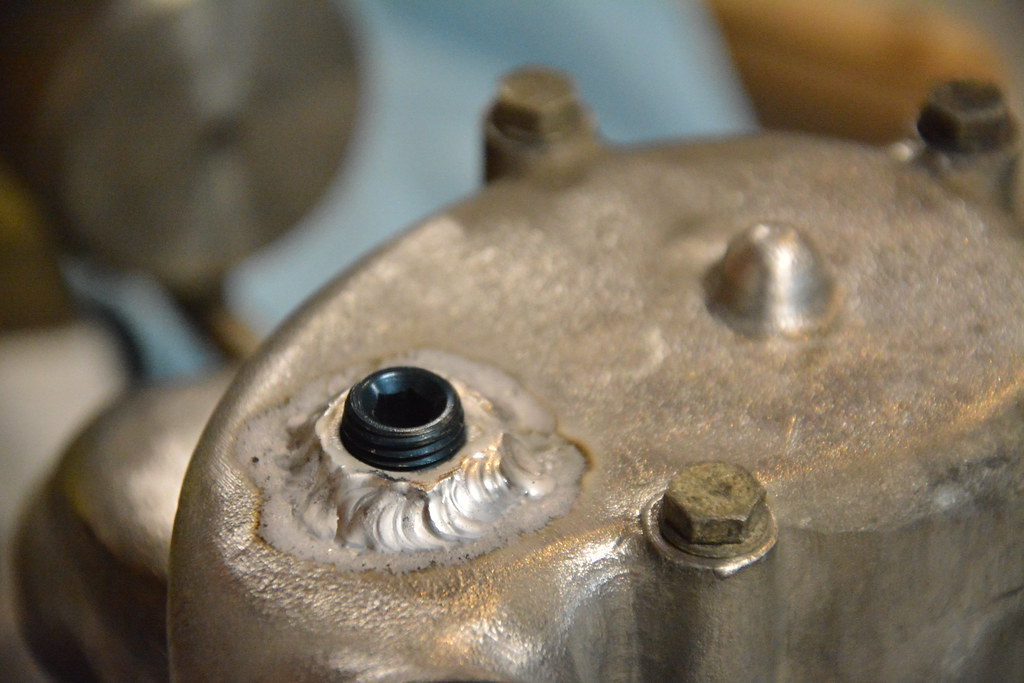 DSC_8235 by ericandshovin, on Flickr
Moving on to the hoses. The guy at autozone took me into the back and we looked around until we found a couple of hoses with bends that look like mine
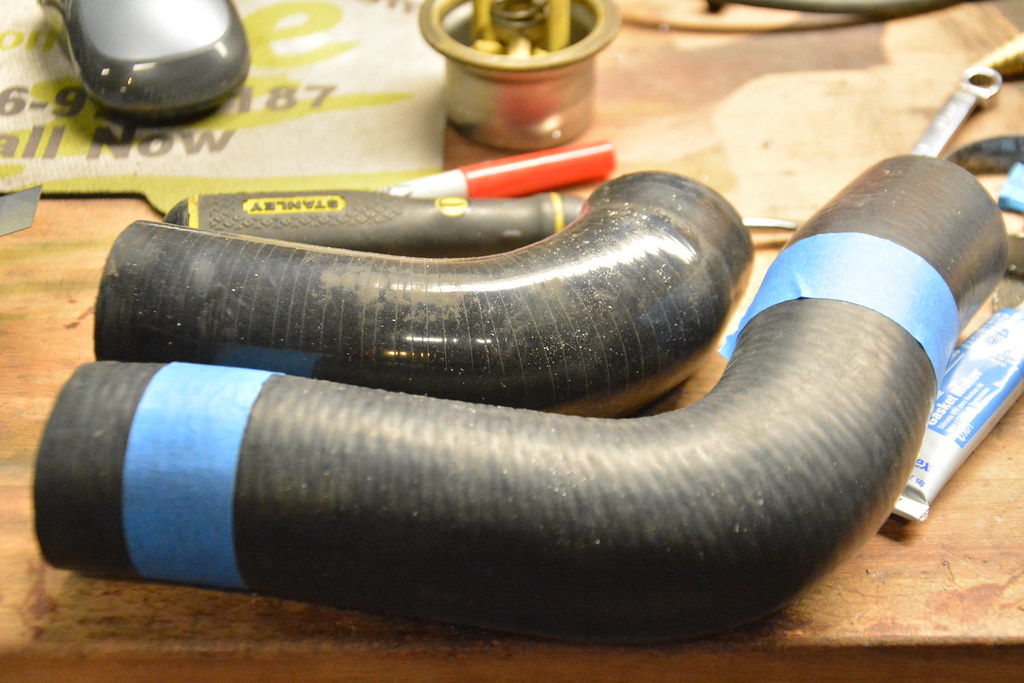 DSC_8241 by ericandshovin, on Flickr
While the pump was out, I pulled of the adapters to see if I could find any leaks/air entering points. The inlet side looked pretty good, but the outlook side was pretty wet.
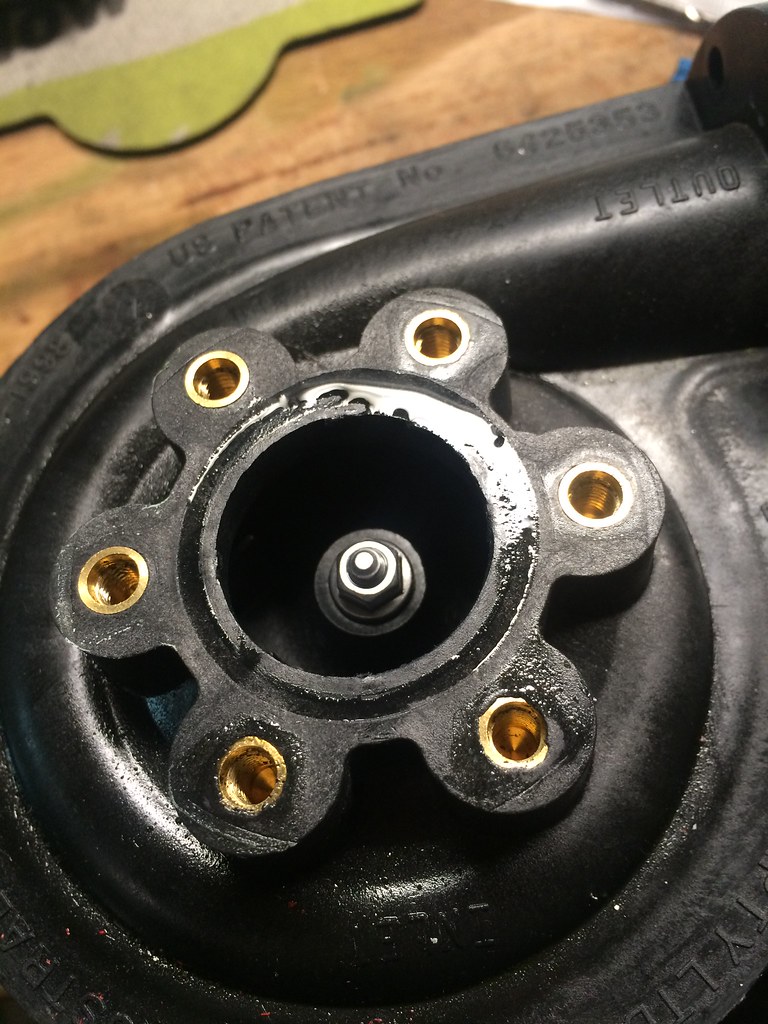 Untitled by ericandshovin, on Flickr
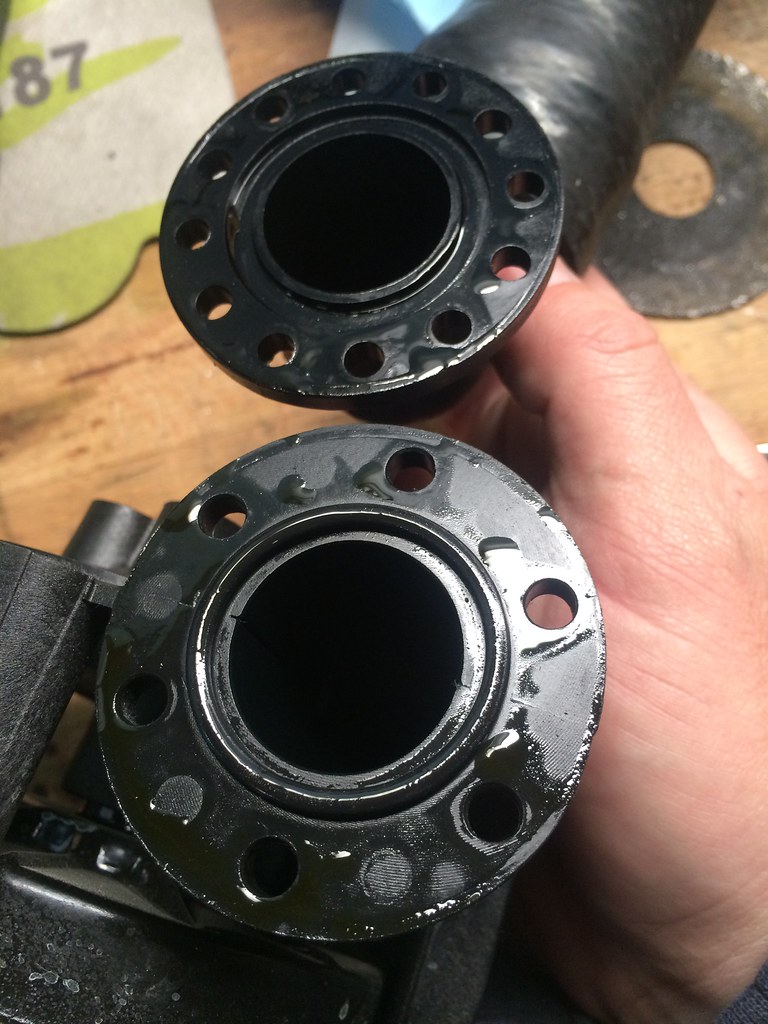 Untitled by ericandshovin, on Flickr
I dried them thoroughly and added some Permatex gasket maker specifically for water pumps.
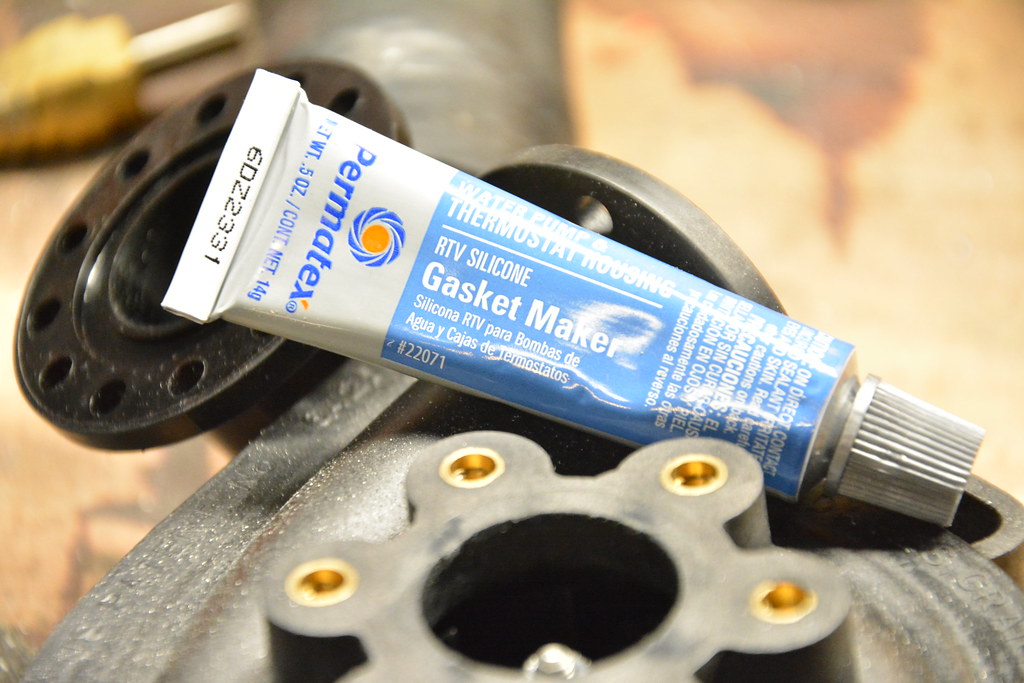 DSC_8239 by ericandshovin, on Flickr
Finally, I pulled the VANOS intake solenoids because the solder repair just didn't feel right. I'm glad I did as the joint didn't take. I'm going to try one more thing, then I'll revert to overprinting a known good one from the UK. New ones are $700-1100!!!
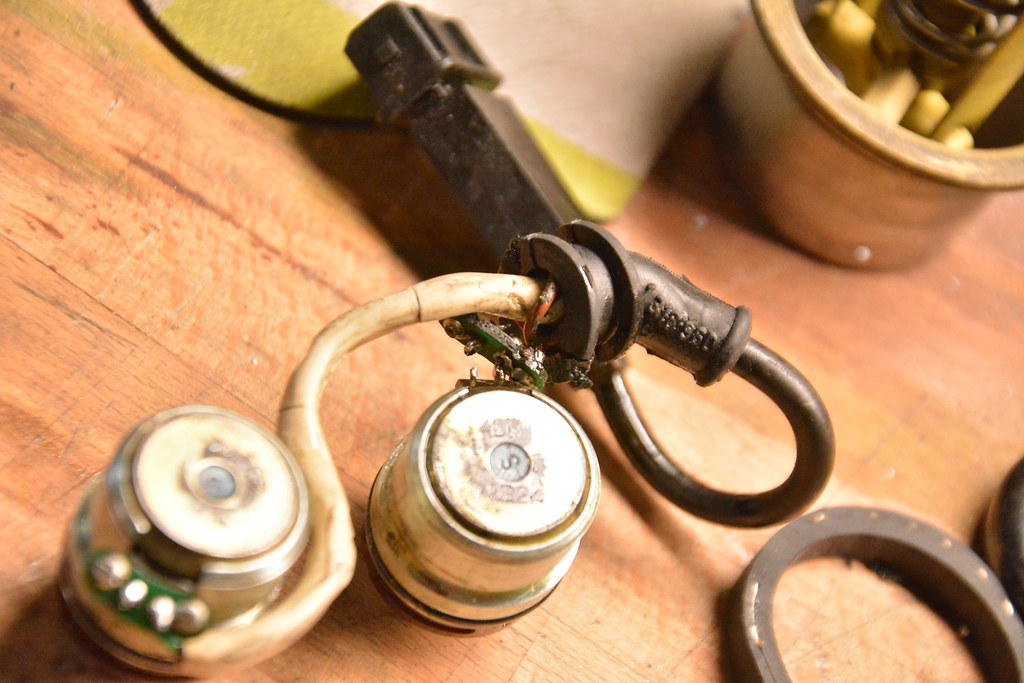 DSC_8243 by ericandshovin, on Flickr
Some things that are still left to do.
- Order a left front ABS sensor
- Fix VANOS Solinoid. Either proper soldering or overnight some from England used as they are $750 new!
- Smaller rear spacers. I thought I had 15mm around, but I can only find some 12mm ones.
- More front spacer. the SSR's are a et45, apex are a et42. The SSR's rub just a tiny amount on the strut. I need to run 28mm of spacer instead of 25mm.
- Corner balance
- Tune the ECU.
- Brakes ordered, they are in route
- bracing for underneath the wingLast edited by Eric; 11-02-2016, 12:00 PM.Leave a comment:
-
Nice updates. If you were hanging with Alex at Octoberfest, and you were around any of the Dorkfest activities, I might have met you.Leave a comment:





Leave a comment: