
A few minor updates on the car.
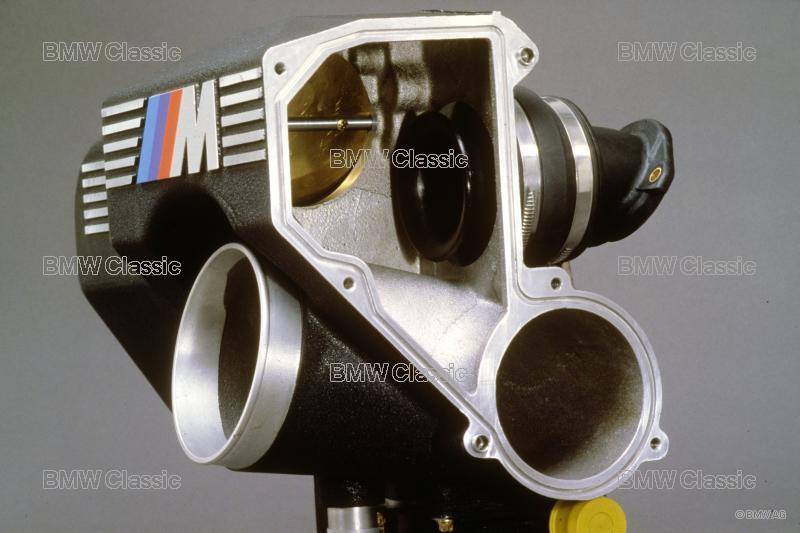
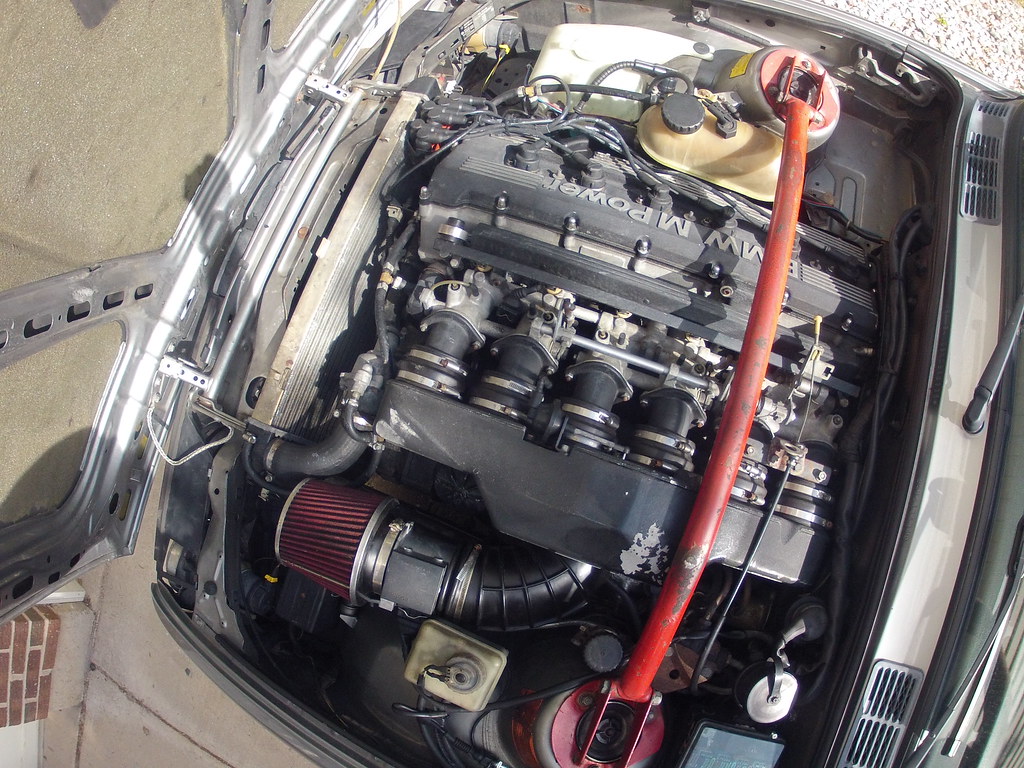
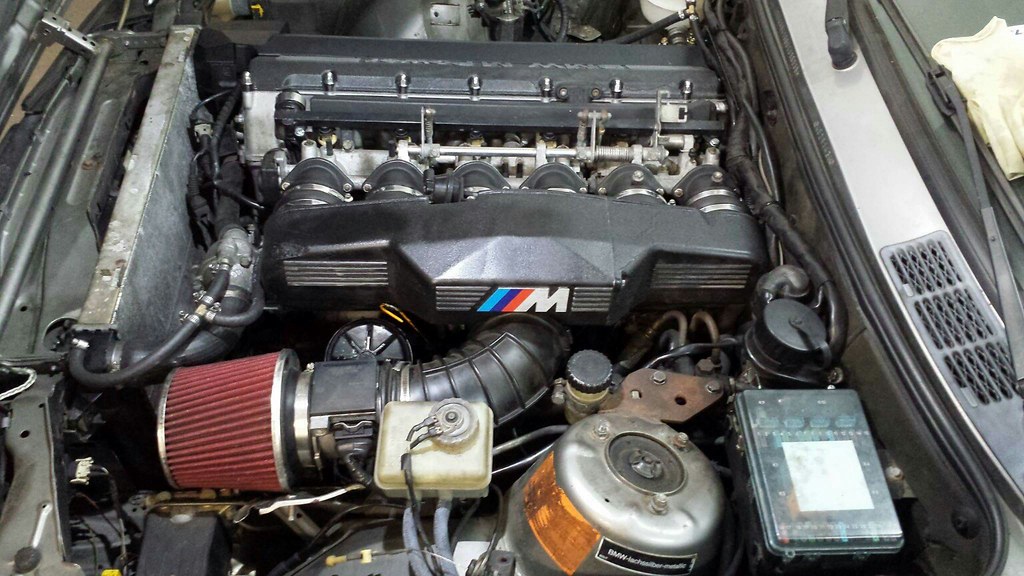
The intake plenum actually has an emblem with an adhesive on it covering the shaft for the butterfly valve that is in the intake plenum as seen in this picture. I thought the motorsport stripe was painted on but it is actually a bmw part number 72601312802.
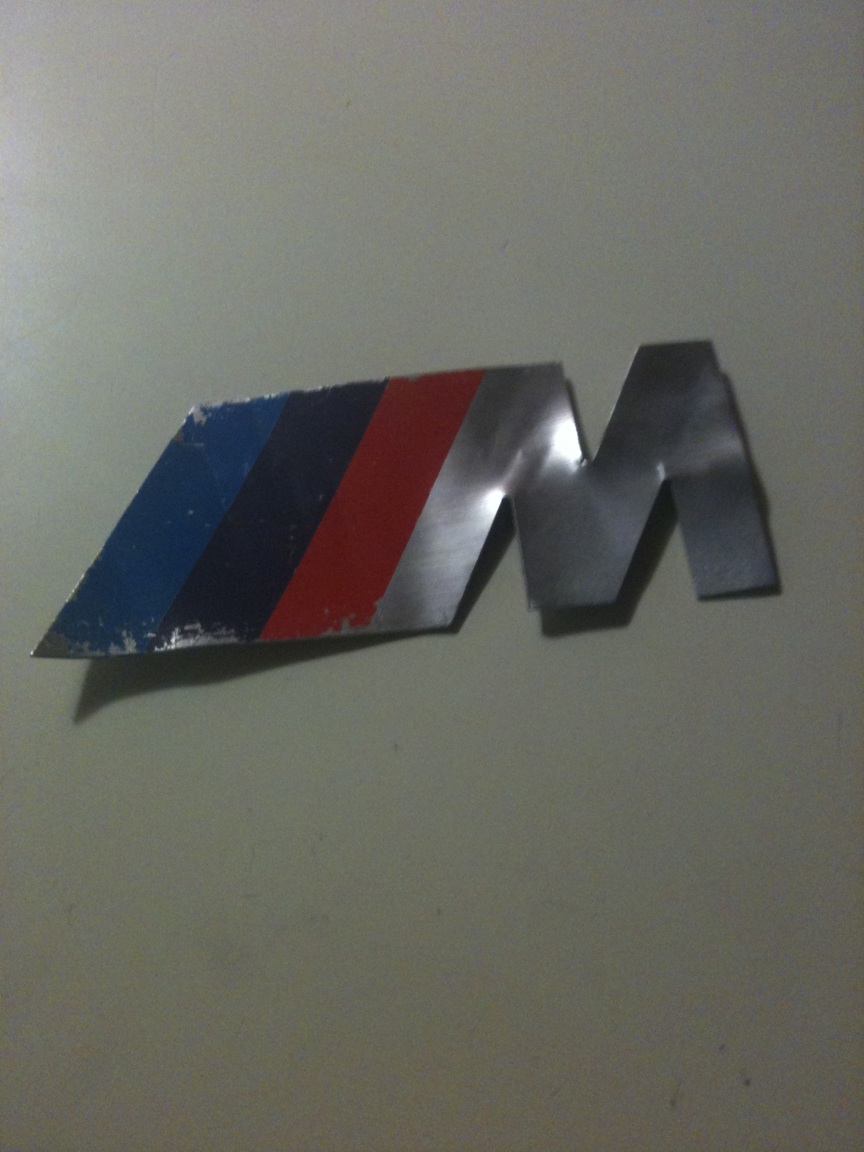
I was able to source a new emblem so here is the old part that I am keeping for the 'Wall of Shame' parts collection that I have going. I figured if I was going to paint the plenum I might as well add a new M stripe on the plenum.
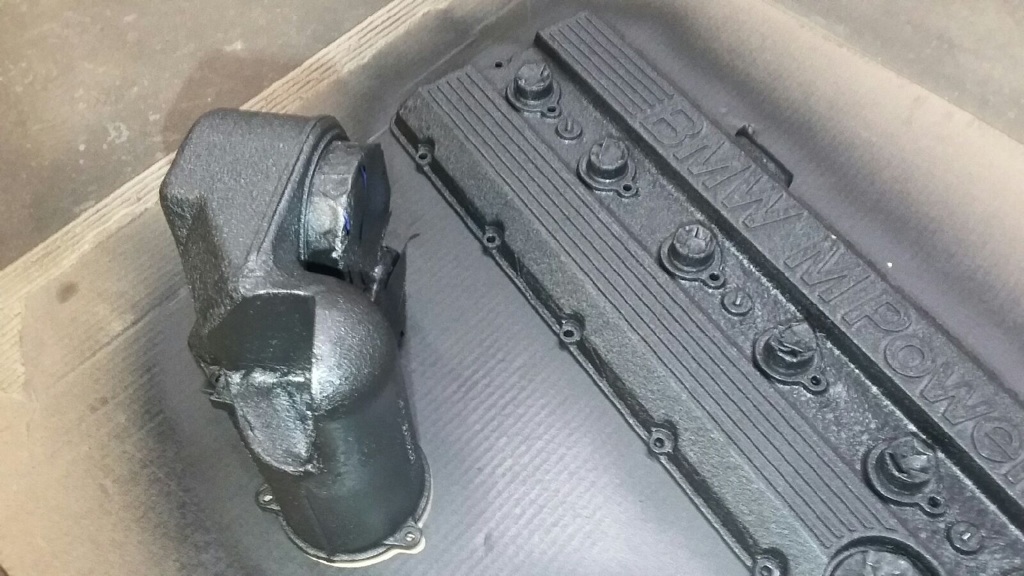
So I was able to get the plenum and valve cover media blasted down to bare metal and begin the repainting process. There seems to have been a repaint on the plenum before as the paint was just falling off in certain areas and adhered much better in others. I went for the black OEM look with the wrinkle finish. I plan to have the lettering ground down back to the silver polished aluminum look like it came from the factory. Here is after paint on the valve cover and half of the plenum.

Now here is a picture the next day after the wrinkle took affect. Unfortunately it started to drip in a few places but the wrinkle style hides most of that. One thing to notice is this rectangular cutout on the plenum. This is the area closest to the drivers side firewall and was obviously done by somebody after the fact. I believe it was cut and rewelded for clearance between the plenum and either the master cylinder or the heater core lines. I will have to verify when it is back in the car.
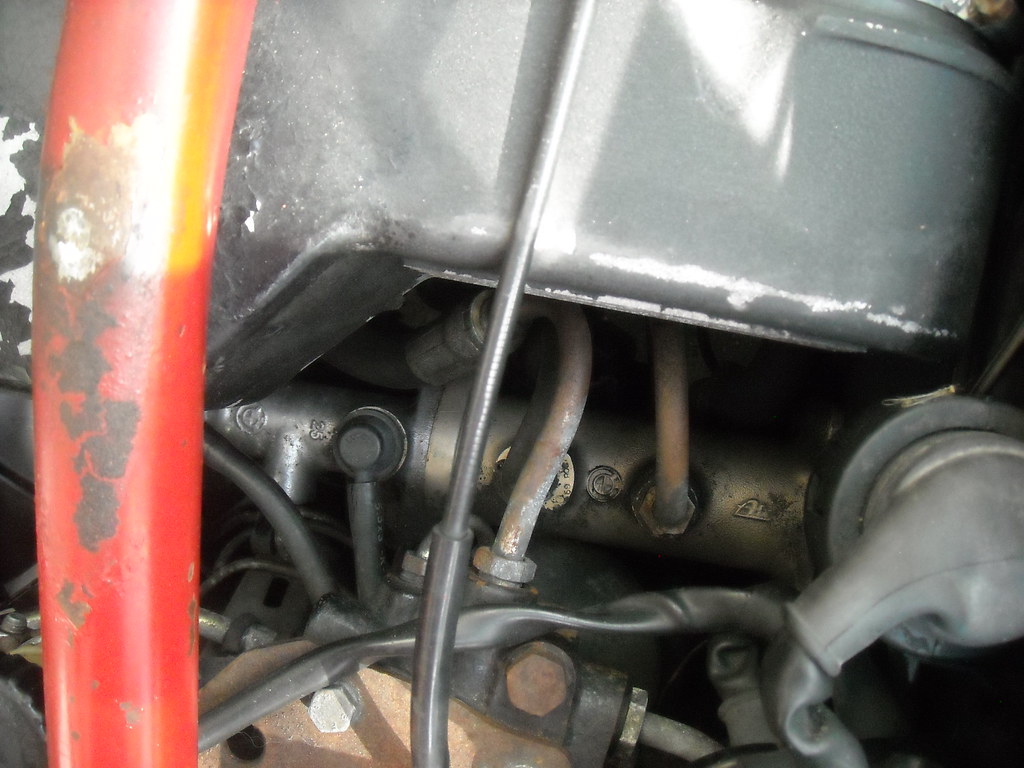
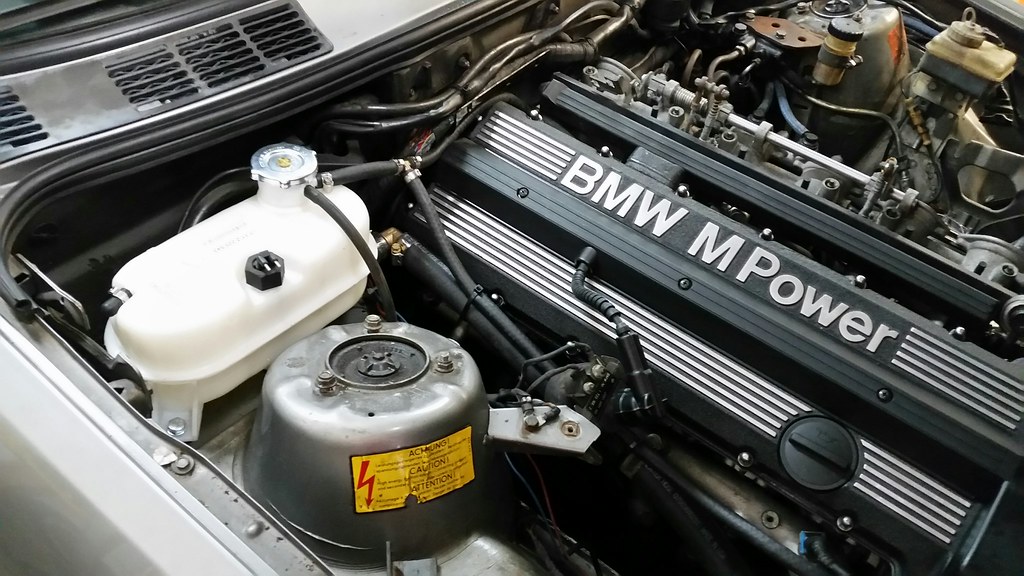
I painted the other components Friday and will be doing reassembly this week. With any luck the intake should be back together, the cam tray back on the car, and it will be one step closer to completion. I had ordered new hose clamps for the throttlebodies so those are on and hopefully it will help clean up the engine bay. One issue I can't remember if I told you guys was the brakes. Upon hard braking there would be no response in the brakes immediately. So you would naturally press harder. After some time the brakes would respond and almost immediately lock up from your braking force. Now this car does not use the traditional brake booster and uses the e23/e28 hydroboost system with a brake bomb or accumulator. It it bolted to the funky looking rusty 'mount' off the driver side strut tower. Seen here in this picture. There is another shot showing how tight it is before everything was taken apart.
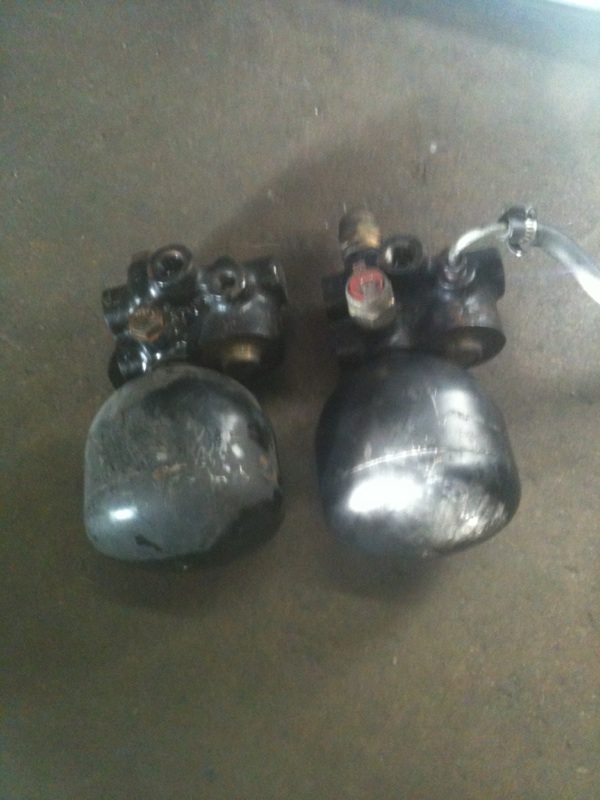
So I got around to replacing that and it was very tough to remove, even with the entire intake out. I hope to take this apart again and atleast clean up this rusty looking bracket and maybe paint it silver. And I know it doesn't look like it in this photo, but old accumulator on the left and new one on the right. We should now have brakes. :woowoo:
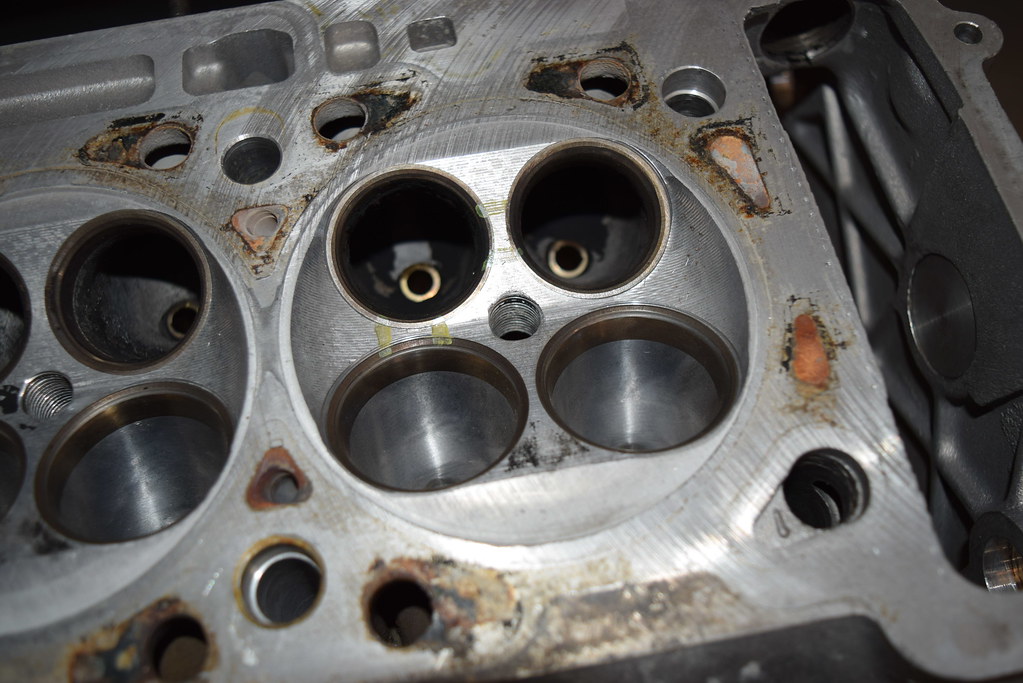
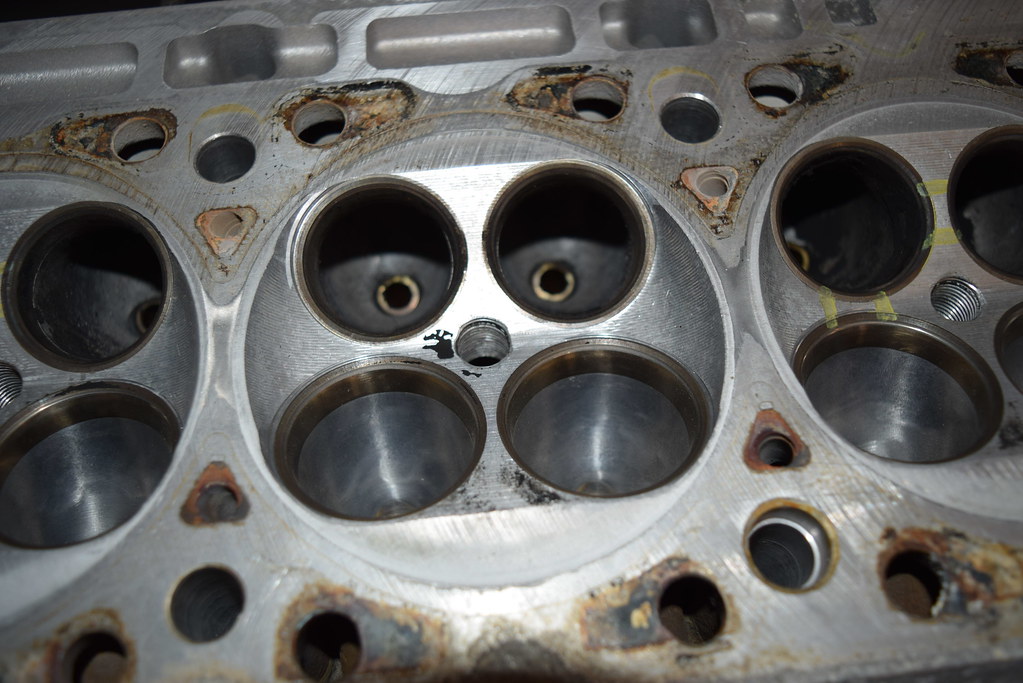
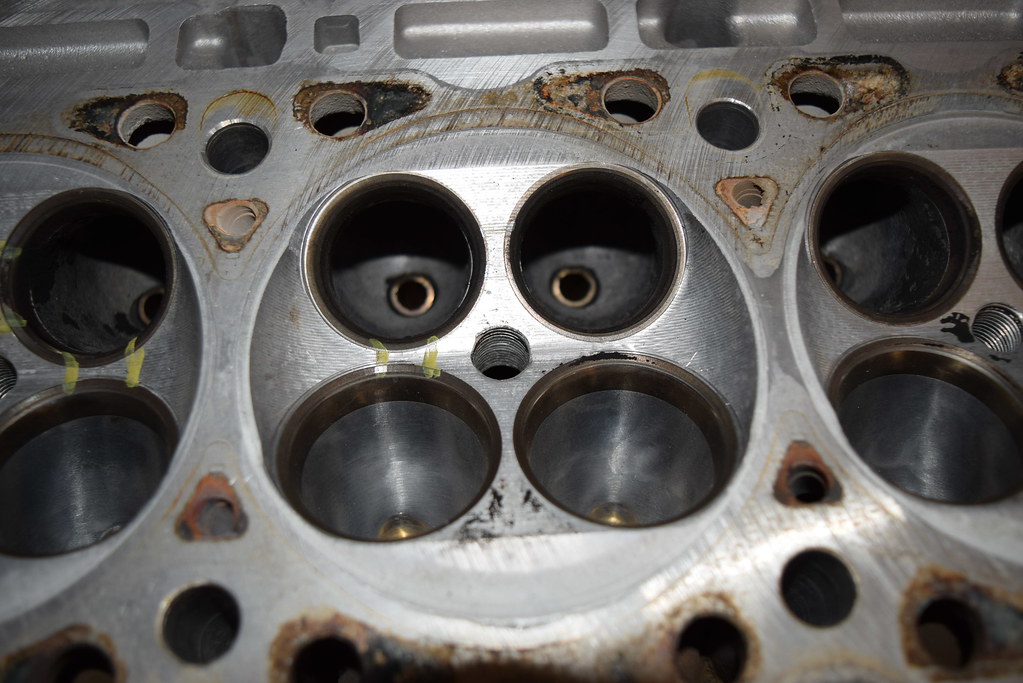
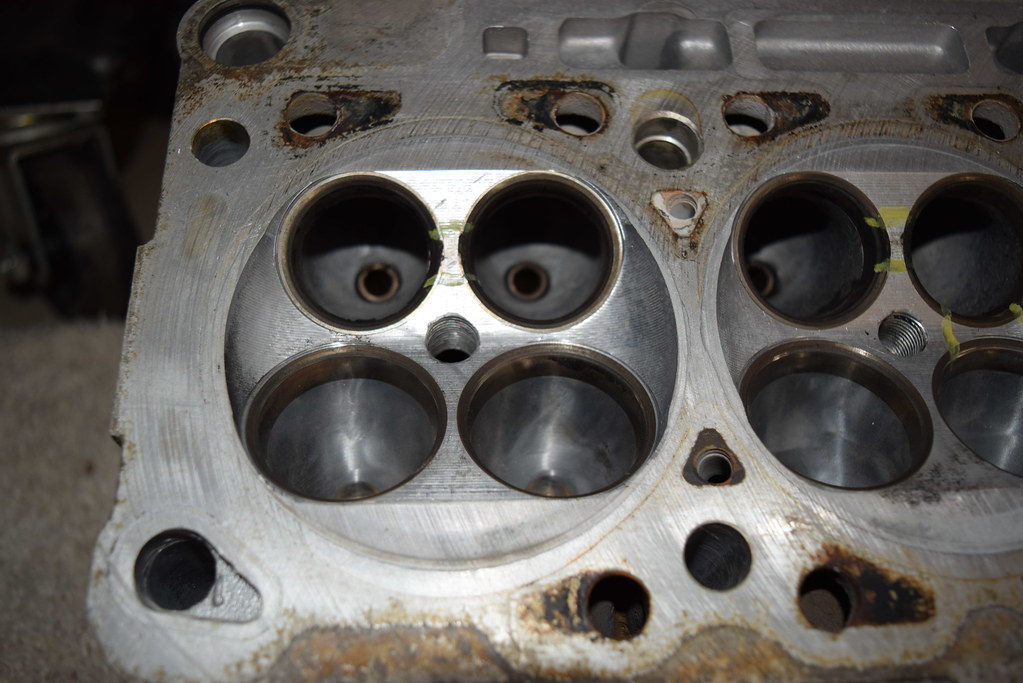
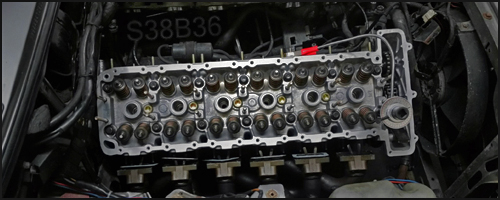
I was able to get my hands on the head that came off the car and thought you all would like to see these pictures. As it turns out there were cracks in 4 or 5 of the combustion chambers. I tried to get some better photos and some of these are tough to see. Obviously cylinder 4 was the worst one as it has 3 cracks!! I guess that explains the lack of compression. Somebody hadn't been doing their maintenance on time.
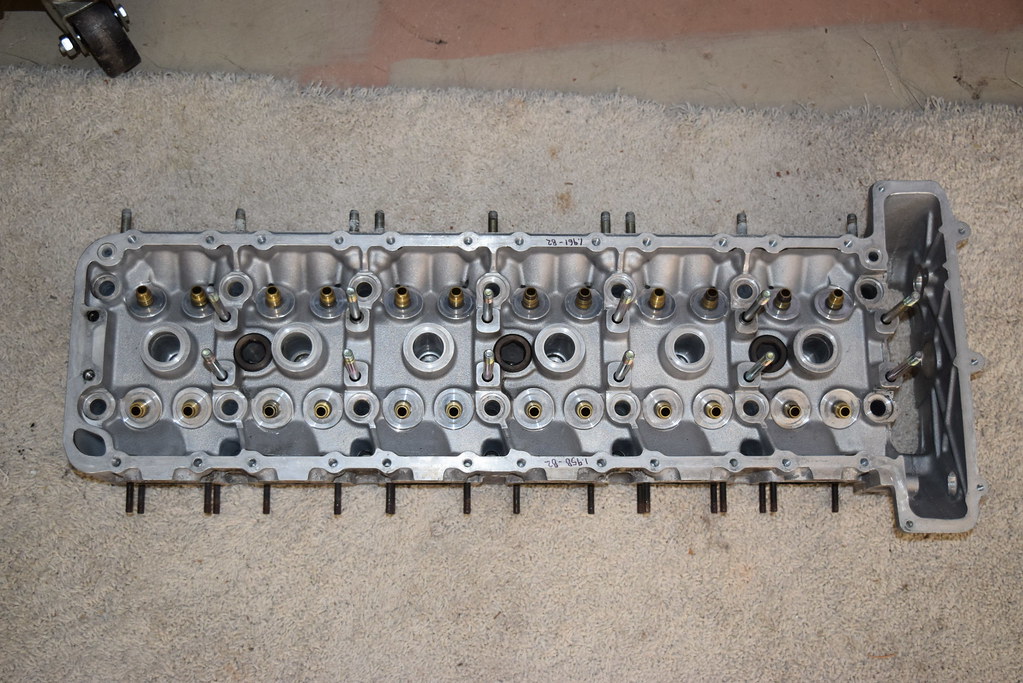
Cylinder 1 - Two cracks
Cylinder 2 - Appears good
Cylinder 3 - Two cracks
Cylinder 4 - Three cracks
Cylinder 5 - Two cracks
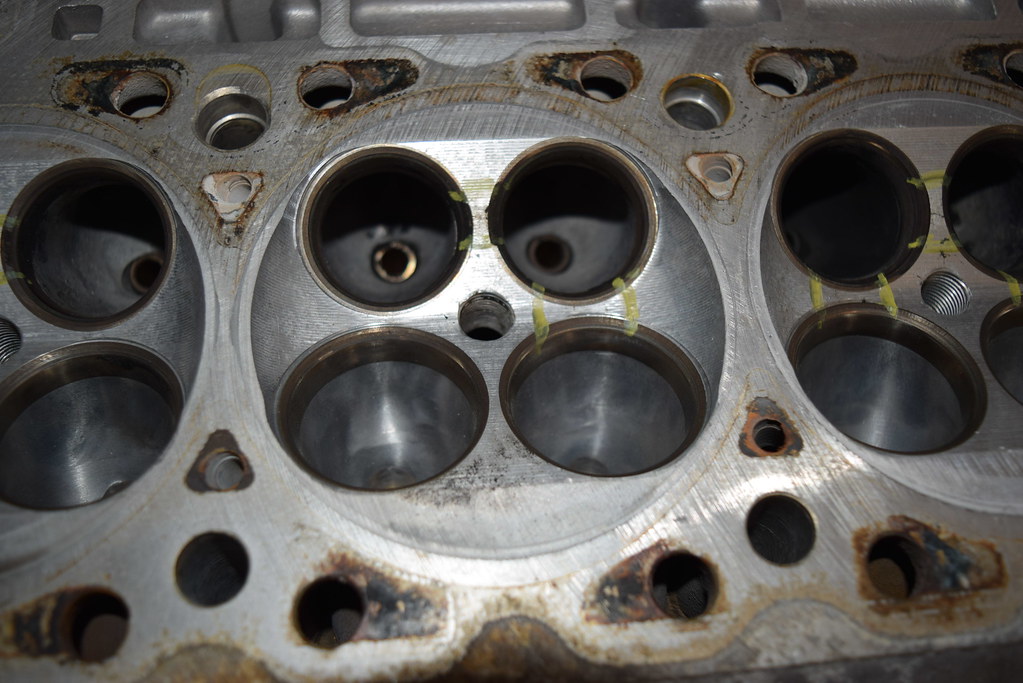
Cylinder 6 - One crack
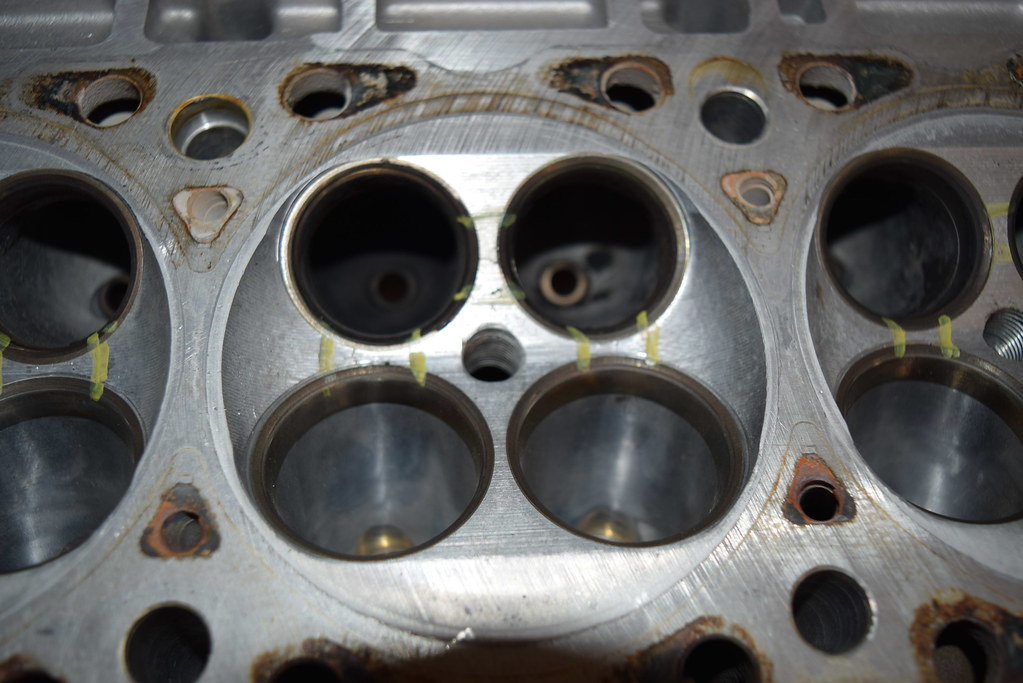
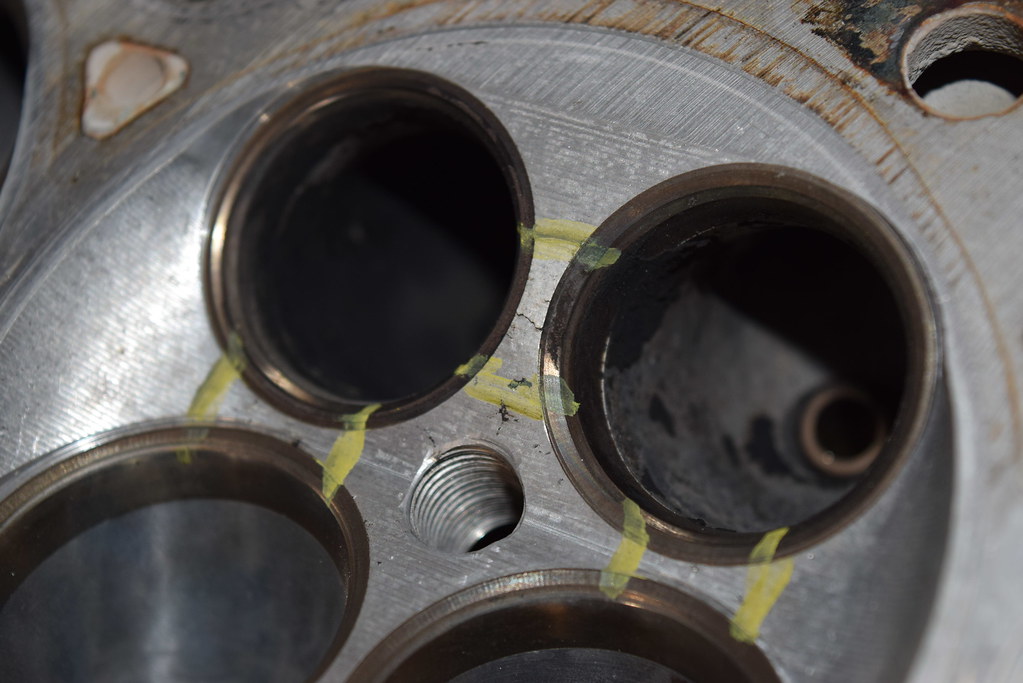
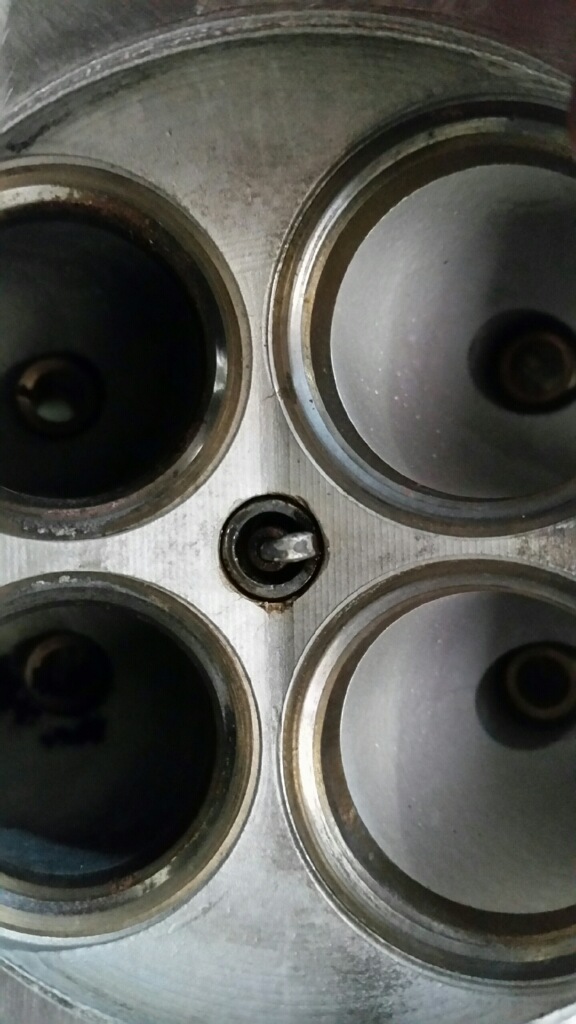
Here is another close up of cylinder 4.
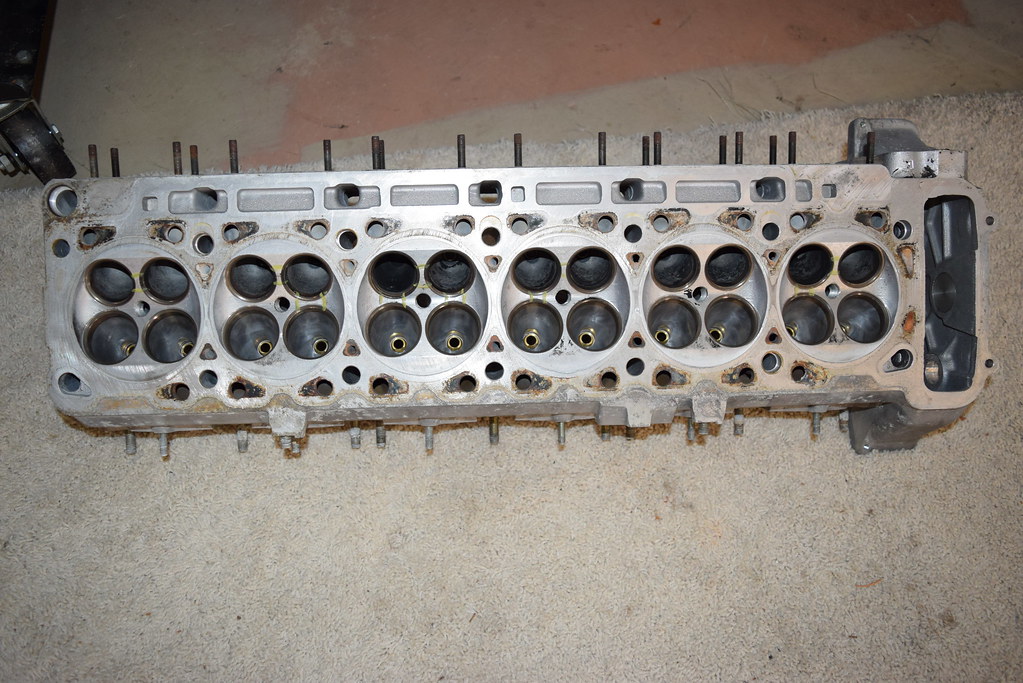
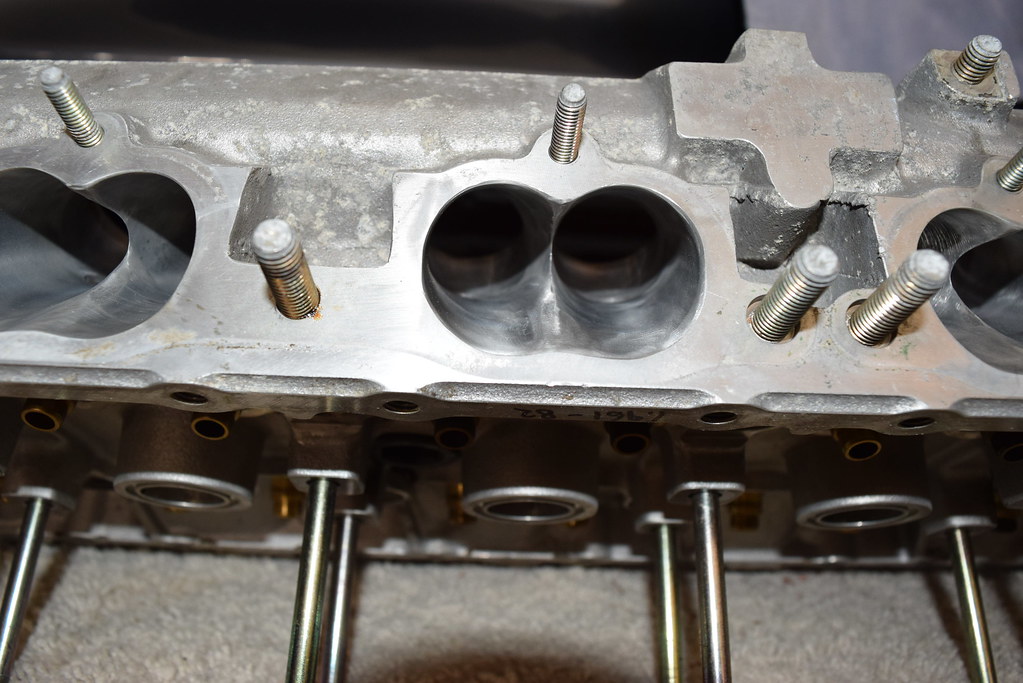
And for those of you interested, here is the intake port on the s38 head.
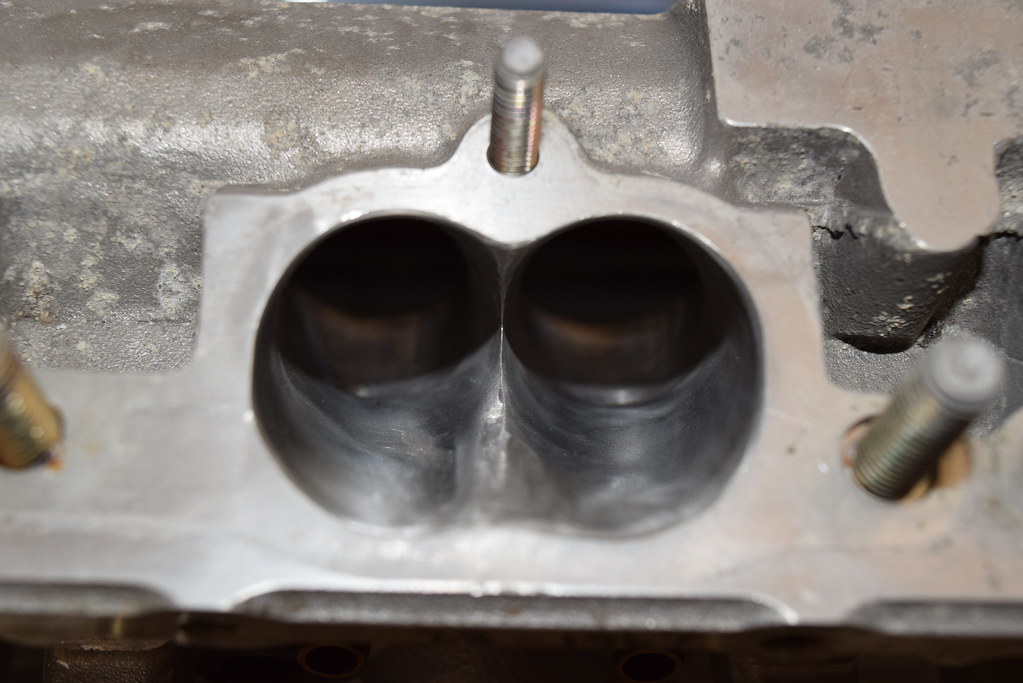
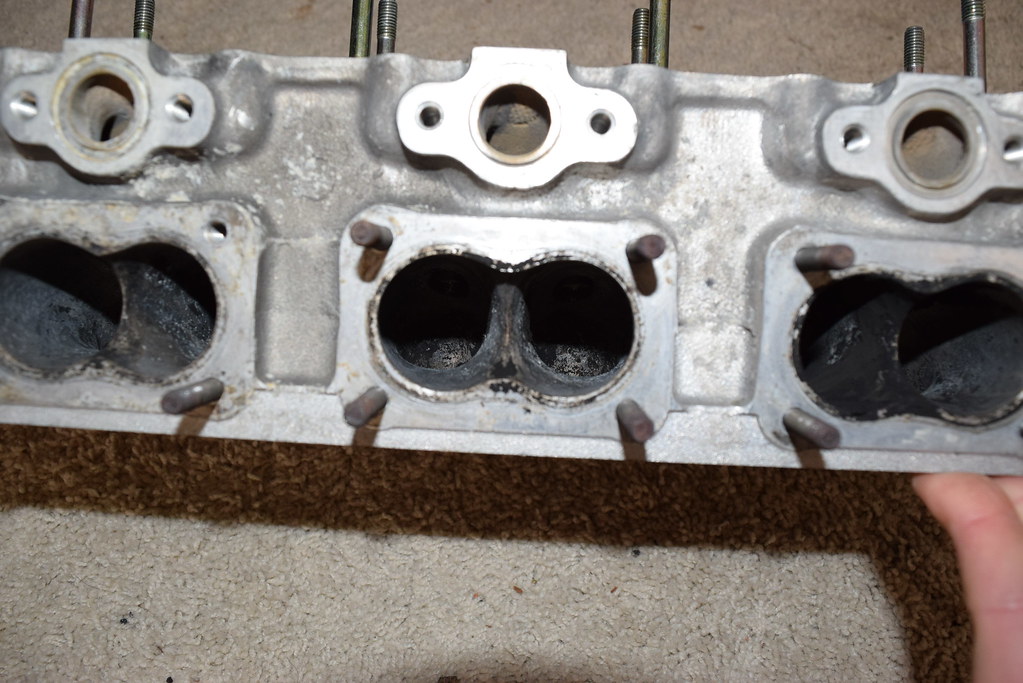
As well as the exhaust port.

I did trade this bad head and a small amount of cash for the b36 head i posted about earlier in this thread which only had one small crack. Though I doubt i will ever use it, it can't be a bad thing to have a spare head around. This one looks to only need a little work to be back to good shape. I also replaced those cracked brake fluid lines so I can cross one more thing off the list.
Things left to do as of now:
- Bolt intake plenum back together
- Install cam tray and cams
- Install upgraded timing chain tensioner
- Install New Water Pump
- Bolt exhaust onto head
- Reinstall throttlebodies and intake plenum
- Reinstall ignition system and new timing/spark plug covers
- Reinstall radiator and cooling system
- Weld on hood hinge bracket and install new hood shock
- Install skid plate
- Find a radio for the dash that looks period correct
After that we should be back in business. After looking at the cracks in the head, I am still surprised the car even ran!!
The intake plenum actually has an emblem with an adhesive on it covering the shaft for the butterfly valve that is in the intake plenum as seen in this picture. I thought the motorsport stripe was painted on but it is actually a bmw part number 72601312802.
I was able to source a new emblem so here is the old part that I am keeping for the 'Wall of Shame' parts collection that I have going. I figured if I was going to paint the plenum I might as well add a new M stripe on the plenum.
So I was able to get the plenum and valve cover media blasted down to bare metal and begin the repainting process. There seems to have been a repaint on the plenum before as the paint was just falling off in certain areas and adhered much better in others. I went for the black OEM look with the wrinkle finish. I plan to have the lettering ground down back to the silver polished aluminum look like it came from the factory. Here is after paint on the valve cover and half of the plenum.
Now here is a picture the next day after the wrinkle took affect. Unfortunately it started to drip in a few places but the wrinkle style hides most of that. One thing to notice is this rectangular cutout on the plenum. This is the area closest to the drivers side firewall and was obviously done by somebody after the fact. I believe it was cut and rewelded for clearance between the plenum and either the master cylinder or the heater core lines. I will have to verify when it is back in the car.
I painted the other components Friday and will be doing reassembly this week. With any luck the intake should be back together, the cam tray back on the car, and it will be one step closer to completion. I had ordered new hose clamps for the throttlebodies so those are on and hopefully it will help clean up the engine bay. One issue I can't remember if I told you guys was the brakes. Upon hard braking there would be no response in the brakes immediately. So you would naturally press harder. After some time the brakes would respond and almost immediately lock up from your braking force. Now this car does not use the traditional brake booster and uses the e23/e28 hydroboost system with a brake bomb or accumulator. It it bolted to the funky looking rusty 'mount' off the driver side strut tower. Seen here in this picture. There is another shot showing how tight it is before everything was taken apart.
So I got around to replacing that and it was very tough to remove, even with the entire intake out. I hope to take this apart again and atleast clean up this rusty looking bracket and maybe paint it silver. And I know it doesn't look like it in this photo, but old accumulator on the left and new one on the right. We should now have brakes. :woowoo:
I was able to get my hands on the head that came off the car and thought you all would like to see these pictures. As it turns out there were cracks in 4 or 5 of the combustion chambers. I tried to get some better photos and some of these are tough to see. Obviously cylinder 4 was the worst one as it has 3 cracks!! I guess that explains the lack of compression. Somebody hadn't been doing their maintenance on time.
Cylinder 1 - Two cracks
Cylinder 2 - Appears good
Cylinder 3 - Two cracks
Cylinder 4 - Three cracks
Cylinder 5 - Two cracks
Cylinder 6 - One crack
Here is another close up of cylinder 4.
And for those of you interested, here is the intake port on the s38 head.
As well as the exhaust port.
I did trade this bad head and a small amount of cash for the b36 head i posted about earlier in this thread which only had one small crack. Though I doubt i will ever use it, it can't be a bad thing to have a spare head around. This one looks to only need a little work to be back to good shape. I also replaced those cracked brake fluid lines so I can cross one more thing off the list.
Things left to do as of now:
- Bolt intake plenum back together
- Install cam tray and cams
- Install upgraded timing chain tensioner
- Install New Water Pump
- Bolt exhaust onto head
- Reinstall throttlebodies and intake plenum
- Reinstall ignition system and new timing/spark plug covers
- Reinstall radiator and cooling system
- Weld on hood hinge bracket and install new hood shock
- Install skid plate
- Find a radio for the dash that looks period correct
After that we should be back in business. After looking at the cracks in the head, I am still surprised the car even ran!!


Comment