
Yeah, I'd agree that a smoking exhaust, after it has been removed/handled is not a big concern. It happened to me every time I removed the exhaust from my last E30.
Good stuff!
-
Got the car all finished today.
We first got the exhaust mounted back under the touring and then finished up the dashboard. Finally I cleaned up the old glue residue and mounted the ix side skirts/fender flares. When starting the car I made sure that I had no ignition so I could build up oil pressure first because it's been a while since the engine ran. Still need to bleed the cooling system but the car is now sitting on our driveway again :)
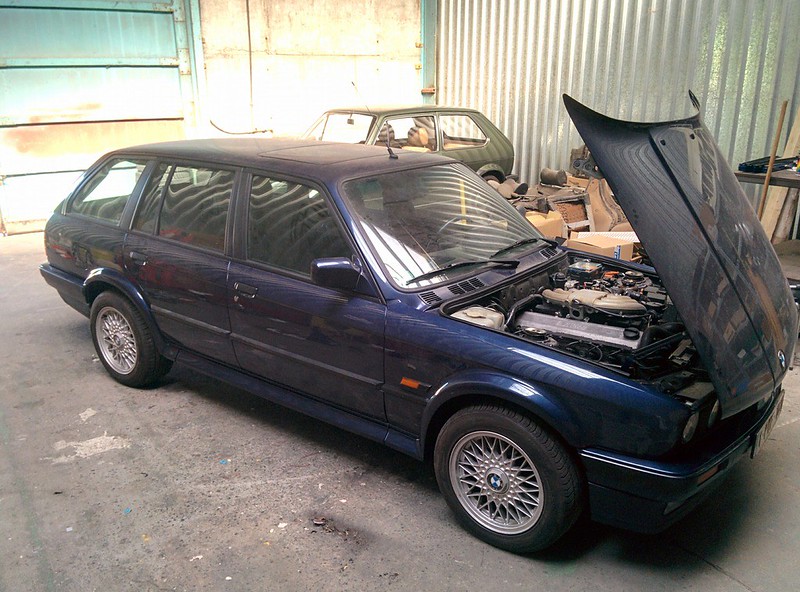
When the car was warming up I noticed there was quite a bit of smoke coming from the exhaust manifold, I think it might be the penetration oil that's left on it or maybe the new gaskets?
"Ran when parked."
 IMG_2381_zps0nmxlnbz by Martijn Demeulemeester, on Flickr
Last edited by D.Martijn; 07-06-2017, 10:58 AM.
IMG_2381_zps0nmxlnbz by Martijn Demeulemeester, on Flickr
Last edited by D.Martijn; 07-06-2017, 10:58 AM.Leave a comment:
-
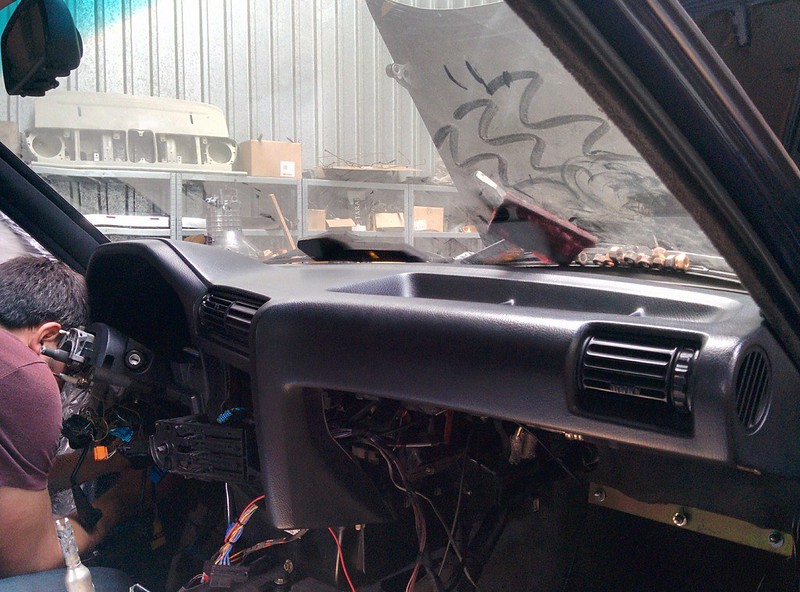
Saturday we got the dashboard back in the E30. Before installing it we cleaned up the wiring and fixed some of the tape that came loose.
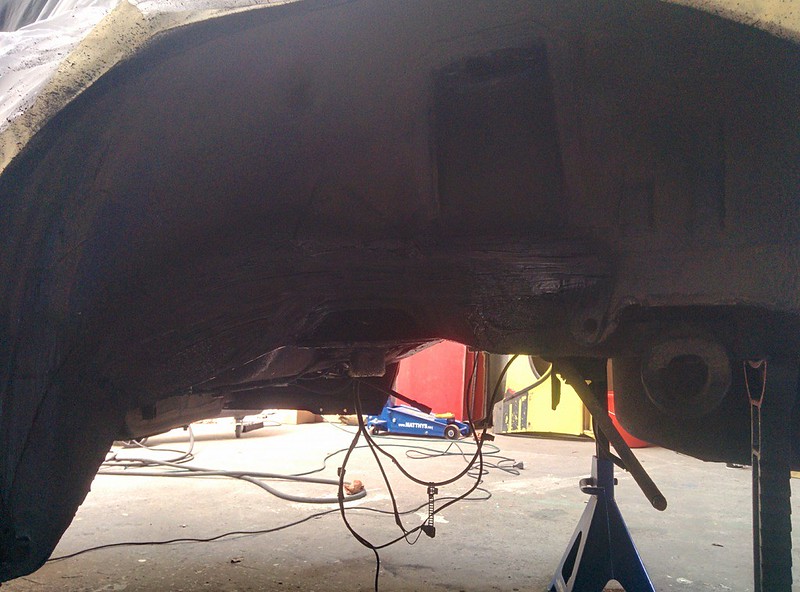
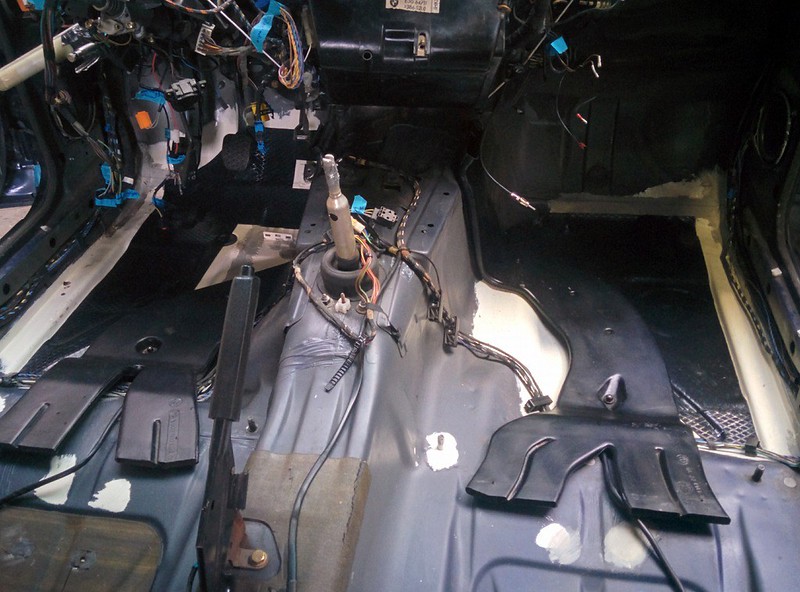
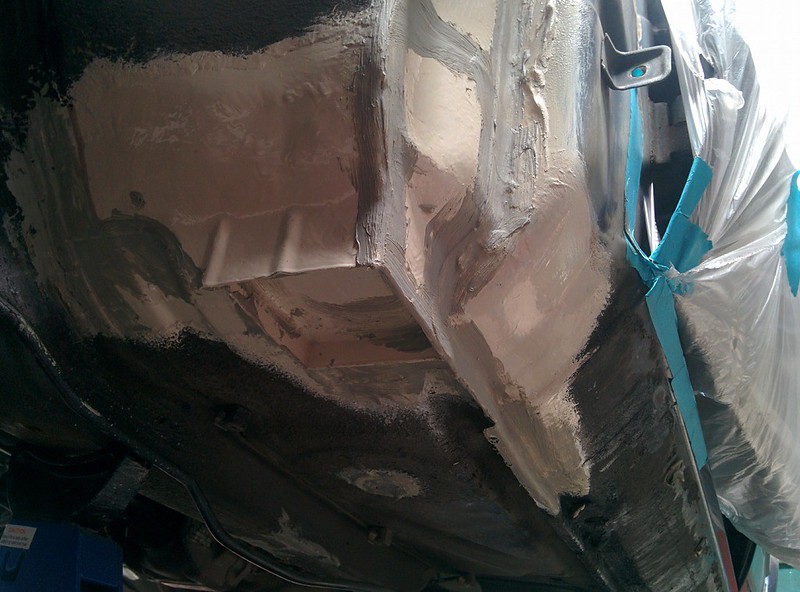
Today I covered the whole car in plastic foil so I wouldn't get any overspray of the undercoating on the paint.
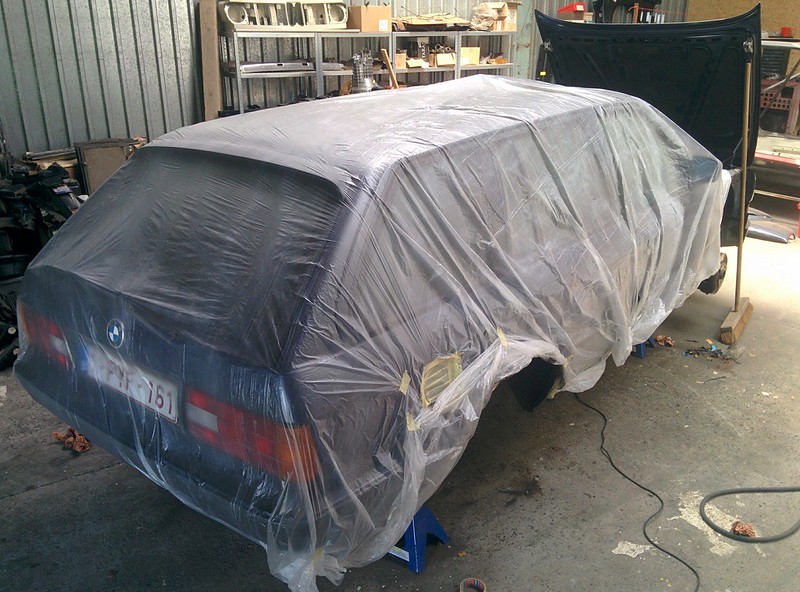
The undercoating turned out ok. I tried to imitate the brush stroaks like original, it's not the greatest but it'll do.
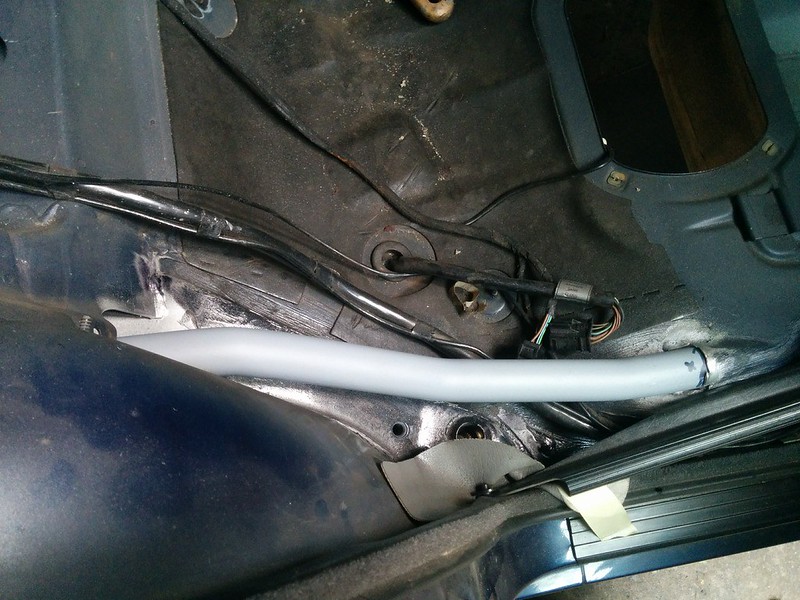
I then cleaned the inside of the car with the vacuum and a damp cloth. We then got the tank fitted, I still need to replace the hard fuel lines but I can't get one of the screws out of the brackets that hold these against the chassis.
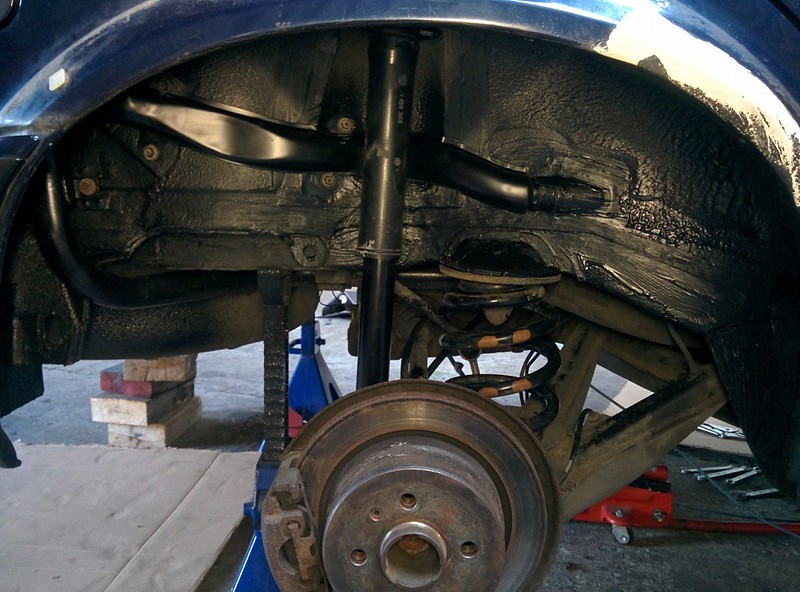
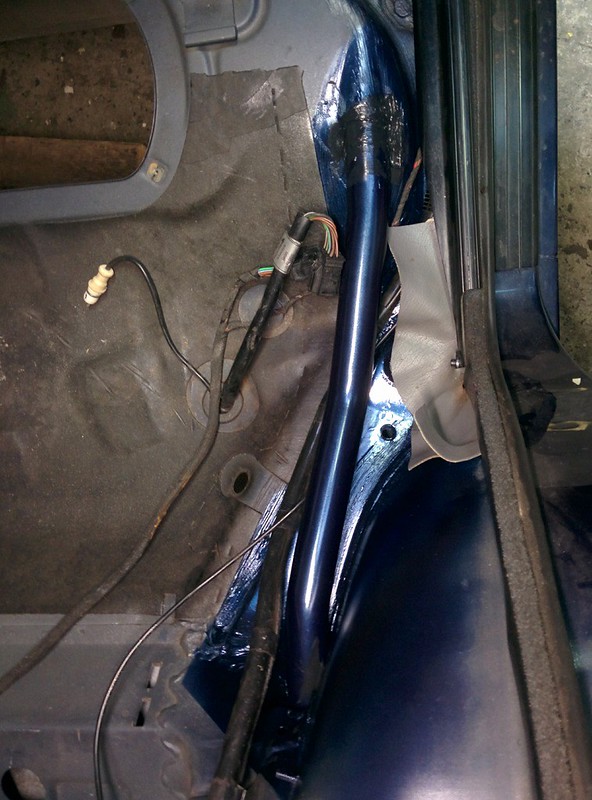
Also installed new swaybar links as the old ones were worn down pretty bad
Everything fitted, pretty happy with the result
 Last edited by D.Martijn; 07-06-2017, 10:57 AM.
Leave a comment:
-
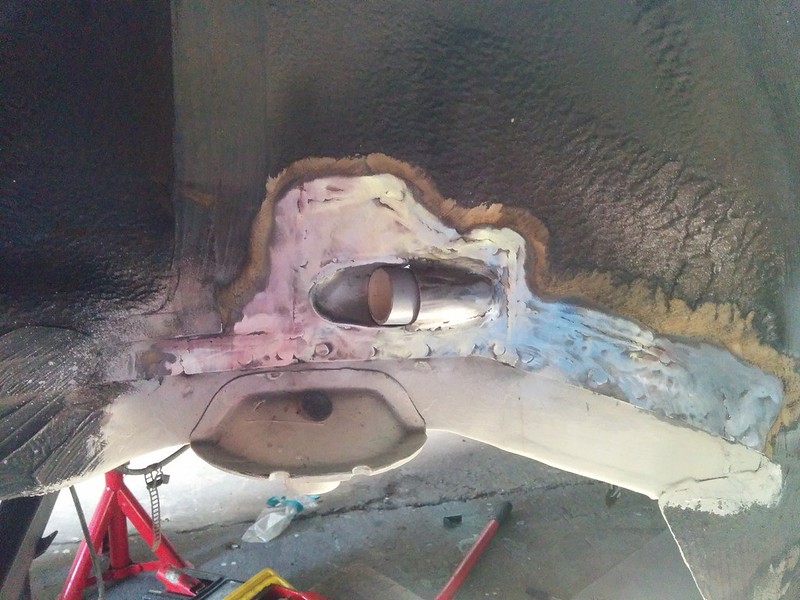
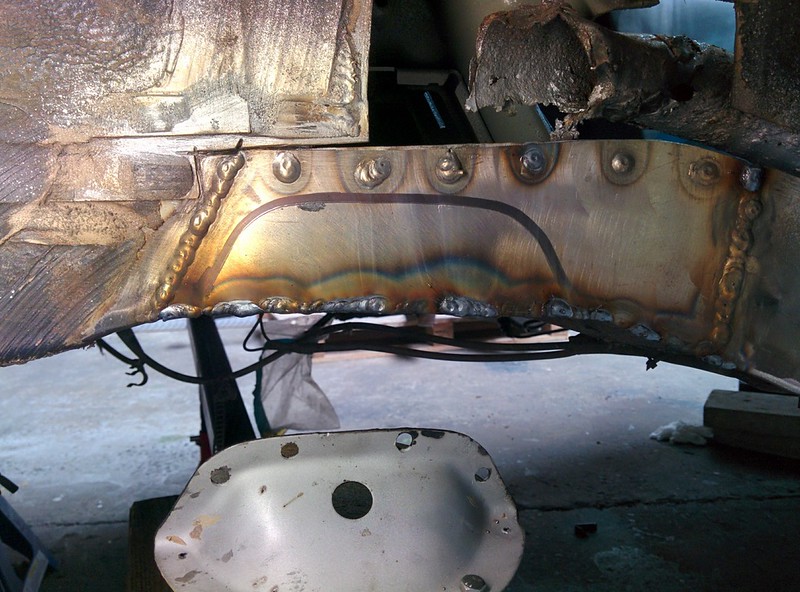
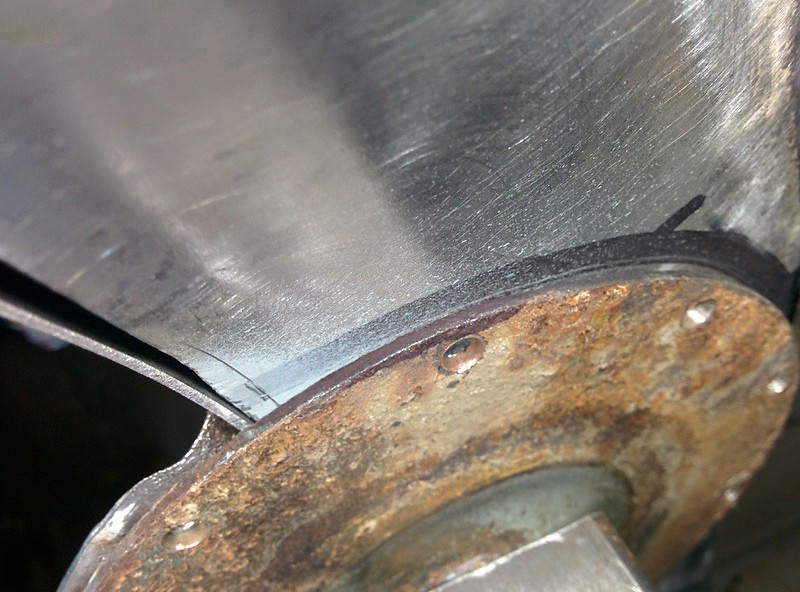
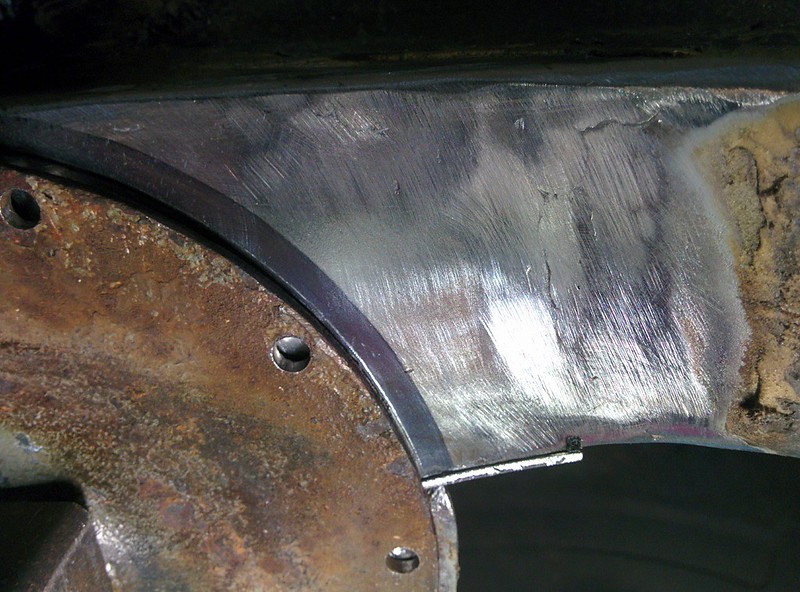
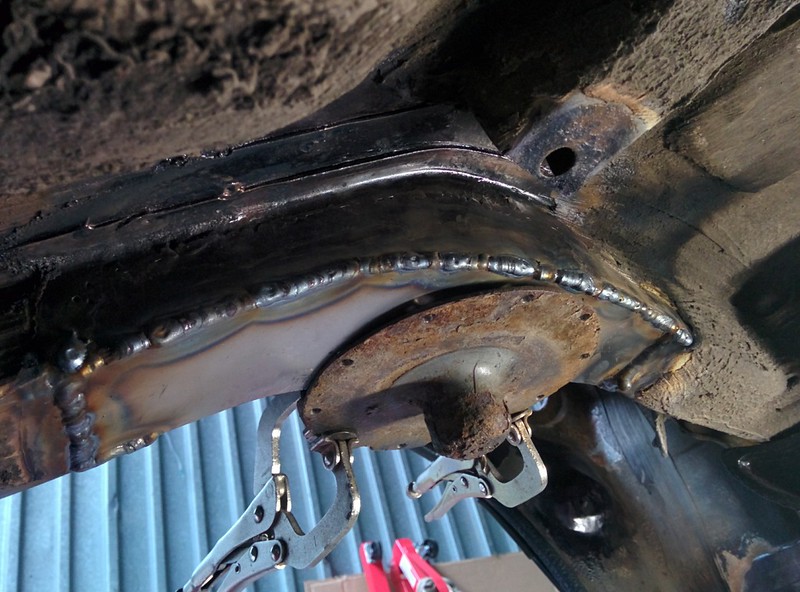
I got all of the welding done now. I first finished the welds on the outer wheel tub where the fuel filler neck meets the hole.
I then got started with the other spring perch. This one was a little bit less rusty but still had to be cut out.
Here is is all finished:
I also welded some patch panels at the box where the jack sits in and the corner of the outer wheel tub. Those were the last repairs I had to do. I also stripped/wirewheeled the undercoating from the flange of the wheel arch and sprayed it with Brunox. But it was still solid.
With the front-end being seam sealed and the new undercoating being applied, I sprayed the inside of the chassis rails & sill with Tectyl
Making sure the cover the welds/seams on the inside of the A post
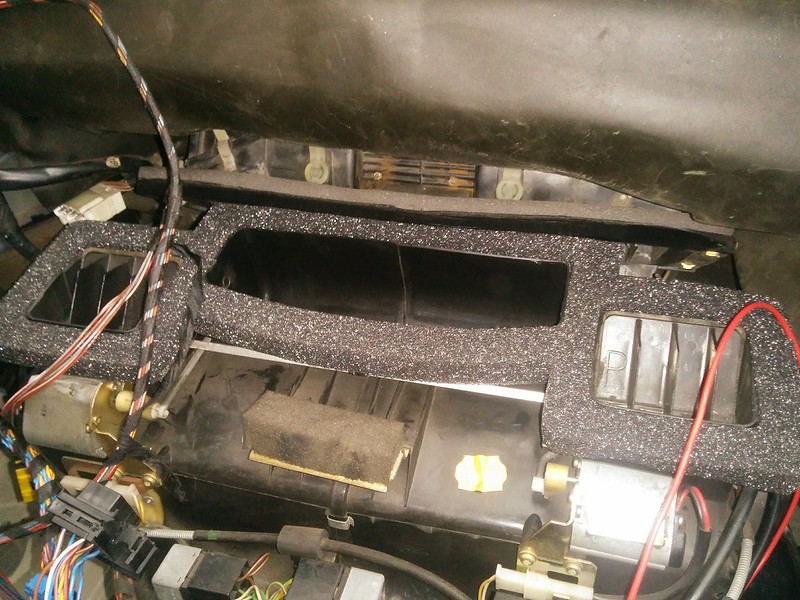
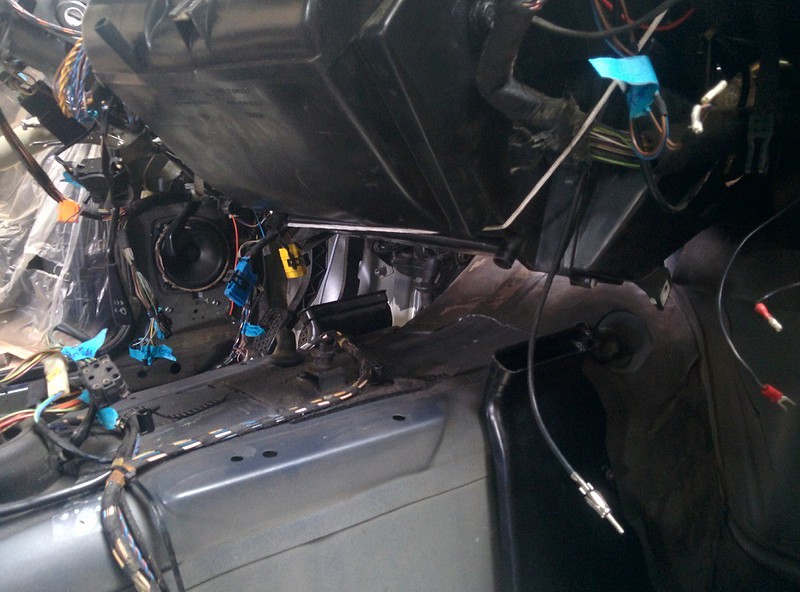
With this being done, my brother and I got started on cleaning the front part of the interior with a vacuum. I noticed that one of the metal rods of the heater box was loose. We pulled it a bit further and removed the flaps that the motors operates. I also installed new foam seals after glueing the little piece back onto the flap.
Also installed new seals from BMW, there wasn't much left of the seal around the vents and blower motors.
While I stripped some surface rust spots on the underside of the whole car, my brother cut out and applied new anti noise mats. By heating them up with a paint stripping gun you can press these in all the little crevices. We used the templates I made before stripping these.

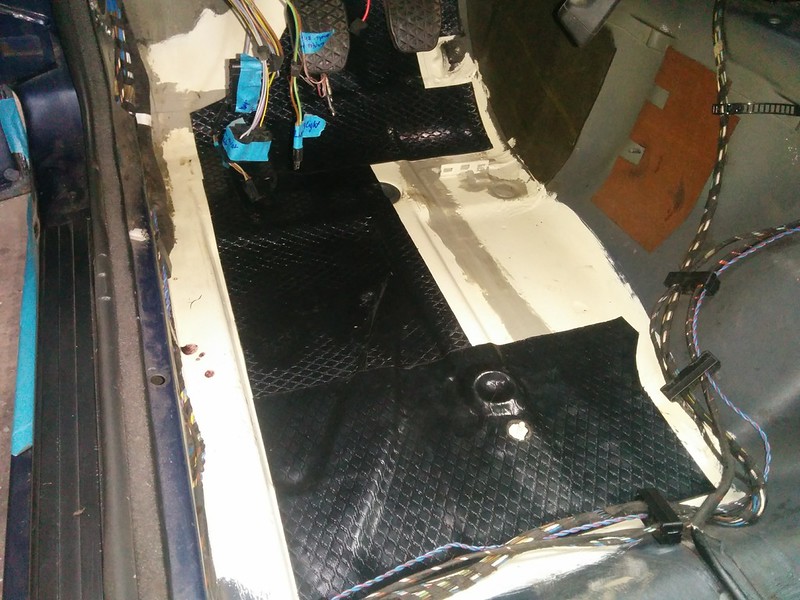
Air channels in place
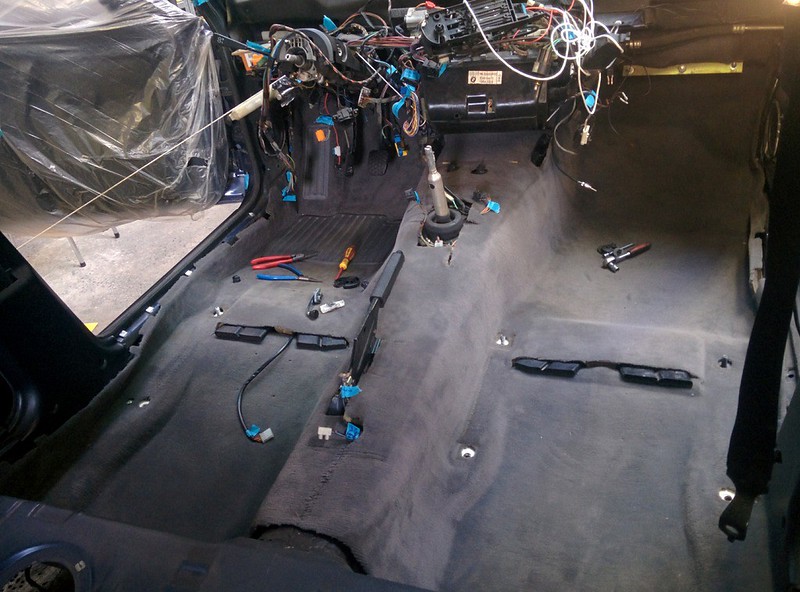
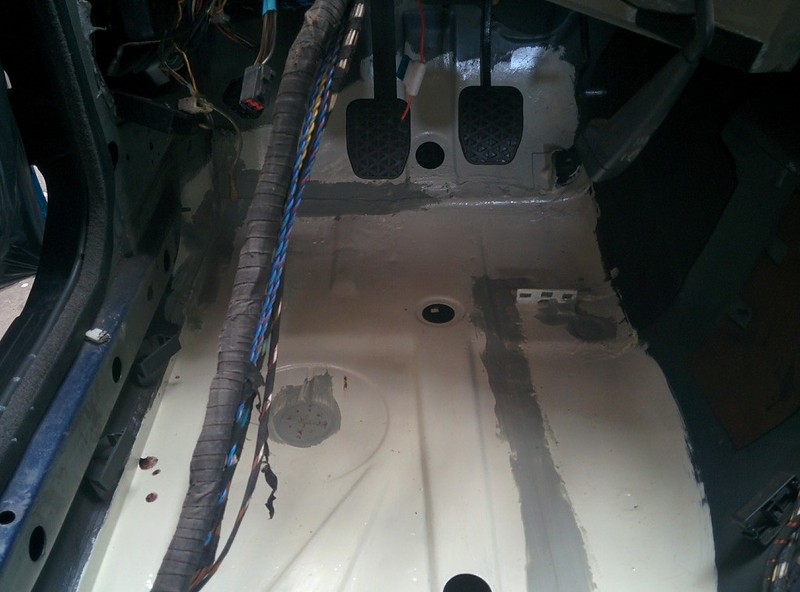
And then it was time to install the carpet again.
By holding the heater core up, we had plenty of room to shuffle the carpet under it.
It's been a while but it's back in the car! :D
 Last edited by D.Martijn; 07-06-2017, 10:55 AM.
Leave a comment:
-
Great work mate....the workmanship is awesome...keep the pics coming!Leave a comment:
-
Today I finished the front corner of the rear outer wheel tub. I also had to weld in a new inner piece of the sill
Luckily I was able to save the outer panel which got welded back on
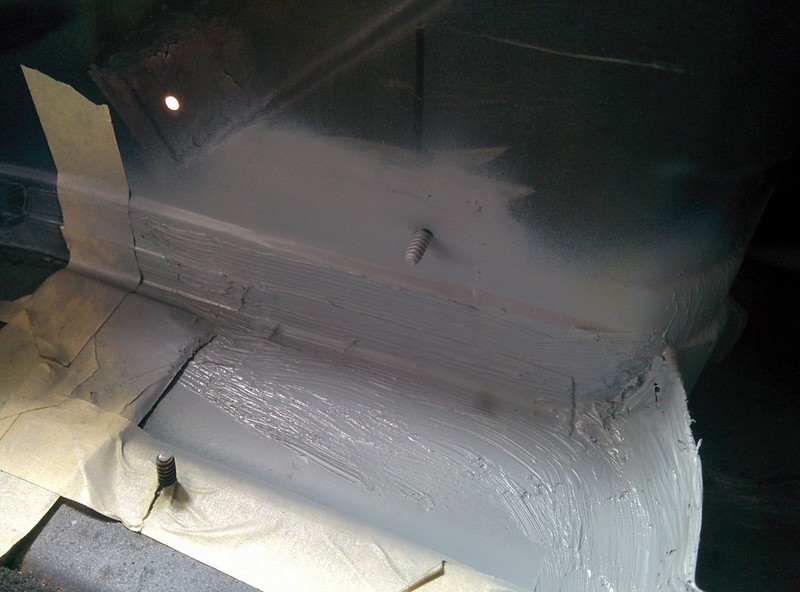
I also started to seam seal the front section of the car. trying to mimicking the OEM look with a brush.
I also had to make a patch for the boot panel. both panels (flange and vertical piece) were rotted as this is where the bracket of the filler neck is.
I then glued in the new metal vent tube with Tec7, After fitting it with the glue I noticed I forgot to route the wires under the tube to I had to pull it back out! Thank god I noticed it on time!
I also made a panel for the outer tub where the fuel cap meets the quarter panel.
I only tacked it in a few places as I glued the curved edge to the quarter panel as original.
So that's it for this side, still need to seam seal it but at least I'm almost done welding on this side, now on to the other side!.Last edited by D.Martijn; 07-06-2017, 10:52 AM.Leave a comment:
-
Originally posted by parkerbink View PostThanks guys! Almost there, still need to address a few rust spots in the passenger rear arch and then the driver side spring perch and some spots of surface rust under the floor but nothing bad. Hopefully it's all done by next weekend.Originally posted by squidmaster View PostLeave a comment:
-
Nice work and updates! Looks like you've been getting a lot done
Sent from my Robin using TapatalkLeave a comment:
-
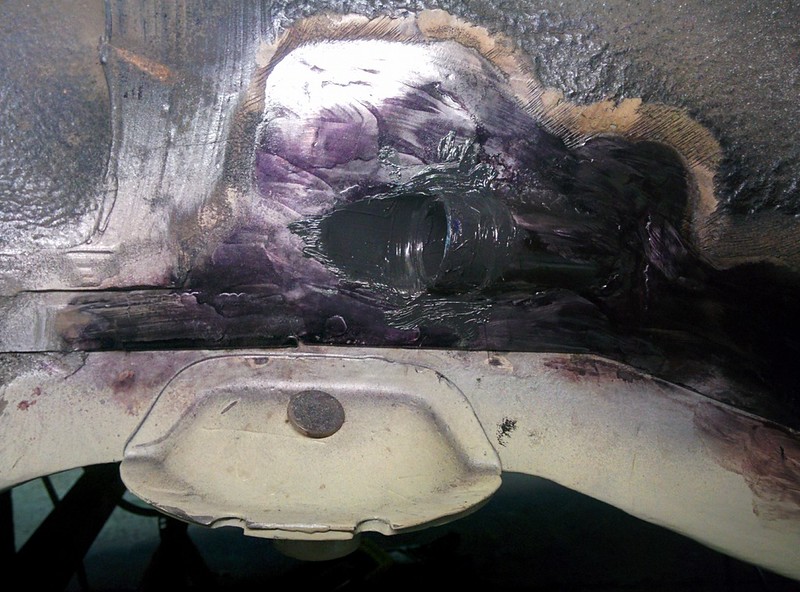
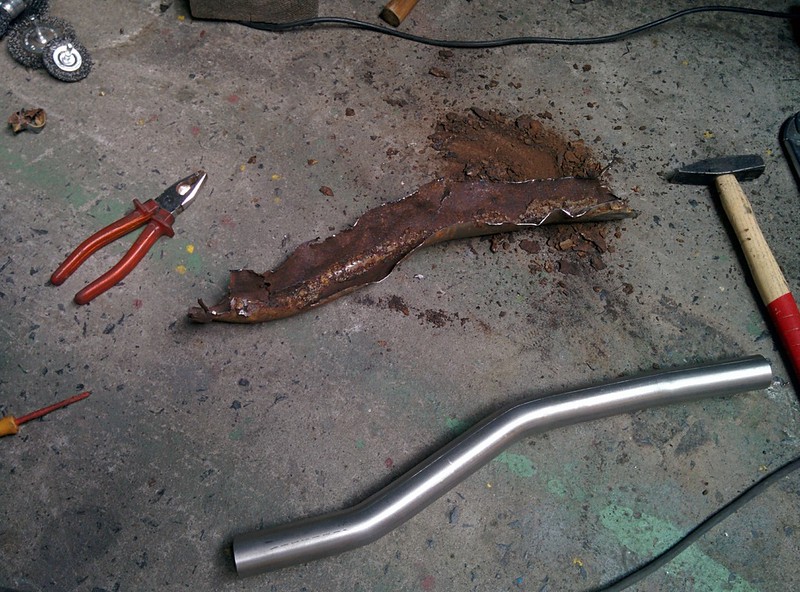
Got the metal vent tube repaired/replaced with a stainless steel one.
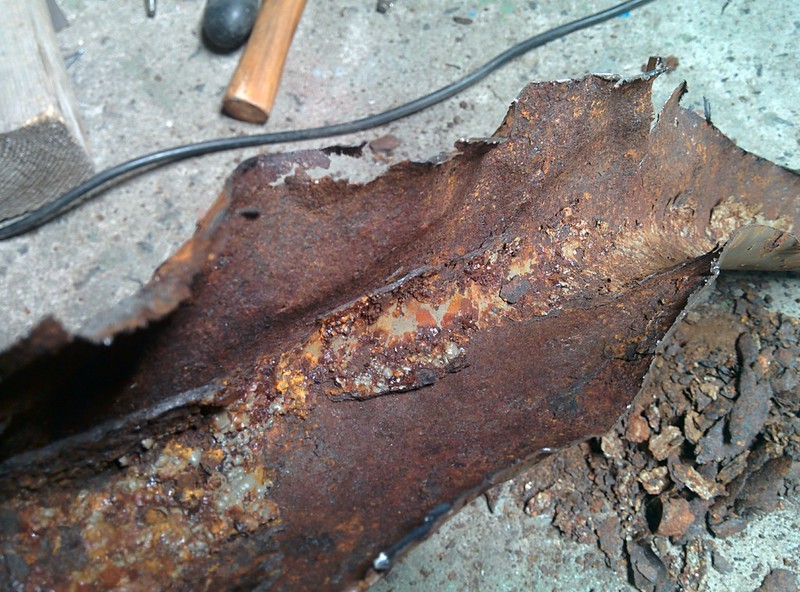
I started with removing the old rusted tube, only had to remove the welds from the section under the seat as the one in the wheel tub was completely gone.
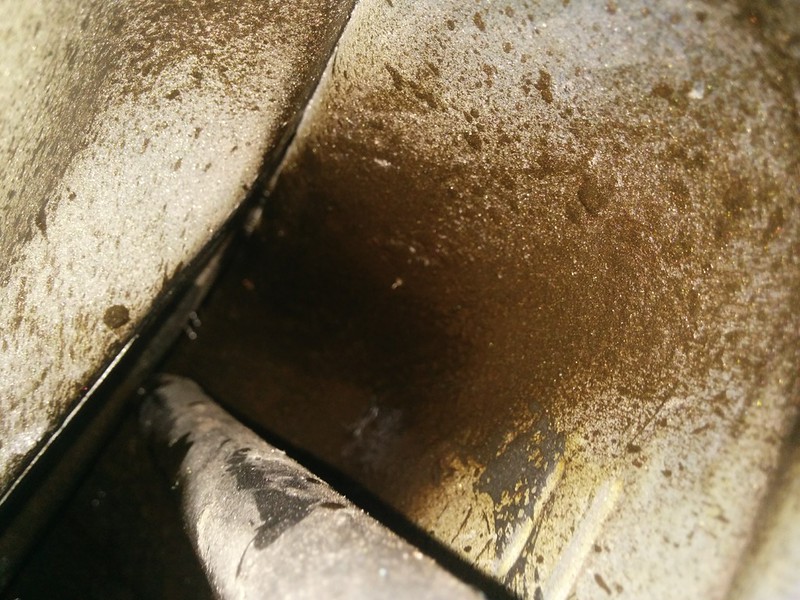
I decided to cut the tube open so I could see what was inside. More rust of course!

Old vs new
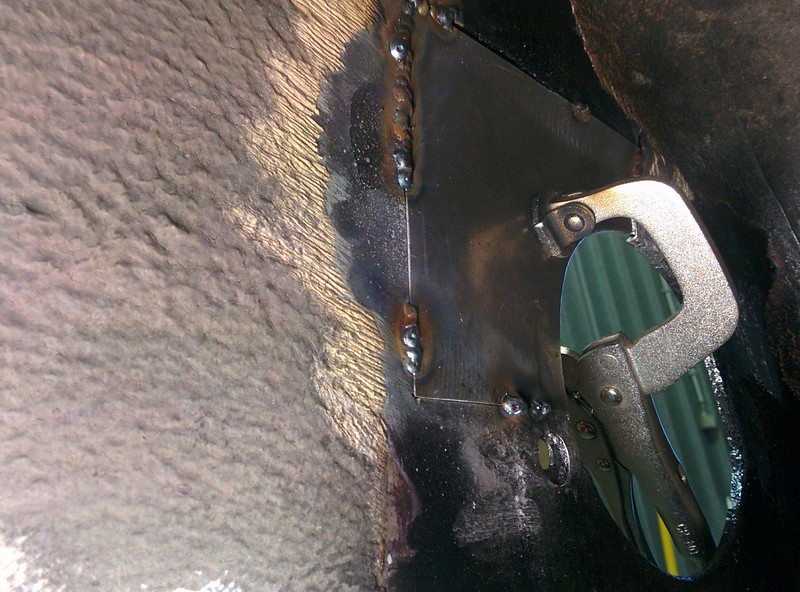
I then started with fabricating a new plate for the wheel tub where the tube goes from the interior into the tub. After trying the make it out of one sheet twice, I gave up and made it form 3 pieces, 1 with a big hole and then 2 bend pieces that I welded on the flat piece of metal.
I'm not going to weld the tube in but glue it as welding metal to stainless will make it rust. I don't have the special feed wire and gas neither.
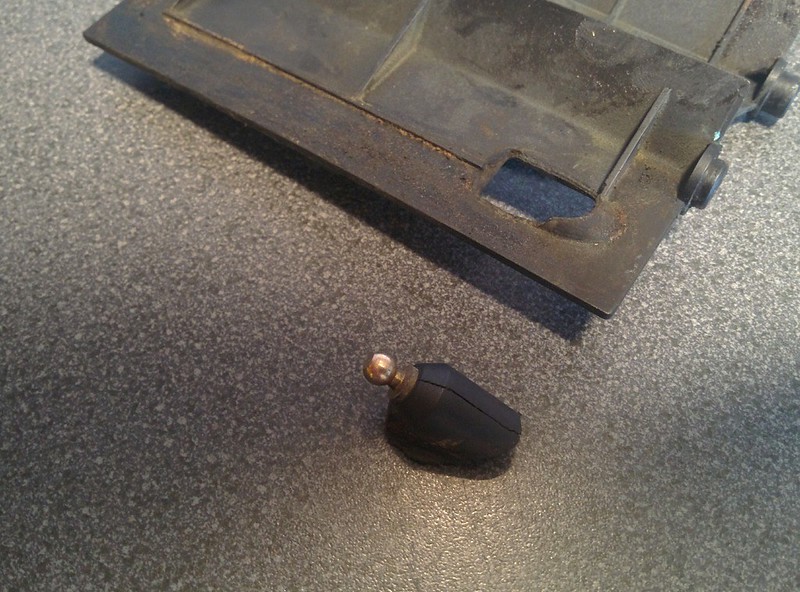
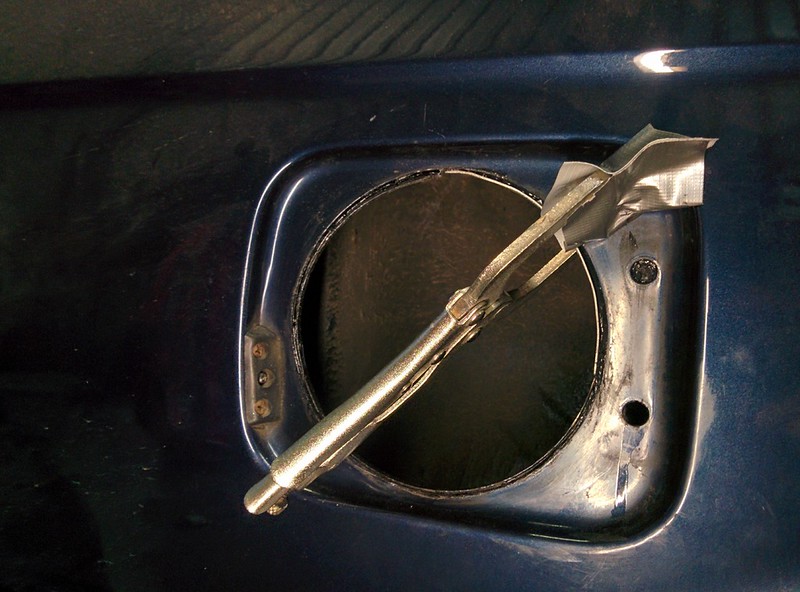
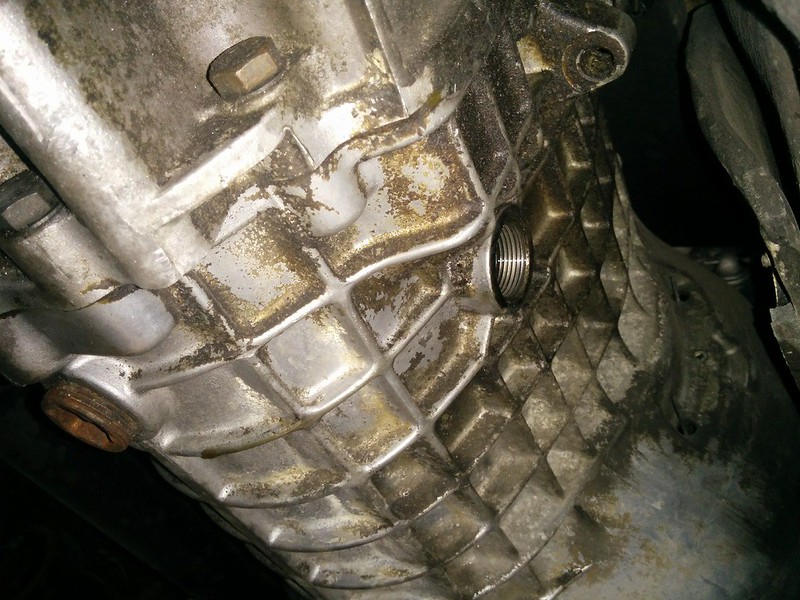
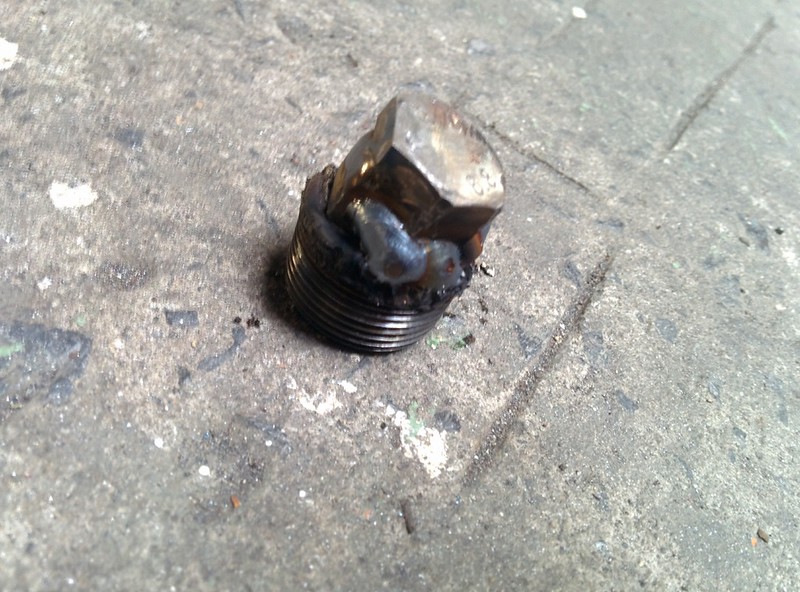
Finally, I figured out a way I could remove the f*cked fill plug of the transmission, by using a M8 bolt with a 17mm head and welding a nut onto the bolt.
This resulted in a long hexagon bar which I then tapped into the old plug and welded it to it. I was so happy when it finally came loose! I'll drain the oil tomorrow or maybe this evening. I already got a new plug to use so it won't take long.
 Last edited by D.Martijn; 07-06-2017, 10:50 AM.
Leave a comment:
-
Thanks, Chris!Originally posted by Chrisbike View Post
__
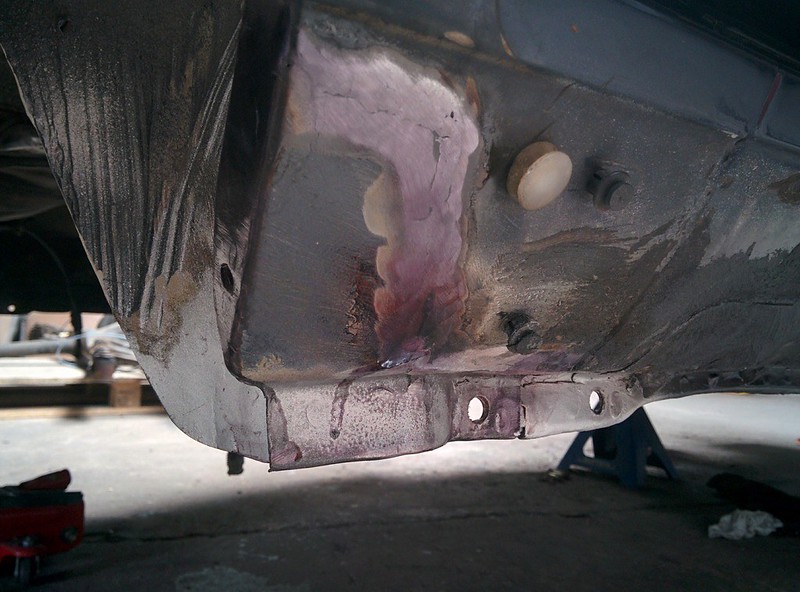
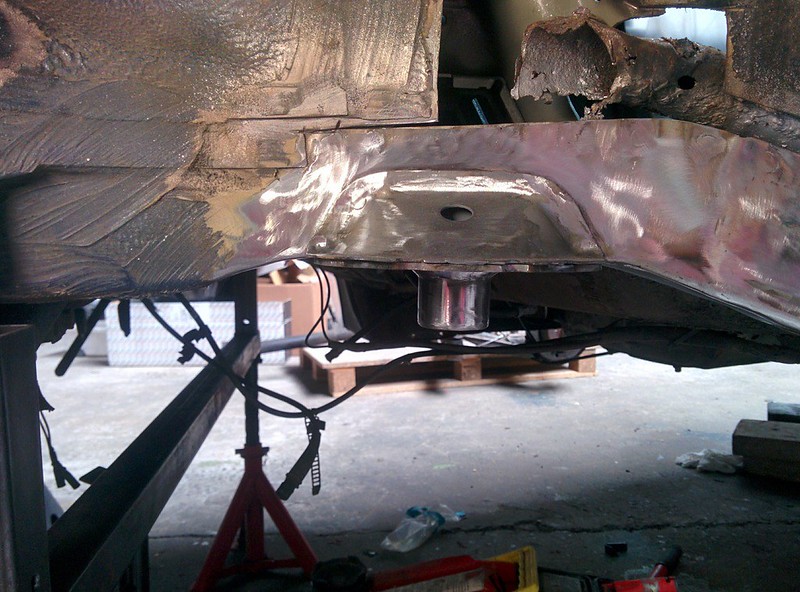
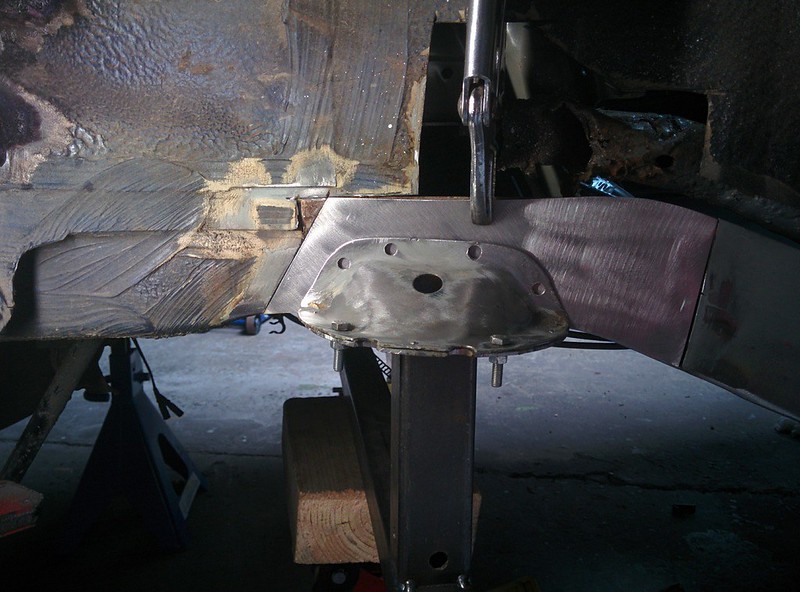
Got the vertical plate of the chassis rail welded in after some more fiddling and checking/measuring. Looks a lot better than the old piece.
After grinding the weld back, I plug welded the brace back on to the plate and finally the spring perch disc
I also welded the new section of the transverse rail back into place but don't have any picture of it. Got the flanges of the fuel tank also wire wheeled and applied POR15 on those. I might replace my fuel tank some time later but for now it'll do.Last edited by D.Martijn; 07-06-2017, 10:47 AM.Leave a comment:
-
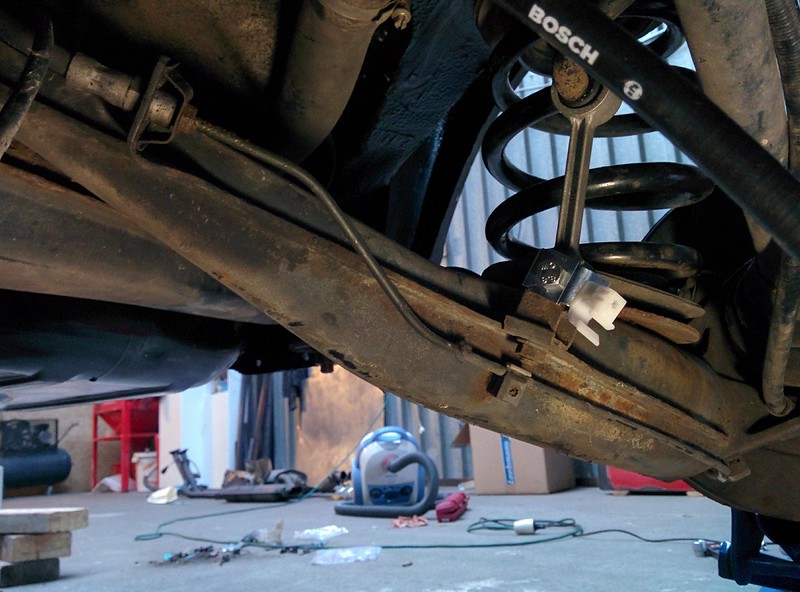
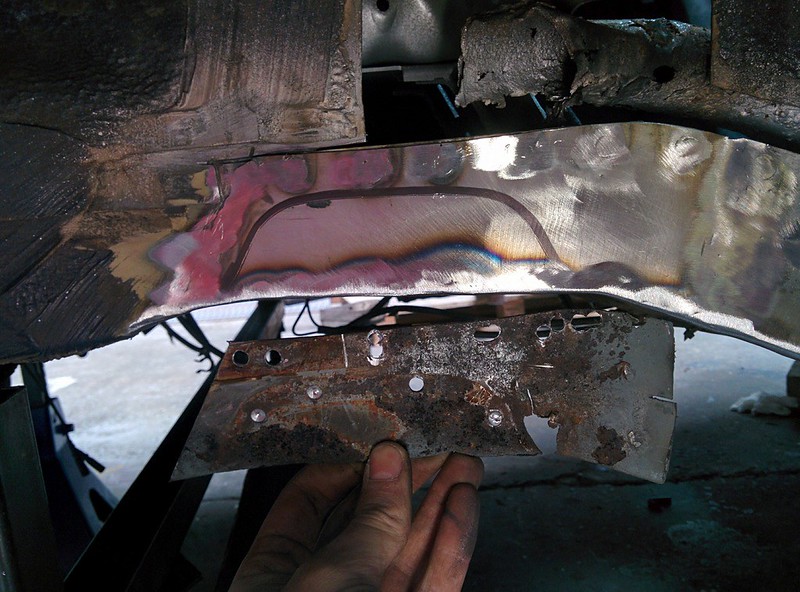
Before I removed the brace for the spring perch disc, I bolted the disc against it and scribed a line around it. This way I can line it up roughly before measuring it all. I then removed the brace and rusted piece of chassis rail and made a new plate

Here you can see the scribed line on the underside.
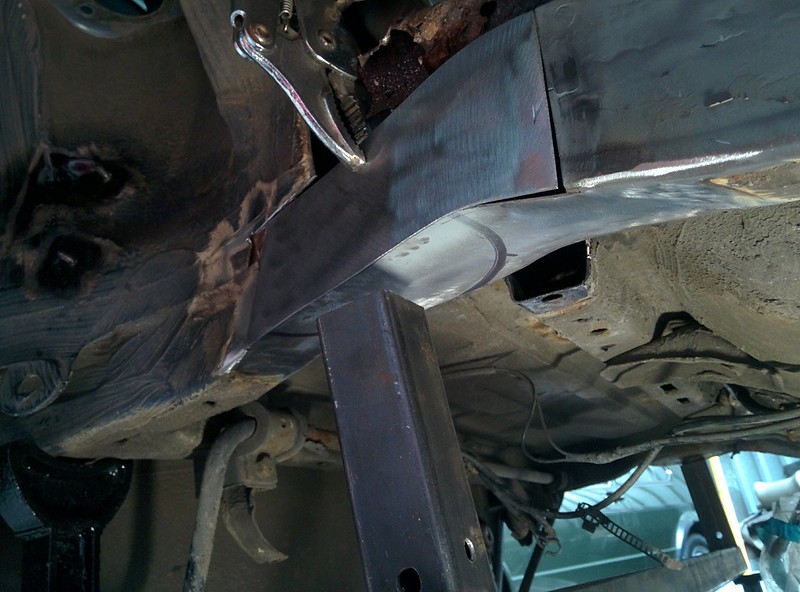
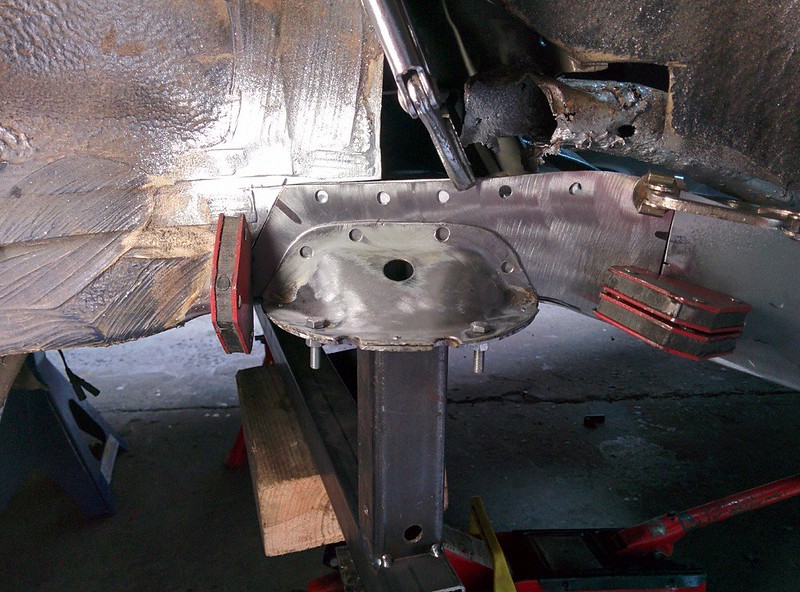
First mock up with the new chassis rail piece clamped in place, fits pretty good and the measurement were spot on after some fiddling
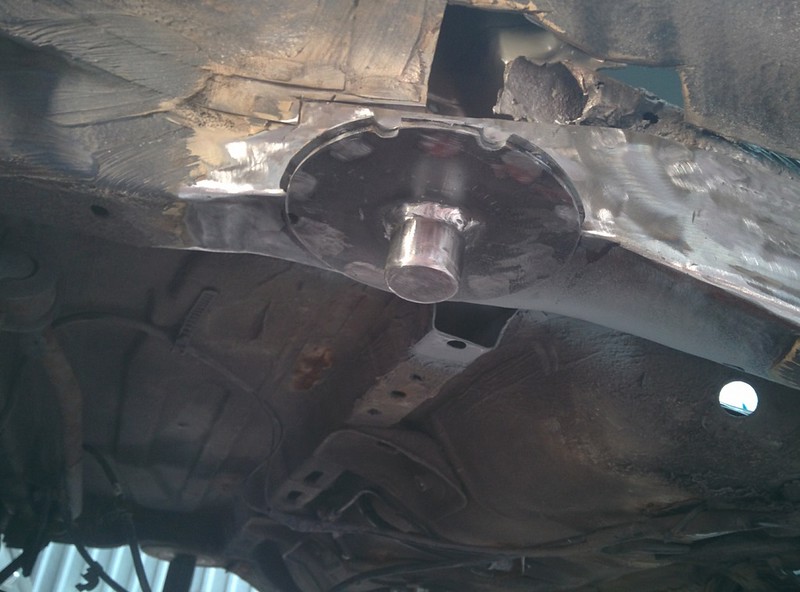
The jig makes holding and lining it up with the other spring perch very easy.
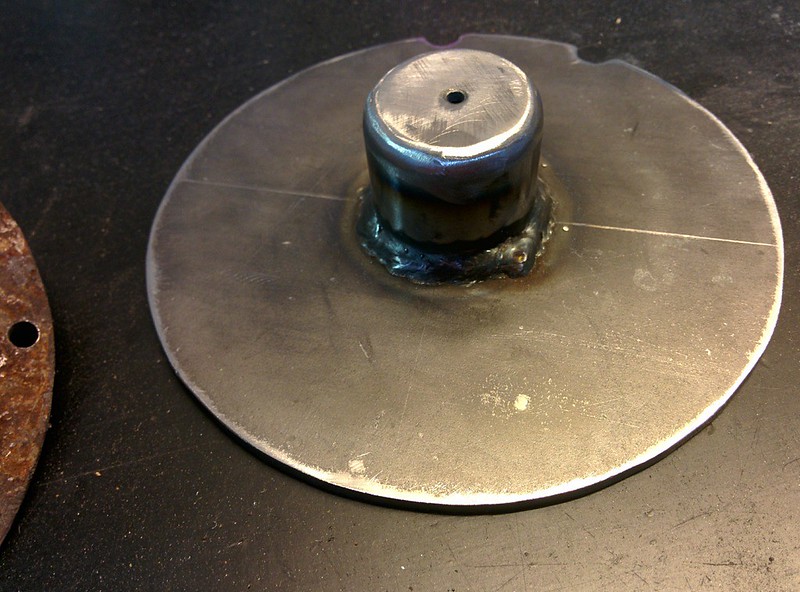
I also got a big cut off from a local shop to make the new discs out of.
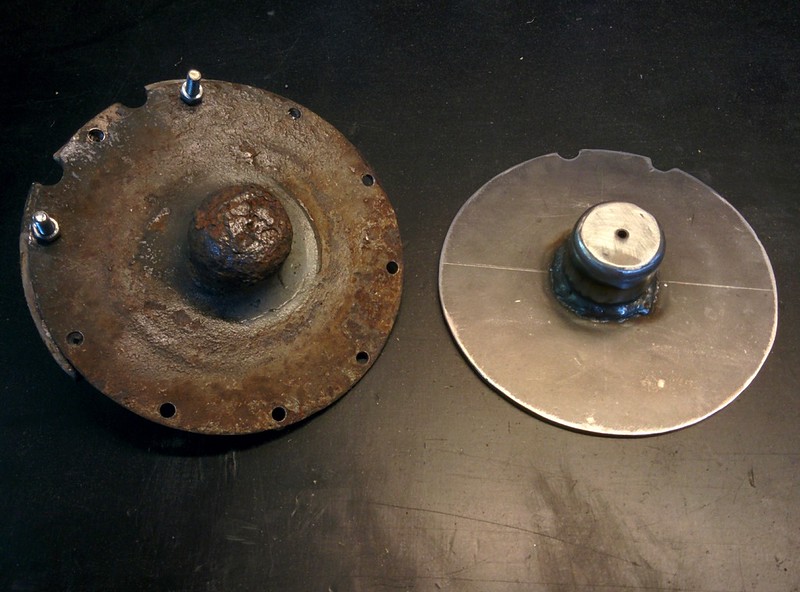
Looks a lot better than the old one..
 Last edited by D.Martijn; 07-06-2017, 10:48 AM.
Leave a comment:
-
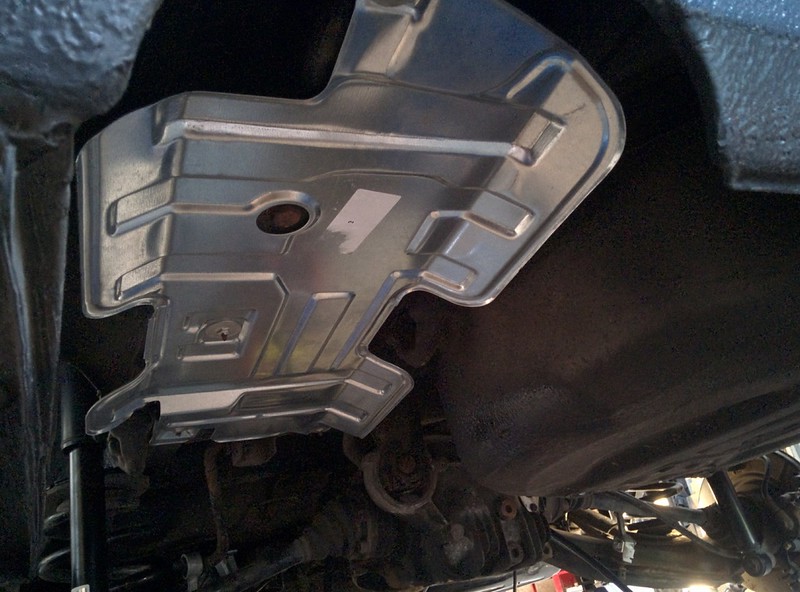
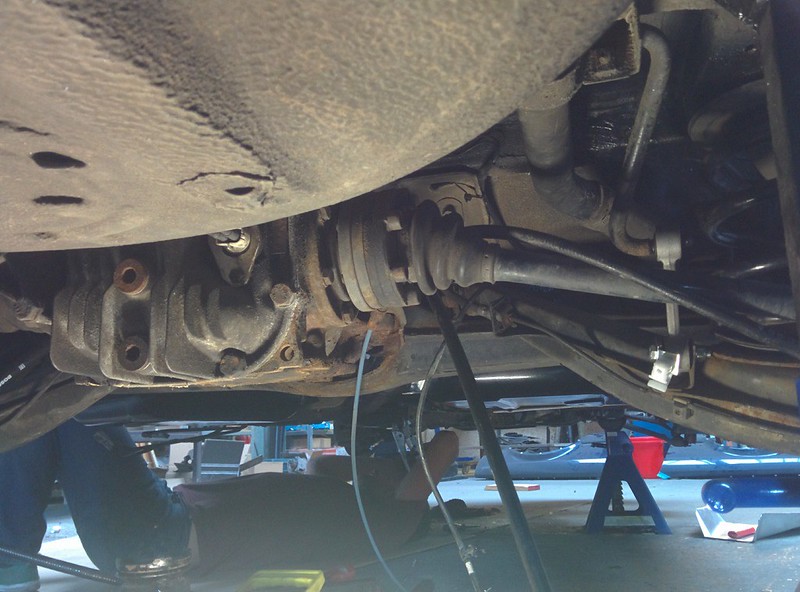
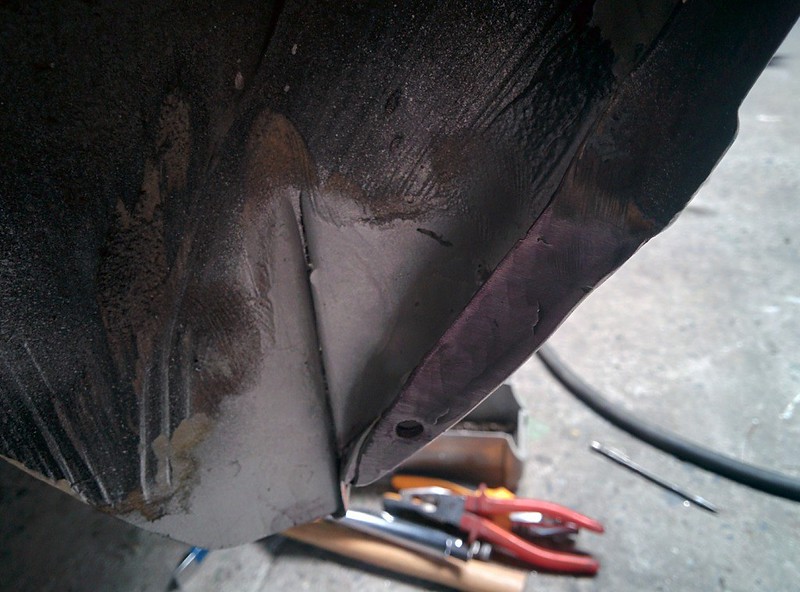
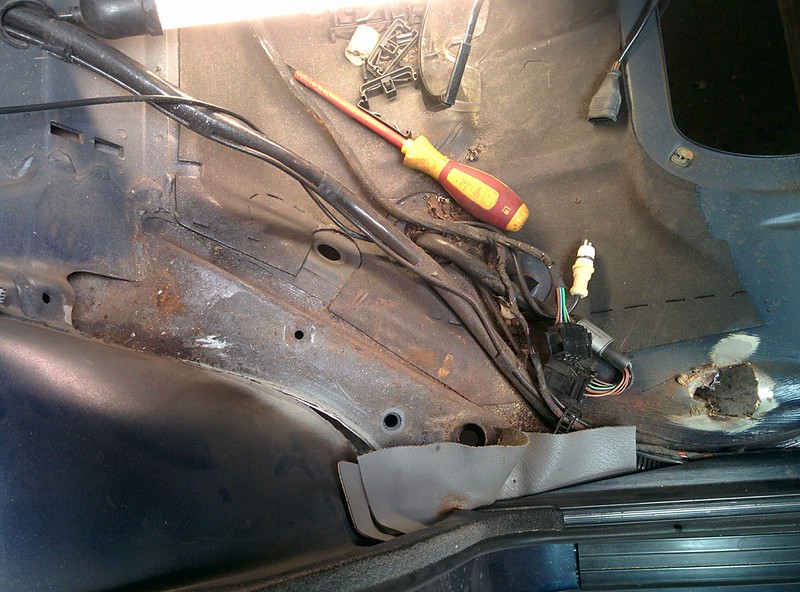
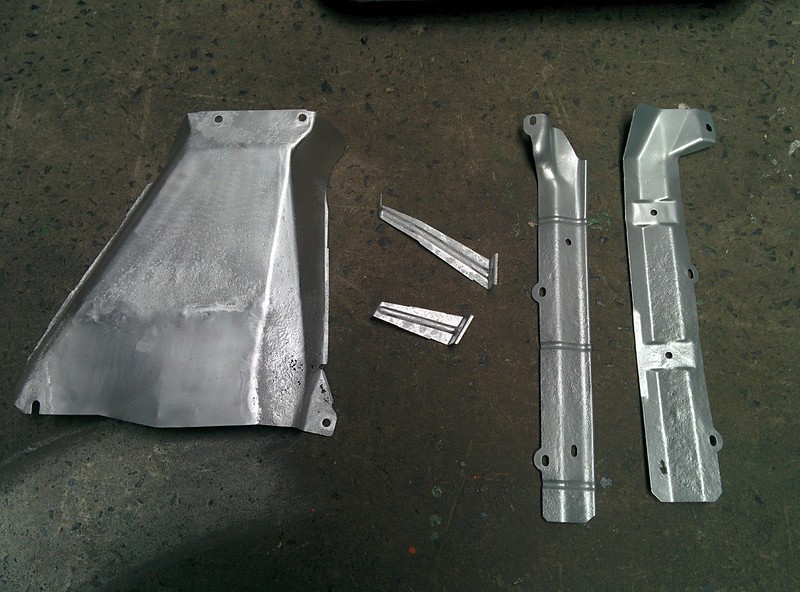
When I removed the exhaust and rear subframe, I noticed the heatshields and procection plates for the fuel tank were quite rusted.
I sandblasted the brackets and heat shield (I decided to repair this one as it wasn't too far gone) and gave them a coat of heat resistant paint. the 2 other plates got primer and some left over grey/silver paint
Got some new parts from BMW too, new heat shield for the exhaust as it was pretty far gone. New fuel lines, as I mentioned in my first post, the end were pretty rusty.
New vent tube, sway bar links and some other small hardware/clips/gaskets.
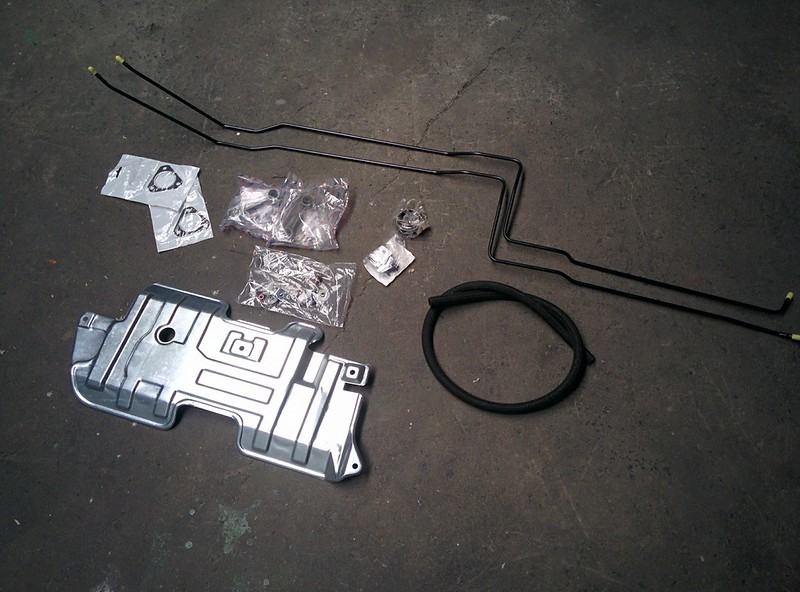
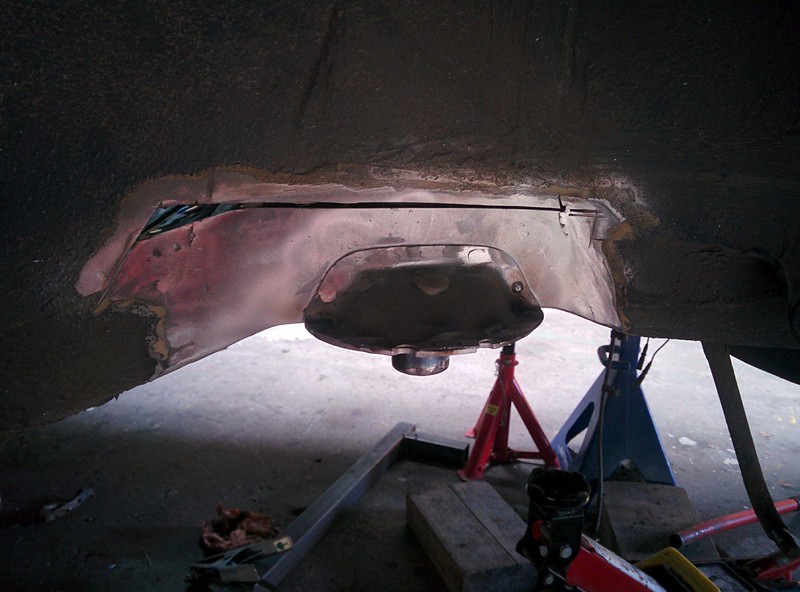
I then removed the fuel tank, there was still plenty of fuel left inside which made it quite heavy to move around. There is some rust on the flanges, I'll try to remove most of the rust and convert it with Brunox.
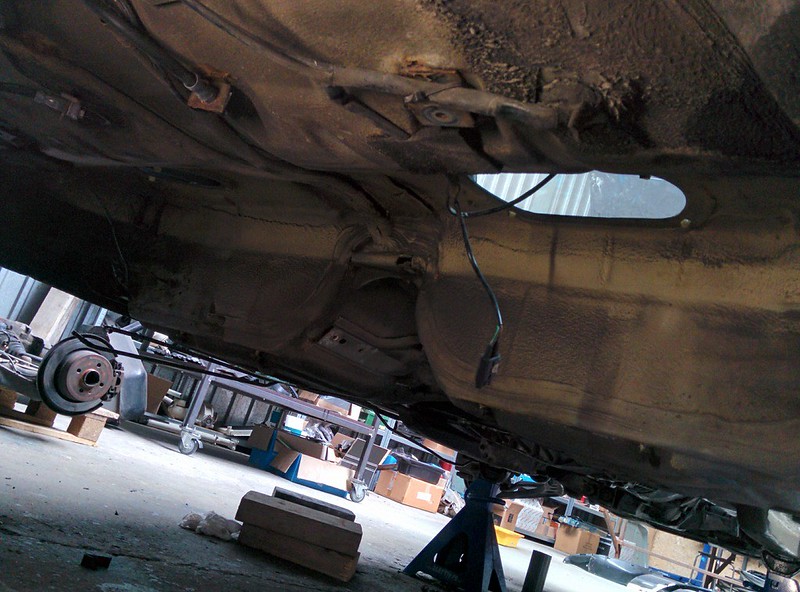
With the fuel tank out, I have plenty of room to cut the weld loose of tube and body

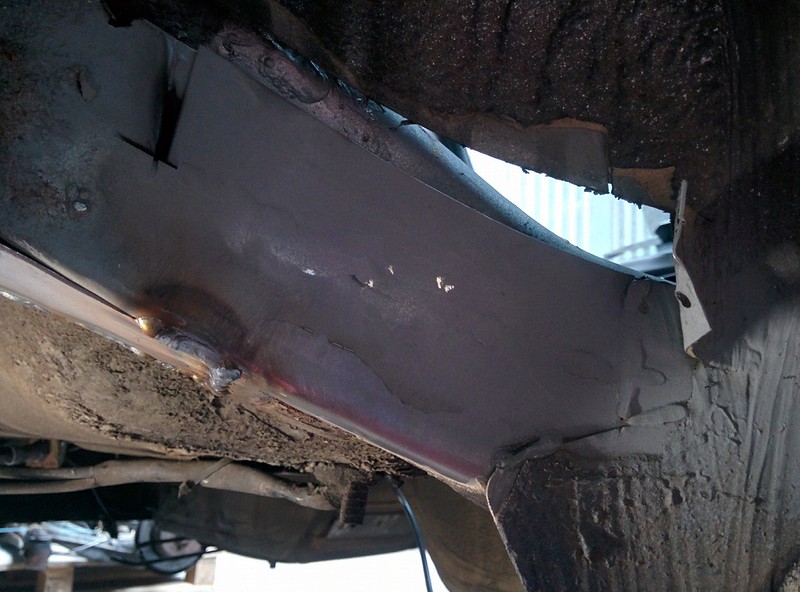
I also got a new plate welded in on the side of the rear chassis rail as the upper side was pitted badly. I made sure I got good penetration. Still need to grind down the weld some more
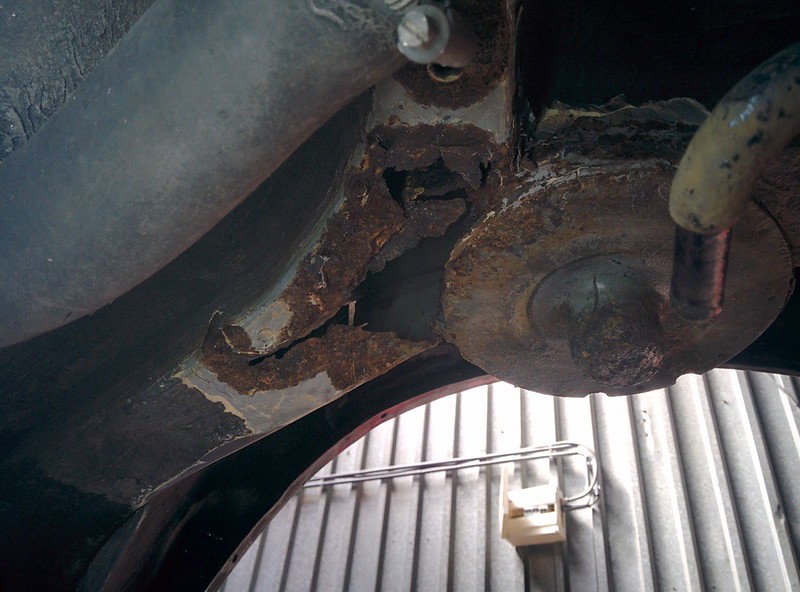
One of the previous owners had welded a plate on the side of the chassis rail which extended on the lower side of the chassis rail. When I ground the tack welds I got presented with this..
Before removing the plate/disc, I made a jig from some left over tubing, 2 vertical tubes that fit tightly over the little protrusion and a square tube that connects both. This way I can reference of the other spring perch to make sure it's in the right place, together with a lot of measurements.
It was a pain to remove all of the rusted sheet metal especially because I was laying on my back and everything flew towards my face..
I removed a small section of the vertical side of the chassis rail and welded in a new piece from the inside of the rail as there is no way I could've ground the welds down on the outside, this also gives it some more strength.
I then welded in a new lower piece, again making sure to have plenty of penetration as I'd like to grind these welds down so it all looks factory.
 Last edited by D.Martijn; 07-06-2017, 10:41 AM.
Leave a comment:
Leave a comment: