-
Thanks guys! Almost there, still need to address a few rust spots in the passenger rear arch and then the driver side spring perch and some spots of surface rust under the floor but nothing bad. Hopefully it's all done by next weekend. -
Nice work and updates! Looks like you've been getting a lot done
Sent from my Robin using TapatalkLeave a comment:
-
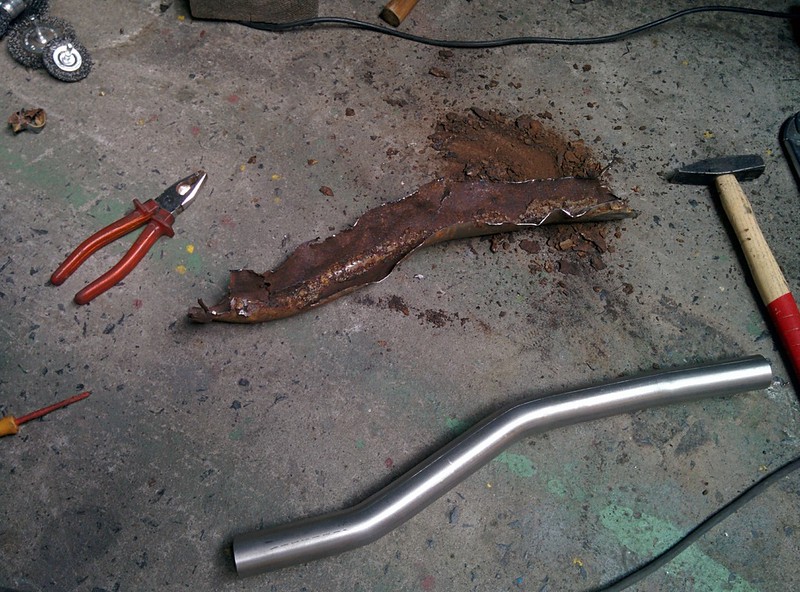
Got the metal vent tube repaired/replaced with a stainless steel one.
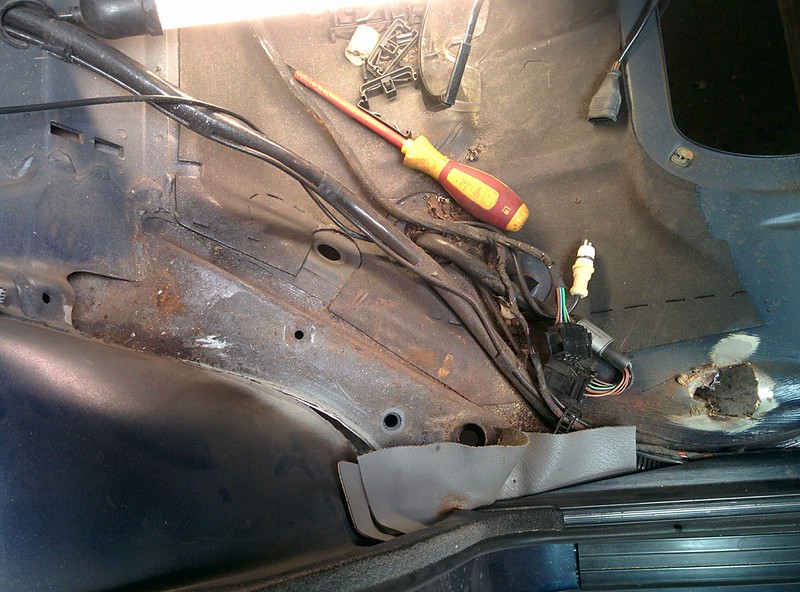
I started with removing the old rusted tube, only had to remove the welds from the section under the seat as the one in the wheel tub was completely gone.
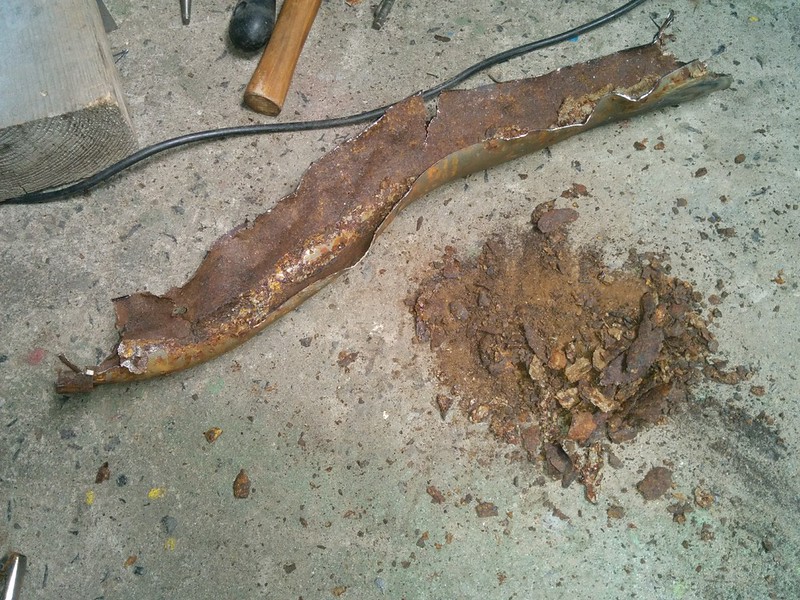
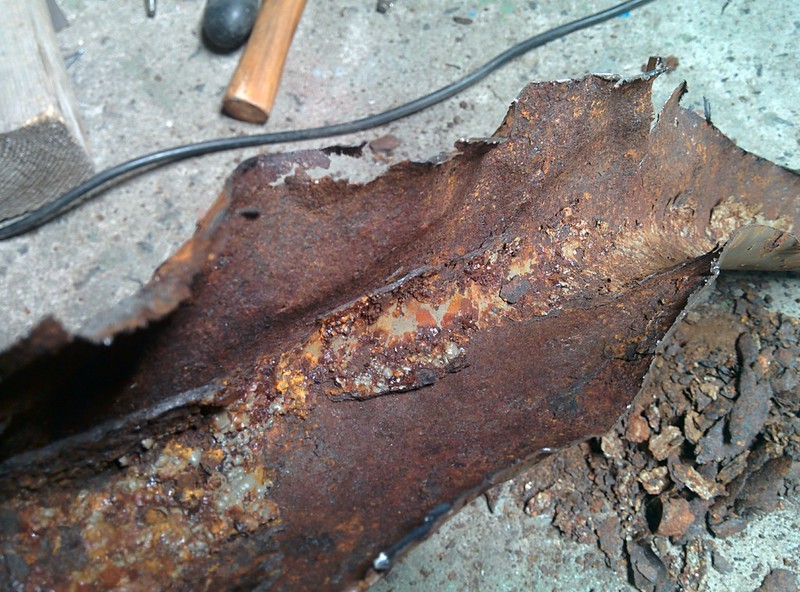
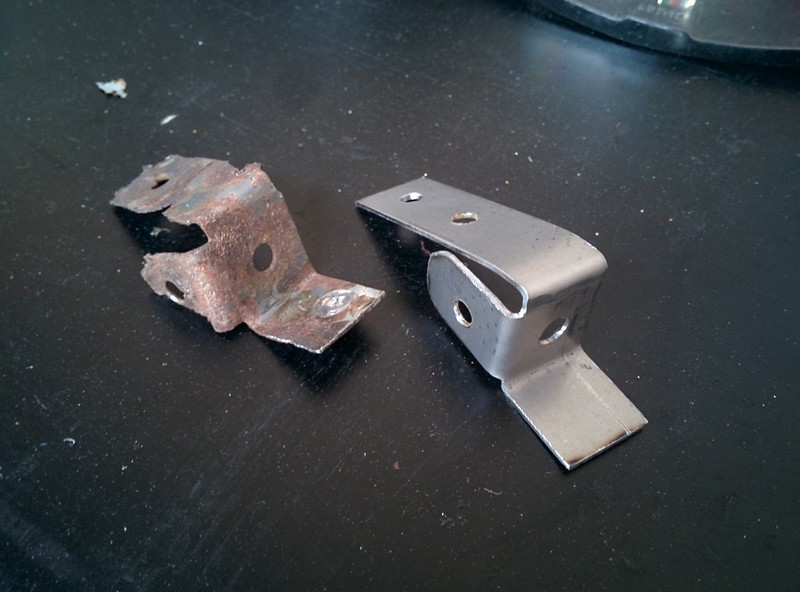
I decided to cut the tube open so I could see what was inside. More rust of course!
Old vs new
I then started with fabricating a new plate for the wheel tub where the tube goes from the interior into the tub. After trying the make it out of one sheet twice, I gave up and made it form 3 pieces, 1 with a big hole and then 2 bend pieces that I welded on the flat piece of metal.
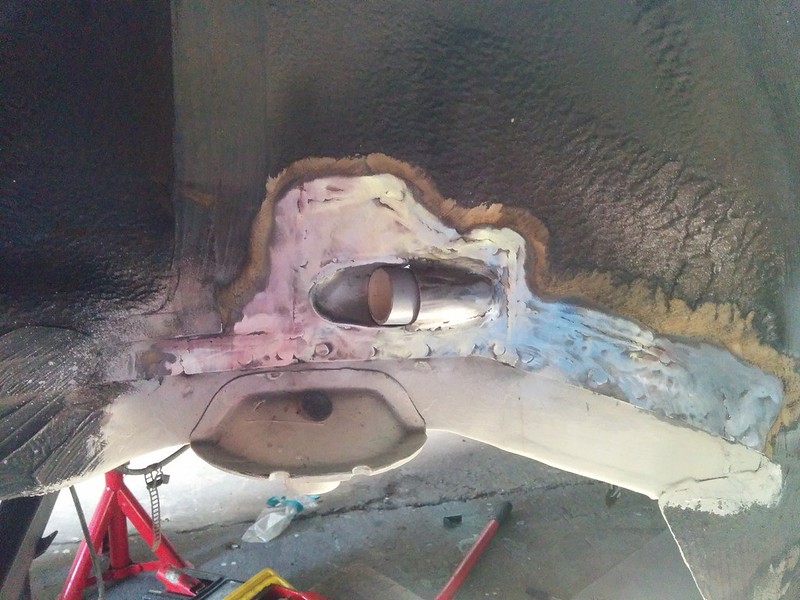
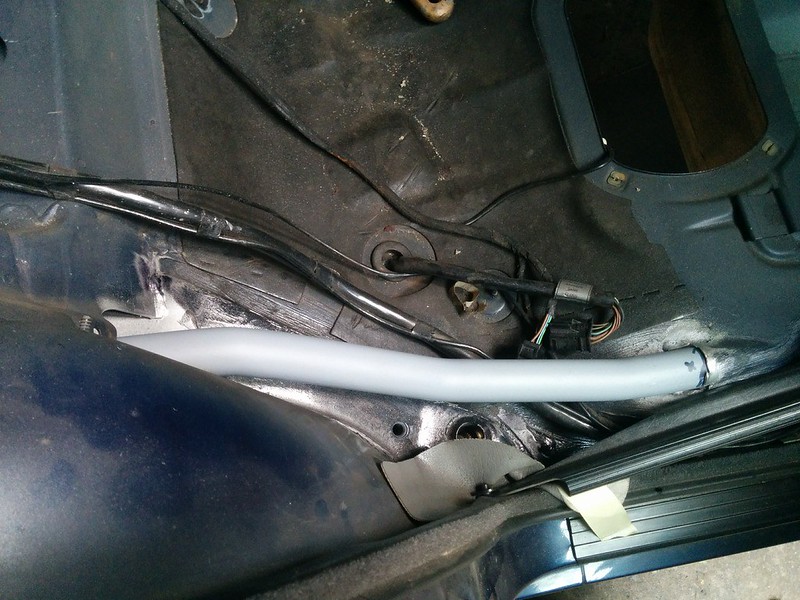
I'm not going to weld the tube in but glue it as welding metal to stainless will make it rust. I don't have the special feed wire and gas neither.
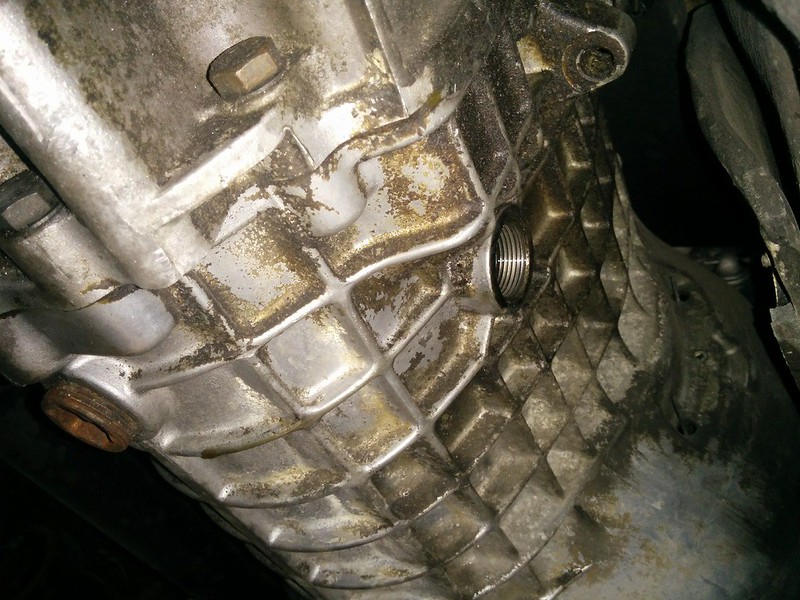
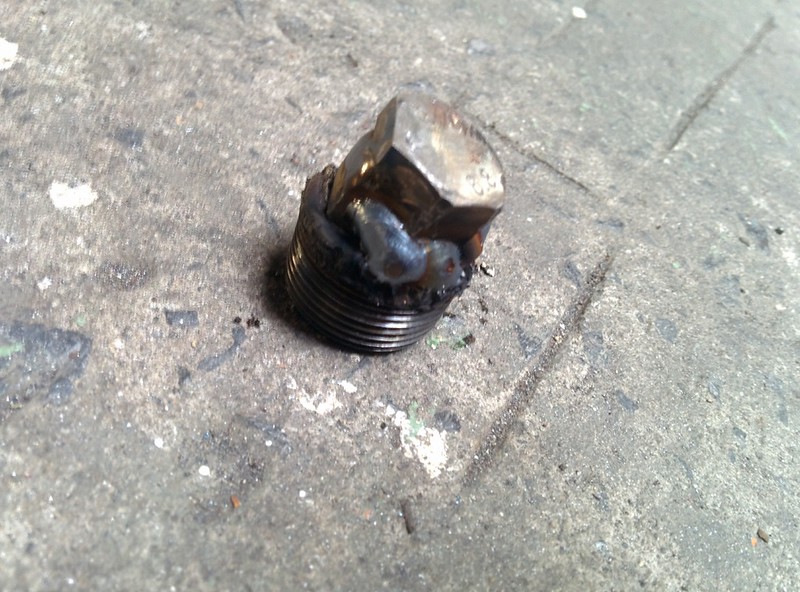
Finally, I figured out a way I could remove the f*cked fill plug of the transmission, by using a M8 bolt with a 17mm head and welding a nut onto the bolt.
This resulted in a long hexagon bar which I then tapped into the old plug and welded it to it. I was so happy when it finally came loose! I'll drain the oil tomorrow or maybe this evening. I already got a new plug to use so it won't take long.
 Last edited by D.Martijn; 07-06-2017, 09:50 AM.
Leave a comment:
-
Thanks, Chris!
__
Got the vertical plate of the chassis rail welded in after some more fiddling and checking/measuring. Looks a lot better than the old piece.
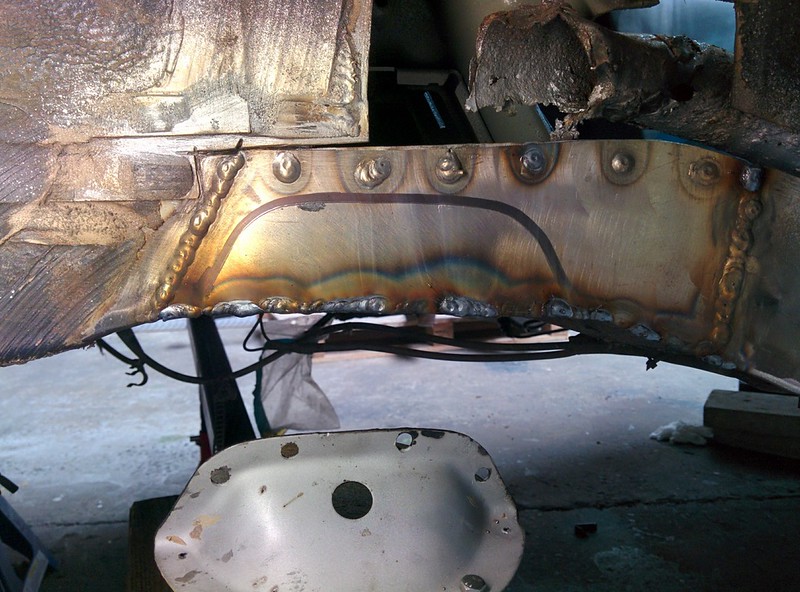
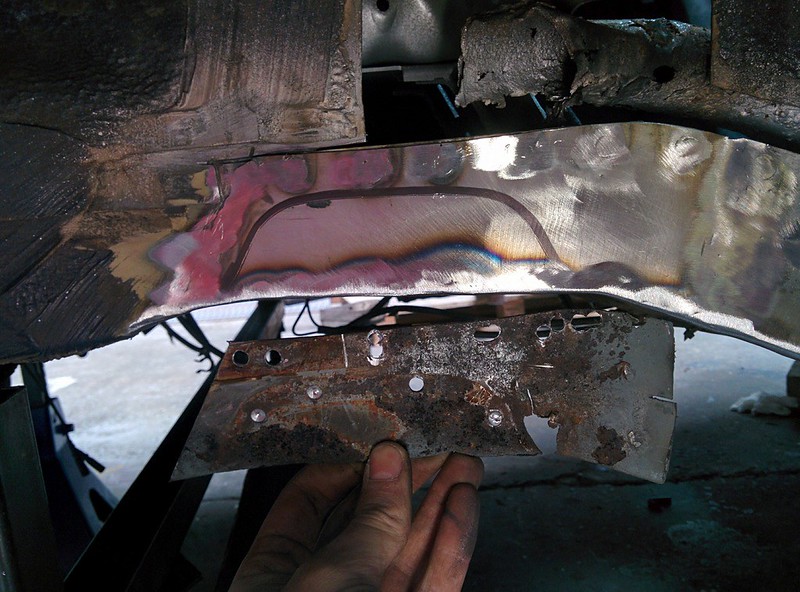
After grinding the weld back, I plug welded the brace back on to the plate and finally the spring perch disc
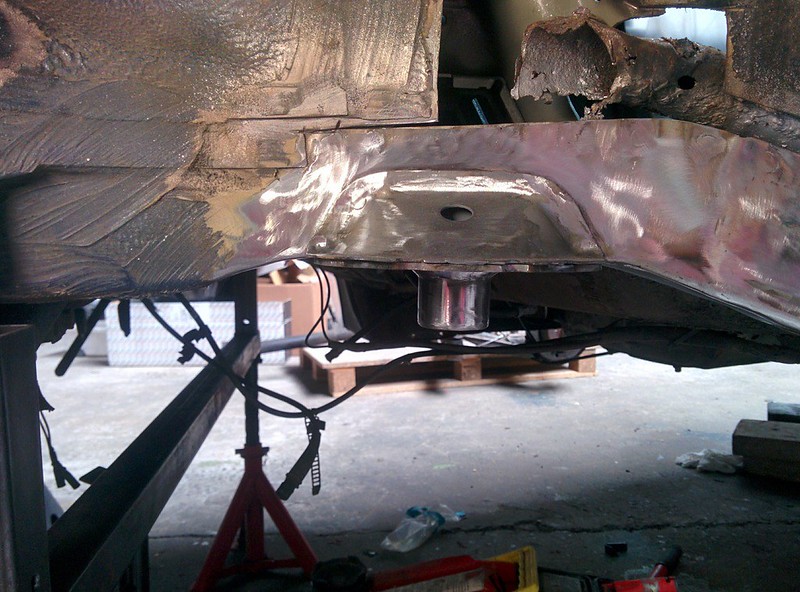
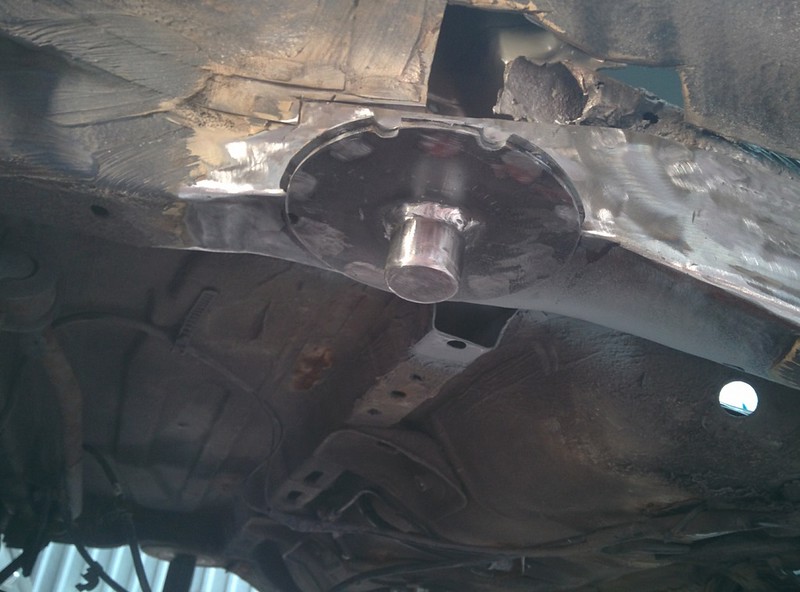
I also welded the new section of the transverse rail back into place but don't have any picture of it. Got the flanges of the fuel tank also wire wheeled and applied POR15 on those. I might replace my fuel tank some time later but for now it'll do.Last edited by D.Martijn; 07-06-2017, 09:47 AM.Leave a comment:
-
Before I removed the brace for the spring perch disc, I bolted the disc against it and scribed a line around it. This way I can line it up roughly before measuring it all. I then removed the brace and rusted piece of chassis rail and made a new plate

Here you can see the scribed line on the underside.
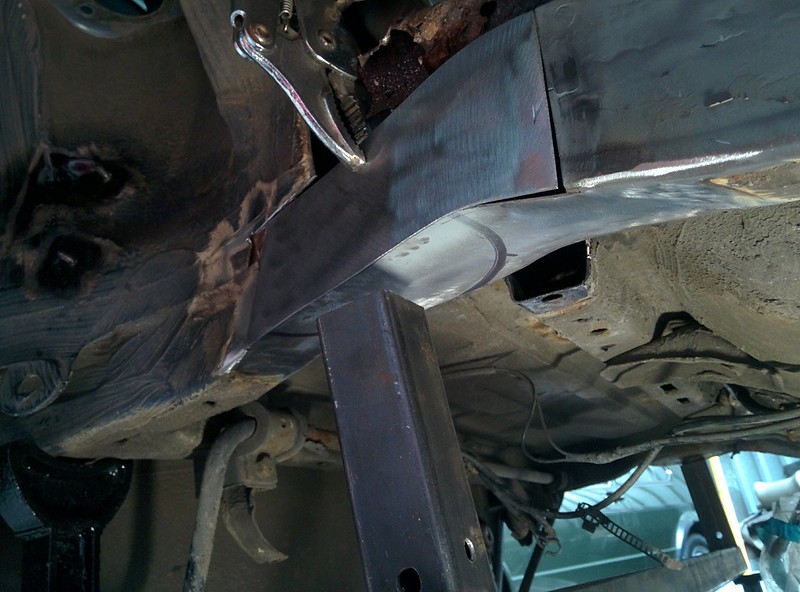
First mock up with the new chassis rail piece clamped in place, fits pretty good and the measurement were spot on after some fiddling
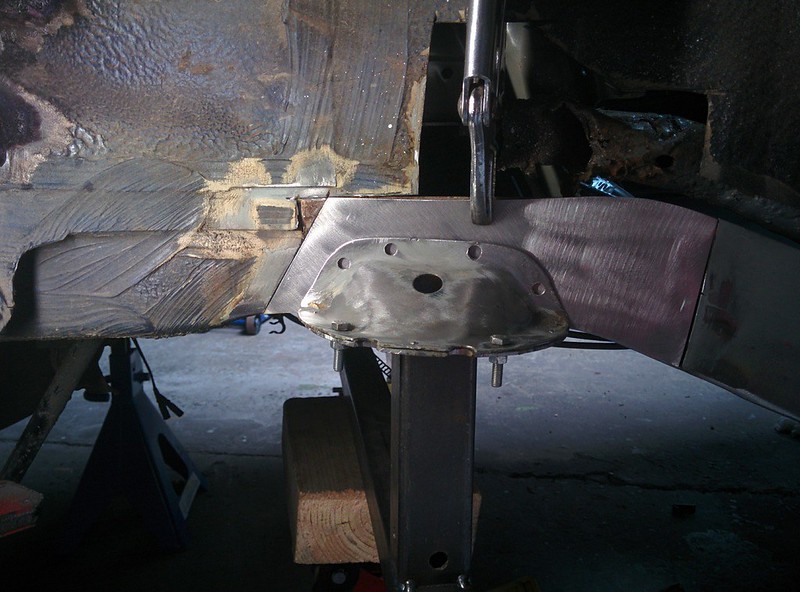
The jig makes holding and lining it up with the other spring perch very easy.
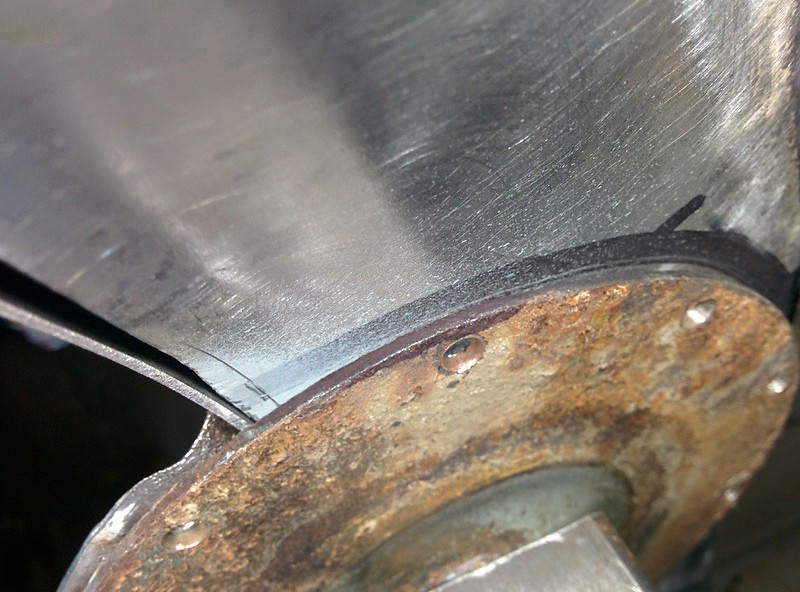
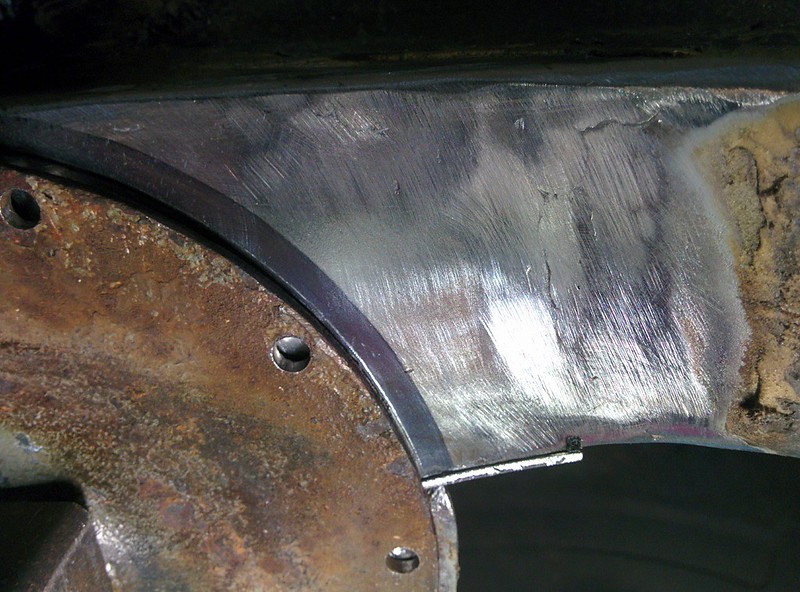
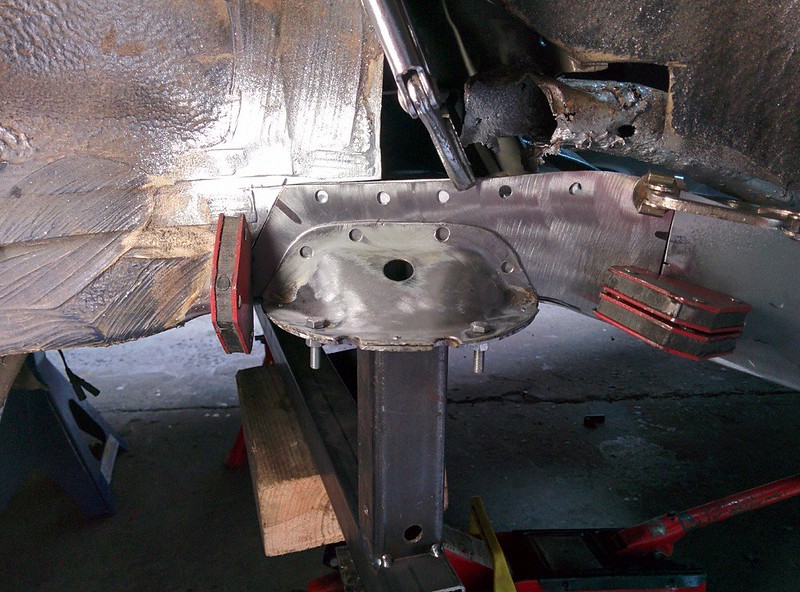
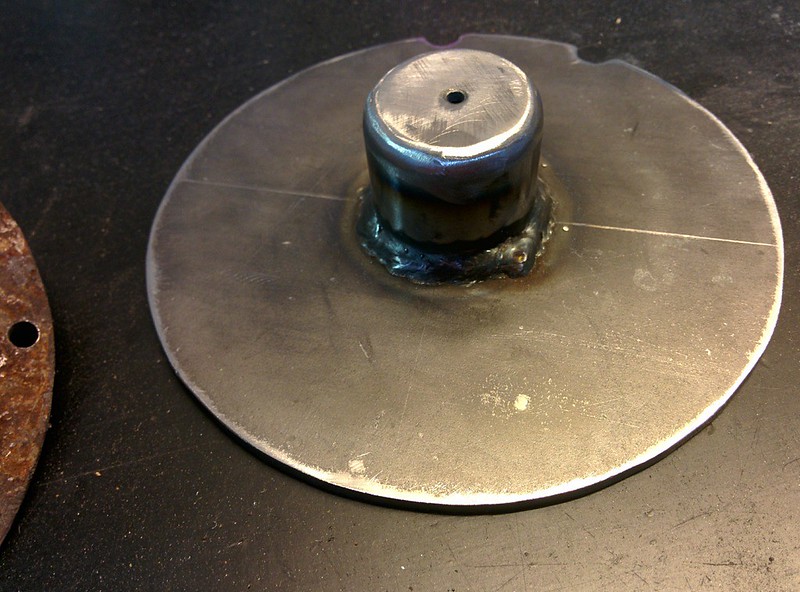
I also got a big cut off from a local shop to make the new discs out of.
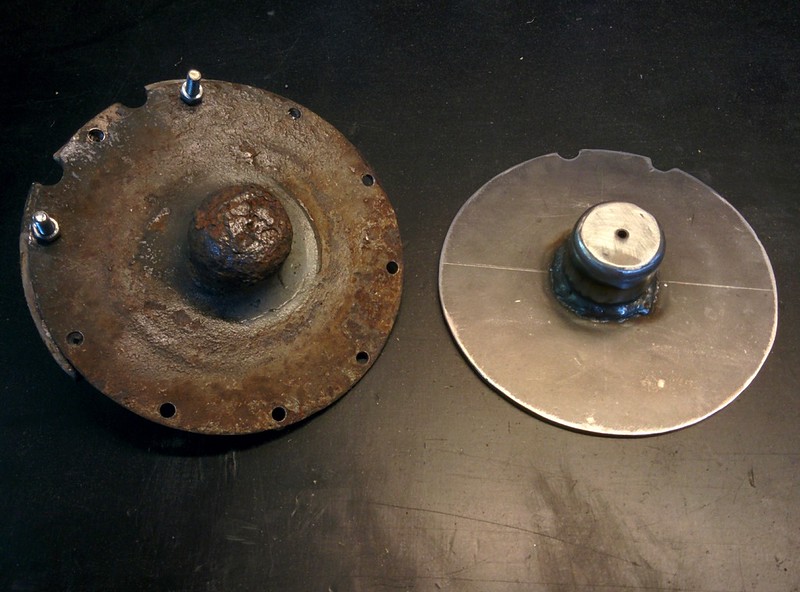
Looks a lot better than the old one..
 Last edited by D.Martijn; 07-06-2017, 09:48 AM.
Leave a comment:
-
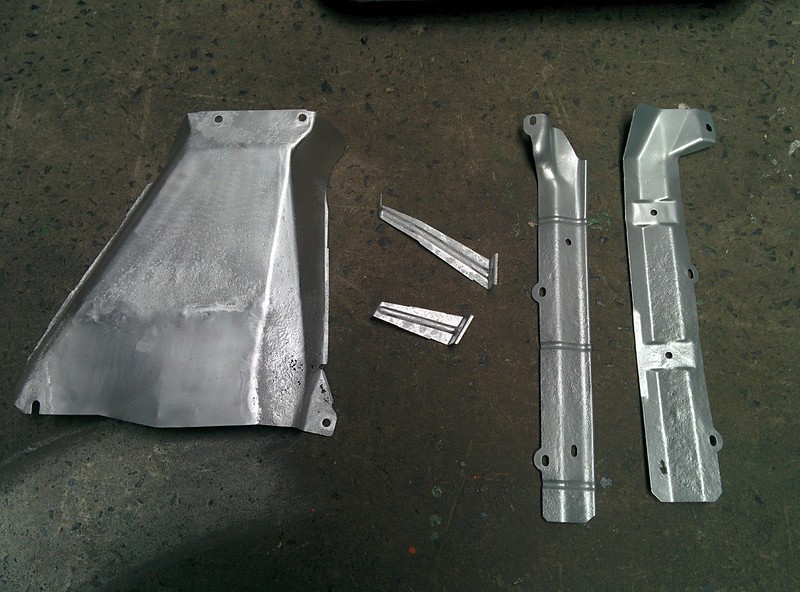
When I removed the exhaust and rear subframe, I noticed the heatshields and procection plates for the fuel tank were quite rusted.
I sandblasted the brackets and heat shield (I decided to repair this one as it wasn't too far gone) and gave them a coat of heat resistant paint. the 2 other plates got primer and some left over grey/silver paint
Got some new parts from BMW too, new heat shield for the exhaust as it was pretty far gone. New fuel lines, as I mentioned in my first post, the end were pretty rusty.
New vent tube, sway bar links and some other small hardware/clips/gaskets.
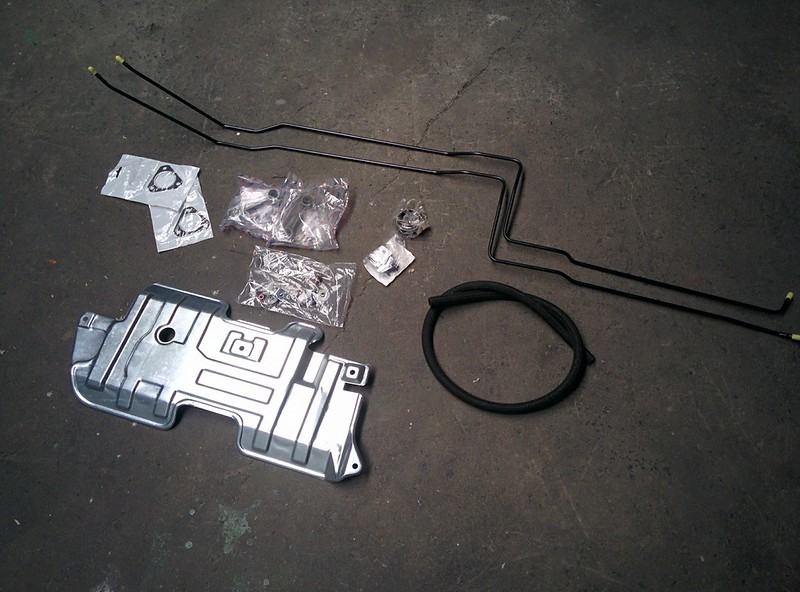
I then removed the fuel tank, there was still plenty of fuel left inside which made it quite heavy to move around. There is some rust on the flanges, I'll try to remove most of the rust and convert it with Brunox.
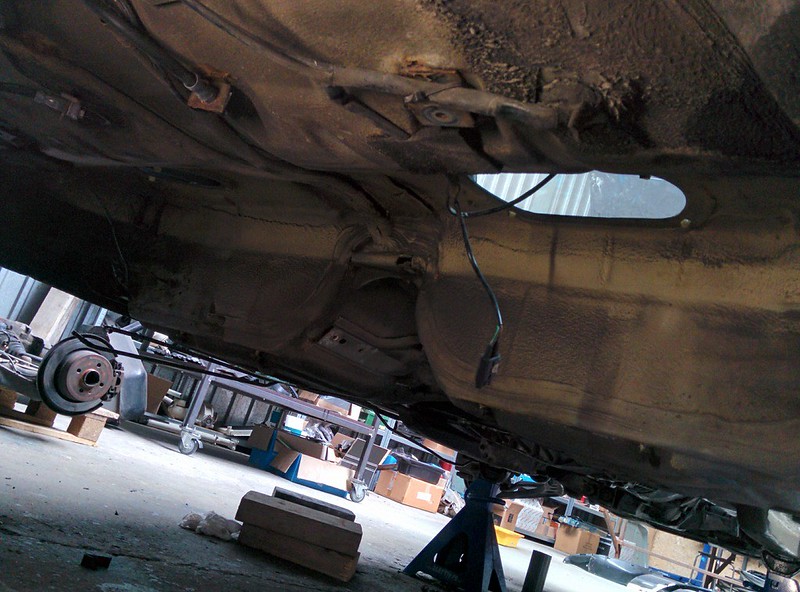
With the fuel tank out, I have plenty of room to cut the weld loose of tube and body

I also got a new plate welded in on the side of the rear chassis rail as the upper side was pitted badly. I made sure I got good penetration. Still need to grind down the weld some more
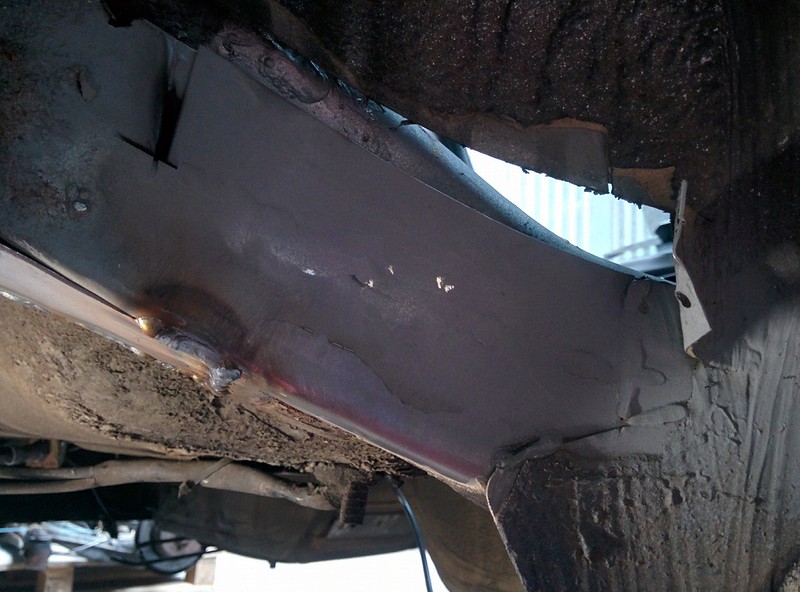
One of the previous owners had welded a plate on the side of the chassis rail which extended on the lower side of the chassis rail. When I ground the tack welds I got presented with this..
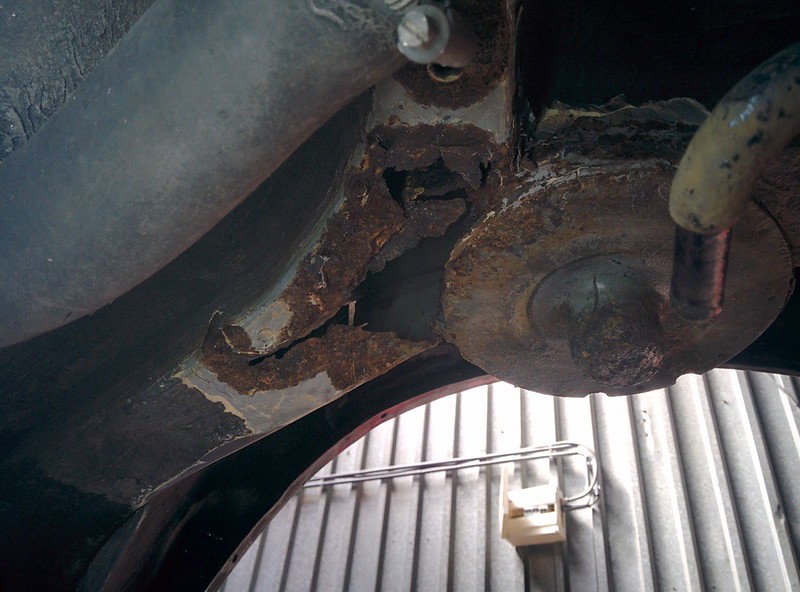
Before removing the plate/disc, I made a jig from some left over tubing, 2 vertical tubes that fit tightly over the little protrusion and a square tube that connects both. This way I can reference of the other spring perch to make sure it's in the right place, together with a lot of measurements.
It was a pain to remove all of the rusted sheet metal especially because I was laying on my back and everything flew towards my face..
I removed a small section of the vertical side of the chassis rail and welded in a new piece from the inside of the rail as there is no way I could've ground the welds down on the outside, this also gives it some more strength.
I then welded in a new lower piece, again making sure to have plenty of penetration as I'd like to grind these welds down so it all looks factory.
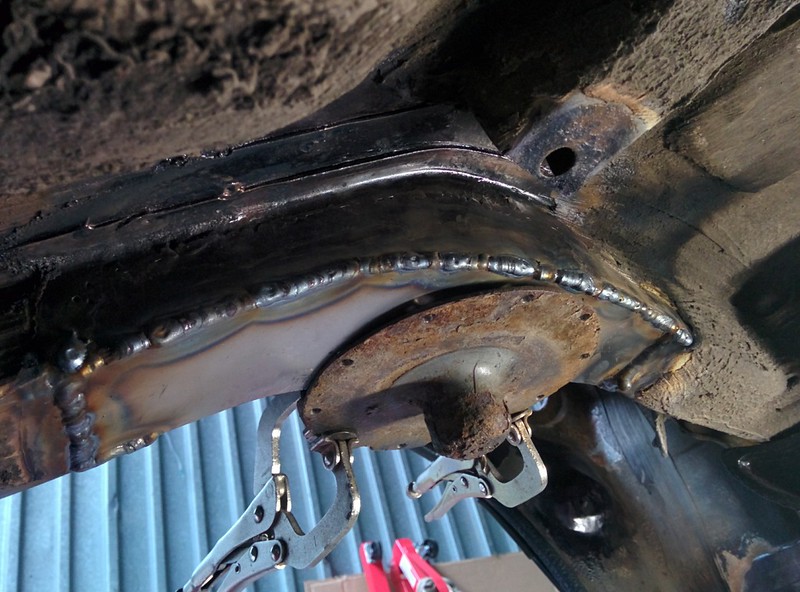 Last edited by D.Martijn; 07-06-2017, 09:41 AM.
Leave a comment:
-
The previous owner had already repaired the side facing the front of the car of the battery box, but again, poorly. After removing the undercoating and cutting out the poor repairs, I got started on replacing/making the replacement panels.
I based the shape of the panels on the left over bits of panels and pictures of replacement panels from BMW.
Flat piece of sheet metal for the battery box
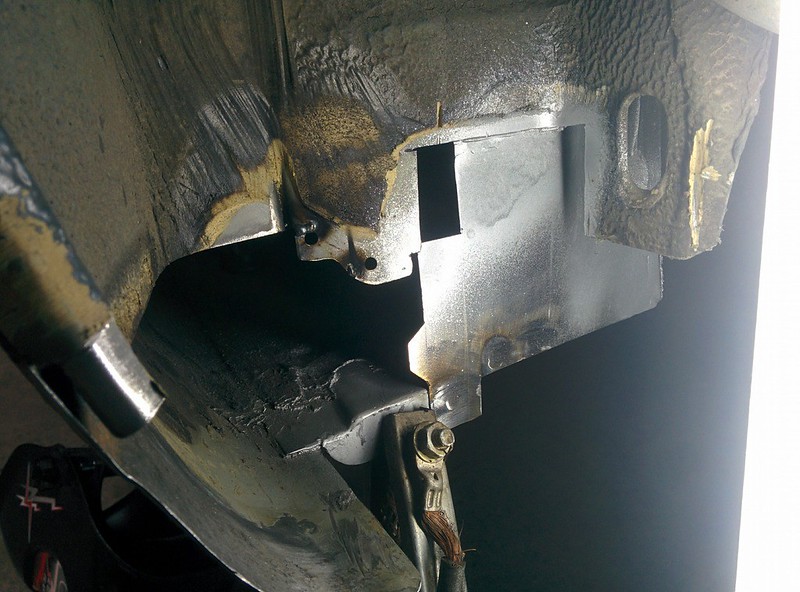
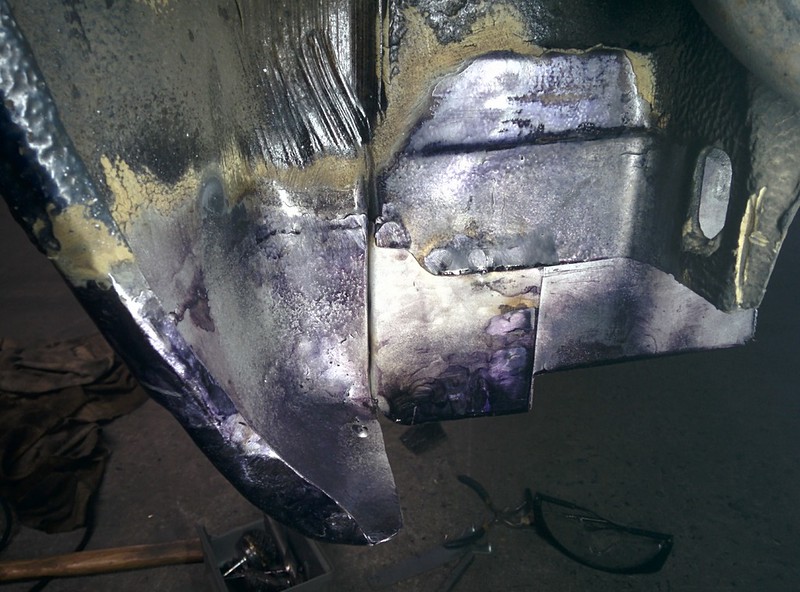
Corner piece of the inner wheel tub
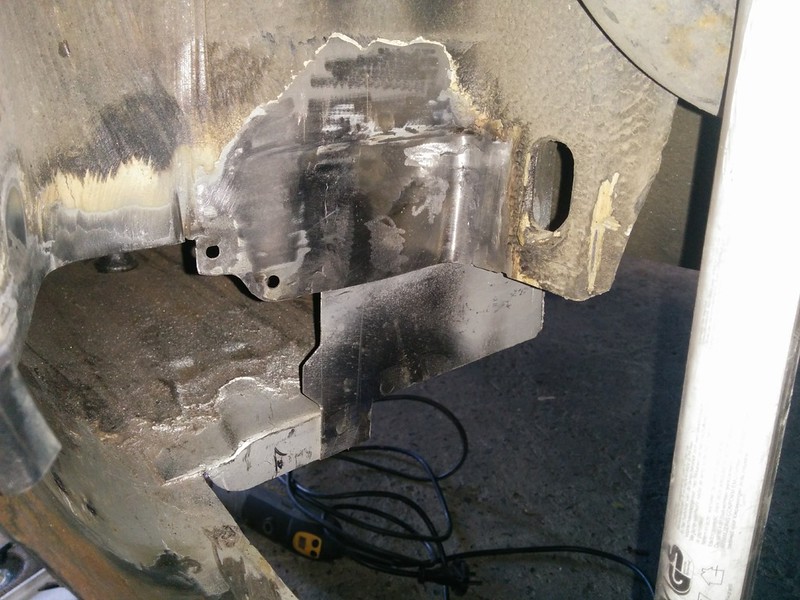
Inner wheel tub, this has to be one of the more complicated pieces I've made for this car
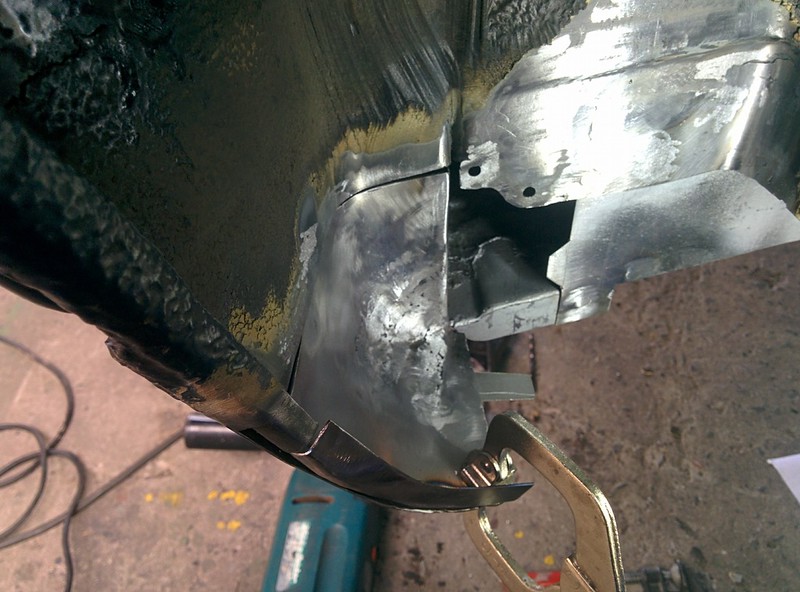
Welded in and then ground down, it's hard to fit the angle grinder in this tight spot
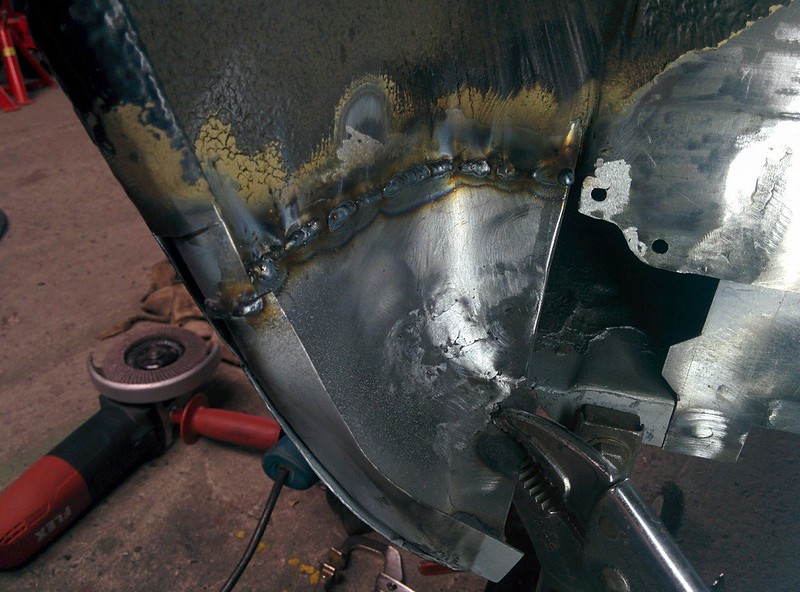
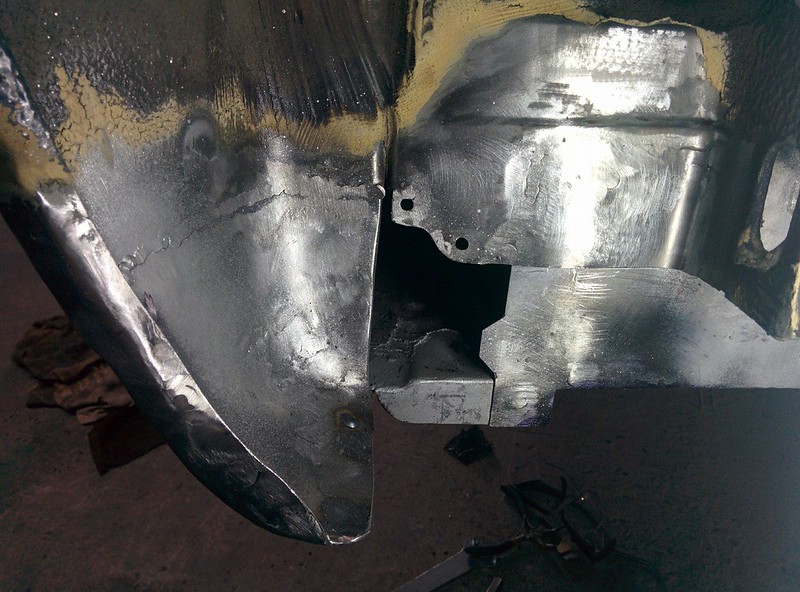
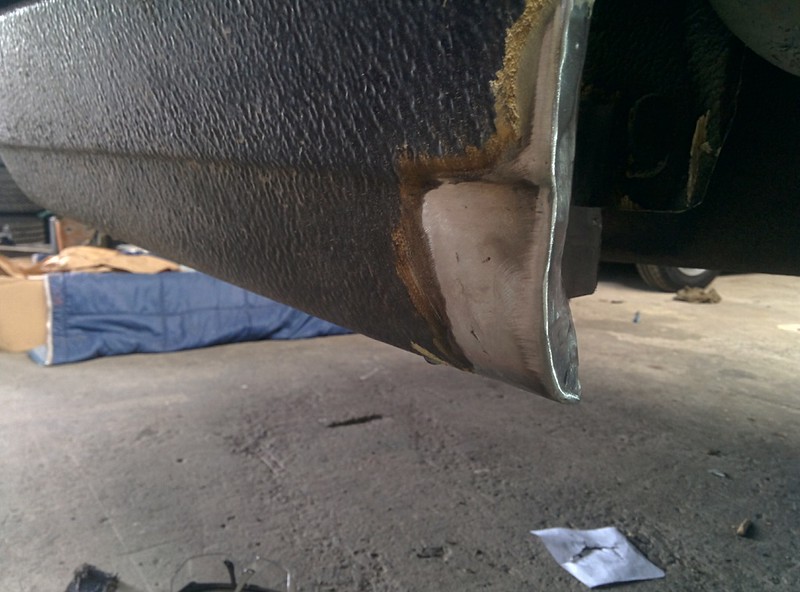
I also welded in a new piece on the outside of the arch as there were a few pinholes after wire wheeling the panel
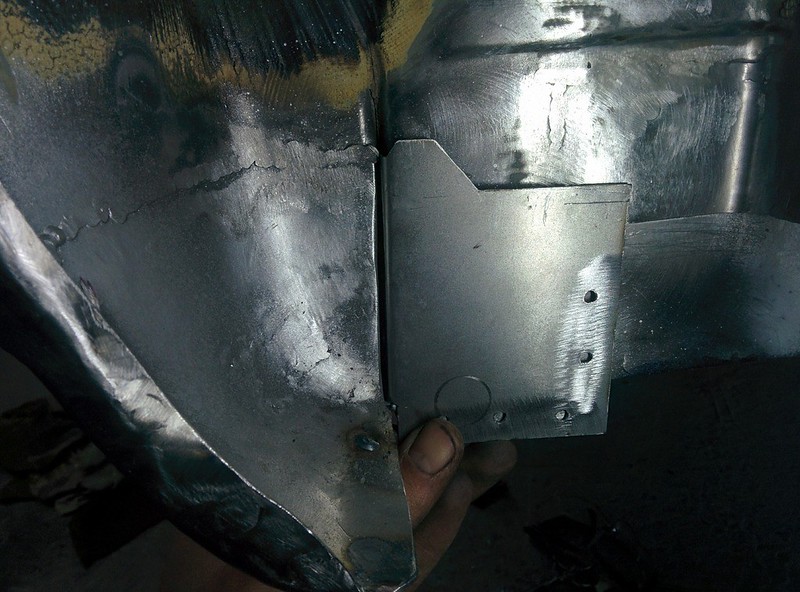
Last panel mocked up, this has to go between the two other pieces I've already welded in.
And fully done, covered in Brunox ready for some epoxy primer
Ordered some more parts from BMW too, new fuel lines as I've mentioned in the beginning of my thread that these were a bit rusty on the ends where it meets the fuel filter.
Also got a new vent tube, heat shield for the exhaust, some new screws and clipsLast edited by D.Martijn; 07-06-2017, 09:37 AM.Leave a comment:
-
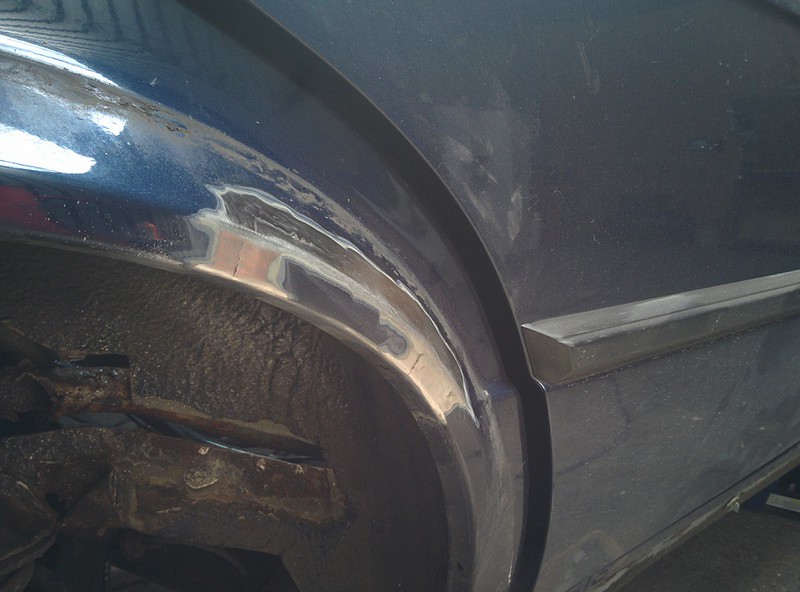
got the rust spot at the inside of the wheel arch fixed today.
Started by carefully cutting a part of the outer arch out as I'll reuse this because it's still in great shape.
Rotted metal cut out
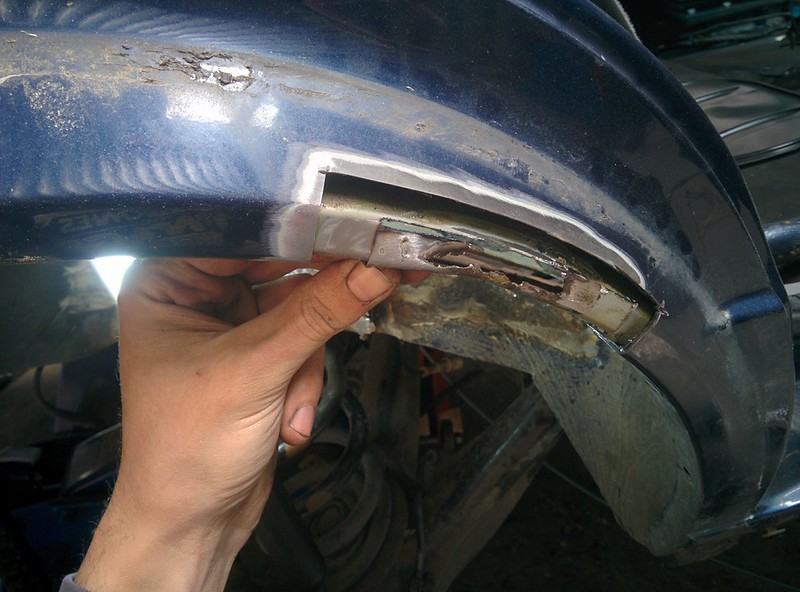
New piece fitted. I first bent a 90deg angle and then stretched the flange until it had the right curve.
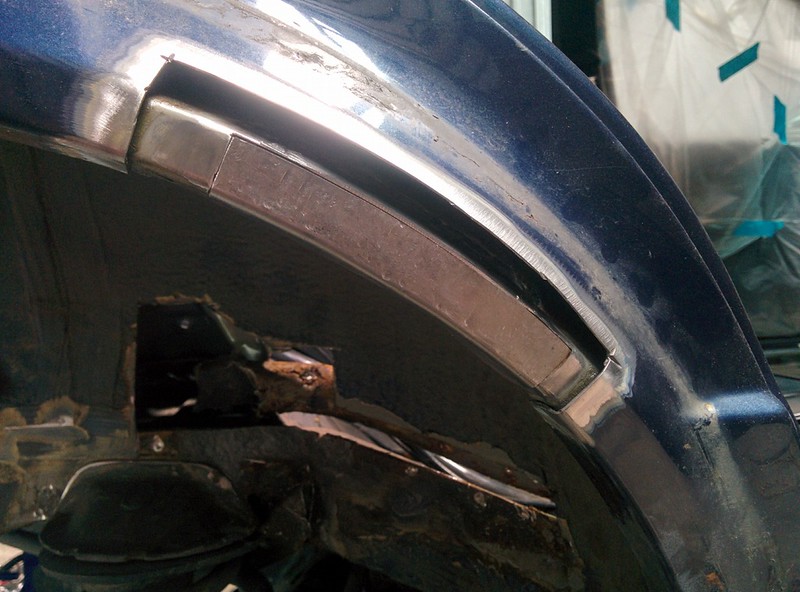
Flange welded in
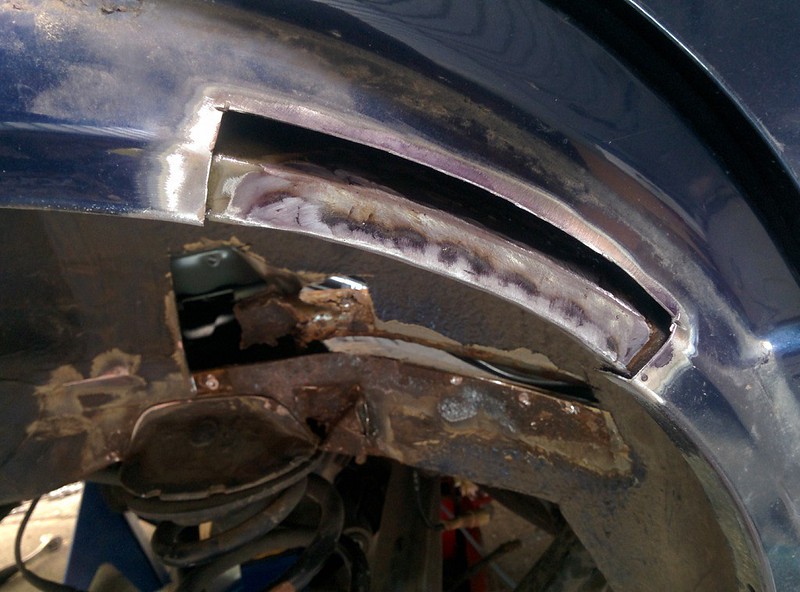
And the original arch back in place after treating the inside arch. turned out pretty good.
Also removed the exhaust and rear subframe so I can remove the fuel tank.
The metal vent tube will get shipped tomorrow :)Last edited by D.Martijn; 07-06-2017, 09:35 AM.Leave a comment:
-
Got the patch mentioned above welded in today.
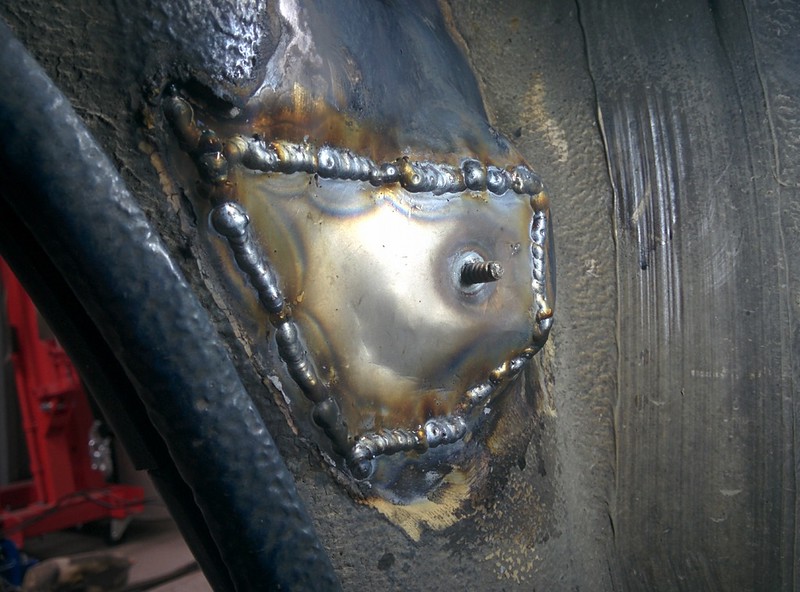
Ground smooth, the pneumatic powerfile came in handy this time as there is very little space in the rear wheel well
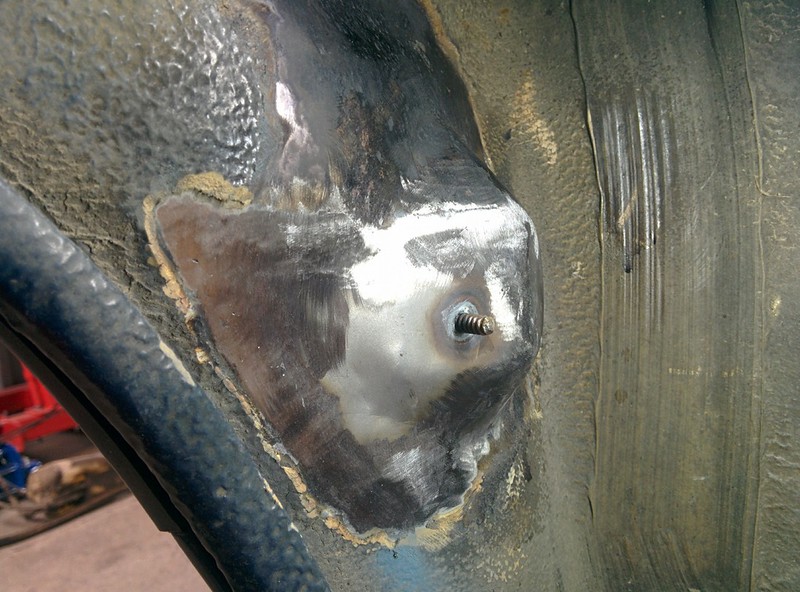
I then removed the rusted metal on at the top of the wheel well. I also removed the rusted flange of the shocktower support and welded a new one on.
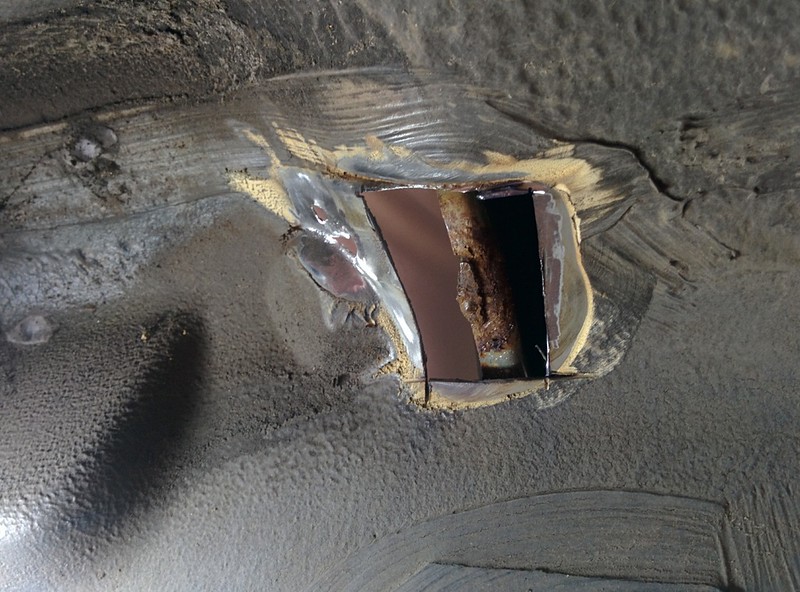
I also removed the old bracket that hold the expansion tank and the plastic cover as this was almost completely rotted away.
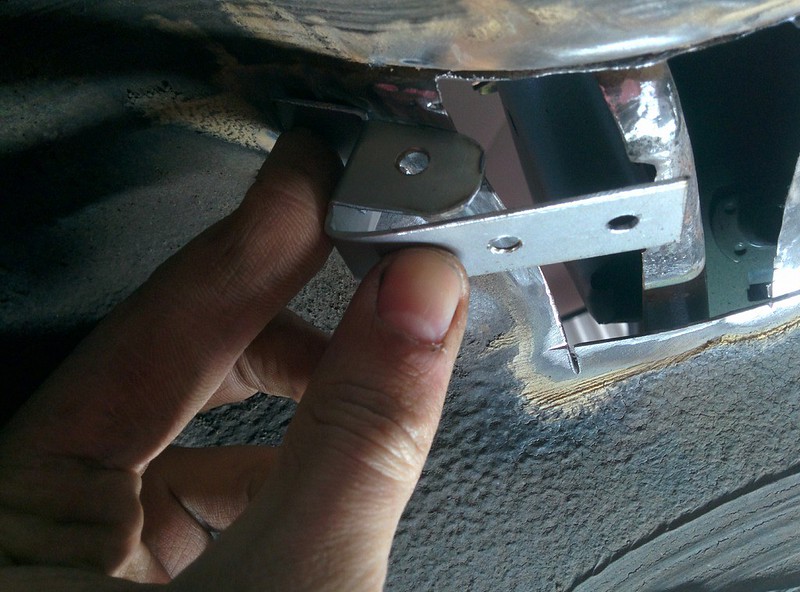
This fits here
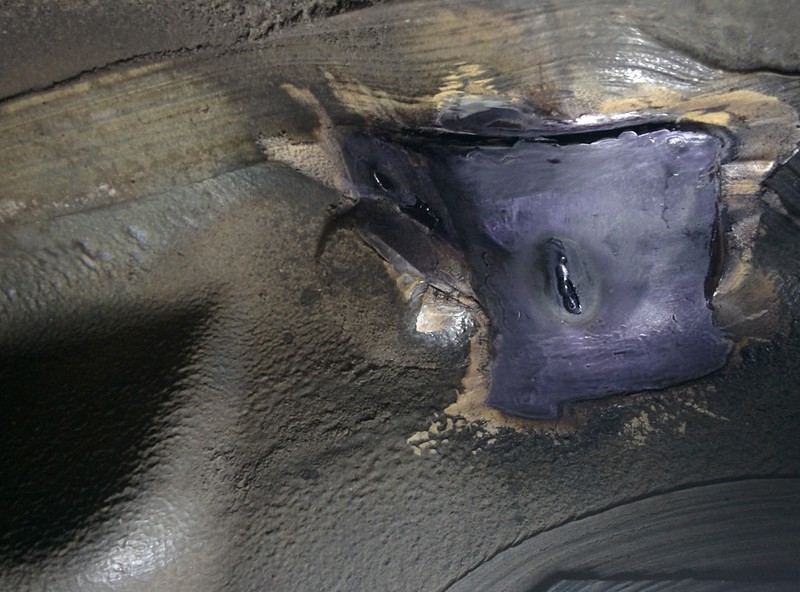
Finally I welded in the new patch, ground the welds down and covered it with brunox.
I was lucky that I could use the old flange of the inner wheel tub as it was still in good shape. This would otherwise be a pretty hard repair as it's pretty much impossible to plug weld a new flange to the outer tub.
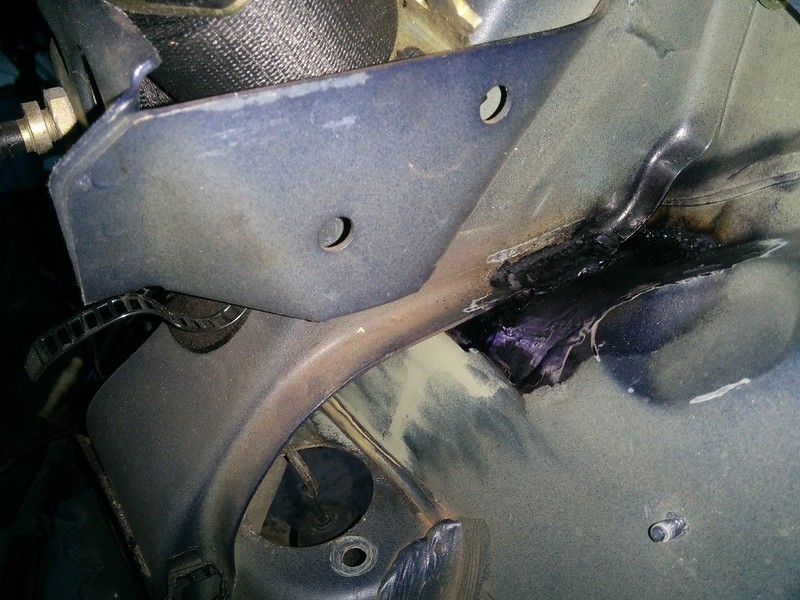
I also welded a short bead on the newly added flange and patch as this was also done before.
 Last edited by D.Martijn; 07-06-2017, 09:34 AM.
Leave a comment:
-
Yes, it sucks finding more rust but on the other hand repairing it now means it'll be good for many years to come.
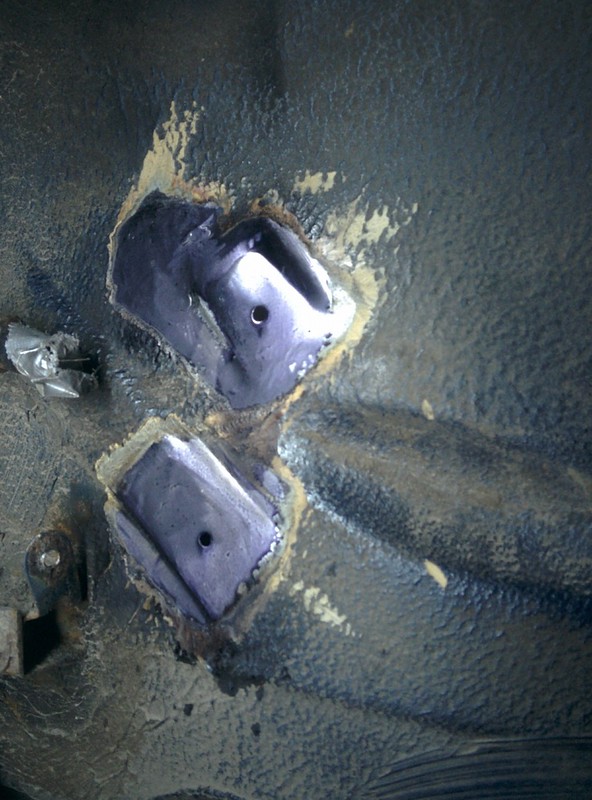
Today I started repairing the rust. Got started on removing the rust at the studs for the vent tube cover. the right 2 only had some surface rust, the other 2 had a small hole on the side.
after carefully cutting out the rotted bits and making a new patch. I cut the old stud off of the old metal. I'll plug weld these back on once the other repairs are done as the studs might be in the way when grinding/welding
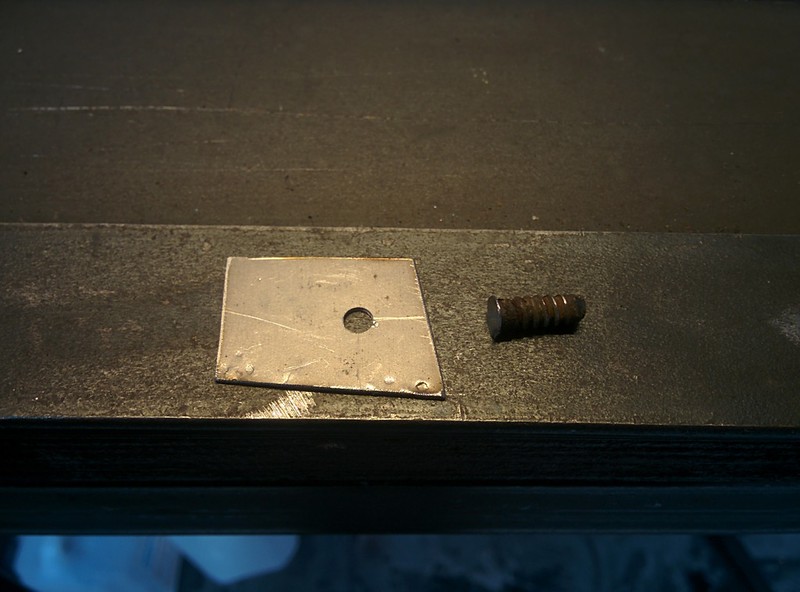
New plates welded in and ground smooth + covered in Brunox for now
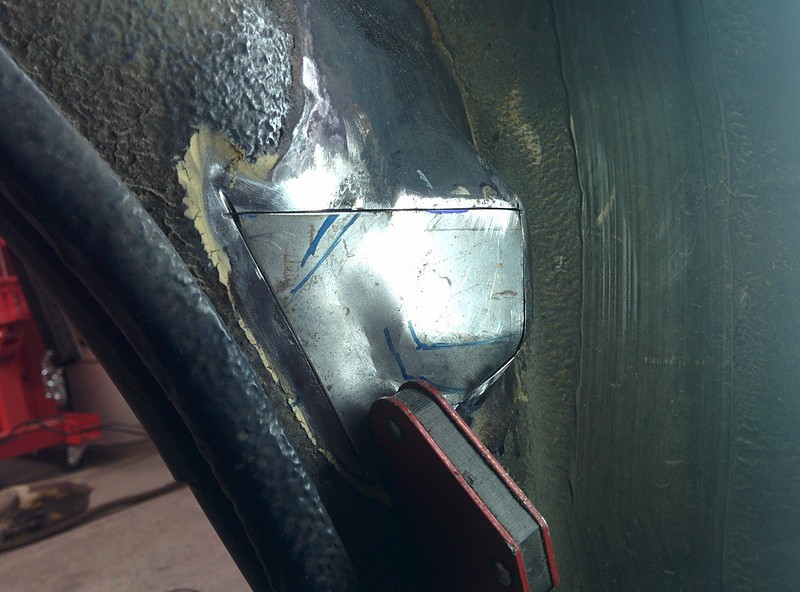
I then cut out the section on the left of the wheel well where the plastic cover mounts onto. New bend piece in place. Still need to drill the hole for the stud so I can plug weld it.
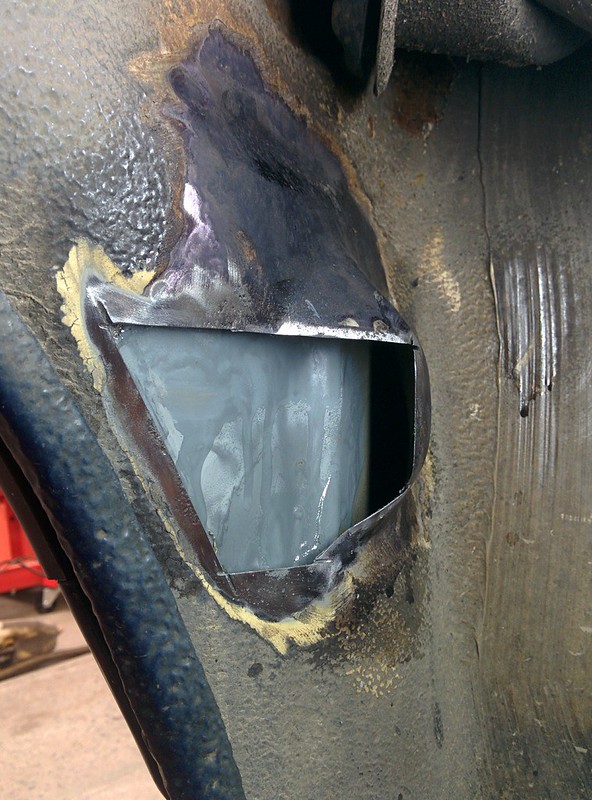
Luckily the inside of the panel is still nice and solid/rust free. I cleaned it up and gave it an extra coat of zinc primer
As it was getting late and the paint wasn't dry yet, I went home. I'll weld the piece in tomorrow or on Monday.Last edited by D.Martijn; 07-06-2017, 09:32 AM.Leave a comment:
-
That sucks, I feel your pain. Well once this is over it will be mint!Leave a comment:


Leave a comment: