Announcement

Collapse
No announcement yet.

1984 318i Resurrection

Collapse
X
 
  • Filter
  • Time
  • Show
Clear All
new posts

    #61
    I initially thought I would purchase the factory BMW lines. Total cost was going to be $300-400 for the hard brake and fuel lines. But I became concerned that I might not be able to make some of the tight radius bends in the steel line that runs to the rear junction under the fuel tank without kinking it. So after doing some online research I decided to make my own copper-nickel lines. To do this I needed a flaring tool for European bubble flares. While there are many inexpensive tools on the market that could probably get the job done I wanted something a step above. The gold standard is the Mastercool hydraulic flare tool, but at $325-400 its an expensive tool if you are only doing one job. I lucked out when I saw a Snap On Blue Point hydraulic flare tool on Ebay for $89. This is essentially a rebranded Mastercool product. It didn’t have the bubble flare die set, but I found a set for $59. This tool works flawlessly. And it is a good investment as someday I’ll be doing a front disc brake conversion on our 57 Corvette. With this tool and a cheap $12 HF tube bender I was ready to attack this project.

    Twenty-five feet of Copper nickel 3/16 tubing with ten M10 fitting is about $35. This is enough with a few extra fittings to just about do the entire system (I didn’t replace the line from the master to the right front brake since it was in good shape). The tubing comes in a roll and you can try to straighten it by hand, but it’s best to have tubing straightener. I didn’t have access to one and wasn’t going to spend $100 for one. I found a number of homemade designs online. My homemade tubing straightener used 3/4 x 1 1/4” aluminum bars (two 12” bars for $11 on Ebay), 5 screen door rollers (about $8 on Amazon) and some 1/4 bolts which I had in my work shop. To straighten the 5/16” tubing I replaced the screen door rollers with some small pulleys and now I have a straightener for 5/16 tubing. Using the screen door rollers left scratches on the surface of the 5/16” tubing.


    Comment


      #62
      I first created the tubing sections using the lengths listed with the part numbers found on the various online BMW parts sites. Here is a 560 mm brake line and the 3120 mm main brake line. Some of the bends were made with the tubing bender while smaller radius bend were made by bending the tubing around an appropriately size socket.


      Comment


        #63
        I went with a new brass junction block up under the rear end and all new soft brake lines. New wheel cylinders, brake shoe and drums completed the rear set up.

        Comment


          #64
          5/16 copper nickel is a near match of the factory BMW steel fuel lines. A little harder to bend that the 3/16 tubing and so the tubing bender came in handy. Go slow or it can kink. The only challenging line is the one from the charcoal filter to the evaporative expansion tank. To get the little flare on the end of the line to help prevent the soft line coming off can be done with the flare tool. Using the bubble flare die you just start to make the flare and you get enough of a flare to keep a high pressure soft line in place. I used Oetiker single ear clamps on the non-high pressure lines because that’s what BMW used and because I think they look neat. I haven’t installed the front brakes yet since I’m in the middle redoing the front struts with Koni Sport shocks and H&R springs and waiting on one part.

          Comment


            #65
            awesome job dude
            We're out there in here.

            Comment


              #66
              There are a lot of issues that you stumble into as you work on an older cars. This is one of those items that I not planned to address on this project at this time, but with the car partially disassembled, and it too cold to work in the garage during a New England winter, I decided to attack it. The front valence had numerous stone chips that then rusted. Once I stripped the paint it was obvious that the rust had caused pitting. I used a non-acid rust removing gel. Apply, cover with clear wrap, rinse and then repeat, and repeat and repeat until the rust is gone.

              Comment


                #67
                I followed this prep with an epoxy primer. Since many of the lower body panel on this car are treated with stone guard I decided to utilize it here, eliminating the need to prime and sand and repeat in order to fill the pitting. I then topped it off with the “Hennarot” Rustoleum that I had mixed, since I only have a limited amount of lacquer which I’m saving for more visible body work.

                Comment


                  #68
                  The frame on the underside of the hood also had significant rust. Since the hood was off the car it also went into my workshop. I removed the superficial rust by wire brushing and light sanding. I again went to the non-acid rust removing gel. After may applications I had removed the rust. Fortunately the rust didn’t seem to form inside the frame. But the rust had created small perforations and the loss of some small areas of the frame. I filled or repaired these areas with JB weld. Then epoxy primer, followed by high build primer and sanding and finally two wet coats of lacquer. Maybe not show quality but much better

                  Comment


                    #69
                    The front struts also got a make over this winter. Removed years of rust, paint, Koni adjustable struts with H&R Sport springs, Zimmerman rotors and refurb’d calipers. Struts installed and brakes bled. Now on to the motor and transmission.

                    Comment


                      #70
                      She lives! After 2+ years I have finally turned the key on this project. I started this project 2 1/2 years ago when I decided to see if I could resurrect my1984 318i. It had been pulled from the road due to structural rust issues in 2008. The initial phase was to see if I could eliminate the rust and create a structurally sound chassis. Once that was done I started to rehab the suspension and brakes. Now that the snow and cold is gone and the Corona Virus is here I’m back in the garage. On to the engine. I had already replaced the fuel tank, both pumps and all of the hard and soft fuel lines. Rodents had nested in the air filter box and who knows where else. The AFM had gone to Bavarian Restorations for their magic touch. I removed and cleaned the fuel rail. I was able to source 3 new BMW OEM injectors, but just could seem to land the 4th. I finally bought an after market injector, but it wouldn’t seat in the fuel rail. I bought a refurbished Bosch injector, and while it might have been functional, it looked like a dog had used it as a chew toy. I finally bought different after market injector that fit. Added a new aftermarket pressure regulator and reinstalled the injectors and fuel rail with all new hoses.

                      Comment


                        #71
                        I pulled the lower oil pan to clean out the sludge. Nasty. I removed the oil pump and cleaned it. It checked out okay and so I put it back together with assembly lube. I wanted to replace the chain but there are no correct split chains available, and all of the aftermarket chains are too wide. So I settled on a couple of shims to take some of the slack out. While the pan was off I gave it a nice coat of paint. So for the moment I believe I have the best looking 318i lower oil pan in the States. The engine got a new water pump, thermostat and all new hoses including heater hoses. Each cylinder got 3cc of Marvel’s Mystery Oil and I turned the engine over by hand without the spark plugs. While the engine was partially disassembled I decided to install new starter. I performed a compression check. Three of the cylinders measured 148-150 and the fourth cylinder 144. Close enough.


                        Comment


                          #72
                          The exhaust manifold got a quick media blast and a couple of coats of POR-15 high heat silver. Set the valve gaps. I tried everything to clean up the valve cover, degreaser, oven cleaner, acids, etc, but couldn’t get rid of a few stains. So I decided to give it a few coats of VHT aluma blast. Sanded the fins and logo to 400 grit and then clearcoat

                          Comment


                            #73
                            Four new NGK spark plugs, Bosch rotor/cap and cheap set of spark plug wires for now. The engine bay hasn’t looked so good in years. On my initial attempt to start the engine I developed a fuel leak from the brand new fuel damper. So much for the $80-90 that I spent on it. I removed it and spliced in a 12” segment of fuel hose. Now after a few seconds of cranking the engine fired up and the oil pressure light went out. She sound good. Next I’ll have to run it for a while and make sure the thermostat opens and it maintains temperature. Now to get the fenders, hood and bumpers back on and attend to some cosmetics.

                            Comment


                              #74
                              engine bay looks great!
                              1984 Delphin 318i 2 door

                              Comment


                                #75
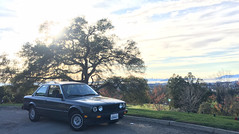
                                Stumbled upon a “before” image to go with the “after”.

                                Comment

                                Working...
                                X