

Jan is doable. Hopefully things don't end up taking too long on mine but we shall see. Would really like the get this thing going for the first event in Feburary :crazy:
I'm always down for drinking beer and kicking bmw parts around.
-
Hmmm... Jan some time?
More than welcome to come down, talk crap, drink beer and kick BMW parts around my garage :pLeave a comment:
-
Thanks for the comments guys.
Iain, name the place and time, I agree! I need to get down and check out your left over e30 parts anyway ;)Leave a comment:
-
There should be more beer drinking among the E30 guys on the Coast/Newcastle...
Great thread, good car. Interesting to see how it goes...Leave a comment:
-
damn! Took me half an hour to get through all of it, but it looks great! Congrats!Leave a comment:
-
Just read through about 95% of this, looks amazing dude. Gives me much motivation for my future track build. Won't be anywhere near has hard core as yours, but same idea.Leave a comment:
-
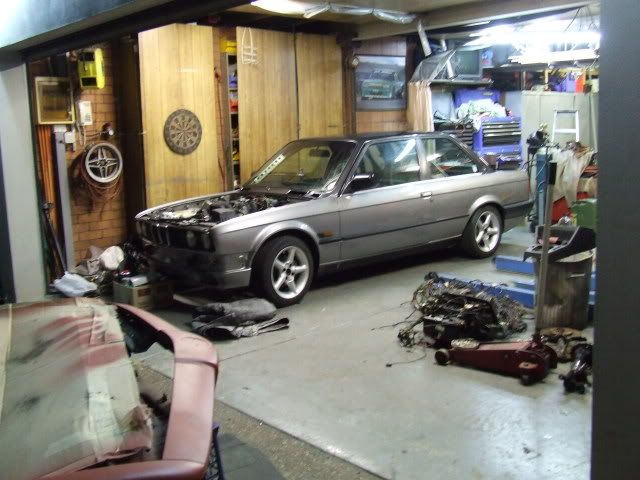
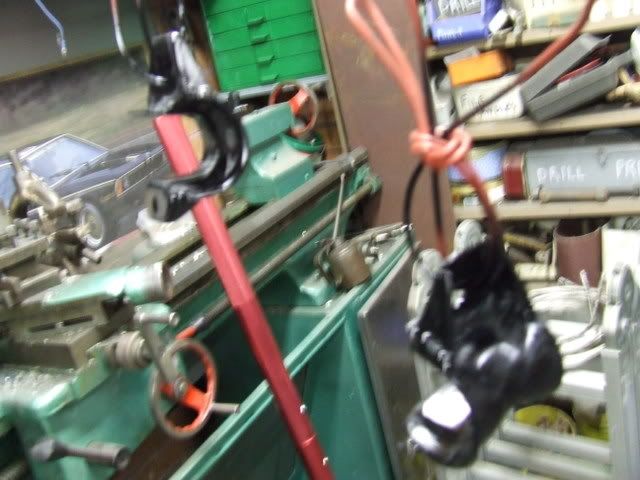
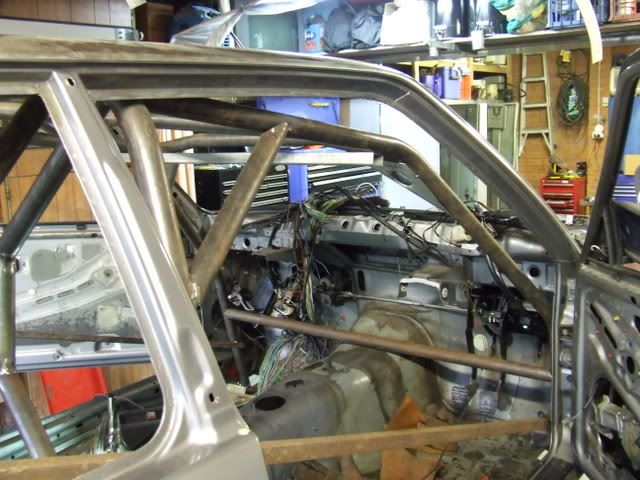
Last night I got stuck in with some cardboard. Have made up some templates for the drivers side mount and half of the passenger side. Need to work out exactly what is happening with the alternator before I go getting a mount plate cut. So should be able to get started on the engine mounts this week.
And now that I have mentioned it, I am looking at putting a smaller alternator on, with next to no electric features in the car now I dont need a massive alternator. We have a few spares kicking around :D
I've got my hands on a brand new 50amp and I also found a couple of 35amp ones in unknown condition. At the moment I'm thinking I'll go the 50amp because it's a brand newy. It's about 1/2 - 2/3 thirds the weight of the standard 90amp and given the one on the road car took a shit recently I now need a replacement for the race car!
ALRIGHT thats you guys up to speed, hope it wasn't too painful to read :DLeave a comment:
-
I think I'm kicking into stage 2 as well, or atleast im spending the money for it.
MegaSquirt II w/PCB v3.0 - got
GT2560r Turbo - got
600x300 Intercooler - got
Aimsports MyChron3 Dash and EVO 4 Logger Setup - In the process of ordering
Bosch External Fuel Pump - got
Pretty much besides the raw materials needed for the Exhaust and Intercooler piping and Surge Tank along with some uprated injectors is all thats left to get for the turbo bits.
I need to start accumulating the bits for the engine rebuild now.
And i will need a shit lot of electrical components for the rewire of the engine loom and digital dash setup.
I'm also on the lookout for a medium case diff and LSD centre. Not sure what ratio yet but i'll prolly drop down a few to take advantage of the lower end torque and the higher terminal velocity :)
Thanks for the compliment BeamerIS
Now the updates are going to start happening again :)
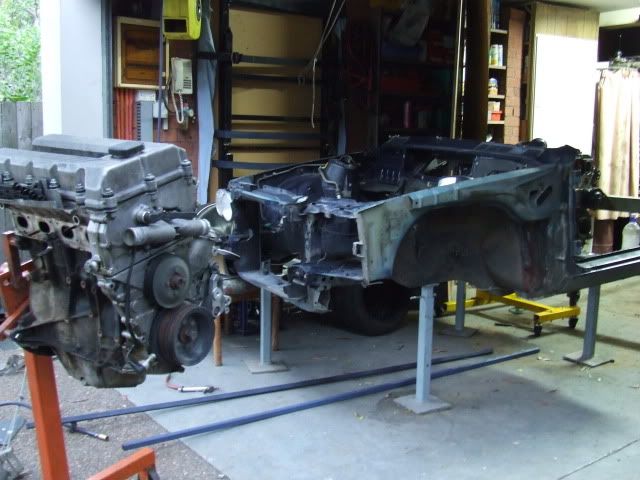
Didn't get as far this weekend as I would have liked but i did do stuff! Most of it has been more preparation stuff, cleaning the shed, organising spare parts, cleaning the front cut, cleaning the spare engine.
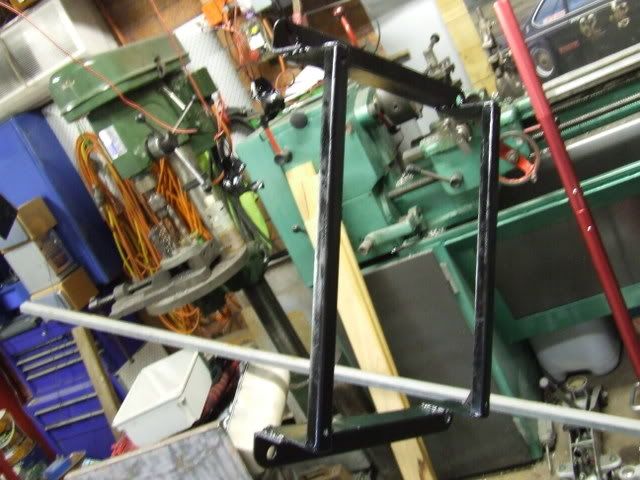
After the recent success I had with this stand for our hoist:
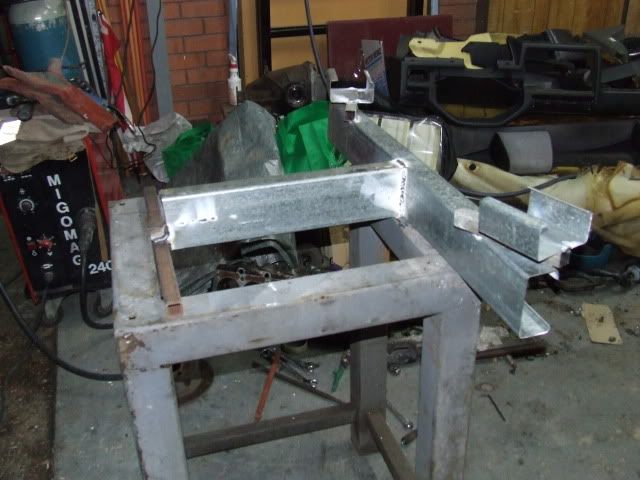
A plan had been hatched to make a similar one, that makes the removal installation of the gearbox possible (currently you cant because of the forks on the hoist). So I am making a car dolly!
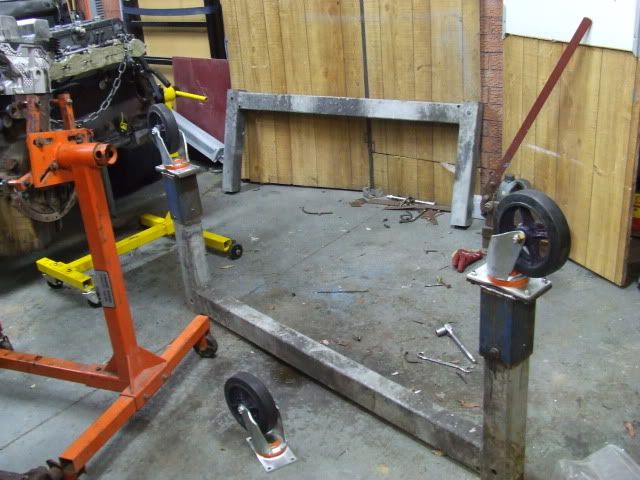
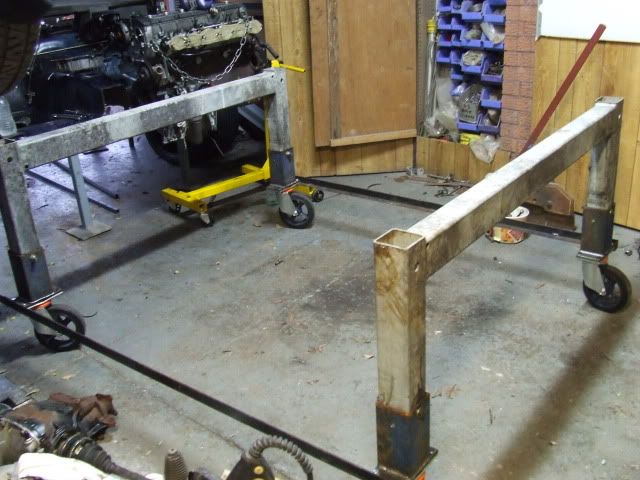
Here is the start of it:
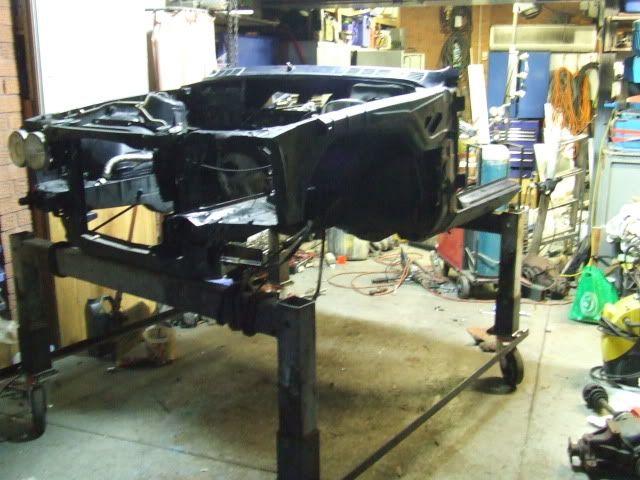
This will double as a stand for the front cut making the mocking up of the new engine postion a sinche with our overhead chainblock and beam setup and the front cut on the dolly.
In the meantime lots of thought is going into the sump. Trying to work out how custom to go, its a case of sticking it in the front cut and having a look which is why im working on getting setup to do so. ope you all had a nice weekend in the blistering heat.
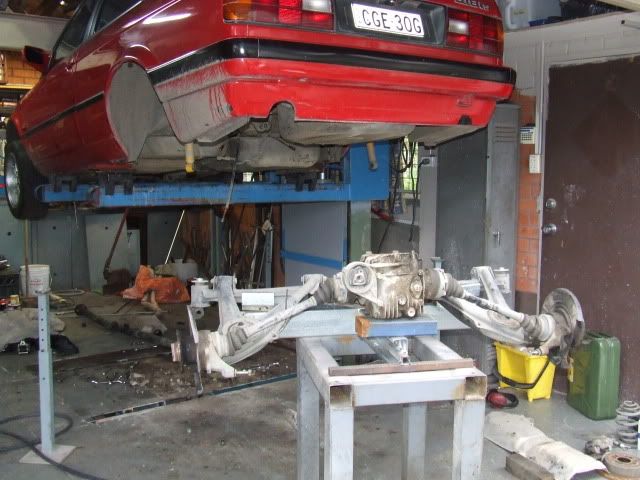
Mondays Progress:
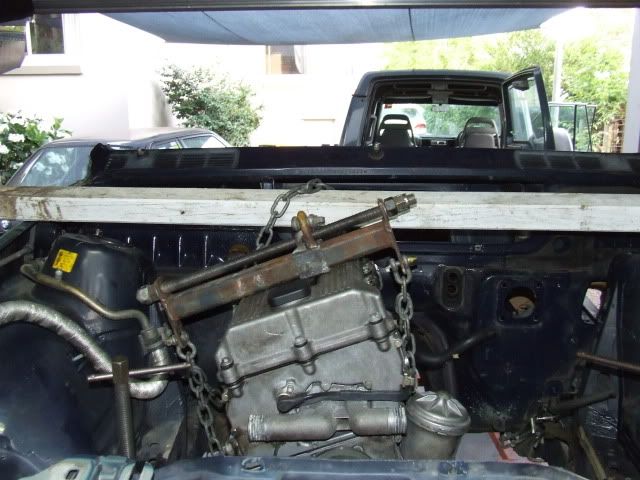
I've had a quick play with the engine in the bay....initial finding aren't looking good for the e36 sump fitting in an e30....more measuring to be done
Payment for one of these bad boys was sent today...my bank account hurts :(

Also ordered the elbows and trinkets im going to use for the exhaust manifold from Blackwoods today, should be in next week.
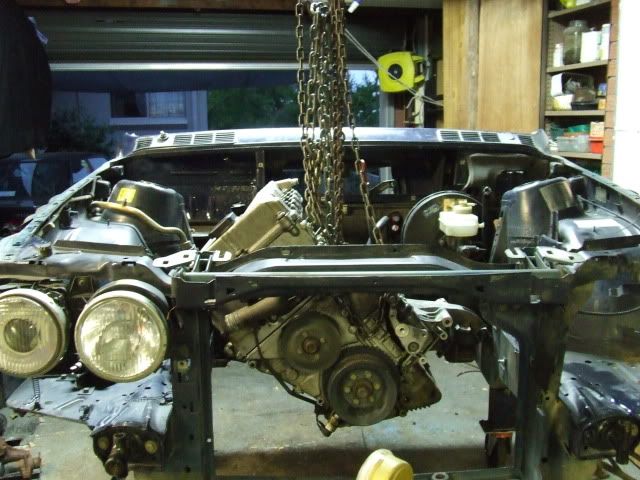
Alrighty So I have been playing with the engine in the front cut now. Initial concerns over e36 sump fitment are unfounded. It is going to be workable with a few mods.
Here are some pictures of the engine in the proposed position (back 95mm and rotated clockwise a bit)
Plenty of room for a radiator and intercooler out here. The RHS has a socket welded to it, thus locating the front of the crank.
Note that we tried clearencing the firewall here. We were expecting to need a bunch more clearence and were concerned we weren't going to get it. But the firewall only needs to be lightly massaged which is great news.

You can see how much we have rotated the engine by looking at what was a vertical oil filter housing. This will be going in the trash anyway, not to worry. (Yes thats a home made load leveller, we make everything!)
I haven't taken a shot but there is a shite load of room down the side of the block now. Plenty for the turbo and dump pipe.
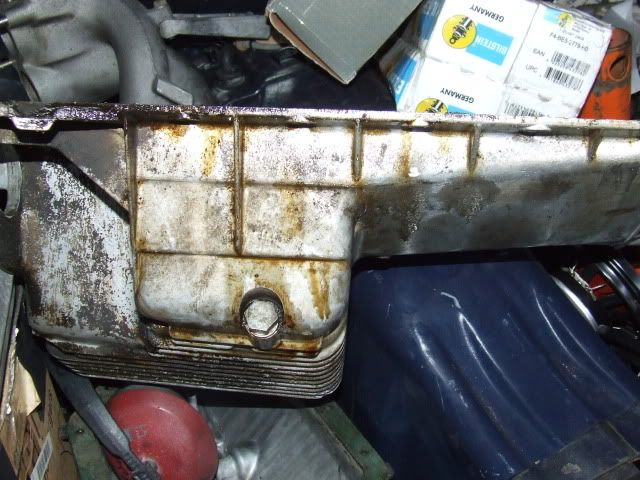
Here is a standard sump:
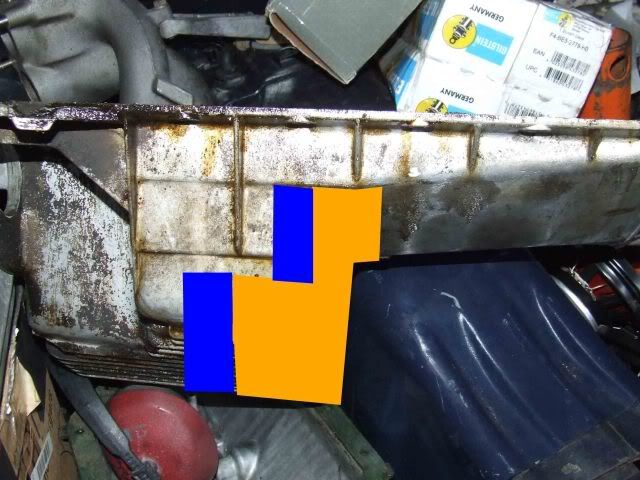
Plan is to cut the blue and yellow pieces out:
And then cut a second sump up:
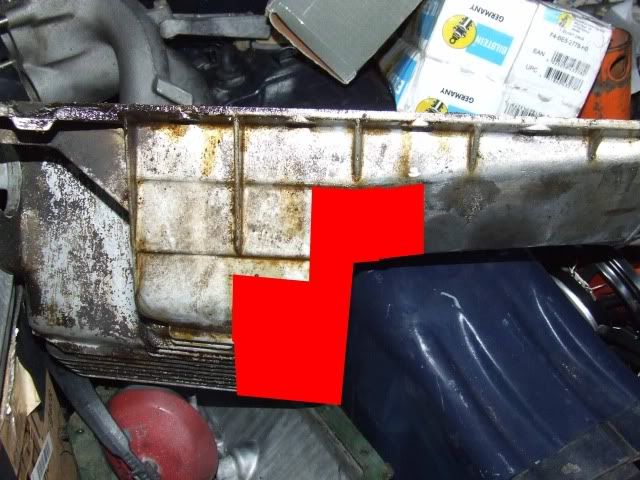
Note the forward edge (right of picture) is longer than before. It would be ~30mm longer. Thus welding into the original sump to move the forward edge of the pan back 30mm. Alternatively (if i can't get a second pan cheap) we would move the yellow piece backwards the 30mm and then add in plate to fill the void left behind.
SO to sum it all up. I need another E36 sump, can come off any 318i or 318iS same part numbers, anyone got a cracked one they want to donate? I'm also chasing up an M42 gearbox, I believe the M40 is different. I just want to use it for fitup purposes so if someone were willing to lend it that would be great :)
Its a catch 22. The chassis rails are tapered. I will have to section the jig to get the right height one i finalise the fore/aft positioning. BUt yer made moving the engine back heaps easy, mark position, move, clamp
ECU is in the country and Injectors are making their way across from Perth as we speak!
ECU and Injectors have arrived! Progress is slow atm, alot of thinking and not much doing.
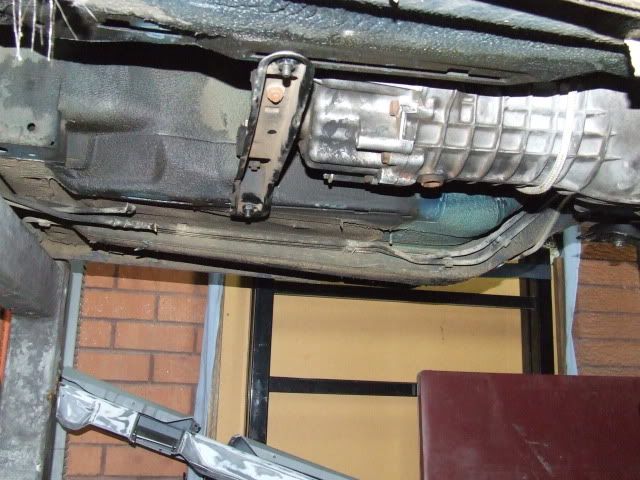
I got my hands on a getrag 260 curtousy shotright. Thought behind this is, its a stronger gearbox and its something I can bolt onto the engine without ripping the box out of the race car.
Anyway as it is this turns out to be somewhat advantageous, because of the amount I have rotated the engine, the 260 and its matching gearbox crossmember BOLT UP! Less fabrication is a win! Note how far back the crossmember is in the mounting slots.
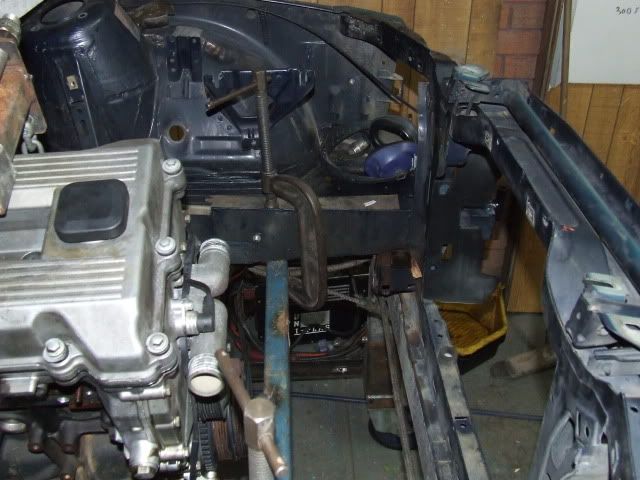
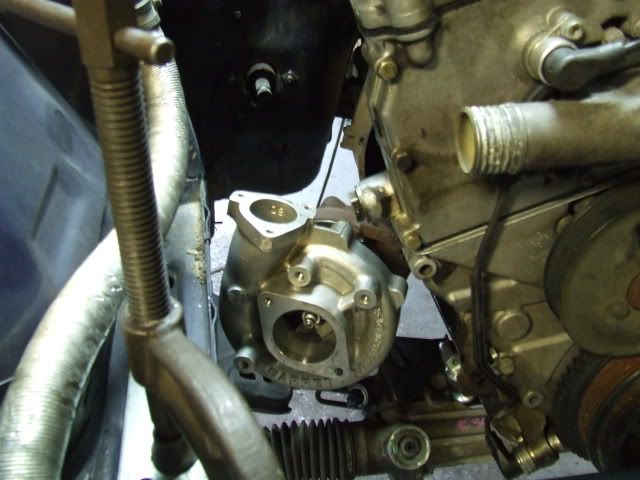
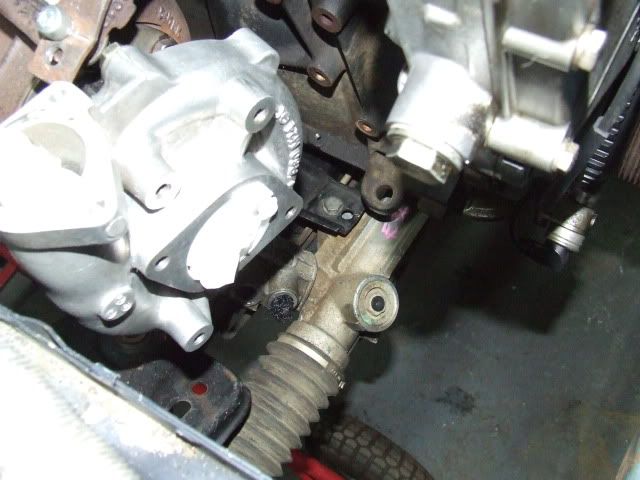
Now that I have defined the engine and gearbox position I started looking at the fitment of other pieces...like the turbo. I have pretty much decided on the following position, with the dump pipe heading over the top of the steering coupler and down beside the block. There is plenty of room for 3" pipe!
Next I threw on the intake manifold for shits and giggles:
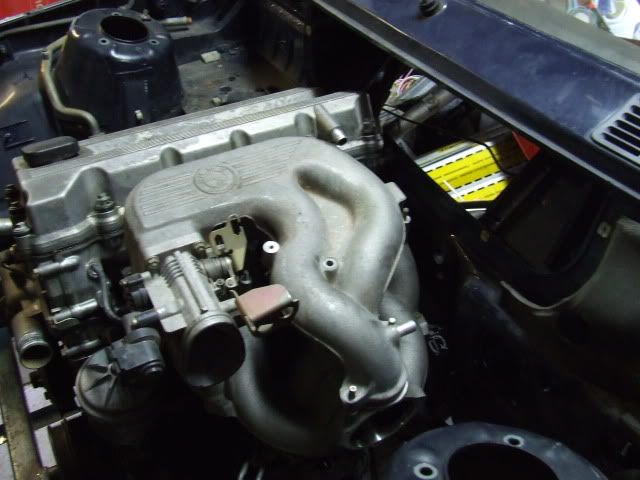
Woah OHHH! The intake manifold and the brake booster are sharing the same real estate.
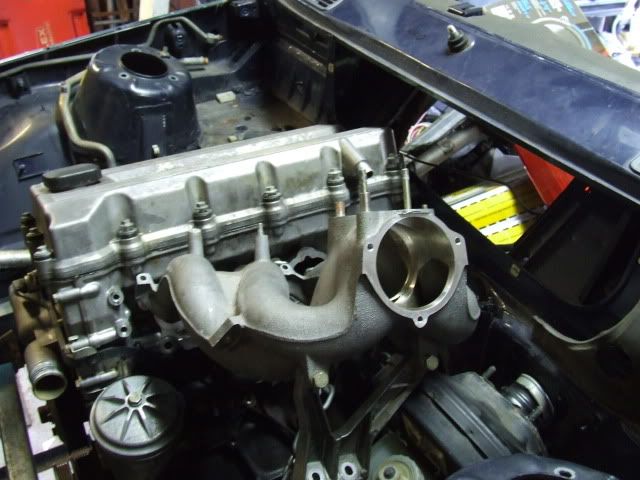
The E30 M42 manifold would be fine, but it is a horrible reverse flow design and I'm doing my best to steer clear of it. At some point later on I guess I will make my own plenum, but not just yet. All this does is move my plans to throw the booster in the bin up the list. That will come later, and whether or not I jump straight into a twin master/balance bar setup or just retain the standard master is yet to be worked out.
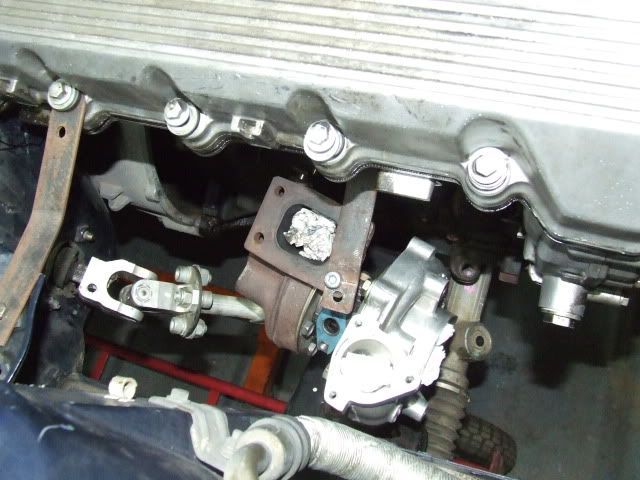
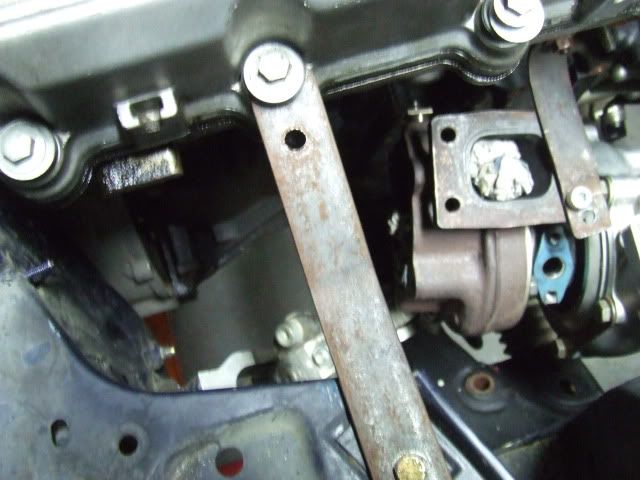
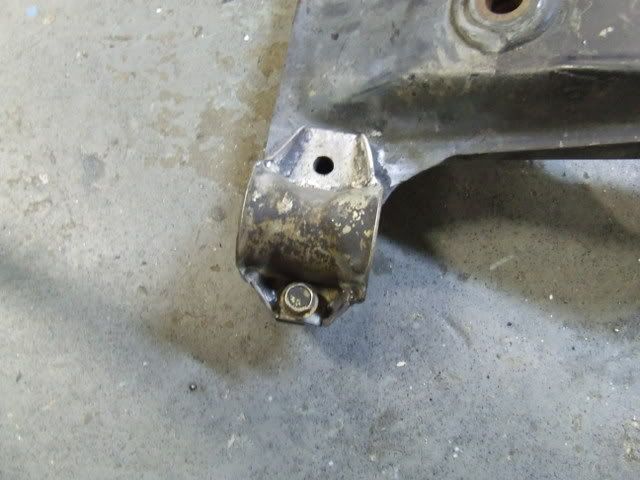
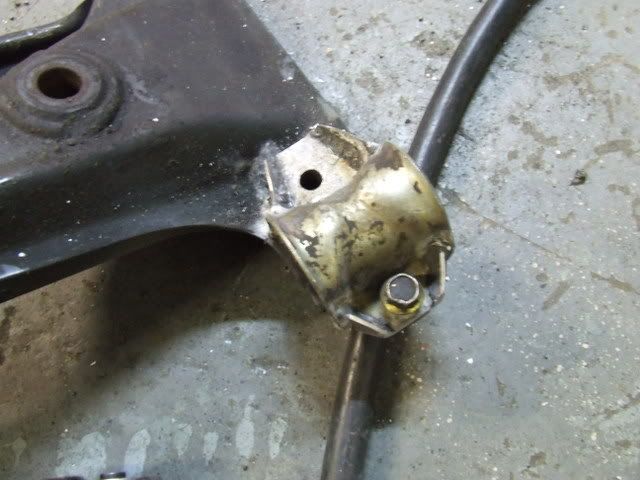
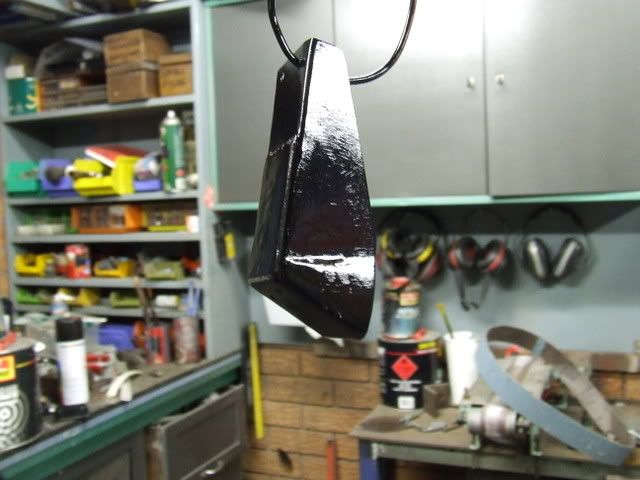
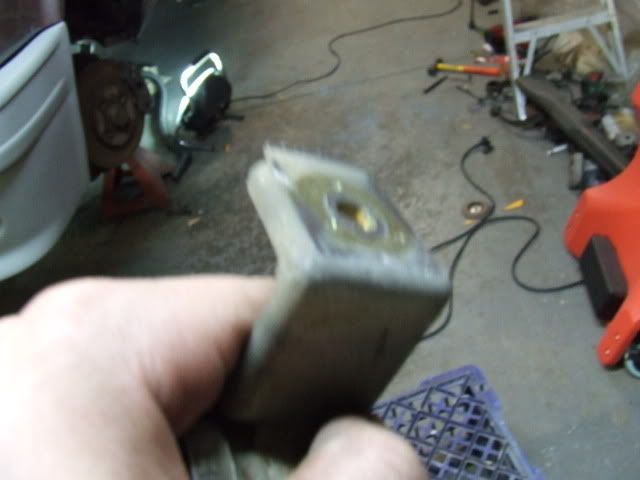
The only other things I started to give consideration was the engine mounts. For the passenger side it looks like we will be able to modify the existing E36 M42 motor mount arm to suit. But the drivers side is going to be interesting!
Here is a rough layout of the plans:

The standard mount pad will be removed in favour for a lowered pad mounted closer to the block (the blue bit)(increasing turbo clearence). Then a custom fabbed motor mount arm will join the block and the new mount pad (the yellow bit). Overall I'm pretty happy with how things are going at the moment.[/QUOTE]
I'd just pick up an M3 and do it properly ;)
Yeh you can say it was your idea. I executed it though :D
The clutch will be even better than it currently is in my G240...as its all G260 stuff
The shifter is going to be a DIY version of UUC's DSSR, complete with V8 supercar inspired shifter, all working together to make a nice solid-feeling, short shifter
The engine mount will obviously go around the turbo :)
Have you posted a picture there? I can't see anything, but that might be because I'm at work.
Ben, all about the priorities. I want this car to go fast, I'm going for strong, hot exhaust pulses into the turbine. So the turbo was going right next to the engine no matter whether it was top or bottom mount.
and with it setup this way the dump pipe shouldn't be too difficult. Its nearly a straight out the back job. If i went between the steering coupler and chassis for sure, would have been two 45 degree bends sort of deal, but between the block and the steering and I will have to use a 90 degree. not ideal, but will work. But more importantly the whole system (turbo position, intake pipework, exhaust manifold, dump pipe, wastegate screamer) will work better in this spot.Last edited by e30guydownunder; 12-09-2009, 04:35 PM.Leave a comment:
-
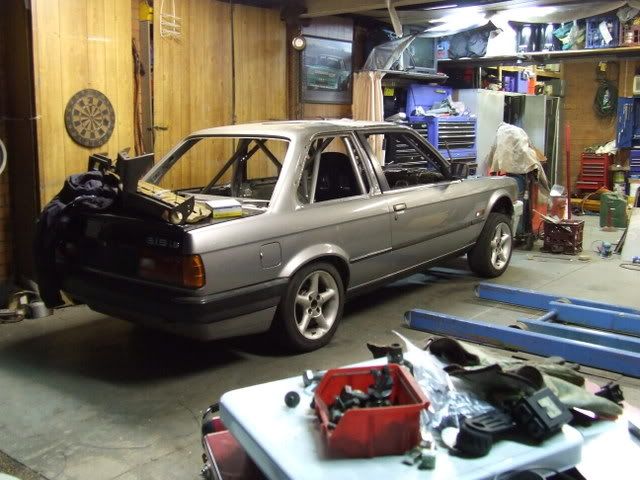
got this shit going!!!!
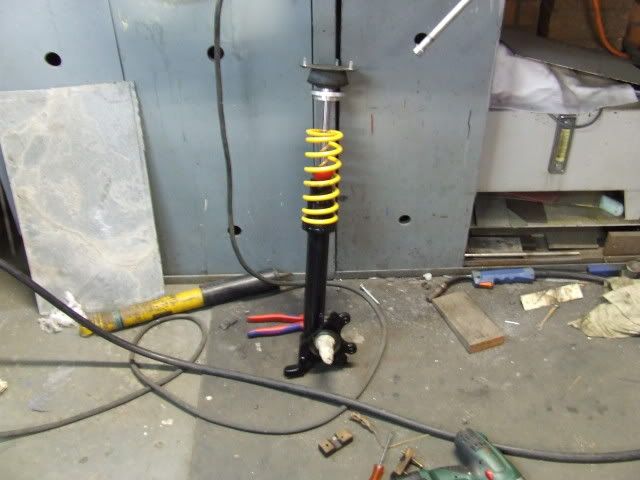
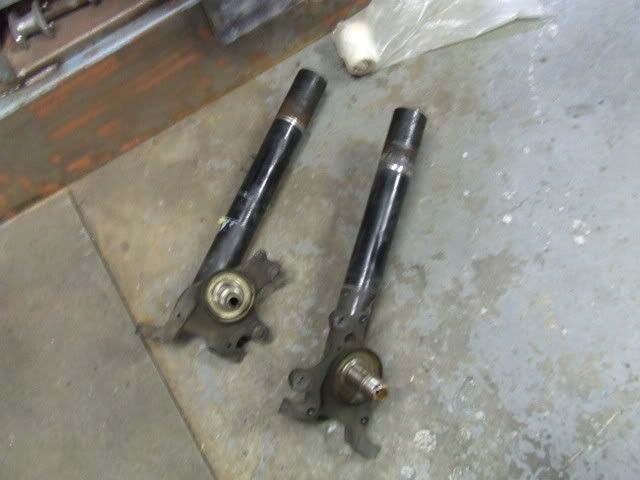
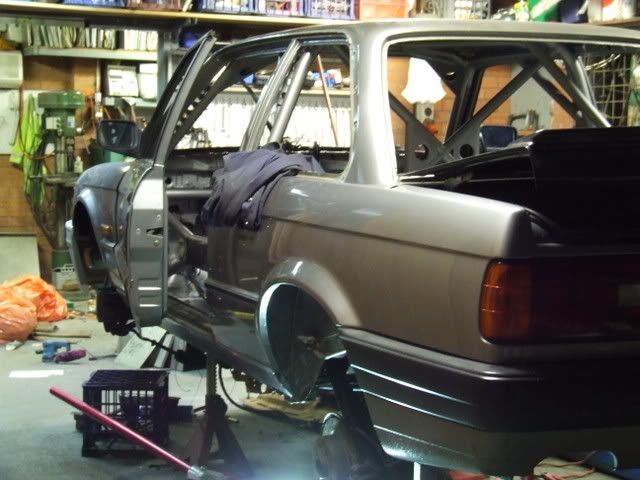
Built front struts:
Sitting on the ground:
the first drive:
also picked up a fivelug doner for lateron when im spitting out driveshaft busting power :)
just need to sort the wiring and interior out and im ready to go racing :)
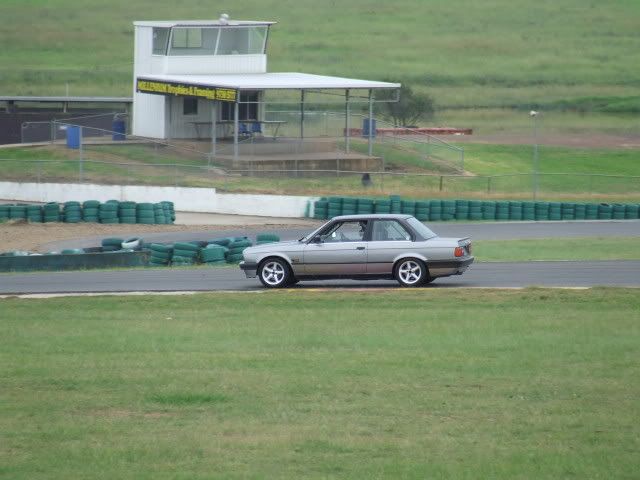
Alrighty so i made it to the track day in the end....here are some pics
Scrutineering (no issues with the car great start):

Venturing out onto the track:
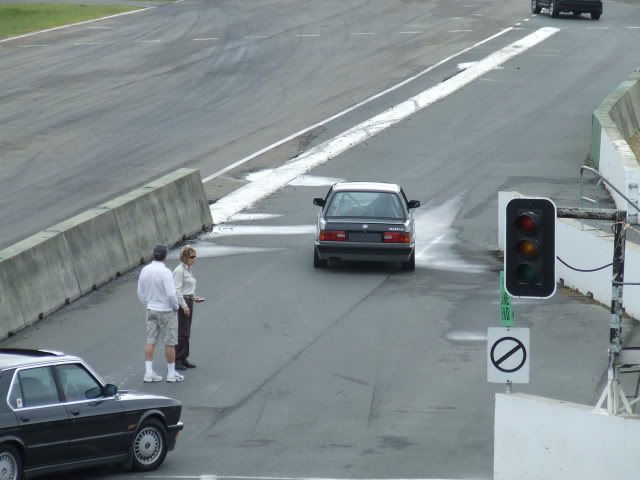
This looks like just after the bridge:
down the main straight:
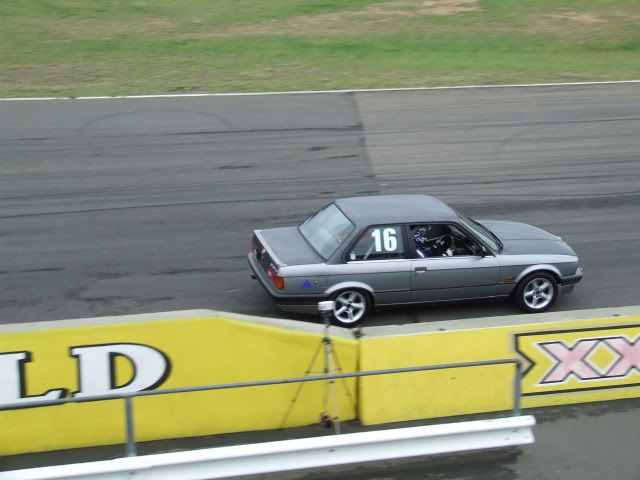
going home, car intact, pride through the roof, absolutely exhausted thou.....lol it was a big night and big day:
End result is the unhealthy engine is very unhealthy....a power up is in the planning stages along with planning to refresh the engine. But to get things kicking along i bought this:
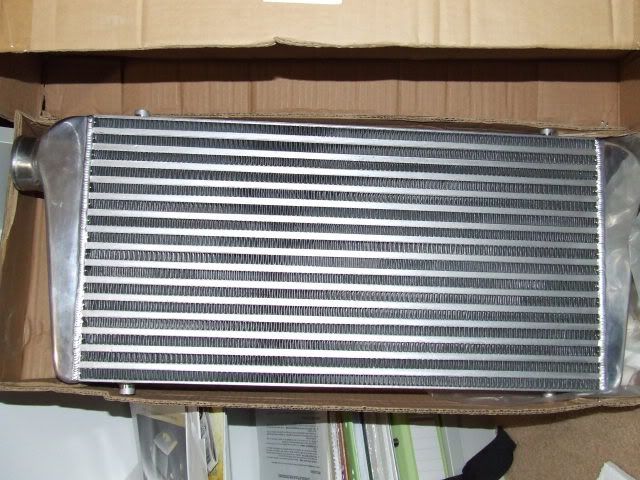
600x300...prolly a bit on the big side for my target of 200 at the wheels (on unleaded), but for $150 brand new can't go wrong.
But that is all for the off season (christams/new years) so between now and then besides aquiring parts im going to be developing my driving and the car as is.
I'll be doing a budget turbo conversion, in that i wont be building the engine for big boost, but i already have a mega squirt so will be jumping to full engine management straight away. Am still undecided on running e85 fuel and more boost. These will all be things to work out later.
But essential that will be stage 3 of the build, stage 1 was the inital build, stage 2 is fine tuning and abit of development (loosing some more weight)....then stage 3 will be the power up.
Besides the engine management and a fairly small turbo (thinking a t25g off a nissan silvia for starters). There will be a surge tank setup to go in, bigger fuel system in general (with head room to run e85), will need a new exhaust system, somewhere to put the intercooler and modifications to the front end to get air in there. Going to modify the oiginal intake manifold for a round throttle body for starters. And probably a bunch of other stuff i haven't even considered yet.
Little update, boost on the horizon. Have an intercooler, turbo, some stainless piping. Need injectors, intercooler piping and stuff for a surge tank setup...and enough 3" pipe to build an exhaust.
Then i just need to rebuild the engine :S
just thought id throw it out there:
also have the actuator to go with it, some stainless piping, boost guage, nd a t25 flange ready to go...now just need to learn how to TIG.
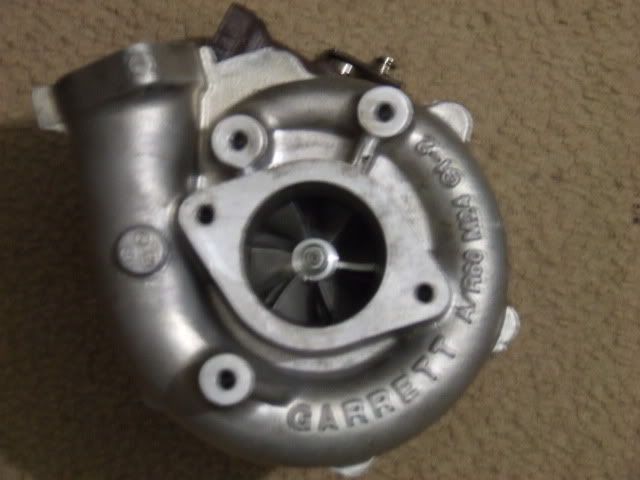
ha its all in the scale of things, the turbo is tiny actually. Its a gt2560. Here's the maps:


The long and the short of it....on estimated engine flow at 3000 rpm the turbo should be sitting at about 70% efficiency on 10psi (compressor side) and 76% at 6500.
The turbine is well and truly on song by about 3000rpm as well so should be a nice little kick along. Its rated at about 300hp which is my optimal, not necessarily desired aim. I'll be happy with 200hp at the wheels (which is about 230-245hp at the fly).
Have a lead on some 55lb injectors also...
another update...track day was an absolute ball...few new goodies and mods etc.
thanks for the reassurance luke....at the end of the day the t25 flange series have a wide range of bolt in or close to bolt in replacements
But its time for an update aye? Well yeh it is, got a drivers floor in finally, new wheels and did an event
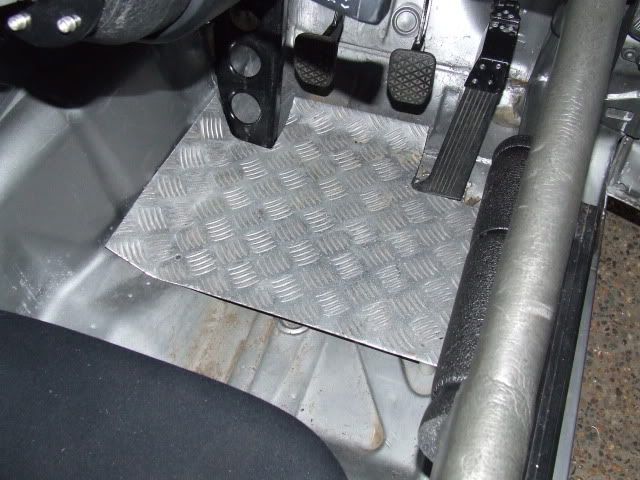
Here are the spacers i made for the floor:

And the installed pic (minus fasteners lol...they are in there now):
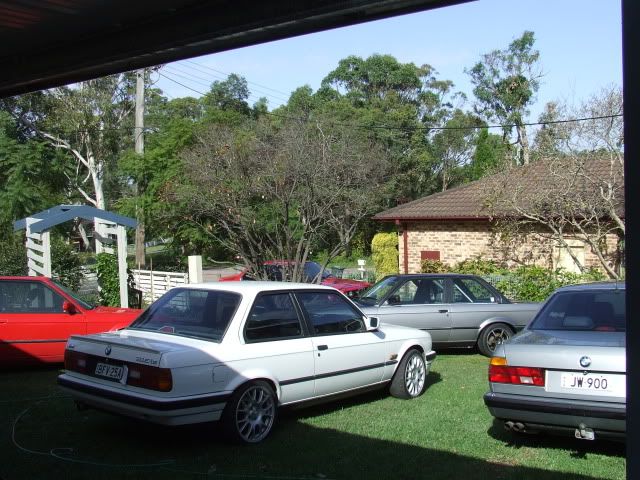
Heres some pics of the new wheels:


As you can see i've lowered the front a touch...sits so much better and the car didn't feel like it was driving around on its arse so much.
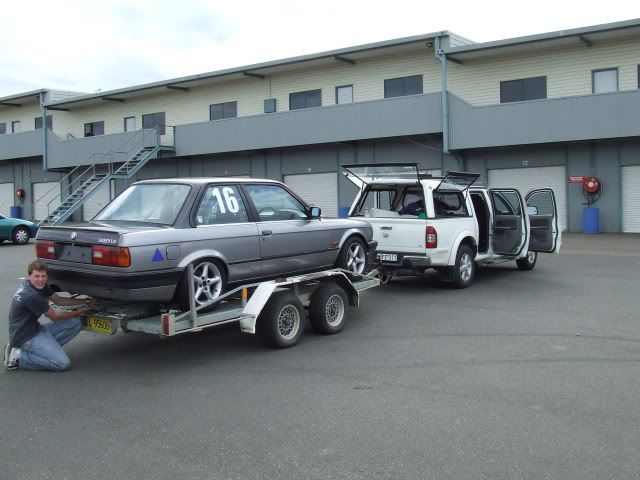
And the few I have from wakefield (should have alot more once my mate gets them organised):

Car looks a lot more like a race car i recon, those wheels were a bargin $820, 6.5 kg each, bolt on to the car and have the right offset and everything and look great!

took my mate for a spin (i mean instructor ;)) recon he looks worried?:

GPS says i was only doing 140 down the main straight...need more power!

Somewhere along the way i forgot the idea was to stay on the track...the car found the mud a few times


While i was washing the cars i figured this picture was pretty hilarious:
never mind the seven though it is getting picked up later this week.
And the 3 318iS's that have to fight it out for time and money:

So pretty much the wrap up is i got the award for completing the most laps on the day, it was basically a private track day and with only 30 of us, there was hardly anyone complaining that i just kept on going...more to the point i think i was good entertainment value
Put 70 litres of fuel through the car and had an absolute ball....i have incurred some damage for my efforts thou, the standard sway bar links it seems are not up to the 6mm increase in diameter. So now i have an excuse to fix those. Speaking of sway bars, i stiffened the rear bar one notch after the first session. and it made a world of difference. The car instantly stopped the understeering caper and was a whole lot more responsive. The only downer being that i was then picking the inside rear wheel up on some tighter corners.
I think i will try softening the front bar and put the rear back the notch and see what happens...its that or i need to find a short ratio lsd, which will be quite a task. But overally had a great day!Last edited by e30guydownunder; 12-09-2009, 04:29 PM.Leave a comment:
-
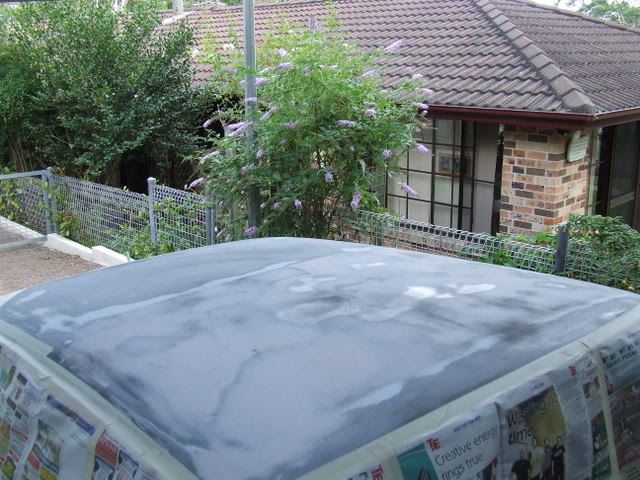
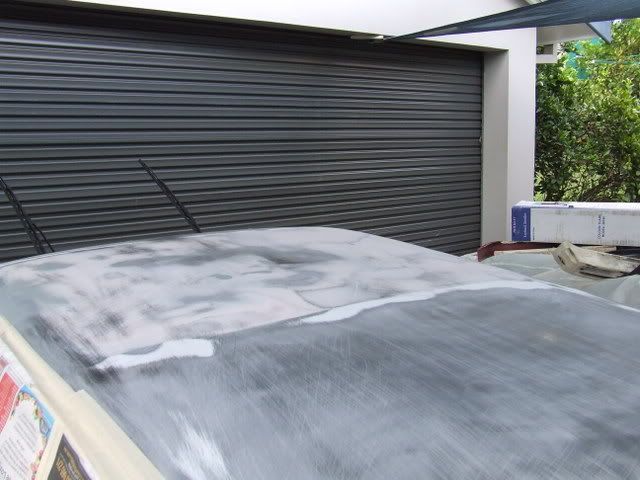
Have done some work on the roof over the weekend.....

Then some filler
We did spray some filler/putty over that lot but i forgot to take a pic, and thats about where the car is up to.
Decided we weren't happy with the finish on the interior paint in some places and have got that mostly ready for repainting...with the spray gun. Also made a mount for the bonnet catch and welded the accelerator base mount in prepartion for this.
We spent most of saturday cleaning the shed...visitors are coming during this week, plus it was majorly needed....but anyway, it basically means im not allowed to make too much mess until after wednesday, so planning to get lots of little things orted like the front swaybar mounts and accelerator pedal etc....
started on the random little jobs today,
front struts:
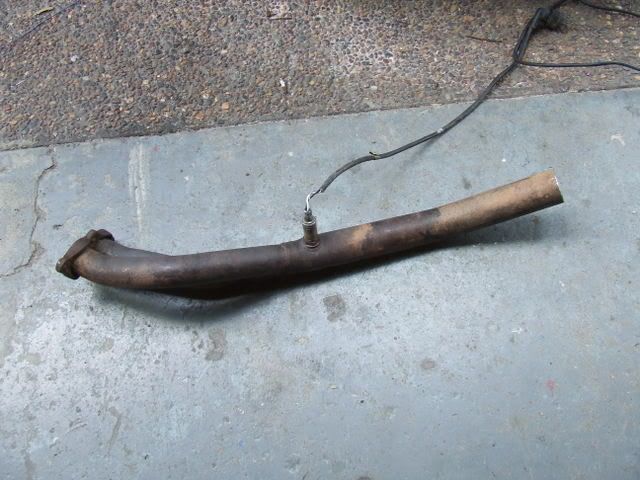
Quiet exhaust (LOL):
but the focus getting the interior repainted so the fitout can start. And then drop the engine/box in so the car is really mobile, at the moment thou me and my brother can push it up the driveway on our own.
So the list for engine install:
Powersteering blank plate
Steering coupler needs mods
Swaybar reinforcing
Engine mount reinforcement plates on subframe
Clean up engine and box
New gearbox oil
Tighten upper sump pan and lower, install a few helicoils
Heater Plate, powersteering, a/c Delete - already did the cooling fan delete
New Fan/Alt Belts
New plugs
Paint rocker cover and upper intake manifold
New gaskets here and there
Could prolly install coil on plug and engine loom before installing engine in car.
Wont have time to do my custom gearshifter so will temporarily run my brothers short shifter in the hope i can still select reverse :P
and still tossing up going to sydney to collect a spare engine (blown up) gearbox and diff that are awfully cheap. I know i should get them, but at what time is the issue.
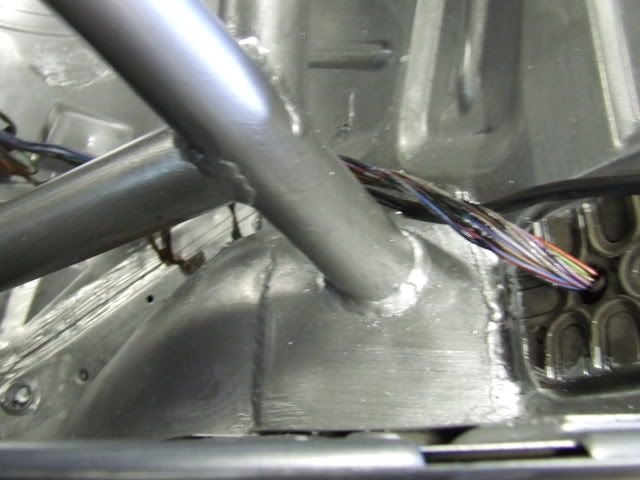
Did some work on the front cross member today.....
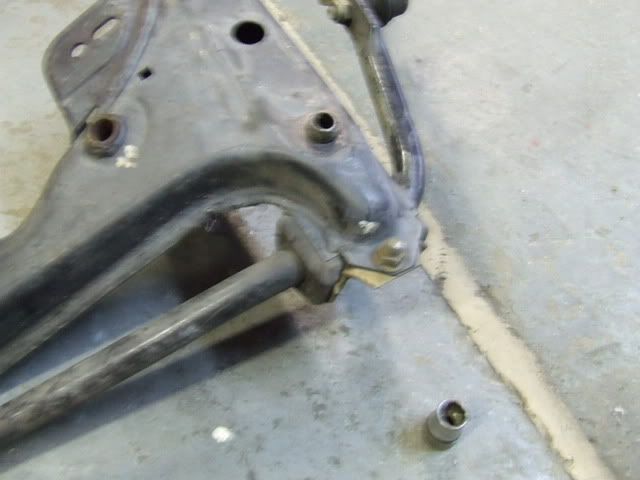
Standard Sway Bar mounts:
Then I added some plates and welded the nut on cause im lazy:
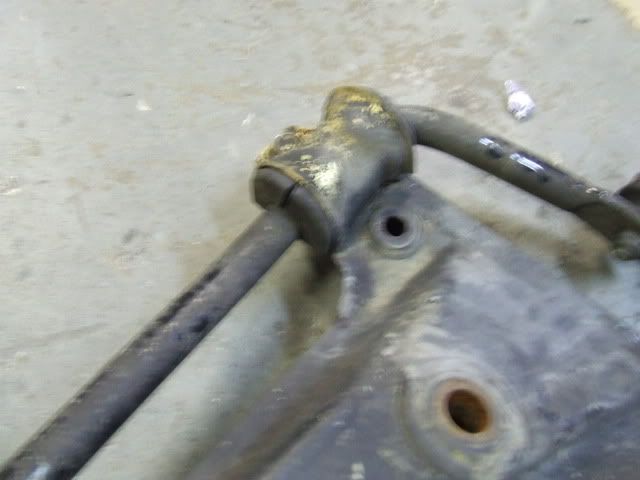
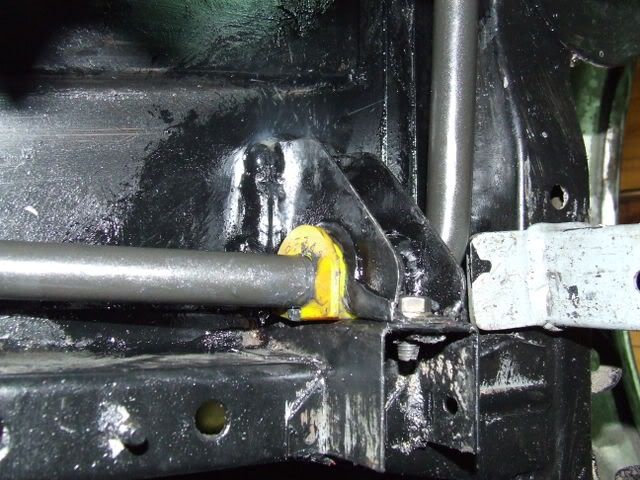
Then i modified the swaybar mount. The problem is with big bars and poly bushes that are very stubborn, getting the taggy bit of metal int he subframe and around and then bolting the mount down is very hard. So i straightened this piece and cut it:
Then i added a tab opposite the factory one that picks up on the crossmember mounting bolt (IE very freaking strong):
Added some gusseting plates on both sides and had something like so:
And the finished articles:
I will be adding some strengthening to the engine mount positions, but can't do this until i have the urethane engine mounts. As there are no 318is engine mounts avaliable because of the offset studs.....I'm using some generic White line mounts with inline studs and as such will have to drill new mounting holes....easy as cake
Besides painting, i can now make the throttle pedal, front struts or rear shock mounts. Should prolly do the rear shock mounts and painting just so one end of the car is done and dusted
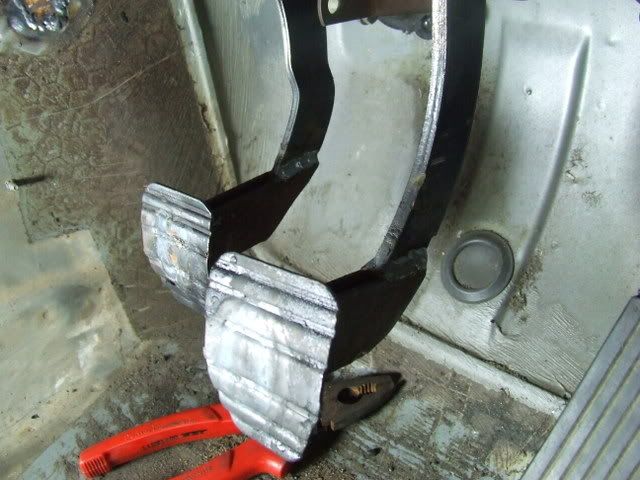
Finally got around to making the extendo accelerator pedal.....this basically moves the pivot point of the top section back about 75mm....All will become clear when i assemble it if your slightly confused atm:
And I also painted the seat mount and sway bar mounts while i had the gloss black out:
Hehe thanks luke...but turnernmotorport are already selling all the reinforcing things i have been doing...except the front swaybar ones....and the rest of the stuff i have done requires fairly in depth fabrication on the body shell....which most people are scared of for some reason.
If more people were to pipe up and say they wanted stuff thou, i could measure it all up properly and get all the plates laser cut (have a contact :) ) then with some jigs be knocking them out a bit quicker.
But to be honest its not that hard from scratch either, just hoard some cardboard for your templates, get a good quality scribe and access to some nice bench shears and away you go.
Hehe yer...money is a big factor :) im still a student remember and on green p's at that!
have been trying to convince him to slot a m6 motor in the race car...but its not happening yet :( i might get as classy as a mid mounting m30 eventually....with some boost and develop the rest of the car to run in sport sedans, but thats when i have alot more money to play with.
Cheers for the cage comments....the reality is if i had paid somebody to do it would be a 3-4k cage. Besides all our time and welding consumables it owes us just under a grand!
Yep strut housing are free and i had planned to put the gusset your talking about in, ala Ground Control. Was also going to go with m3 sway bar mounts but the suspension guys i have talked to advised against it as it binds the sway bar up when your turning.
I can has painted interiorz????
yes i can, dad donned the spray mask and shit this evening and threw the second coat of epoxy around, we also darkened it up a touch and looks a million miles better.
Engine/Gearbox mounts are in the mail and expected to be here tomorrow...have canned ideas of wasting time in sydney this weekend and will be aiming to drop the engine in....fair amount of shit to do is an understatement :)Last edited by e30guydownunder; 12-09-2009, 04:16 PM.Leave a comment:
-
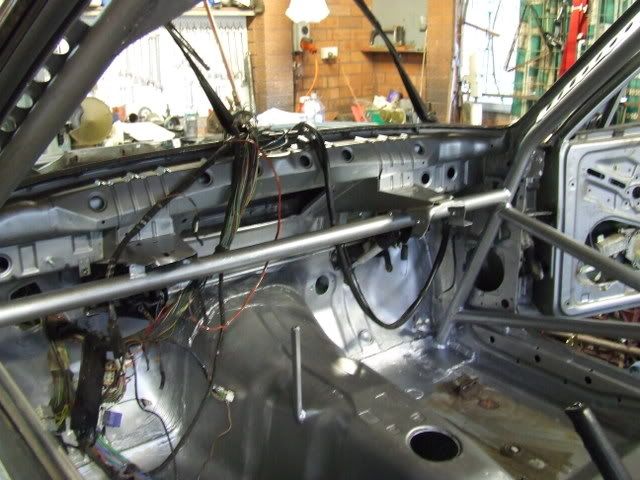
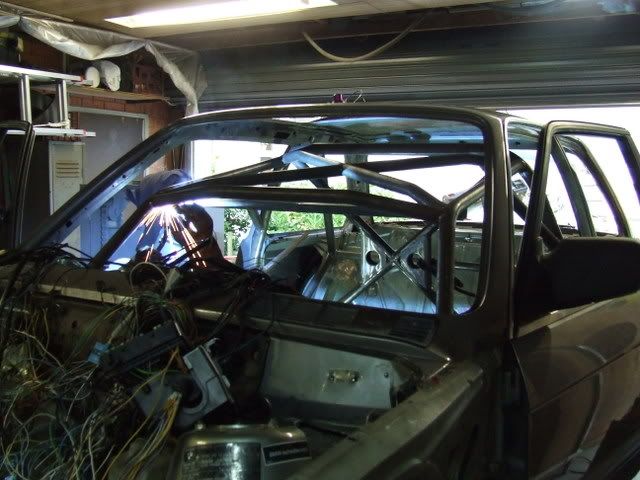
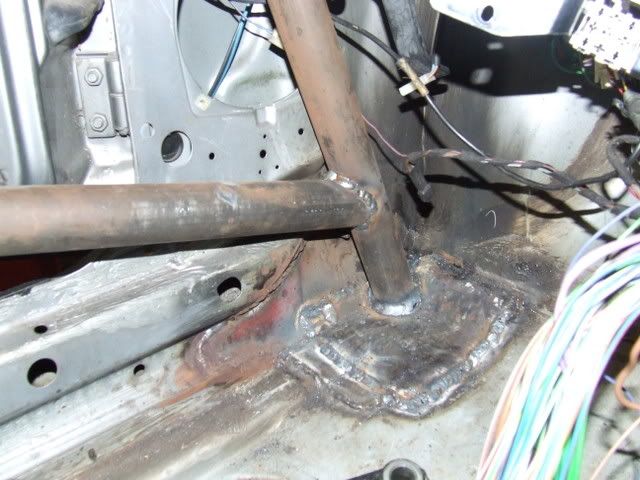
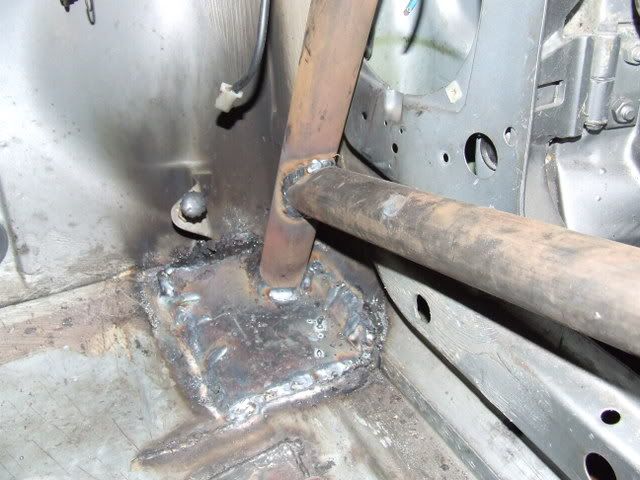
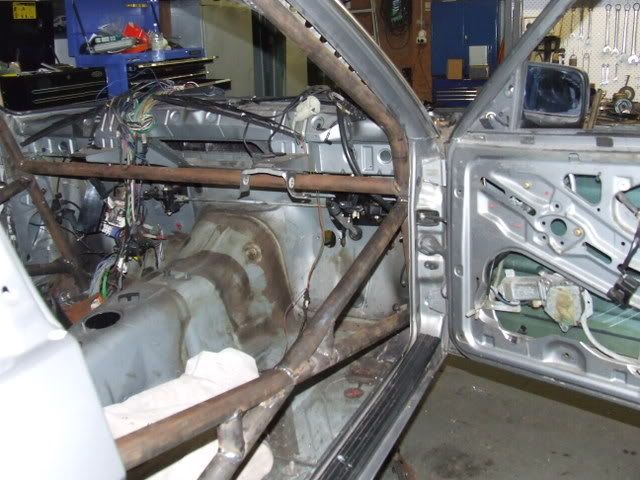
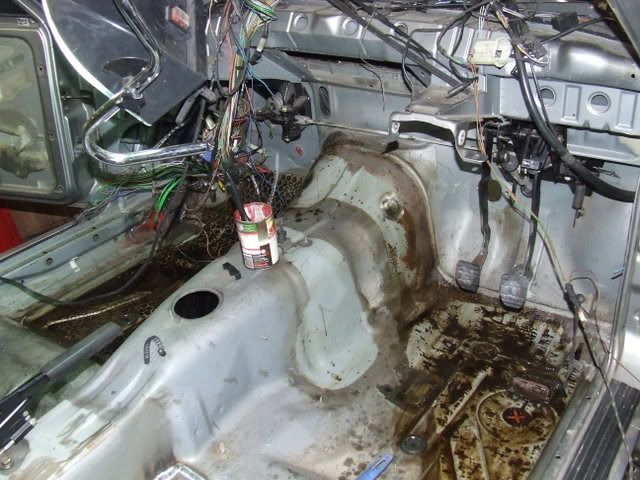
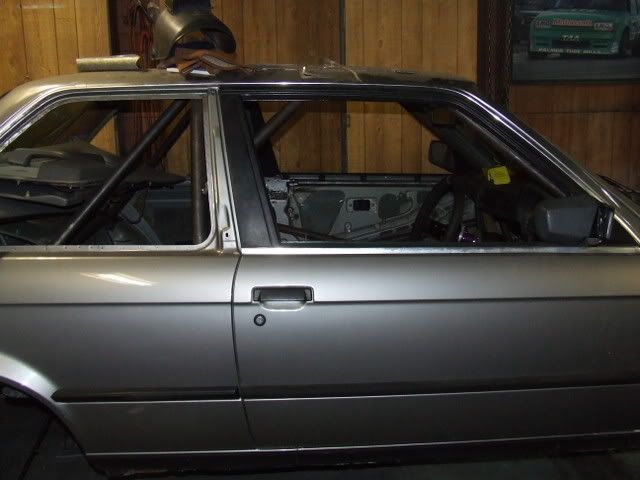
Well for once i have achieved the overall goal!!! There is paint on the inside and damn is it hot. I havent taken all the detail pics for the roll cage certification thou :( will do that tomorrow and get the paper work off in the mail tuesday.
But yeh, the dash mounts are finalised, and after buggering around with cardboard for an hour i decided to leave the dead pedal for later.....so i weled some nuts in to provide a mount system....this will give me the opportunity to change designs as the driver changes shape :) and the seating position changes (inevetible).
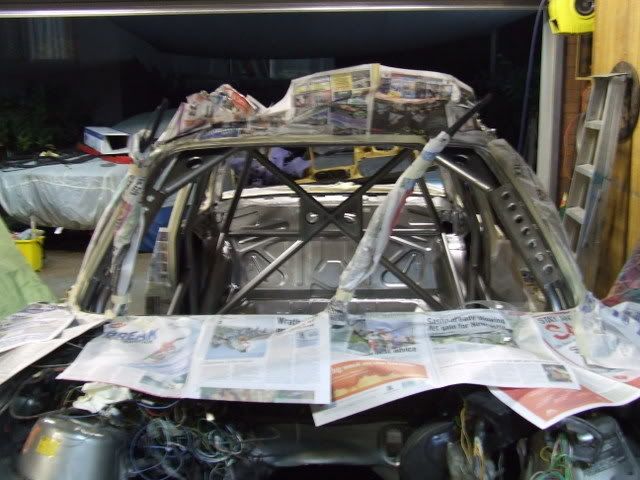
Then we threw the roof in, tacked it along the edges in something that resembled even intervals and around each corner, trying to be careful of heat build up, was going good till i got the flapper wheel out to knock the tops off the welds, doh the roof pulled in one spot :( ah well we'll have the bog out anyway.
Also did a few stitches on the seam inside. Then we have filled the seam with devcon...its a metal filler based product, basically powdered metal in an epxoy based resign.....the roof is solid "as brew". :crazy
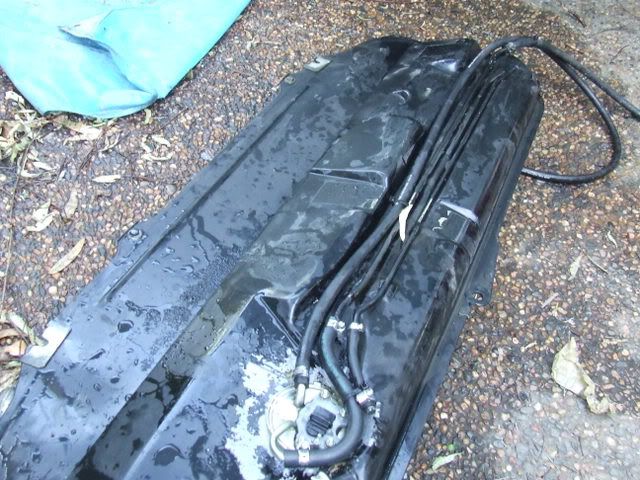
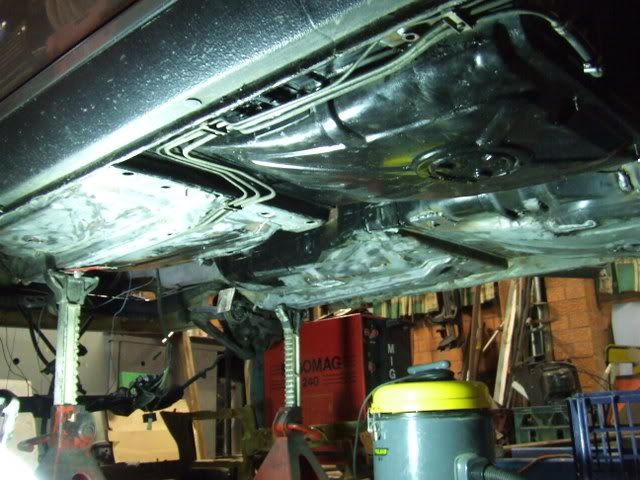
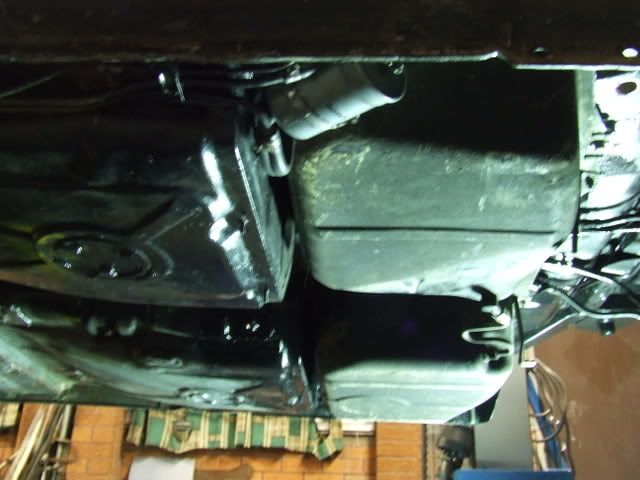
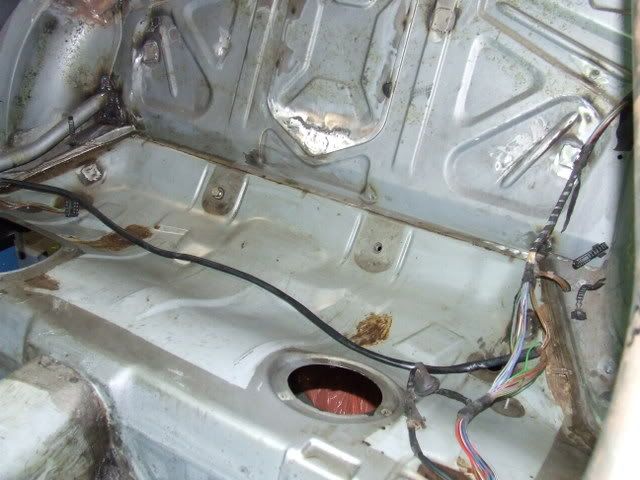
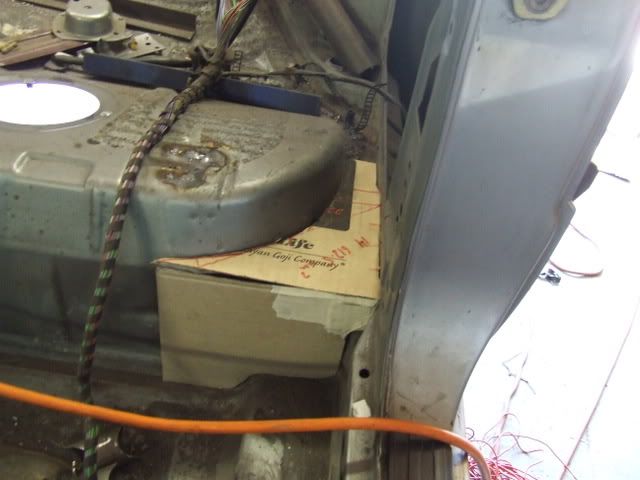
And then for shits and giggles (well not really, shit off the ground and in/on the car is always good) i got the 318is fuel tank in the car...i added new rubber lines where ever they were used for some preventative maintenance, one thing i can tell you is the 55 and the 65 litre tanks are very very different. I've had to modify the fuel filter bracket in order to run the big fuel filter under the car as the 6 cylinder do.
i wanted this because the ones the 4 cylinders have in the engine bay are, smaller, more expensive, slightly harder to change and may get in the way of future developments....BOOST :hehe
So after modifying that threw it in with the tank. something else that will be different is there is no lift pump on the 55 litre tank because it has a line between the tanks.
Anyway some pics from the weekend, I'll get more up later today was pretty flatout, painting took 2.5 hours on its own :screwed
Today my car became a true Australian Race car...ZIPTIES!
The roof after filler metal

Beautiful paint
Modded fuel filter bracket (lip and bush removed):
Lines in:
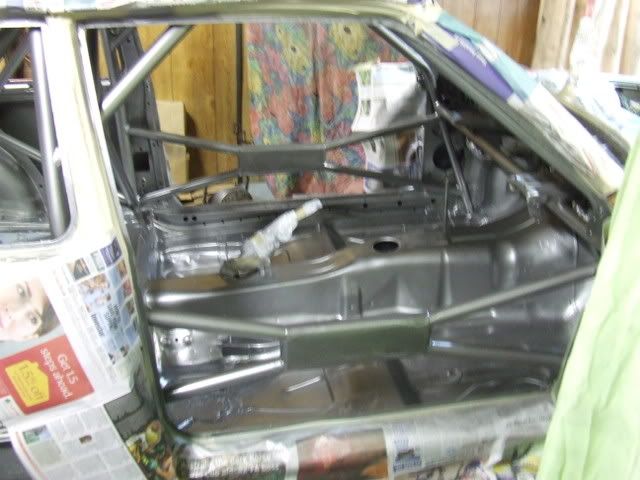
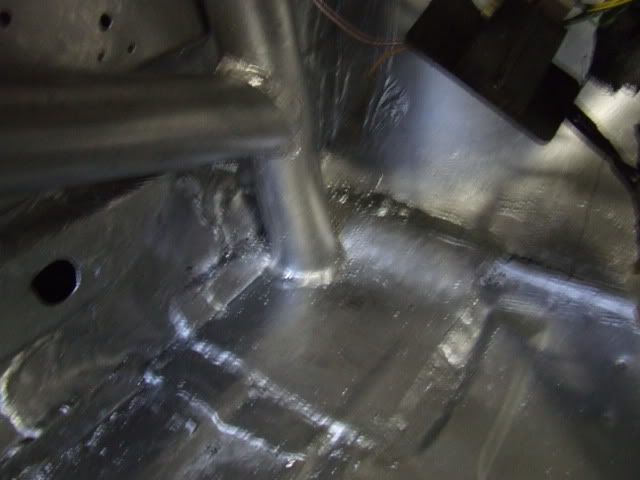
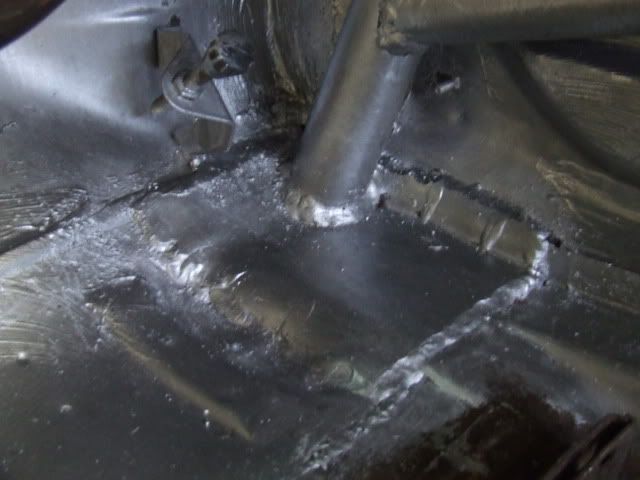
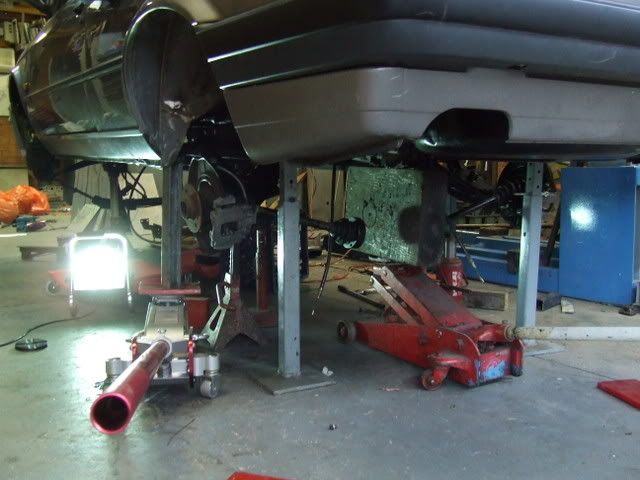
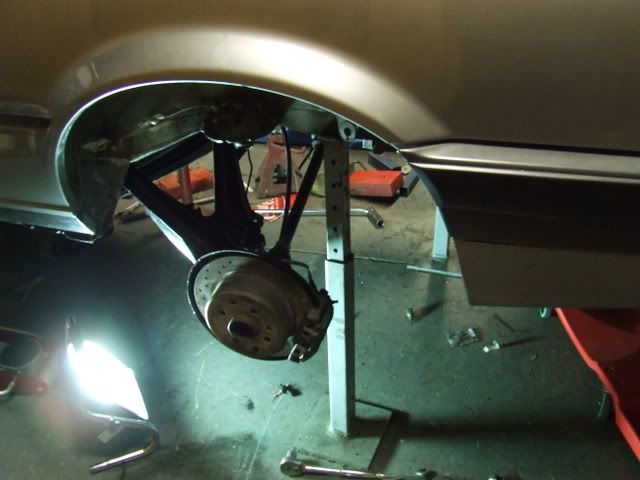
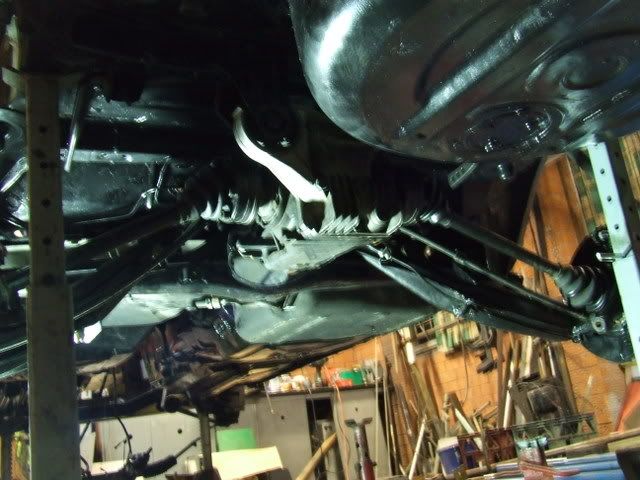
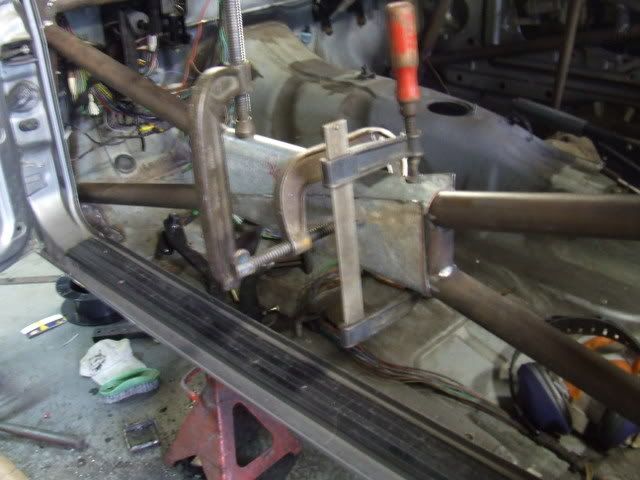
over the past two days i have been working towards getting the rear suspension in the car....this has included finishing off the rear sway bar mounts and actually strengthening the strut towers.
Yesterday i did the towers:
Profiled plate:
After some work:
Ready for full welding:
Welded (yes i had issues with the sheet metal blowing out :():
I was trying to avoid creating a stress point in the corner where the strut mounts are prone to cracking and ripping out. This is why i welded the profiled plate to the vertical strips and not the cars sheet metal. The strips then transfer the load down the stronger sheet metal....in theory anyway.
And today:
Here is the swaybar mount in position:
I threw an L and R on them to tell them apart, no doubt they are different side to side:
This all means that with some paint thrown around the wheel wells and on the sway bar mounts im ready to throw the rear suspension in tomorrow...and am planning to do so. Everything is ready except the Rear Shock mounts, so for the time being i'll leave the shocks out.
Im hoping to get the engine and box in over the weekend and give the car a good wash. Then it will be all systems are go on making the front struts, fitting out the interior and painting the roof (shit loads of bogging, sanding and painting to be done).
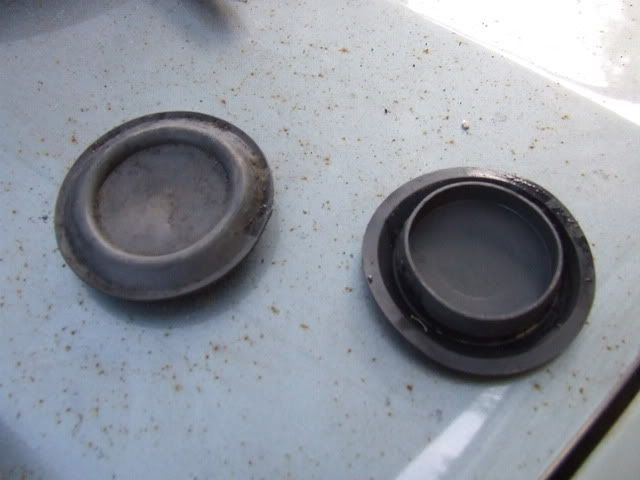
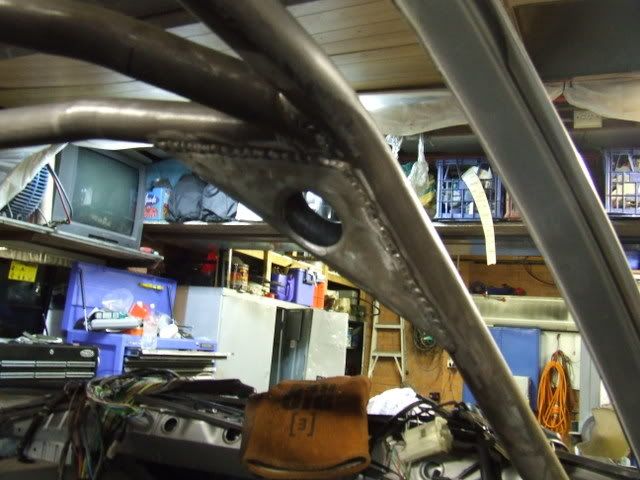
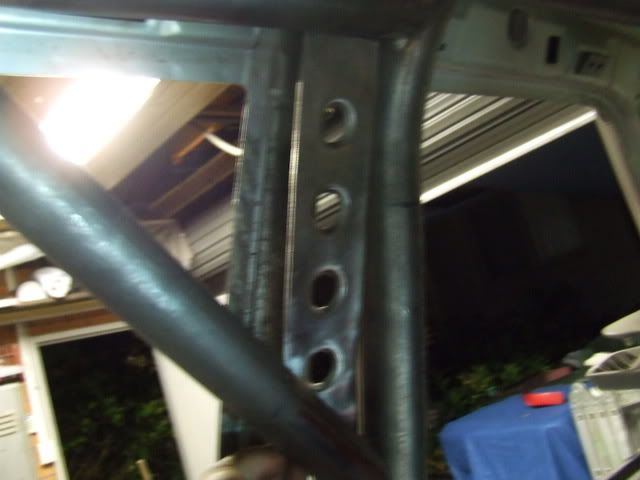
Here are the two holes i put through the boot to make diff instal, removals quicker, easier :)
going to plug them with these out of the parts car:
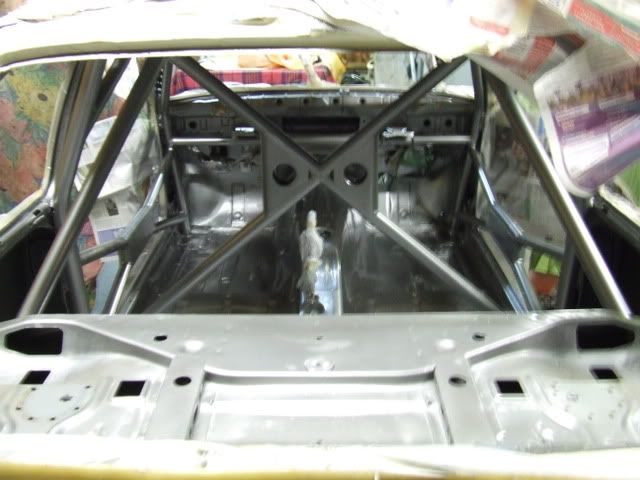
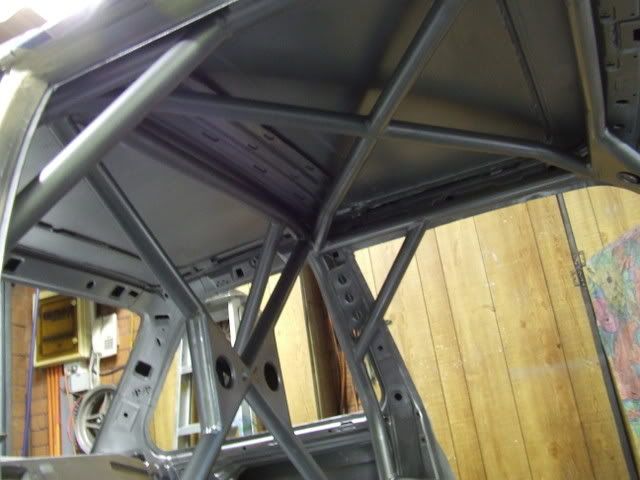
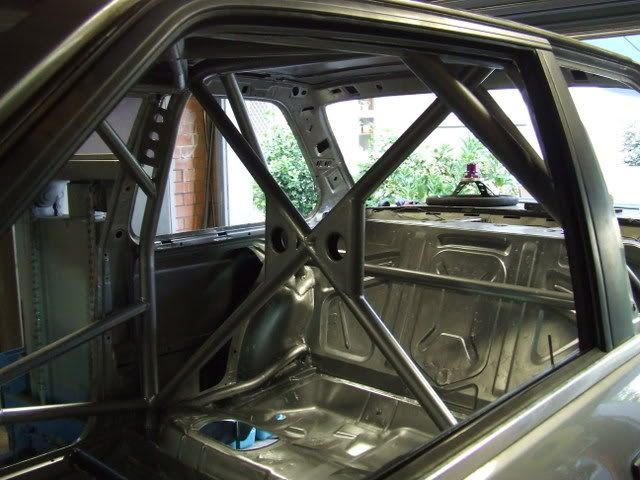
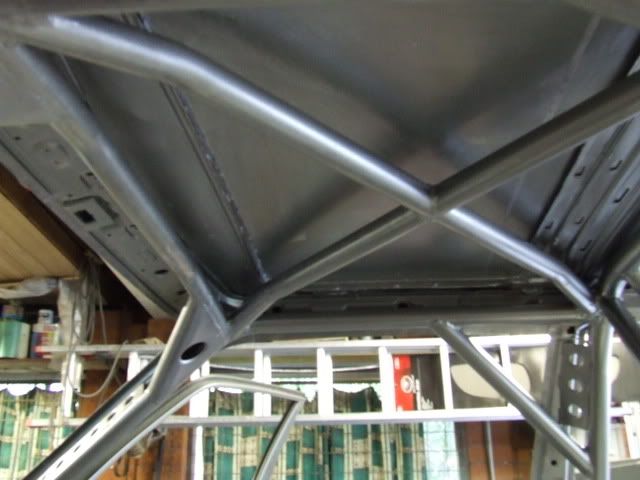
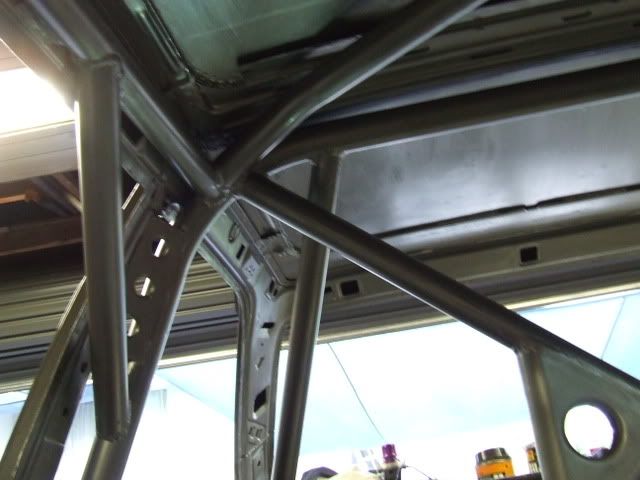
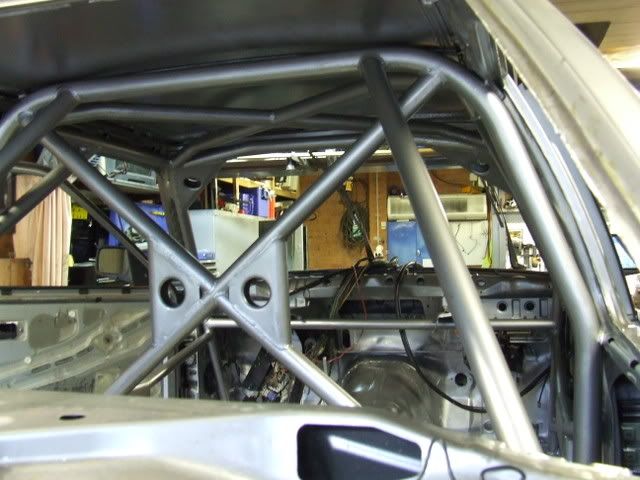
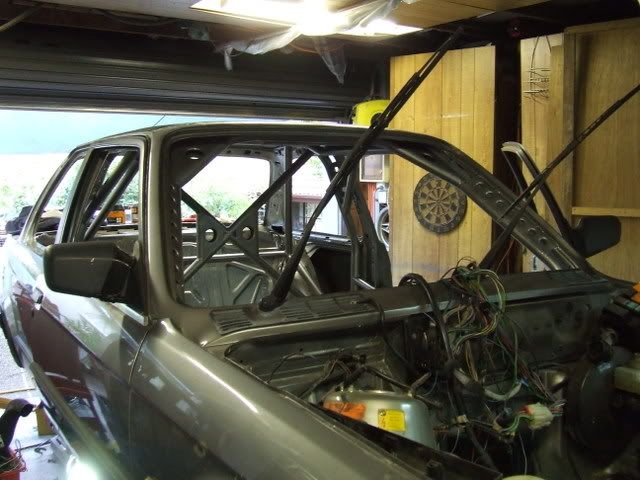
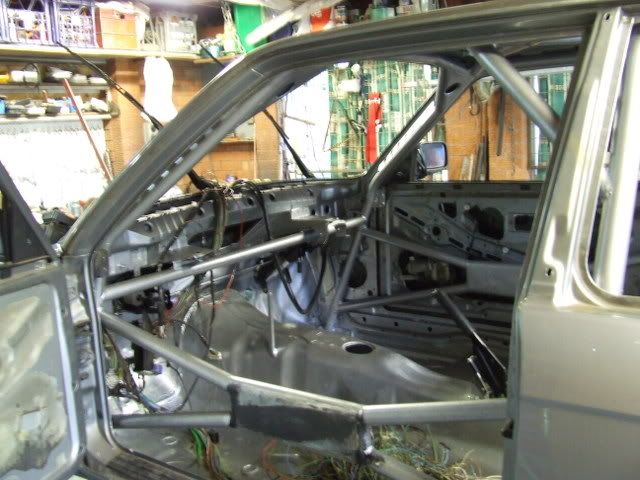
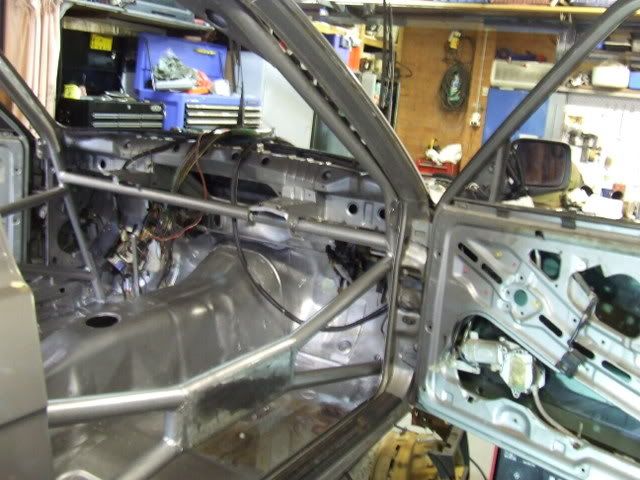
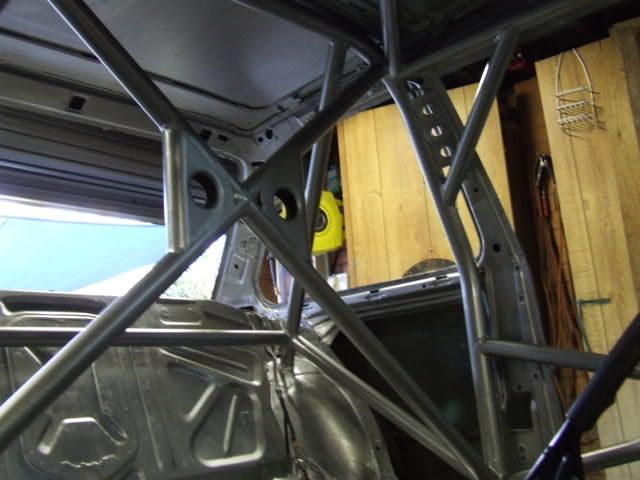
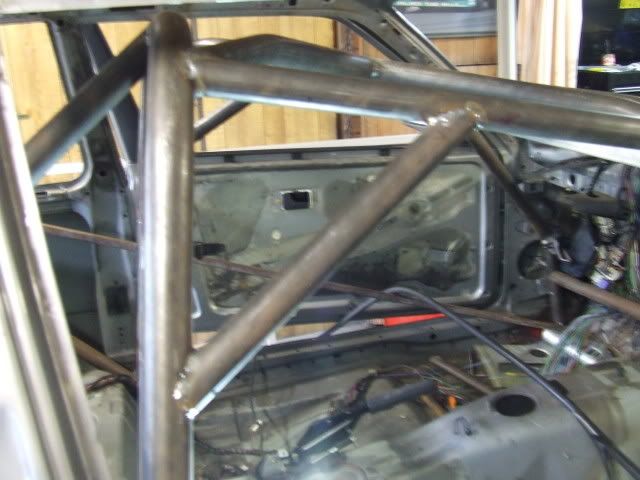
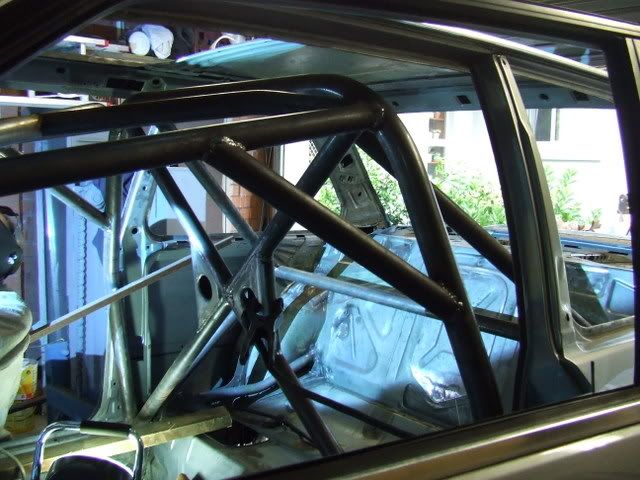
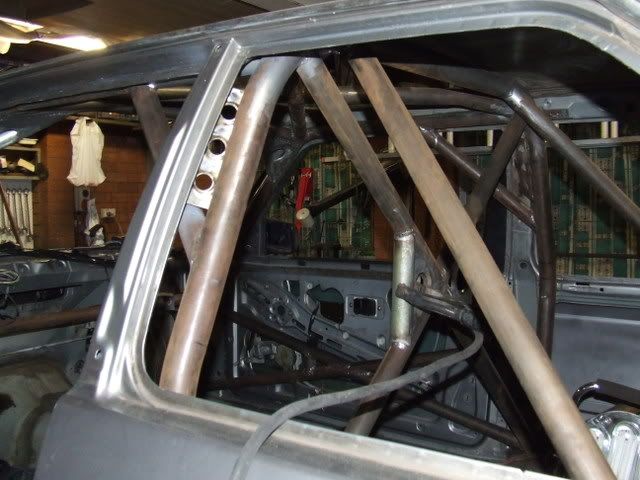
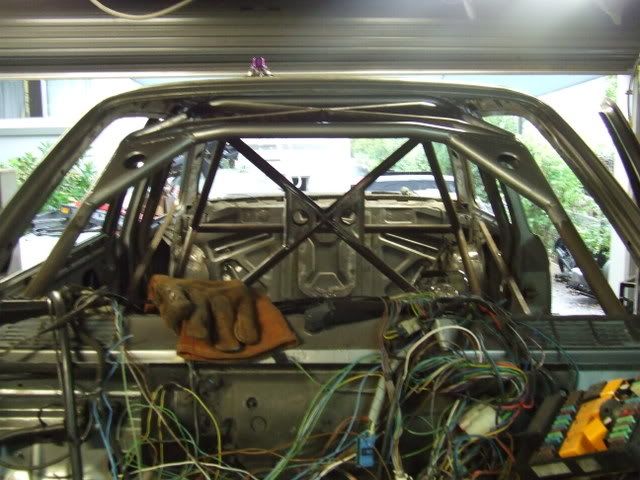
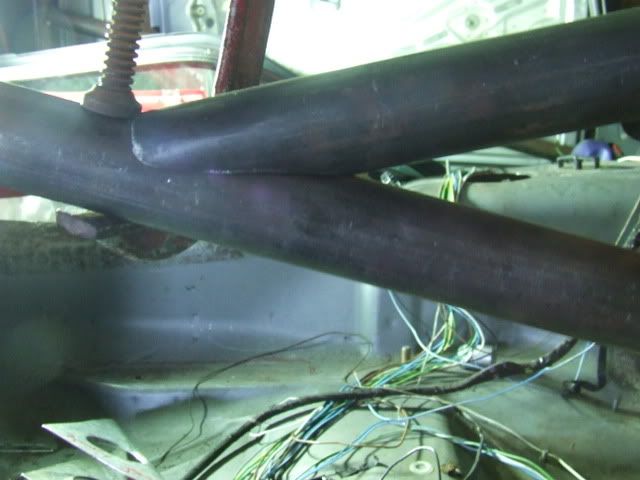
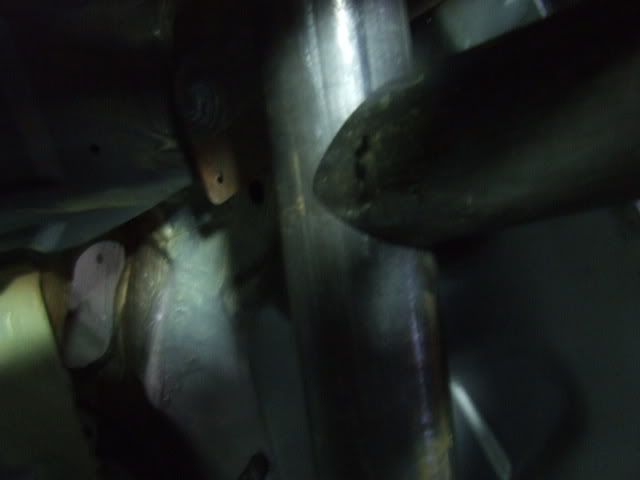
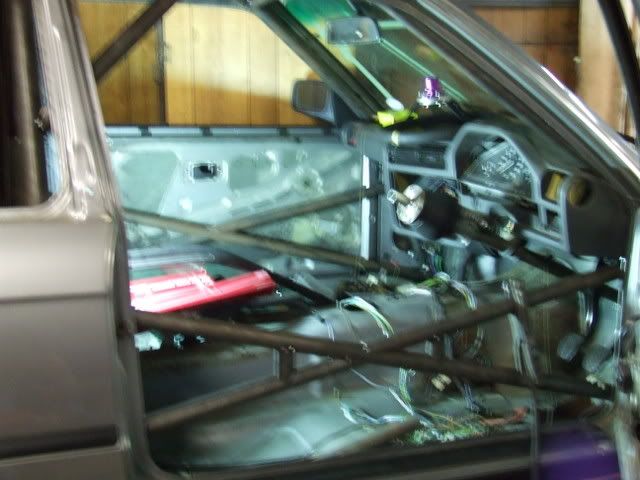
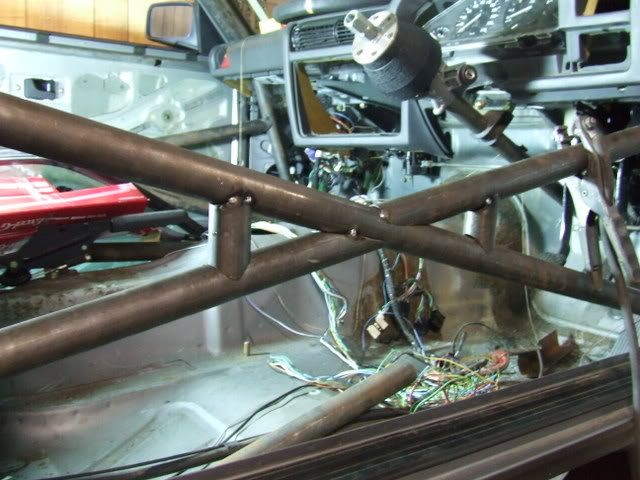
Now just random shots of the cage:

So on thursday i got most of the rear suspension bits in:
And yesterday i finished things up and then...taaa daaaah
No rear shocks are in...still need to make the rear strut mounts and hook the sway bar up along with the fuel filler.
Ohh and finish painting the wheel wells.
Didnt get my engine or gearbox mounts in time so just going to get everything ready to drop the engine and bx in over next week.Last edited by e30guydownunder; 12-09-2009, 04:13 PM.Leave a comment:
-
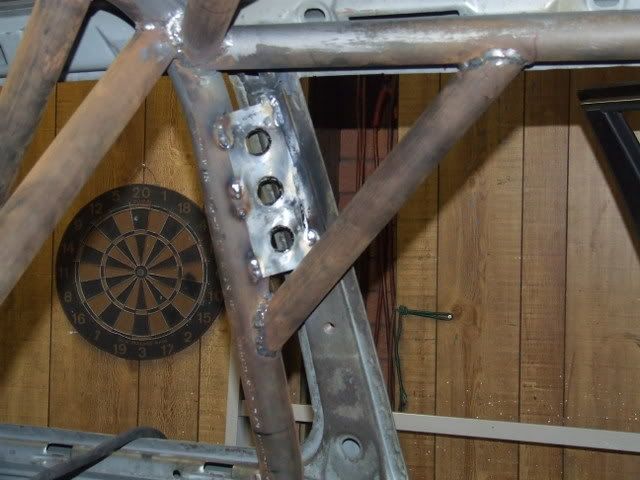
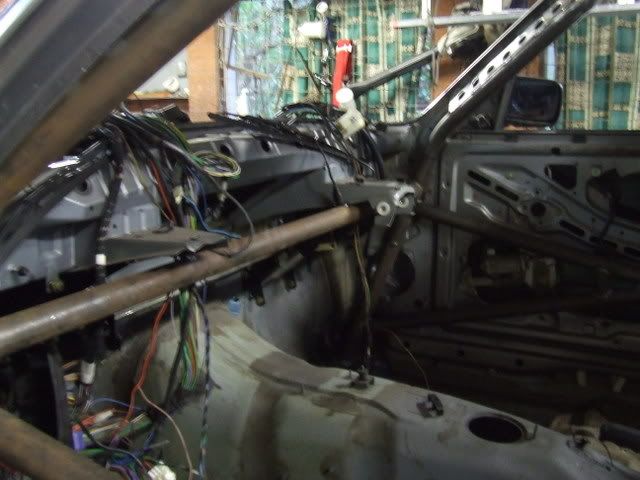
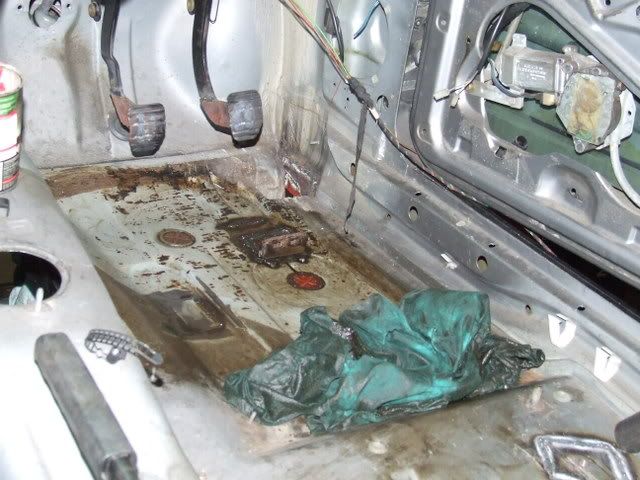
Used these to maintain doorbar spacing while we repaired the floor and got the rest of the cage zipped up:
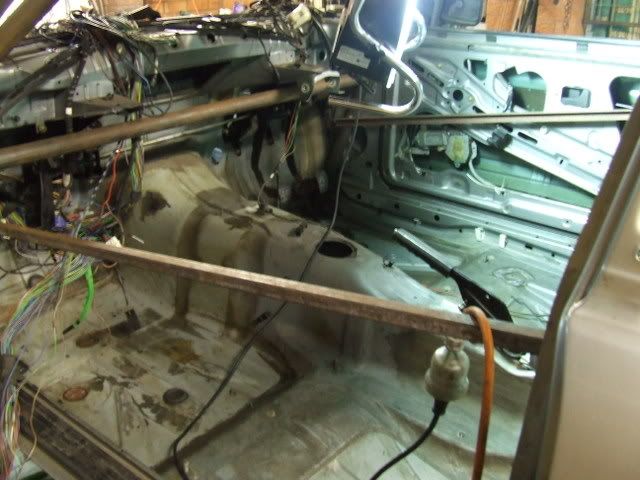
Floor repaired ready to begin fully welding:
Welded Stuff:
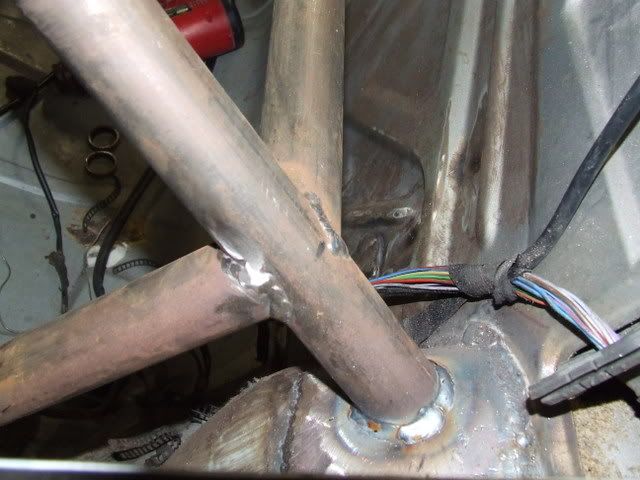
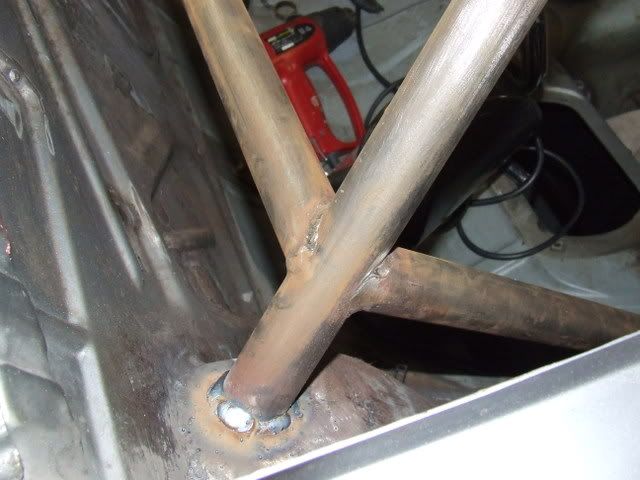
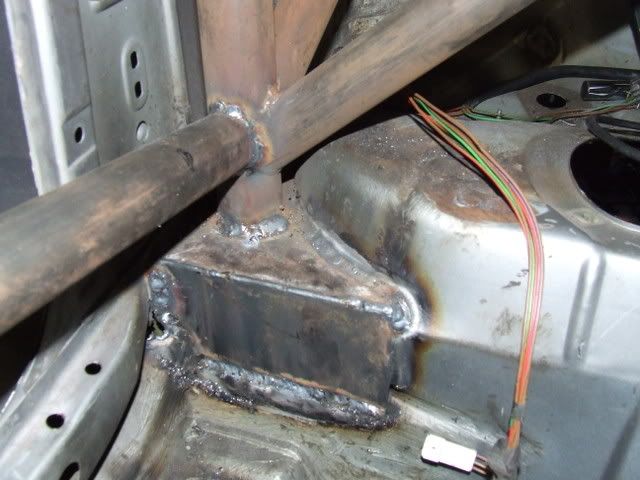


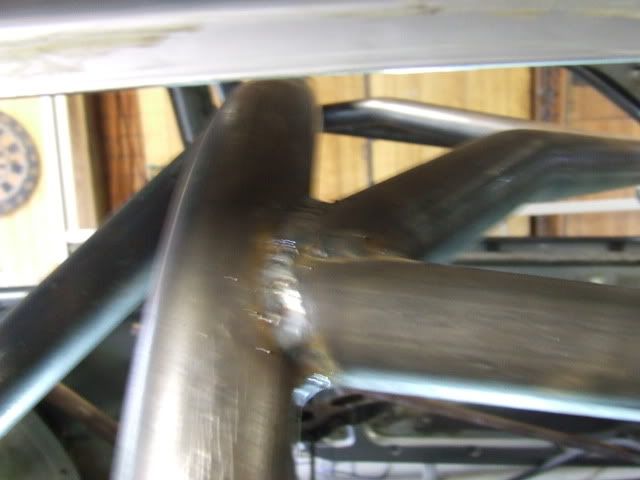
Some of those welds look pretty sketch in the pictures :screwed but believe me they are well and truly fine, with a cleanup for paint and a coat of paint everything will be beaut, you can see some of the silve paint on the top of the cage, this is the colour i'm planning to paint the interior, althou i might darken it up a touch looking at the pics.
anyway uploading 55 pics took a bit longer than i expected, wont be getting to work that early :laugh
Another quick update from this arvo.
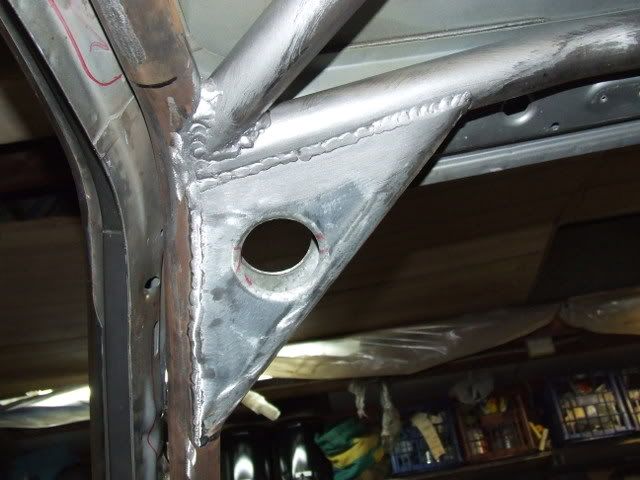
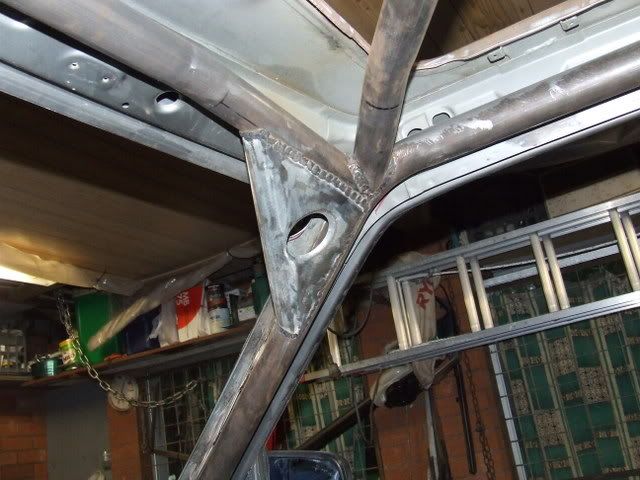
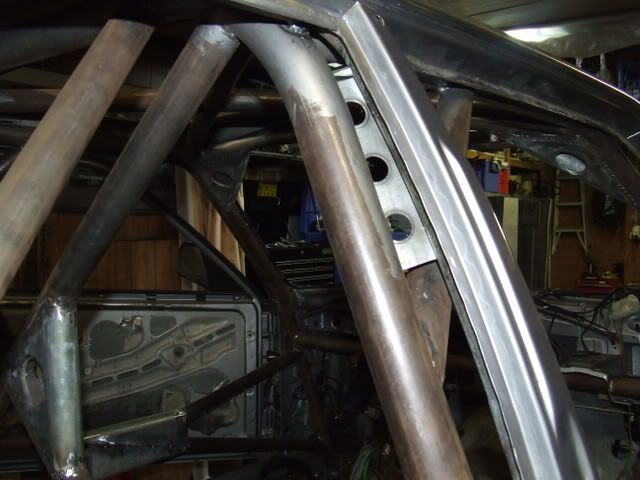
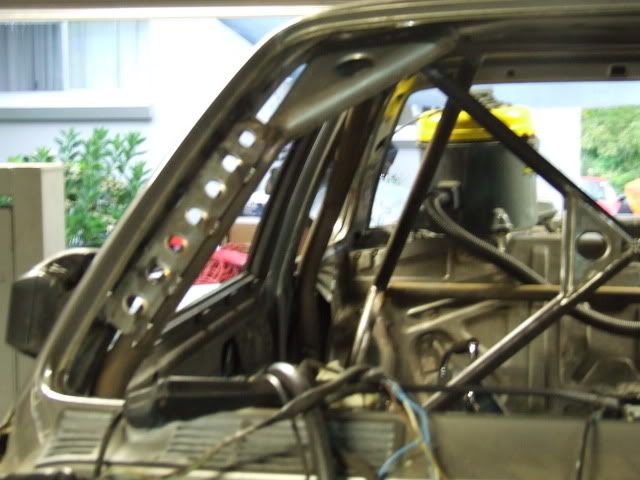
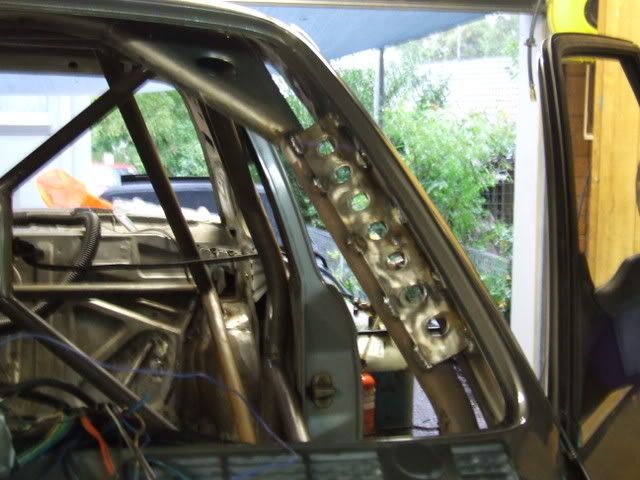
Got the drivers side intrusion done. And did the tags along the front legs to the roof. Just have the main hoop welding to finish on the drivers side and the cage is welded.
Throwing some ideas around this arvo for a dead pedal, window net mounting and dash mounts, as well as general switch locations and things. Think we have the dash mounts sorted, its fair to say the dash will be a heap easier to get in and out now :)
Going to be making a fair bit more stuff before painting than I intended...so its pushed back again :) Aiming to throw paint around by the end of the weekend so i can send the paper work away for the Rollcage Approval and then the Log Book etc.
haha thanks for the tips matt. Got any on getting free time and money :p
Made the dash mounts, just two tags sticking off the front legs behind the dash sides, thing is even more solid than the factory mounts very impressed. Going to finish them off, modify the dash and get stuck into the cleanup stages of the cage for paint this arvo.
Things to do before paint:
Finish Dash Mounts
Make a mount in the middle of the dash
Dead pedal
Finish the weld on the back of the drivers side main hoop leg
Weld sunroof patch in
clean up the cage and weld spatter
wipe down with thinners/wax remover/prep wash
No doubt I'll think of a million other things to do, but the aimis paint on the inside so i can get the paper work away and the log book happening.Last edited by e30guydownunder; 12-09-2009, 04:10 PM.Leave a comment:
-
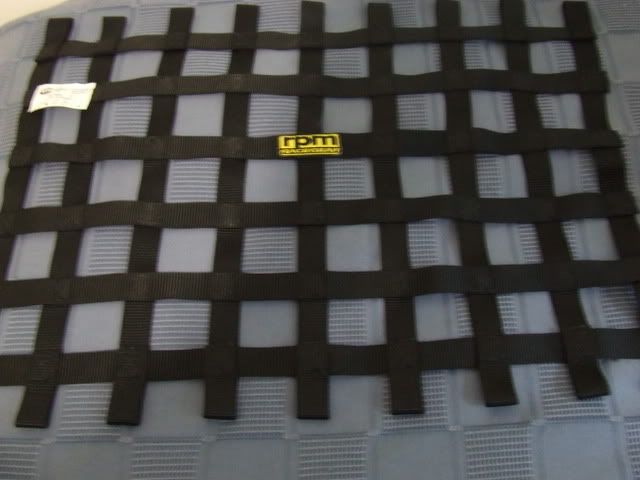
Spent some more money yesterday:
RPM Window Net -$25
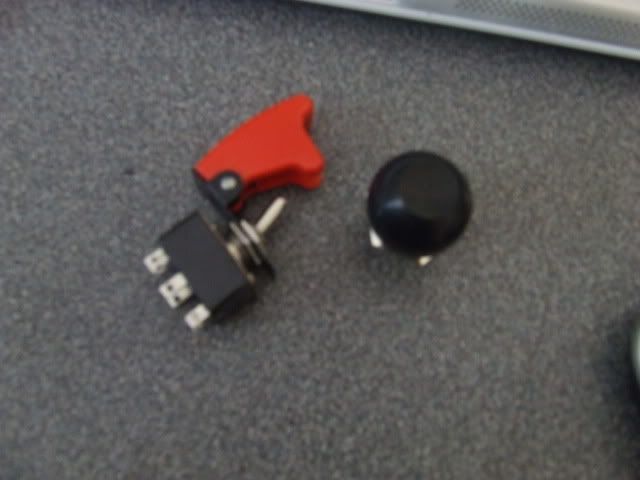
Waterproof momentary Push Switch (for start) - $3.95
NOS switch (toggle siwtch with aircraft quick-off cover) - $5.95
The switches will be mounted on a switch panel next to the seat with the battery isolator i previosuly bought. The column switch is too far away (along with the dash) but as Dave mentioned in his build thread having to turn the key switch back to ACC before restarting can be a pain in the heat of the competition.
Had thoughts about putting the net on the door so it was out of the way for getting in and out, while it is within CAMS regs, I dont fancy trying to get out with the car upside down, So will be working on the conventional method of mounting to the cage. Now to find a solution that doesn't get in the way too much.
Apart from this everything in preparation for the cage going in properly is progressing well. The main hoop feet are made and ready to be putin after the cage is in and together. All the rust repairs and patchs have been handled. Just the front feet and any paint/seam seamer that will need removing is left.
"I'm excited" as the late Big Kev would say.
Weekends progress was slow and steady. Found a bit more rust on the right hand guard side that still needs to be fixed. But the back half of the cage is in and welded together. Didn't get to the front half yet. And the camera batteries died so i dont have any pictures.
forgot to add....i cracked the wirewheel out again and took the foam off the c-pillars, musta been another 0.5kg of glue and sticky shit i had just left there...."eh that can't be too heavy ill pull it off later"
HAHAH i think i classify as harcore? That will comeout once i get some power back on the windows to put them up.....considering running the power windows just to get started, making the window winders work is going be painful and take time i dont have.... :(
The rust in the front right corner is sorted now...pics to come of course :)
Going to mount the seat tonight and pop some holes for the seatbelt reinforced mounts, which are also made, just need to be put on the car.
So status:
- Clutch, brake pedal sorted
- Know how we are going to sort the accelerator pedal and the mount has been moved accordingly
- Seat mounts are in
- Rust in front corners sorted
- holes in floor and rear bulkhead are patched
- the shell is ground up and prepped where it needs to be
- main hoop feet are made
- front feet are all but done, just need some tweaking
- seat belt mounts to go in tonight
- steering sorted.
So thats pretty much everything driver related? Guess we are ready to weld the front half of the cage in and together!!! I have hadf a nice lil break and ready to hit hard again. The main struture of the cage should definitely be sorted this weekend, hopefully will finish all the tag plates and associated bits as well. Which will leave me ready to start getting the car rolling again. Still need to reinforce the rear strut towers and make the rear shock mounts yet, but the rear suspension is ready aside from that.
Front half of the cage is joined to the back...everything is nipped up except the door bars...top of cage painted and cage hoisted into position.....
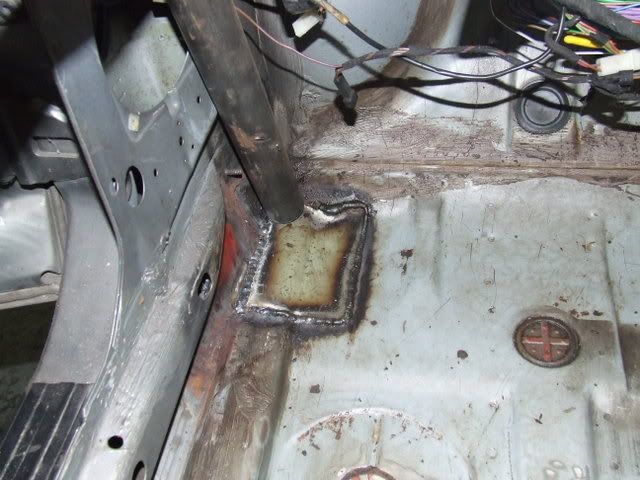
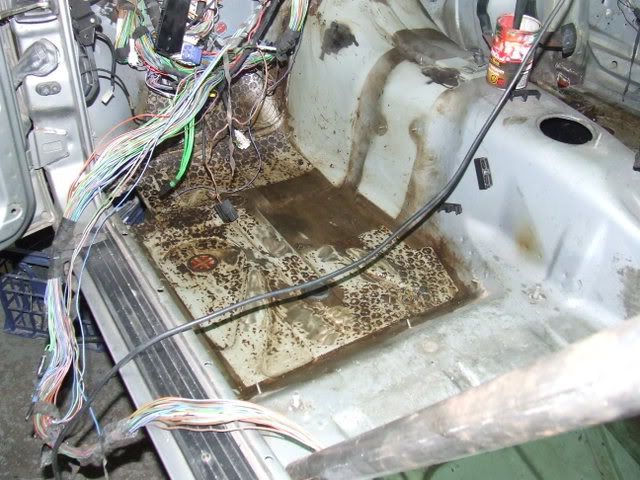
floor in the front has been replaced....
floor in front clean.....got the super duper thinners out....contact adhesive on rear bulkhead still wont budge thou :(
put front leg feet in tomorrow, door bars, then weld cage to feet.
tag plates are punched rolled ready to be trimmed to fit and welded in.
basic summary.
80% done 50% time left WOOHOO! optimistic goal is to have the interior done and painted tomorrow evening :) thinnners is good shit in closed environments :yesnod and the back seat requires a degree in planning and some form of advanced experience in gymnastics for entering/exitting.
Thanks Glen.
Yesterday was a very busy day. I didn't get to my optimistic goal (paint), but there were also several details i had forgotten about which prevented this anyway.
All the tubes are in and welded, just a lil touch up to do on the main hoop bars (haven't welded round the back where it is extrexely difficult to get to yet), going to put a few stitches along the tops of the doors inbetween the front legs and body metal, lil spot to do on the dashbar under the passenger dash mount. And I have half welded the passenger door tacos on at the cross intersection, whilst i still need to make the drivers lower taco and weld.
Aim is to finish the welding over the week. Look at putting the sunroof patch in (if this doesn't happen i wont paint that general area yet. But by the start of next weekend I want the cage sorted and atleast the back half of the interior painted out (some of which will depend if we can find a piece of alloy to make a rear parcel shelf cover)
Haven't uploaded all the pics of this weekends mayhem yet but they are there ready to rip.
Once the cage is completed focus will be getting the front crossmember ready (swaybar mounting mods) fitting all the rear suspension (those RSM's aren't done yet!), fuel tank and lines, clean the drivetrain and engine up and fit!
Have a tentative aim to have the car on its feet (the front struts wont be done yet) with the majority of assembly done and running by the start or first week of march. Going to be pushed for time, but if it doesn't happen its probbaly won't happen for a while (uni starts up in march).
I'll do the pictures tonight
ok today was fairly productive for an arvo after work. The left side of the car is now done, finished the tagging on the main hoop, front legs and dashbar, finished around the main hoop foot, finished the door bar reinforcing.
Now to the pictures from recent times:
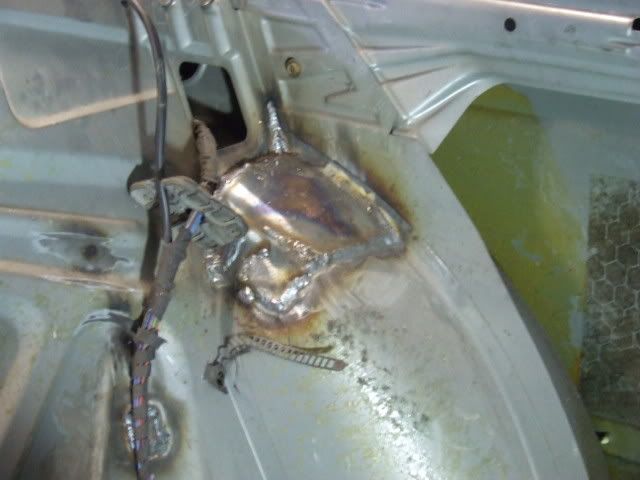
Rust hole I repaired near fusebox (obviously not fixed in picture):
RPM Window Net:
Ignition Switch and Start Button:
Accelerator pedal gimmying:
75x50x3 Seat Belt Pad:
Seat Belt points on drivers side (fifth point to be added):
Seat Belt points on passenger side (fifth point to be added):
Front left rust repair:
Front right rust repair:

Cleaning the floor up before final installation of the cage:
Cage on an angle, welding the top/front half up:
 Last edited by e30guydownunder; 12-09-2009, 04:09 PM.
Leave a comment:
-
After my little play with the door bars i am so glad we paid a lil extra and got the cage bender to notch the majority of the cage. Simple notches don't take too long, its just getting your head around the complex ones and how you can use the notcher to get the result that takes forever....
i managed to jerry-rig the notcher to get more angle out of it simplifying the doorbar process a heap. might snap a picture of that when im doing the drivers side. The only thing limiting the angle of the notcher is the depth of the holesaw, so i spaced out the tube for the angle anyway and did the notch bit by bit, cutting out the waste material when the holesaw bottomed out.
it might be a lil dodge but it works and sure as hell beats doing it by hand with the grinder, much neater and quicker.
It does effect the steering knuckle and this is something i need to double check yet. It shouldn't be an issue thou, dave is running around with a spaced column, and the angle doesnt change a hell of a lot anyhow. Long lever, small angle change = big change in height of wheel
The steering wheel with the low and far back driving position feels a hell of alot better than my road car. Almost how its meant to feel
I'll get back to you guys on the steering knuckle.
Yeh mate, the nuts were just lying around. I figured they were quick cheap and adjustable. I will be making proper ones no worry there
The car wont be on the road quickly. Im hoping to make the bimmer nats, half way thru a weekend it seems achieveable, but afterwards you sit and thing i have to do this this this this this this.....its best not to think about everything there is to do too much and just work as best i can. I'll try get there, if i make it good o.
I will be able to check the knuckle soon, within the week, thou.
Been in the shed this arv after work...came home enthusiastic for once must be the proximity of the weekend!
I've booked the shed out for the weekend, kicked dads six out and took the car off the hoist (onto stands) so i could get in the drivers side. Got the door bar mocked up and did the tube from the main hoop to front legs.
Dad also finished making the mandrels to roll the punched holes in the taco's and tag plates. and we had a play with the tacos and one of the tag plates.
The drivers side is looking pretty nice, all that i need to finish it is the rectangle taco i mentioned before.
Pics:
Jerry rigged notcher for more angle:
cut a bit out and keep going:

After some initial grinding and a clean up:
Freaking good fit!!!:

top bar sitting in position:

notches are pretty decent:
hey presto more bars...yes the vertical bits are pilferred from the other side, need to make another set yet:
Also threw in the bar from the hoop to front leg like so:
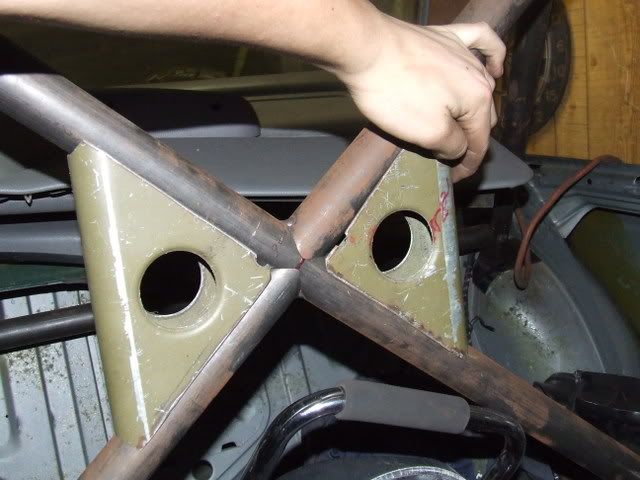
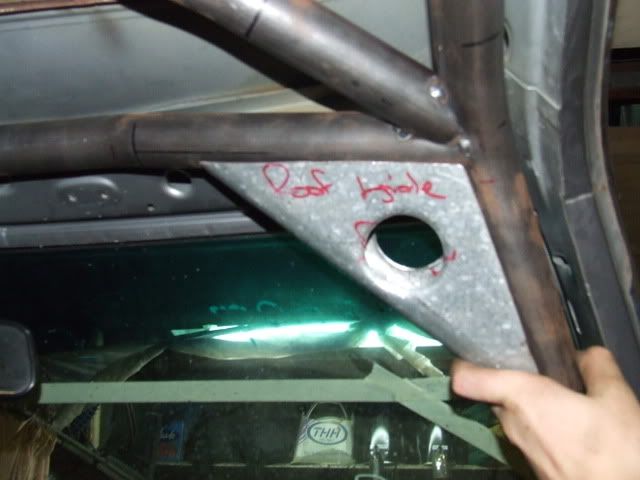
this is where the punched/rolled tag plates will go after some trimming:
punched rolled tacos in situ:
the office...quite a fair way back:
what seat?:
the large roll set:
Ready to roll:
Taco is rolled:
One of the disadvantages of our big feck off single post hoist is these forks, they prevent the removal install of the gearbox, exhaust and tailshaft, also make the fuel tank slightly difficult. but more importantly unloading/loading cars takes up both bays of the shed.
We do plan to sink the thing in the floor on the right bay which will negate the issues with low cars as well.
I'll prolly throw the car in the middle of the shed tomorrow arv in preparation for a big weekend. Aiming to get the shell and cage prepped for final welding. This will require the making of the cage feet and some other bars not yet made. as well as grinding all the paint off the shell where i plan to weld the cage....will also have to remove the zinc off the taco's that i made out of galvinised steel (what we had).
Anyway, lets see how we go, way past bedtime, guess i wont be getting to work early.
and then there was more
Hey thanks for the heads up Dave i had completly forgotten about those. I can imagine the shit fit when i realised this after fully welding them in. Will be back in an hour or two with minimal pictures.....visually today we went backwards.
The cage is back out of the car (in two big pieces however) and we have been preparing things like the rear firewall and getting the feet for the cage sorted etc.
Thanks for the tip alan
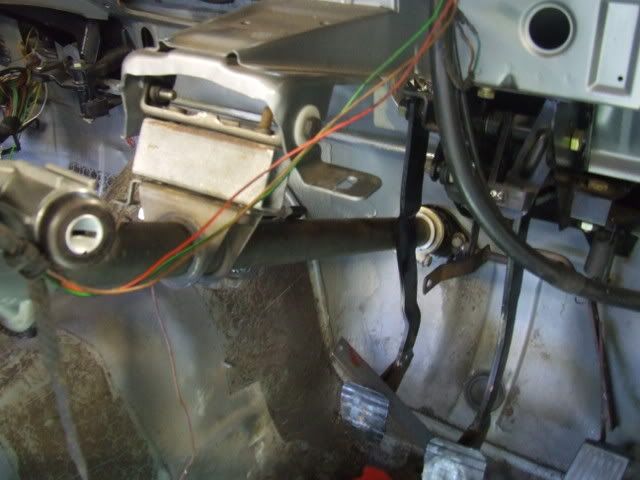
as always i didn't get as far as i wanted...moving the accelerator pedal back 50 has proved difficult. Still working on the solution but anyway heres how i progressed today.
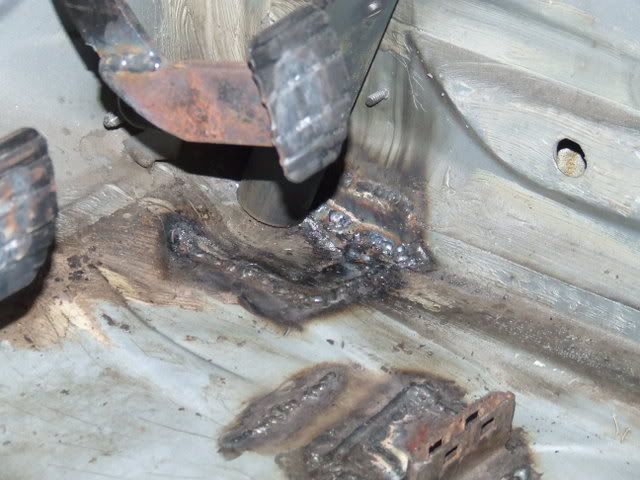
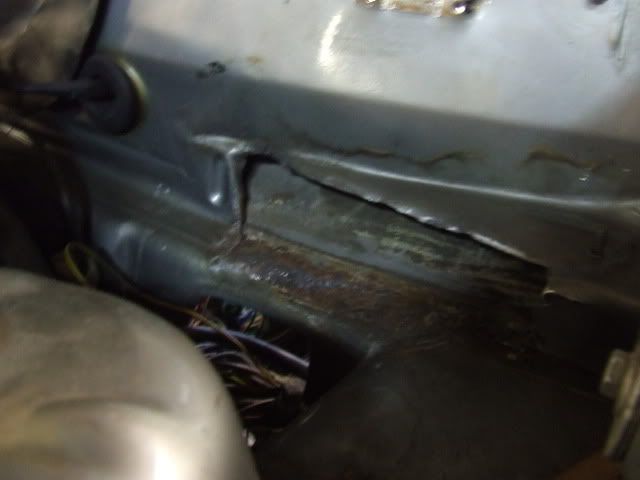
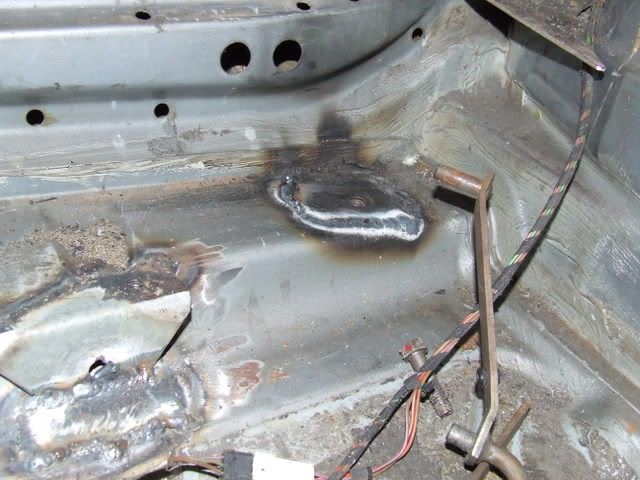
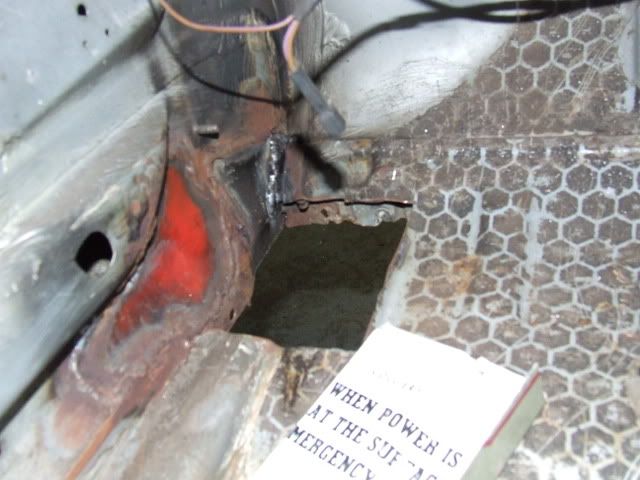
sketch as rust repair (not ground clean):
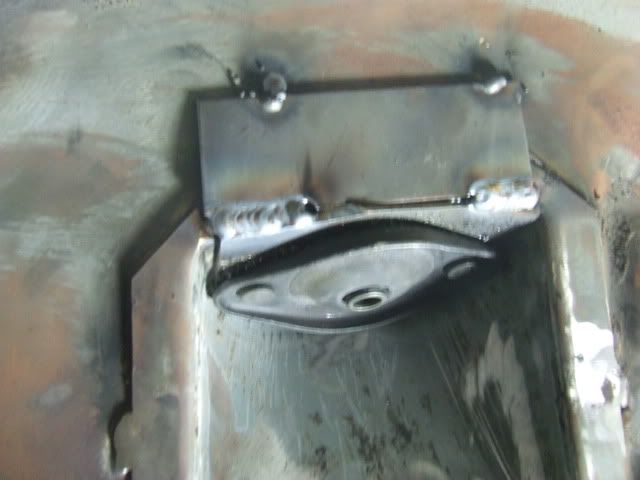
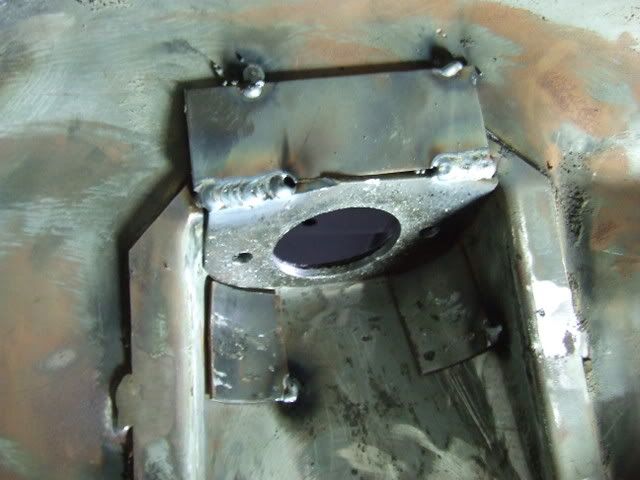
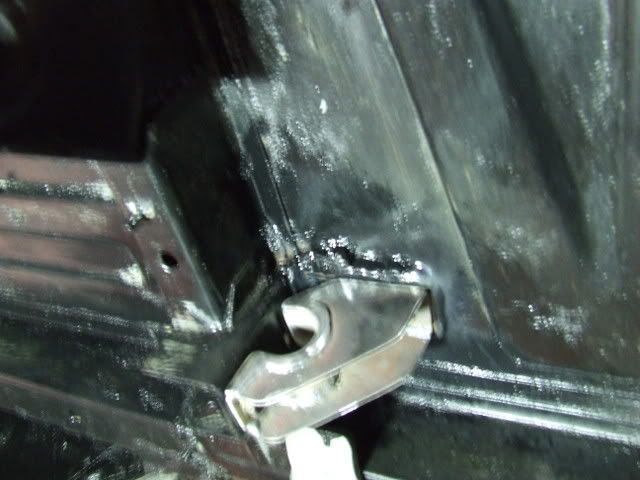
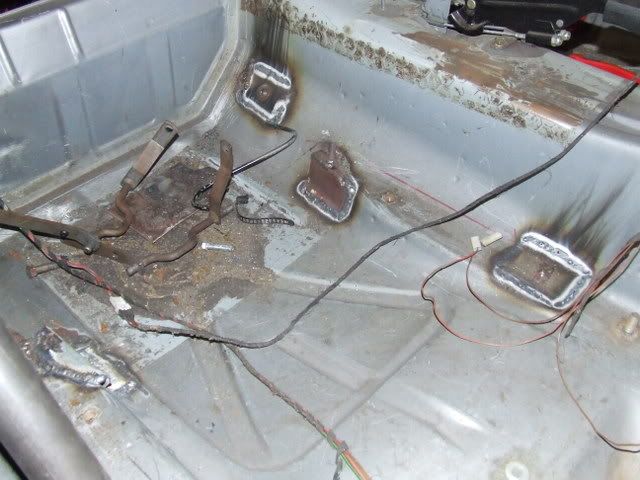
passenger backleg foot:
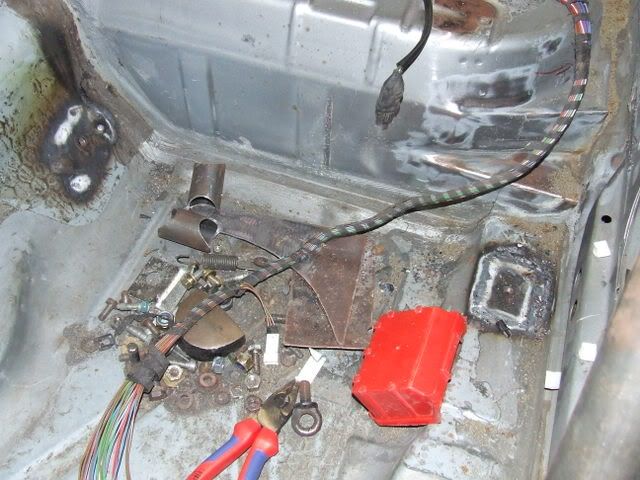
the rear bulkhead (needs some more grinding):
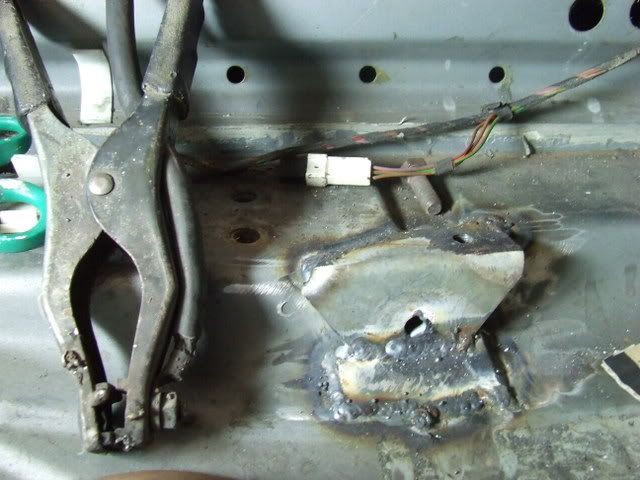
driver back leg foot in and cleaned up:
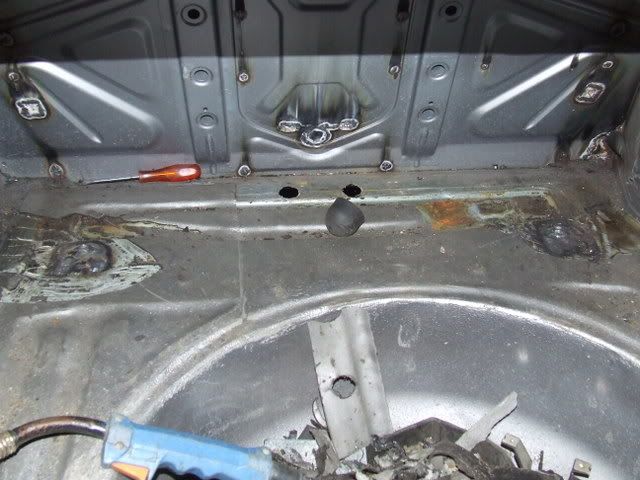
rear seat mounts in:
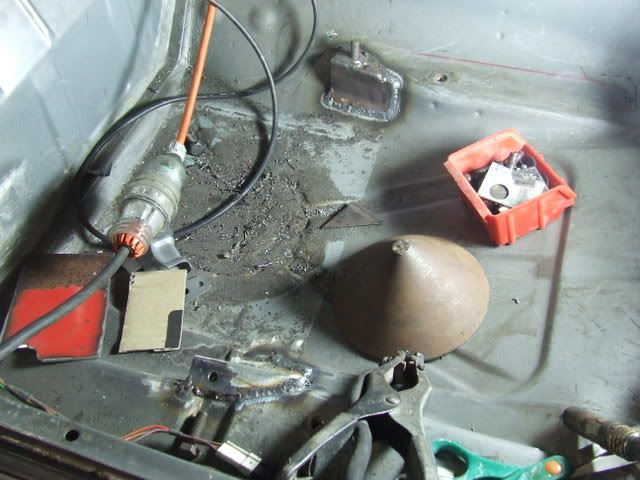
wasn't enough room on the tunnel side, so used a stud (bolt):
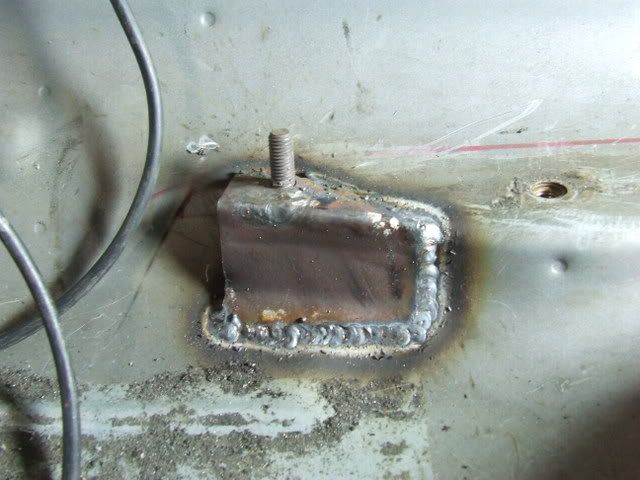
Driver side rear mount
the brake and clutch were considerably easier to reposition compared to the accelerator, yes this will slightly modify the acting ratio (barely noticably thou):
Proper column spacer (40mm RHS) no i didnt put the coupler in this weekend sorry guys:
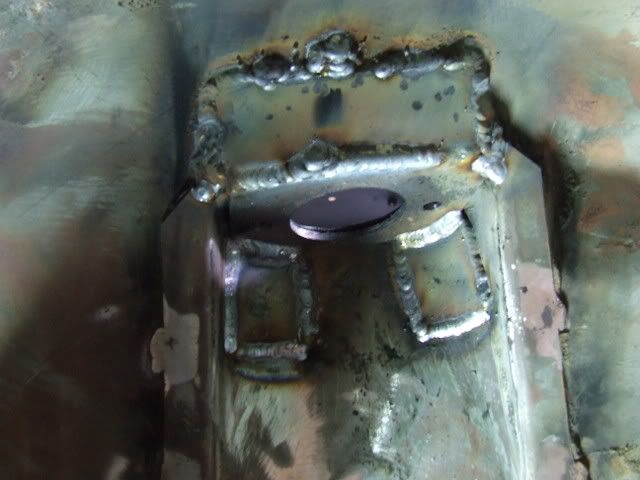
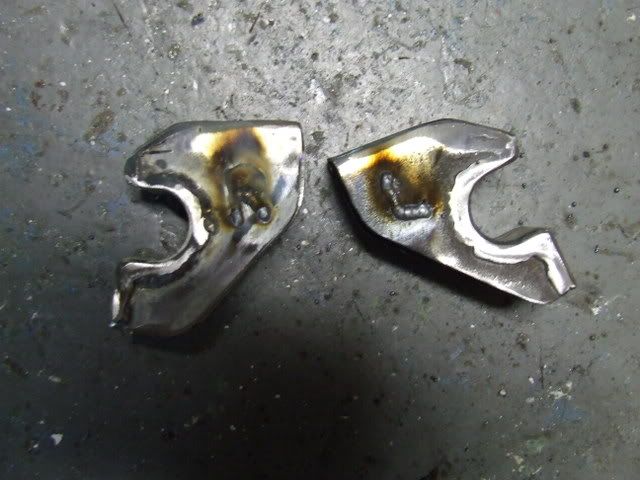
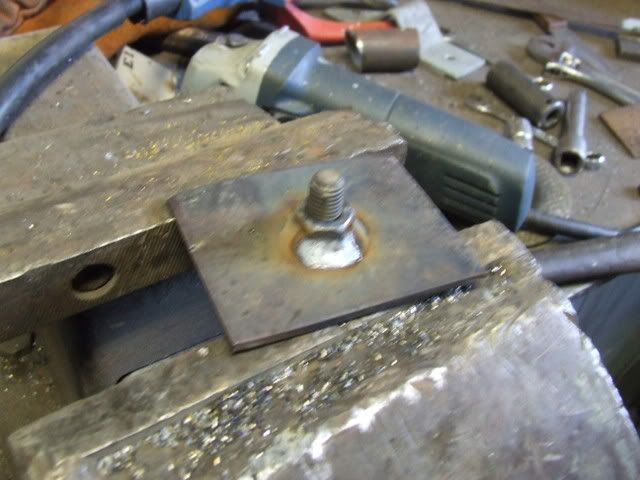
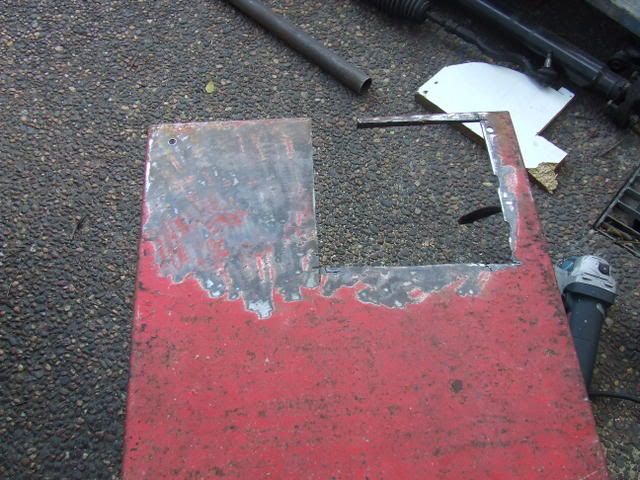
Template for the main hoop feet:
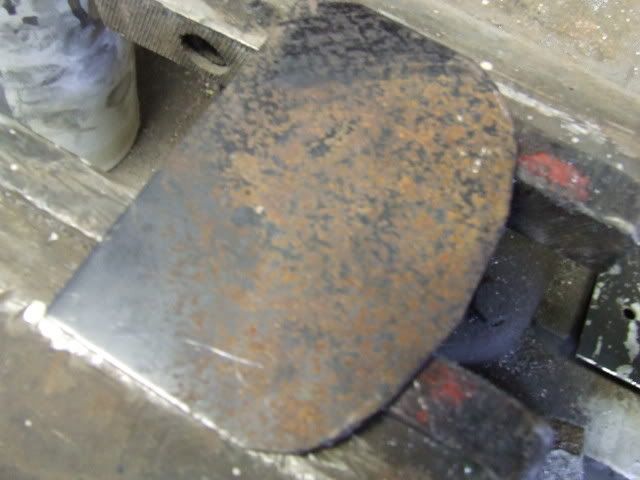
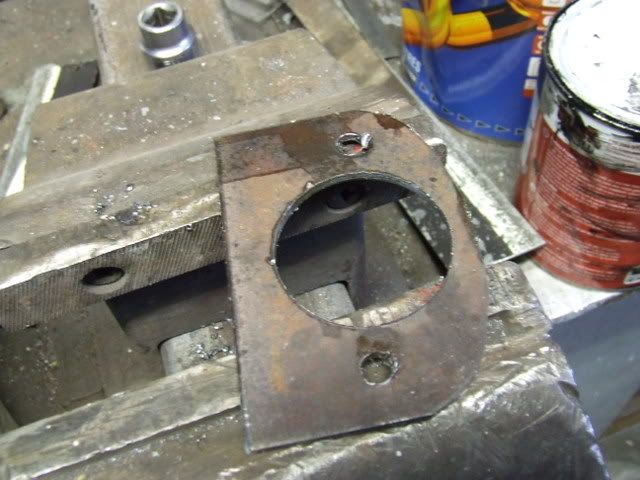
Main hoop feet in steel (used the process detailed below to cut them out)....SA of a bit over 14000mm^2.....well over the 12000 required:
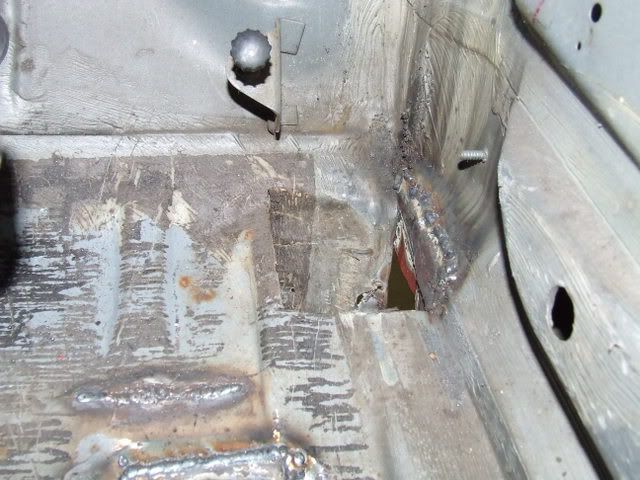
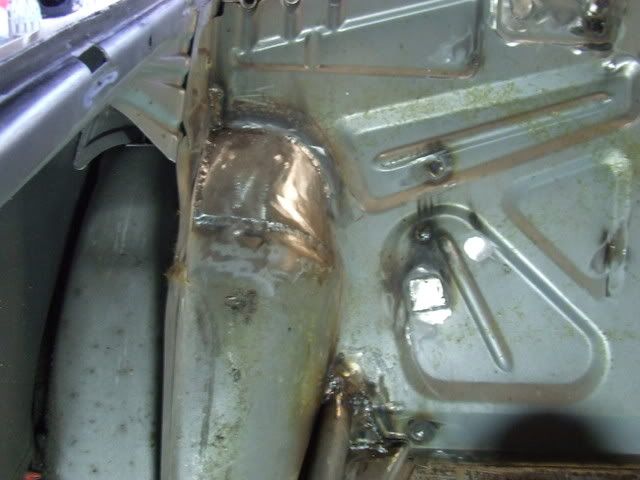
rust repair on passenger side front corner:
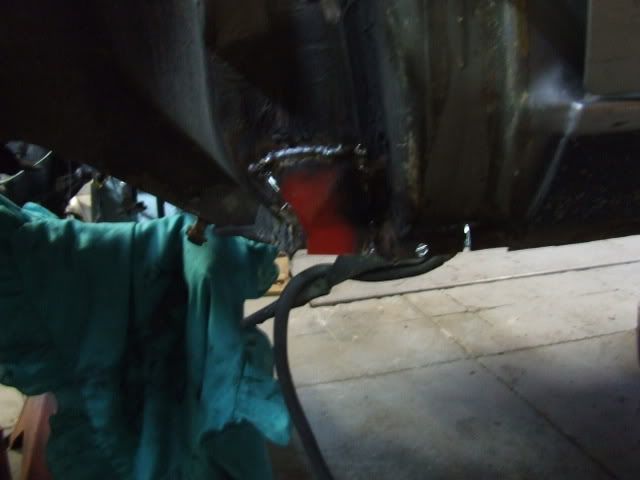
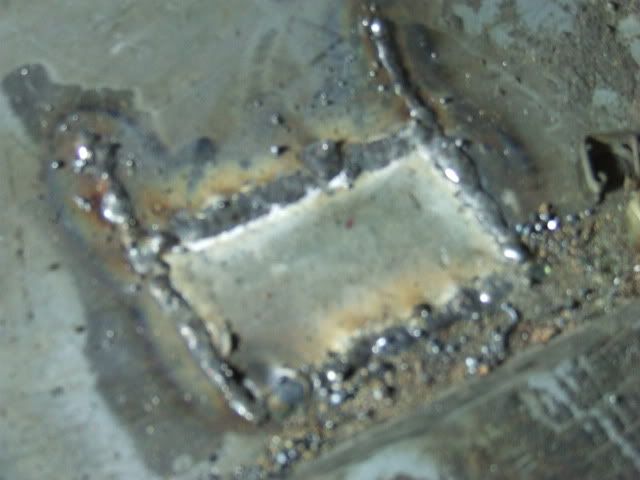
And the inside edge that was gooooooooonnnnnnnne!!!! is now back in existance
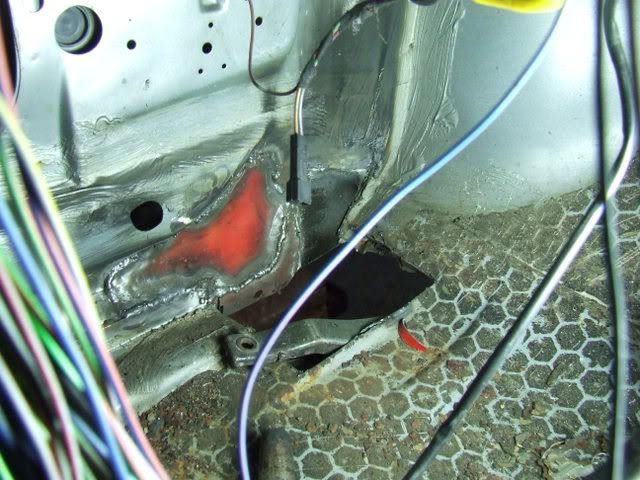
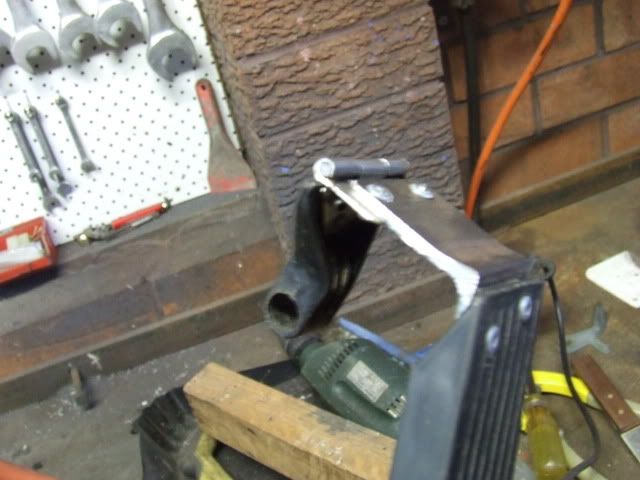
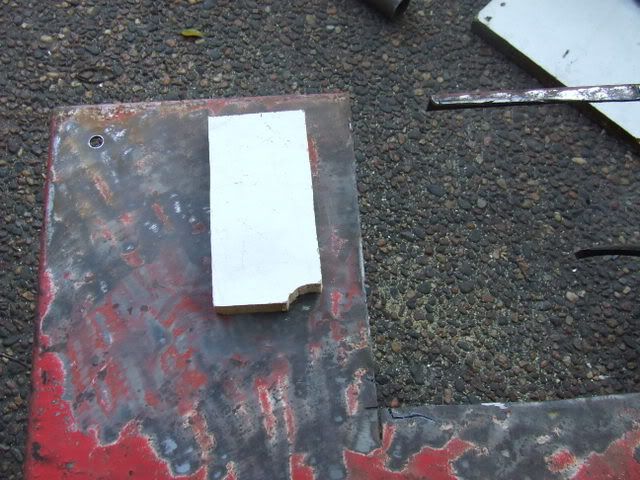
Plate ready to be cut:
Template for plasma:
remains of plate (freebie steel):
going to do my best to get everything sorted for the weekend so i can get the cage over and done with. if progress is looking good (i.e. sort that damn accelerator pedal) i'm going to take saturday arvo off and go race the buggy. so keen for a drive...will help up the motivation a bit too, if i can get out there
 Last edited by e30guydownunder; 12-09-2009, 04:06 PM.
Leave a comment:
Leave a comment: