M20B29 w/ Triple Webers into my '71 2002

Collapse
X
 
  • Time
  • Show
Clear All
new posts

  • 2mAn
    replied
    2018 update at sometime please [emoji8][emoji8]

    Leave a comment:


  • SkiFree
    replied
    Originally posted by deutschman
    Bad ass as always Andrew! Happy I checked back in again. Its getting close.
    Hey, thank you! Glad to see you are still alive, I sincerely hope all is well with you.

    Originally posted by 2mAn
    this sucks... your older pics are dead
    Yeah.... thanks photo bucket. I'm going to have to transfer the older pictures to flickr in the next month.
    -------------------------------

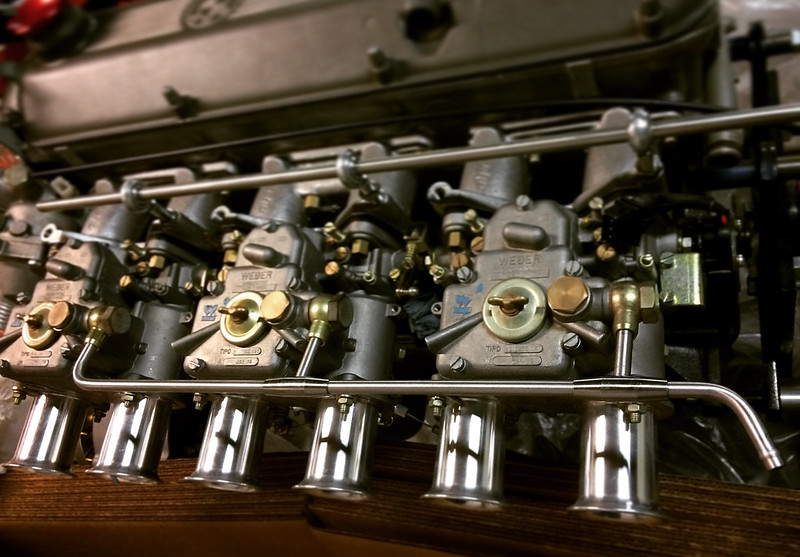
    Last thing for the intake system is the fuel rail. I've been making fuel rails for the M10 for a bit now (see here https://www.bmw2002faq.com/forums/to...er-sidedrafts/), but am now playing around with M20 options.

    Here's the first version mocked up for a friend. The next option I'm playing around with will have the rail mounted to where the heir-joint linkage would have gone with rubber lines going to each carb. It will be a more refined version of what you can find on some Datsun Z-cars. Inspiration is also coming from the old Aston Martin and Ferrari systems.


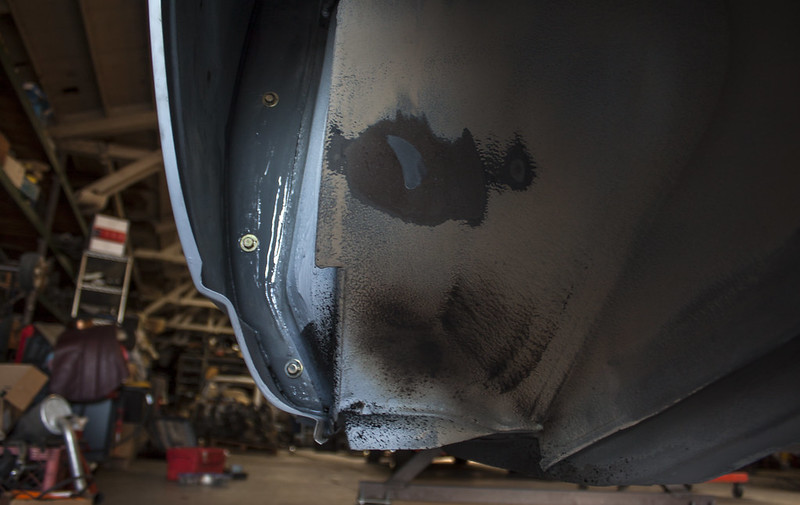
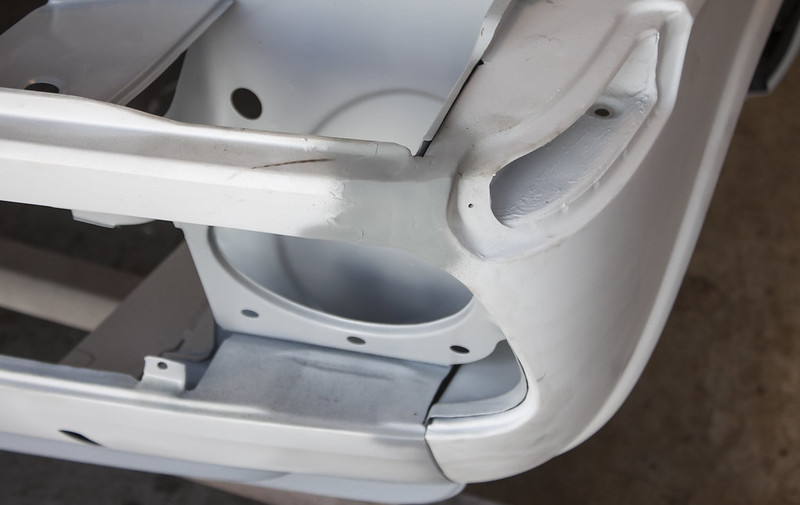
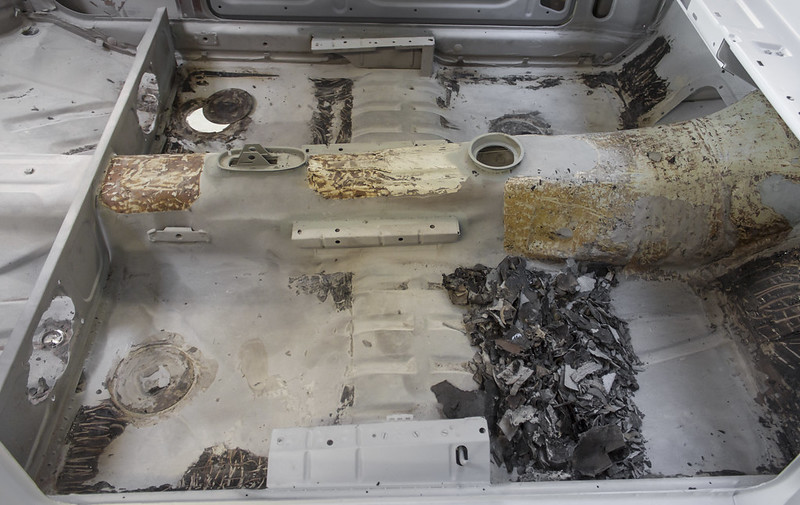
    On the bodywork side, I've knocked out the floor drains. Seam sealing where needed. Will be laying down epoxy primed shortly after thanksgiving.

    Leave a comment:


  • 2mAn
    replied
    this sucks... your older pics are dead

    Leave a comment:


  • deutschman
    replied
    Bad ass as always Andrew! Happy I checked back in again. Its getting close.

    Leave a comment:


  • 88SuperETABD
    replied
    Wow!! Nice andrew. I need to give some TLC to my body. But want to get it running first. Then will pull everything back apart and paint. Great work! Can't wait to see it with paint


    Sent from my iPhone using Tapatalk

    Leave a comment:


  • MrBurgundy
    replied
    Really awesome stuff here... wow

    Leave a comment:


  • bradnic
    replied
    Artist.
    Love.

    Leave a comment:


  • 2mAn
    replied
    Originally posted by SkiFree

    Maestro, the man himself. By all accounts, an artist.

    He seems like a man who would really enjoy a Jarrito. Orange is my personal fav

    btw he is exactly as I pictured him

    Leave a comment:


  • SkiFree
    replied
    Originally posted by ForcedFirebird
    Leaves an undesirable residue for paint prep which acetone fixes, but ~$2.8x/gal local gas prices vs ~$16/gal for acetone/lacquer thinner is a no brainer.

    EDIT: ...and I meant the most recent removal. Noticed the scrape marks, freezing it tends to leave a honeycomb pattern.
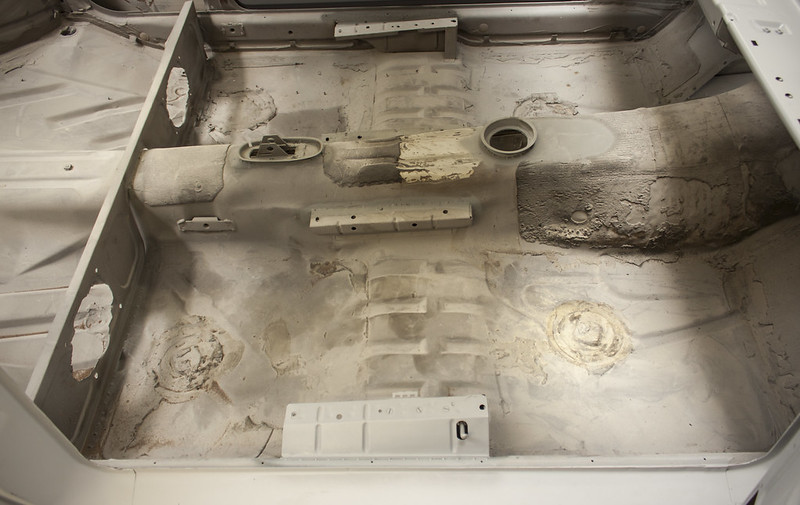
    On the stuff stuck to the tunnel, I just used a scraper. No heat. The floor pans needed that bit of heat. Also, last night I cleaned up the residue with gas followed by the acetone via your suggestion (holy cow that acetone cleans the gas right up).


    -------------------------------------------------------------
    OK, well we had Fabrication Day #2.


    Fender rust is now repaired (inner pillar mount sections on both sides and that piece on the upper shelf of the passenger side fender.


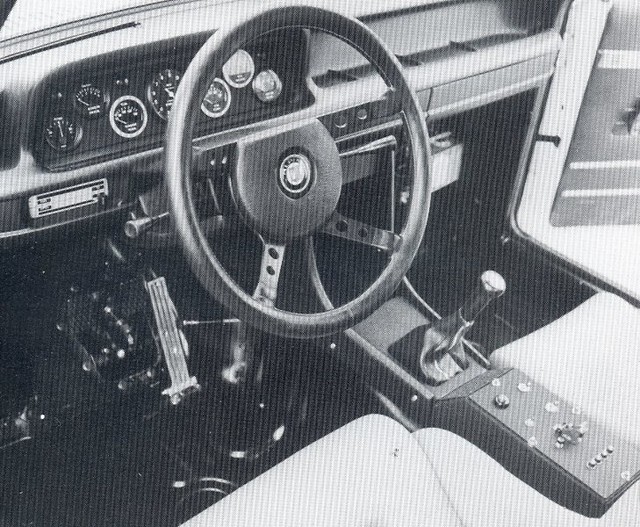
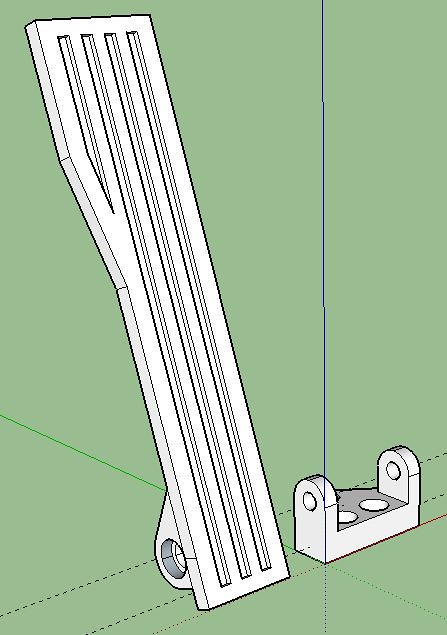
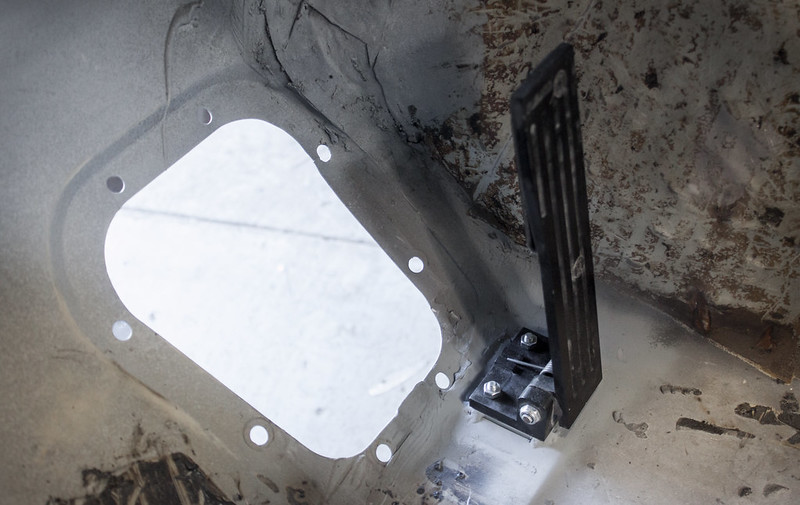
    In the inside the stock "accelerator nubs bracket" was ground off and the IE pedal reinforcement plate welded on. It has been so fun to go from dreams to reality.


    With the fabrication work on the fenders finished, the fenders were lines up and welded back in place. We then rolled the chassis back over to Maestro for a little more bodywork.


    Maestro, the man himself. By all accounts, an artist.


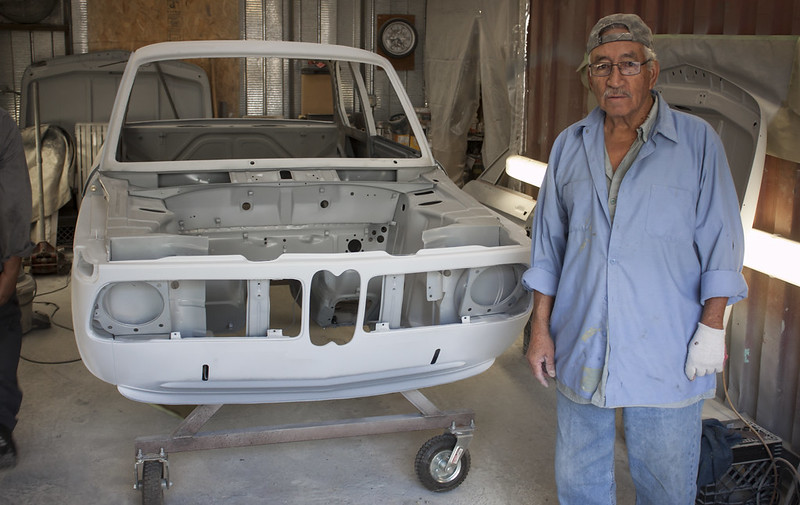
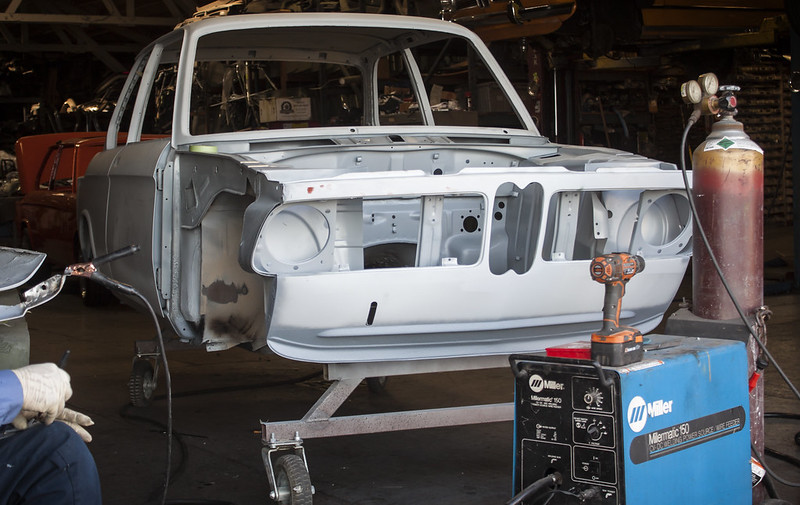
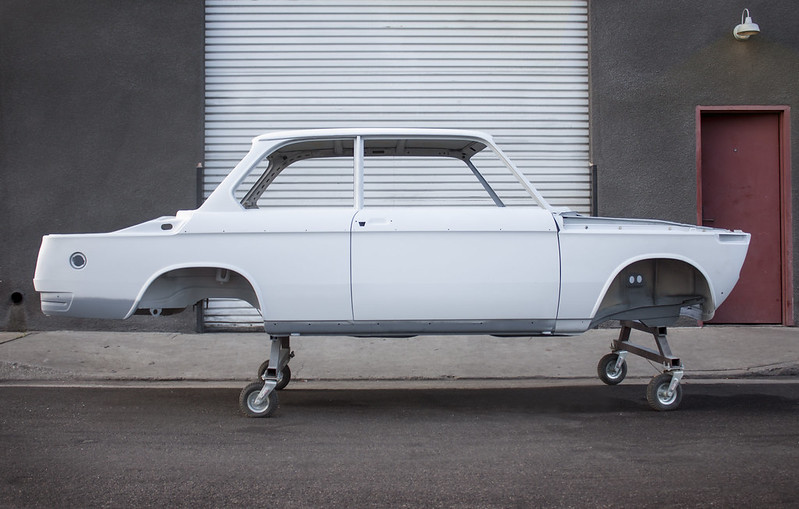
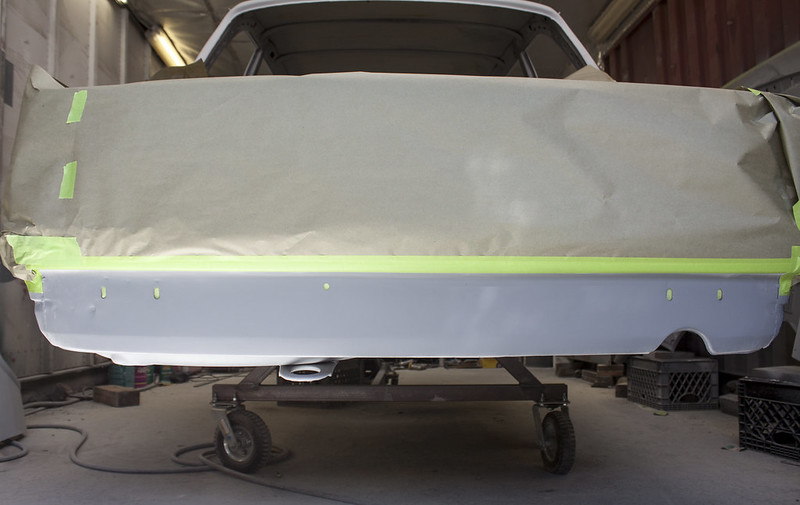
    The chassis is now %95 ready for paint. The following projects still remain.
    1) cut hole for oil cooler
    2) weld in a reinforcement brace at the front.
    3) clean up the underbody, wheel wells, and spray on Wurth underbody coating.

    Last edited by SkiFree; 10-14-2017, 09:19 PM.

    Leave a comment:


  • ForcedFirebird
    replied
    Originally posted by SkiFree
    Jesus taught me that trick a few days ago.
    Leaves an undesirable residue for paint prep which acetone fixes, but ~$2.8x/gal local gas prices vs ~$16/gal for acetone/lacquer thinner is a no brainer.

    EDIT: ...and I meant the most recent removal. Noticed the scrape marks, freezing it tends to leave a honeycomb pattern.

    Leave a comment:


  • SkiFree
    replied
    Originally posted by ForcedFirebird
    What did you use to remove the tar?

    I have used both the dry ice and heat methods. The dry ice does a nicer job, but found you must be very patient and let the tar really freeze. Heat makes it come up quick, but things get sticky. Plain old gasoline is the cheapest method to removing glue in my experiences.
    Yep. I did the bulk of it with dry ice before media blasting, got the last bit of it with a torch (heat gun would have been better).

    As you say, gas works great! Jesus taught me that trick a few days ago. Got it in a spray bottle and it works like a charm.

    Leave a comment:


  • ForcedFirebird
    replied
    What did you use to remove the tar?

    I have used both the dry ice and heat methods. The dry ice does a nicer job, but found you must be very patient and let the tar really freeze. Heat makes it come up quick, but things get sticky. Plain old gasoline is the cheapest method to removing glue in my experiences.

    Leave a comment:


  • SkiFree
    replied
    Originally posted by LateFan
    Such nice work.
    Did you ever consider a non OEM center exhaust like Steve's / Blunt's orange project car?

    The Pumpkin is crazy! Almost too perfect to drive. (Will it be driven?)
    I'd like to keep it with the factory side exit look, but a cool vintage Ansa double-tip would be tempting. The pumpkin should get driven, it will be living in Texas once finished.


    Yesterday evening I removed the remaining factory tar. Should have done this sooner obviously. Spraying/wiping a little solvent throughout the cabin this afternoon will clear up any remaining tar/glue smears.


    Leave a comment:


  • LateFan
    replied
    Such nice work.
    Originally posted by SkiFree
    Did you ever consider a non OEM center exhaust like Steve's / Blunt's orange project car?

    The Pumpkin is crazy! Almost too perfect to drive. (Will it be driven?)

    Leave a comment:


  • SkiFree
    replied
    Originally posted by 2mAn
    Amazing
    This isn't exactly the most glamorous part of the project, but I think it's the foundation on which the fun stuff can really shine.

    -------------------------------------
    10.4.17 Wurth Texturing


    With the media blasting and trunk repairs, a lot of the factory texturing was removed or in bad shape. The Wurth texturing gun was brought out to get back to the OEM look.

    Maestro has just finished the rear wheel wells in the trink, so starting there we masked off the spare tire well and gas tank opening.


    With that finished the final corrections to the trunk were made and then a coating of zinc primer laid over top.


    I don’t think the spare wheel well ever looked this good.


    Next to get shot were the rockers and front/rear lower sections.


    Up in the front Maestro has taken to smoothing out our fabrication work from Saturday. Namely making the small corrections needed to make the removable radiator support look like it could have been that way from the factory.


    Looking forward to FabDay #2 this Saturday. We should get that wrapped up, then underbody clean up (and texturing). After that, the paint booth is looking mighty appealing!

    If anybody is a bit tired of these “body-centric updates”... we’ve been reassembling “Project Pumpkin” right now. It’s pretty fun.

    https://www.flickr.com/photos/152898...h/36809369083/

    Also got a call from Momo yesterday, we’ll be doing some fun stuff with them next week.

    -Andrew
    Last edited by SkiFree; 10-05-2017, 08:52 AM.

    Leave a comment:

Working...