-
Just found this thread. Title is intriguing. But there's 6 six years and 25 pages of now unviewable Photobucket pictures. What did I miss? -
That is NOT a bad idea. I will do it before they go on the car.
I want to say 0 offset, however you can ask Eddie yourself, his Instagram is @carguyalpina
-------------------------------------------------------------
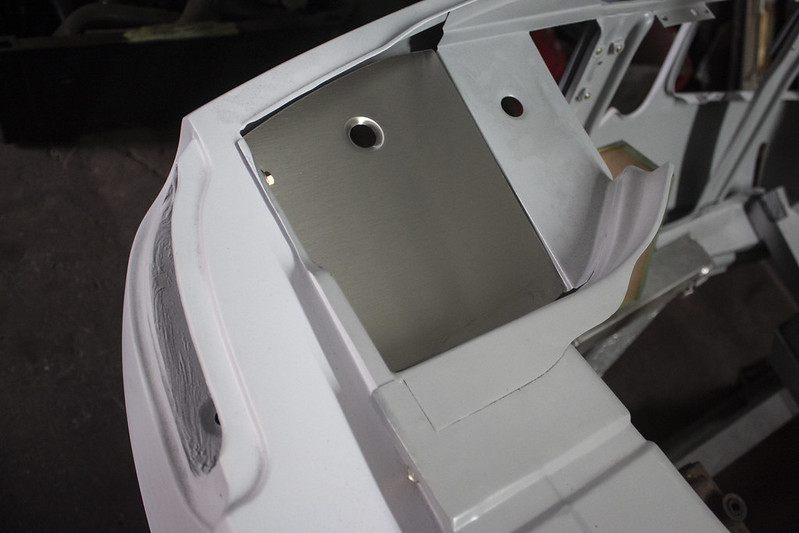
Final Fab Day 12.1.18
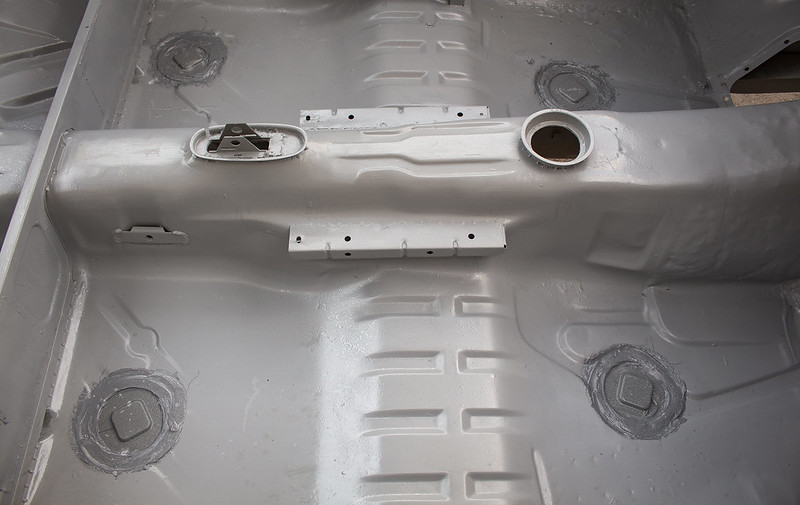
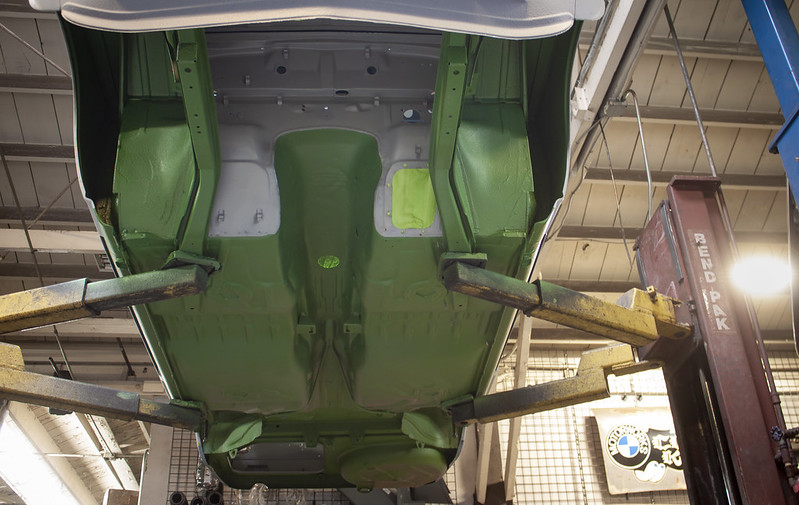
Well the epoxy primer took a lot of time to brush on by hand, but it finally got finished. This past Saturday I rolled the chassis closer to the welder and the last of the fabrication was finished. Namely, bolts were welded into the floor. They will act as studs for what will be the fuel/brake hardline retainer tabs. I’m actually using retainer tabs found on E30's/E28's for a clean setup. A couple wayward screw holes were welded closed, and the old speaker holes on the rear seat support were patched.
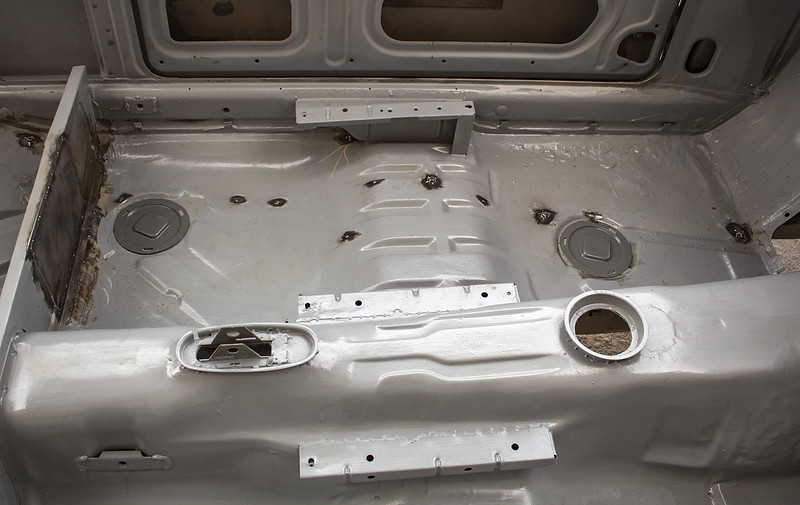

In the engine bay, I bent up a little extra reinforcement bar and welded it into place.

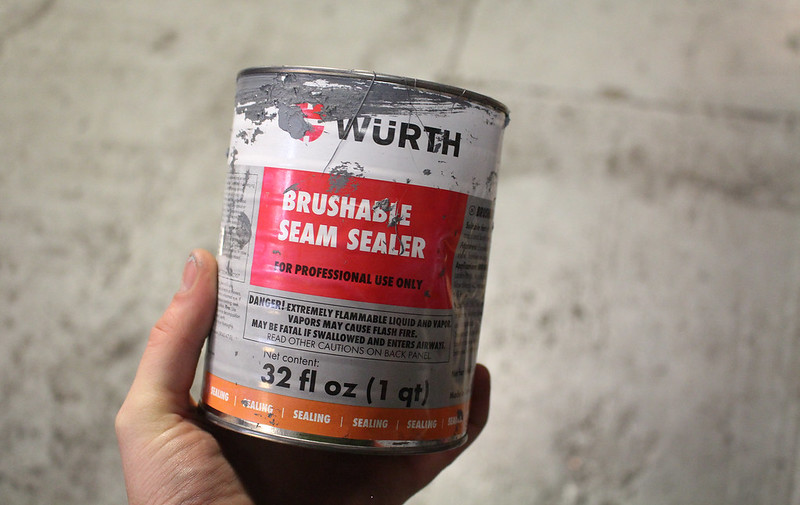
With that done, I used a brush and some Wurth Seam Sealer to close up the floor drain holes. Also brushed the inner front fenders, rear inner fender wells, and a couple other spots.
Undercoating 12.5.18:
I've been getting geared up for undercoating for a while! It's the first chance at seeing some color on the car!
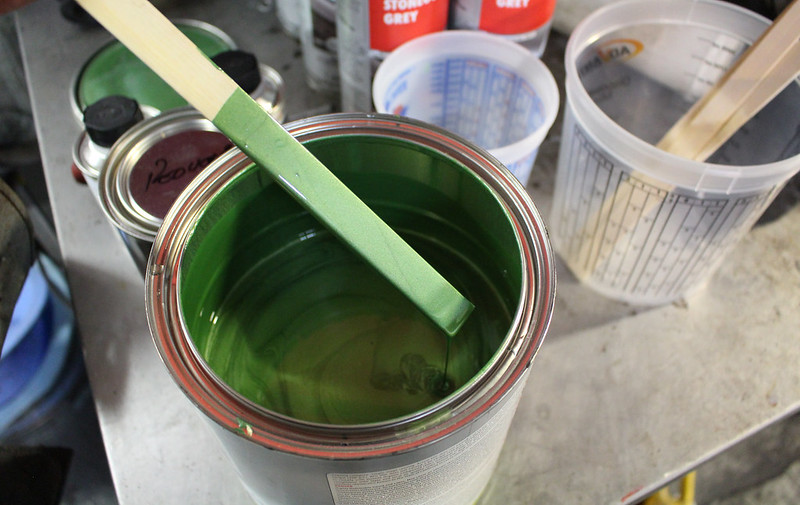
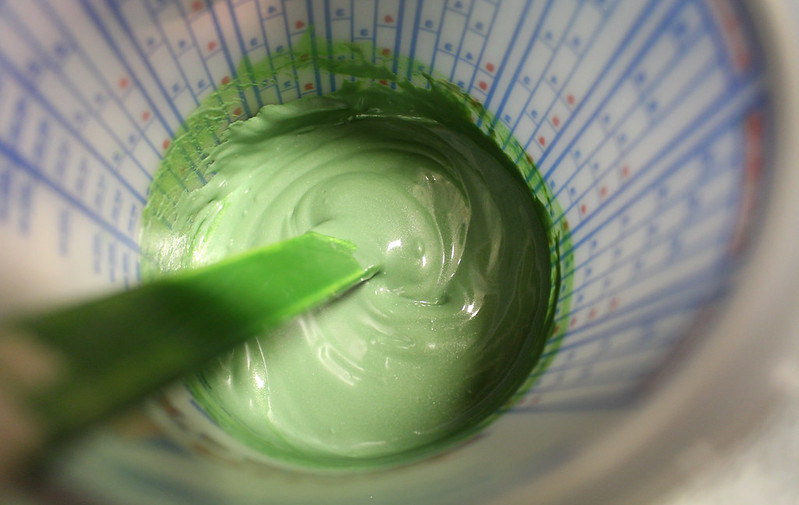
For the undercoating, I can't thank Wurth enough for bringing back the grey Stoneguard. It's nice to use because %30 water-based paint can be mixed in. So off to the store I went with a piece of Taiga sheet metal from a parts car. Between the sample and Taiga color code (072) the paint shop was able to mix up 2 quarts for the project.
This whole experiment was a bit of a fun learning experience for me, I haven’t done this kind of thing before and was a little nervous at the thought of a worst case scenario that included all $350 worth of supplies in the trash. The idea of coloring the undercoating itself is pretty straight forward. With the undercoat colored all the way through (rather than just paint over top of the coating), future chips/gouges are less likely to stand-out.
Masked off the car with some riveting Spanish newspaper.

Stoneguard

Paint! (mixed 4:1:1 w/ hardener and reducer)
The lab station
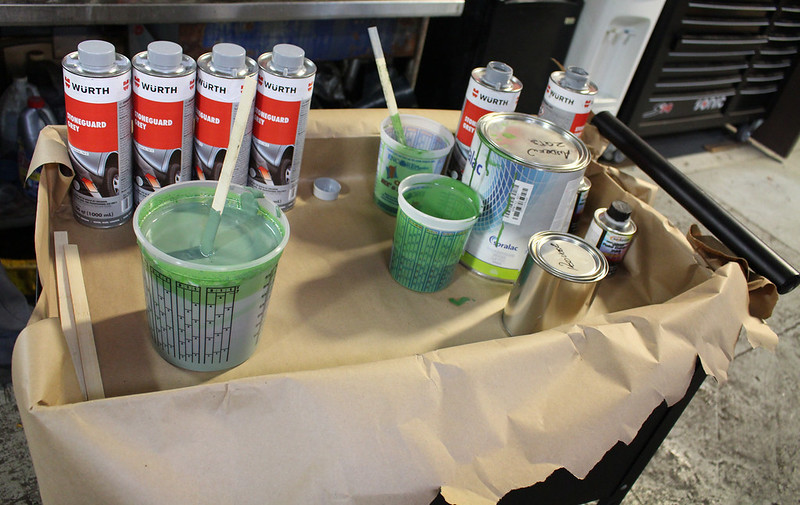
All mixed up! The batches were done 2 quarts at a time.
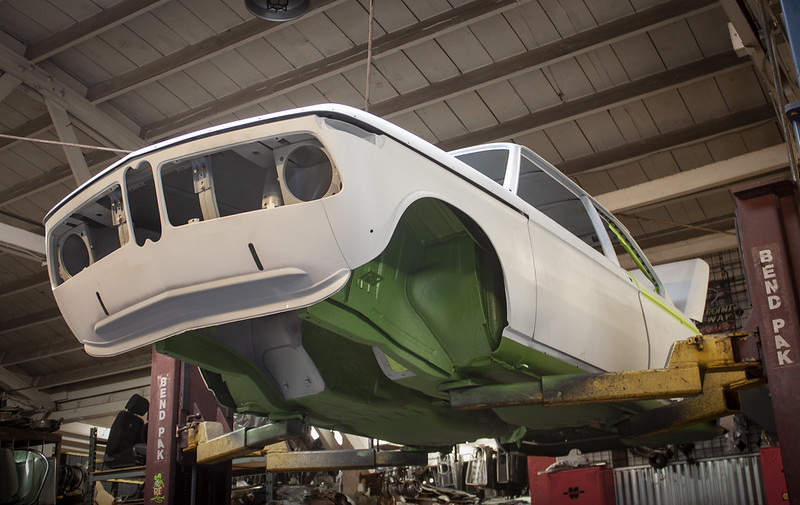
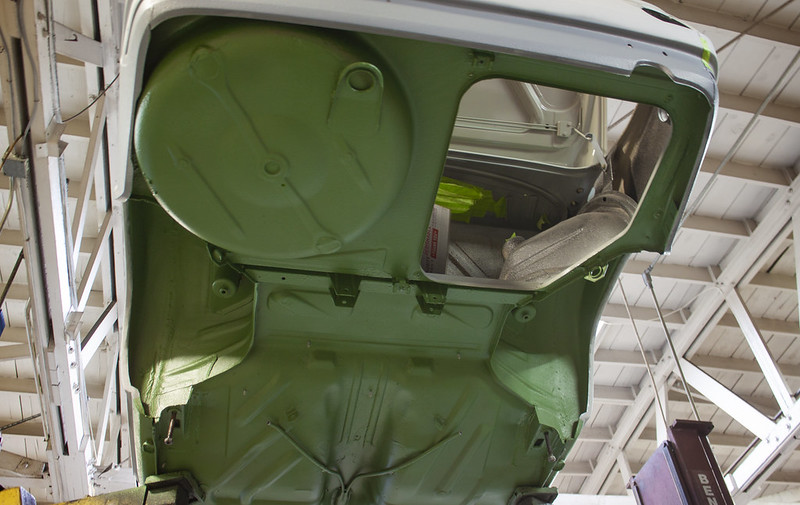
And ACTION! There was a little learning curve, the gun didn’t want to cooperate at first as the mixture was a little too thick. Once that was corrected by a little dilution, everything went great. In total the undercarriage received two-to-three-ish coats. All in, six bottles of Stoneguard were used and around a quart and a half of paint.
A little color peeking through, this was a pretty involved little session, so no photos were taken of the actual work being done.

I did a little touch up this morning and pulled off the masking tape! It feels fantastic to finally have some color on the car!
Leave a comment:
-
Wheels
What are specs on those Alpina wheels? 8 x 13 ? Offset, offset... "0"?
Would appreciate info.Leave a comment:
-
if you sanded the brembo logos so they are silver it would be sexual
pic is of the ones on my bike

Leave a comment:
-
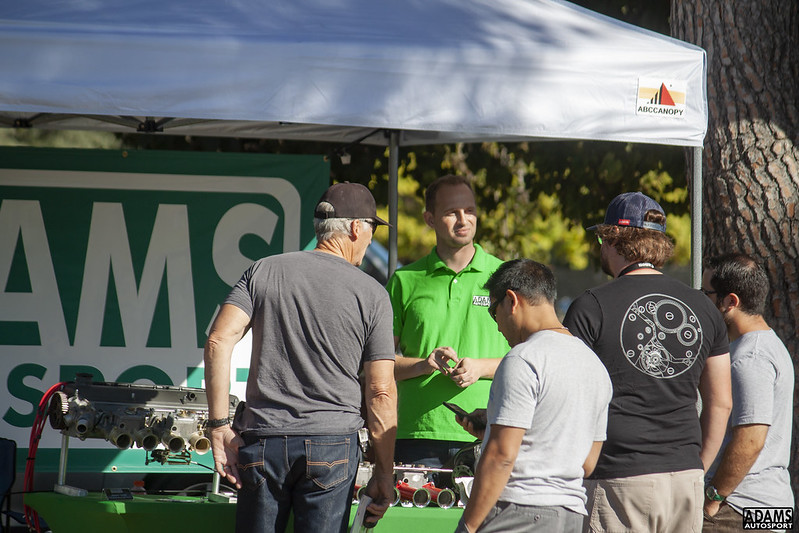
Also, it was fun to have a booth out at SoCalVintage for the first time!

Leave a comment:
-
More odds-and-end progress. The car still is not painted unfortunately, but have been working on some fun stuff.
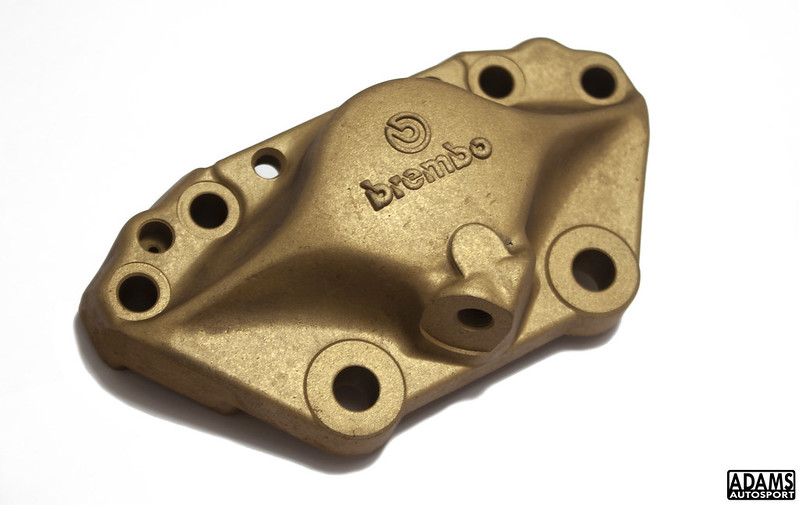
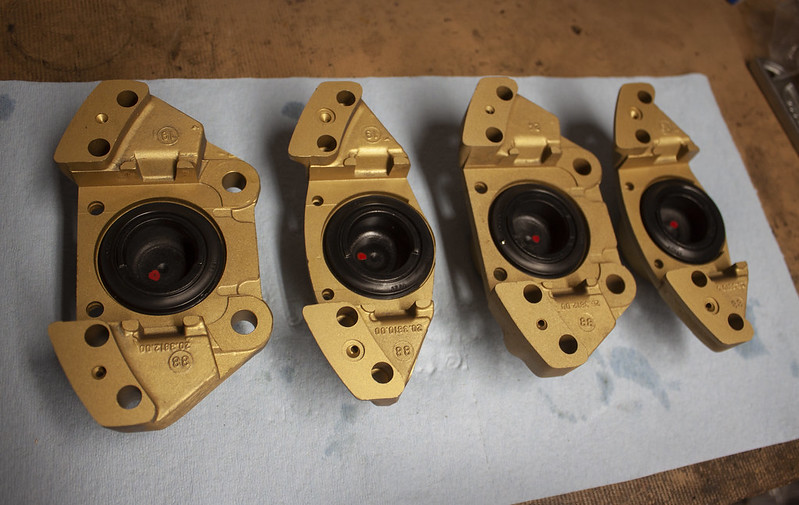
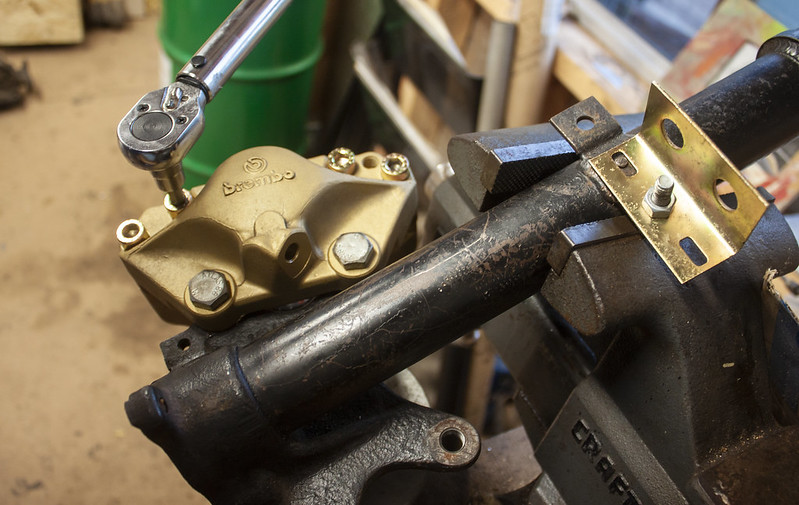
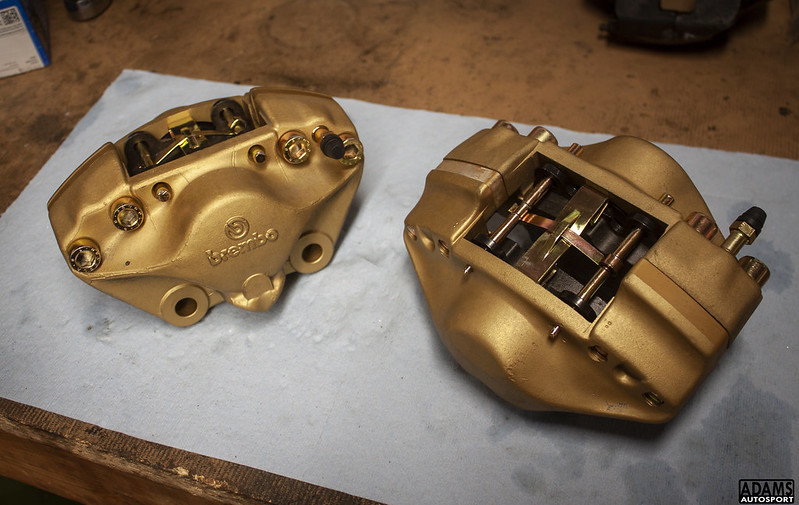
1) I picked up these old lightweight aluminum Brembo calipers, these will work with the 13" Diana wheels along with the vented E21 rotor setup. Should be a slick little big brake kit that will hopefully weigh less than the stock brakes!
Started by tearing them apart, had to be careful not to knick the aluminum.
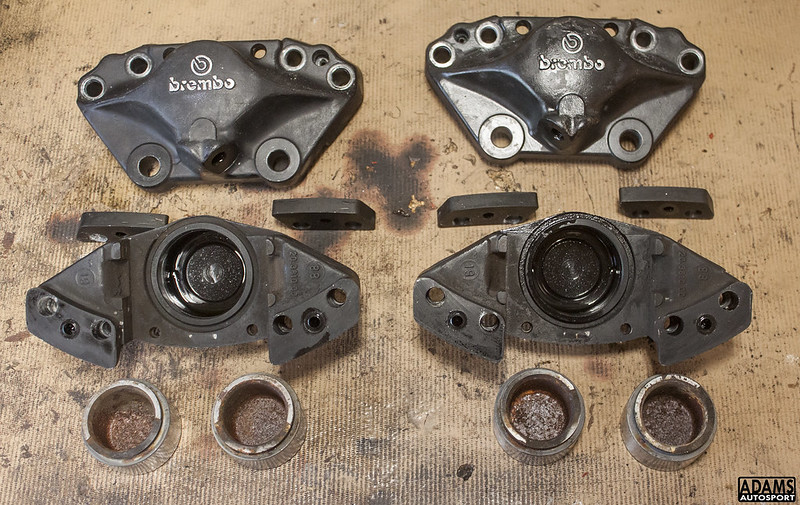
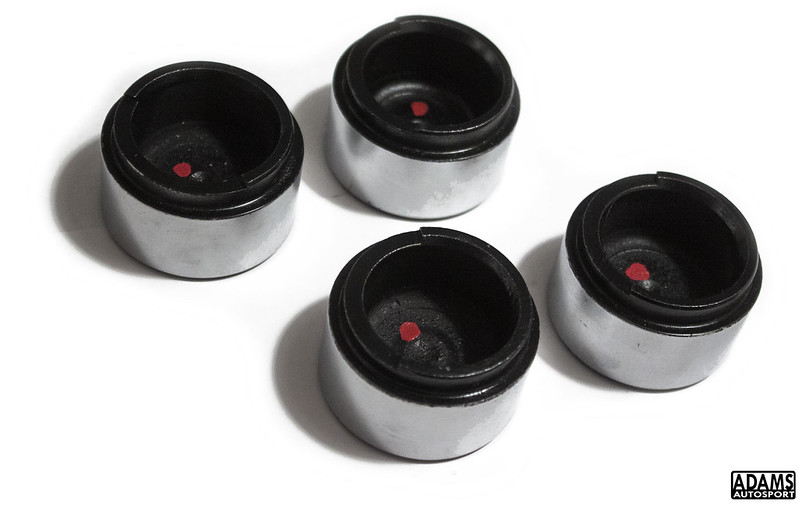
Sent the bodies out to be stripped and hard anodized. They came back great! Rob at Centerline Alfa got me setup with a nice set of pistons and new seals. For giggles I polished the hardware and had it all plated.
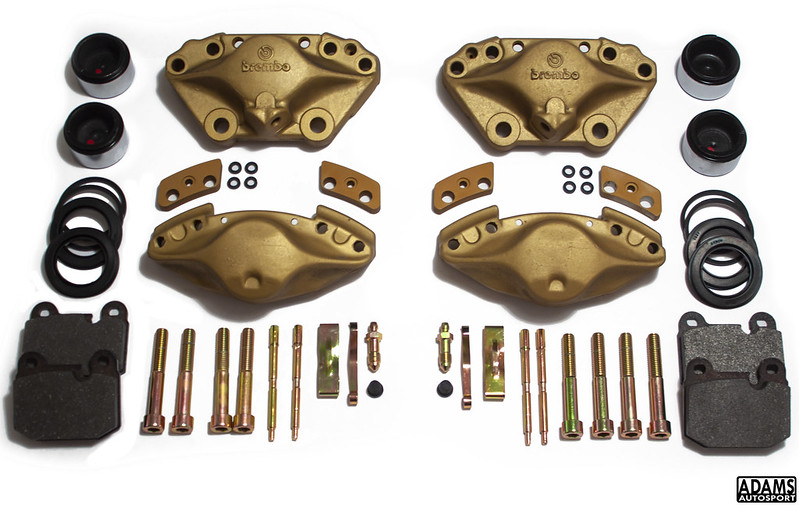
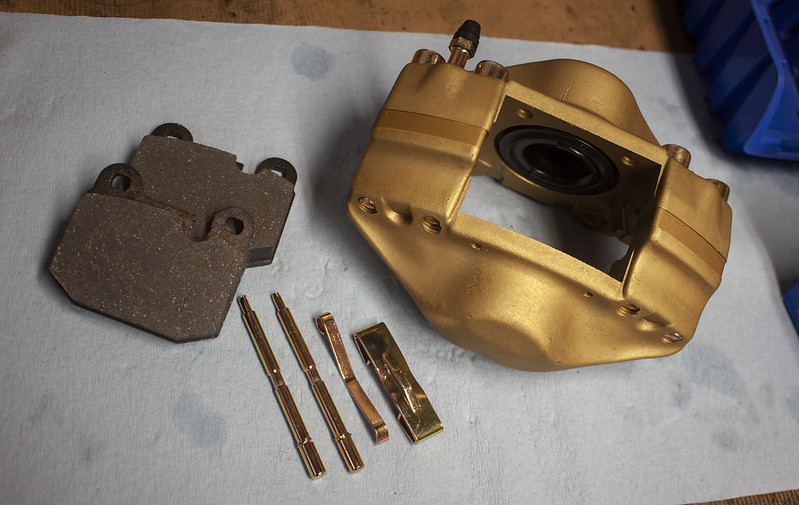
all ready to go!
------------------------------------------
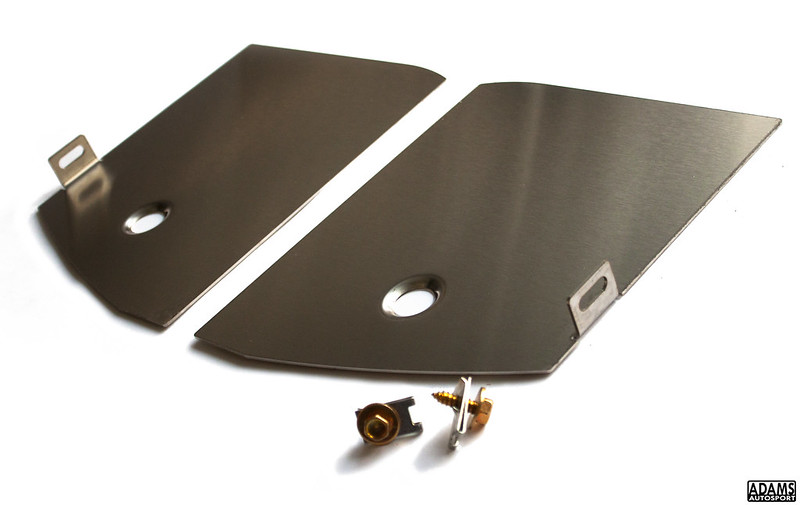
Made these headlight covers a couple months back, they fit in over-top of where the headlight sits in the engine bay. It really cleans up that area.
-----------
Also did this Tachometer Adapter which will allow me to keep the stock 2002 tachometer functioning with the swap. It's a nice OEM-like touch.

Leave a comment:
-
-
-
-
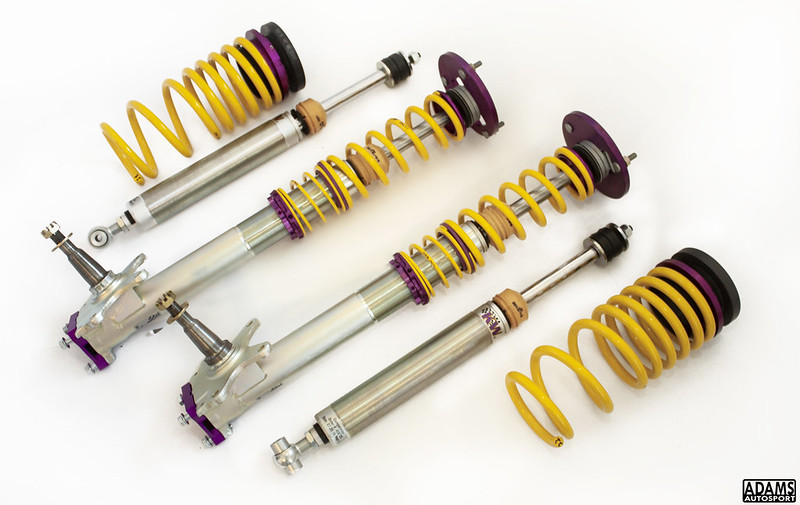
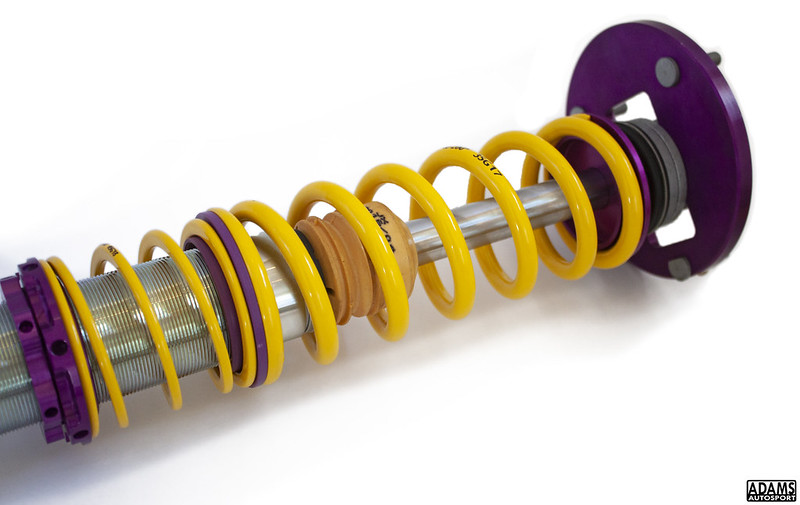
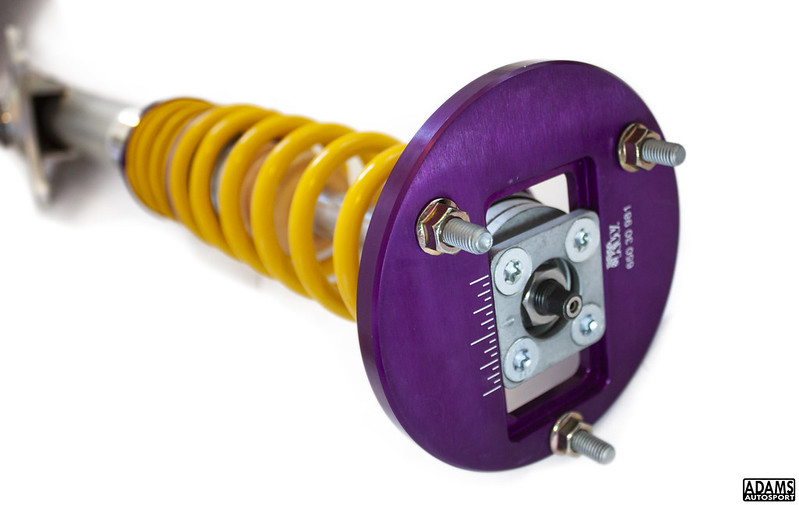
Well, this happened recently. A long project with KW has yielded fruit. I helped them develop a V3 Coilover system for the 2002, as a thank you they kindly made a set spec'd specifically for this car (accounting for a stock-looking ride height and the M20 engine weight). Can't wait to get PAINT on this car!!!
Leave a comment:
-
Well, I've been absent from this thread, but have kept pretty busy!
ADAMS Autosport is an actual "thing" with an actual website now. More parts are in process, and more tutorials are incoming.
-------------
One of the things that the car needed was a rebuilt heater core, so that was tackled over the last couple weeks.
Here's a before shot.
Here's a couple after shots.
There is a tutorial I just finished on the website for anyone who needs it.
The car is coming along as well. I just finished laying out my fitting locations for the fuel/brake lines. They need to be tacked down and covered with body sealer before the Wurth Schutz gets sprayed on.
After getting a lot of input I ended up using Southern Polyurethane's epoxy primer for the interior and underbody. Taking an concours/hotrod trick, I'm brushing the stuff on. Very very impressed with SPI as a whole, it is a neat company with great quality product.
Leave a comment:


Leave a comment: