-
Simon
Current Cars:
-1966 Lotus Elan
-1986 German Car
-2006 Volkswagen Jetta TDI

Make R3V Great Again -2020 -
-
I'm alive! Just very busy (...now can publicly state I was working on the James Webb Telescope, [happy to report that my parts didn't fail, lol.]) Hope r3v is well. Lost my original log in info, so here's to a fresh start.
The car is moving forward. Hoping to get the last of the glass in over the next week.
Here's how the car looks right now.
 IMG-1241 by Adams Autosport, on Flickr
 IMG-1243 by Adams Autosport, on Flickr
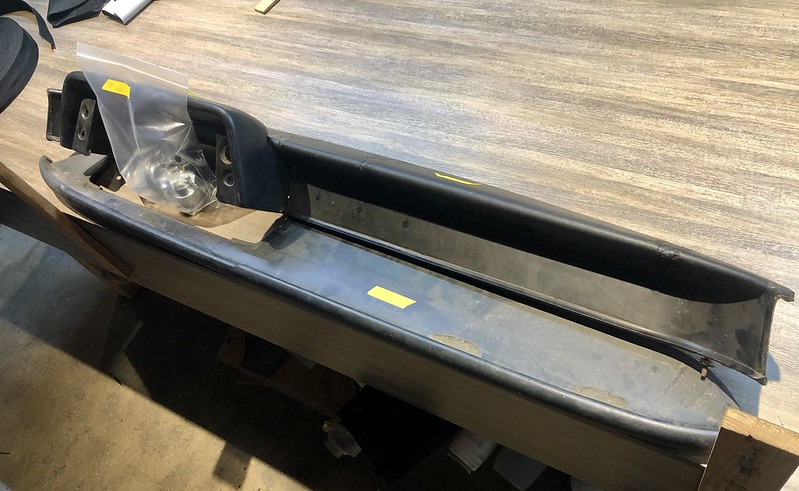
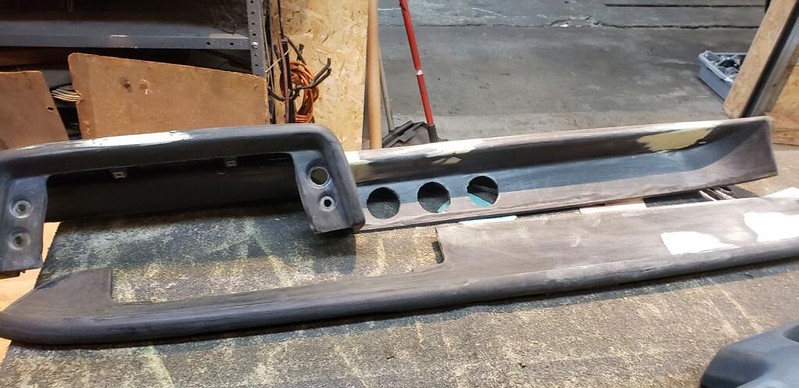
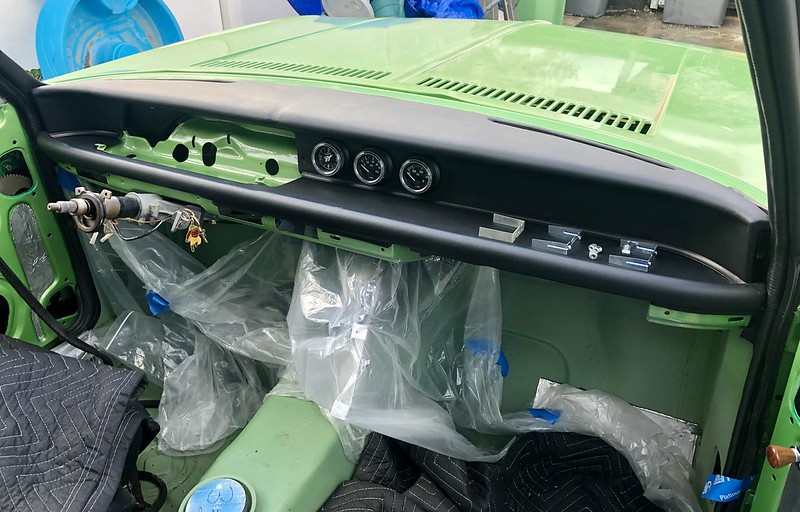
Dash has moved forward. Ground out the cracks. Filled with with glass-fiber reinforced plastic weld. Topped with dash filler. Marked out the gauge holes to be drilled, then dropped the three pieces off at CoupeKing to have their upholstery fellow do his magic. He rewrapped everything with orginal OEM vinyl in such a way to avoid visible stitched seams.
Once finished I had to get it in! Mocked up the gauges and made a cut to the sheet metal for more clearance. Still isn't deep enough, so next up will be deeper mounting bezels. Also mocked up the gauge cluster for fun.
 IMG-0783 by Adams Autosport, on Flickr
 Resized-20211105-075023 by Adams Autosport, on Flickr
 Resized-20211108-132950 by Adams Autosport, on Flickr
 Resized-20211109-083055 by Adams Autosport, on Flickr
 Resized-20211108-105423 by Adams Autosport, on Flickr
 IMG-1096 (1) by Adams Autosport, on Flickr
 IMG-1099 (1) by Adams Autosport, on Flickr
 IMG-1142 by Adams Autosport, on Flickr
 IMG-1143 by Adams Autosport, on Flickr
Funny note: I FINALLY got the VDO Series-1 clock finished. Used a different style VDO clock and took it to Paul's Speedo, where he swapped the series-1 chrome ring onto it.
 IMG-1135 by Adams Autosport, on Flickr
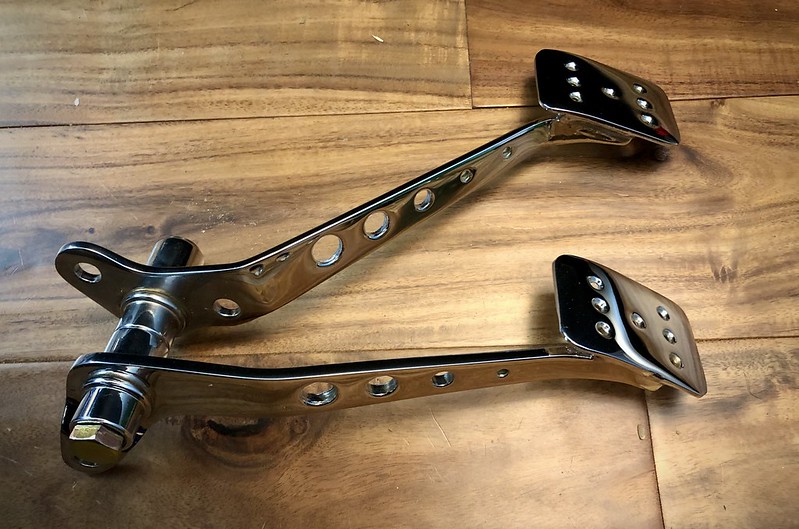
In another fit of stupidity, I drilled speed holes into the stock pedals and had them chromed. Huge thanks to Verne's Chrome Plating. He's being forced by California's draconian environmental laws to shut down. Trying to get anything I need chromed to him right now.
 IMG-1267 by Adams Autosport, on Flickr
 IMG-1266 by Adams Autosport, on Flickr
Will post some more updates. Want the suspension in and the car on the ground by mid next month.
Comment
-
Love updates!Simon
Current Cars:
-1966 Lotus Elan
-1986 German Car
-2006 Volkswagen Jetta TDI
Make R3V Great Again -2020Comment
-
Looking forwards to more updates!Comment
-
Thank you Simon and Moat.
3.1.22 Some more updates.
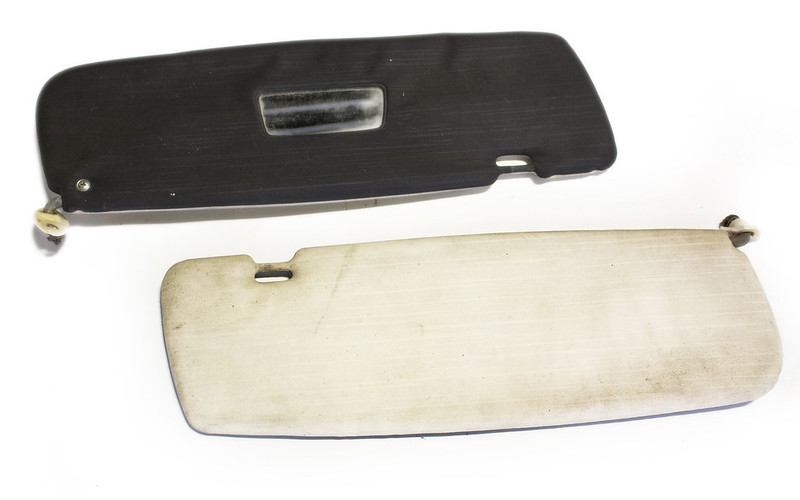
Headliner is now in. I do NOT like the OEM 2002 headliner, as it looks like cheap wallpaper from an old motel. Opted for the headliner material used on the E9 Coupes which has embossed pyramid details.
 IMG-1209 by Adams Autosport, on Flickr
 IMG-1208 by Adams Autosport, on Flickr
Doing the sunvisors in the same material, however, they are not quite done yet.
 IMG_0214 by Adams Autosport, on Flickr
 IMG_0220 by Adams Autosport, on Flickr
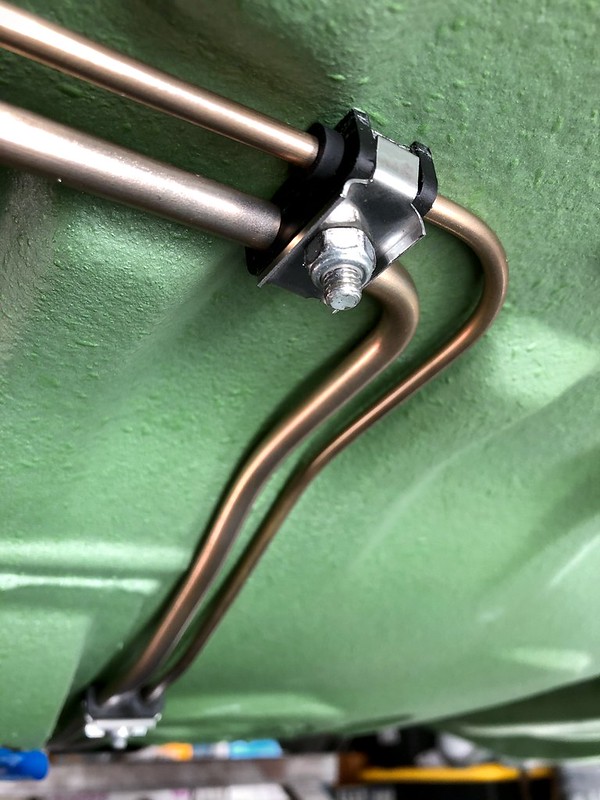
.Fuel and Brake Hardlines
At the beginning I mapped out the route for the brake and fuel line with welded mounting bolts. Now that the bodywork is done it was time to put the lines in. Running E30/E12/E28 mounting tabs for a little OEM+ action. Lines are made from 3/16" and 5/16" Cunifer pipe.
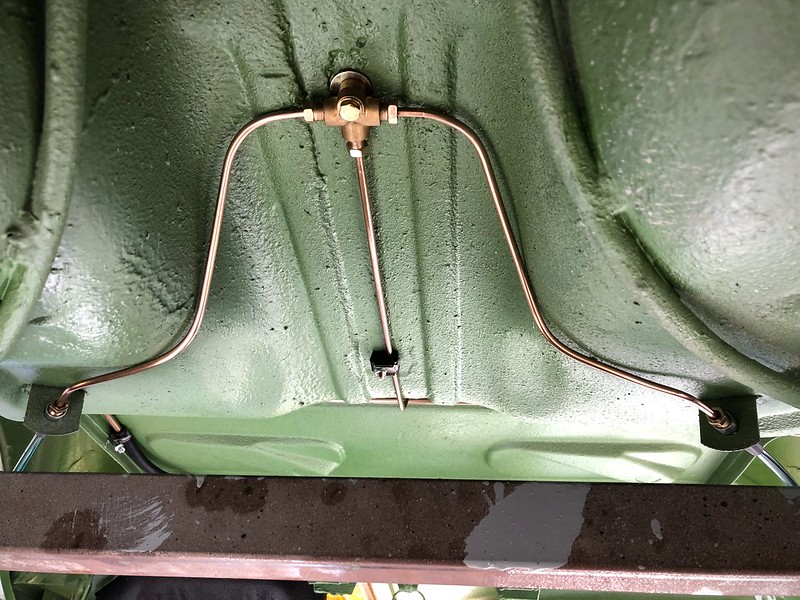
First, the gas tank was dropped in (little gold heat reflection tape added for good measure).
 IMG-0142 by Adams Autosport, on Flickr
Prepping the mounting tabs (needed to drill them out for the 6mm stud size).
 IMG-0527 by Adams Autosport, on Flickr
Started with the brake line.
 IMG-0706 by Adams Autosport, on Flickr
Moved on the the fuel line.
 IMG-0763 by Adams Autosport, on Flickr
Love these mounting tabs. There's a little piece of mind using the nylon versus straight billet.
 IMG-0764 by Adams Autosport, on Flickr
 IMG-0762 by Adams Autosport, on Flickr
 IMG-0766 by Adams Autosport, on Flickr
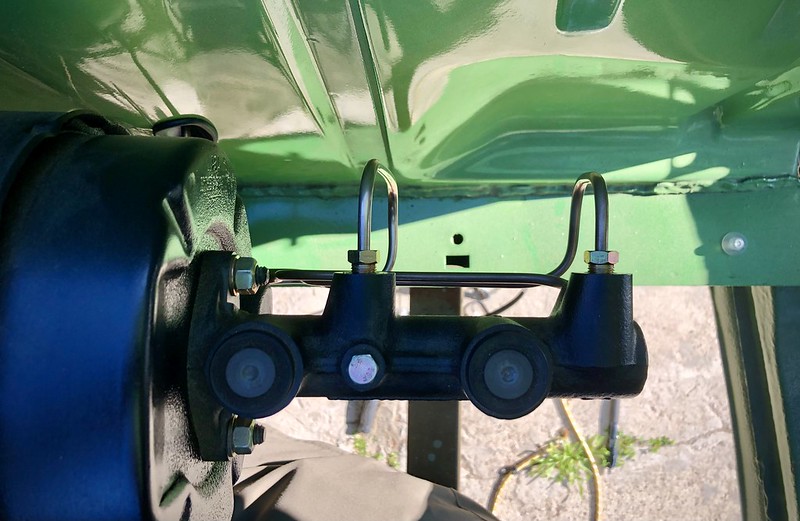
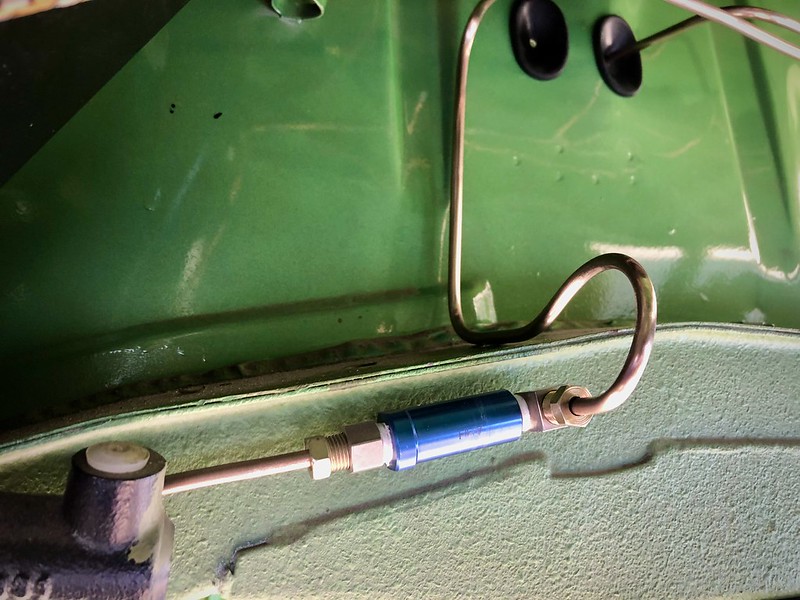
Here you can see where they terminate up front. The fuel line ends with a flare and runs a 1ft. section of hose to the fuel pressure regulator. The brake line ends underneath the frame rail with a 2 PSI residual pressure valve. Will route it up to the brake master (just found a compatible Alfa master cylinder with a 23mm bore, so swapping out the 20mm E21 master for that!). Happy to have bought the 2002tii booster years ago, they are stupid expensive now.
 IMG-0798 by Adams Autosport, on Flickr
Last edited by AceAndrew777; 03-01-2022, 09:47 AM.
IMG-0798 by Adams Autosport, on Flickr
Last edited by AceAndrew777; 03-01-2022, 09:47 AM.Comment
-
Whoops....
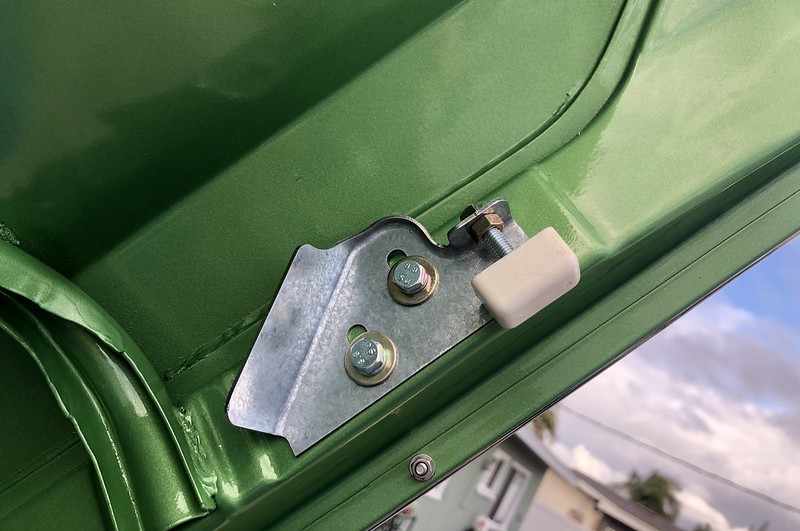
Also installed these awesome Koogleworks Hood Props (more speed holes!). With these, I was able to delete the hood cross bar and get some extra clearance.
 IMG-1211 by Adams Autosport, on Flickr
A couple new OEM hardware pieces to round things out.
 IMG-1105 by Adams Autosport, on Flickr
Comment
-
Comment
-
Those hood props are awesome. I wonder if they make them for the 30.....Comment
-
Progress has been happening!
Firewall heatshield finished. Started with a butcher-paper template, then cut out of the DEI heat shielding material. Sealed the exposed ends with aluminum tape. Then started on the front brake lines (templates made from wire before cutting, flaring, bending the cunifer tubing).
 IMG-1393 by Adams Autosport, on Flickr
 IMG-1391 by Adams Autosport, on Flickr
 IMG-1431 by Adams Autosport, on Flickr
 IMG-1430 (1) by Adams Autosport, on Flickr
 IMG-1444 by Adams Autosport, on Flickr
 IMG-1437 by Adams Autosport, on Flickr
Next up was the front/rear glass. On the 2002, this installation is done via the old/fun string method. It took a couple times (and a willing wife and child), but it's all in now. The hardest part is definitely the little locking trim strip.
Used OEM seals from Walloth and Nesch.
 IMG-1432 by Adams Autosport, on Flickr
 IMG-1434 by Adams Autosport, on Flickr
 IMG-1435 by Adams Autosport, on Flickr
 IMG-1468 by Adams Autosport, on Flickr
This stuff (sprayed in the crack) was a life saver.
 IMG-1469 by Adams Autosport, on Flickr
 IMG-1474 (1) by Adams Autosport, on Flickr
Comment
-
Brake lines look cool. Makes total sense but never would have thought to mock it up with wire first.
Instagram: Reichart12Comment
-
As usual... speechlessSimon
Current Cars:
-1966 Lotus Elan
-1986 German Car
-2006 Volkswagen Jetta TDI
Make R3V Great Again -2020Comment
-
Nice! I've been following all the unfolding and calibration steps. My son just graduated with a degree in astrophysics and is trying to figure out which way to go next. Fermilab, space telescopes on a mountain somewhere...?
I really like your brake line routing. Very tidy. You're doing beautiful work.
Comment
-
Reichart12 - Thank you sir. An old local fabricator taught me that. I've now had to find excuses to break out the wire.
2mAn - As usual, my car remains a lawn ornament while you're actually enjoying the drive in yours! Can't wait to join you.
LateFan - Dude, huge congratulations to your son. That is no joke. I bet you're hugely proud of him, and rightfully so. If he ends up at Fermilab, please let me know! I've got some experiments needs doing, lol.
Finals are looming next week (yes, still in school), but I did get a couple little things knocked out this weekend.
1) Exhaust
In an effort to mitigate weight gain I opted to do a titanium exhaust system. Ordered a bunch of bits from Vibrant to make it happen. By my estimates, it'll end up being close to half the weight of the factory system. Overall, taking into account the M20 swap and all part changes on my "weights spread sheet", I'm getting very close to a net-zero weight difference over a stock roundie running a 5-speed. (a couple mufflers are not pictures).
 IMG-1567 by Adams Autosport, on Flickr
A couple observations with regard to titanium ....
1) One goal is to have a higher pitch in the exhaust note. Titanium helps with this by simply being thinner. We are going to try a couple things with regard to header design as well, so it should be interesting.
2) When buying material, mandrel bends of titanium are actually much more expensive than the fancy "pie-cuts" you see on fancy aftermarket systems.
 IMG-1564 by Adams Autosport, on Flickr
 IMG-1565 by Adams Autosport, on Flickr
2) Brakes
Final brake system clearance checks..... and jeez it's tight. I really wanted to run the Alfa-brembo single-line brake calipers with e21 vented rotors behind the Diana wheels .... did a rough mock up a year ago. Did final mock up over the weekend. Looks like the OD of the rotor and the hat itself need to be turned down slightly. Rear 250mm drums also JUST cleared.
 IMG-1555 by Adams Autosport, on Flickr
 IMG-1556 by Adams Autosport, on Flickr
Cool OEM little bracket from the Alfa the calipers came off of that allow for a short section of hardline at the caliper. Made some new hardlines and had technafit make some custom flex lines to thread right in. This setup mitigates stress at the fitting, so we'll call it a win!
 IMG-1560 by Adams Autosport, on Flickr
Comment
-
Thanks, I have my fingers crossed for him! You're in grad school?
Wow, this is such nice work you're doing. What kind of wire did you use for brake tubing patterns? Like heavy electrical wire? I'm about to tackle an entire new braking system on my '67 Alfa, but with the engine in. MC to calipers. I'm a bit nervous.
Oh, EDIT - Is it in post 475, second pic, that fine wire?Last edited by LateFan; 05-04-2022, 08:42 AM.Comment


Comment