
Some good info here - 2008! Does anyone really do this old school stuff anymore lol.
Just don't want to take on a bigger tuning project right now. Alot of changes coming, so 1 step at a time - this is it for the season hopefully.
and e30tech has plenty of reading.
stock airbox vs cone filter dyno test http://www.e30tech.com/forum/showthread.php?t=23927
what dmcl is describes here is what I have in mind, but I need another m20 airbox to hack up first. don't want to mess with my original one.
similar m30afm in m20 airbox meme: http://www.e30tech.com/forum/showthread.php?t=14419
as is frequently the case, stock design is pretty darn good. hard to beat without a complete cold air setup. also was of the mind that cone filters don't flow as well but that's a generalization so... no data means it's just an opinion.
-
drool is right Dan.. incredible to look at. def hoping I get the chance to own a set.. maybe even an RD valvecover too.
received @blackjack7s' AFM and sssquid chip today. will be shipping the chip back to sssquid as I have a 173 tune coming from them tomorrow.
you can see how much bigger they are in the pics below. they're not compatible with the m20 airbox either. I'm sure the E30/BMW vets around here know this cold... but the M30 airbox conversion stuff is new to me, and as usual the OEM+ thing always kicks in..
the M30 AFM was fully refurbed by Bav Resto last year and looks great.
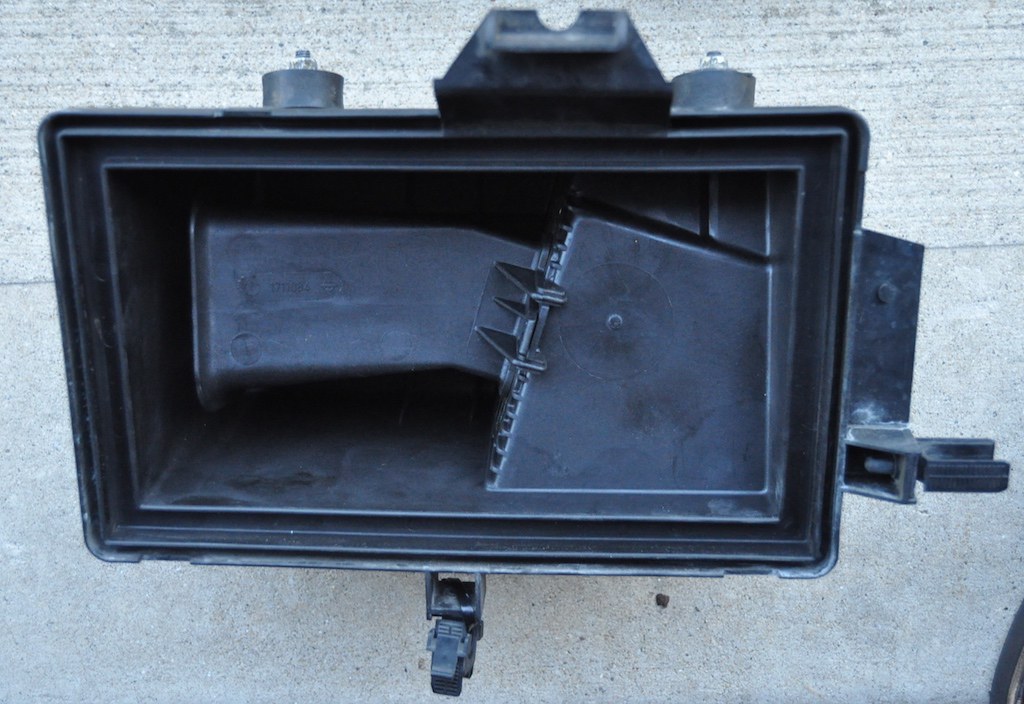
the M20 airbox. M30 AFM won't bolt up, and the opening's too small

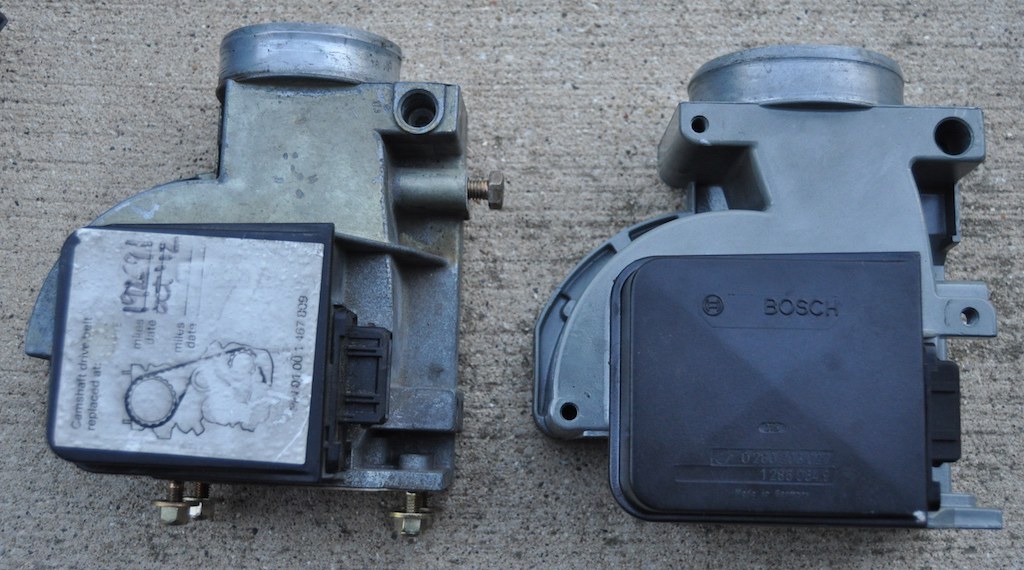
M20 vs M30 AFMs - use the same harness connector. M30 taller, same overall length and width
You see those nuts? That's how all our hardware looked new! zinc chromate plating in my future that's for sure.
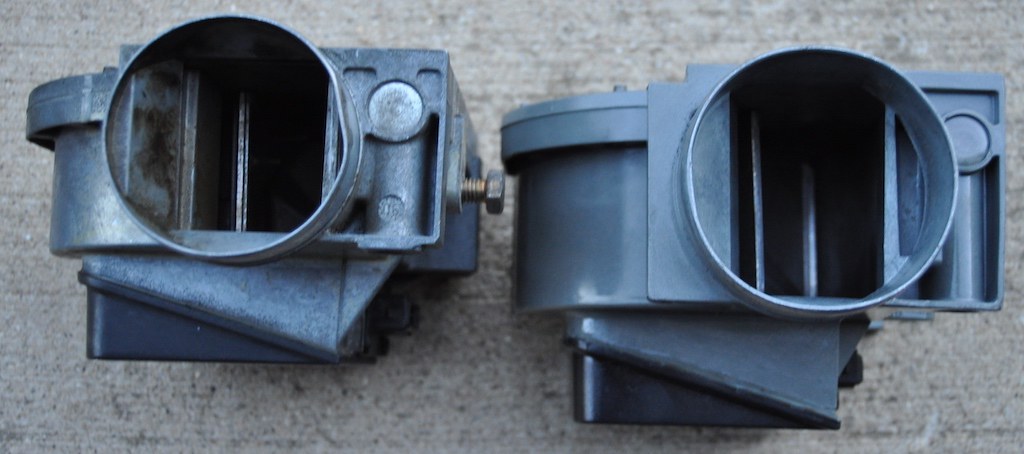
Can really see the opening differences.
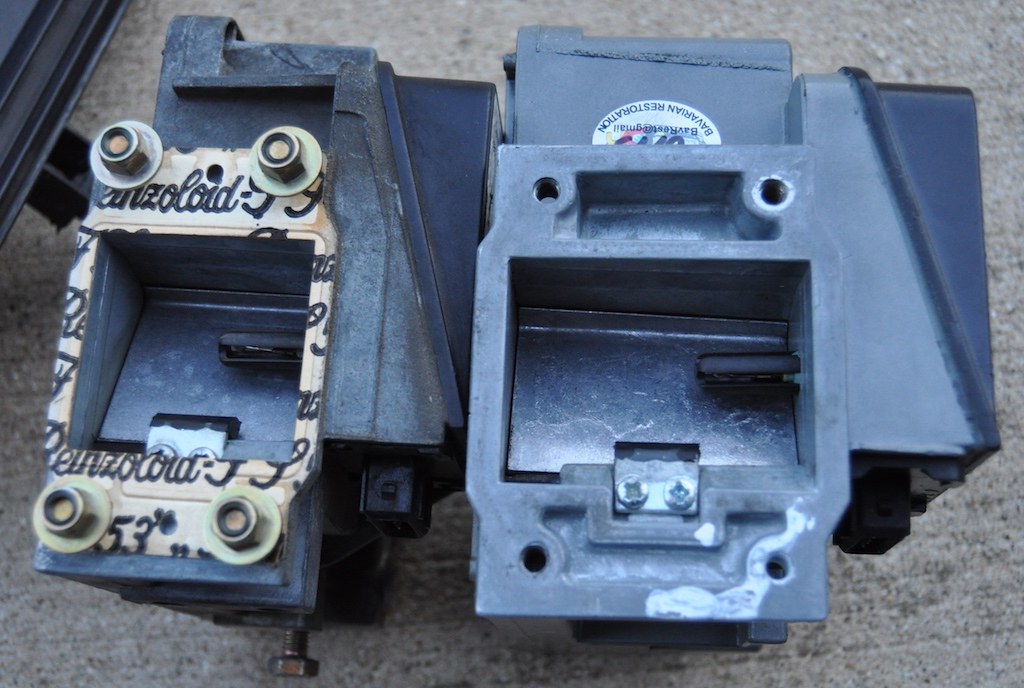
bolt patterns don't line up due to height difference (e.g., left to right in the pic doesn't line up, top to bottom in the pic does). even if they did the housing opening is too small for the M30 AFM
 Last edited by bradnic; 09-03-2017, 08:29 AM.
Leave a comment:
-
WANT.. Frank had 2 of the new Racing Dynamics long tube hearders left last year and I passed. I'm on the list for the next batch of 6.
Note his old dbilas plenum on the top of the pic :-)
re the inevitable midrange torque drop, i'm thinking the SC + MS combo will allow me to completely flatten and raise the torque curve. We'll see next year.Last edited by bradnic; 03-17-2016, 06:37 PM.Leave a comment:
-
per http://www.r3vlimited.com/board/showthread.php?t=347961, this is an automatic transmission TPS. apparently the manual M30 setup uses a 3 wire TPS, so I should be good with the M20 TPS I retrofitted.
@blackjackT7 had a rebuilt M30 AFM and an sssquid M30AFM/m20b25 tune. Unfortunately it was for a 153 DME but he made me a great deal. THANKS Jack!
I also went ahead and ordered a stage 1 M30 AFM flash upgrade from Jesse @ squid. He suggested I go with the mustang injectors so we're doing that. Also sticking to stage 1 and not stage 2 b/c I don't have the headers in yet. When the chip gets here I'll send it out for reflash and we should have something workable.Last edited by bradnic; 09-02-2017, 09:52 PM.Leave a comment:
-
Gonna try working with Jesse and the sssquid.com folks on this stage of the project.
http://sssquid.com/v2/shop/bmw/e30/e...-with-m30-afm/Leave a comment:
-
Leave a comment:
-
haha nah.. it's just an old part that oxidized over the years and was resprayed without proper prep. most of the paint has bubbled off there. I'll take it apart and sand blast the housings at some point, assuming I'm confident I can get it back together and align/tune everything properly.
thanks! Aussies and ITBs just go perfectly together. As soon as they RHD boys have a plenum ready I'll be taking a look :-)Leave a comment:
-
-
haha indeed. just make sure you solve it before you get on the road right?
just snagged a rebuilt M30 AFM and an M20B25 tune for it. We'll see if it works. If not I'll put it back up for sale.Leave a comment:
-
Still sorting through the supposedly easy install instructions. I put an order in with dbilas for the loose bits that were missing, shown in their pic here
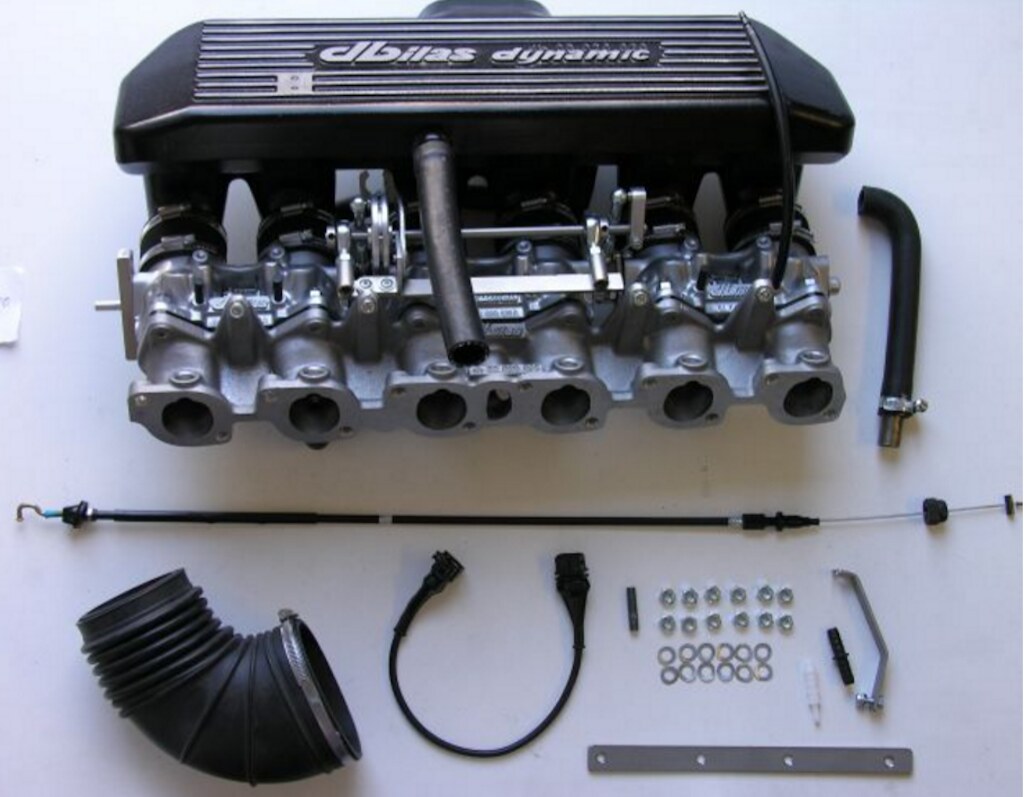
pretty sure the long hose on the right is for the ICV, and there's a vacuum fitting on the bottom of the plenum, but the hose end is too big for it. bracket on the lower right is for the dipstick. cable at the bottom extends the tps connector harness.
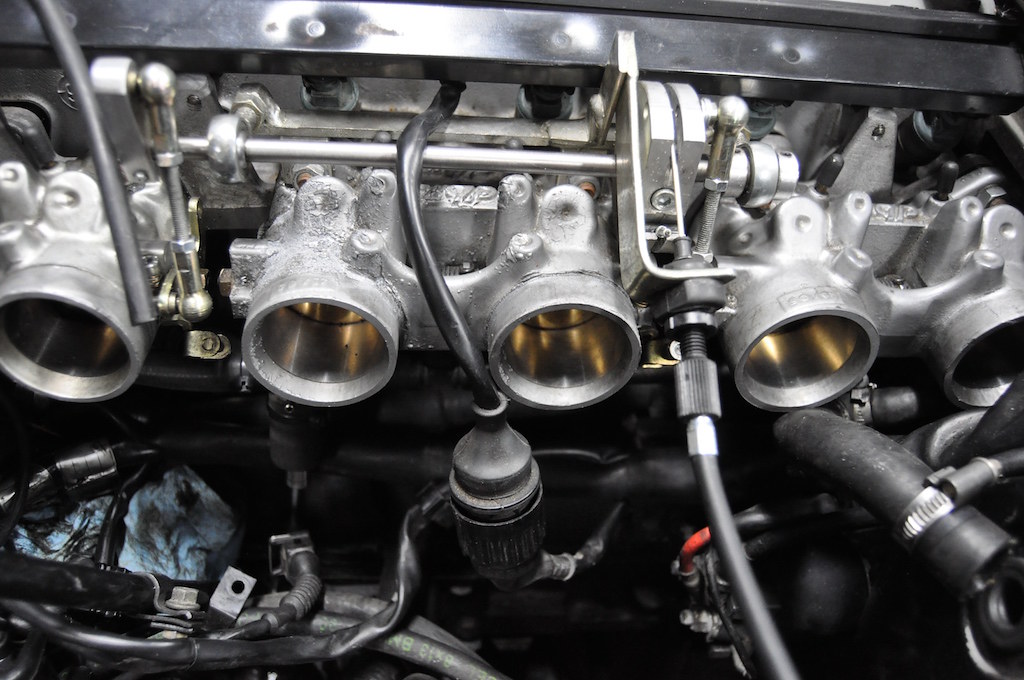
Here's the itb setup with OEM bits installed.
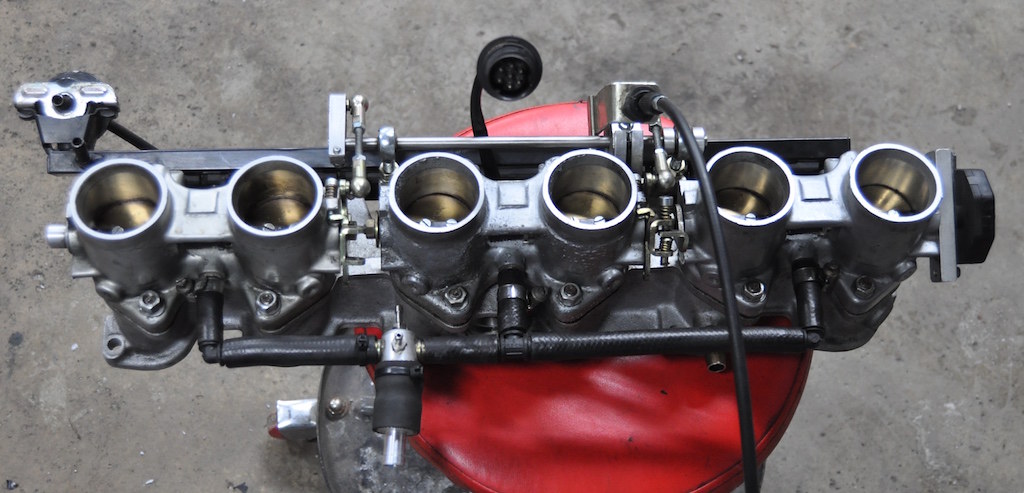
The hose arrangement and valve underneath are from the previous build and will be replaced by whatever I end up doing with the booster and carbon canister valve hoses.. The dbilas instructions tell you to remove the booster hose, but then don't tell you to put it back in lol. They do explain where to reconnect the carbon canister "pulse valve" hose. Maybe I need to keep a hose arrangement like the previous build's shown above to act as a manifold for the 3 pairs of throttle bodies? we'll see

Here's the fitting on the bottom of the plenum
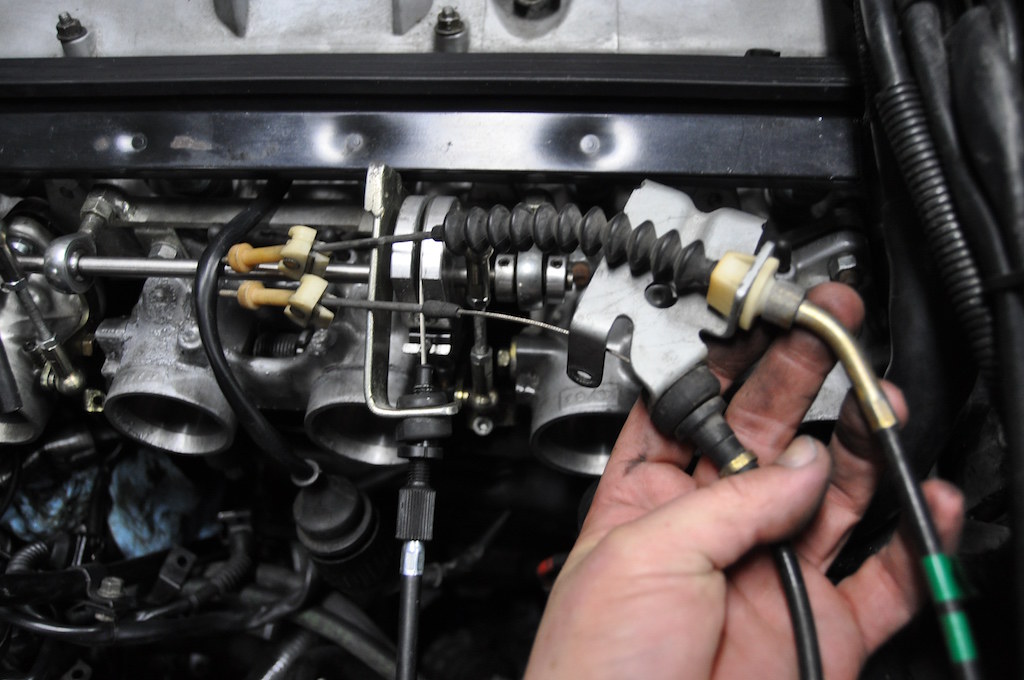
The other thing is the cruise control - there's no provision for it. Seems like the cleanest way to add it is to position another cable reel on the throttle mechanism and modify the mounting bracket the cable goes through. Alternatively some sort of 2:1 cable arrangement with either the throttle or cruise cables pulling the reel. I will ask dbilas - these things have been around for more than 10 years... someone must have figured this out by now!
holding up the oem bracket - it sits flat of course and the ITB throttle cable mechanism sits vertical.
 [
[
[url=https://flic.kr/p/W9AB3S]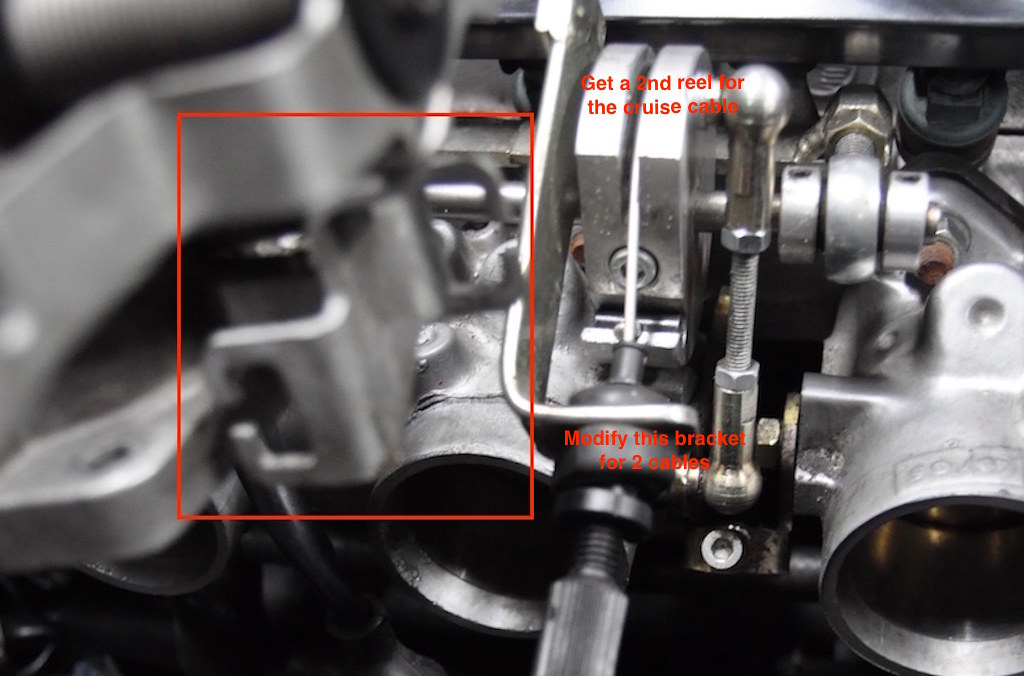
the fuel injector harness also needs to be routed under the center ITB or it will rub
that's why a 2nd cable spool mounted to the same armature is probably the best option.Last edited by bradnic; 09-02-2017, 09:49 PM.Leave a comment:
-
My dbilas setup came with some $500+ worth of sweet upgrades, but I can't use them until I stroke out the motor and switch to MS. So I swapped in the OEM fuel rail, injectors and TPS and put the upgraded bits aside for future use.
Not crazy about the braided lines and color anodized bits anyway - it's got to be OEM+ man!
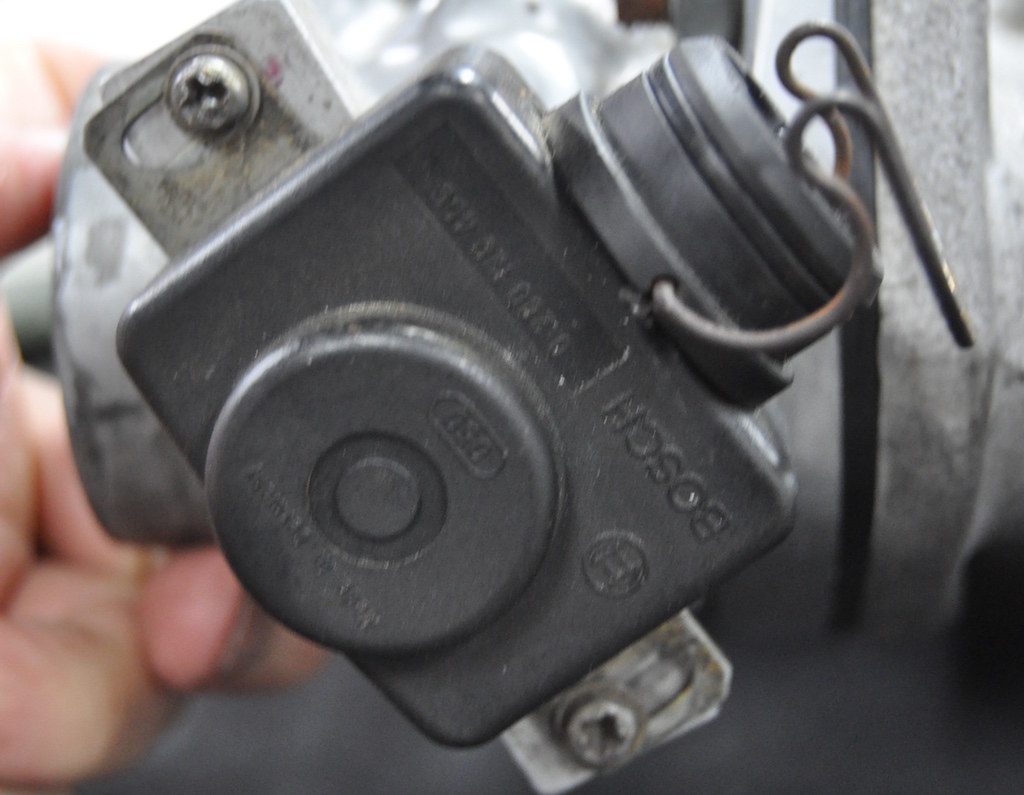
M30 TPS (6 wire connector, clicks at WOT).
nuke fuel rail with mustang injectors

aeromotive adjustable FPR (seriously pricey bit!)

Using standard m20 injectors may limit my options short term, but that's ok. when I get MS going I'll have the mustang injectors to go with. Crazy thing is the caps off two of my injectors were gone when I pulled the manifold! they must have fallen off somehow, and been burned off. Freaked me right out. I had some extra injector rebuild parts so all's well.
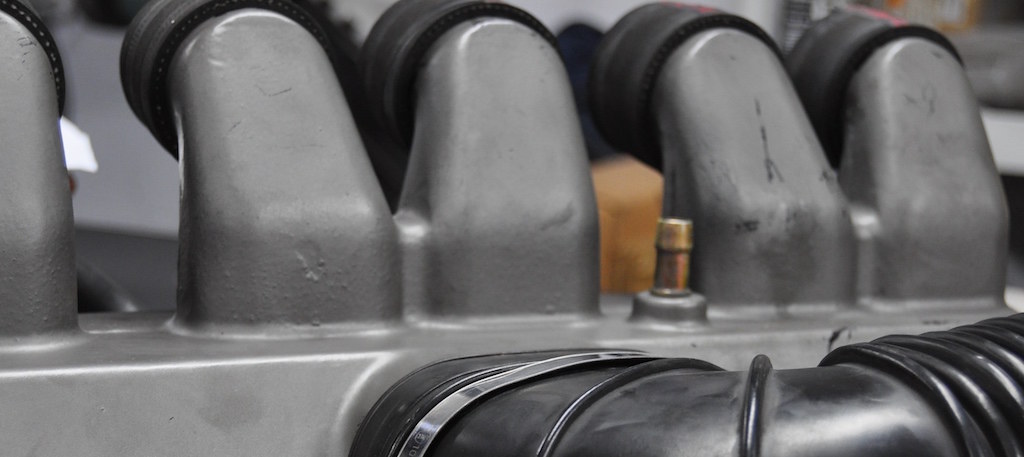
As to the core dbilas bits, the AFM side of the intake boot is too large...
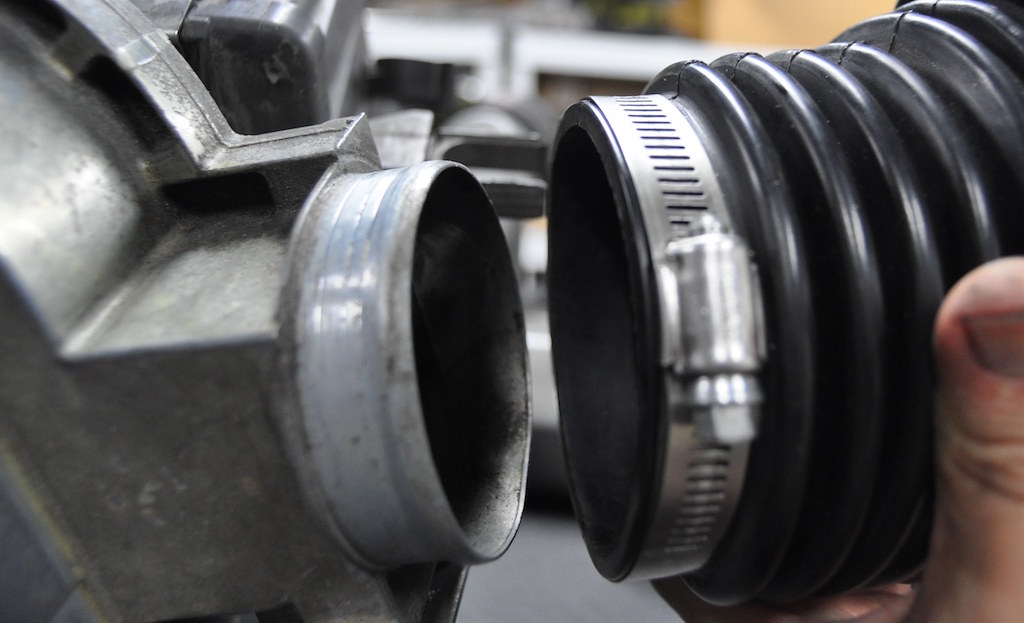
It's part number 13-71-1-707-767, realoem shows it's for an E34/E32 M30. Didn't think I was gonna need to swap the AFM.. Obviously I don't plan to keep it but I'm at a bit of a loss here. Don't want to just do a MAF conversion either if I'm not going to need it with the supercharger. After checking out r3v classifieds, if I can find a tune that will work with an M30 AFM I'll probably just do that.Last edited by bradnic; 09-02-2017, 09:21 PM.Leave a comment:


Leave a comment: