Announcement

Collapse
No announcement yet.

Touring M52B28 (another one from Ireland)

Collapse
X
 
  • Filter
  • Time
  • Show
Clear All
new posts

    #91
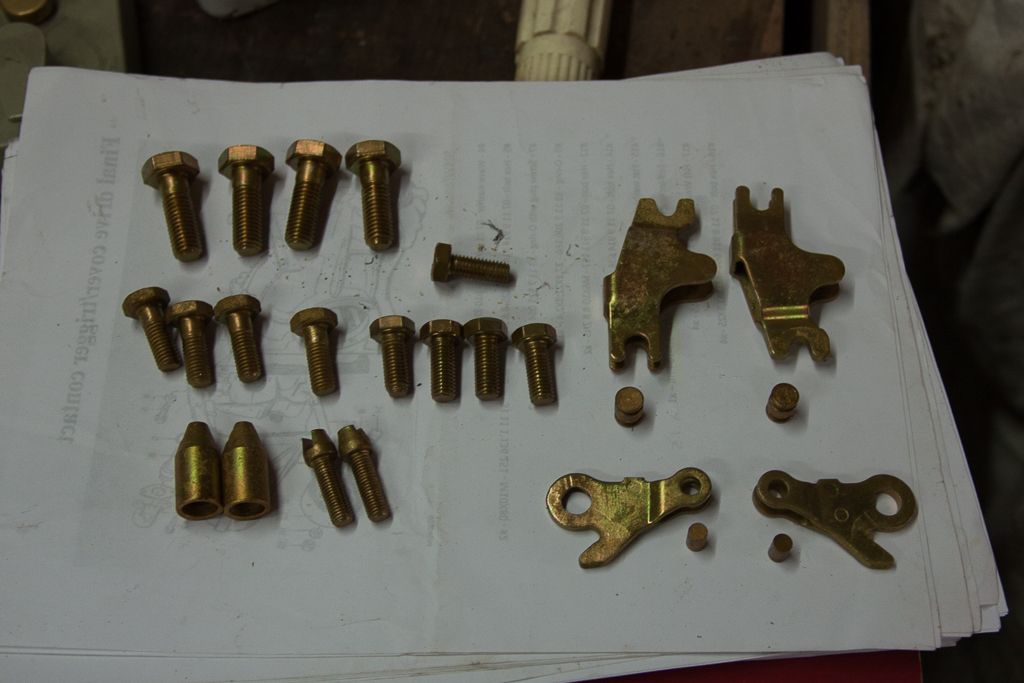
    The zinc plating isnt to bad, once it works. I pretty much derust anything first, then leave it in some de-greaser and de rust again if bits were missing, then I leave it in the de-greaser that came with the kit for as long as possible, 2mins acid pickle and straight into the zinc tank after a quick rinse. That takes up to an hr depending on how much zinc you want, the gold/yellow colour takes 30seconds and I dry it with a hair dryer then.

    The seats are great, love them :D

    Comment


      #92
      Small update as progress has been nearly non-existant since starting a new job 5 weeks ago.

      Old shell is another step closer to being scrap ready now that I got the last of the shadowline trim removed last weekend and the rear quarter glass.


      And yes that one pice of glass missing


      Good thing I have spare from the red shell that has been restored.

      Comment


        #93
        Little bit of progress this weekend, quite happy with what I got done for once :D

        Subframes were looking a bit worse for wear with dust from the paint shop and some paint chipped etc from being moved around. Decided to make use of some of bmw's own stone chip, more like a heavy rubberized paint than anything else, and treat the underside of the front subframe and the whole rear subframe with it, and some satin paint to make it look a little better. Both are ready to be refitted once I do the same with the trailing arms and wishones next time I'm home.


        Close up of the slightly textured finish.


        I also got the front of the car soundproofing started, made patterns using the old car as a template. Front of the car is done, will be adding more to some of the larger empty areas and I have another product I might use to cover the whole floor pan.


        Comment


          #94
          I've mostly been tidying up small bits here and there before I refit the subframes again. Plan is to also use Bilthmaber underseal in the arches and possibly a few other places under the car, it's a nasty looking black coating though.

          I've only so far fitted the front subframe and rack and the rear end can be bolted up once I have brake lines made and do up the clamps on the new cv boots.


          Anyone with BC Coils notice the rear rubber above the top mount perishing? I've had them maybe 2 years and 0 miles and the rubber is full of cracks.

          Comment


            #95
            Just a small update

            Got a start made on rebuilding the trailing arms, new kunifer brake lines, stainless brake nuts and stainless goodridge braided hoses


            Tools used


            One finished brake line


            And one trailing arm


            I have to zinc a few of the bolts that are used on the parking brake and get some new pads before I can finish the brakes of. Discs also need a bit of de-rusting and if my kit can manage I'll zinc plate them also.

            Comment


              #96
              For the past few weeks I've been prepping the arches for some undersealing and finally last weekend and this weekend I got it done. I had 4L of bilthamber dynax ub lying around dying to be used so, purists look away because this won't be to your liking :D


              And up close


              It's a slightly tacky finish, stuff will probably stick to it but I had my reasons for using it and there's no way it's gonna rust under there!

              Also, got a few more parts plated, few bolts were new and re-plated and the rest was cleaned up, de-rusted and replated


              The diff is in a big tub de-rusting, my attempt at eletrolysis didn't really work, think I used the wrong powder and I couldnt find the right stuff at the time so I've put a load of bilthamber dynax powder in the tub, a little water pump and a aquarium heater to help the process along.

              I've a few more parts to plate but I think I might have enough done to start putting subframe's back on the car next weekend :dance:

              Anyone know how to remove the top mount bolts from bc coilovers? The look pressed in. They have gone a little grubby and I want to plate them like the nuts on them

              Comment


                #97
                Small update, didn't get as much done as I wanted to over the weekend. Ran out of paint and my handbrake cable doesn't fit

                Had the diff soaking in deox c for the past week with a little aquarium pump and heater. Came out nearly spotless with next to no rust


                Few little spots like this left but painted it up anyway


                Ran out of paint so only one coat, will do another coat next weekend and should be fine. Also got new bolts, yellow passivated them so they are pretty. Just need some washer and zinc the speed sensor plate and it can all go back together.

                Also got the diff cover cleaned up and painted


                Anyone know the correct orientation for the bush?

                Comment


                  #98
                  I just had a few days of tidying up some lose ends and loads of small job which meant I finally made some progress by the end of today :D

                  Few touch-ups to the front struts and disc backing plates


                  I had to get custom handbrake cables made as a result of chopping up 10cm of the metal tube under the car in which it runs. From what I remember I bought a cable in a motor factors and got a company to make me a pair exactly the same only with 10cm added to the outer cable. All well and good till I went to fit it, the little eye let was to wide and to wide Some minutes later on a bench grinder and 40mins in the zinc tank and she fits


                  When I pulled of the bearing from the struts I found this


                  Pretty bad I thought for a pair of bearings with no miles on them that has been on a car that was sitting up. Treated them and painted up the worst of it with alloy wheel silver, came up lovely.


                  I only realised today I forgot the backing plates, luckily I was able to pull the bearings of again, the nearly slid of.

                  Rear discs were also a bit rust, cleaned them up with a wire wheel and some paint on the bells (I'll pull the masking tape of the brake surface when she's ready to go on the road)


                  Diff painted up with 2x coats of hammerite after I ran out of spray paint, bit shiny but it will do, diff cover also painted with wheel silver. Just got to zinc the sensor plate and the 2x alen bolts for filling her up.


                  And finally today with some help of my brother we got the lot bolted up under the car :dance:

                  All thats left to do it tighten everything up to their torque value's set the camber/caster and a couple more small jobs but she's as good as ready for wheels to be put on.


                  Front end also all bolted up and ready for wheels after all the bolts are torqued up right.


                  I zinc plated the rear subframe brackets and painted them silver since I ran out of black, came out fine though.


                  And here's a little something I've been working on as well

                  Comment


                    #99
                    damn you seem to be as anal/ocd/methodical as me. This is how i will be going about my build. Every bolt, nut, and surface gets cleaned and painted. Truly a pleasure to read through to far.
                    89 325i Coupe Auto Delphin Metallic - Sold
                    91 325i Sedan Auto Brilliantrot - Sold
                    83 323i Euro Coupe Manual Lapisblue - Sold
                    89 325i Coupe Manual Delphin - Sold
                    89 325i Sedan Auto Brilliantrot
                    87 325i Vert Manual Brilliantrot

                    Comment


                      Originally posted by markt51 View Post
                      damn you seem to be as anal/ocd/methodical as me. This is how i will be going about my build. Every bolt, nut, and surface gets cleaned and painted. Truly a pleasure to read through to far.
                      Thanks very much for the kind words. I think it may have gotten slightly out of hand, I never setout to do it all this way but I wouldn't be happy otherwise!

                      Comment


                        Man oh man do I wish I could take on another restoration project like this.

                        I'm secretly letting my iX rot so I can do this in the future.
                        1990 Brilliantrot 325iS Build Thread
                        1989 Zinnoberrot M3 Build Thread

                        Comment


                          Don't let her rot, just creating more work and hardship for yourself!

                          Comment


                            Have not seen someone do this in a long while, Very awesome!
                            sigpic

                            Comment


                              Are you doing pop outs?
                              For all things 24v, check out Markert Motorworks!
                              Originally posted by mbonanni
                              I hate modded emtree, I hate modded cawrz, I hate jdm, I hate swag, I hate stanceyolokids, I hate bags (on cars), I hate stuff that is slowz, I hate tires.

                              I am a pursit now.

                              Comment


                                Originally posted by DirtyDozen View Post

                                Have not seen someone do this in a long while, Very awesome!
                                Easiest way to work on her, only cost around 150-200e for the metal and casters (which were expensive!) was well worth it!

                                Originally posted by Roysneon View Post
                                Are you doing pop outs?
                                Going to try anyway! I think I need a different window seal as the 2dr one pushes the glass out further than I would like, unless the whole lot pules it in and compresses the rubber enough to make it flush.

                                I had a buddy measure the distance between the up stand for the glass and the edge of the quarter and the saloon has a but more width.

                                Comment

                                Working...
                                X