If this is your first visit, be sure to
check out the FAQ by clicking the
link above. You may have to register
before you can post: click the register link above to proceed. To start viewing messages,
select the forum that you want to visit from the selection below.
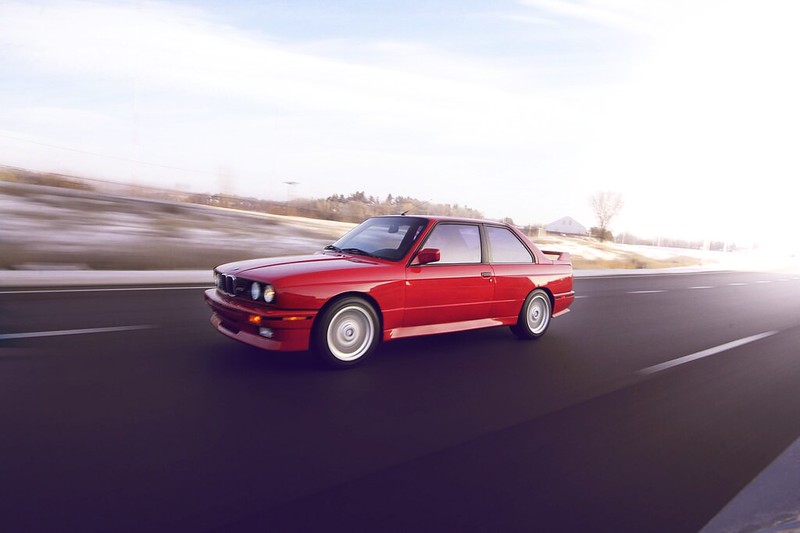
Finally have some proper wheels and tires on :) 225/45/16 is a tough size to get
Sun didnt cooperate... Putting them on, I noticed these. Didn't know about them until now. Finally a nice surprise. I noticed earlier the shocks were bilsteins when looking under the car
I will get better pictures once its nice enough to take it out.
In other news, I repainted my tow hook covers and bumper cover. They were just slightly off, but the paint I got when I did the brake ducts matched a better, so I decided to repaint them. Hard to tell but they match better.
Next up is to remove the tint and install the stromung muffler
I got the fender liners on. I tried when putting on the wheels, but some issues made it a little tough to get them on and I was excited to get the wheels on. I know these pictures are a little boring but I couldn't find any good pictures online showing the hardware needed and where it goes.
There's the main liner piece that attaches on the back of the fender with two bolts that go into existing expanding rivets in the wheel arch. There is another hole near the side skirt. It looks like this just slips over the stud that's there, but doesn't get tied down. It attaches at the top with two plastic nuts on existing studs. The front is what gave me problems. It looks like there should be a bracket to attach a body nut and screw in, but mine were all rusted and bent. I needed to carefully bend these back, enough to stick an expanding rivet in. Then I was able to screw it down.
Then came attaching the intermediate part, as BMW calls it. It attaches with two body nuts and two screws. It's held on with the bottom of the front bumper, and by the main liner piece.
Glad I bought oem size tires, as I shouldn't run into any rubbing issues.
I hope this helps somebody. Let me know if you need part numbers
I did a few things
-replaced ebrake handle
-replaced third brake light bulb
-replaced window trim pieces on pass side
-ordered trim pieces under rear bumper
Hoping its nice enough out next Saturday to bring her out to cars and coffee :D
So today I took care of a few things with my cluster. Taking the cluster out is something that might take awhile the first time, but really is very simple. I had a refurbished board from Greg to put in
I also had a good working led panel from his as well. The other main reason I pulled the cluster was the left illumination bulb was burnt out, so at night I had no idea how fast I was going. They are the larger bulbs that aren't in a socket. The small green bulbs are extras I bought in case any needed replacing.
Back of the m3 cluster. Had a weird plug I hadn't seen before that I'm guessing is for the oil temp
Let there be light
So as I'm sitting in the car enjoying all the lights working, I can't help but notice my defrost button doesn't light up...
That's better
Still not sure what route I want to go on the stereo/headunit
in my opinion i think you should keep the oem head unit. or save some bucks and get a oem CD player for the M3 and have it worked on cause from what i recall they skip like hell. Go for a concorse restoration ^_^.
Things are warming up for good. After getting 8" of snow Thursday, I am ready for spring weather.
The hazet 880amgt spark plug tool came. It was over $50, but was worth it, as any other spark plug socket has to be ground down to fit. So I replaced the plugs, and checked condition of the plug wires and distributor cap. Wires and cap look good. The wires are the red evo version, so it was replaced at one point.
Old plugs, it was time.
I went ahead and replaced all the engine decals. Most of them came off pretty easy.
This one was a PITA to remove, however.
You can see some of the wiring was wrapped in some janky looking tape. So I re-wrapped it with oem tesa harness tape.
Engine bay is getting there. I also put in the middle harness cover and wiper fluid bottle. I'm thinking about pulling the valve cover this week to get it powder coated. With that and a new coolant bottle, the engine bay should be looking great :)
And here's a shot from cars and coffee. More maintenance stuff coming soon.
OEM Hella Smoked Euro Smileys | OEM Headlamp Washers | Startec Tail Lights |
EVO III Undertray | EVO III Front Lip | '92 DTM CF Gurney Flap | Recaro N'Joys |
Ground Control Coilovers | OZ Futuras


Comment