
You should've stopped by shop in San Luis Obispo on your way back!
-
cool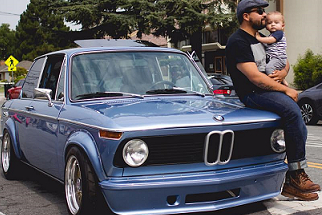
Comment
-
Comment
-
Went through your build again as I sit shotgun for the long drive back from your headquarters, love what you're doing with the car. Tha ks agin for taking some time to show her to me today, inspiring stuff here.-Ryan
05/87 Henna M3
04/71 Baikal 2002tiiComment
-
Glad you could stop by! Hope you can make use of those parts. I'm having seller's remorse already.
Updates.
I started working on the electric fan mounting and ran into a few issues. I ended up drilling two holes in the top part of the radiator support for the top mounting points on the fan. These two holes and the fasteners are covered by the new radiator. The bottom mounting on the fan was a bit more difficult. I quickly whipped up a few zip ties to get an idea of how it will sit against the radiator. I then removed them and fitted a more permanent solution.

How it sits against the radiator. There is about 1/8" - 1/2" space between the fan and the radiator. I'll add a fan shroud if I have cooling issues. Hopefully I don't, though.

I had to drill MORE holes just to mount the IE aluminum radiator. It was larger than the stock rad and none of the mounting holes lined up very well. Not very happy about that, but there is no turning back now. I fabbed up a few 1/2" rubber bushings to sit between the radiator and the support. I didn't want the aluminum radiator directly against the support. It just seemed right.
I then decided the clean the hoses and hose clamps. I'm removing as many non-BMW clamps as I can.

Remember this photo from a few months ago? It's how I received the car:

This is what it looks like as of this morning:

I wanted to wire up the electric fan using IE's diagram but after a quick conversation with Andrew and Jeremy at IE, they suggested that I finish up the battery relocation before I start on the fan wiring. This way I can correctly find a switched 12V power source. Fair enough.
These wires will have to wait until tomorrow:

So I got back to the battery relocation project.
See that big wire down there? As much as I want to leave it, I can't.

Here is a better example of the e30 battery cable:

I used a few e39 parts to route the battery cable and make it fit nicely and all the cracks and crevices.

Reading a few of the project threads on battery relocation, it was apparent that I need some sort of system that allowed the battery to be tied down and free of movement. This led me to purchase some aluminum.

I turned the aluminum bar into this:

and here it is, nestled in it's new home:

and with the seat back in, you'd never know anything is back there!

I turned the key enough to allow switched power to be activated. I tested the hazards, and blinkers, all of which worked correctly. Also, nothing caught on fire which was also a good sign. Good.
And this is what I end with. Bad lighting, but you get the point.

Sorry for the lack of words, I'm wiped out from being cooped up all day, then decided to surf, which doubled wiped me out. I'm toast.
Til next time.world renown Harry Potter expert
sigpicComment
-
Wow, just read this thread from top to bottom, amazing!
SILBER COMBAT UNIT DELTA (M-Technic Marshal)
RTFM:http://www.r3vlimited.com/board/showthread.php?t=56950Comment
-
A few things.
I only spent a few hours at the office today. And by office, I mean the warehouse where the 1600 is.
First, I wanted to finalize the electric fan wiring. Before I did so, I checked polarity to the wires on the fan. In order for the fan to act as a pusher, the black wire is the power wire, and the blue wire acts as the ground.

I went through all my electrical stuff, and realized that I was inadequately prepared for this task. I had no crimpers, male or female connectors for 14 AWG or 16 AWG wiring. So I ran down to the local hardware store and bought a few things. It's awesome what a good set of crimpers can do.

Some more wiring:

How it will all sit. I'm sick of drilling holes into this car. No more holes. I think this was a good location for the relay. All wires are/will be friction taped to keep the subtle look.

I had to leave early, but I dropped off these seats and new seat skins to a little run-down shop in Long Beach. If I didn't know any better, I'd think I was in Tijuana. It's that bad.

and

I'm hoping everything turns out like this:

The upholstery guy only asked for $200 to reskin the seats and rebuild one of the side bolsters on the driver's side seat. I'm not sure what to expect yet. Fingers crossed.
Still no word on those headers.Last edited by phreshkid; 04-25-2014, 04:30 PM.world renown Harry Potter expert
sigpicComment
-
where did you get the seat set from? i have the exact same fabric as you do and wanted to go to full blackComment
-
I bought the seat skins from this guy: http://losangeles.craigslist.org/lgb...447497119.html
I'll let you know how everything fits tomorrow or Friday, when they are completed. Then again, I paid very little to have them reskinned. The mexican guy that I'm using can very easily be under the "You get what you paid for" category.
New Updates:
I finished up one side of the BBK. I will likely finish up the other side Friday, pending a package from IE. There was a mix up but Andrew jumped on it right away. Great guy.
Old brakes in their entirety. Looking at them now, it's clear that these are dual-circuit calipers when I originally thought that the 1600 had the single-line system. I'm proven wrong every single day.

Removing the calipers from the rotor, the rotor/hub from the spindle was a pretty simple process. Here is a shot of a cleaned spindle, with the dirty backing plates. I wanted to keep the backing plates, but that would require modification to fit, and actually hurt the general design of the vented rotors. The rotors pull air from the center, and pass through to be released from the outside. Pretty common brake cooling system, but these rotors are from a 1977(?) e21 car. So, no backing plates.

Here is a shot of the inner race being pressed in. The inner bearing seats up against the race. It's very important that this pieces seats correctly inside of the new hub.

I then applied liberal amount is bearing grease, and pressed in the dust shield on the inner side of the hub. I got as much grease into the dust shield channel before installation, as instructed by Marshall. Everything went in pretty smooth.

And then it was time to install the new hub onto the cleaned spindle, now missing the backing plate. I did some cleaning of the strut housing unit beforehand. Nothing crazy, just a bunch of degreasing.
You'll also notice new Motorsport Hardware studs. I ran by Ryan Castro's house last night and picked up a new stud/nut kit and 5mm spacers. I ended up using only 8 studs out of all that I purchased from Ryan.
Install:

Motorsport Hardware:

And here is everything bolted up. After this photo was taken, I removed the current brake lines and installed the single braided steel like. When I change out the Master Cylinder, I will have to delete one brake line on each side of the front brake systems, since this is a single line caliper.

I butchered the dust caps pretty bad. They can always be replaced.
I snapped this shot to give me a good idea of wheel clearance on these new brakes. I've heard many horror stories of not being able to fit Minilite wheels with BBKs, but this specific casting didn't seem to have any issues.
Here is that photo I mentioned:

And here it is, all bolted up. I'm so glad I didn't have to use spacers to make this all fit. I already have to roll and slightly pull the front fenders just to make the 205s fit:

Everything spins freely and smoothly. Still have a bunch of things to do, but I'm still killing time, waiting on those headers. The headers situation is really starting to piss me off.world renown Harry Potter expert
sigpicComment
-
Pretty awesome!Yours truly,
Rich
sigpic
Originally posted by RigmasterComment
-
Great progress. I miss my 02 badly. My GF actually cried when I sold it, and now she wants another one. Thats when I knew I should marry her lolsigpic
"The bitterness of poor quality remains long after the sweetness of low price is forgotten."
Comment
-
I just noticed that I mounted the passenger side front wheel on the driver's side.
The details are what will kill me.world renown Harry Potter expert
sigpicComment


Comment