
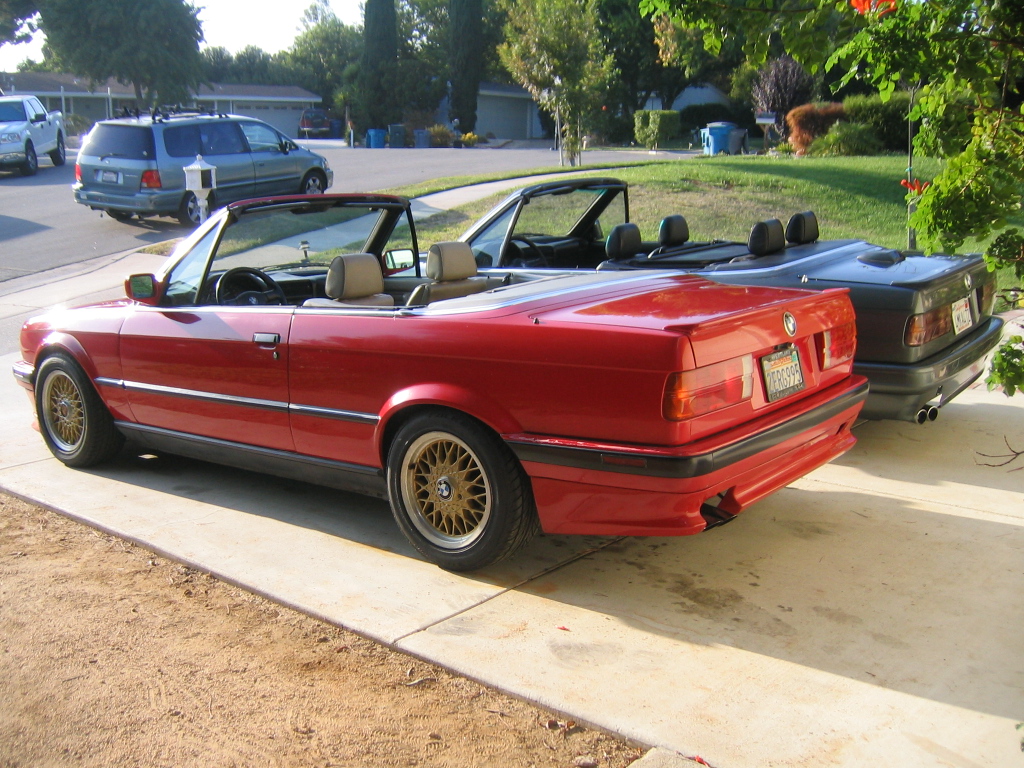
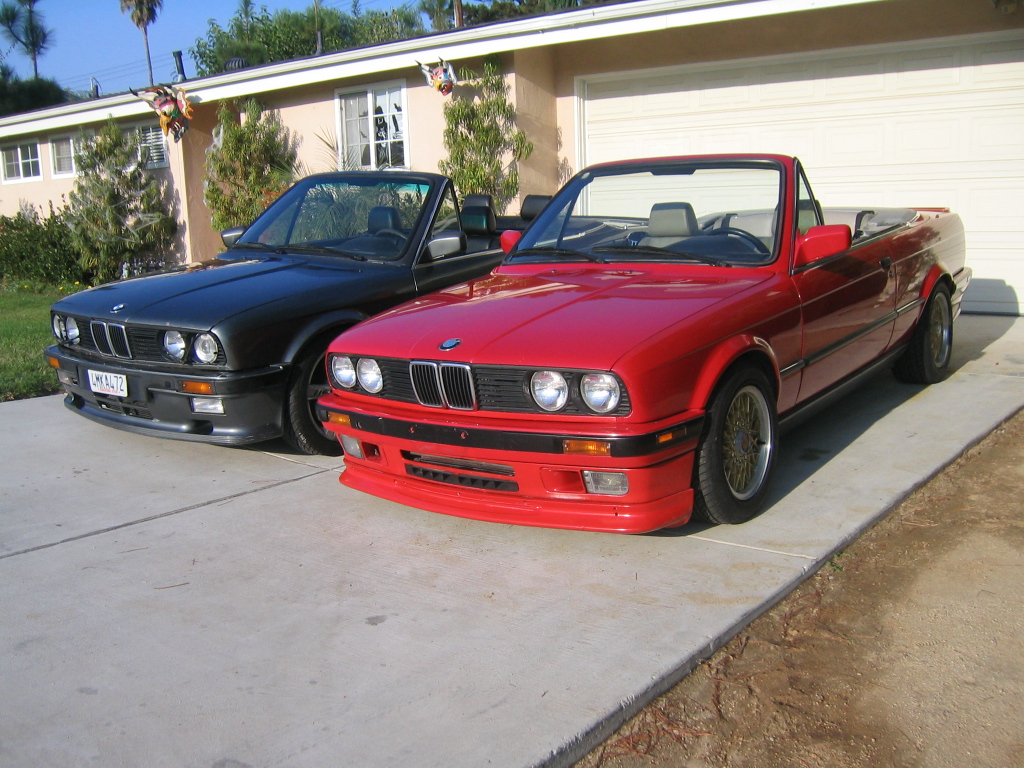
Quick update - rear bumper is in! Will post detailed pics. We were lucky to have a 318is right next to the DB vert so we could do detailed comparisons.
Bottom line:
-- NO rear bumper mods required, EXCEPT for a small hole for an M6 bolt that sits UNDER the bumper trim so it's not visible
-- NO cutting / drilling of the body required
You DO need to attach the sides of the rear bumper to the car differently:
- don't use the coupe side bracket mounting hardware.
- pop off the ends of your bumper side trim from the rear bumper
- drill a hole in the bracket that's attached to the rear bumper in the spot that lines up with the existing hole already on the car. It's about centered between the 2 slides of the bumper bracket, and about 17.3mm from the edge of the rear bumper trim, measured in line with the hole in the body. (pics will show you where this is)
- notch a metal fender washer and use it between the outside of the rear plastic bumper cover and an M6x30 bolt (not sure on the length - will check)
- run the bolt through the fender washer and the rear bumper bracket. through another fender washer on the other side of the bracket and locktite the assembly together with a nut.
- repeat on the other side. You now have a "stud" you can feed through the existing body.
- the sides of the rear bumper will rest on the existing slides of the bracket against the car.
- throw a rubber washer and a flange nut (or washer+nut) on the inside of the car (you DON'T want metal on metal contact).
DONE.
-
If you're going to use the stock slider brackets, definitely. We'll know for sure if it works on the vert in a day or two. Only reason it wouldn't - the bumper area on a DB vert quarter panel is not recessed. you have 3-4 mm there of surface height difference.
Yeah the only alternative is fitting a rear metal valance + quarter panel lowers off a plastic bumper vert. same facelift project Jan3rson did on his coupe. not easy at all.
my friend's going bone stock late model front end with body color IS lip and ryang splitter. will post pics when we're done
definitely personal preference. I love the black trim line myself. So did several of the body shop people we spoke to (not bmw / E30 people). also not a fan of side skirts. that's the "issue" with using a rear apron - makes you want to tie everything together.
my friend wants to shadowline everything and body color the bottom trim. hasn't pulled the trigger yet, but we did find one example like that, also with 16" 1 piece style 5s:

note how the rocker weld line really stands out. I suppose you could just paint that part a flat black..
I'll stick to my euro bumper conversion and black bottom thank you :-)Last edited by bradnic; 08-28-2014, 10:03 AM.Leave a comment:
-
Looks like I need 2 (maybe 3 to be safe) of these...
41351971597 http://www.ecstuning.com/ES71851/
So I think that after looking at what I have and fporro's lower portion the fit is similar and though the design is not identical, I think it is pretty close.
Up front I have a stock 'is" lip (being painted to match) and a RyanG splitter. Somewhere in my parts pile I have either that JimmyHill lip or something close to it. I got it off a way-early metal bumper car- I think it was an '85 (but it had all kinds of non-original parts) at the junkyard.
As for the lower side "skirt" area, I don't know the plan. I might texture it and leave it black or I might texture it and have it painted over. Undecided at this point. After the repair is made I will go back to the body shop and we will decide on a final course of action for that area.Leave a comment:
-
here's the left side one from ECS (the right is same bracket with studs welded in opposite holes - so you can buy two lefts and mod one for the right one).
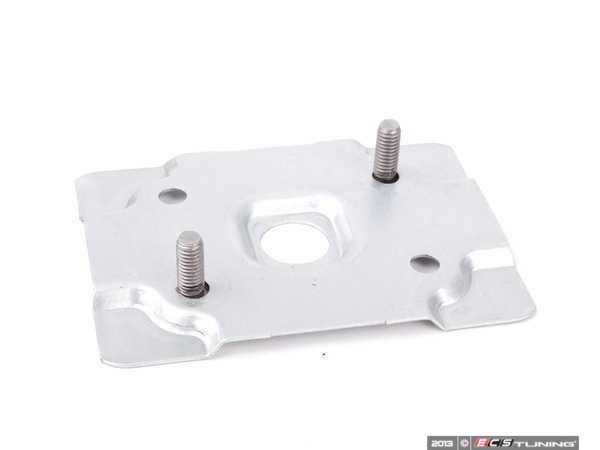
EDIT: bracket not needed.
No thread posted but we'll definitely put up pics and details up in the next days.
yeah. only 2 options I've seen there that look ok, but they have pretty major implications for the rest of the car:
1) go mtech2
2) an RD (or replica) rear apron attached directly to the plastic bumper
Having an RD apron on the back and just stock late model front end and IS lip... probably ok. fporro's the master at this. Looks like he added a jimmy hill lip in place of the IS lip in front of his red vert.
 Last edited by bradnic; 09-09-2014, 05:31 AM.
Leave a comment:
-
When I got the car the bumpers had all of the main mounting hardware for the bumper shock portion(s)/attachment points. I purchased all of the sliders and side hardware to augment that.
Do you have a picture of the metal bracket that you mention?
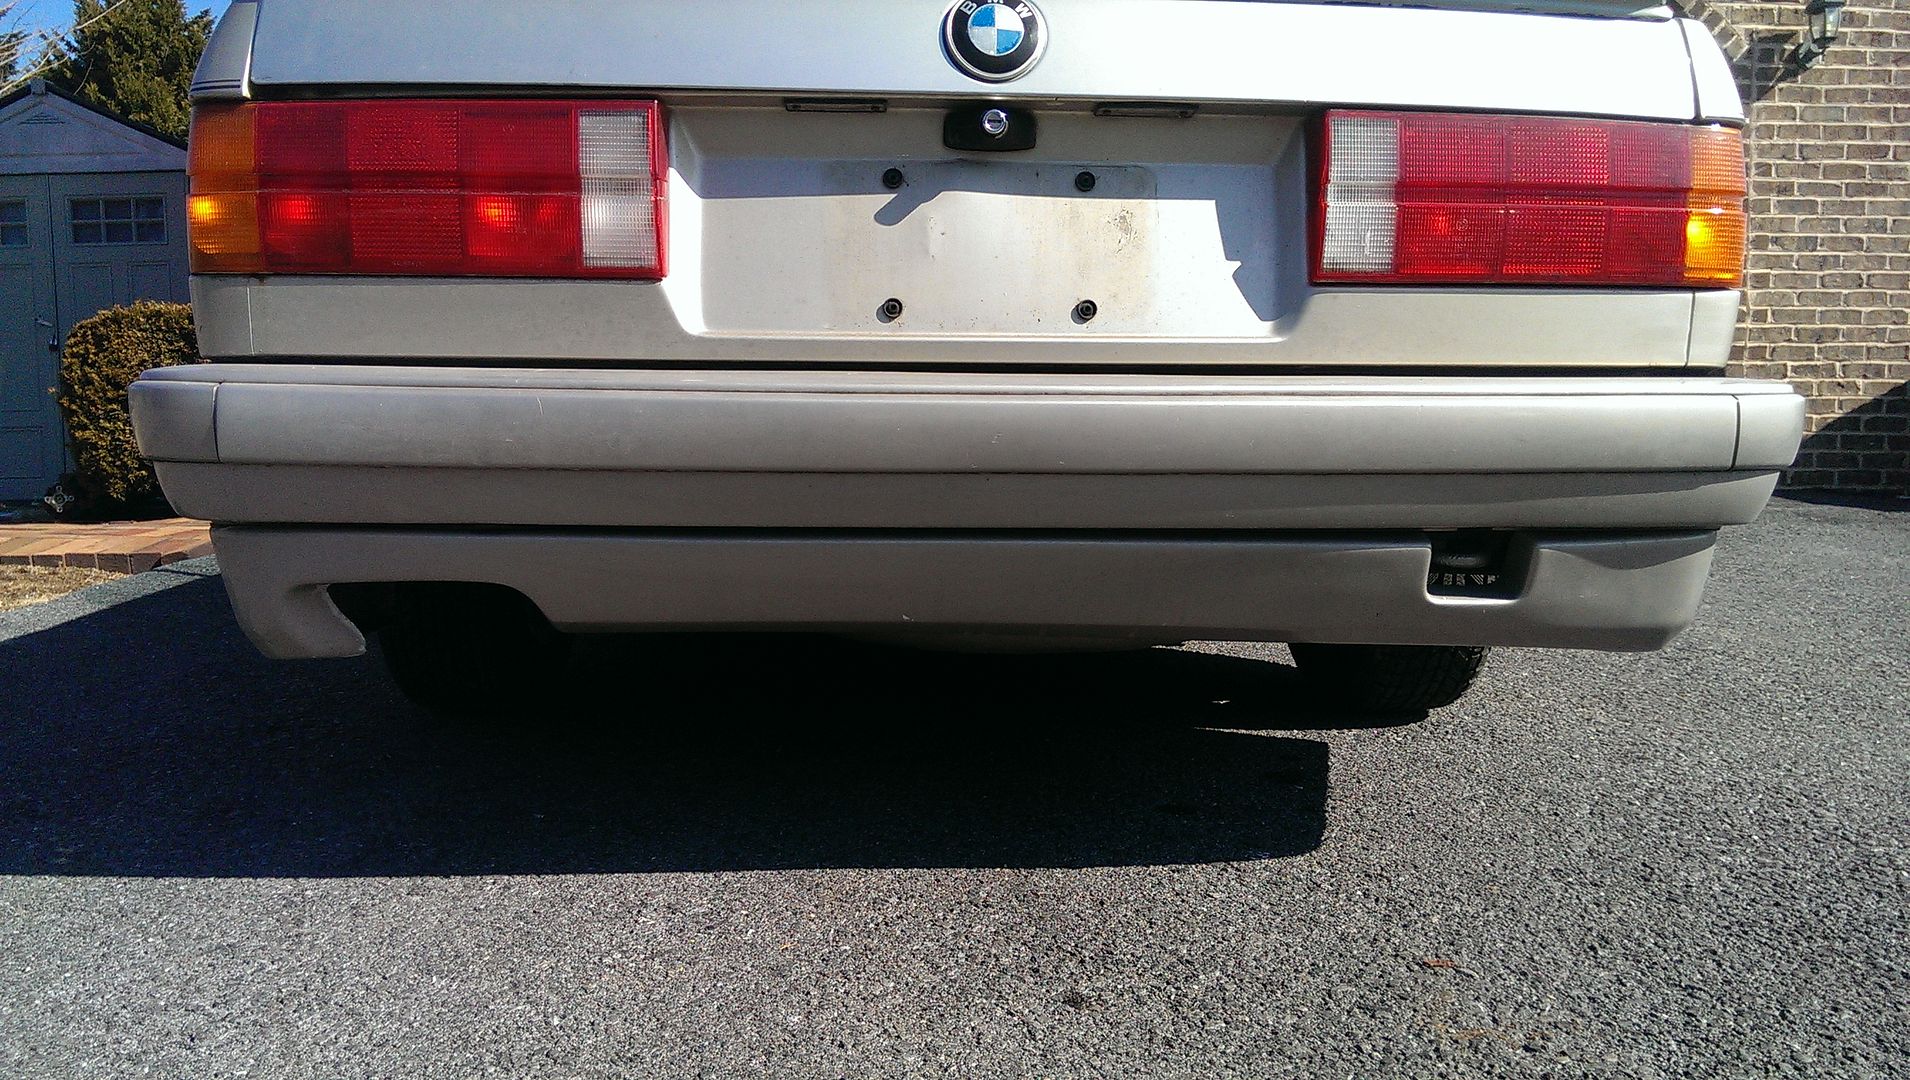
Having that oddball rear apron/valance alleviates (or at least masks) the visual issues with the early model metal rear valance. While that is certainly not the most attractive rear valance in existence, it covers up the worst aspects of having the short early valance.
This part is still TBD on my install.
The look from the side is not bad but it does have the small gap at the arch itself:
Definitely let me know how that turns out. Is there a thread up about it?Leave a comment:
-
Going through a plastic bumper conversion right now with a friend's 7/89 DB vert. Will post pics to that thread. Some of the hardware is NLA so you'll need to find it used:
- right rear metal bracket
- rear M12x100 T55 head bumper bolts
EDIT: you don't need the metal brackets for a diving board to plastic bumper conversion on a vert, or any of the side mounting hardware for the plastic bumpers
Here's the net of it:
- looks terrific from the rear and top, not terrific from below, especially looking from the sides and front (just behind the rear wheel)
- the lower part of the rear quarter panels are different in 2 ways
a) curvature of the rear quarters below the bumper area - the early model metal valance area on the rear quarters sweeps inwards quite a bit more than the late model quarters, and of course the early model metal valance doesn't extend down as far
b) the vert doesn't have a recessed area in the rear quarters for the bumper to fit into. I think this is why that thread shows people trying to trim back the plastic bits on the bumper and mounting them differently.
We have trial fitted the rear bumper without cutting off the plastic brackets on the sides and it fits well. Will let you know how it works out.
As to the lower view, a body kit like an mtech2 is the obvious solution. lots of examples out there - check fporro's posts. truth is the whole package looks darn good as is though.
 Last edited by bradnic; 09-09-2014, 05:30 AM.
Leave a comment:
-
Car is officially at the paint shop. Head (and internals) are at BimmerHeads being rebuilt. Also parking this here for now:
http://www.turnermotorsport.com/imag...9_BMW_only.pdf
I picked up some (more) front turn signals and some silicone radiator hoses for the head (or engine) install.
Unfortunately, paint is going to cost a little more than I had hoped. Painter wants 3 weeks with the car and I am not in a rush. Looks like it might be time to start selling off some parts.
I really want to keep the TRM C1 wheels in case I autoX the car but the chances of doing that are pretty low. I'll hang onto them until I get the car back form paint so that I can see if I like those or the 17" replica wheels better but chances are that the TRMs will be sold. I also have a bunch of spare engine parts that need to go.Leave a comment:
-
Loaded up to go to paint tomorrow. All parts are in the bed of the truck and ready to go.
The only issue that I had is that the late valance- even without the "is" lip - scrapes on the ramps when loading and unloading. I was hoping to have the valance painted on the car but it may be just as well to paint it off of the car. If I have to I could install it at the shop and then remove it for the ride home. On the plus side, not having it installed reduces the chances of it being damaged on the initial ride home. I intend to let the paint cure for about a week once the car is home before I take it to the upholstery shop for the top install.
Leave a comment:
-
Unnecessary, I know, but I saw a fellow R3V'er making these and since I have my own small fabrication "business" I like to support other people doing similar stuff.
Leave a comment:
-
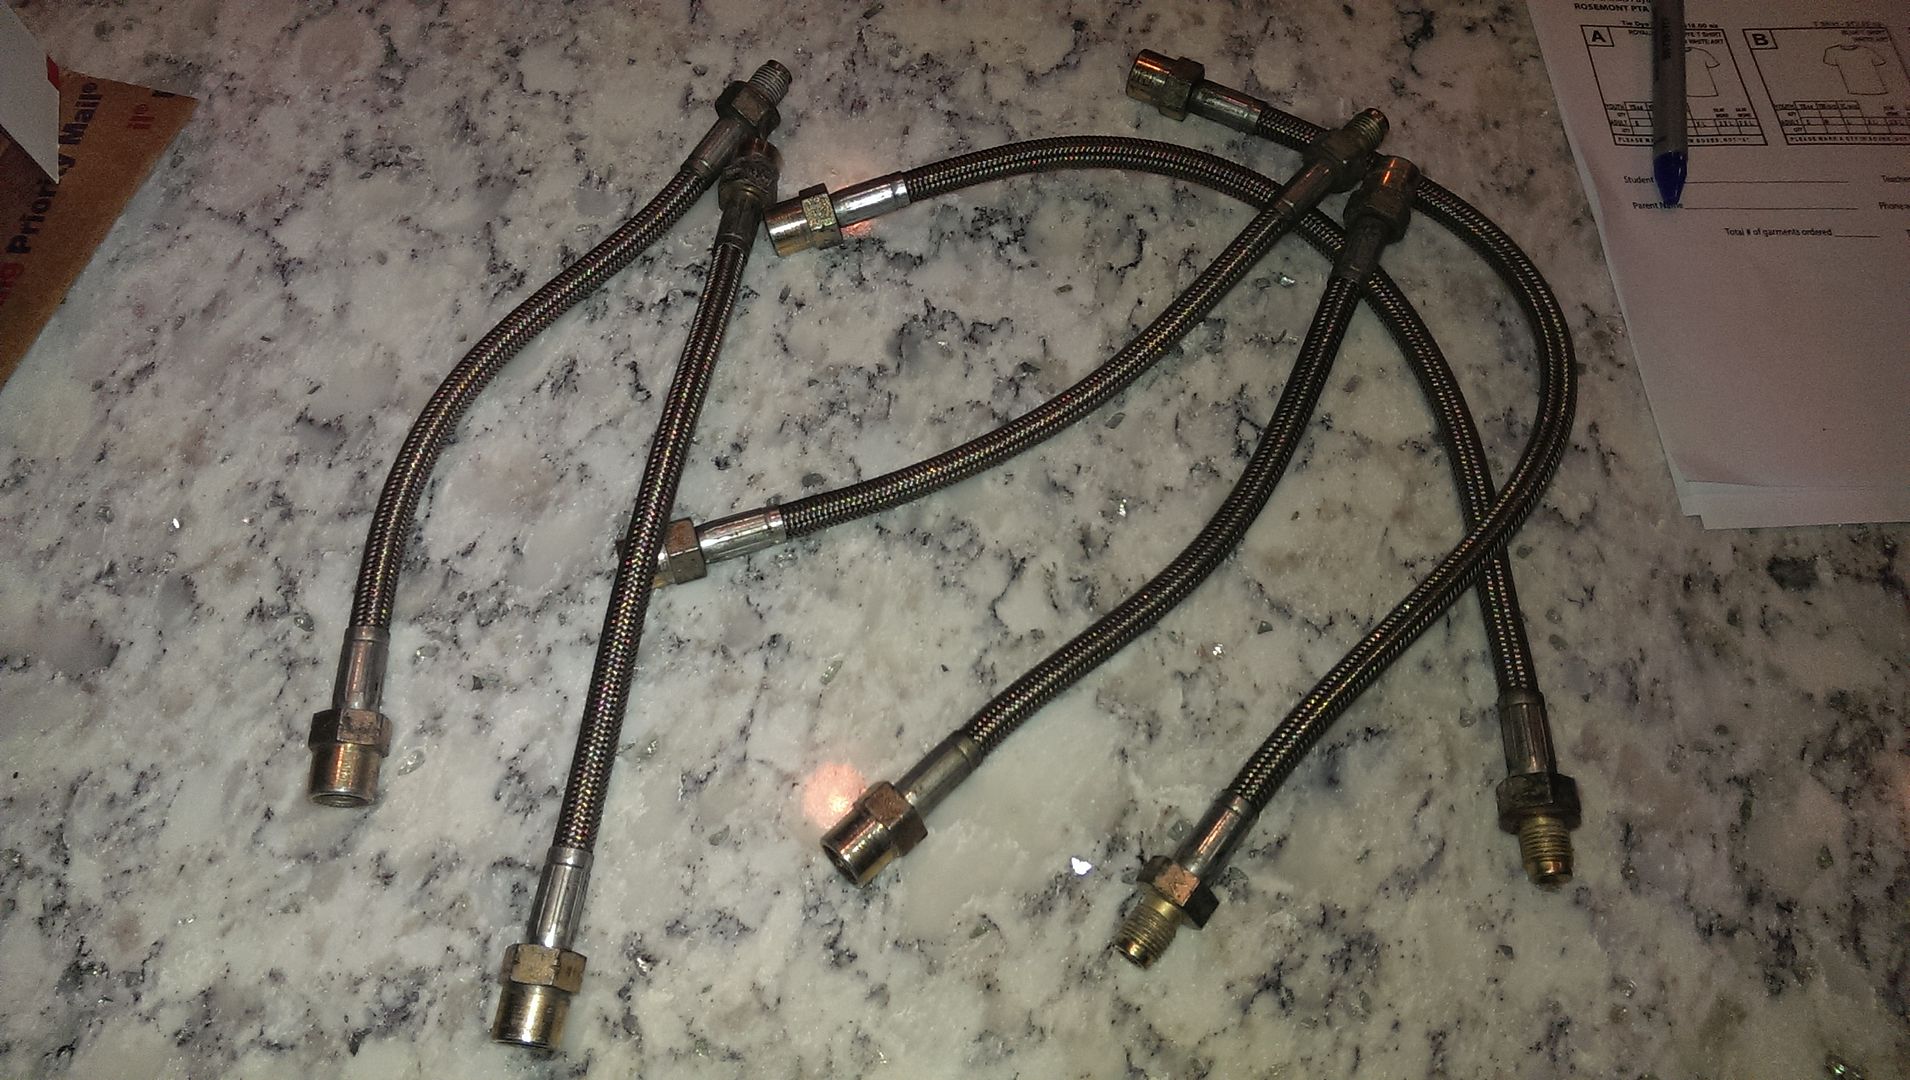
Picked up some SS brake lines last night. Not new but in good shape. Not 100% needed but the old lines look so-so and I am swapping out new/reman calipers so I might as well do the lines as well.
Leave a comment:
-
Well, you can revert back to your #1 choice.
I went this way because while I thought that I'd like LeMans, I saw the Topas in person and I know that I like that. Rather than paint it Lemans without seeing it in person, I decided to go with what I know I like.
And we got the car fixed. I re-did the inner boot (those crazy bearings) on one side and had no trouble getting it back together but I had to do it 3x to got the outer race and inner race aligned properly. It woudl rotate but only on 1 axis. I flipped it and it had proper movement.
Somehow that also fixed what we thought was diff whine- turned out to be a bad axle.Leave a comment:


 damn you....that was my #2 choice color to do on the e21 lol...
Leave a comment: