If this is your first visit, be sure to
check out the FAQ by clicking the
link above. You may have to register
before you can post: click the register link above to proceed. To start viewing messages,
select the forum that you want to visit from the selection below.
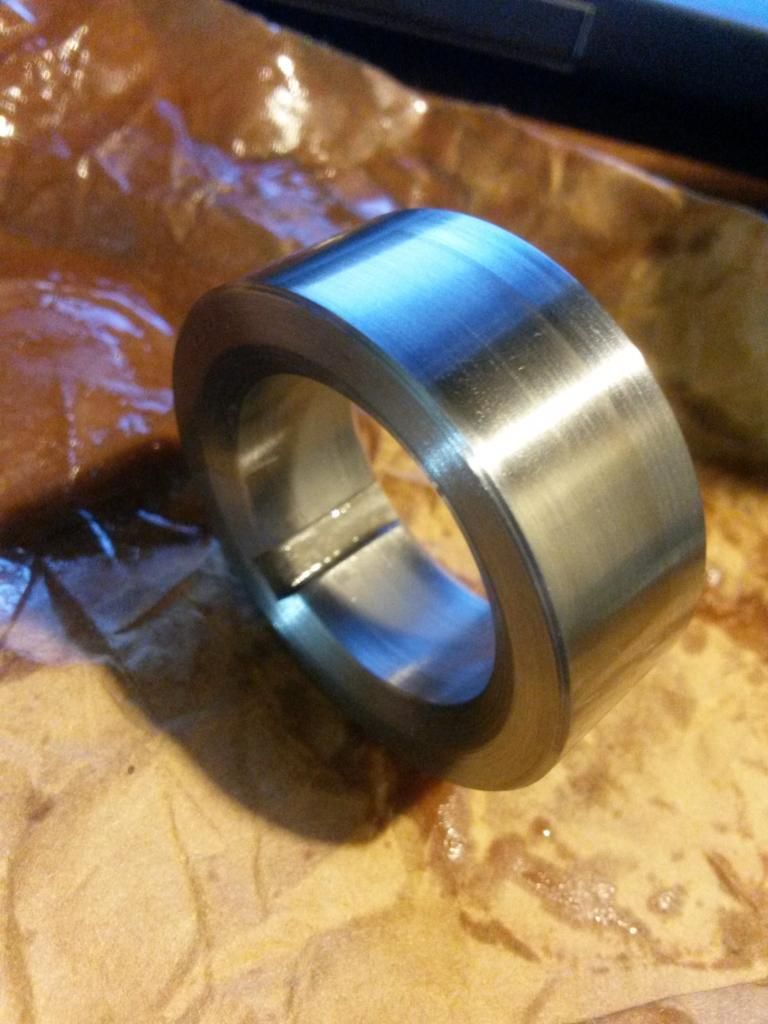
Made a better crank spacer, using the old pulley hub from the S52 I parted out. Was kind of worried that the anti-rotation pin would be hardened or something but it cut like butter on the lathe.
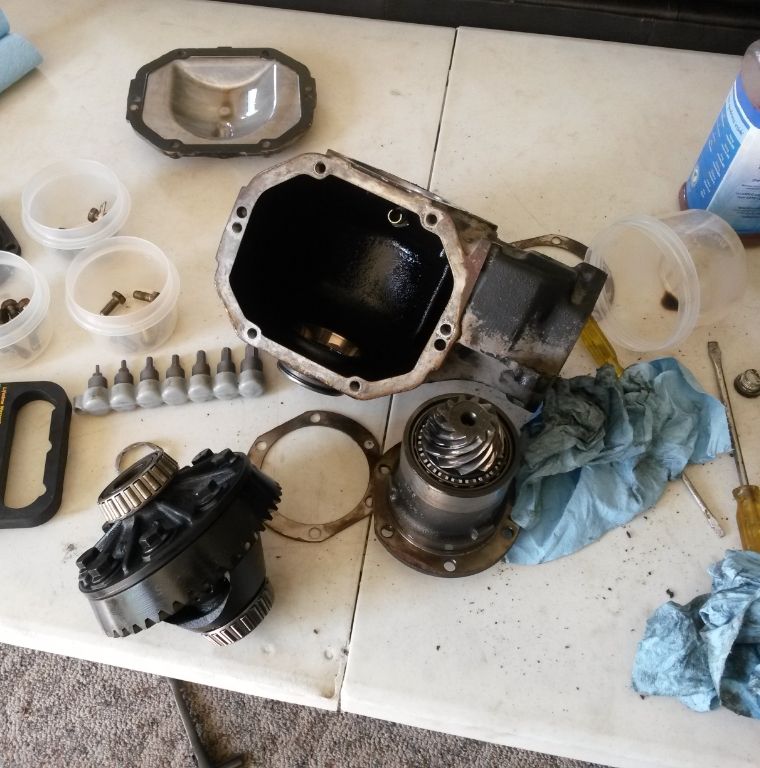
I pulled the second diff apart and it was a little worst for wear. The spider gears had some pitting, and looked worn. I'm going to pull another diff apart after Christmas and we'll go from there. I actually did a bit of digging and you can still get the spider gears new from BMW. So if the third one is trash I might just buy new ones
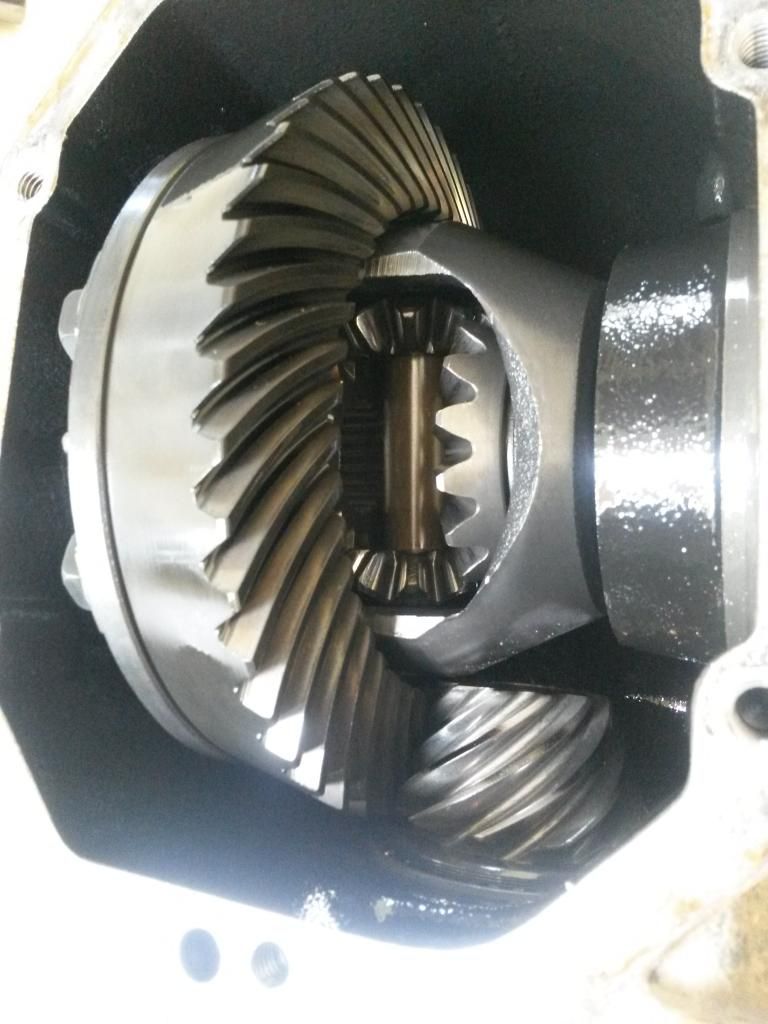
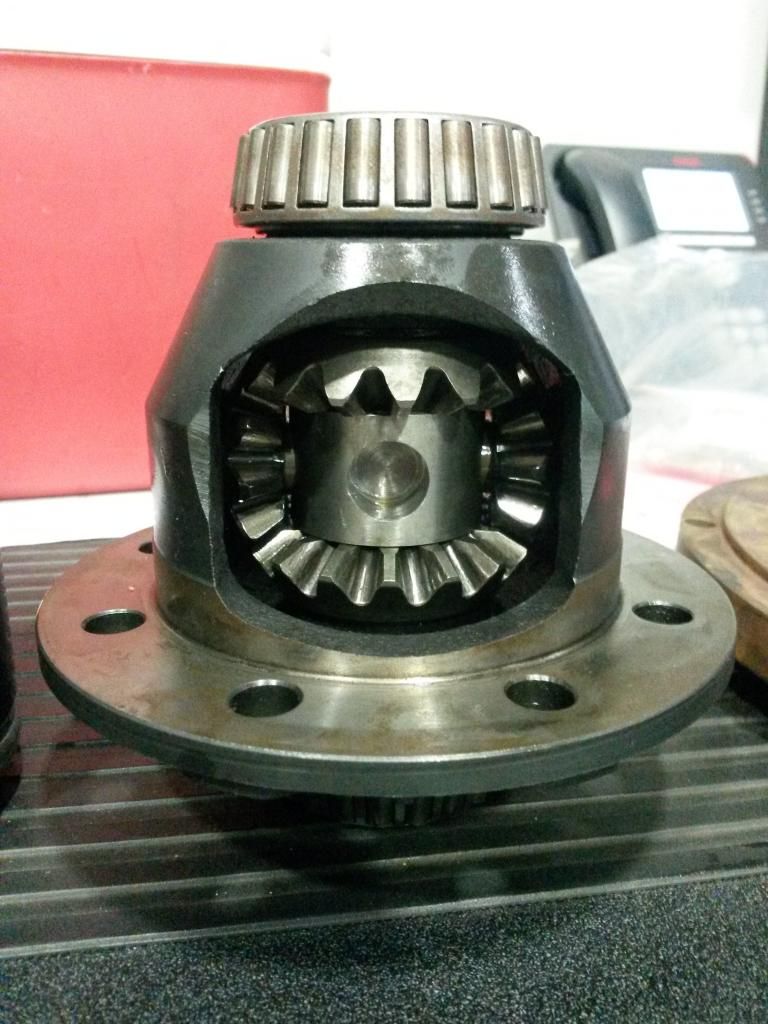
Hey guys happy thanksgiving, here’s one of the projects I’m currently working on. I disassembled and started working on a diff upgrade similar to mw044’s back in September. It’s his experience that the at least the first point of failure in the front diff are the small spider gears.
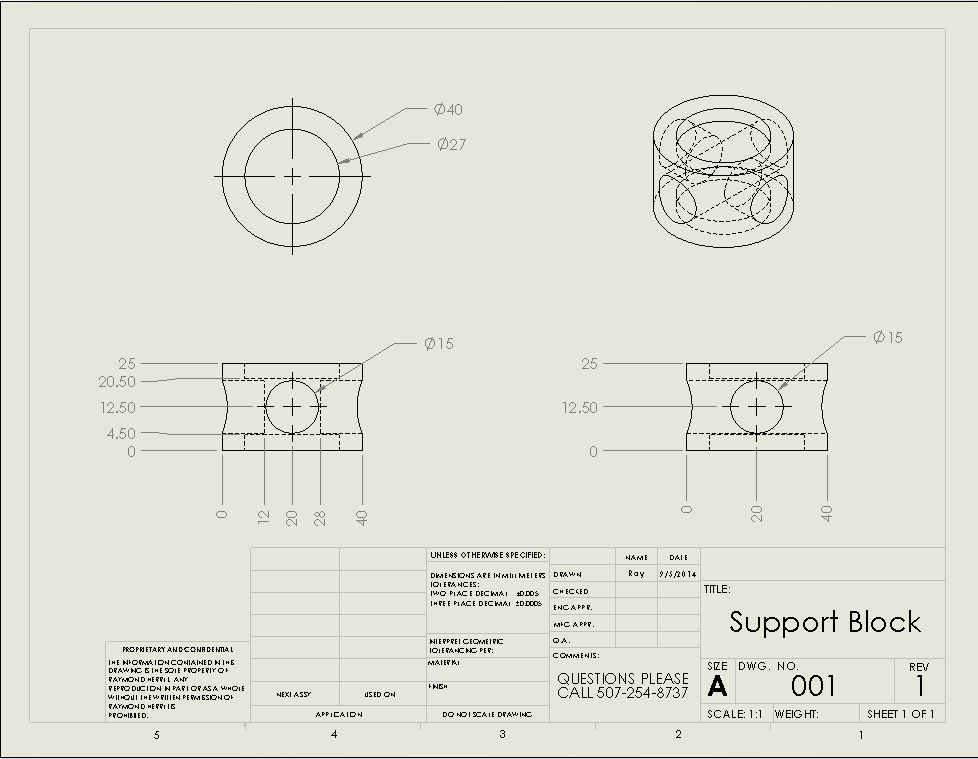
The idea is to cut the walls of the pumpkin off one diff and weld them to another thus adding two more spider gears, basically sacrificing one diff to reinforce another. This will help to lessen the load on each gear. With adding the two more spider gears I need to cut the shaft the gears ride on in half and machine a support block to hold the free ends of the shafts. I took a few measurements and had the support block machined out of a “tool steel” I’m not exactly sure what type of steel it’s made out of, I got the material when I was at school, it was just advertised as tool steel.
The support block came out quite nicely. I was a little upset after having to wait about two months to get it back when the machine shop forgot about my order and temporarily lost the material I gave them, but when I did get it back it was no charge because of the wait, I was like, wat? Oh alright, thanks! haha
Alright easy stuff done, now for the complicated part. This is where I thought I could improve upon mw044’s diff. My plan is to bolt the crown gear back on and weld the sides of the pumpkin to the crown gear. Then cut off the top and bottom of the pumpkin. In my mind, the geometry of the additional spider gears is critical; you must retain the original gear fitment/lash or you will have increased wear and ultimately failure. By welding the sides of the pumpkin to the crown gear I can then (after some shaping/grinding) bolt the crown gear onto another diff, keeping the cups that the spider gears ride on in the correct position.
Now for the welding. The plan is to grind and shape the sides of the diff so everything bolts up without any interference. Then with the crown gear bolted to the diff tack weld the additional sides from the old diff to the new diff. Then cut the tack welds off of the crown gear and remove it. Then finish welding.
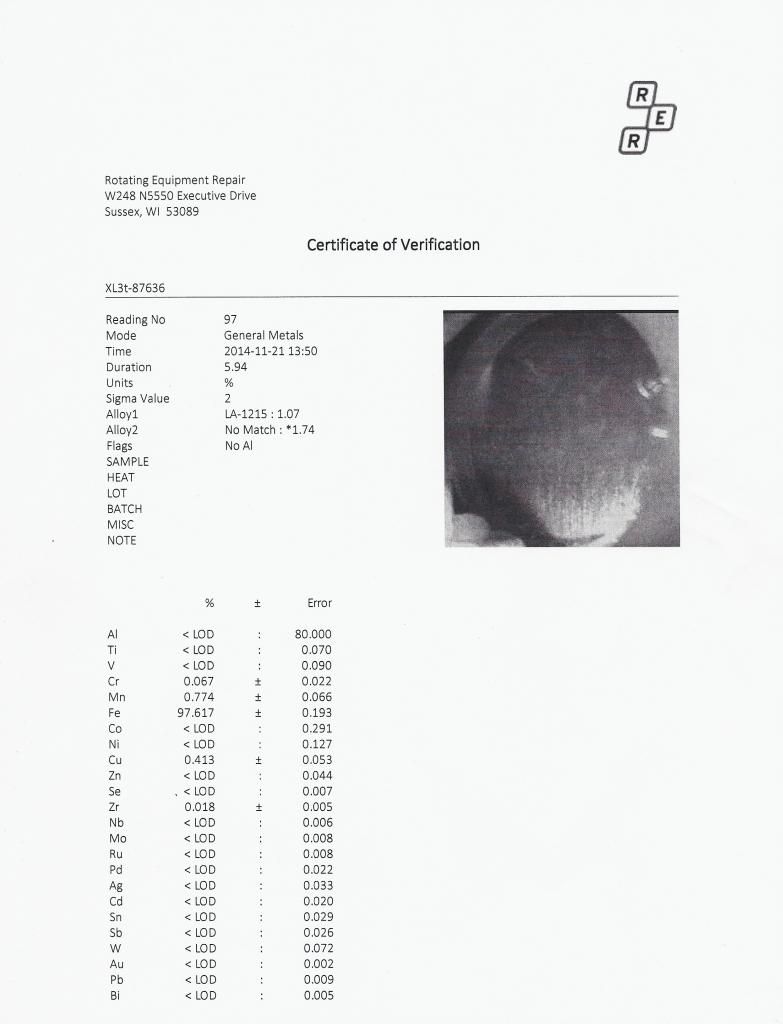
To ensure a good weld I need to know what material the diff is made of and come up with a weld procedure. To determine what kind of steel I’m dealing with I shot it with our Niton XRF Analyzer at work. It came back as 1215 carbon steel. This is kind of bad news because while 1215 has excellent machinability it doesn’t have very good weldability due to a high sulphur content. I don’t think it will be too much of an issue because it won’t take too much to hold the sides in there and the weld isn’t going to be seeing too much of a load, its mostly just holding the sides on there. We have some extremely skilled welders at work that I’m sure are more than capable of getting the job done. Here’s the print out from the XRF Analyzer if anyone is interested
After everything is welded up I would like to have it sent out for stress relieving but I don’t think it would be a good idea because I don’t want to mess with the gear heat treat or that it will distort or crack the case. Once its welded I may need to skim cut the crown gear fit turn on the diff to clean up any excess weld. Then it’s just a matter of pressing on some new bearings and resealing it, then I should be good to go.
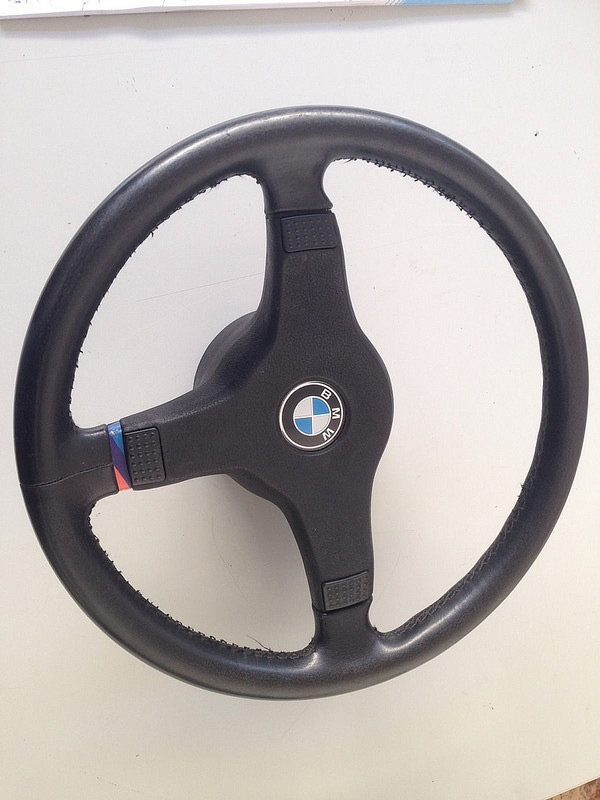
Picked up a 370mm mtech 1 wheel a while ago. I really like my 385mm mtech 1 wheel but with my steel toe boots for work and being 6'2" I can't get in my car without hitting my knee. The stitching is coming apart but the leather is in perfect shape, its at an upholstery shop now getting restitched. Hopefully this will solve the problem or at least make it less of a hassle to get in/out of the car.


Leave a comment: