Announcement

Collapse
No announcement yet.

SNAFU; high performance 318is build that lives up to the name, Turbo M42 ➞ Turbo M20

Collapse
X
 
  • Filter
  • Time
  • Show
Clear All
new posts

    SNAFU; high performance 318is build that lives up to the name, Turbo M42 ➞ Turbo M20

    Mod list, newest in bold
    • M20B25 swap
    • 272°, 11mm lift cam
    • Megasquirt 2 V3 with zeal daughterboard and electronic boost control
    • Wasted spark ignition
    • Turbonetics T3/T4 60 trim .63ar turbocharger (58/75mm compressor 65/57mm turbine)
    • Koni single adjustable shocks
    • Homebrew coilovers, 450lb/in front 650lb/in rear
    • Z3 2.7 turn LTL steering rack
    • Spec stage 3+ clutch
    • Rapid Spool Industries exhaust manifold
    • 3" turbo back exhaust
    • 3.25 medium case LSD
    • 225/45/16 Toyo R1R tires
    • 16x8 ET20 XXR 530 wheels
    • 24"x12"x3" intercooler
    • Z3 short shifter
    • Garagistic DSSR and ball bearing selector joint
    • Deatschwerks DW300 fuel pump
    • Siemens Deka 60lb/hr fuel injectors
    • ARP head studs
    • Poly offset control arm bushings
    • Condor speed shop UHMW bushings and diff mount
    • Z3M Radiator
    • Trunk mounted washer reservoir


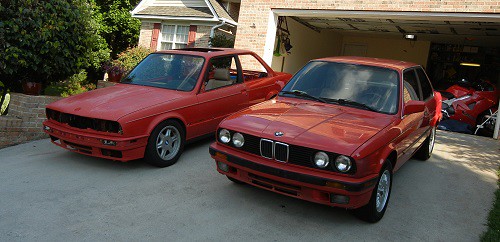
    This is my first E30 and I'll be improving it.


    More pictures to come, and better quality (phone pictures above, the first pictures I took of it 5-24-2014 when I bought it)

    The good:
    -Cold AC!
    -5 speed
    -Relatively rust free (only a little on the strut tower near the header and on the sunroof panel)
    -Runs well, compression test within spec
    -Clean interior
    -Crack-free dash
    -Power windows
    -No water leaks
    -No apparent crash damage, all body panel VIN tags match
    -New tires
    -New CSB
    -New brake pads
    -Coil On Plug conversion done, otherwise stock(!)
    -Nice Alpine headunit that doesn't look like something out of the fast and furious franchise
    -No power antenna
    -Tinted windows


    The bad:
    -Bottlecaps, no basketweaves...
    -Leaks oil pretty bad (timing case cover, valve cover gasket)
    -Needed new balljoints
    -(surface)rusty sunroof panel with hard, worn out seal
    -Paint is shot, and it's a repaint
    -Odometer doesn't work, estimated mileage? Around 200k...
    -Brake fluid was nasty
    -Typical M42 vacuum leaks under the intake manifold (I have already remedied this and removed the TB heater plates)
    -Aux fan busted
    -Driver's side won't lock from the inside or outside, but will with the power locks
    -Courtesy lights don't work when driver's door is open
    -Needed suspension refreshed (typical for a 23 year old car)
    -Bad rear right wheel bearing
    -Not a 325is
    -No LSD
    -A few dings and scuffs

    Stay tuned for project updates!
    Last edited by varg; 02-03-2023, 09:14 PM.

    IG @turbovarg
    '91 318is, M20 turbo
    [CoTM: 4-18]
    '94 525iT slicktop, M50B30 + S362SX-E, 600WHP DD or bust
    - updated 1-26

    #2
    Always nice to see another 318is! Subscribed

    Sent from my XT1058 using Tapatalk
    '90 325i - 5 speed coupe
    '05 330ci 6MT ZHP

    Comment


      #3
      Nice
      sigpic
      "The bitterness of poor quality remains long after the sweetness of low price is forgotten."

      Comment


        #4
        This week's project is the suspension. I removed the control arms and had a shop press new ball joints in and removed the bad wheel bearing (it was seized in there pretty badly, took some wailing on the slide hammer to get it out). I got lucky though and the hub came out of the bearing instead of the races separating.


        This part is a lot easier if you have an assistant sit in the car and step on the brakes for you while you break the bolts free, then let off to allow you to rotate the axle so that the next bolt is in an optimal position.


        Hub out, corrosion is evident.


        No LSD :(

        Tips on doing these jobs for anyone about to attempt them for the first time:
        -The passenger side ball joint is a pain to get to. Remove the swaybar and the heat shield that is over the engine mount, undo the bottom nut on the mount and jack the engine up a couple of inches. Put a socket in between the engine mount and the crossmember and have at that upper ball joint with a 7/8"/22mm wrench. It will take a good amount of force to break it free.
        -Soak all nuts and bolts to be wrenched on in the penetrating oil of your choice for a couple of days prior to your project. Because I did this, the 30mm axle nut and ball joint nuts that so many have had so much trouble with was easily removed in my case
        -You don't need to remove the parking brake components to do the wheel bearings, I have read people saying that you do. Use a pulley puller and a slide hammer to yank the hub; it will take some serious beating if yours is as seized as mine was.
        -You can rent the pullers and slide hammer at your local Autozone (deposit and return, no rental fee) Slide hammer part 27033, Axle bearing remover part 27129. I had my own "steering wheel puller" which I used in conjunction with the slide hammer to remove the hub, I also used it to push the axle out of the hub.
        -Lollipops come off the control arms easily with a 3 jaw puller, I wouldn't rent one of these if you don't have one. It's a useful tool to own.

        IG @turbovarg
        '91 318is, M20 turbo
        [CoTM: 4-18]
        '94 525iT slicktop, M50B30 + S362SX-E, 600WHP DD or bust
        - updated 1-26

        Comment


          #5
          looks like a great start! sub'd


          1991 325i
          flickr
          @sambhaskins

          Comment


            #6
            So I got one test drive in with the refreshed suspension and poly offset CABs, there was a definite improvement, but now it's time for more work, so back up on jackstands it goes. I started the timing case cover job today. What a mess...


            This won't be going back in.


            After de-greasing and removal of all of the pulleys. You don't need to pay $60 for piece of steel with holes drilled in it and a pipe welded to it if you have a MAPP torch, a good starter and a breaker bar. After trying to break the crank bolt free without heat several times, I broke out the torch and on the third bump after getting the bolt nice and hot it broke free. An easy way to do a job that gives a lot of people a lot of grief. It helps to not be rushing to get a car back on the road though, taking your time makes working on a car almost relaxing. As for doing big jobs on your only vehicle and being stressed; I've been there and don't want to do it again.

            After I finish fixing the oil leaks, it's time for this project to finally get interesting.

            IG @turbovarg
            '91 318is, M20 turbo
            [CoTM: 4-18]
            '94 525iT slicktop, M50B30 + S362SX-E, 600WHP DD or bust
            - updated 1-26

            Comment


              #7
              If you can, post as much info on the MS build as possible. Going turbo?

              -NICK

              Comment


                #8
                Originally posted by Balleristic31 View Post
                If you can, post as much info on the MS build as possible.
                Sure. I'll start with saying that In that picture is an MS2V3 kit, a Zeal Engineering dual VR conditioner daughterboard, a boost control mod kit, 4 BIP coil drivers, a boost control solenoid and a JimStim kit. The Zeal daughterboard also has a PWM output suitable for an IAC valve so the PWM IAC mod is not necessary. The fuel injection will be paired batch fire run off of the stock MS outputs and the coils will be fully sequential as they are in the OEM application. If desired, one can also go a simpler route and use the 4 coil drivers to run the coils in wasted spark.

                Originally posted by Balleristic31 View Post
                Going turbo?
                Of course. That's the only way to go.

                IG @turbovarg
                '91 318is, M20 turbo
                [CoTM: 4-18]
                '94 525iT slicktop, M50B30 + S362SX-E, 600WHP DD or bust
                - updated 1-26

                Comment


                  #9
                  In for more m42 turbo

                  Comment


                    #10
                    Update! I'm way behind schedule due to waiting on parts and being busy in general. The car is currently up on stands with no transmission, exhaust or cylinder head. I'll be putting an aftermarket M20 clutch in it and building a turbo-back exhaust. The head is currently off being machined and cleaned to prepare it for an MLS gasket and ARP studs.

                    This is the current state of the engine bay, deck and piston cleaning in progress:


                    Before starting the cleaning and dropping the transmission (lots of carbon on the pistons):


                    Head before being sent off:


                    Finished Jimstim (MS2 build in progress)


                    The head had obviously been off the car before I got it since the profile gasket was in good condition, still flexible and no leaks. Everything looks to be in good shape. Today I'm finishing up on cleaning the deck and pistons, and removing the old clutch. Lots of work to be done!
                    Last edited by varg; 08-07-2014, 08:17 AM.

                    IG @turbovarg
                    '91 318is, M20 turbo
                    [CoTM: 4-18]
                    '94 525iT slicktop, M50B30 + S362SX-E, 600WHP DD or bust
                    - updated 1-26

                    Comment


                      #11
                      Due to a rainy summer and having to wait for many parts, this project wound up so behind schedule it isn't funny. I was aiming to finish it before school started up again, because I knew once it did I would have hardly any time to work on it between work and school. Well, that didn't work out, and here I am, car up on stands waiting for me to finish the exhaust system, megasquirt and intake plumbing, and I'm uploading pictures that are months old.


                      Clean and (relatively) fresh cylinder head.


                      Re-installed with ARP studs and a .120 MLS headgasket. With the head surfacing that was done this will leave my compression at around 9:1.


                      I installed a proper water pump with a metal impeller, replacing the one that was in the car which had a cracked crappy plastic impeller.


                      This is where plans changed. I originally planned to invert the stock header and fabricate an adapter for it, running the turbo off of that and locating it right where the washer bottle used to go, but there was not enough room to do this. Since I was already over-budget and too crunched for time and money to build my own header, I bought one of these ebay M50 turbo headers. The quality of cheap ebay parts has improved since I last saw it in person back when I was building a Volvo 240 Turbo.


                      As you may be aware, when you cut these down to fit an M42 they place the turbo in a bad spot and there is unfortunately not enough room to bottom-mount the turbo in the cars. This also means that an AC line must be removed and replaced with a custom one because it is in a bad place and interferes with the turbo. This was in the middle/end of September.

                      IG @turbovarg
                      '91 318is, M20 turbo
                      [CoTM: 4-18]
                      '94 525iT slicktop, M50B30 + S362SX-E, 600WHP DD or bust
                      - updated 1-26

                      Comment


                        #12
                        lets finish it up
                        Looking for late model fogs, E39 Fog lights, cool cheap 17 5x120 wheels.

                        Comment


                          #13
                          All about the sleepers. Very cool.

                          Comment


                            #14
                            im watching

                            Turbo M42 Build Thread :Here
                            Ig:ryno_pzk
                            I like the tuna here.
                            Originally posted by lambo
                            Buttchug. The official poster child of r3v.

                            Comment


                              #15
                              Time for a big update. I'm just about done with the project, the car just needs to be tuned now. As for how long this took, well, it's a long story.

                              The modded M50 header before de-burring:


                              Downpipe:


                              Midpipe:


                              I'm not a fabricator and only have the budget for FCAW, elitists and "pros" please contain your snide.

                              M20 Flywheel, nice and shiny:


                              Aftermarket M20 clutch:


                              The finished megasquirt with zeal daughterboard and boost control mod shown:


                              The bottom, showing the BIP drivers, don't mind the dirty board, I cleaned it:


                              Harness adapter, just about done:


                              I will post the charts you see in the background later, I used these for making the adapter and wiring the MS mods. I'm going to try to make as much information as possible available on the setup of megasquirt for an M42, because there is very little info on doing it out there. It would be a very difficult task for someone new to MS.

                              More to come!

                              IG @turbovarg
                              '91 318is, M20 turbo
                              [CoTM: 4-18]
                              '94 525iT slicktop, M50B30 + S362SX-E, 600WHP DD or bust
                              - updated 1-26

                              Comment

                              Working...
                              X